preface
Last class, I mentioned that I wanted to use it directly Online mlab Build the database, but the online mlab has been unable to log in normally (or it's hard to log in, but it's cloud mongodb, which charges), so these days are delayed, so we can only choose to install mongodb locally. Briefly introduce the local installation steps of mongodb
- Go to the official website to download mongodb's msi package (my computer is Win10)
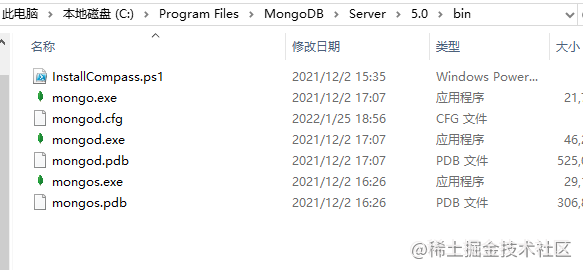
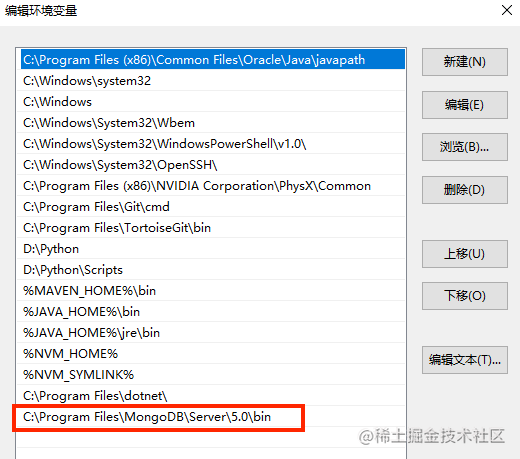
- After the installation is successful, it will automatically create a directory containing bin files in the Program Files of drive C and add it to the system environment variable (I choose to store the data and log files in drive D)


- At the command-line terminal, enter mongod, there is output information, or enter in the browser address bar http://127.0.0.1:27017 , the following information indicates that the installation has been successful
It looks like you are trying to access MongoDB over HTTP on the native driver port.
Connect mongodb
On app JS, add the following code
const mongoose = require('mongoose');

mongoose.connect('mongodb://localhost/admin ') / / I use the default admin database of the local mongodb
mongoose.connection.once('open', () => {
    console.log('connected to database')
})
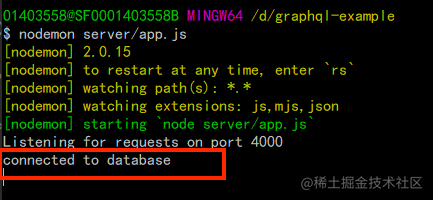
Enter $nodemon server / app at the command line terminal JS, if you see the following information, it indicates that you have successfully connected to the database

models
Previously, we stored people and jobs directly in memory. Now we need to store them in mongodb. Based on this, we create a models folder in the root directory of the project. In this folder, we create two JS files - > person JS and job js
person. The code of JS is as follows:
const mongoose = require('mongoose')
const Schema = mongoose.Schema;

const personSchema = new Schema({
    name: String,
    sex: String,
    age: String,
    jobId: String
})

module.exports = mongoose.model("Person", personSchema)
module.exports = mongoose.model("Person", personSchema): create a Collection named Person, whose data structure is a personSchema object
We don't need to define id in it, because the database will automatically generate id for each data
job. The code of JS is as follows:
const mongoose = require('mongoose')
const Schema = mongoose.Schema;

const jobSchema = new Schema({
    name: String,
    department: String
})

module.exports = mongoose.model("Job", jobSchema)
mutation
After building the models, we need to create a mutation to add, delete and modify the database, which is similar to the principle of mutation in vuex. We need to modify the schema JS, part of the code is as follows:
const Person = require('../models/person')
const Job = require('../models/job')

const Mutation = new GraphQLObjectType({
    name: 'Mutation',
    fields: {
        addPerson: {
            type: PersonType,
            args: {
                name: {type: GraphQLString},
                sex: {type: GraphQLString},
                age: {type: GraphQLInt}
            },
            resolve(parent, args) {
                // Person corresponds to the model above
                let person = new Person({
                    name: args.name,
                    sex: args.sex,
                    age: args.age
                })
                person.save() // This is the convenience provided by mongoose. The instance directly calls the save method to store the data in the database specified by us
            }
        },
        addJob: {
            type: JobType,
            args: {
                name: {type: GraphQLString},
                department: {type: GraphQLString}
            },
            resolve(parent, args) {
                let job = new Job({
                    name: args.name,
                    department: args.department
                })
                return job.save()
            }
        },
    }
})

module.exports = new GraphQLSchema({
    query: RootQuery,
    mutation: Mutation
})
Refresh page http://localhost:4000/graphql , enter the following command on the left and run it

Obviously, the data has been successfully inserted, but why is "addperson" displayed on the right: null? This is because we need to return the data in resolve and modify the code in resolve
resolve(parent, args) {
    let person = new Person({
        name: args.name,
        sex: args.sex,
        age: args.age
    })
    return person.save()
}
Run the command again, and the interface is as follows:

Execute the addJob command as follows:

Associate Person and Job
From the above, we can know that Person can be associated with a job through its jobId. Now we need to know the id corresponding to the job data we just inserted. I recommend installing mongodb's graphical management tool, mongodbcross (officially provided), to facilitate viewing management data
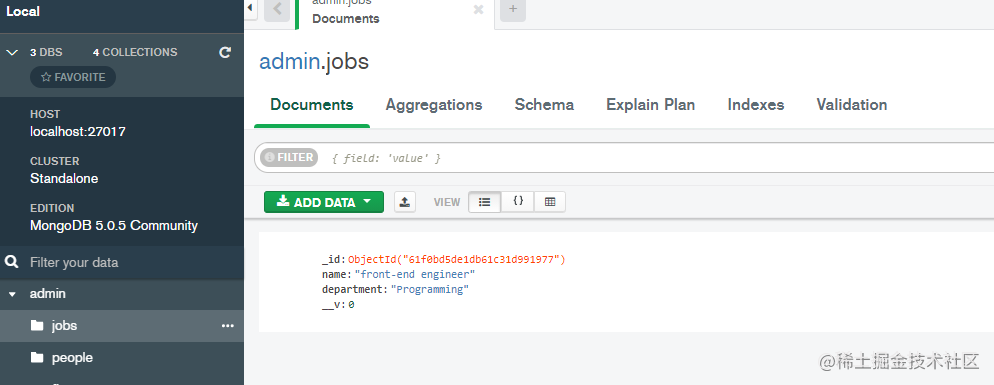
MongoDBCompass I downloaded a zip compressed file, unzip it and open it directly exe file. After connecting to the local database, enter the admin database and you can see the jobs data we just created

Create a new person data, associate the id:61f0bd5de1db61c31d991977 in the figure above with the person, and modify the schema JS, some contents are as follows:
const Mutation = new GraphQLObjectType({
    name: 'Mutation',
    fields: {
        addPerson: {
            type: PersonType,
            args: {
                ...,
                jobId: {type: GraphQLID}
            },
            resolve(parent, args) {
                let person = new Person({
                    ...,
                    jobId: args.jobId
                })
                return person.save()
            }
        },
    }
})
Refresh the page and execute the command

View the database interface to see the newly added data

Query the Job of Person
To do this, we need to modify the Person structure. The code is as follows:
const Job = require('../models/job')
const PersonType = new GraphQLObjectType({
    name: 'Person',
    fields: () => ({
        id: {type: GraphQLID},
        name: {type: GraphQLString},
        sex: {type: GraphQLString},
        age: {type: GraphQLInt},
        job: {
            type: JobType,
            resolve(parent, args) {
                // return _.find(jobs, {id: parent.jobId})
                // mongoose provides a model with built-in findById and find methods
                return Job.findById(parent.jobId)
            }
        }
    })
})
Refresh the page, and enter the following command on the left to query the corresponding results

Query all persons of the Job
We need to query all employees of a position. Therefore, we need to reconstruct the JobType, and the code is as follows:
const JobType = new GraphQLObjectType({
    name: 'Job',
    fields: () => ({
        id: {type: GraphQLID},
        name: {type: GraphQLString},
        department: {type: GraphQLString},
        persons: {
            type: new GraphQLList(PersonType),
            resolve(parent, args) {
                return Person.find({
                    jobId: parent.id
                })
            }
        }
    })
})
Add a lisi person through mutation addPerson and associate him with jobId: "61f0bd5de1db61c31d991977"

Run the query again and you can see that there are two employees in this Job position

schema
schema. The RootQuery of JS should also be changed accordingly. At this time, the query should be based on model to find (if the parameter is empty, query all data) or findById (query according to id). The complete code is as follows:
const graphql = require('graphql')
const {
    GraphQLObjectType,
    GraphQLString,
    GraphQLSchema,
    GraphQLID,
    GraphQLInt,
    GraphQLList
} = graphql
const _ = require('lodash')
const Person = require('../models/person')
const Job = require('../models/job')

// Create Person structure
const PersonType = new GraphQLObjectType({
    name: 'Person',
    fields: () => ({
        id: {type: GraphQLID},
        name: {type: GraphQLString},
        sex: {type: GraphQLString},
        age: {type: GraphQLInt},
        job: {
            type: JobType,
            resolve(parent, args) {
                return Job.findById(parent.jobId)
            }
        }
    })
})

const JobType = new GraphQLObjectType({
    name: 'Job',
    fields: () => ({
        id: {type: GraphQLID},
        name: {type: GraphQLString},
        department: {type: GraphQLString},
        persons: {
            type: new GraphQLList(PersonType),
            resolve(parent, args) {
                return Person.find({
                    jobId: parent.id
                })
            }
        }
    })
})


const RootQuery = new GraphQLObjectType({
    name: 'RootQueryType',
    fields: {
        person: {
            type: PersonType,
            args: {
                id: {type: GraphQLID}
            },
            resolve(parent, args) {
                return Person.findById(args.id)
            }

        },
        job: {
            type: JobType,
            args: {
                id: {type: GraphQLID}
            },

            resolve(parent, args) {
                return Job.findById(args.id)
            }

        },
        persons: {
            type: new GraphQLList(PersonType),
            resolve(parent, args) {
                return Person.find({})
            }

        },

        jobs: {
            type: new GraphQLList(PersonType),
            resolve(parent, args) {
                return Job.find({})
            }
        }

    }

})

const Mutation = new GraphQLObjectType({
    name: 'Mutation',
    fields: {
        addPerson: {
            type: PersonType,
            args: {
                name: {type: GraphQLString},
                sex: {type: GraphQLString},
                age: {type: GraphQLInt},
                jobId: {type: GraphQLID}
            },
            resolve(parent, args) {
                let person = new Person({
                    name: args.name,
                    sex: args.sex,
                    age: args.age,
                    jobId: args.jobId
                })
                return person.save()
            }
        },
        addJob: {
            type: JobType,
            args: {
                name: {type: GraphQLString},
                department: {type: GraphQLString}
            },
            resolve(parent, args) {
                let job = new Job({
                    name: args.name,
                    department: args.department
                })
                return job.save()
            }
        },
    }
})
module.exports = new GraphQLSchema({
    query: RootQuery,
    mutation: Mutation
})
epilogue
That's all for today's course. In the next class, I'll introduce you to other related knowledge, such as how to restrict users from having to pass in some parameters to succeed in mutation