0 origin
- Pulsar is a high-performance message oriented middleware that supports multi tenancy.
- The initial production environment will be put into use in mid November 2018.
- On Pulsar's official website, the deployment tutorial documents are not very detailed. The tutorials on the network are basically translated versions of the official website. For a developer without rich experience, he will still step on some pits. This paper records in detail the process of how to use a server to build a simple test cluster.
1. Prepare resources
- One host (this article takes MacOS as an example)
- JDK8 running environment (ready by default)
2. Composition of cluster
- ZooKeeper cluster (composed of 3 ZooKeeper nodes)
- bookie cluster (composed of 3 BookKeeper nodes)
- broker cluster (composed of 3 Pulsar nodes)
3 zookeeper Cluster - build
(this article takes ZooKeeper version 3.4.12 as an example; you can download the latest version from the link) use a machine, run multiple ZooKeeper service processes on the machine, and build a ZooKeeper cluster.
(1) Download ZooKeeper and unzip it.
# Download address of Zookeeper official website
https://archive.apache.org/dist/zookeeper/
# Take version 3.4.12 as an example https://archive.apache.org/dist/zookeeper/zookeeper-3.4.12/
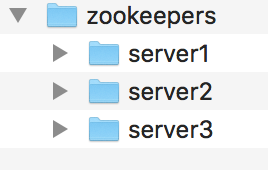
(2) Copy the unzipped zookeeper-3.4.12 to the new file zookeepers directory and rename it server1. Use server1 to copy server2 and server3. The directory structure is shown in the figure.
(3) Configure server1 (first configure a node of ZooKeeper).
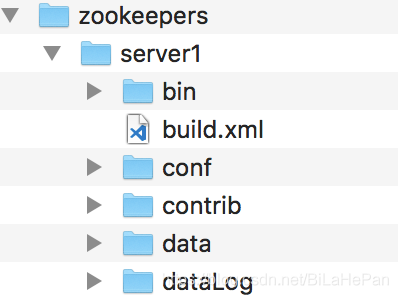
1) Under server1 directory, create two new folders: data and dataLog. The directory structure is as follows.
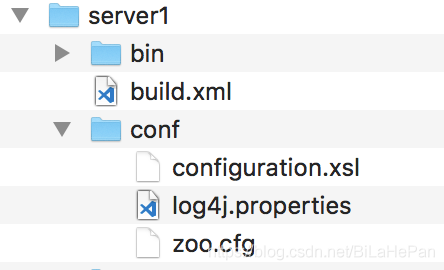
2) Set the zoo in the conf directory_ sample. The cfg file is renamed zoo cfg. As shown in the figure.
3) Modify zoo Cfg file content, mainly modify the following five configuration parameters and add cluster node information.
# Modify the following five parameters. The port number is modified to avoid port number conflict on a server
dataDir
dataLogDir
clientPort
admin.enableServer
admin.serverPort
# Add the following cluster node information
server.1=127.0.0.1:2888:3888
server.2=127.0.0.1:2889:3889
server.3=127.0.0.1:2890:3890
My server1's zoo The contents of CFG file are as follows:
# The number of milliseconds of each tick
tickTime=2000
# The number of ticks that the initial
# synchronization phase can take
initLimit=10
# The number of ticks that can pass between
# sending a request and getting an acknowledgement
syncLimit=10
# the directory where the snapshot is stored.
# do not use /tmp for storage, /tmp here is just
# example sakes.
dataDir=/Users/bilahepan/Softwares/zookeepers/server1/data
dataLogDir=/Users/bilahepan/Softwares/zookeepers/server1/dataLog
# the port at which the clients will connect
clientPort=2181
# the maximum number of client connections.
# increase this if you need to handle more clients
#maxClientCnxns=60
admin.enableServer=true
admin.serverPort=9181
#
server.1=127.0.0.1:2888:3888
server.2=127.0.0.1:2889:3889
server.3=127.0.0.1:2890:3890
# Be sure to read the maintenance section of the
# administrator guide before turning on autopurge.
#
# http://zookeeper.apache.org/doc/current/zookeeperAdmin.html#sc_maintenance
#
# The number of snapshots to retain in dataDir
#autopurge.snapRetainCount=3
# Purge task interval in hours
# Set to "0" to disable auto purge feature
#autopurge.purgeInterval=1
Yes, zoo CFG configuration parameter explanation:
tickTime: ZooKeeper The basic time unit used in, Millisecond value, default 2000 ms.
initLimit: Used to configure ZooKeeper Server cluster Follower Server initialization connection Leader How long can the server last tickTime. Setting 10 here means that the maximum tolerance time is 10 s.
syncLimit: Used to configure Leader And Follower How long can you tolerate sending messages, requests and responses between tickTime. Setting it to 4 here means that the maximum tolerance time is 4 s.
dataDir: Data file directory.
dataLogDir: Log file directory.
clientPort: monitor client The port number of the connection.
server.{myid}={ip}:{leader The port on which the server exchanges information}:{When leader After the server hangs up, election leader Port of}
maxClientCnxns: For the connection limit of a client, the default is 60.
admin.enableServer: Enable ZooKeeper Manage the background.
admin.serverPort: Management background port number.
zoo. Configuration description of CFG file in the other two nodes:
To deploy multiple instances on one server, you need to specify different port numbers.
[1]clientPort: 3 individual ZooKeeper The nodes are respectively configured as:2181,2182,2183
[2]admin.enableServer: 3 individual ZooKeeper All nodes are configured as true
[3]admin.serverPort: 3 individual ZooKeeper The nodes are respectively configured as:9181,9182,9183
[4]Cluster node information: 3 ZooKeeper All nodes are configured as:
server.1=127.0.0.1:2888:3888
server.2=127.0.0.1:2889:3889
server.3=127.0.0.1:2890:3890
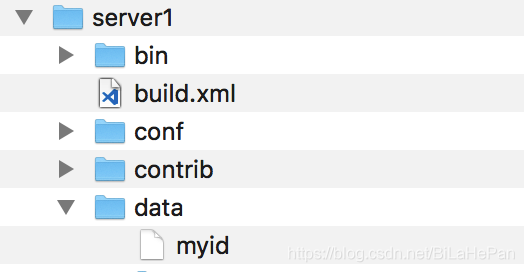
4) Create a file named myid in the server1/data / directory and write the content 1
towards myid Write content in file 1
 every last ZooKeeper Nodal myid The file contents cannot be the same. It is the unique identification of different nodes.
3 individual ZooKeeper In node myid The contents of the documents are 1,2,3
5) After configuring Server1, configure server2 and server3 as described above.
6) Start the ZooKeeper cluster and start the ZooKeeper node with the command at the terminal.
# Start command (zkServer.sh start)
./bin/zkServer.sh start
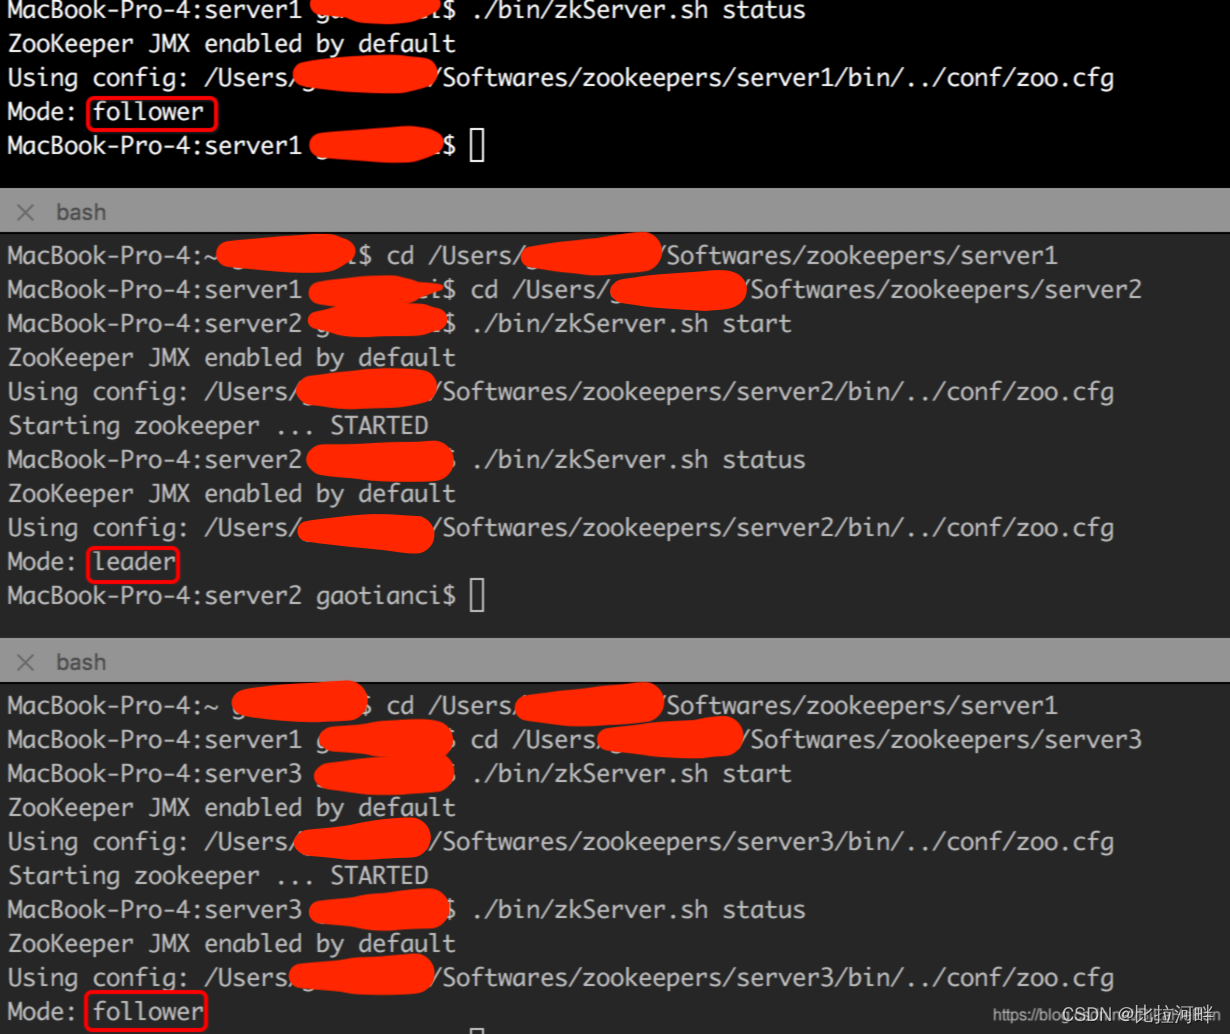
7) Use the command to view the node status.
# Status view command (zkServer.sh status)
./bin/zkServer.sh status
8) Other commands for zookeeper operation.
# Connect zookeeper client
./bin/zkCli.sh -timeout 5000 -server 127.0.0.1:2181

# View the contents of the zookeeper node
ls /
4. Bookie Cluster - build
(bookie yes BookKeeper Another name for. This paper is based on 4.7.2 Version as an example).
Use one machine and run multiple on that machine bookie Service process, build bookie Cluster.
(1) Download bookkeeper and unzip it.
# Download address of BookKeeper official website (this article takes version 4.7.2 as an example))
https://bookkeeper.apache.org/releases/
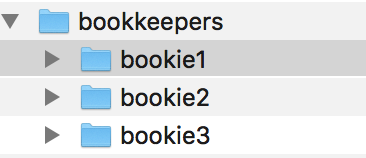
(2) Copy the unzipped bookkeeper-server-4.7.2 to the new file bookkeepers directory, renamed bookie1. Use bookie1 to copy bookie2 and bookie3. The directory structure is shown in the figure.
(3) Configure bookie1 (first configure a node of BookKeeper).
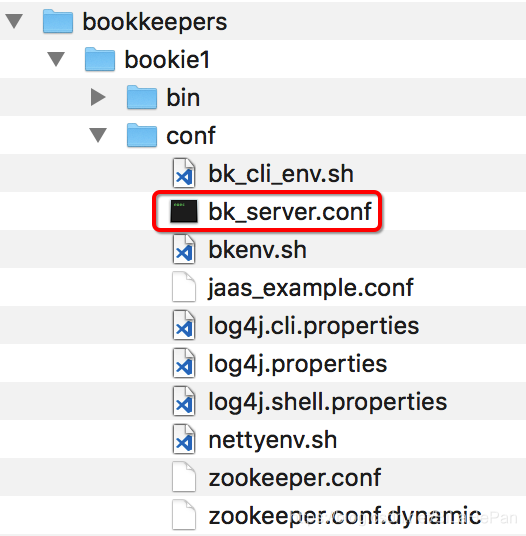
1) Modify BK_ server. The contents of conf file mainly modify the following three port numbers to avoid port number conflict on one host, add ZooKeeper cluster node information, and specify two file directory addresses.
# Modify the following three parameters
bookiePort
httpServerPort
storageserver.grpc.port

# Add the following ZooKeeper cluster node information
zkServers=localhost:2181,localhost:2182,localhost:2183

# Specify two file directory addresses
journalDirectories=/Users/bilahepan/Softwares/bookkeepers/bookie1/tmp/bk-txn
ledgerDirectories=/Users/bilahepan/Softwares/bookkeepers/bookie1/tmp/bk-data
bk_ server. Configuration description of conf file on the other two nodes:
To deploy multiple instances on one server, you need to specify different port numbers.
[1]bookiePort: 3 individual bookie The nodes are respectively configured as:3181,3182,3183
[2]httpServerPort: 3 individual bookie All nodes are configured as:8050,8060,8070
[3]storageserver.grpc.port: 3 individual bookie All nodes are configured as: 4181,4182,4183
[4]zk Cluster node information: 3 individual bookie Are configured as:
zkServers=localhost:2181,localhost:2182,localhost:2183
2) After configuring bookie1, configure bookie2 and bookie3 as described above.
3) Execute the command to initialize cluster metadata (just execute it on a bookie). The command is as follows.
./bin/bookkeeper shell metaformat

4) Start the bookie cluster and use the command to start the bookie node at the terminal.
./bin/bookkeeper bookie
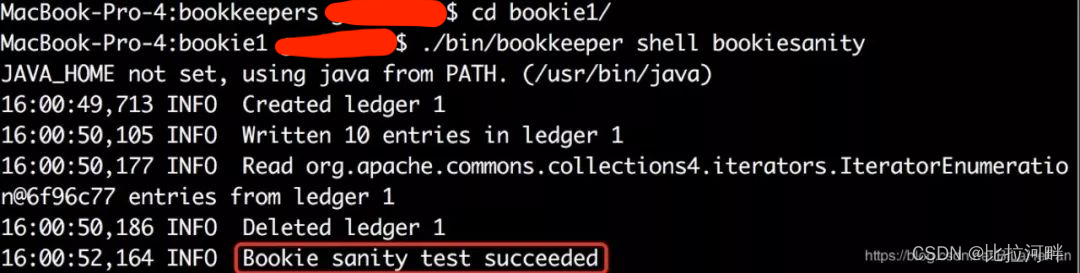
5) Check the startup status of bookie. If the cluster is started successfully, "Bookie sanity test succeeded" log will be output. Execute the following command in a bookie instance.
./bin/bookkeeper shell bookiesanity
5. Broker Cluster - build
broker yes Pulsar Instance nickname. (2).2.0 Version as an example).
Use one machine and run multiple on that machine broker Service process, build broker Cluster.
(1) Download pulsar and unzip it.
# Taking version 2.2.0 as an example, it is recommended to download the latest version
# Pulsar official website download address (apache-pulsar-2.2.0-bin-tar.gz)
http://pulsar.apache.org/zh-CN/download/
(2) Copy the extracted apache-pulsar-2.2.0 to the new file brokers directory and rename it broker1. Use broker 1 to copy broker 2 and broker 3. The directory structure is shown in the figure.

(3) Configure broker 1 (configure a node of the broker first).
1) Modify broker The contents of the conf file mainly modify the following four port numbers to avoid port number conflicts on one host, add ZooKeeper cluster node information and specify the cluster name.
# Modify the following four parameters
brokerServicePort
brokerServicePortTls
webServicePort
webServicePortTls

# Add the following ZooKeeper cluster node information
zookeeperServers=localhost:2181,localhost:2182,localhost:2183
configurationStoreServers=localhost:2181,localhost:2182,localhost:2183

# Specify the cluster name
clusterName=pulsar-cluster

broker. Configuration description of conf file on the other two nodes:
To deploy multiple instances on one server, you need to specify different port numbers.
[1]brokerServicePort: 3 individual broker The nodes are respectively configured as:6650,6660,6670
[2]brokerServicePortTls: 3 individual broker The nodes are respectively configured as:6651,6661,6671
[3]webServicePort: 3 individual broker The nodes are respectively configured as:8080,8081,8082
[4]webServicePortTls: 3 individual broker The nodes are respectively configured as:8443,8444,8445
[5]zk Cluster node information: 3 individual broker Are configured as:
zookeeperServers=localhost:2181,localhost:2182,localhost:2183
configurationStoreServers=localhost:2181,localhost:2182,localhost:2183
2) After configuring broker 1, configure broker 2 and broker 3 accordingly as described above.
3) Initialize the cluster metadata and execute the following command in broker1.
  bin/pulsar initialize-cluster-metadata \
  --cluster pulsar-cluster \
  --zookeeper 127.0.0.1:2181 \
  --configuration-store 127.0.0.1:2181 \
  --web-service-url http://pulsar.cluster.com:8080 \
  --web-service-url-tls https://pulsar.cluster.com:8443 \
  --broker-service-url pulsar://pulsar.cluster.com:6650 \
  --broker-service-url-tls pulsar+ssl://pulsar.cluster.com:6651
Explanation of cluster metadata:
--cluster
 Cluster name

--zookeeper
ZooKeeper Cluster connection parameters only need to include one node in the cluster

--configuration-store
Pulsar Configuration storage cluster of instance( ZooKeeper),and--zookeeper Parameters are the same. You only need to include one node in the cluster

--web-service-url
 colony Web Service URL+Port, URL Must be a standard DNS Name. The default port is 8080. Modification is not recommended.

--web-service-url-tls
 colony Web provide TLS Service URL+Port. The default port is 8443. It is not recommended to modify it.

--broker-service-url
 colony brokers service URL,URL in DNS Name and Web Service consistency, URL use pulsar replace http/http,The default port is 6650, which is not recommended to be modified.

--broker-service-url-tls
 colony brokers provide TLS Service URL,The default port is 6551, which is not recommended to be modified.
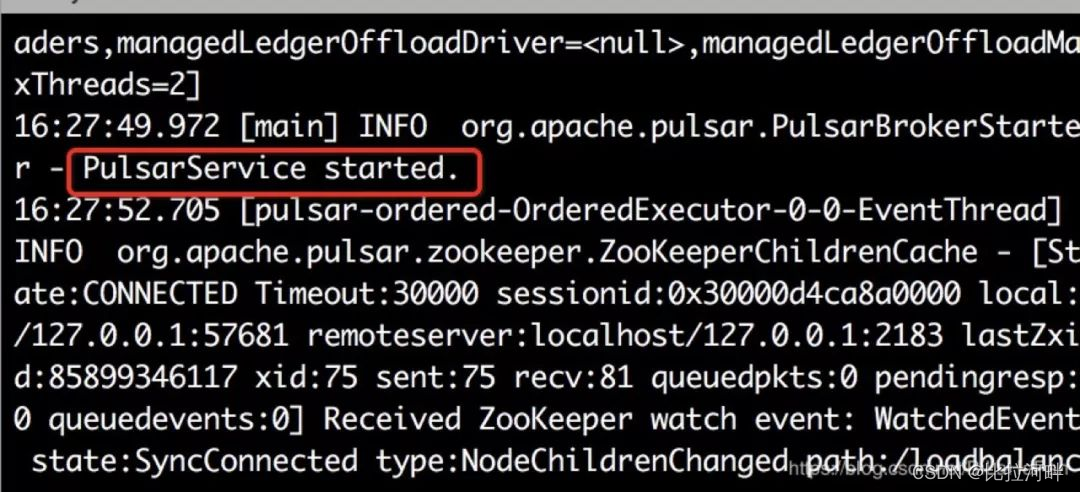
4) Start the broker cluster and start the broker node with the command at the terminal. After successful startup, the log "PulsarService started" will be output, and the command is as follows.
./bin/pulsar broker
6 after pulsar cluster is started, use the command to create cluster name, tenant name, namespace and topic, and give the test demo in parallel.
(1) Create clusters, tenants, namespaces, partition topic s, and specify clusters for namespaces in turn.
# Create a cluster (cluster name: pulsar cluster)
./bin/pulsar-admin clusters create --url http://pulsar.cluster.com:8080  pulsar-cluster
# Create tenant (tenant Name: my tenant)
./bin/pulsar-admin tenants create my-tenant
# Create a namespace (namespace name, specifying the tenant my tenant: my tenant / My namespace)
./bin/pulsar-admin namespaces create my-tenant/my-namespace
# Create persistent partition topic (full name of topic: P) ersistent://my-tenant/my-namespace/my-topic )
./bin/pulsar-admin topics create-partitioned-topic persistent://my-tenant/my-namespace/my-topic -p 3
# Update the namespace and specify the cluster for it
./bin/pulsar-admin namespaces set-clusters my-tenant/my-namespace --clusters pulsar-cluster
(2) Producer and consumer test demo.
1)maven dependency
 <dependency>
            <groupId>org.apache.pulsar</groupId>
            <artifactId>pulsar-client</artifactId>
            <!-- Specify your version -->
            <version>2.2.0</version>
 </dependency>
2) Producer
public class PulsarProducerDemo {
    private static String localClusterUrl = "pulsar://localhost:6650";

    public static void main(String[] args) {
        try {
            Producer<byte[]> producer = getProducer();
            String msg = "hello world pulsar!";

            Long start = System.currentTimeMillis();
            MessageId msgId = producer.send(msg.getBytes());
            System.out.println("spend=" + (System.currentTimeMillis() - start) + ";send a message msgId = " + msgId.toString());
        } catch (Exception e) {
            System.err.println(e);
        }
    }

    public static Producer<byte[]> getProducer() throws Exception {
        PulsarClient client;
        client = PulsarClient.builder().serviceUrl(localClusterUrl).build();
        Producer<byte[]> producer = client.newProducer().topic("persistent://my-tenant/my-namespace/my-topic").producerName("producerName").create();
        return producer;
    }
}
3) Consumer
public class PulsarConsumerDemo {
    private static String localClusterUrl = "pulsar://localhost:6650";
    public static void main(String[] args) {
        try {
            //The topic and subscription specified by the consumer will be subscribed
            Consumer<byte[]> consumer = getClient().newConsumer()
                    .topic("persistent://my-tenant/my-namespace/my-topic")
                    .subscriptionName("my-subscription")
                    .subscribe();
            while (true) {
                Message msg = consumer.receive();
                System.out.printf("consumer-Message received: %s. \n", new String(msg.getData()));
                // Acknowledge the message so that the broker can delete the message
                consumer.acknowledge(msg);
            }
        } catch (Exception e) {
            System.out.println(e);
        }
    }

    public static PulsarClient getClient() throws Exception {
        PulsarClient client;
        client = PulsarClient.builder().serviceUrl(localClusterUrl).build();
        return client;
    }
}
"Code farmer who does not throw the pot" is original. Please indicate the source of reprint. Unauthorized commercial use is prohibited! Please pay attention to GZH with the same name!