The interviewer's soul from deep inside asked, "Tell me about the springboot startup process";
Stuffy-faced interviewer: "It simplifies the configuration of spring, mainly because of the auto-assembly feature and it can be started directly because it has a tomcat container embedded in it";
Interviewer:'Well, yes, this is some of its concepts. You haven't answered my question yet, how did it start and what happened when you started it?'
Stuffy-faced interviewer: ~~Don't know. I'm skilled at using it, but I don't know what's going on inside it!';
Interviewer:'Understanding the internal principles is to help us expand and also to validate a person's learning ability. If you want to take your career to the next level, you have to have these basics. Okay, go back and wait for the news!'
Interviewer:
What is SpringBoot
Springboot relies on spring, which requires no cumbersome xml configuration other than its full functionality, depending on its powerful auto-assembly capabilities. It has embedded web containers such as Tomcat and Jetty, and integrated springmvc, which allows springboot to run directly without additional containers. It provides some common non-functional features in large projects, such as embedded server, security, metrics, health detection, external configuration, and so on.
Spring knows boot means start. So spring boot is actually just a tool to start a spring project. In short, spring boot is a framework that serves the framework. springboot is also a tool that simplifies the configuration of spring.
SpringBoot Start Process
The springboot startup has undergone a series of processes. Let's first look at the overall process flow chart

Don't mention, there are still many steps, but it doesn't matter. To help you understand, let's explain the numbers above one by one, and tell you what's going on inside in a plain and easy-to-understand way. Don't talk much, just start.
1. Run SpringApplication.run() method
To be sure, all standard springboot applications start with the run method
package com.spring;
import org.springframework.beans.factory.config.ConfigurableListableBeanFactory;
import org.springframework.boot.SpringApplication;
import org.springframework.boot.autoconfigure.SpringBootApplication;
import org.springframework.context.ConfigurableApplicationContext;

@SpringBootApplication
public class App  {

    public static void main(String[] args) {
        // Start springboot
        ConfigurableApplicationContext run = SpringApplication.run(App.class, args);
    }

}
When you enter the run method, a new SpringApplication object is created, and the constructor for this object is prepared. Step 2-5 of the number is what is done inside the constructor
	/**
	 * Static helper that can be used to run a {@link SpringApplication} from the
	 * specified sources using default settings and user supplied arguments.
	 * @param primarySources the primary sources to load
	 * @param args the application arguments (usually passed from a Java main method)
	 * @return the running {@link ApplicationContext}
	 */
	public static ConfigurableApplicationContext run(Class<?>[] primarySources,
			String[] args) {
		return new SpringApplication(primarySources).run(args);
	}
As an additional note, springboot can be started in three ways. Other ways can be found in another post of mine: Three ways to start SpringBoot
2. Identify application types
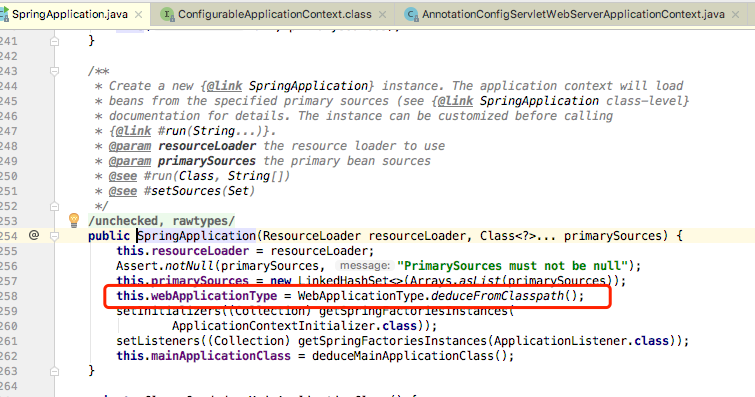
Within the construction method of the Spring Application, the first step is through the WebApplicationType.deduceFromClasspath(); Method To determine the container of the current application, the default is the Servlet container, in addition to the servlet, there are NONE and REACTIVE (Responsive Programming);
3. Load all initializers
The initializer loaded here is springboot's own initializer, from META-INF/spring. The factories configuration file is loaded, so where is this file? From the two, one in the source jar package's spring-boot-autoconfigure project and one in the spring-boot project

Spring. Inside the factories file, you see that it starts with org. Springframework. Context. The ApplicationContextInitializer interface is the initializer.

Of course, we can also implement a custom initializer ourselves: by implementing the ApplicationContextInitializer interface we can
MyApplicationContextInitializer.java
package com.spring.application;

import org.springframework.context.ApplicationContextInitializer;
import org.springframework.context.ConfigurableApplicationContext;
/**
 * Custom Initializer
 */
public class MyApplicationContextInitializer implements ApplicationContextInitializer<ConfigurableApplicationContext> {
    @Override
    public void initialize(ConfigurableApplicationContext configurableApplicationContext) {
        System.out.println("I am initialized MyApplicationContextInitializer...");
    }
}
Add META-INF/spring to the resources directory. The factories configuration file, which reads as follows, registers a custom initializer;
org.springframework.context.ApplicationContextInitializer=\
com.spring.application.MyApplicationContextInitializer

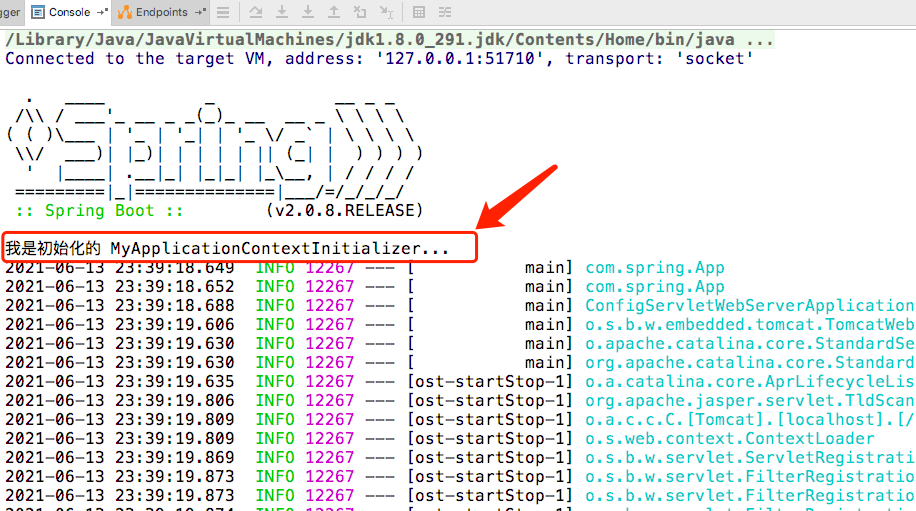
After starting springboot, you can see what is printed by the console, where we can see the execution order intuitively, which is performed after the banner is printed.
4. Load all listeners
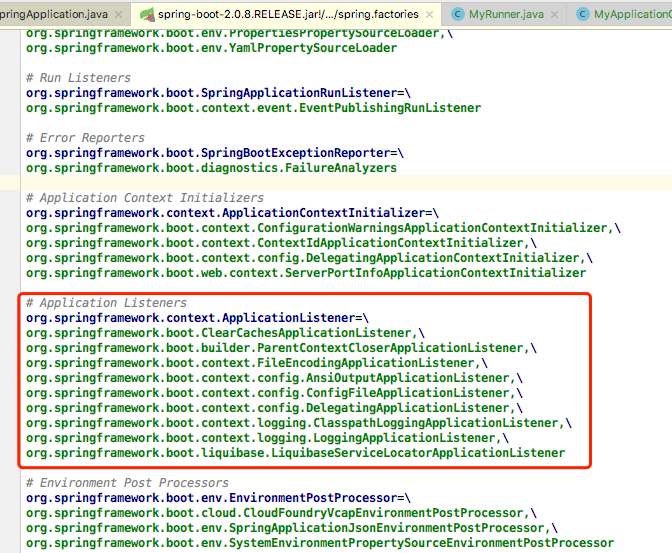
Loading listeners is also from META-INF/spring. Loaded in the factories configuration file, unlike initialization, the listener loads classes that implement the ApplicationListener interface
Custom listeners are just like initializers. Just draw a gourd ladle. There are no examples.
5. Set the main class for the program to run
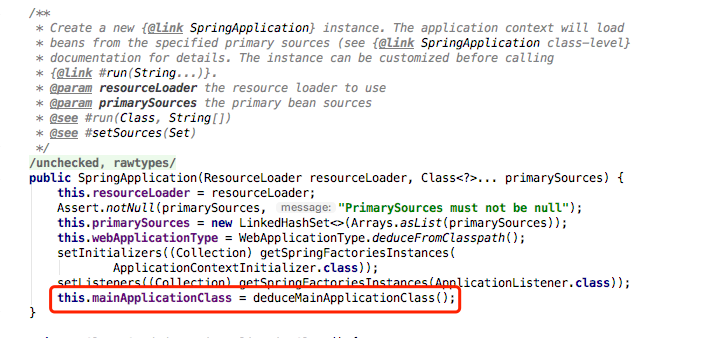
deduceMainApplicationClass(); This method simply finds the class in which the main method resides and prepares for subsequent sweeps. deduce is the meaning of inference, so to be precise, this method is used to infer the class in which the main method resides.
6. Turn on the timer
When the program runs here, it has entered the main body of the run method. The first step is to call the run method as a static method. At that time, the SpringApplication object has not been instantiated yet. Now the run method that is called is non-static and needs to be instantiated before it can be invoked. When it comes in, it will start the timer first. What is the function of this timer? As the name implies, it is used to time, calculate how long it took springboot to start; The key codes are as follows:
// Instantiation timer
StopWatch stopWatch = new StopWatch();
// Start Timing
stopWatch.start();
Snippet of run method code

7. Will java.awt.headless set to true
This will be java.awt.headless is set to true, meaning that the transport is on the server side and can work in the mode without display and mouse keyboard to simulate input and output device functions.
After doing this, what does SpringBoot want to do? You really want to set up the app to allow it to start even if no monitor is detected. For servers, there is no need for a monitor, so set it up like this.
The method body is as follows:
	private void configureHeadlessProperty() {
		System.setProperty(SYSTEM_PROPERTY_JAVA_AWT_HEADLESS, System.getProperty(
				SYSTEM_PROPERTY_JAVA_AWT_HEADLESS, Boolean.toString(this.headless)));
	}
You can see that there is a getProperty () inside the setProperty() method. Isn't that more? There are actually two parameters in the getProperty() method, the first key value and the second default value, which means to find the property value through the key value, and return the default value true if the property value is empty. It guarantees a certain value;
8. Get and enable listeners
This step, which implements the basic operation of initialization through the listener, does two things
- Create all Spring Run Monitors and publish application startup events
- Enable listeners

9. Setting application parameters
Encapsulate the parameters passed in when executing the run method into an object
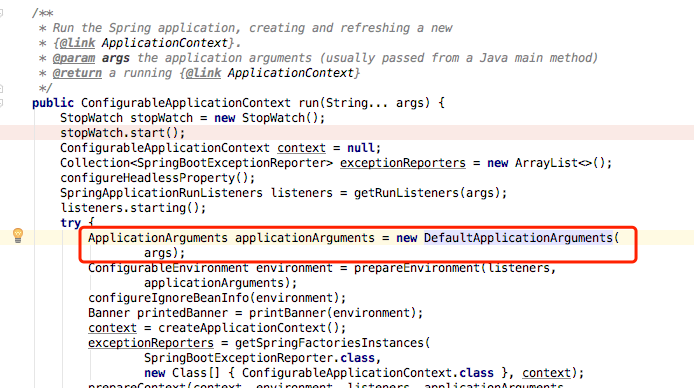
Just encapsulate the parameters as objects, nothing to say, the object's constructor is as follows
	public DefaultApplicationArguments(String[] args) {
		Assert.notNull(args, "Args must not be null");
		this.source = new Source(args);
		this.args = args;
	}
So the question arises, where does this parameter come from? This is actually the parameter passed in by the static run method inside the main method.

10. Preparing environment variables
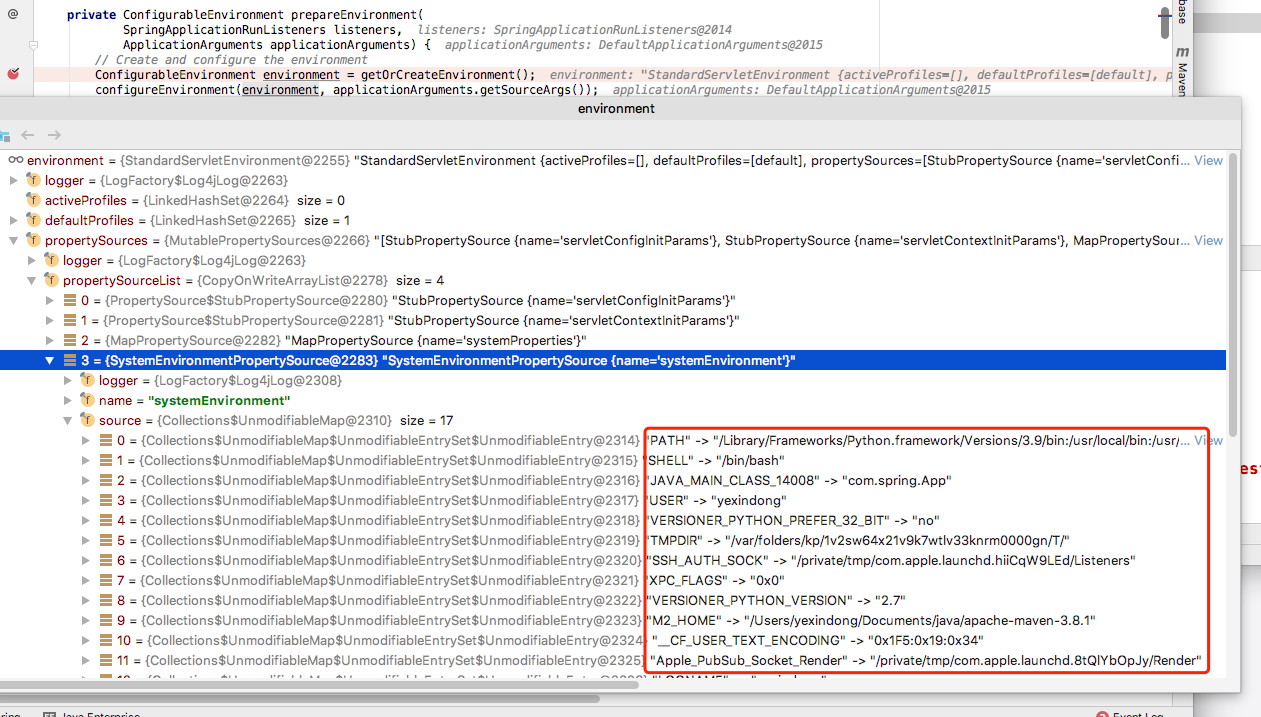
Prepare environment variables, including system and user-configured properties, and execute code blocks within the prepareEnvironment method
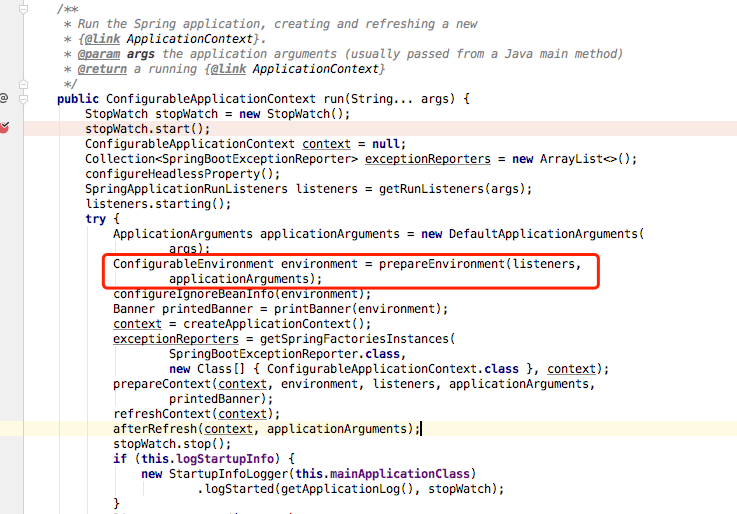
As you can see after the breakpoint, it loads both maven and the environment variables of the system
11. Ignore bean information
This method configureIgnoreBeanInfo() This method will be spring.beaninfo.ignore's default value is set to true, meaning to skip searching for beanInfo, which works the same way as step 7.
    private void configureIgnoreBeanInfo(ConfigurableEnvironment environment) {
		if (System.getProperty(
				CachedIntrospectionResults.IGNORE_BEANINFO_PROPERTY_NAME) == null) {
			Boolean ignore = environment.getProperty("spring.beaninfo.ignore",
					Boolean.class, Boolean.TRUE);
			System.setProperty(CachedIntrospectionResults.IGNORE_BEANINFO_PROPERTY_NAME,
					ignore.toString());
		}
	}
Of course, you can also add the following configuration to the configuration file to set false
spring.beaninfo.ignore=false
The specific role of this configuration is not known at this time and should be added when the author finds out
12. Print banner information
Obviously, this process is used to print the banner of that big spring in the console, which is the following
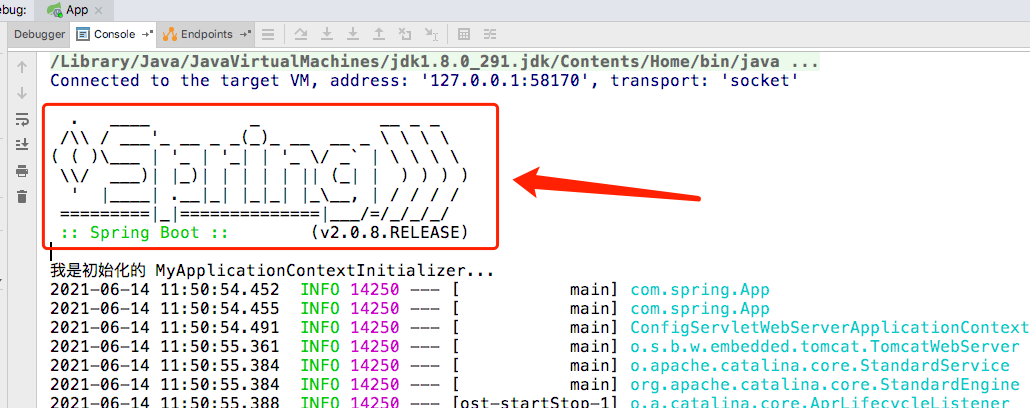
Where did he print it? He's in SpringBoot Banner. Printed in java, this class implements the Banner interface.
And the banner information is written directly in the code;
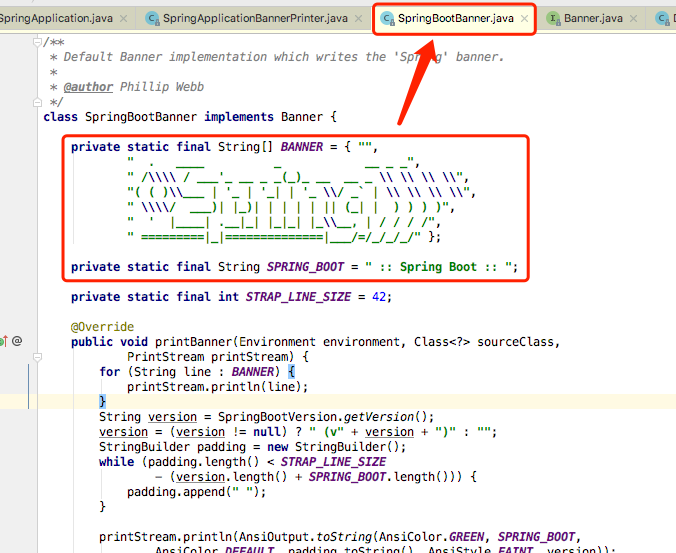
Some companies like to customize banner information. What if you want to change to your favorite icon? It's really simple. Just add a banner to the resources directory. The txt file is as follows
                 _           _
                (_)         | |
 _   _  _____  ___ _ __   __| | ___  _ __   __ _
| | | |/ _ \ \/ / | '_ \ / _` |/ _ \| '_ \ / _` |
| |_| |  __/>  <| | | | | (_| | (_) | | | | (_| |
 \__, |\___/_/\_\_|_| |_|\__,_|\___/|_| |_|\__, |
  __/ |                                     __/ |
 |___/                                     |___/
:: yexindong::
Be sure to add it to the resources directory. Don't make a mistake

Just add a file, do nothing else, and start springboot directly to see the effect

13. Create application context
Instantiate the application's context and call the createApplicationContext() method, which creates objects with reflection, nothing to say;

14. Instantiate Exception Reporter
The exception reporter is used to catch global exceptions. When an exception occurs in a springboot application, the exception reporter will catch and handle it accordingly, in spring. The default exception reporter is configured in the factories file.

It is important to note that this exception reporter will only catch exceptions thrown during startup. If an error occurs when a user requests after startup, the exception reporter will not catch exceptions that occur in the request.

Now that we know the principle, we'll configure an exception reporter to play with.
MyExceptionReporter.java inherits the SpringBootExceptionReporter interface
package com.spring.application;

import org.springframework.boot.SpringBootExceptionReporter;
import org.springframework.context.ConfigurableApplicationContext;

public class MyExceptionReporter implements SpringBootExceptionReporter {


    private ConfigurableApplicationContext context;
    // Must have a parameterized constructor or startup will fail
    MyExceptionReporter(ConfigurableApplicationContext context) {
        this.context = context;
    }

    @Override
    public boolean reportException(Throwable failure) {
        System.out.println("Enter exception reporter");
        failure.printStackTrace();
        // Returning false prints detailed springboot error information, and returning true prints only exception information
        return false;
    }
}
In spring. Register exception reporter in factories file
# Error Reporters Exception Reporter
org.springframework.boot.SpringBootExceptionReporter=\
com.spring.application.MyExceptionReporter

Then we're in application. Setting the port number to a very large value in YML will cause errors.
server:
  port: 80828888
When started, the console prints the following image

15. Prepare context
The context prepared here is for the next refresh, and there are some extra things to do.

15.1. beanName generator instantiating a singleton
In the postProcessApplicationContext(context); Method inside. The BeanNameGenerator object is created using the singleton pattern, which is essentially the beanName generator used to generate the name of the bean object
15.2. Execute initialization method
What are the initialization methods? Remember the initializer loaded in step 3? The class that implements the ApplicationContextInitializer interface is actually all the initializers loaded in step 3
15.3. Register startup parameters in containers
The startup parameters are registered here as singletons in the container for later convenience. The beanName of the parameter is: springApplicationArguments
16. Refresh Context
Refreshing the context is already a spring category. This is how tomcat is automatically assembled and started. There are other spring mechanisms that come with it.

17. Refresh Context Post-processing
The afterRefresh method is some post-startup processing that is reserved for user extensions and is currently empty.
/**
	 * Called after the context has been refreshed.
	 * @param context the application context
	 * @param args the application arguments
	 */
	protected void afterRefresh(ConfigurableApplicationContext context,
			ApplicationArguments args) {
	}
18. End timer
At this point, the springboot is actually finished, and the timer prints how long it takes to start the springboot

In the console, you can see that the boot is still fast, and the boot is completed in less than 2 seconds.

19. Publish Context Ready Event
Tell the app that I'm ready to start working
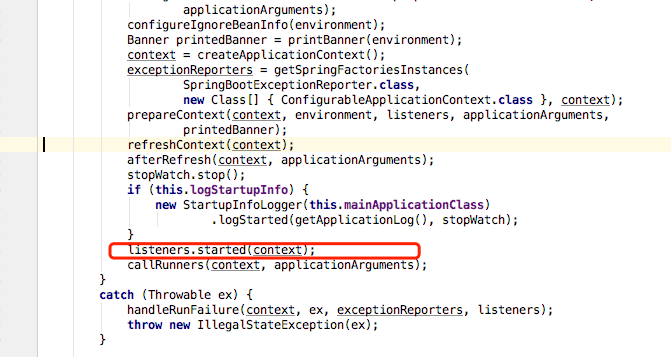
20. Executing custom run methods
This is an extension that callRunners(context, applicationArguments) can execute custom run methods after startup is complete; There are two ways to do this:
- Implement the ApplicationRunner interface
- Implement CommandLineRunner interface
Next, let's validate that for code readability, I've put both of them in the same class
package com.spring.init;

import org.springframework.boot.ApplicationArguments;
import org.springframework.boot.ApplicationRunner;
import org.springframework.boot.CommandLineRunner;
import org.springframework.stereotype.Component;

/**
 * Two ways to customize the run method
 */
@Component
public class MyRunner implements ApplicationRunner, CommandLineRunner {

    @Override
    public void run(ApplicationArguments args) throws Exception {
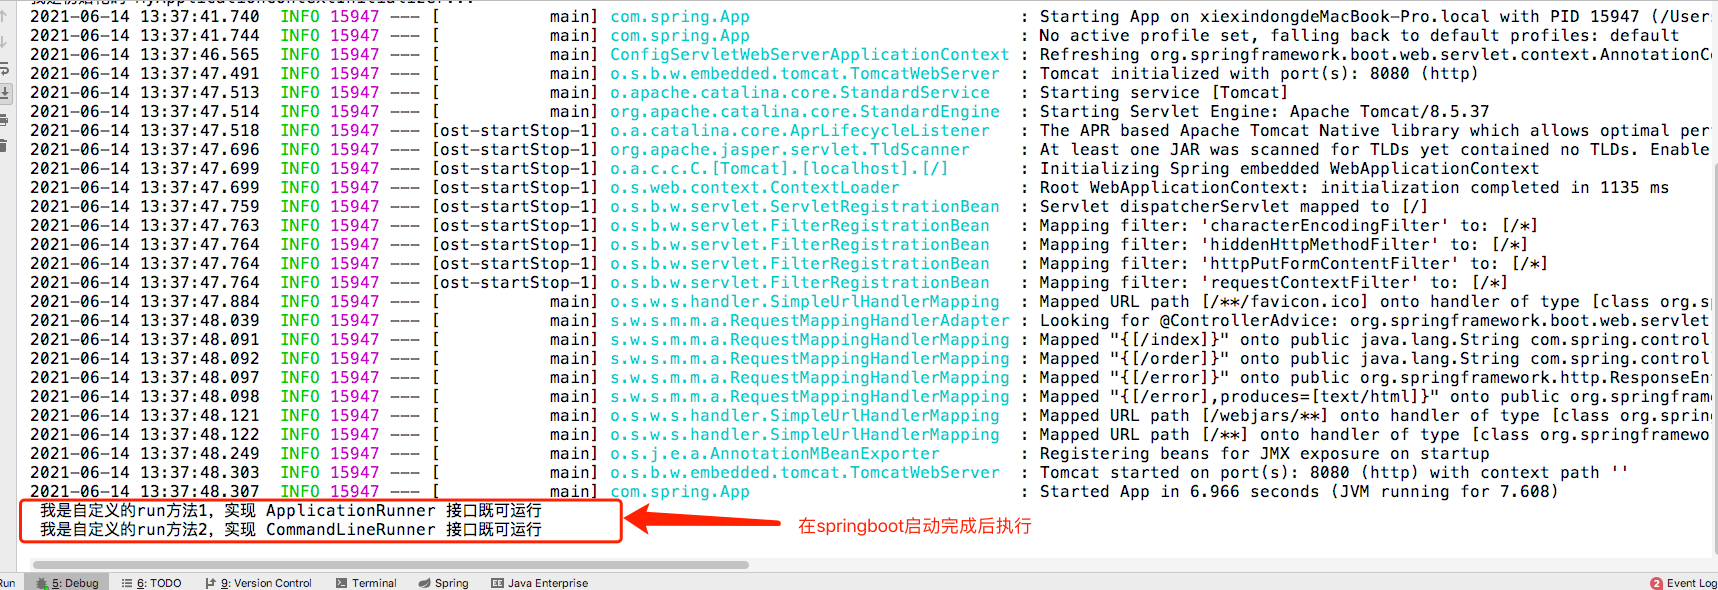
        System.out.println(" I'm customized run Method 1, implementation ApplicationRunner Interface is operational"        );
    }

    @Override
    public void run(String... args) throws Exception {
        System.out.println(" I'm customized run Method 2, implementation CommandLineRunner Interface is operational"        );
    }
}
You can see the information printed by the console when you start springboot
finish
In fact, it is still good for developers to know the springboot startup principle. At least you know what can be extended, how to extend it, and how to do its internal principle. I believe it is also possible to let you write a springboot yourself after you know these ideas. But here is just a list of the start-up process, not all of it. The source code is very negative. I remember a bull said, "When we look at the source, we can only imagine or guess what the author thinks, and test it carefully. Just like when we were a kid learning classical poems, we can only guess what the ancients thought. As for the moral scriptures, everyone has different views after reading, which requires different opinions."
