
For ease of reference, put the Swagger interface address directly (this sentence can be ignored)
http://127.0.0.1/swagger-ui.html#/user-controller
What is the interface document of your company written in?
I believe that both front-end and back-end are more or less tortured by interface documents. The front end often complains that the interface documents given by the background are inconsistent with the actual situation. The back end feels that writing interface documents wastes time and often has no time to update. Sometimes the contradiction between the front and back ends arises in this way. Many company interface documents are still written in World documents or Excel! With the passage of time and project iterations, offline interface documents often fail to keep up.
Here I recommend the online document doclever I have used before: http://doclever.cn/ Instructions: http://doclever.cn/controller/read/read.html#5a532f98b7731a2ba86093b3
DOClever is specially designed for small and medium-sized teams to solve interface management, testing and data generation, and realize a truly integrated solution.
Let's talk about Swagger.
Official website: https://swagger.io/
Theoretical reference: https://www.jianshu.com/p/349e130e40d5
Detailed explanation of common notes used by Swagger: https://blog.csdn.net/wyb880501/article/details/79576784
Swagger Codegen: through Codegen, the description file can be generated into interface documents in html format and cwiki form. At the same time, it can also generate server-side and client-side codes in multiple languages. Support localized generation through jar package, docker, node, etc. It can also be generated online in the later Swagger Editor.
Swagger UI: provides a visual UI page presentation description file. The caller, test and project manager of the interface can view relevant interfaces and make some simple interface requests on this page. The project supports online import of description files and local deployment of UI projects.
Swagger Editor: an editor similar to the markdown editor for editing swagger description files, which supports real-time preview of the update effect of description files. Online editor and local deployment editor are also provided.
Swagger Inspector: it feels similar to postman. It is an online version of postman that can test interfaces. It will return more information and save the actual request parameters and other data you requested than making an interface request in the Swagger UI.
You can upload all the functions of swagger and hub to the above project. You can complete all the work of the above projects in Swagger Hub. You need to register an account, which is divided into free version and paid version.
Start building Swagger environment
We use swagger version 2.10.5. The annotation no longer supports @ EnableSwagger2. Please choose one of the following two types: @ EnableSwagger2WebMvc or @ EnableSwagger2WebFlux
View the latest version of swagger address: https://mvnrepository.com/artifact/io.springfox/springfox-swagger2 , it is recommended to collect maven addresses. You can view the latest versions of many open source products.
There are three maven dependencies. The complete code is as follows:
<?xml version="1.0" encoding="UTF-8"?>
<project xmlns="http://maven.apache.org/POM/4.0.0"
         xmlns:xsi="http://www.w3.org/2001/XMLSchema-instance"
         xsi:schemaLocation="http://maven.apache.org/POM/4.0.0 http://maven.apache.org/xsd/maven-4.0.0.xsd">
    <modelVersion>4.0.0</modelVersion>

    <groupId>com.study</groupId>
    <artifactId>study-swagger</artifactId>
    <version>1.0-SNAPSHOT</version>

    <parent>
        <groupId>org.springframework.boot</groupId>
        <artifactId>spring-boot-starter-parent</artifactId>
        <version>2.2.2.RELEASE</version>
    </parent>

    <properties>
        <!-- to configure Swagger edition -->
        <swagger.version>2.10.5</swagger.version>
    </properties>

    <dependencies>
        <!--Spring boot Integration package-->
        <dependency>
            <groupId>org.springframework.cloud</groupId>
            <artifactId>spring-cloud-starter-netflix-eureka-client</artifactId>
        </dependency>
        <!-- SpringBoot integration Web assembly -->
        <dependency>
            <groupId>org.springframework.boot</groupId>
            <artifactId>spring-boot-starter-web</artifactId>
        </dependency>
        <dependency>
            <groupId>org.springframework.boot</groupId>
            <artifactId>spring-boot-starter-test</artifactId>
            <scope>test</scope>
        </dependency>
        <!-- lombok rely on -->
        <dependency>
            <groupId>org.projectlombok</groupId>
            <artifactId>lombok</artifactId>
        </dependency>

        <!-- SpringBoot swagger2 Interface -->
        <dependency>
            <groupId>io.springfox</groupId>
            <artifactId>springfox-swagger2</artifactId>
            <version>${swagger.version}</version>
        </dependency>
        <!-- SpringBoot swagger2 UI -->
        <dependency>
            <groupId>io.springfox</groupId>
            <artifactId>springfox-swagger-ui</artifactId>
            <version>${swagger.version}</version>
        </dependency>
        <!-- SpringBoot swagger2 WebMVC -->
        <dependency>
            <groupId>io.springfox</groupId>
            <artifactId>springfox-spring-webmvc</artifactId>
            <version>${swagger.version}</version>
        </dependency>
    </dependencies>

    <dependencyManagement>
        <dependencies>
            <dependency>
                <groupId>org.springframework.cloud</groupId>
                <artifactId>spring-cloud-dependencies</artifactId>
                <version>Hoxton.SR2</version>
                <type>pom</type>
                <scope>import</scope>
            </dependency>
        </dependencies>
    </dependencyManagement>
</project>
Swagger configuration class:
package com.study.config;
import org.springframework.context.annotation.Bean;
import org.springframework.context.annotation.Configuration;
import springfox.documentation.builders.ApiInfoBuilder;
import springfox.documentation.builders.PathSelectors;
import springfox.documentation.builders.RequestHandlerSelectors;
import springfox.documentation.service.ApiInfo;
import springfox.documentation.spi.DocumentationType;
import springfox.documentation.spring.web.plugins.Docket;
import springfox.documentation.swagger2.annotations.EnableSwagger2WebMvc;
/**
* @author biandan
* @description SwaggerConfig Related configuration of
* @signature Let the world have no hard to write code
* @create 2021-06-06 9:42 PM
*/
@Configuration
@EnableSwagger2WebMvc
public class SwaggerConfig {
@Bean
public Docket api(){
return new Docket(DocumentationType.SWAGGER_2)
.apiInfo(myApiInfo()) //document information
.select()
.apis(RequestHandlerSelectors.basePackage("com.study.controller")) //Scanned packages
.paths(PathSelectors.any())
.build();
}
/**
* Create document information
* @return
*/
private ApiInfo myApiInfo(){
return new ApiInfoBuilder()
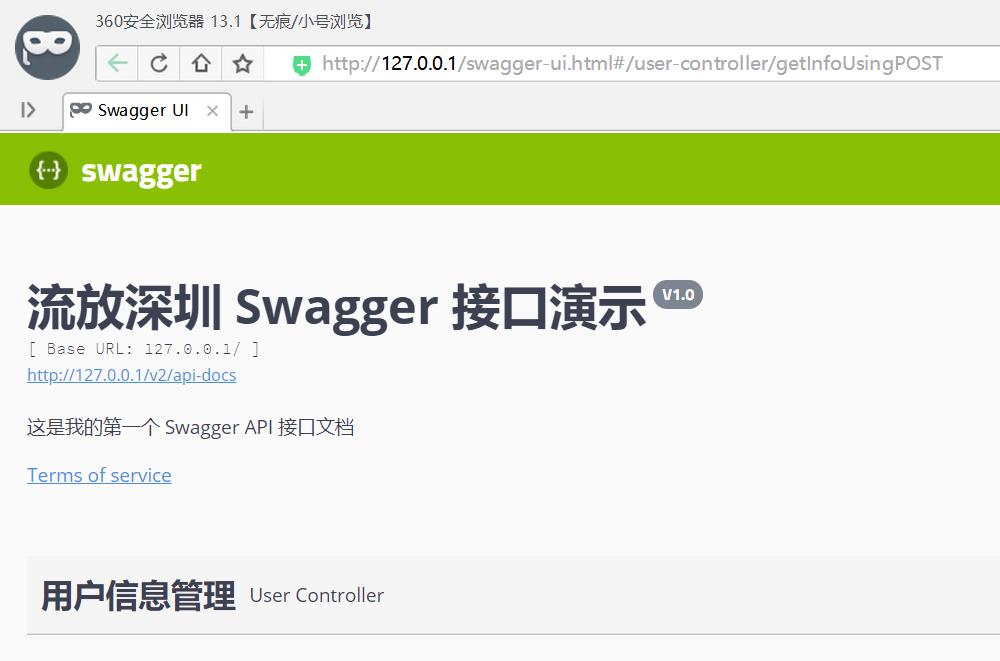
.title("Exile to Shenzhen Swagger Interface demonstration") //document title
.description("This is my first Swagger API Interface document") //Document description
.termsOfServiceUrl("http://www.baidu.com ") / / terms of service address
.version("V1.0") //Version number
.build();
}
}
Entity class: if you don't understand the usage of lombok expression, you can check my blog: https://blog.csdn.net/BiandanLoveyou/article/details/117632905
package com.study.entity;
import io.swagger.annotations.ApiModel;
import io.swagger.annotations.ApiModelProperty;
import lombok.*;
/**
* @author biandan
* @description
* @signature Let the world have no hard to write code
* @create 2021-06-06 5:45 PM
*/
@Data
@Getter
@Setter
@NoArgsConstructor
@AllArgsConstructor(staticName = "of")
@Builder
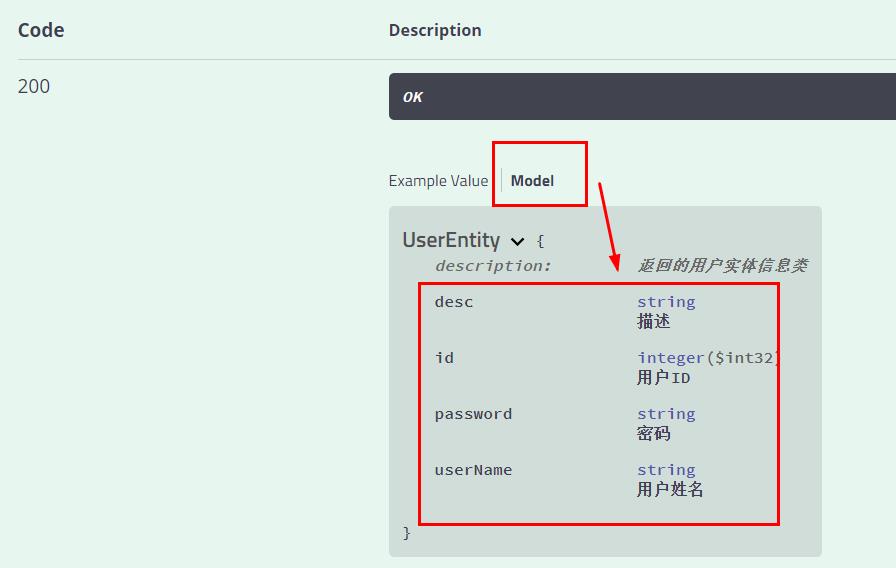
@ApiModel(description = "Returned user entity information class")
public class UserEntity {
@ApiModelProperty(value = "user ID")
private Integer id;
@ApiModelProperty(value = "User name")
private String userName;
@ApiModelProperty(value = "password")
private String password;
@ApiModelProperty(value = "describe")
private String desc;
}
explain:
@ApiModel: used on the response class to represent a message that returns response data
@ ApiModel: used on the response class to represent a message that returns response data
(this is generally used in the scenario of @ RequestBody when creating a post,
Request parameters cannot be described with @ ApiImplicitParam annotation)
@ ApiModelProperty: used on the property to describe the property of the response class
Say a word: after the test is successful, you can click [Model] on the returned information to see it.
Controller class:
package com.study.controller;
import com.study.entity.UserEntity;
import io.swagger.annotations.Api;
import io.swagger.annotations.ApiImplicitParam;
import io.swagger.annotations.ApiImplicitParams;
import io.swagger.annotations.ApiOperation;
import org.springframework.web.bind.annotation.PostMapping;
import org.springframework.web.bind.annotation.RequestMapping;
import org.springframework.web.bind.annotation.RequestParam;
import org.springframework.web.bind.annotation.RestController;
/**
* @author biandan
* @description
* @signature Let the world have no hard to write code
* @create 2021-06-06 5:45 PM
*/
@RestController
@Api(tags = "User information management")
@RequestMapping("/api")
public class UserController {
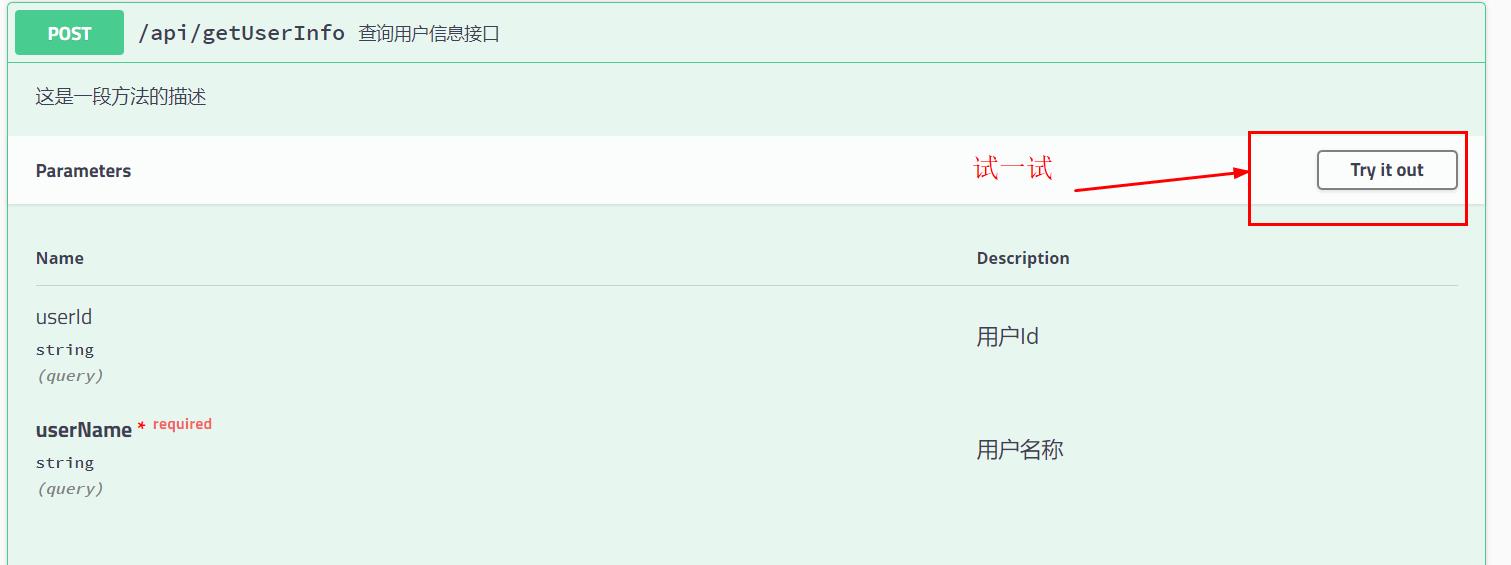
@PostMapping("/getUserInfo")
@ApiOperation(value = "Query user information interface", notes = "This is a description of the method")
@ApiImplicitParams({
@ApiImplicitParam(name = "userId", value = "user Id", required = false, dataType = "String"),
@ApiImplicitParam(name = "userName", value = "User name", required = true, dataType = "String")
})
public UserEntity getInfo(@RequestParam(value = "userId",required = false) Integer userId,
@RequestParam("userName") String userName) {
System.out.println("userName=" + userName);
System.out.println("userId=" + userId);
UserEntity userEntity = new UserEntity();
userEntity.setId(userId);
userEntity.setUserName(userName);
userEntity.setPassword("123456");
userEntity.setDesc("Let the world have no hard to write code");
return userEntity;
}
}
explain:
1. @ Api: used on the requested class, indicating the description of the class. tags = "describe the function of this class and the annotations you can see on the UI interface, as shown in the figure below"
2. @ ApiOperation: used on the requested method to describe the purpose and function of the method
value = "describe the purpose and function of the method"
Notes = "notes of method"
3. @ ApiImplicitParams: used on the requested method and represents a set of parameter descriptions
@ ApiImplicitParam: used in @ ApiImplicitParams annotation to specify all aspects of a request parameter
Name: parameter name
value: Chinese character description and explanation of the parameter
required: whether the parameter must be passed, true or false
paramType: where is the parameter placed
· header -- > acquisition of request parameters: @ RequestHeader
· query -- > acquisition of request parameters: @ RequestParam
· path (for restful interface) - > acquisition of request parameters: @ PathVariable
· body (not commonly used)
· form (not commonly used)
dataType: parameter type. The default is String. If it is an Integer, please use int instead of Integer.
defaultValue: the default value of the parameter
4. If there is only one parameter to describe, use @ ApiImplicitParam(name = "userId", value = "userid", required = false, datatype = "string"). If there are multiple, use @ ApiImplicitParams
application.yml configuration information:
server:
  port: 80

# When deploying and debugging a SpringBoot project as a single instance, you do not need to register with the registry
eureka:
  client:
    fetch-registry: false
    register-with-eureka: false

spring:
  application:
    name: swagger-server
Startup class:
package com.study;

import org.springframework.boot.SpringApplication;
import org.springframework.boot.autoconfigure.SpringBootApplication;

/**
 * @author biandan
 * @description
 * @signature Let the world have no hard to write code
 * @create 2021-06-06 5:44 PM
 */
@SpringBootApplication
public class SwaggerApplication {

    public static void main(String[] args) {
        SpringApplication.run(SwaggerApplication.class, args);
    }
}
Start the micro service and enter the browser address: http://127.0.0.1/swagger-ui.html#/user-controller Note the following URL parameters /swagger-ui.html#/user-controller It's fixed.
swagger can also be tested. try it out in the upper right corner
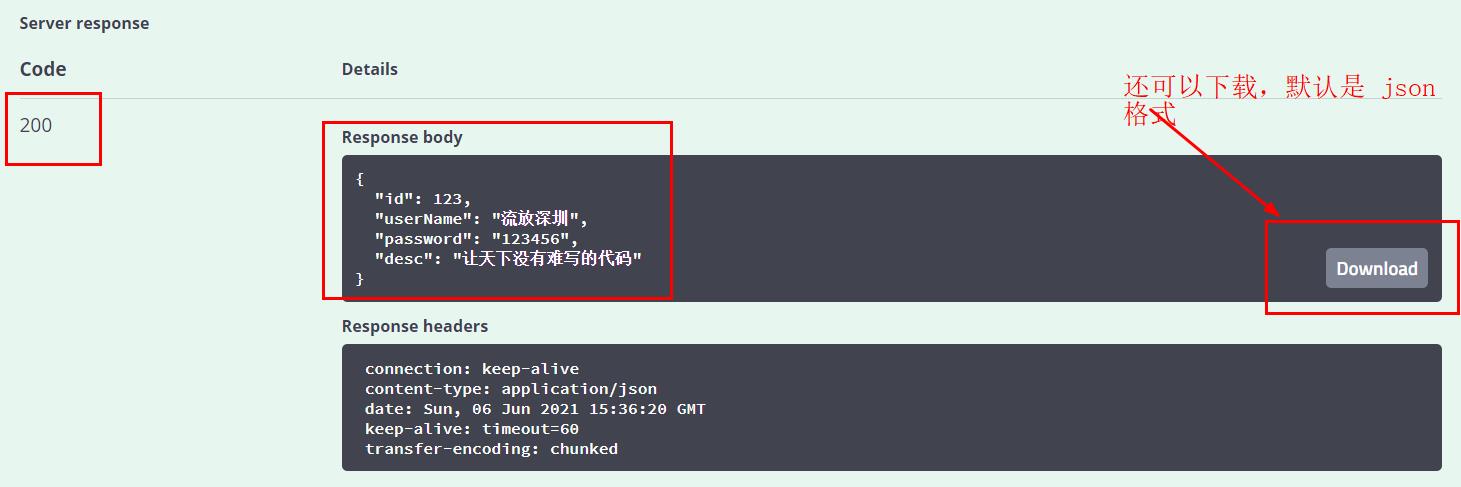
Enter the parameters and click execute
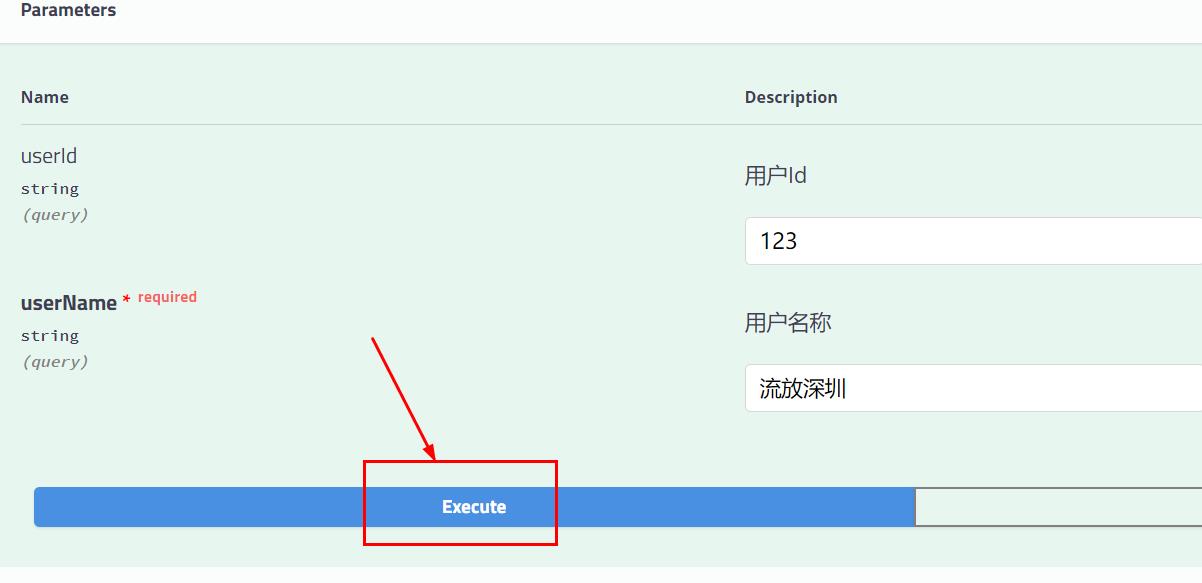
The returned results can also be downloaded. The default format is json.
OK, swagger is officially introduced!
Code of this blog: https://pan.baidu.com/s/1_9v4hwj3htFqJe0W7JjxMQ Extraction code: qeg7