My latest and complete articles are in Pumpkin speak slowly www.pkslow.com com , welcome to tea!
1 Preface
There is not much about Spring Cloud Data Flow here. If you are interested, you can see the following article. This article mainly introduces how to integrate Data Flow and CloudFoundry UAA for permission control, rather than anyone can directly access the operation.
Spring Cloud Data Flow related articles:
Initial experience of Spring Cloud Data Flow, running in Local mode
Deploy Spring Cloud Data Flow on Kubernetes and try another task
Spring Cloud Data Flow is operated by Shell to facilitate the establishment of CICD
UAA CloudFoundry User Account and Authentication, an identity authentication and authorization service system, is mainly used in CloudFoundry. It can also be used as an independent OAuth2 server to distribute tokens to clients. It can be used in single sign on SSO and other scenarios.
UAA can also integrate LDAP, but for simplicity, this article only demonstrates how to integrate in the simplest way.
2 start UAA service
UAA in the form of war package is officially provided War can be downloaded directly and then deployed on Servlet containers, such as Tomcat. UAA Bundled Wrap the war package through springboot, making it as easy to start the application as applying springboot. This paper starts in this form.
Download the war package through the plugin Maven dependency plugin, as follows:
<plugin>
  <groupId>org.apache.maven.plugins</groupId>
  <artifactId>maven-dependency-plugin</artifactId>
  <executions>
    <execution>
      <id>copy</id>
      <phase>process-resources</phase>
      <goals>
        <goal>copy</goal>
      </goals>
    </execution>
  </executions>
  <configuration>
    <artifactItems>
      <!--local IDE Required at startup-->
      <artifactItem>
        <groupId>org.cloudfoundry.identity</groupId>
        <artifactId>cloudfoundry-identity-uaa</artifactId>
        <version>4.30.0</version>
        <type>war</type>
        <overWrite>true</overWrite>
        <outputDirectory>${project.basedir}/src/main/resources</outputDirectory>
        <destFileName>uaa.war</destFileName>
      </artifactItem>
      <!--Pack into jar need-->
      <artifactItem>
        <groupId>org.cloudfoundry.identity</groupId>
        <artifactId>cloudfoundry-identity-uaa</artifactId>
        <version>4.30.0</version>
        <type>war</type>
        <overWrite>true</overWrite>
        <outputDirectory>${project.basedir}/target/classes</outputDirectory>
        <destFileName>uaa.war</destFileName>
      </artifactItem>
    </artifactItems>
  </configuration>
</plugin>
Call through a Springboot main function entry:
@SpringBootApplication
public class UaaServer {

    public static void main(String[] args) {
        SpringApplication.run(UaaServer.class, args);
    }

    @Bean
    public ServletWebServerFactory servletContainer() throws IOException {

        final File tempDirectory = Files.createTempDirectory("uaa").toFile();
        final File tempUaaYmlFile = new File(tempDirectory, "uaa.yml");
        final File tempUaaWarFile = new File(tempDirectory, "uaa.war");

        FileCopyUtils.copy(
                new ClassPathResource("uaa.yml").getInputStream(),
                new FileOutputStream(tempUaaYmlFile));

        FileCopyUtils.copy(
                new ClassPathResource("uaa.war").getInputStream(),
                new FileOutputStream(tempUaaWarFile));

        System.out.println("uaa.yml: " + tempUaaYmlFile.getAbsolutePath());
        System.out.println("uaa.war: " + tempUaaWarFile.getAbsolutePath());

        System.setProperty("UAA_CONFIG_FILE", tempUaaYmlFile.getAbsolutePath());

        return new TomcatServletWebServerFactory() {
            protected TomcatWebServer getTomcatWebServer(org.apache.catalina.startup.Tomcat tomcat) {
                final Server tomcatServer = tomcat.getServer();
                final File catalinaBase = new File(tempDirectory, "catalina");
                catalinaBase.mkdirs();

                tomcatServer.setCatalinaBase(catalinaBase);
                new File(tomcatServer.getCatalinaBase(), "webapps").mkdirs();
                try {
                    Context context = tomcat.addWebapp("/uaa", tempUaaWarFile.toString());
                    final ClassLoader properClassLoader = UaaServer.class.getClassLoader();

                    WebappLoader loader =
                            new WebappLoader(properClassLoader);
                    context.setLoader(loader);

                } catch (Exception ex) {
                    throw new IllegalStateException("Failed to add webapp", ex);
                }
                return super.getTomcatWebServer(tomcat);
            }
        };
    }
}
The file names of the configuration file and war package are hard coded, and the actual project can be realized through configuration.
Next, configure UAA YML file. See the code for details https://github.com/LarryDpk/pkslow-samples , it's not posted here. Note that the key of JWT needs to be generated:
$ openssl genrsa -out signingkey.pem 2048
Generating RSA private key, 2048 bit long modulus
........................+++
..........................................................................+++
e is 65537 (0x10001)

$ openssl rsa -in signingkey.pem -pubout -out verificationkey.pem
writing RSA key
After completing the above steps, you can start the package. The command is as follows:
mvn clean package
java -jar target/cloudfoundry-uaa-server-1.0-SNAPSHOT.jar
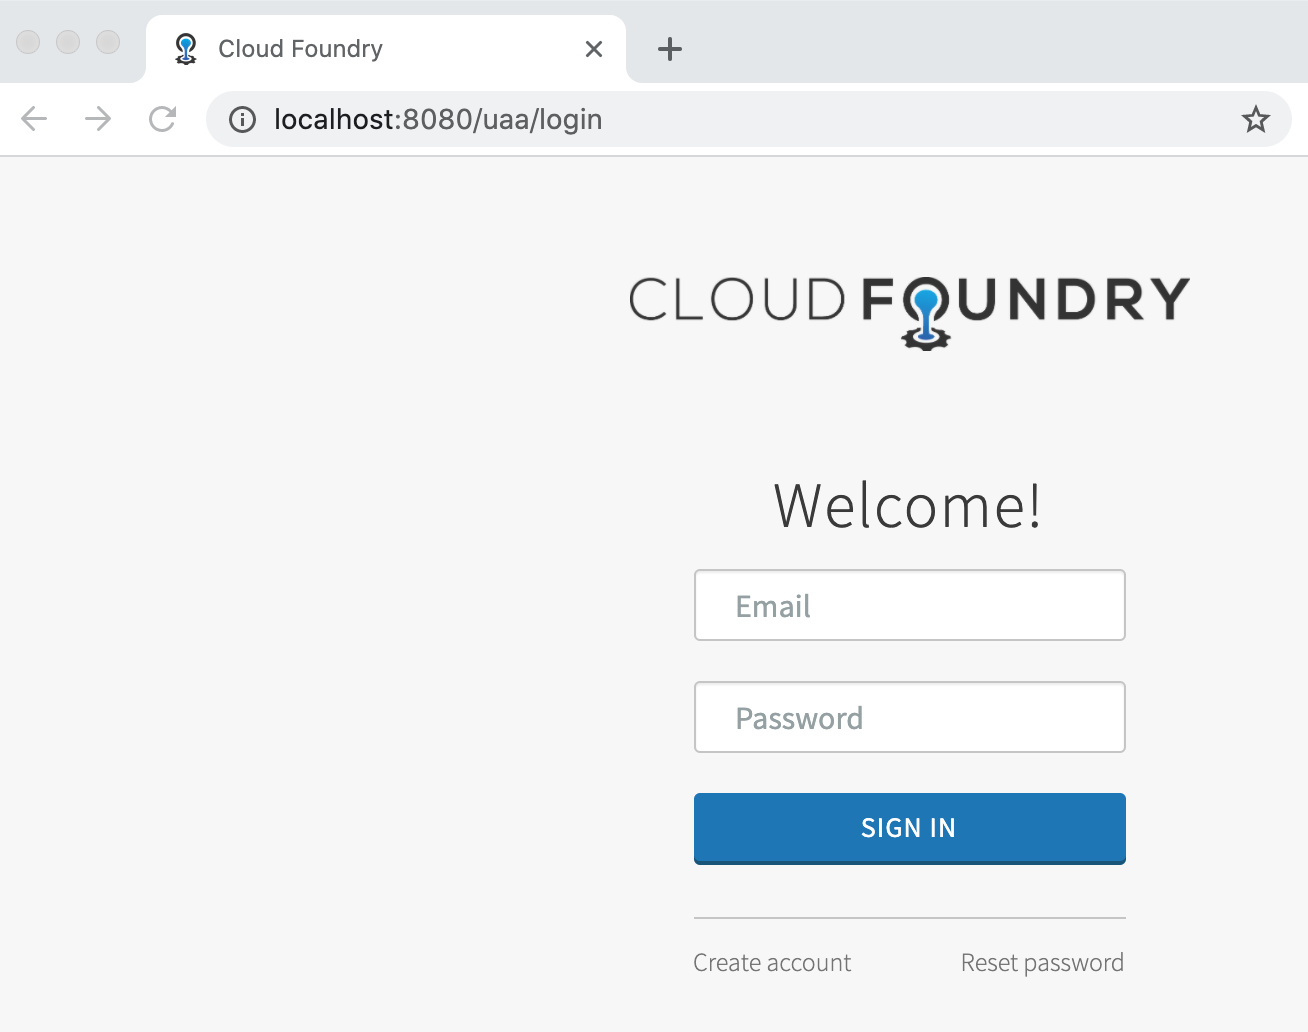
The default port is 8080. After successful startup, you can access: http://localhost:8080/uaa/login
3. Configure account
For convenience, we use the memory database to save the account information, which will be lost after restart. Command line tools provided by uaa uaac To create users and permissions. Because uaac is based on Ruby, I need to install Ruby first. My computer has brought it with me, so I won't demonstrate it here.
To install the command-line tool CF uaac faster, modify the source of gem, the Ruby package management tool:
$ gem sources --add https://gems.ruby-china.com
https://gems.ruby-china.com added to sources

$ gem sources -l
*** CURRENT SOURCES ***
https://rubygems.org/
https://gems.ruby-china.com

$ gem sources --remove https://rubygems.org/
https://rubygems.org/ removed from sources
After configuring the domestic source, install:
$ sudo gem install cf-uaac
15 gems installed
After the installation is completed, you can create users through the following commands.
uaac target http://localhost:8080/uaa
uaac token client get admin -s adminsecret
uaac client add dataflow \
  --name dataflow \
  --secret dataflow \
  --scope cloud_controller.read,cloud_controller.write,openid,password.write,scim.userids,sample.create,sample.view,dataflow.create,dataflow.deploy,dataflow.destroy,dataflow.manage,dataflow.modify,dataflow.schedule,dataflow.view \
  --authorized_grant_types password,authorization_code,client_credentials,refresh_token \
  --authorities uaa.resource,dataflow.create,dataflow.deploy,dataflow.destroy,dataflow.manage,dataflow.modify,dataflow.schedule,dataflow.view,sample.view,sample.create \
  --redirect_uri http://localhost:9393/login \
  --autoapprove openid

uaac group add "sample.view"
uaac group add "sample.create"
uaac group add "dataflow.view"
uaac group add "dataflow.create"
uaac group add "dataflow.deploy"
uaac group add "dataflow.destroy"
uaac group add "dataflow.manage"
uaac group add "dataflow.modify"
uaac group add "dataflow.schedule"


uaac user add larry -p larry --emails larry@pkslow.com
uaac member add "dataflow.view" larry
uaac member add "dataflow.create" larry
uaac member add "dataflow.deploy" larry
uaac member add "dataflow.destroy" larry
uaac member add "dataflow.manage" larry
uaac member add "dataflow.modify" larry
uaac member add "dataflow.schedule" larry

uaac user add vieweronly -p mysecret --emails vieweronly@pkslow.com
uaac member add "dataflow.view" vieweronly
The key here are users and groups, that is, users and groups. The information configured here will correspond to the configuration of the Data Flow Server.
4 configuring and starting the Data Flow Server
The configuration file of Data Flow Server is very important. It is the key to integrate UAA. The key is two parts. The first part is to configure various UAA information, such as clientId, Token address, various authentication addresses, etc; The second part is role mapping. Data Flow is role-based permission control. Its own roles can only be used normally if they are mapped with UAA groups.
The configuration is as follows:
spring:
  security:
    oauth2:
      client:
        registration:
          uaa:
            client-id: dataflow
            client-secret: dataflow
            redirect-uri: '{baseUrl}/login/oauth2/code/{registrationId}'
            authorization-grant-type: authorization_code
            scope:
              - openid
              - dataflow.create
              - dataflow.deploy
              - dataflow.destroy
              - dataflow.manage
              - dataflow.modify
              - dataflow.schedule
              - dataflow.view
        provider:
          uaa:
            jwk-set-uri: http://localhost:8080/uaa/token_keys
            token-uri: http://localhost:8080/uaa/oauth/token
            user-info-uri: http://localhost:8080/uaa/userinfo
            user-name-attribute: user_name
            authorization-uri: http://localhost:8080/uaa/oauth/authorize
      resourceserver:
        opaquetoken:
          introspection-uri: http://localhost:8080/uaa/introspect
          client-id: dataflow
          client-secret: dataflow
  cloud:
    dataflow:
      security:
        authorization:
          provider-role-mappings:
            uaa:
              map-oauth-scopes: true
              role-mappings:
                ROLE_VIEW: dataflow.view
                ROLE_CREATE: dataflow.create
                ROLE_MANAGE: dataflow.manage
                ROLE_DEPLOY: dataflow.create
                ROLE_DESTROY: dataflow.create
                ROLE_MODIFY: dataflow.create
                ROLE_SCHEDULE: dataflow.create
It can be seen that multiple different roles can be mapped to the same group, which is very flexible.
After configuration, you can start the Data Flow Server:
java -jar data-flow-server.jar --spring.config.additional-location=./src/main/resources/application.yaml
5. It's time to experience the results
After the UAA is successfully started and the user is configured, and then the Data Flow Server is started, it can be used. The process is as follows:
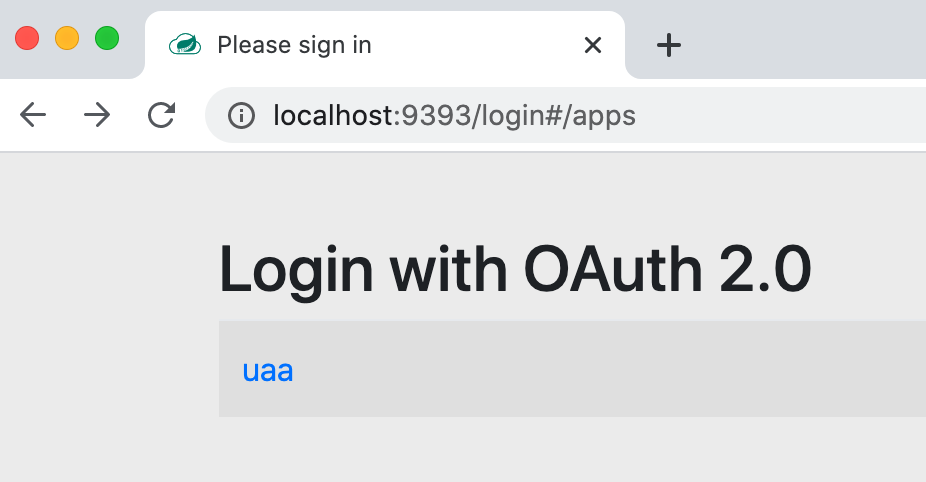
visit http://localhost:9393/dashboard/#/apps It will automatically jump to the login interface and click uaa:
Jump to the login interface of uaa:
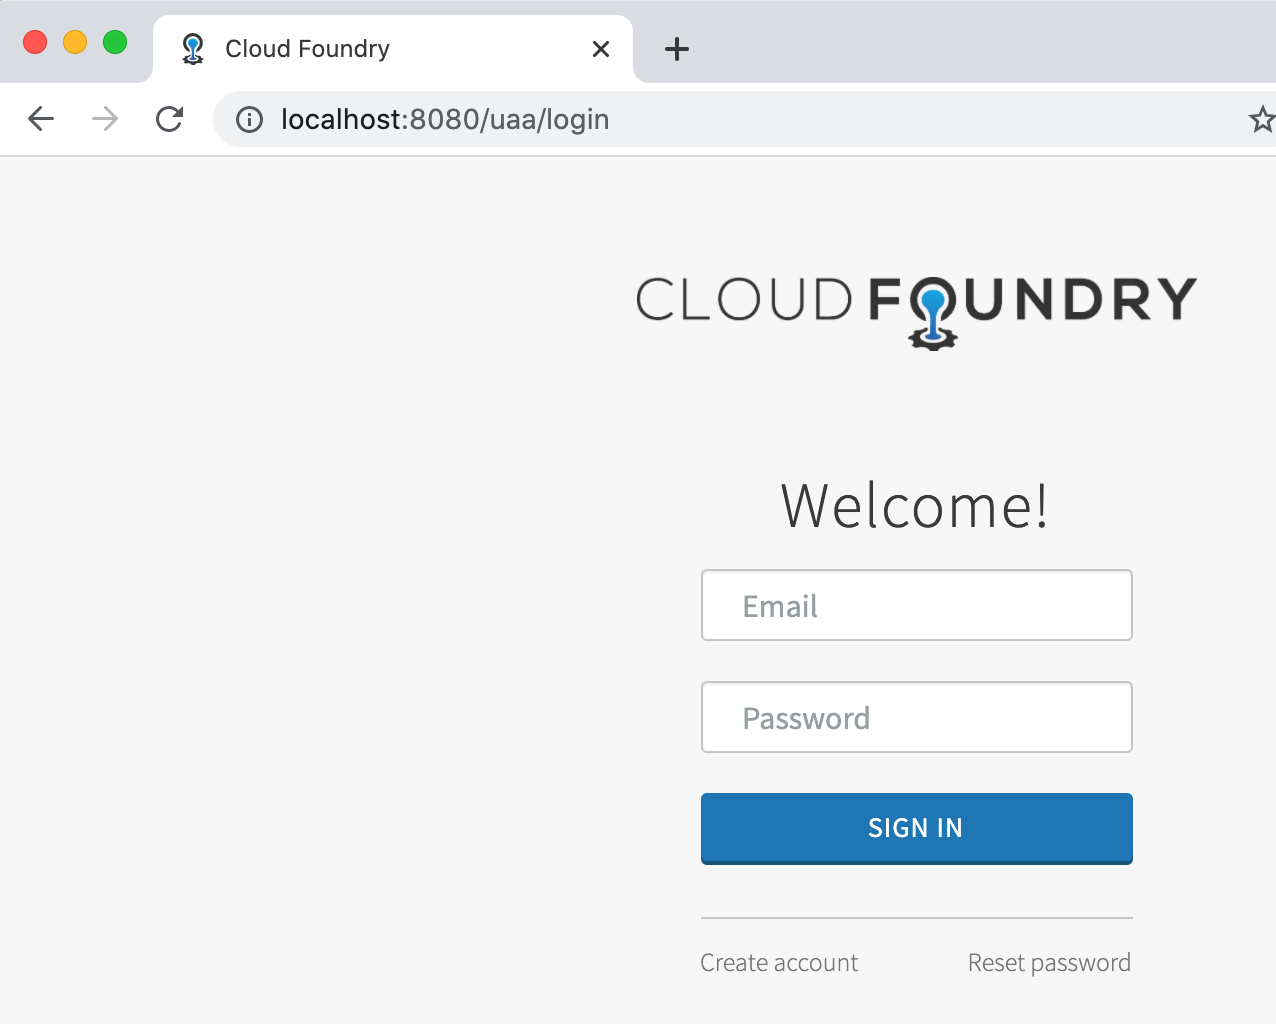
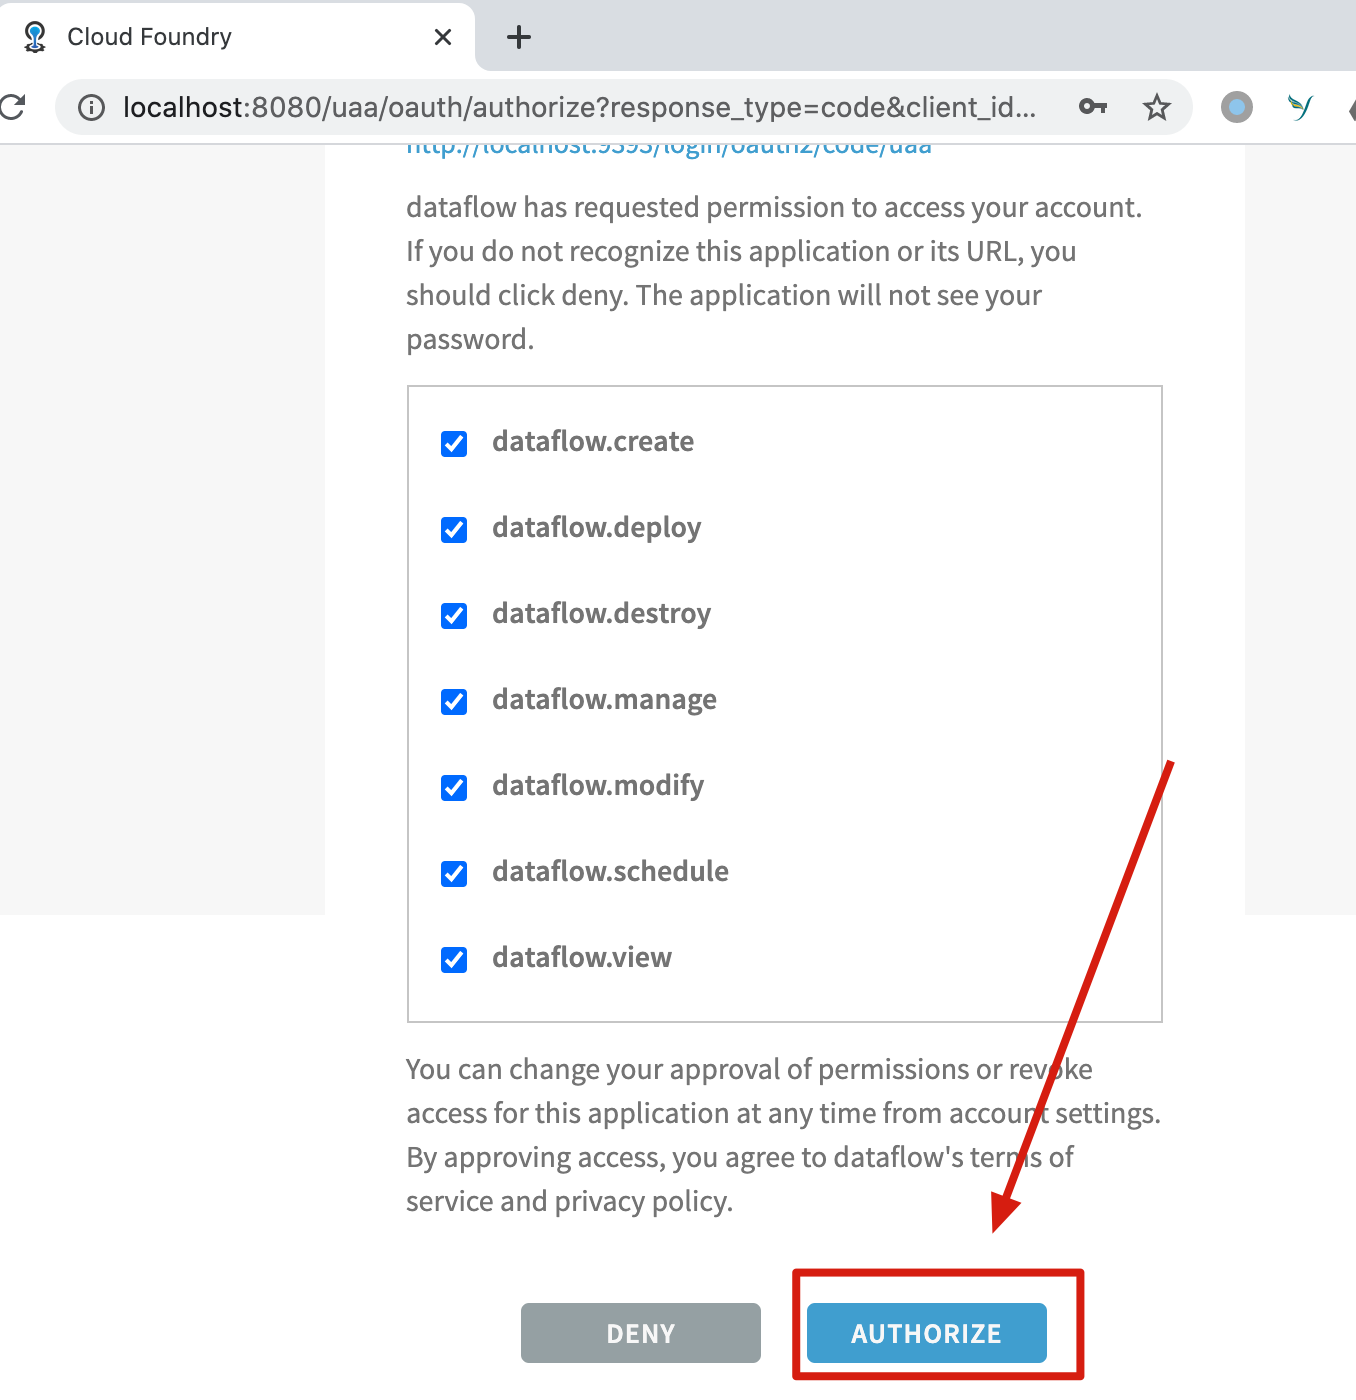
Enter the configured account password: larry/larry, which is displayed as Email, but it is not. Confirm the authorization after logging in:
After authorization, it will automatically jump back to the interface of Data Flow and has permission to view:
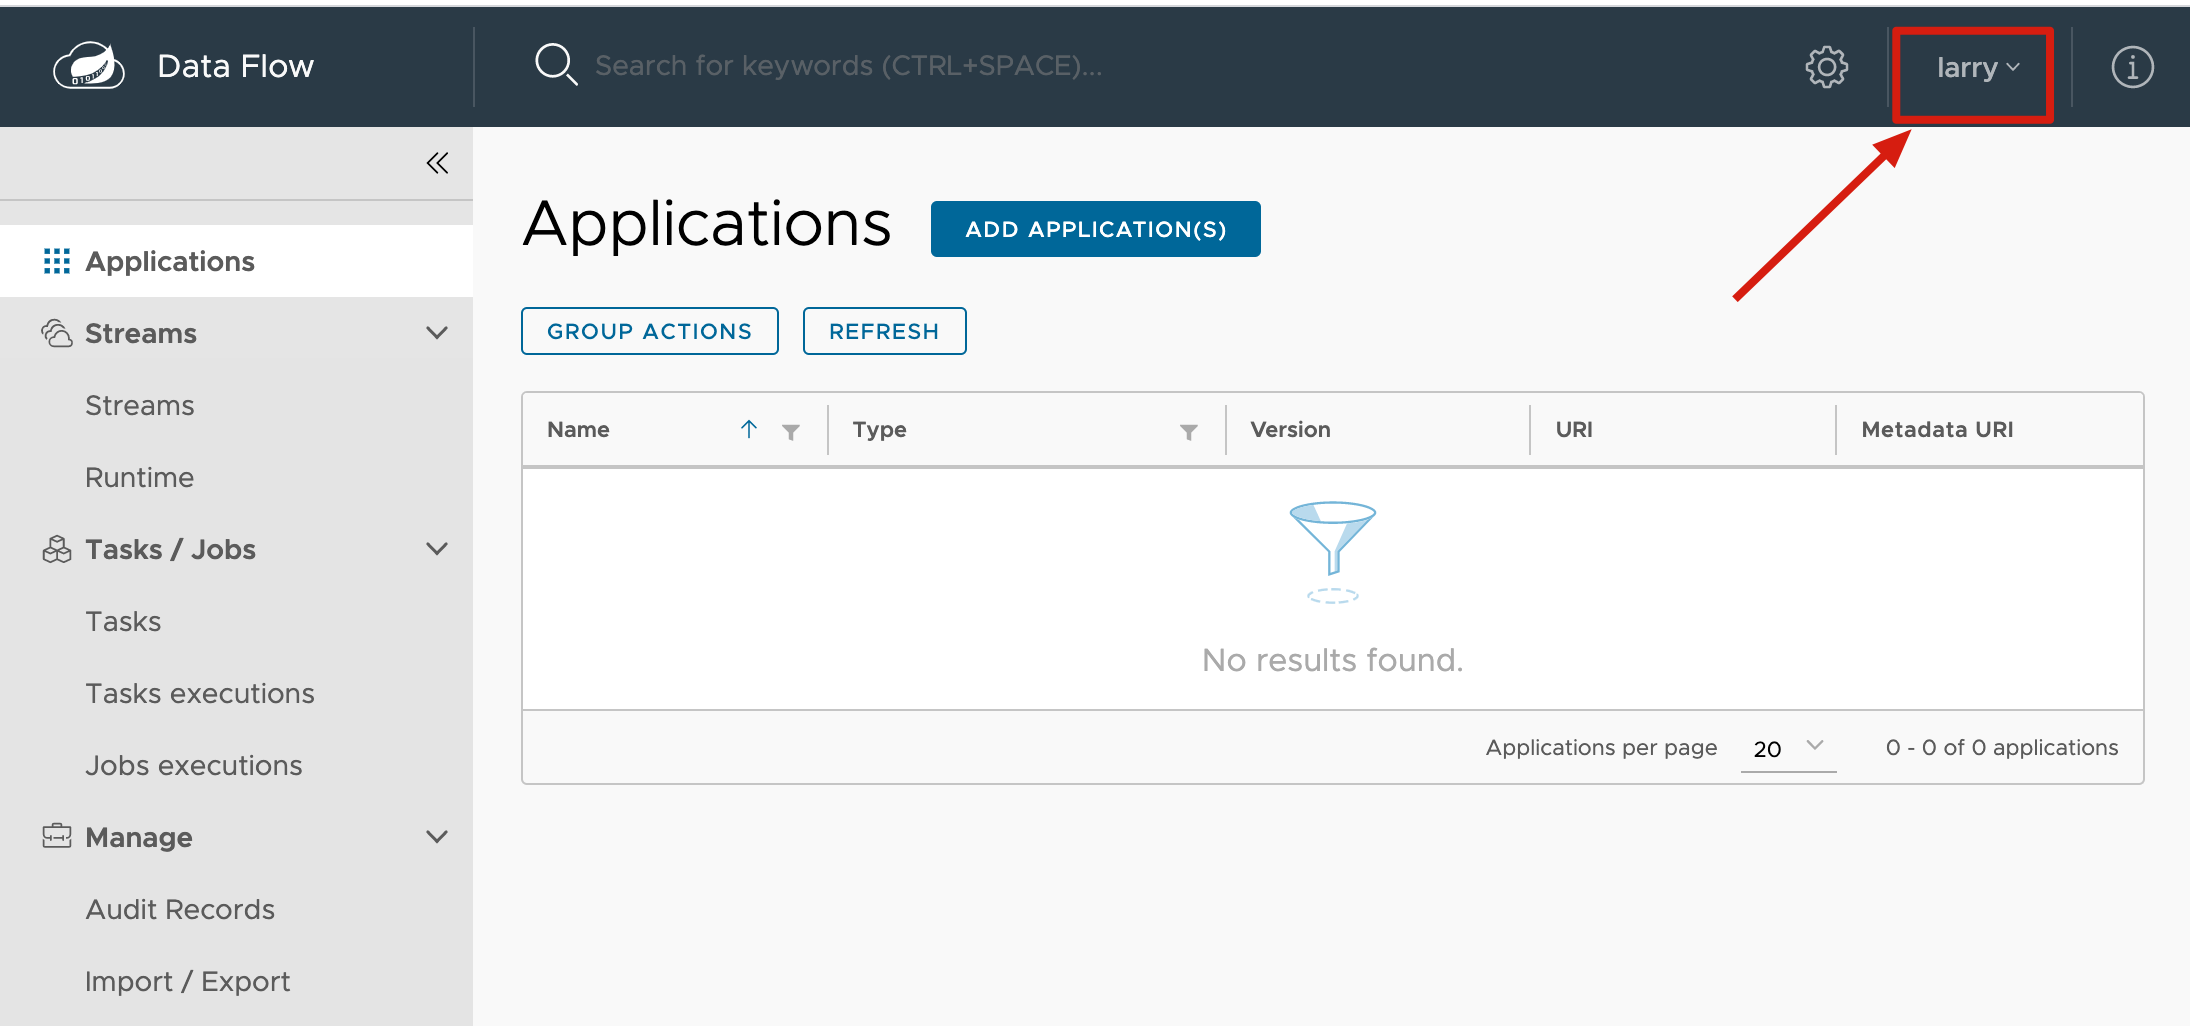
After logging out, you have to ask to log in again. So far, we have successfully integrated.
The shell is used as follows:
$ java -jar spring-cloud-dataflow-shell-2.7.0.jar \
  --dataflow.uri=http://localhost:9393            \
  --dataflow.username=my_username                 \
  --dataflow.password=my_password                 \
  --skip-ssl-validation  true
summary
This article demonstrates step by step how to integrate Data Flow Server and UAA to achieve Data Flow security requirements. The actual UAA should use other databases, such as MySQL, or integrate LDAP, so that the restart account data will not be lost. Let's discuss it later.
Please check the code: https://github.com/LarryDpk/pkslow-samples
Reference documents:
Data Flow official document version 2.7.0
A Quick Guide To Using Cloud Foundry UAA
Welcome to WeChat official account, "pumpkin slow talk", which will continue to update for you.

Read more and share more; Write more and organize more.