catalogue
1.1 yolo_cpp_dll.dll and Yolo_ cpp_ dll. Acquisition of Lib
1.2 pthreadGC2.dll and pthreadvc2 DLL acquisition
1.3 yolo_ v2_ class. Acquisition of HPP
1.4. Set opencv environment variable (if it has been set, it can be ignored)
2. C reation of new C + + projects
2.1 create a new C + + project (omitted)
2.2 create two new folders in the new project folder
0. Preface
Before the text, by default, we have completed yolov3 target detection based on darknet framework under win10 system. If you have any questions about this part, you can refer to This blog post , very good!
1. Preparation
After completing the basic work (described in the preface), prepare the following documents:
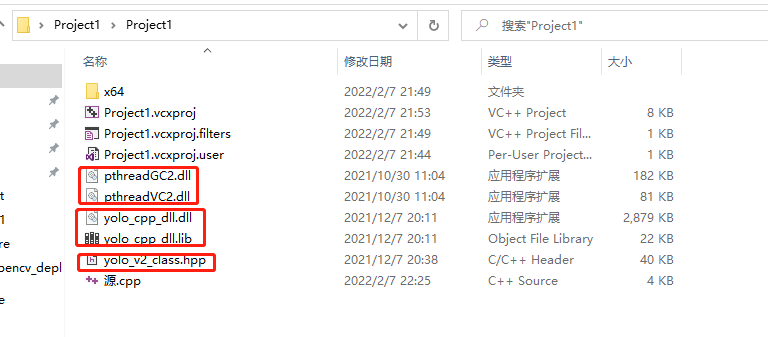
1.1 yolo_cpp_dll.dll and Yolo_ cpp_ dll. Acquisition of Lib
① In D: \ Darknet master \ Darknet master \ build \ Darknet path, modify yolo_cpp_dll.vcxproj file (open it in Notepad, change CUDA 11.1 to CUDA version of your own computer, mine is CUDA 10.1)
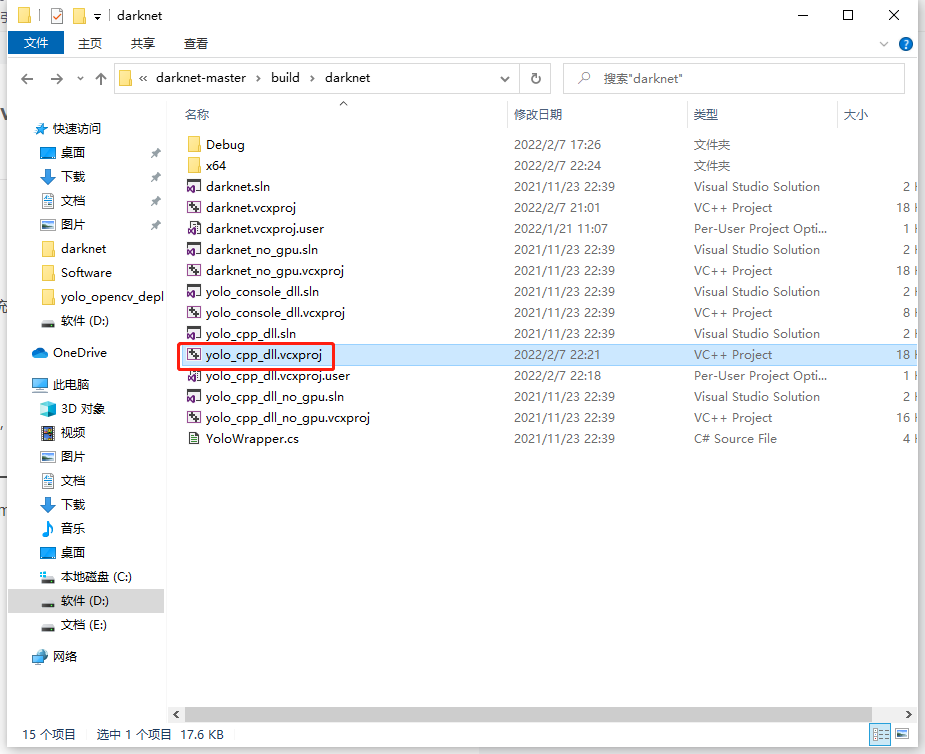
② Open Yolo with vs2019_ cpp_ dll. SLN for compilation and generation
③ Continue to open the x64 folder under darknet, and you will find that Yolo is generated under the x64 folder_ cpp_ dll. DLL and yolo_cpp_dll.lib

1.2 pthreadGC2.dll and pthreadvc2 DLL acquisition
Before step 1.1, it also exists directly in the x64 folder, so there is no need to obtain it (refer to the previous picture).
1.3 yolo_ v2_ class. Acquisition of HPP
Under the path of D: \ Darknet master \ Darknet master \ include, you can directly obtain

1.4. Set opencv environment variable (if it has been set, it can be ignored)
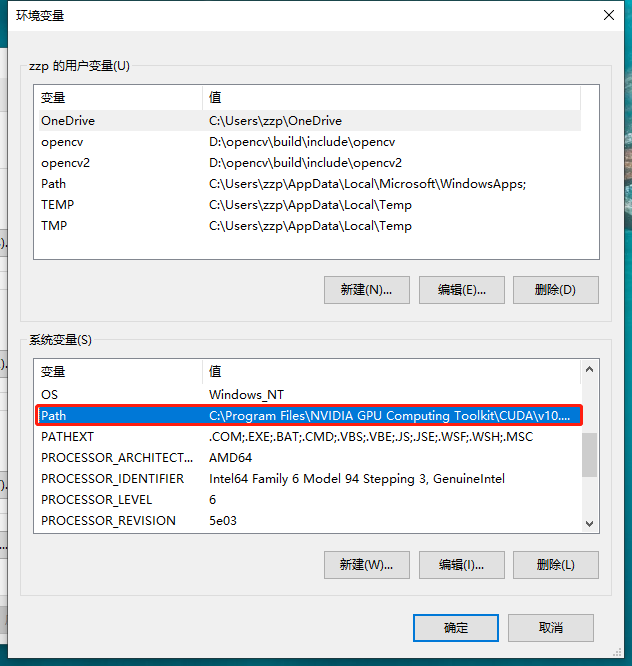
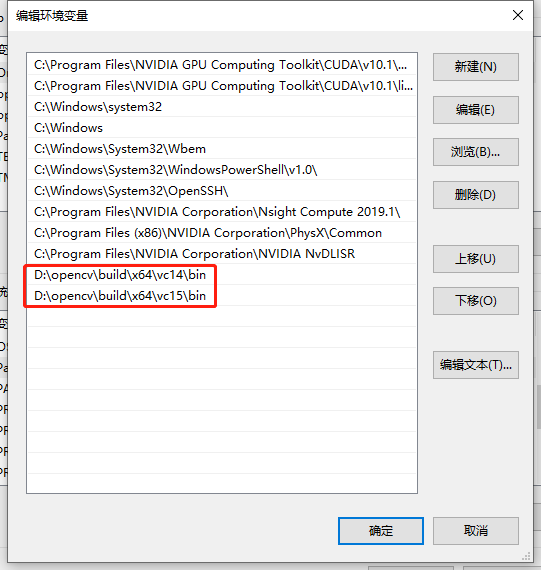
Double click system variable - > path to create two opencv environment variables.
2. C reation of new C + + projects
2.1 create a new C + + project (omitted)
2.2 create two new folders in the new project folder
They are params (storing files such as cfg and names) and test (storing files such as jpg pictures and avi videos for testing)
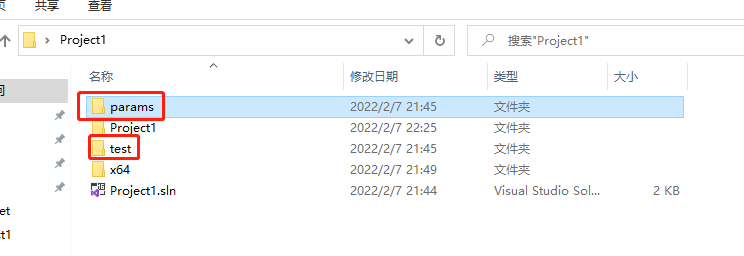
In params, store coco names,yolov3.cfg,yolov3.weights, these files can be found directly in darknet/x64

In test, store some test pictures, which will not be displayed here. Put what you want to detect.
2.3 put the link library and other files prepared in advance in the new project folder (here is project1)
2.4 writing source code
If the above steps are strictly implemented, there is no need to make major changes here. Just change opencv to the version number of opencv downloaded by yourself in the line of opencv link library; In addition, there are test pictures in the test folder. I'm dog jpg.
For example: I'm opencv3 Version 4.6, I use opencv_world346.lib is OK.
#include <iostream>

#ifdef _WIN32
#define OPENCV
#define GPU
#endif

#include "yolo_v2_class.hpp" / / reference the header file in the dynamic link library
#include <opencv2/opencv.hpp>
#include "opencv2/highgui/highgui.hpp"

#pragma comment(lib, "opencv_world346.lib") / / introducing OpenCV link library
#pragma comment(lib, "yolo_cpp_dll.lib") / / introduce the YOLO dynamic link library

//The following two pieces of code are from yolo_console_dll.sln
void draw_boxes(cv::Mat mat_img, std::vector<bbox_t> result_vec, std::vector<std::string> obj_names,
	int current_det_fps = -1, int current_cap_fps = -1)
{
	int const colors[6][3] = { { 1,0,1 },{ 0,0,1 },{ 0,1,1 },{ 0,1,0 },{ 1,1,0 },{ 1,0,0 } };

	for (auto& i : result_vec) {
		cv::Scalar color = obj_id_to_color(i.obj_id);
		cv::rectangle(mat_img, cv::Rect(i.x, i.y, i.w, i.h), color, 2);
		if (obj_names.size() > i.obj_id) {
			std::string obj_name = obj_names[i.obj_id];
			if (i.track_id > 0) obj_name += " - " + std::to_string(i.track_id);
			cv::Size const text_size = getTextSize(obj_name, cv::FONT_HERSHEY_COMPLEX_SMALL, 1.2, 2, 0);
			int const max_width = (text_size.width > i.w + 2) ? text_size.width : (i.w + 2);
			cv::rectangle(mat_img, cv::Point2f(std::max((int)i.x - 1, 0), std::max((int)i.y - 30, 0)),
				cv::Point2f(std::min((int)i.x + max_width, mat_img.cols - 1), std::min((int)i.y, mat_img.rows - 1)),
				color, CV_FILLED, 8, 0);
			putText(mat_img, obj_name, cv::Point2f(i.x, i.y - 10), cv::FONT_HERSHEY_COMPLEX_SMALL, 1.2, cv::Scalar(0, 0, 0), 2);
		}
	}
	if (current_det_fps >= 0 && current_cap_fps >= 0) {
		std::string fps_str = "FPS detection: " + std::to_string(current_det_fps) + "   FPS capture: " + std::to_string(current_cap_fps);
		putText(mat_img, fps_str, cv::Point2f(10, 20), cv::FONT_HERSHEY_COMPLEX_SMALL, 1.2, cv::Scalar(50, 255, 0), 2);
	}
}

std::vector<std::string> objects_names_from_file(std::string const filename) {
	std::ifstream file(filename);
	std::vector<std::string> file_lines;
	if (!file.is_open()) return file_lines;
	for (std::string line; getline(file, line);) file_lines.push_back(line);
	std::cout << "object names loaded \n";
	return file_lines;
}

int main()
{
	std::string names_file = "C:\\Users\\zzp\\Desktop\\Project1\\params\\coco.names";
	std::string cfg_file = "C:\\Users\\zzp\\Desktop\\Project1\\params\\yolov3.cfg";
	std::string weights_file = "C:\\Users\\zzp\\Desktop\\Project1\\params\\yolov3.weights";
	Detector detector(cfg_file, weights_file, 0); //Initialize detector
	//std::vector<std::string> obj_ names = objects_ names_ from_ file(names_file); // Call to get the classification object name
	//Alternatively, the following four lines of code can also be used to read in the classification object file
	std::vector<std::string> obj_names;
	std::ifstream ifs(names_file.c_str());
	std::string line;
	while (getline(ifs, line)) obj_names.push_back(line);
	//Test whether the classification object file is successfully read in
	for (size_t i = 0; i < obj_names.size(); i++)
	{
		std::cout << obj_names[i] << std::endl;
	}

	cv::VideoCapture capture;
	capture.open("C:\\Users\\zzp\\Desktop\\Project1\\test\\dog.jpg");
	if (!capture.isOpened())
	{
		printf("File open failed");
	}
	cv::Mat frame;
	while (true)
	{
		capture >> frame;
		std::vector<bbox_t> result_vec = detector.detect(frame);
		draw_boxes(frame, result_vec, obj_names);
		cv::namedWindow("test", CV_WINDOW_NORMAL);
		cv::imshow("test", frame);
		cv::waitKey(0);
	}
	return 0;
}
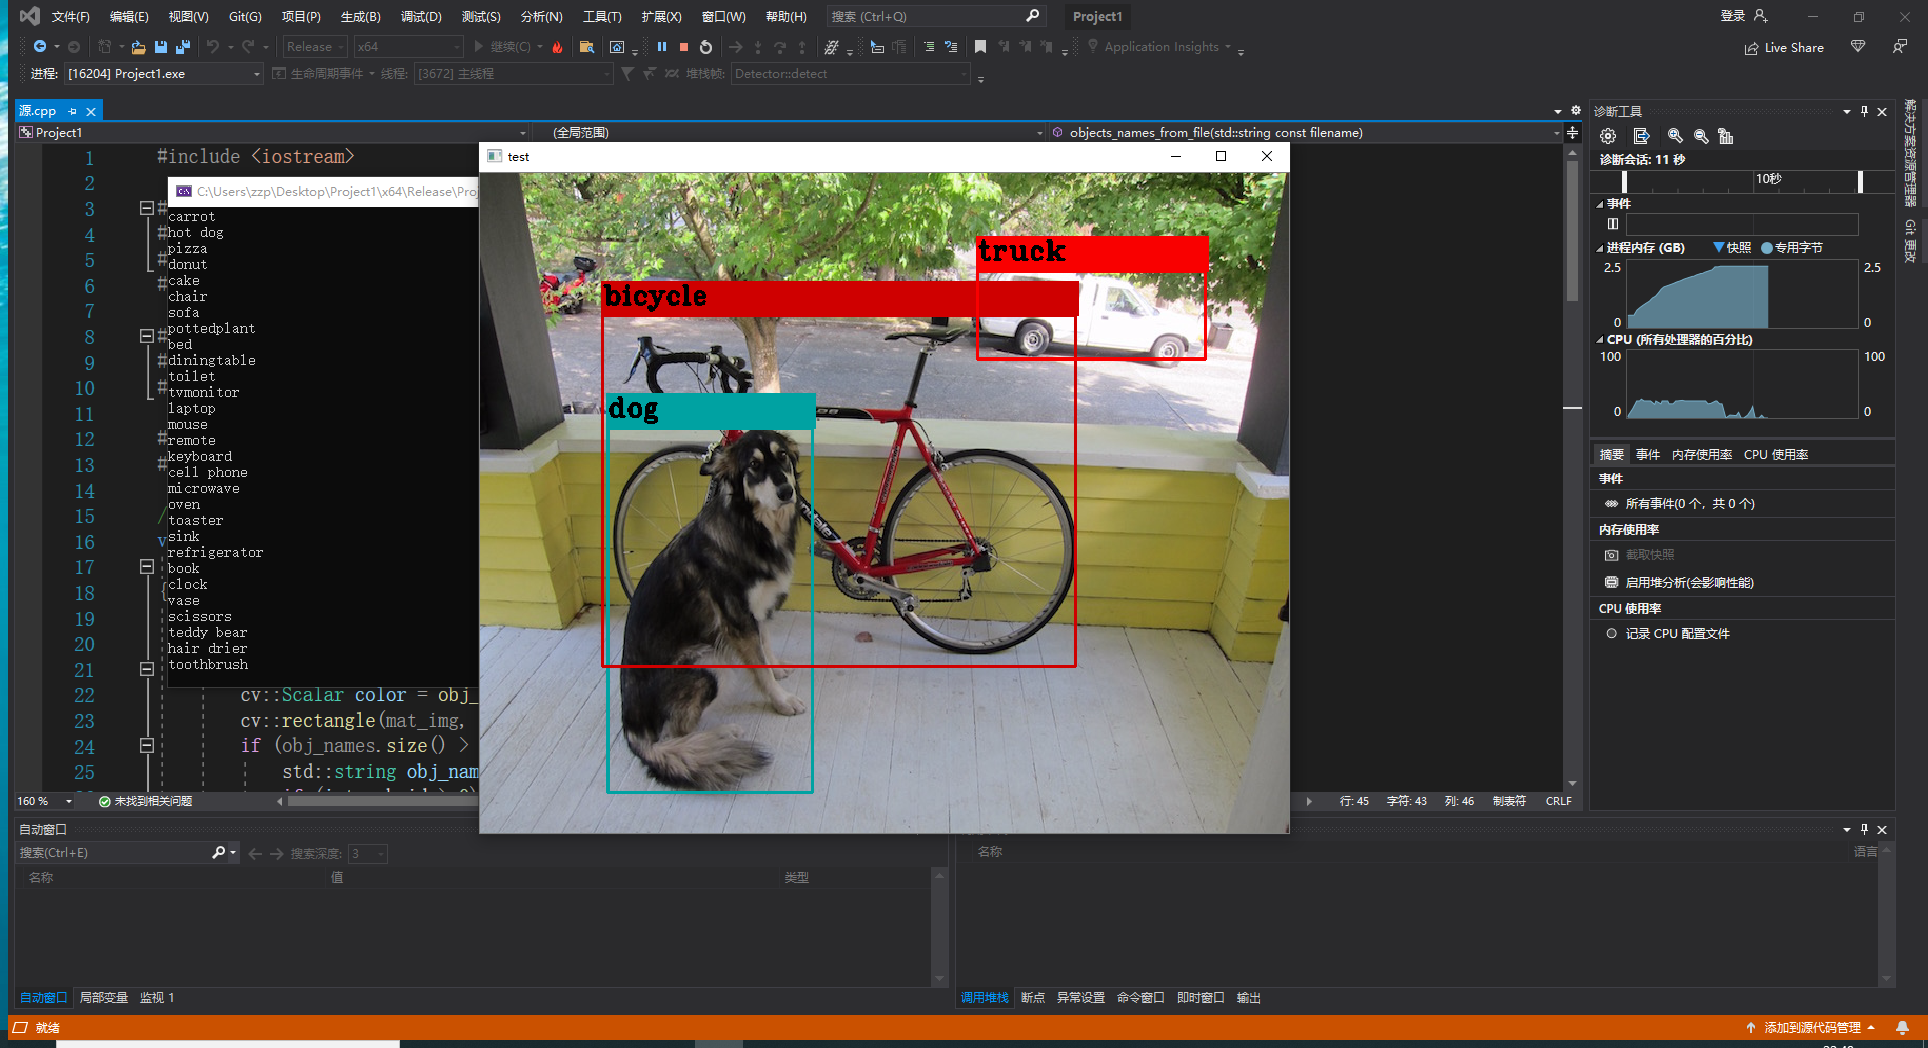
3. Test results
4. Problems
Before the test, there was a problem

Solution: Perfect solution
5. Follow up objectives
Will be encapsulated in QT, still learning QT