Zero. Preparation before start
- Windows should be equipped with node, npm and git tools
- Server (either Alibaba cloud or Tencent cloud)
- Domain name (filed)
If the above preparations are not ready, please check the Internet by yourself
1, Write the back-end interface locally using node+express
Introduction and introduction to express
1. Create a new project folder
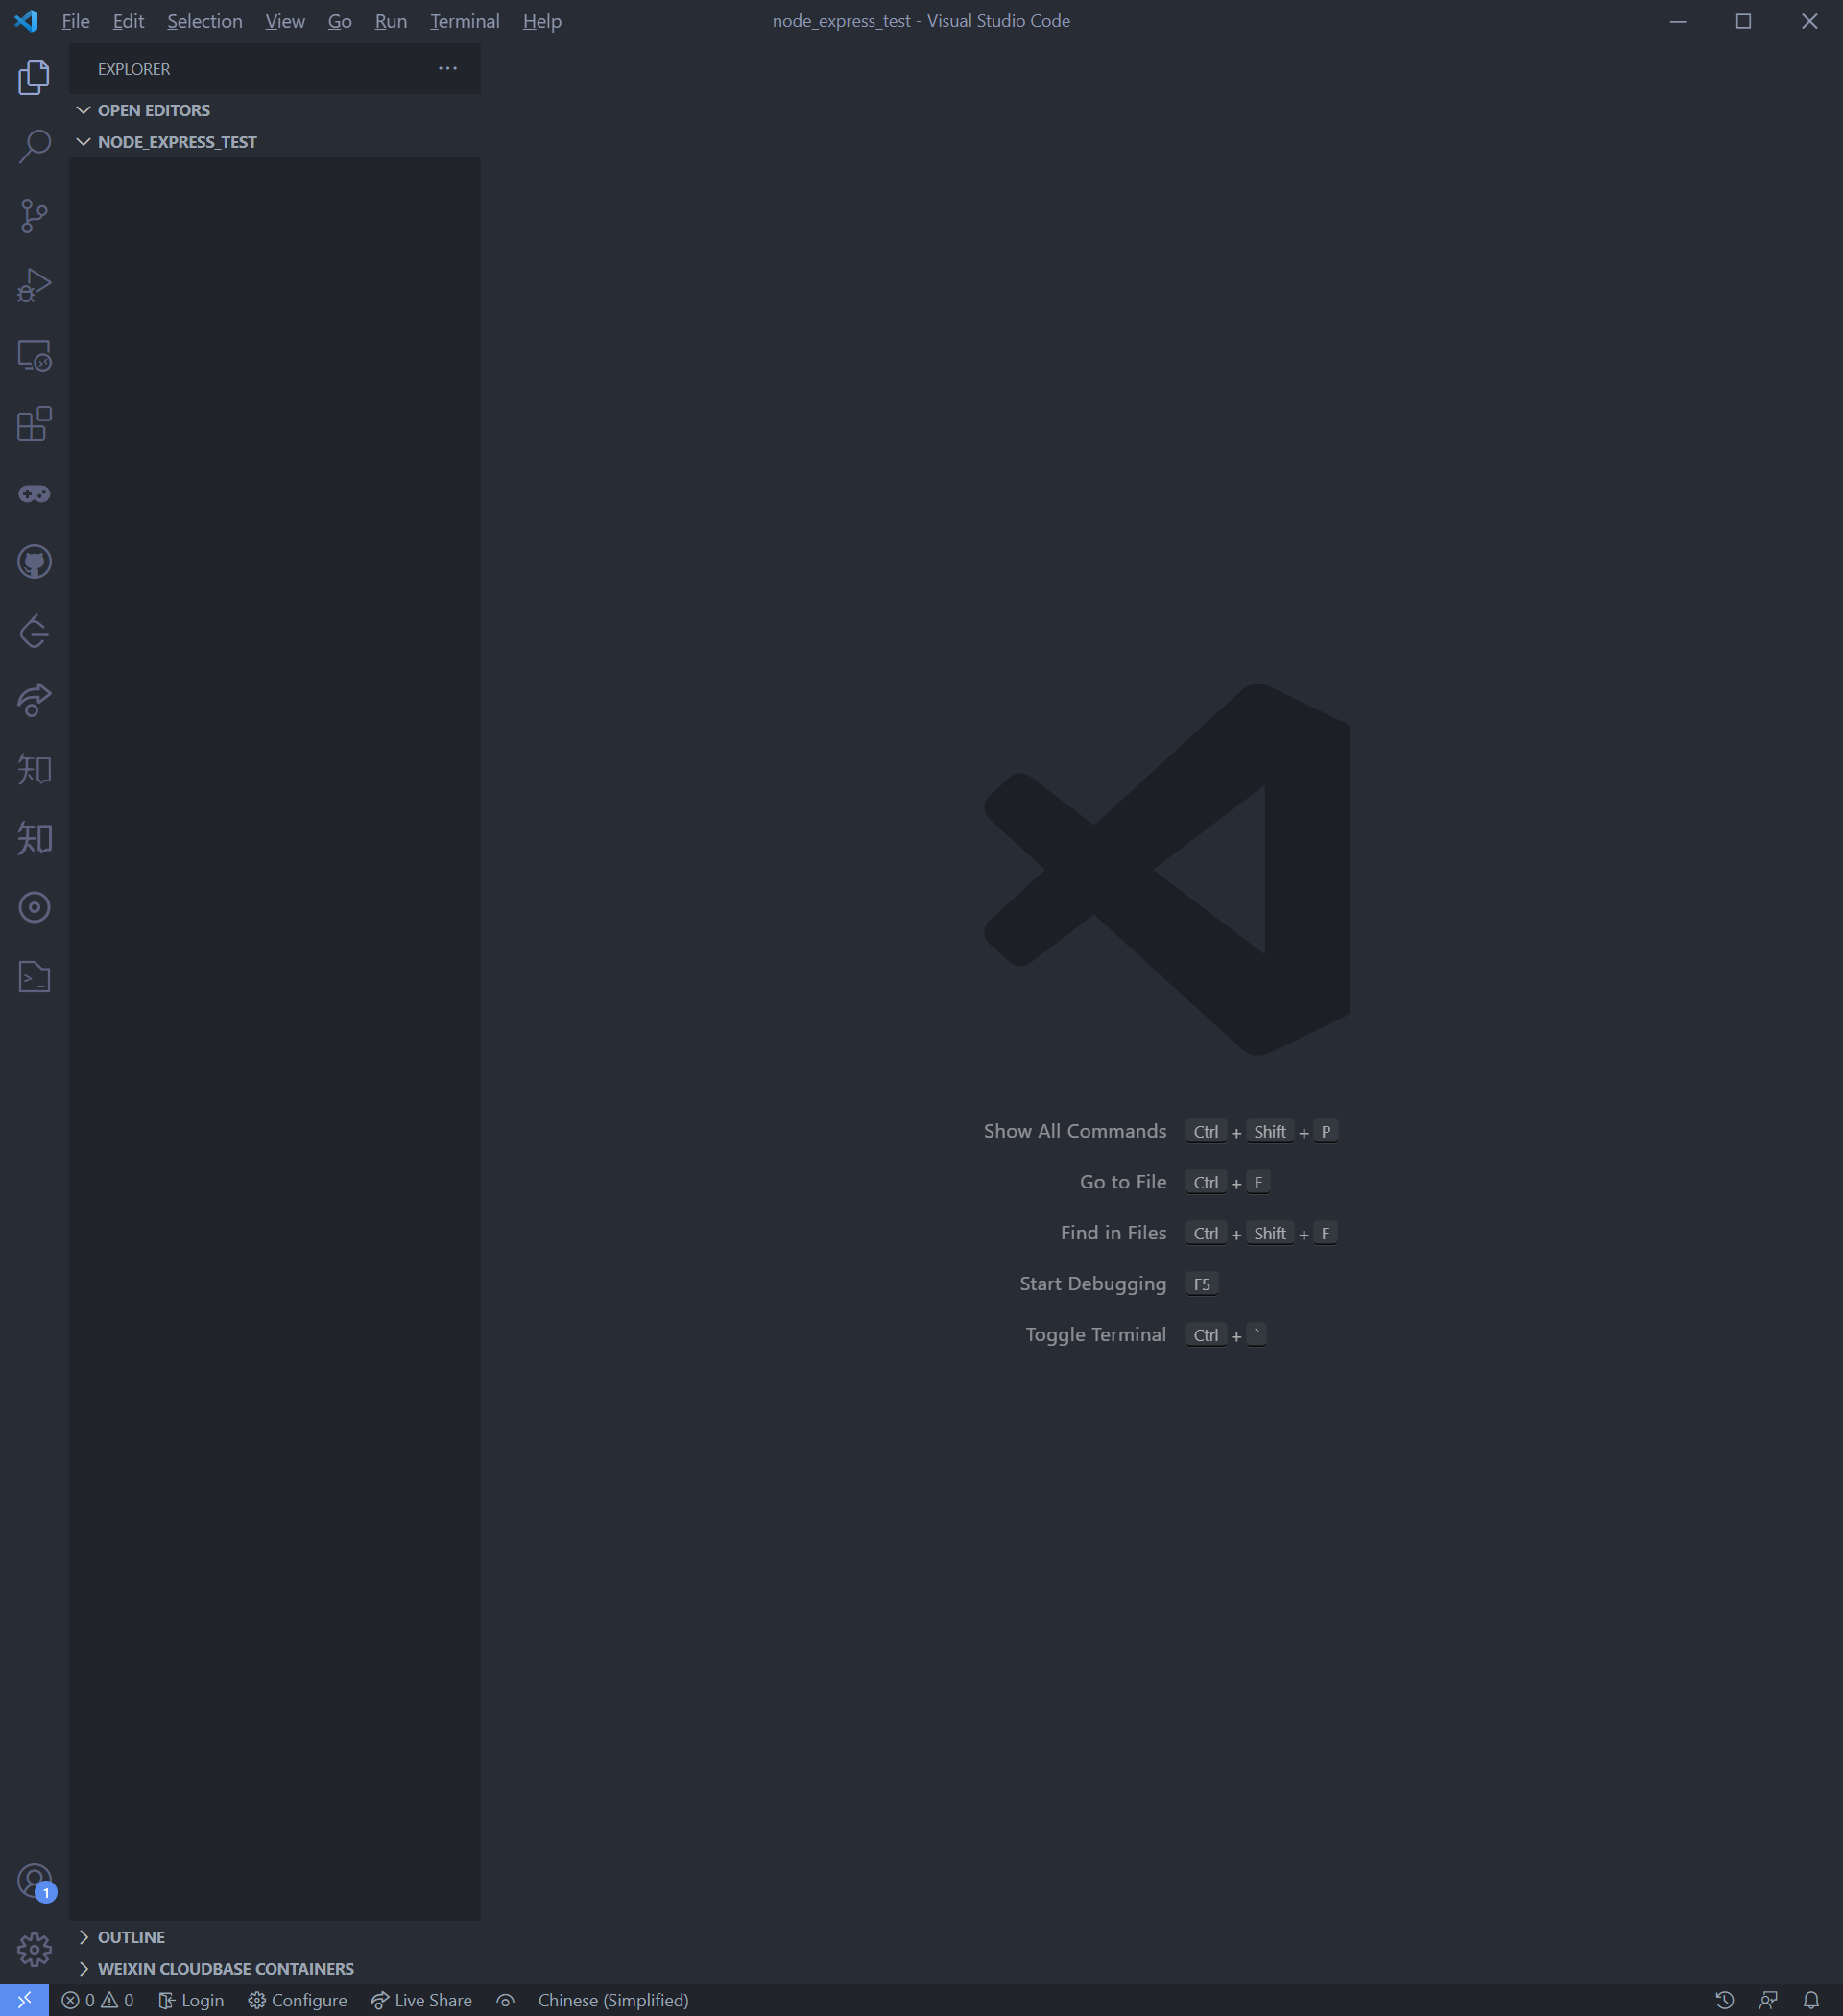
2. Open with vscode
3. Install the express frame
3.1 initialize npm (press enter after prompt)
npm init
Operation results:
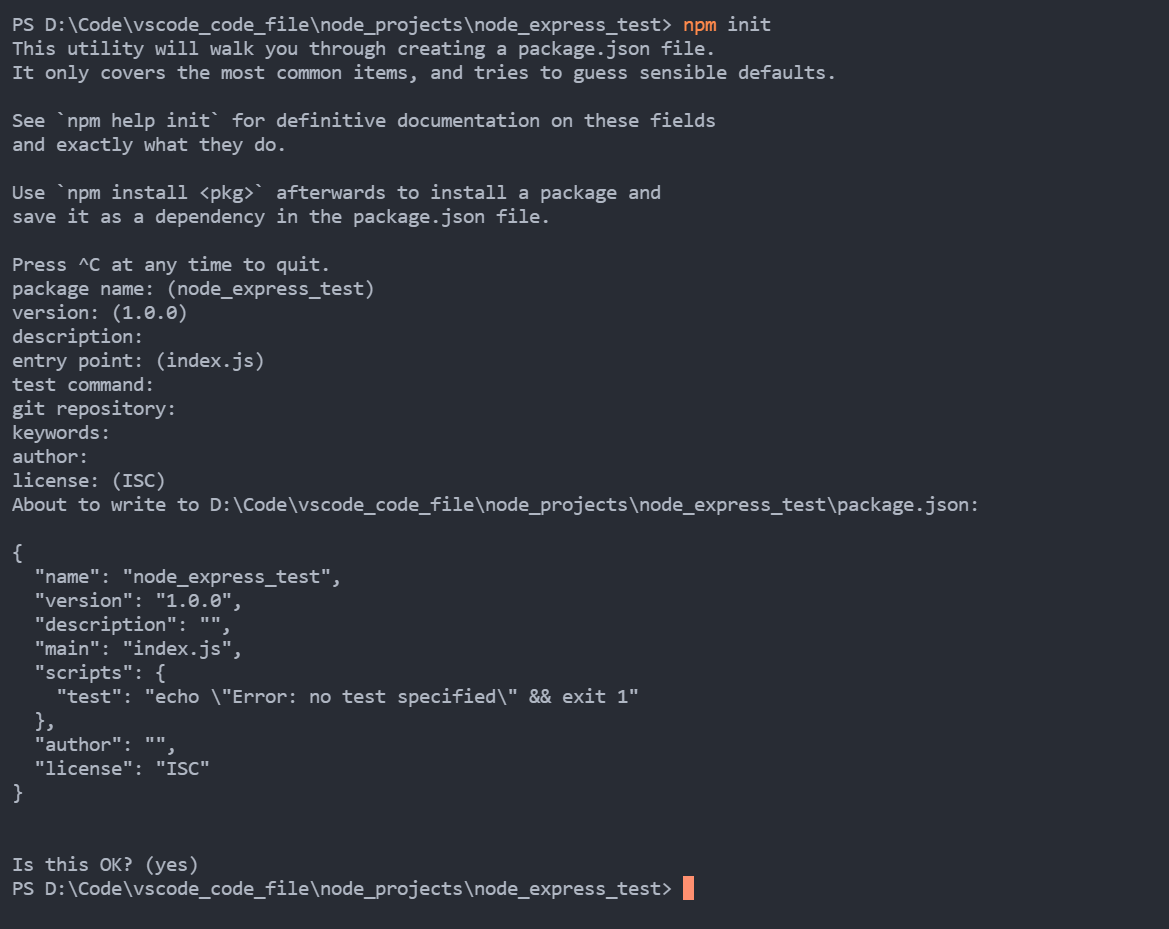
After running, a package will appear JSON configuration file, indicating that the initialization of npm is successful
4. Install express
npm i express
5. A test JS file, write a simple get/post interface
// 1. Introduction of framework
// The node project adopts common JS, which cannot be imported, can only be imported in the require mode
const {
  response
} = require('express')
const express = require('express')

// 2. Create an application
const app = express()

// 3. Create routing rules
// get request
app.get('/hello', (request, response) => {
  // Set response header settings allow cross domain
  response.setHeader('Access-Control-Allow-Origin', '*')
  // Set response body
  response.send('Hello node')
})

// post request
app.post('/server', (request, response) => {
  // Set response header settings allow cross domain
  response.setHeader('Access-Control-Allow-Origin', '*')
  // Set all corresponding headers available
  response.setHeader('Access-Control-Allow-Headers', '*')
  let query = request.query
  // Set the response body and return the request parameters
  response.status(200).send(query)
})

// 4. Listening port start service
app.listen(8280, () => {
  console.log('The service has been started. Port 8280 is listening...,click http://localhost:8280');
})
6. Operation
Enter node at the command line terminal \test. JS run node project

6.1 testing
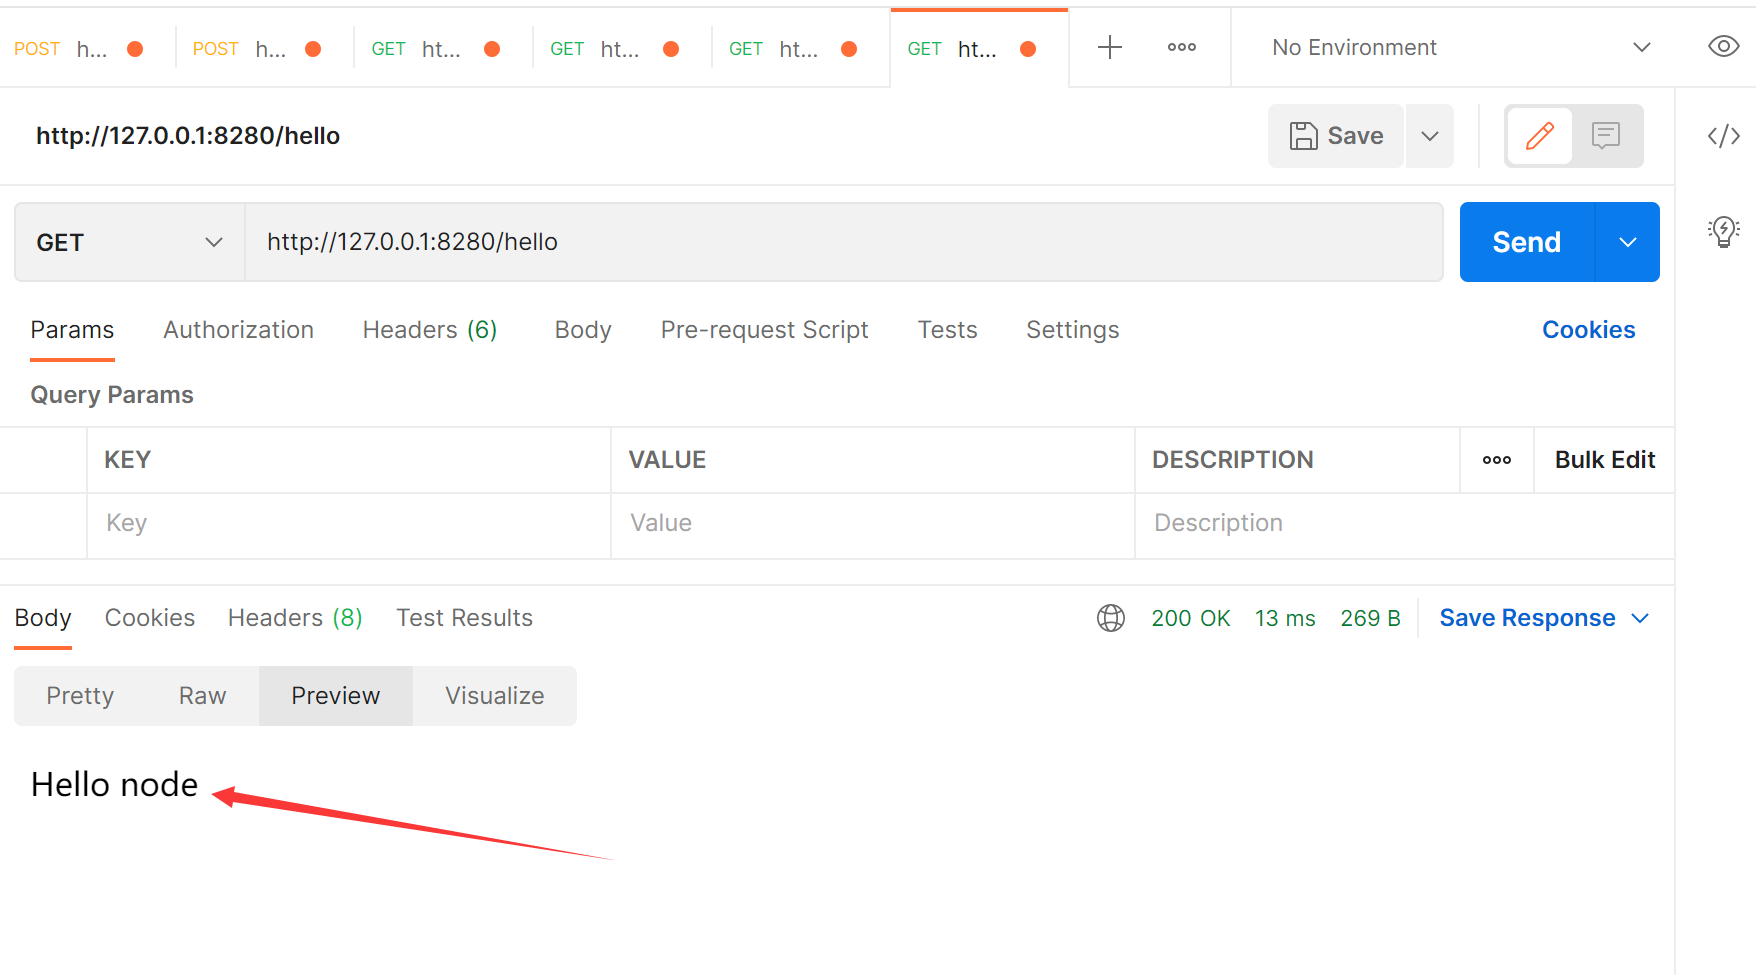
The postman test tool is used here
7. Extension – use nodemon
nodemon is used to monitor node JS application and automatically restart the service, which is very suitable for use in the development environment.
Nodemon will monitor the files in the startup directory, and if there are any file changes, nodemon will automatically restart the node application.
7.1 installation (Global installation recommended)
npm install -g nodemon
2, Deploy to server
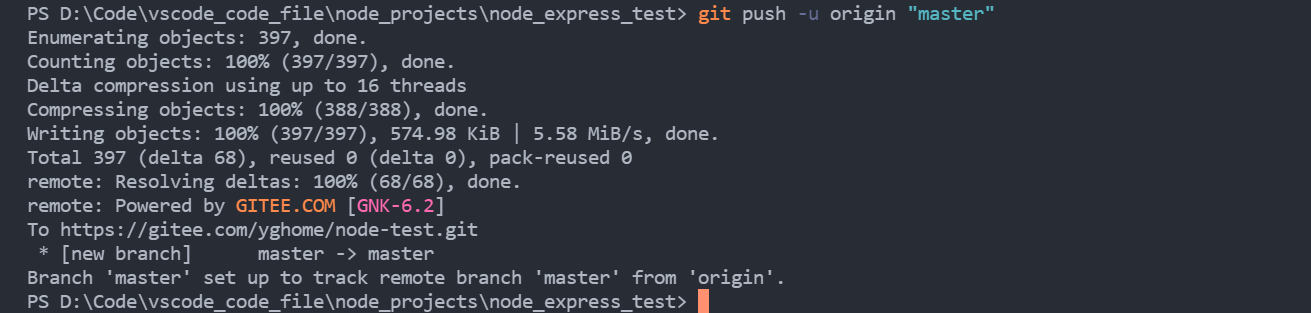
1. First upload the project deployment to git warehouse
1.1 new warehouse

1.2 copy link

1.3 upload
Use this to enter the above command
2. Pull the item code from the server
If there is no git on the server, download and install it first
How to install git on the server

Enter project folder
cd node-test
If there is a node on the server, you can directly run the project with node

3. Install pm2 and manage node project
PM2 (Process Manager 2) is a node with a built-in load balancer Production runtime and process manager for JS applications. It allows you to keep your applications active permanently, reload them without downtime, and facilitate common Devops tasks.
3.1 global installation pm2
npm install pm2 -g
How to install npm and node on the server
Basic use of pm2 command
3.2 after installation, use pm2 to start the node project

You can see that I started two node projects here
At this point, you can use your server ip + port number to access the interface
Note: if you want to access directly through the ip + port, you must close the firewall of the server, otherwise you can't access it
Close firewall command: systemctl stop firewalld service

3, nginx configuration domain name
1. Prepare a secondary domain name
Log in to your domain name management background to resolve a secondary domain name

2. Install nginx on the server
Nginx is a lightweight Web server / reverse proxy server and e-mail (IMAP/POP3) proxy server, which is distributed under BSD like protocol. Its characteristics are less memory and concurrent capability. In fact, nginx's concurrent capability is better in the same type of Web server. Chinese mainland users use Baidu website: Baidu, Jingdong, Sina, NetEase, Tencent, Taobao, etc.
Since I have already installed nginx before, in order to demonstrate the operation, now uninstall nginx and then reinstall it
2.1 uninstall nginx
2.1.1 first find all nginx folders
find / -name nginx

2.1.2 delete all nginx files
It is best to shut down nginx service before deleting
Enter the sbin directory of nginx and execute
./nginx -s stop
View nginx run command
ps -ef | grep nginx

Delete all nginx files
rm -rf /usr/local/nginx /usr/local/nginx/nginx-1.13.7/objs/nginx /usr/local/nginx/sbin/nginx /var/lib/yum/repos/x86_64/7/nginx /var/cache/yum/x86_64/7/nginx /www/server/panel/vhost/nginx
2.2 installation nginx
2.1.1 check whether gcc, pcre, zlib and openssl have been installed on your server. If not, install them first
Introduction to gcc, pcre, zlib and openssl:
gcc is a compiler under linux. It can compile C,C++,Ada,Object C, Java and other languages
pcre is a perl library, including a perl compatible regular expression library. The http module of nginx uses pcre to parse regular expressions, so the pcre library needs to be installed
Zlib library provides many compression and decompression methods. nginx uses zlib to gzip the contents of http package, so it needs to be installed
openssl is the cornerstone of web secure communication
View command:
gcc -v
rpm -qa pcre
yum list installed | grep zlib*
rpm -qa openssl
Installation command:
yum -y install gcc
yum install -y pcre pcre-devel
yum install -y zlib zlib-devel
yum install -y openssl openssl-devel
2.1.2 installation nginx
cd /usr/local/
wget http://nginx.org/download/nginx-1.1.10.tar.gz
tar -zxvf nginx-1.1.10.tar.gz
cd nginx-1.1.10
./configure
make
make install
2.1.3 start nginx
cd /usr/local/nginx/sbin
./nginx
# Check whether the nginx configuration file is correct
./nginx -t
# Correct if the output is the following two lines
# nginx: the configuration file /usr/local/nginx/conf/nginx.conf syntax is ok
# nginx: configuration file /usr/local/nginx/conf/nginx.conf test is successful
2.1.4 other commands of nginx
# The following commands are executed in the sbin directory of nginx
# Restart nginx service
./nginx -s reload
# Stop nginx service
./nginx -s stop
# View nginx running status
ps -ef | grep nginx
3. Configure domain name
3.1 check whether the firewall port is open
Port 80 should be opened here, so you can use the firewall command to check whether port 80 is open
If the firewall is turned off, turn on the firewall first
systemctl start firewalld
Check the opening of port 80
firewall-cmd --query-port=80/tcp
If not, open it with the following command
firewall-cmd --zone=public --add-port=80/tcp --permanent
Finally, restart the firewall
firewall-cmd --reload
3.2 modify nginx Conf configuration
Switch to the / usr/local/nginx/conf / directory
Modify nginx Conf file
Find the code snippet of listen 80 in the server service
Change server_ The name and location fields can serve your own domain name and loaclhost port
Content of original document:
#user  nobody;
worker_processes  1;

#error_log  logs/error.log;
#error_log  logs/error.log  notice;
#error_log  logs/error.log  info;

#pid        logs/nginx.pid;


events {
    worker_connections  1024;
}


http {
    include       mime.types;
    default_type  application/octet-stream;

    #log_format  main  '$remote_addr - $remote_user [$time_local] "$request" '
    #                  '$status $body_bytes_sent "$http_referer" '
    #                  '"$http_user_agent" "$http_x_forwarded_for"';

    #access_log  logs/access.log  main;

    sendfile        on;
    #tcp_nopush     on;

    #keepalive_timeout  0;
    keepalive_timeout  65;

    #gzip  on;

    server {
        listen       80;
        server_name  localhost;

        #charset koi8-r;

        #access_log  logs/host.access.log  main;

        location / {
            root   html;
            index  index.html index.htm;
        }

        #error_page  404              /404.html;

        # redirect server error pages to the static page /50x.html
        #
        error_page   500 502 503 504  /50x.html;
        location = /50x.html {
            root   html;
        }

        # proxy the PHP scripts to Apache listening on 127.0.0.1:80
        #
        #location ~ \.php$ {
        #    proxy_pass   http://127.0.0.1;
        #}

        # pass the PHP scripts to FastCGI server listening on 127.0.0.1:9000
        #
        #location ~ \.php$ {
        #    root           html;
        #    fastcgi_pass   127.0.0.1:9000;
        #    fastcgi_index  index.php;
        #    fastcgi_param  SCRIPT_FILENAME  /scripts$fastcgi_script_name;
        #    include        fastcgi_params;
        #}

        # deny access to .htaccess files, if Apache's document root
        # concurs with nginx's one
        #
        #location ~ /\.ht {
        #    deny  all;
        #}
    }


    # another virtual host using mix of IP-, name-, and port-based configuration
    #
    #server {
    #    listen       8000;
    #    listen       somename:8080;
    #    server_name  somename  alias  another.alias;

    #    location / {
    #        root   html;
    #        index  index.html index.htm;
    #    }
    #}


    # HTTPS server
    #
    #server {
    #    listen       443;
    #    server_name  localhost;

    #    ssl                  on;
    #    ssl_certificate      cert.pem;
    #    ssl_certificate_key  cert.key;

    #    ssl_session_timeout  5m;

    #    ssl_protocols  SSLv2 SSLv3 TLSv1;
    #    ssl_ciphers  HIGH:!aNULL:!MD5;
    #    ssl_prefer_server_ciphers   on;

    #    location / {
    #        root   html;
    #        index  index.html index.htm;
    #    }
    #}

}
Modified file content
#user  nobody;
worker_processes  1;

#error_log  logs/error.log;
#error_log  logs/error.log  notice;
#error_log  logs/error.log  info;

#pid        logs/nginx.pid;


events {
    worker_connections  1024;
}


http {
    include       mime.types;
    default_type  application/octet-stream;

    #log_format  main  '$remote_addr - $remote_user [$time_local] "$request" '
    #                  '$status $body_bytes_sent "$http_referer" '
    #                  '"$http_user_agent" "$http_x_forwarded_for"';

    #access_log  logs/access.log  main;

    sendfile        on;
    #tcp_nopush     on;

    #keepalive_timeout  0;
    keepalive_timeout  65;

    #gzip  on;

    server {
	  listen 80;
	  server_name test.xxxxxx.com; # Fill in the secondary domain name you assigned here
	  location / {
		  proxy_set_header X-Real-IP $remote_addr;
		  proxy_set_header X-Forwarded-For $proxy_add_x_forwarded_for;
		  proxy_set_header Host  $http_host;
		  proxy_set_header X-Nginx-Proxy true;
		  proxy_set_header Connection "";
		  proxy_pass       http://127.0.0.1:8280;  #  Your local http service address
	  }
	}

    # another virtual host using mix of IP-, name-, and port-based configuration
    #
    #server {
    #    listen       8000;
    #    listen       somename:8080;
    #    server_name  somename  alias  another.alias;

    #    location / {
    #        root   html;
    #        index  index.html index.htm;
    #    }
    #}


    # HTTPS server
    #
    #server {
    #    listen       443;
    #    server_name  localhost;

    #    ssl                  on;
    #    ssl_certificate      cert.pem;
    #    ssl_certificate_key  cert.key;

    #    ssl_session_timeout  5m;

    #    ssl_protocols  SSLv2 SSLv3 TLSv1;
    #    ssl_ciphers  HIGH:!aNULL:!MD5;
    #    ssl_prefer_server_ciphers   on;

    #    location / {
    #        root   html;
    #        index  index.html index.htm;
    #    }
    #}

}
After configuration, go back to sbin directory to check whether the configuration file is corrected
./nginx -t
If the configuration file is modified successfully, the output is ok
Restart nginx service
./nginx -s reload
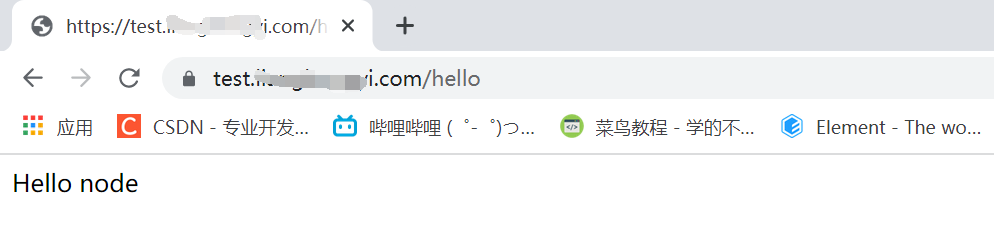
Test interface
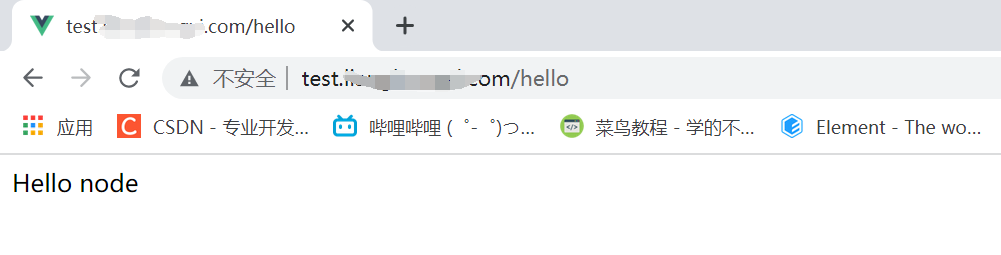
So far, we have forwarded our ip to our secondary domain name through nginx agent
But this is an http link, so there will be an unsafe prompt in front
Let's configure the ssl certificate to make our link a secure https link
4, Configure ssl certificate
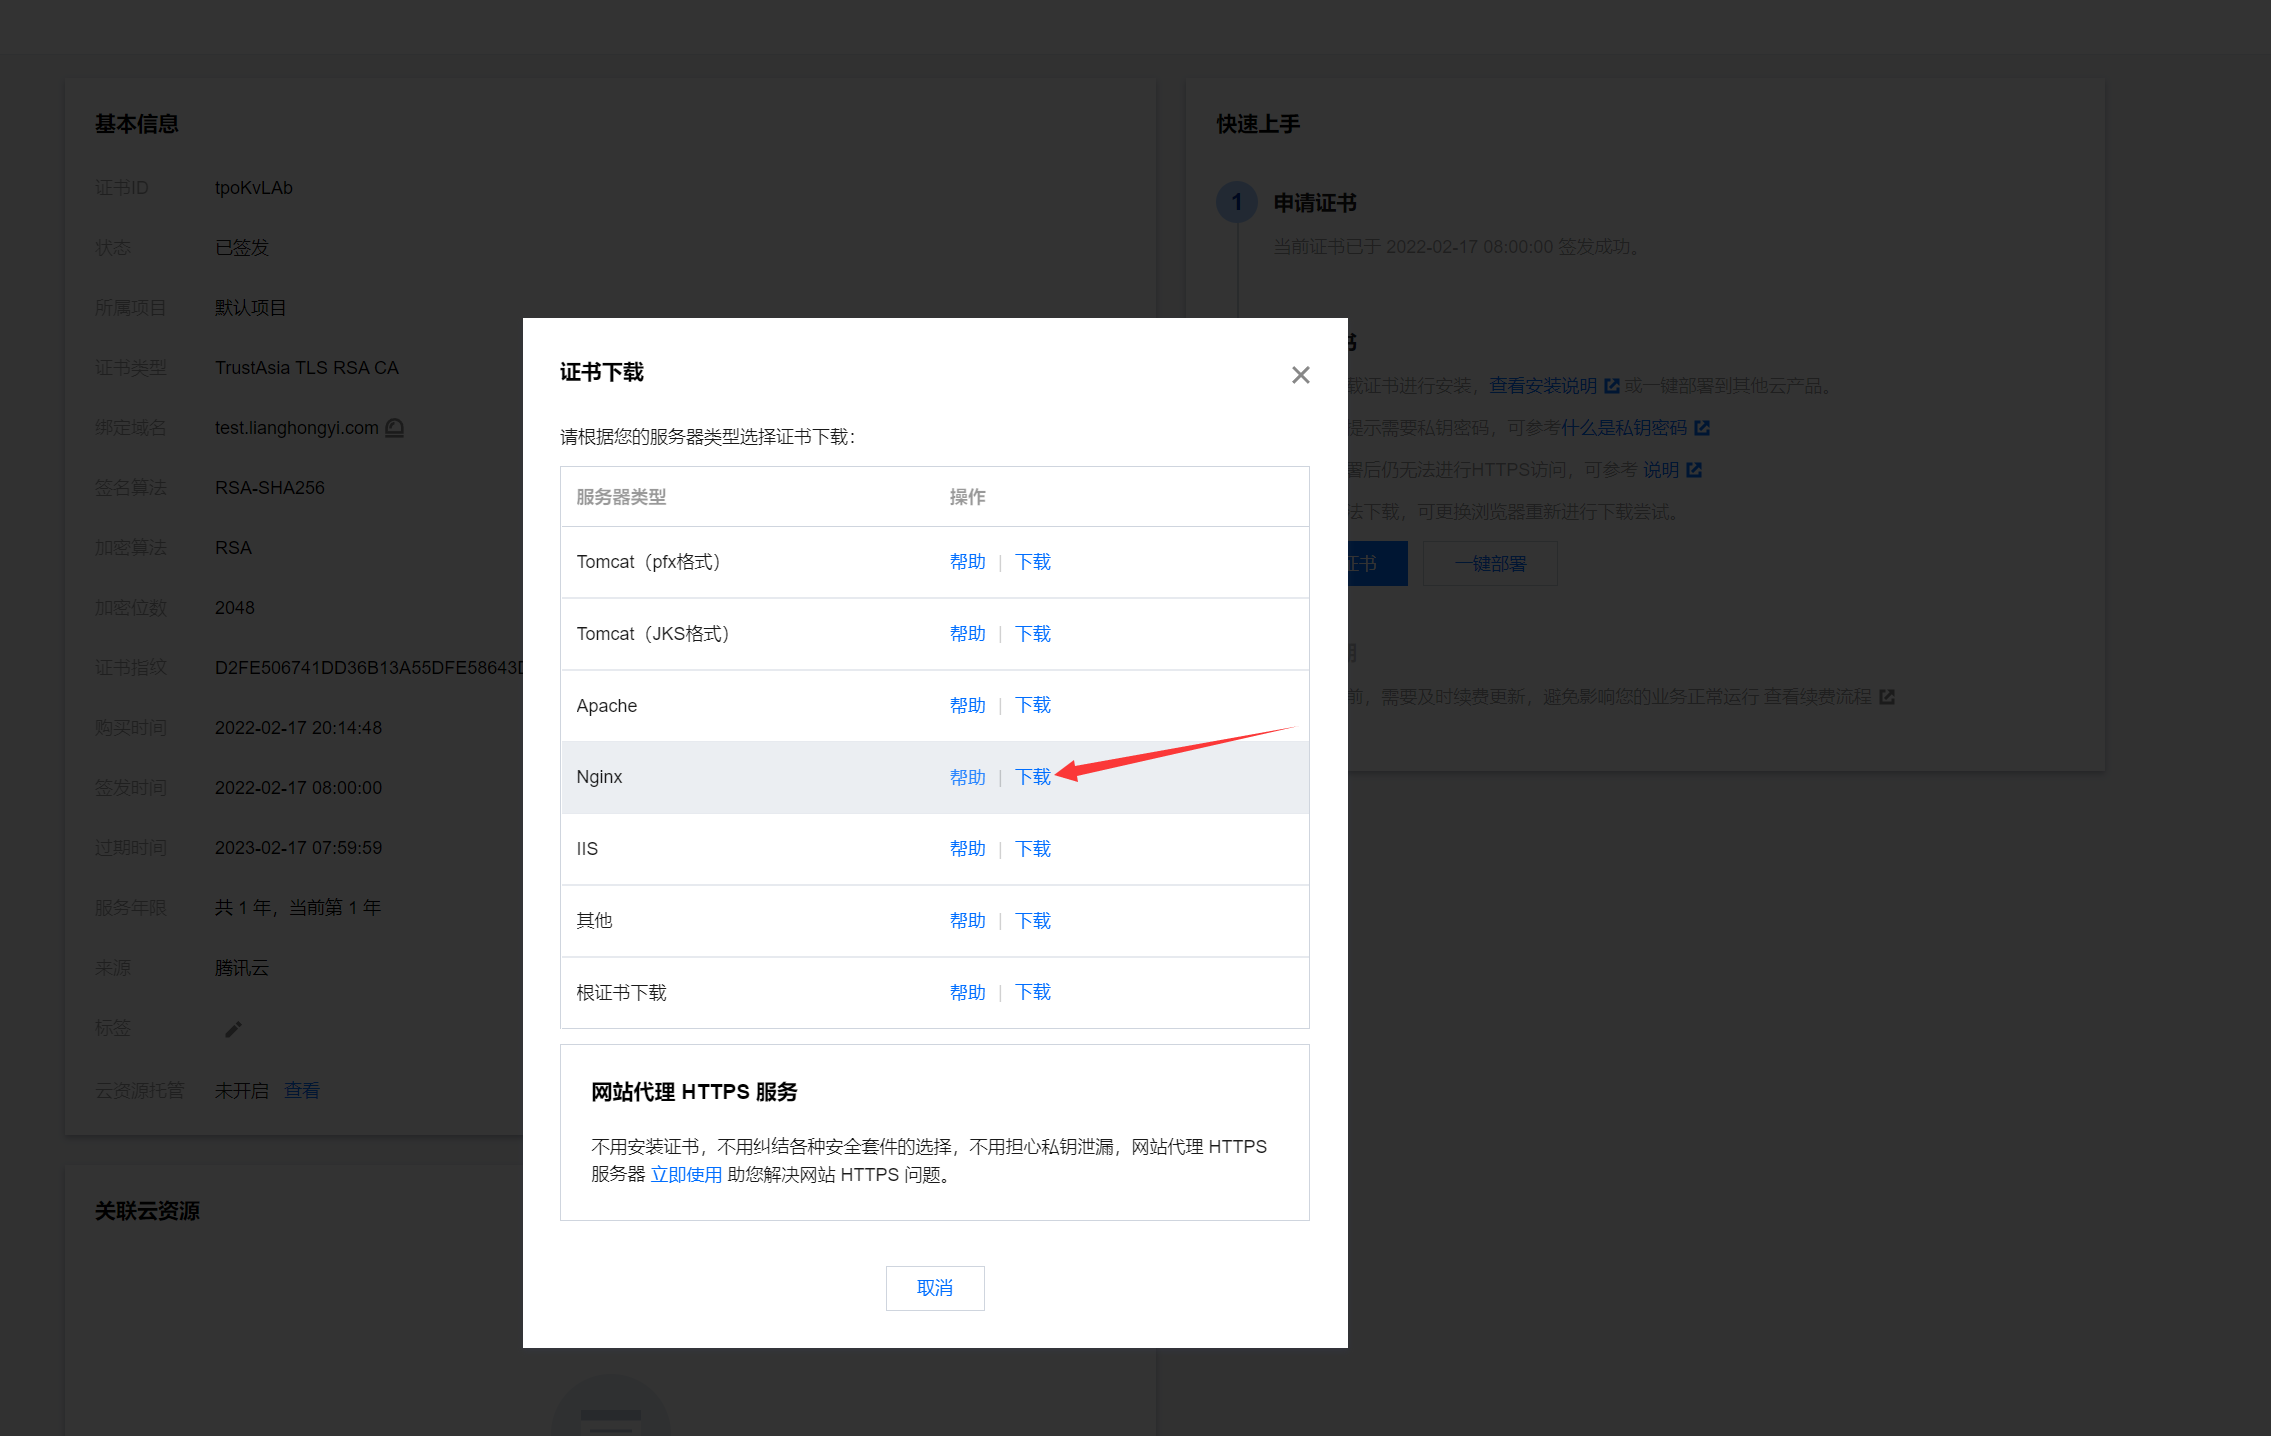
1. First go to your domain name console to apply for ssl certificate

Download nginx certificate after approval
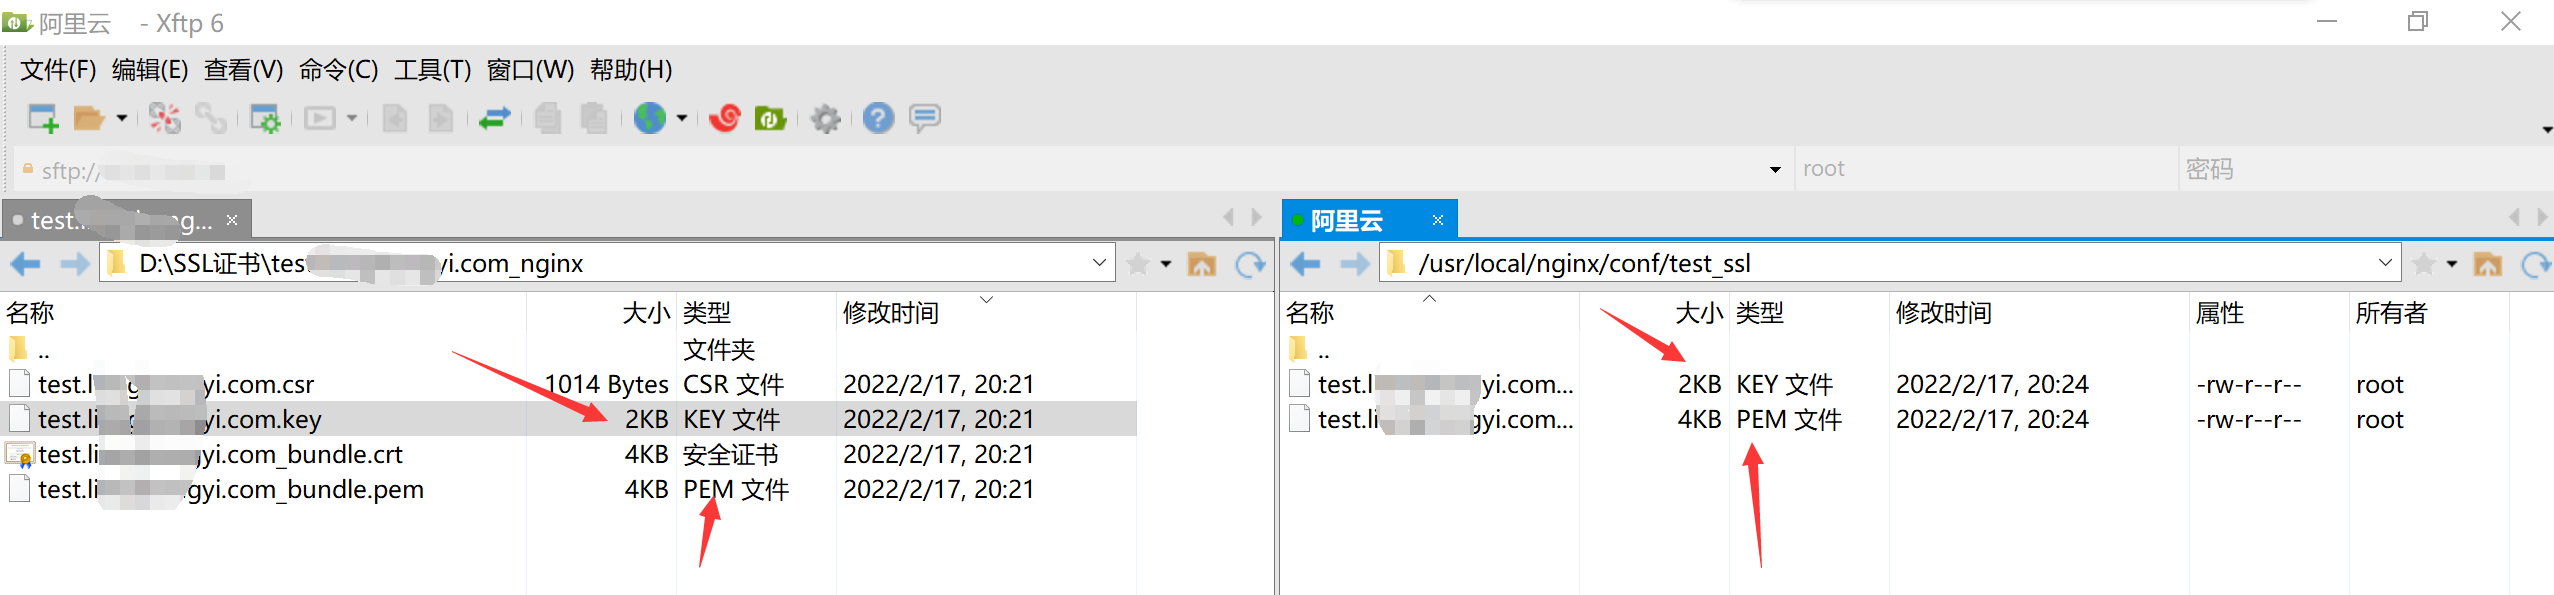
2. Upload the pem and key files in the certificate folder to nginx Conf directory
In nginx Create a new folder under the conf directory to store the certificate
In nginx Add a new server to the conf file
server {
        listen       443 ssl;
        server_name  test.xxxxxxxx.com;

		# pem file of your domain name
        ssl_certificate      /test_ssl/test.xxxxxx.com_bundle.pem;
        # key file of your domain name
        ssl_certificate_key  /test_ssl/test.xxxxxx.com.key;

        ssl_session_cache    shared:SSL:1m;
        ssl_session_timeout  5m;

        # ssl_ciphers  HIGH:!aNULL:!MD5;
        ssl_ciphers ECDHE-RSA-AES128-GCM-SHA256:ECDHE:ECDH:AES:HIGH:!NULL:!aNULL:!MD5:!ADH:!RC4;
        ssl_protocols TLSv1 TLSv1.1 TLSv1.2;

	ssl_prefer_server_ciphers  on;

        location / {
            proxy_pass       http://127.0.0.1:8280;
        }
    }
Check whether the configuration file is correct

This means that nginx does not have http_ssl_module module
3. Add ssl module
Enter nginx installation path
cd /usr/local/nginx-1.1.10
Additional – with http_ ssl_ module
./configure --prefix=/usr/local/nginx --with-http_stub_status_module --with-http_ssl_module
When the configuration is complete, run the command
make
Do not make install here, otherwise it will overwrite the installation
Then back up the original installed nginx
cp /usr/local/nginx/sbin/nginx /usr/local/nginx/sbin/nginx.bak
Then overwrite the original nginx with the newly compiled nginx (at this time, nginx will stop)
cp ./objs/nginx /usr/local/nginx/sbin/
Enter the sbin directory and run nginx again
./nginx
4. Modify nginx Conf configuration file
Add the following server s
server {
        listen       443 ssl;
        server_name  test.xxxxxx.com;

		# pem file of your domain name
        ssl_certificate      /test_ssl/test.xxxxx.com_bundle.pem;
        # key file of your domain name
        ssl_certificate_key  /test_ssl/test.xxxxxx.com.key;

        ssl_session_cache    shared:SSL:1m;
        ssl_session_timeout  5m;

        # ssl_ciphers  HIGH:!aNULL:!MD5;
        ssl_ciphers ECDHE-RSA-AES128-GCM-SHA256:ECDHE:ECDH:AES:HIGH:!NULL:!aNULL:!MD5:!ADH:!RC4;

		ssl_prefer_server_ciphers  on;

        location / {
            proxy_pass       http://127.0.0.1:8280;
        }
    }
After configuration, check nginx Whether the conf file is correct. If so, restart the nginx service
Note: if you still cannot access the corresponding https interface after restarting, turn off nginx and restart
# nginx stop command
/usr/local/nginx/sbin/nginx -s stop
# nginx start command
/usr/local/nginx/sbin/nginx
After restarting nginx, visit the https link
Interface request succeeded!!!