I Easy search installation
1. Download easy search
docker pull elasticsearch:7.6.2
2. External folder mounting configuration and granting folder permissions
mkdir -p /mydata/elasticsearch/config
mkdir -p /mydata/elasticsearch/data
echo "http.host: 0.0.0.0" >/mydata/elasticsearch/config/elasticsearch.yml
chmod -R 777 /mydata/elasticsearch/
3. Start Elastic search
docker run --name elasticsearch -p 9200:9200 -p 9300:9300 \
-e  "discovery.type=single-node" \
-e ES_JAVA_OPTS="-Xms64m -Xmx512m" \
-v /mydata/elasticsearch/config/elasticsearch.yml:/usr/share/elasticsearch/config/elasticsearch.yml \
-v /mydata/elasticsearch/data:/usr/share/elasticsearch/data \
-v  /mydata/elasticsearch/plugins:/usr/share/elasticsearch/plugins \
-d elasticsearch:7.6.2
-e ES_JAVA_OPTS="-Xms64m -Xmx512m" / / set the initial heap memory and maximum memory, or adjust the virtual machine memory
4. Set startup to start elasticsearch
docker update elasticsearch --restart=always
5. Test
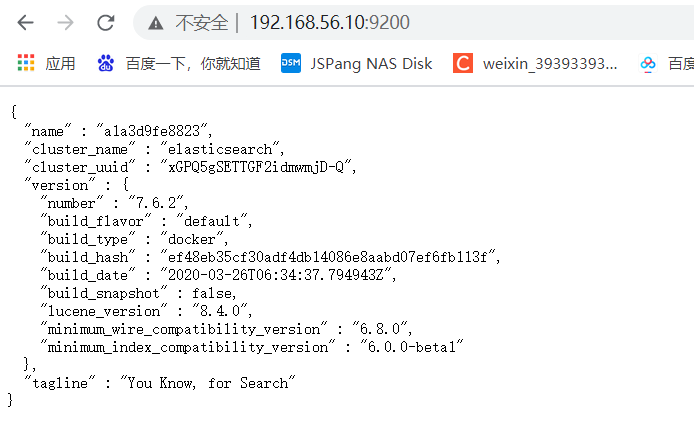
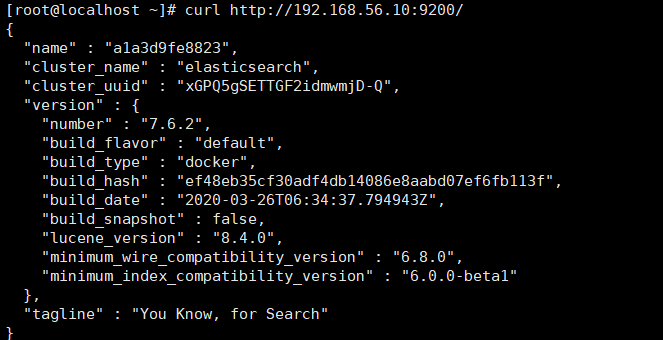
View elasticsearch version information
http://192.168.56.10:9200/

Displays the elasticsearch node information
http://192.168.56.10:9200/_cat/nodes

II kibana installation
1. Download kibana
docker pull kibana:7.6.2
2. Start kibana
docker run --name kibana -e ELASTICSEARCH_HOSTS=http://172.17.0.3:9200 -p 5601:5601 -d kibana:7.6.2
3. Set the boot to start kibana
docker update kibana --restart=always
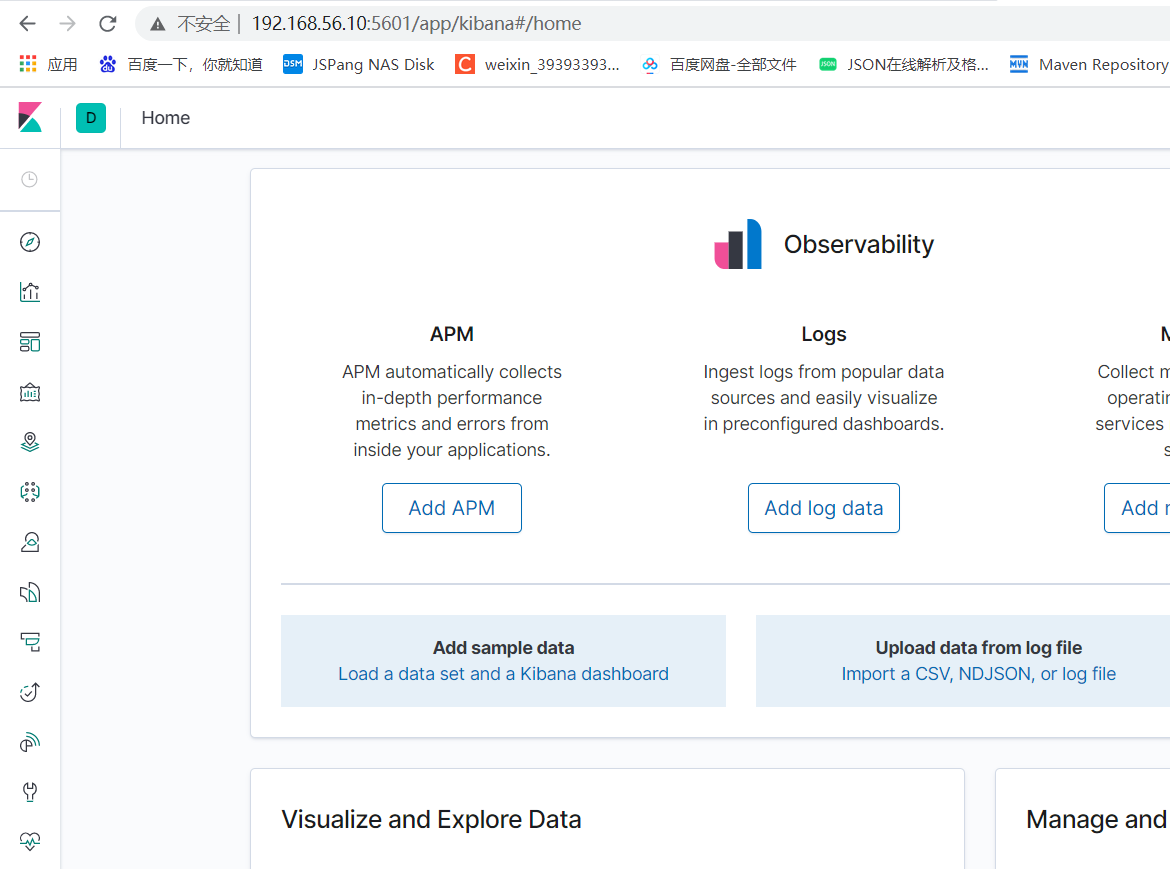
4. Test and visit kibana
http://192.168.56.10:5601

III Install ik word splitter
1. When installing elasticsearch earlier, we have mapped the "/ usr/share/elasticsearch/plugins" directory of elasticsearch container to the "/ mydata/elasticsearch/plugins" directory of the host computer, so it is more convenient to download the "/ elasticsearch-analysis-ik-7.6.2.zip" file and extract it into this folder. After installation, restart the elasticsearch container.
2. If it is not too troublesome, it can also be installed in the following ways
1) View elasticsearch version number

2) Enter es container
docker exec -it elasticsearch /bin/bash

3) Download ik7 six point two
wget https://github.com/medcl/elasticsearch-analysis-ik/releases/download/v7.6.2/elasticsearch-analysis-ik-7.6.2.zip

4)unzip unzip the compressed package to the file ik folder
unzip elasticsearch-analysis-ik-7.6.2.zip -d ik
5) Move the extracted ik folder to the pulgins folder of es
mv ik plugins/
6) Delete the compressed package
rm -rf elasticsearch-analysis-ik-7.6.2.zip

7) Testing word segmentation in kibana
Use default:
GET my_index/_analyze
{
   "text":"I am Chinese,"
}
Execution result:
{
  "tokens" : [
    {
      "token" : "I",
      "start_offset" : 0,
      "end_offset" : 1,
      "type" : "<IDEOGRAPHIC>",
      "position" : 0
    },
    {
      "token" : "yes",
      "start_offset" : 1,
      "end_offset" : 2,
      "type" : "<IDEOGRAPHIC>",
      "position" : 1
    },
    {
      "token" : "in",
      "start_offset" : 2,
      "end_offset" : 3,
      "type" : "<IDEOGRAPHIC>",
      "position" : 2
    },
    {
      "token" : "country",
      "start_offset" : 3,
      "end_offset" : 4,
      "type" : "<IDEOGRAPHIC>",
      "position" : 3
    },
    {
      "token" : "people",
      "start_offset" : 4,
      "end_offset" : 5,
      "type" : "<IDEOGRAPHIC>",
      "position" : 4
    }
  ]
}
Using ik_smart:
GET my_index/_analyze
{
   "analyzer": "ik_smart",
   "text":"I am Chinese,"
}
Execution result:
{
  "tokens" : [
    {
      "token" : "I",
      "start_offset" : 0,
      "end_offset" : 1,
      "type" : "CN_CHAR",
      "position" : 0
    },
    {
      "token" : "yes",
      "start_offset" : 1,
      "end_offset" : 2,
      "type" : "CN_CHAR",
      "position" : 1
    },
    {
      "token" : "Chinese",
      "start_offset" : 2,
      "end_offset" : 5,
      "type" : "CN_WORD",
      "position" : 2
    }
  ]
}
3. Configure ik word splitter and customize Thesaurus
1) First, install nginx in docker
Before running the following example, you need to install nginx (see Installing nginx for the installation method), and then create an ES folder and a "fenci. TXT" file in the html directory under the nginx directory; http://192.168.56.10/es/fenci.txt Access path to resources on nginx
2) Modify ikanalyzer.com in / usr/share/elasticsearch/plugins/ik/config cfg. xml

The original ikanalyzer cfg. xml
<?xml version="1.0" encoding="UTF-8"?>
<!DOCTYPE properties SYSTEM "http://java.sun.com/dtd/properties.dtd">
<properties>
	<comment>IK Analyzer Extended configuration</comment>
	<!--Users can configure their own extended dictionary here -->
	<entry key="ext_dict"></entry>
	 <!--Users can configure their own extended stop word dictionary here-->
	<entry key="ext_stopwords"></entry>
	<!--Users can configure the remote extension dictionary here -->
	<!-- <entry key="remote_ext_dict">words_location</entry> -->
	<!--Users can configure the remote extended stop word dictionary here-->
	<!-- <entry key="remote_ext_stopwords">words_location</entry> -->
</properties>
Amend it to read:
<?xml version="1.0" encoding="UTF-8"?>
<!DOCTYPE properties SYSTEM "http://java.sun.com/dtd/properties.dtd">
<properties>
	<comment>IK Analyzer Extended configuration</comment>
	<!--Users can configure their own extended dictionary here -->
	<entry key="ext_dict"></entry>
	 <!--Users can configure their own extended stop word dictionary here-->
	<entry key="ext_stopwords"></entry>
	<!--Users can configure the remote extension dictionary here -->
	<entry key="remote_ext_dict">http://192.168.56.10/es/fenci.txt</entry>
	<!--Users can configure the remote extended stop word dictionary here-->
	<!-- <entry key="remote_ext_stopwords">words_location</entry> -->
</properties>
http://192.168.56.10/es/fenci.txt This is the access path of the resource on nginx
3) Exit save and restart elasticsearch, otherwise it will not take effect
IV elasticsearch head plug-in monitoring management
1. Download elasticsearch head
docker pull mobz/elasticsearch-head:5
2. Run elasticsearch head
docker run -d -p 9100:9100 docker.io/mobz/elasticsearch-head:5
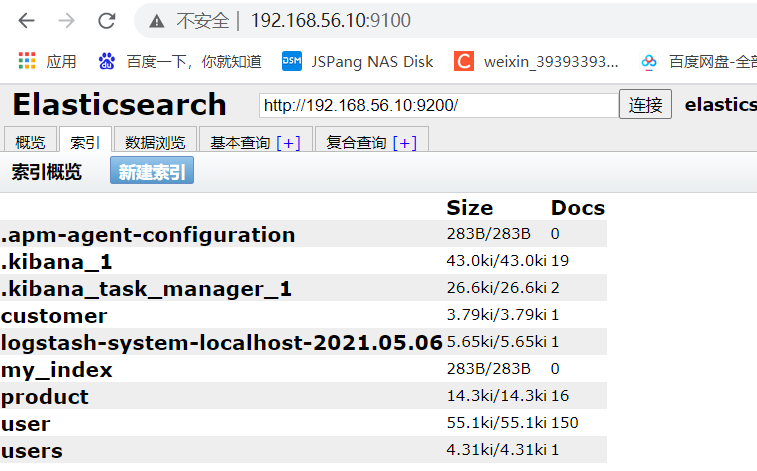
3. Open the ElasticSearch head page in the browser and fill in the ElasticSearch address

4. Cross domain access denial may occur here, and elasticsearch cannot be connected
In elasticsearch Add to YML:
http.cors.enabled: true
http.cors.allow-origin: "*"


5. Restart the elasticsearch container
docker restart elasticsearch
That's it!
