1 installation
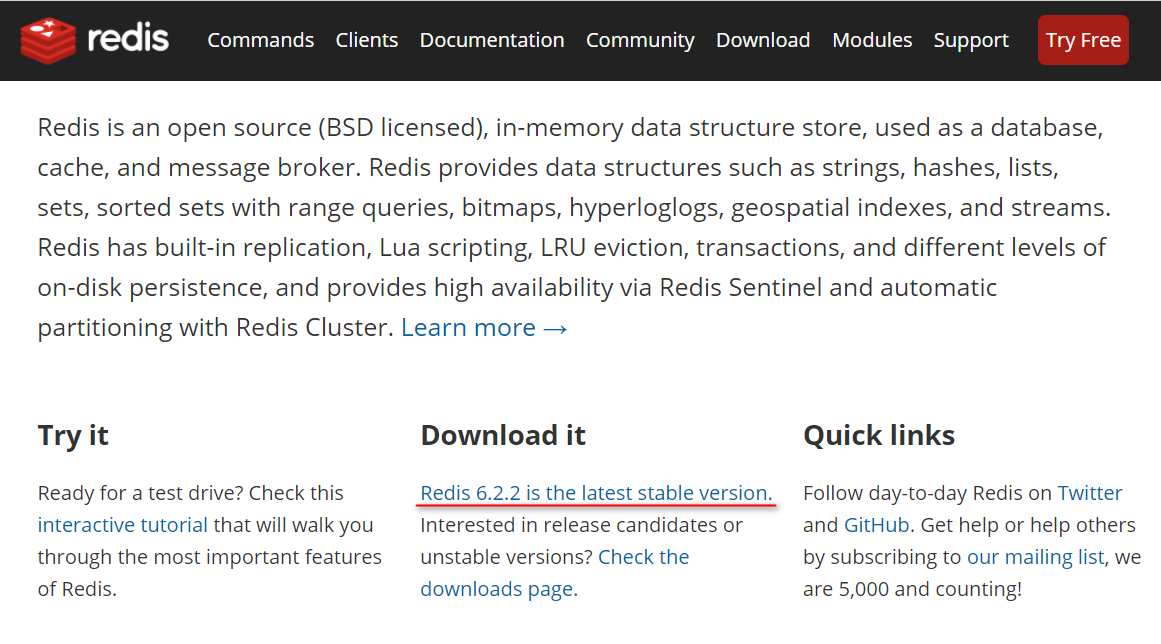
- Download the compressed package on the official website of Redis:
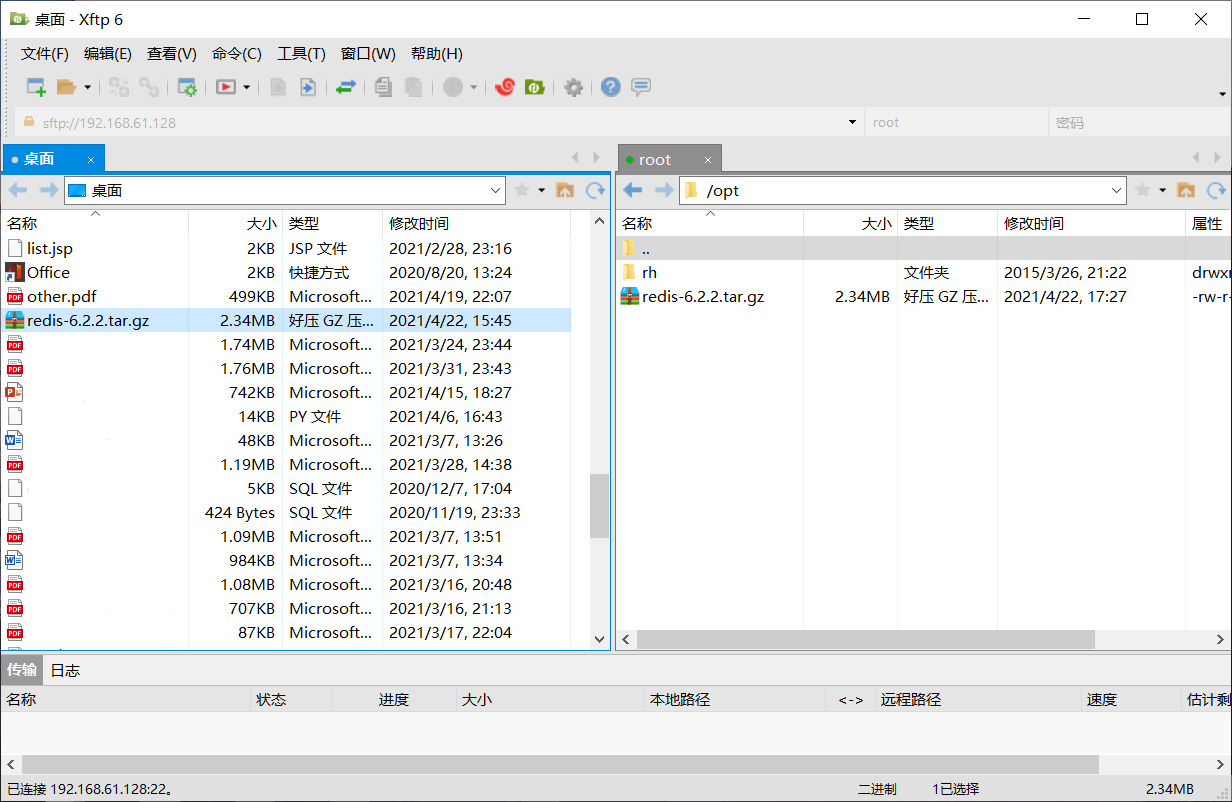
- Use Xftp to put the Redis compressed package in the / opt directory and use the command: tar -zxvf Redis-6.2.2 tar. GZ decompression.

- Because Redis is implemented based on C + +, it needs to rely on two additional packages: GCC and gcc-c + +. Use the commands yum install gcc and yum install gcc-c + + under the opt directory to install these two dependencies.
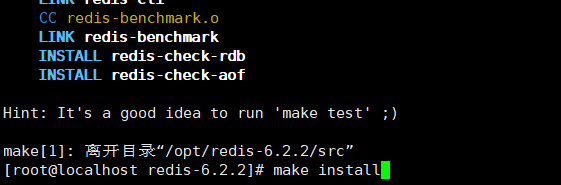
- Under the Redis decompression directory (redis-6.2.2), use the command: make to compile Redis. After compiling, use the command: make install to install Redis.

Note 1: if you use the make command before installing GCC and gcc-c + +, an error will be reported. At this time, you need to install GCC and gcc-c + +. After the installation is successful, use the command: make distclean to empty the previous running cache, and then execute step 4.
Note 2: the installation directory of Redis is: / usr/local/bin. The advantage of installing in this directory is that Redis commands can be executed anywhere in the system (such as the commands to start and close Redis).
2. Start and shut down the client and server
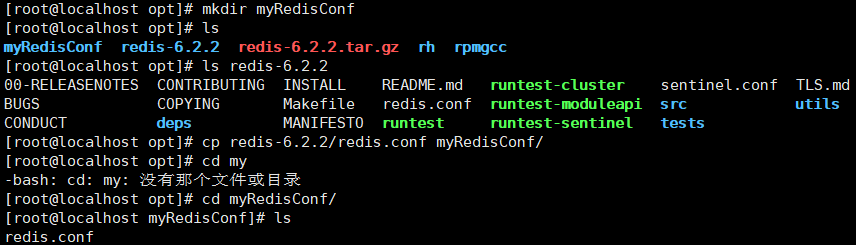
- Enter the Redis installation directory (/ opt/Redis-6.2.2) and copy Redis Conf configuration file to a new directory (myRedisConf) under / opt.
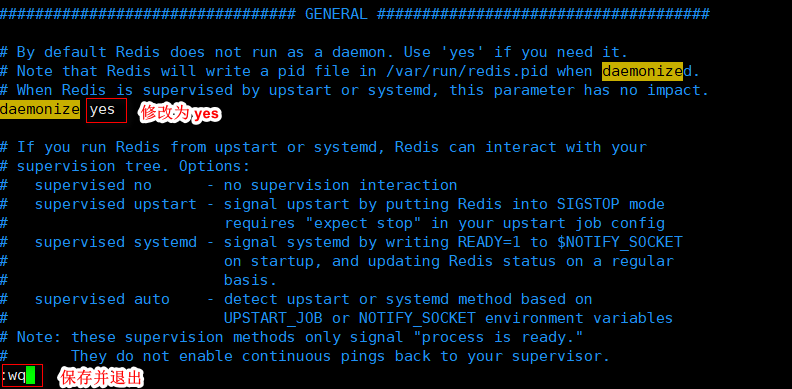
- Open myredisconf / Redis Conf file, and change the daemon no to daemon yes. After modification, Redis can be started in the background.
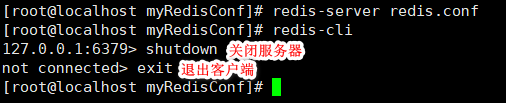
- Execution: Redis server modified Conf path and start Redis service. Use: ps -ef | grep redis to check whether it is opened successfully.

- Use: Redis cli [- H ip address - p port number] to open the client. If the ip address and port number are not specified, the ip address and port number of Redis server will be used by default.

- After entering the Redis client, enter: ping. If you output: pong, it means that the connection between the client and the server is successful.

- (1) Exit the client, enter: exit, or press: Ctrl + C.
(2) In the client, shut down the server and enter: shutdown.
(3) When the client does not enter, shut down the server and enter: redis cli shutdown. When the server has multiple ports, use: redis cli - P to shut down the port number.

3 Database
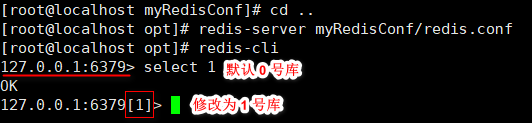
- Redis has 16 databases, similar to array subscripts. These databases start from 0 to 15. Library 0 is used by default. Use the command: select index to switch the database.
- Redis unified password management. All databases have the same password. Either all can be connected, or none can be connected.
4 single thread + multiplex IO
5 basic instructions
| instructions | effect |
|---|---|
| keys * | View all keys in the current library. |
| exists k | Check whether there is a key k in the current library. 1 is returned, 0 is not returned. |
| type k | View the type of key k. |
| del k | Delete key k. 1 is returned if the deletion is successful. |
| expire k time | Sets the expiration time for key k in seconds. |
| ttl k | See how many seconds the key k has left to expire- 1 means it will never expire, - 2 means it has expired. |
| dbsize | View the total number of keys in the current library. |
| Flushdb | Empty the current library. |
| Flushall | Empty all libraries. |
6 five basic data types
6.1 String
- String is the most basic data type of Redis. The format is in the form of key value pair.
- The value of a String can contain any data, such as a picture or a serialized object.
- The maximum value of String is 512M.
- The subscript of value starts from 0.
- Atomicity: refers to operations that will not be interrupted by thread scheduling mechanism. Once the operation starts, it runs until the end.
Common instructions for manipulating strings:
| instructions | effect |
|---|---|
| get k | Get v corresponding to k. |
| set k v | Add key value pairs to the library. |
| append k v | Append v after the original value of k. |
| strlen k | Gets the length of v. |
| setnx k v | When k does not exist, set the key value pair. |
| incr k | Add 1 to the numeric value stored in k. You can only operate on numeric values. If it is empty, it is set to 1. |
| decr k | Subtract the numeric value stored in k by 1. You can only operate on numeric values. If it is empty, it is set to - 1. |
| incrby/decrby k n | Add or subtract n from the numeric value stored in k. You can only operate on numeric values. |
| mset k1 v1 k2 v2 ... | Add multiple key value pairs at the same time. |
| mget k1 k2 ... | Obtain v of multiple k at the same time. |
| msetnx k1 v1 k2 v2 ... | When k1, k2... Do not exist, set multiple key value pairs at the same time. |
| getrange k start end | From start to end, obtain v of k (including end). Equivalent to intercepting substring. |
| setrange k start v | Starting from start, replace the original value of k with v. |
| setex k expireTime v | Set the expiration time of k while setting the key value pair. The unit is seconds. |
| getset k v | Get the key value pair and modify the value of k to v. |
6.2 List
- List: single key multi value, orderly and repeatable. There is a list if there is a key.
- Redis's list is a simple string list, sorted by insertion order.
- Only strings can be stored in the List.
- List is actually a two-way linked list.
- The index of the first value of the List is 1, and the index of the last value is - 1.
Common instructions for operating List:
| instructions | effect |
|---|---|
| lpush/rpush k v1,v2 ... | Insert data into the head or tail of the list k. |
| lpop/rpop k | Take out the value of the header or footer. After taking out, the value does not exist in k. |
| rpoplpush k1 k2 | Take the ending value of k1 and insert it into the header of k2. |
| lrange k start end | View the [start, end] value of list k from left to right. |
| lindex k index | View the list k from left to right. The index is the value of index. |
| llen k | Gets the length of the list k. |
| linsert k before|after v nV | Insert the new value nV before or after the value v of table k. |
| lrem k n v | (1) When n > 0: delete n v in list k from left to right; (2) When n < 0: delete n v in list k from right to left; (3) When n = 0: delete all v in list k. |
6.3 Set
- The function of Set is similar to that of List, except that it is unordered and cannot be repeated.
- Only String can be stored in Set.
- Set is actually a hash table.
Common instructions for operating Set:
| instructions | effect |
|---|---|
| sadd k v1,v2 ... | Add data v1, v2... To set k. Skip existing data. |
| smembers k | View all values in the set k. |
| sismember k v | Judge whether there is v in set k. 1 is returned, 0 is not returned. |
| scard k | Returns the number of values in the set k. |
| srem k v1,v2 ... | Delete v1, v2 in set k |
| spop k | Randomly take out a value in the set k. After taking out, the value does not exist in k. |
| srandmember k n | Randomly take out n values in the set k. After being taken out, these values will not be deleted. |
| sinter k1,k2 | Returns the intersection of k1 and k2. |
| sunion k1,k2 | Returns the union of k1 and k2. |
| sdiff k1,k2 | Returns the difference set of k1 and k2. k1 - k2: data in k1 but not in k2. |
6.4 Hash
- Hash is a collection of key value pairs of type String. Similar to map < String, String > in Java
Common instructions for operating Hash:
| instructions | effect |
|---|---|
| hset k f v | Assign v to the key f of the k set. |
| hmset k f1 v1 f2 v2 ... | Batch assignment. |
| hget k f | Gets the value of key f in set k. |
| hexists k f | Determine whether the key f exists in the set k. |
| hkeys k | Displays all keys f of set k. |
| hvals k | Displays all values v of set k. |
| hgetall k | Displays all key value pairs of set k. |
| hincrby k f increment | Increase the key f in set k by increment. Value must be numeric. |
| hsetnx k f v | When the key f does not exist in k, save f v to k. |
6.5 Zset
- Zset is a non repeatable ordered Set (Set is a non repeatable unordered Set).
- Each member of Zset is associated with a score, and Zset sorts the members according to this score.
Common instructions for operating Zset:
| instructions | effect |
|---|---|
| zadd k s1 v1 s2 v2 ... | Add members and their corresponding scores to the set k. (1) s and v are the same: failed to add; (2) S is different, v is the same: update s of v; (3) s is the same, v is different: it is added successfully and sorted according to the order of addition. |
| zrange k start end | Query the data indexed in [start, end] in the set k. The index of the last value is - 1. Sort from small to large. |
| zrevrange k start end | Sort from large to small. |
| zrangebyscore k min max | Query the data scored in [min, max] in set k. Sort from small to large. |
| zrevrangebyscore k max min | Sort from large to small. |
| zincrby k increment v | Increase the score of value v by increment. |
| zrem k v | Delete v. |
| zcount k min max | Returns the number of elements with a score between [min, max]. |
| zrank k v | Gets v the ranking in the collection. Ranking starts from 0. |
7 configuration file
- Unit of measurement: 1 k = 1000 bytes, 1 kb = 1024 bytes. Rounding without b. Case insensitive.
- Include: similar to include in jsp, you can extract the same part of the configuration file.
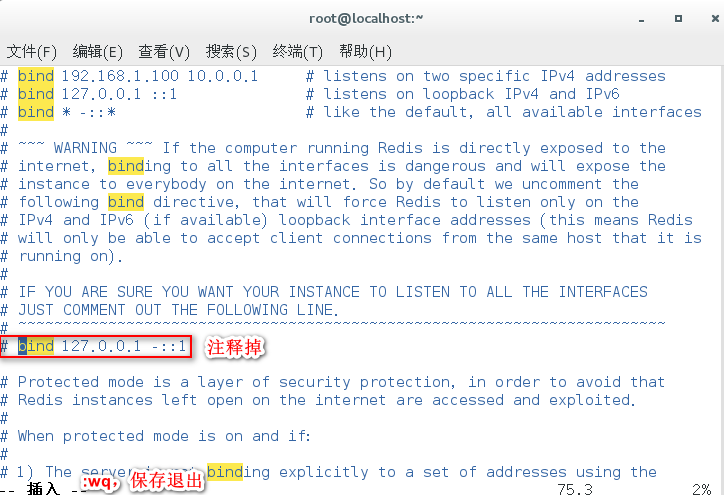
- Bind of ip address: bind 127.0.0.1 by default, only local access is allowed. If you want any address to be accessible, just comment out bind and turn off protected mode. Turn off protected mode: protected model no.
- TCP backlog: the total number of queues after the request reaches Redis and before it is processed.
- timeout: the number of seconds after an idle client is shut down. 0 means never close.
- TCP keepalive: how often do you check whether the client is still connected to the server. The official recommended setting is 60 seconds.
- Daemon: whether to set the server as a background process (background startup).
- pidfile: the location where the pid file is stored.
- loglevel: log level. From low to high: debug, verbose, notice, warning. The higher the level, notice or warning is recommended in the production environment.
- logfile: the name of the log file.
- syslog: whether to output Redis log to Linux system log.
- Syslog ident: Flag of the log.
- Syslog facility: the device that outputs the log.
- database: the number of Redis libraries. The default is 16.
- security:
(1) Temporary password: after entering Redis client:
Get password: config get requirepass.
Set password: config set requirepass "xxx".
After setting, you can enter the password: auth password.
(2) Permanent password: in Redis configuration file:
requirepass: set the login password. - maxclient: the maximum number of client connections.
- maxmemory: set the maximum memory that Redis can use.
When the memory reaches the upper limit, Redis will try to remove the data and release the memory. Removal rules can be set through: maxmemory policy. If Redis is unable to release memory according to the removal rule, or the rule is set to not allow removal, Redis will return error messages for memory application instructions, such as set and lpush. - Maxmemory policy: memory removal policy.
Volatile LRU: use LRU algorithm (least recently used) to remove the key. Only valid for keys with expiration time set.
Allkeys LRU: use LRU algorithm to remove keys.
Volatile random: randomly remove keys. Only valid for keys with expiration time set.
All keys random: remove keys randomly.
Volatile ttl: remove the key with the smallest ttl time (remaining expiration time).
noeviction: do not remove the key. For the instruction of applying for memory, an error message is returned. - Maxmemory samples: select several of the data that meet the requirements of LRU and ttl algorithms as alternative removal data.
(1) During the operation of LRU and ttl algorithms, there may be multiple data with the same latest minimum usage times or remaining expiration time. These data meet the conditions of removed memory. At this time, you can set maxmemory samples to select n of all the data that meet the conditions for further filtering, and finally remove the most qualified data.
(2) Maxmemory samples is generally set to 3 - 7. The larger the number, the more alternative data to remove, the more accurate the removal, but the higher the performance consumption.
8 Jedis
-
In Redis configuration file, comment out bind 127.0.0.1.
-
It is not recommended to turn off the protection mode. It is recommended to set the Redis login password.

-
Close the firewall of Linux system: systemctl stop firewalld.

-
Check the ip address of Linux: ifconfig.

-
Create maven project and introduce jedis dependency.
<dependencies> <dependency> <groupId>redis.clients</groupId> <artifactId>jedis</artifactId> <version>3.6.0</version> </dependency> </dependencies> -
(1) Create a Jedis object, and the constructor passes in the ip address of the Linux system and the port number of Redis (default: 6379).
(2) Use the auth method to enter the login password.
(3) Use the ping method to check whether the connection is successful.
(4) Perform data operations.
(5) Close the jedis connection.public class TestJedis { public static void main(String[] args) { //Construction method, incoming ip address and port number Jedis jedis = new Jedis("192.168.61.128", 6379); jedis.auth("Redis password"); String ping = jedis.ping(); System.out.println(ping);//pong // jedis.set("jedisKey","jedisVal"); String jedisKey = jedis.get("jedisKey"); System.out.println(jedisKey);//jedisVal jedis.close(); } }
9 case 1: mobile phone verification code

code.html: page.
<!DOCTYPE html>
<html lang="en" xmlns:th="http://www.thymeleaf.org">
<head>
	<meta http-equiv="Content-Type" content="text/html; charset=ISO-8859-1">
	<title>Insert title here</title>
	<script  src="jquery/jquery-3.1.0.js" ></script>
	<link href="bs/css/bootstrap.min.css" rel="stylesheet" />
	<script  src="static/bs/js/bootstrap.min.js"   ></script>
</head>
<body>
<div class="container">
	<div class="row">
		<div id="alertdiv" class="col-md-12">
			<form class="navbar-form navbar-left" role="search" id="codeform">
				<div class="form-group">
					<input type="text" class="form-control" placeholder="Fill in the mobile phone number" name="phone_no">
					<button type="button" class="btn btn-default" id="sendCode">Send verification code</button><br>
					<font id="countdown" color="red" ></font>
					<br>
					<input type="text" class="form-control" placeholder="Fill in the verification code" name="verify_code">
					<button type="button" class="btn btn-default" id="verifyCode">determine</button>
					<font id="result" color="green" ></font><font id="error" color="red" ></font>
				</div>
			</form>
		</div>
	</div>
</div>

</body>
<script type="text/javascript">
	var t=120;//Set the countdown time
	var interval;
	function refer(){
		$("#countdown").text(" please fill in the verification code within "+ t +" seconds); / / the countdown is displayed
		t--; // Counter decrement
		if(t<=0){
			clearInterval(interval);
			$("#countdown").text(" verification code is invalid, please resend! ");
		}
	}

	$(function(){
		$("#sendCode").click( function () {

			$.post("/sendcode",$("#codeform").serialize(),function(data){
				if(data=="true"){
					t=120;
					clearInterval(interval);
					interval= setInterval("refer()",1000);//Start 1 second timing
				}else if (data=="limit"){
					clearInterval(interval);
					$("#countdown").text(" more than times of sending in a single day! ")
				}
			});
		});

		$("#verifyCode").click( function () {

			$.post("/verifycode",$("#codeform").serialize(),function(data){
				if(data=="true"){
					$("#result").attr("color","green");
					$("#result").text(" validation succeeded ");
					clearInterval(interval);
					$("#countdown").text("");
				}else{
					$("#result").attr("color","red");
					$("#result").text(" validation failed ");
				}
			});
		});

	});
</script>
</html>
PageController.java: visit code html.
@Controller
public class PageController {
    @GetMapping("/code")
    public String gotoIndex(){
        return "code";
    }
}
GetCode.java: get the random 6-bit verification code.
public class GetCode {
    //Generate verification code
    public static String getCode(){
        Random random = new Random();
        //Randomly generated 6 as verification code
        String code = "";
        for(int i=0; i<6; i++){
            int anInt = random.nextInt(10);
            code = code + anInt;
        }
        return code;
    }
}
CodeController.java: get the verification code and verify whether the verification code is correct.
/**
 * Handle the business of obtaining verification code and verification code
 */
@Controller
@ResponseBody
public class CodeController {
    private Jedis jedis = new Jedis("192.168.61.128",6379);

    @PostMapping("/sendcode")
    public String sendCode(@RequestParam("phone_no") String phoneNum){
        jedis.auth("Redis password");
        //If count is empty, it means that the verification code is applied for for the first time, the application is successful, and count is set to 1
        String codeKey = "verifycode:code:"+phoneNum;
        String countKey = "verifycode:count:"+phoneNum;
        String count = jedis.get("verifycode:phone:count");
        if(count==null){
            String code = GetCode.getCode();
            //The valid time of verification code is 120 seconds
            jedis.setex(codeKey,120,code);
            //Obtain the verification code three times within 24 hours
            jedis.setex(countKey,24*60*60,"1");
        }else if(Integer.parseInt(count) <= 2){
            //If count < = 2, you can also apply and send the verification code to count+1
            String code = GetCode.getCode();
            jedis.setex(codeKey,120,code);
            jedis.incr(countKey);
        }else if(Integer.parseInt(count) >= 3){
            //If count > = 3, you cannot apply again
            jedis.close();
            return "limit";
        }
        jedis.close();
        return "true";
    }

    /**
     * Verify whether the verification code is correct
     */
    @PostMapping("/verifycode")
    public String verifyCode(@RequestParam("phone_no") String phoneNum,
                             @RequestParam("verify_code") String verifyCode){
        String codeKey = "verifycode:code:"+phoneNum;
        String code = jedis.get(codeKey);
        if(code==null){
            jedis.close();
            return "nocode";
        }else if(code.equals(verifyCode)){
            jedis.close();
            return "true";
        }else{
            jedis.close();
            return "false";
        }
    }
}
10 affairs
- Redis transaction is a separate isolation operation. All commands in the transaction will be serialized and executed in order. During the execution of a transaction, it will not be interrupted by requests from other clients.
- The main function of Redis transaction is to concatenate multiple commands, so that the executing command is interrupted by other commands.
- Transaction command:
(1) multi: start the transaction and enter the queue state.
(2) discard: abandon team formation.
(3) exec: execute the transaction.
(4)watch k1 k2 ...: Monitor some keys. If these keys are changed before the transaction is executed, the transactions that operate these keys will be cancelled.
(5) Unwatch: cancels the monitoring of all key s. The exec and discard operations will automatically execute unwatch. - Error handling of transactions:
(1) When forming a queue, a command has a writing error: the whole queue will be cancelled.
(2) An error occurred in a command during execution: the command in error is cancelled and other commands continue to be executed. - Three features:
(1) Separate isolation operation.
(2) There is no concept of isolation level.
(3) Atomicity is not guaranteed.
11 case 2: second kill
11.1 basic code

seckill.html: page.
<!DOCTYPE html>
<html lang="en" xmlns:th="http://www.thymeleaf.org">
<head>
<meta http-equiv="Content-Type" content="text/html; charset=UTF-8">
<title>Insert title here</title>
</head>
<body>
<h1>iPhoneXsMAX !!!  1 Yuan second kill!!!
</h1>


<form id="msform" action="" th:action="@{/doSecKill}" enctype="application/x-www-form-urlencoded">
	<input type="hidden" id="prodid" name="prodid" value="0101">
	<input type="button"  id="miaosha_btn" name="seckill_btn" value="Kill me"/>
</form>

</body>
<script  type="text/javascript" src="jquery/jquery-3.1.0.js"></script>
<script  type="text/javascript">
$(function(){
	$("#miaosha_btn").click(function(){
		var url=$("#msform").attr("action");
	     $.post(url,$("#msform").serialize(),function(data){
     		if(data=="nostock"){
    			alert("It's all gone" );
    			$("#miaosha_btn").attr("disabled",true);
    		}else if(data=="havesuccess"){
				alert("You have succeeded in second kill. You can't second kill again" );
				$("#miaosha_btn").attr("disabled",true);
			}else if(data=="success"){
				alert("Second kill success" );
				$("#miaosha_btn").attr("disabled",true);
			}
		} );
	})
})
</script>
</html>
PageController.java: visit seckill.com html.
@Controller
public class PageController {
    @GetMapping("/seckill")
    public String gotoSeckill(){
        return "seckill";
    }
}
SecKillController.java
@Controller
public class SecKillController {
    @ResponseBody
    @PostMapping("/doSecKill")
    public String secKill(@RequestParam("prodid") String prodid) throws IOException {
        //Randomly generated userid
        String userid = new Random().nextInt(50000) +"" ;
        String status= SecKill_redis.doSecKill(userid,prodid);
        return status;
    }
}
SecKill_redis.java: handle second kill logic.
public class SecKill_redis {

	private static final  org.slf4j.Logger logger =LoggerFactory.getLogger(SecKill_redis.class) ;

	public static String doSecKill(String uid,String prodid) throws IOException {
		//Connect to Redis
		Jedis jedis = new Jedis("192.168.61.128", 6379);
		jedis.auth("Redis password");
		//Save key to Redis
		String stockKey = "seckill:"+prodid+":stock";
		String userKey = "seckill:"+prodid+":user";
		//Get inventory
		String stock = jedis.get(stockKey);
		//Whether the goods are in stock. If not, the end of the second kill will be displayed
		if(stock==null||Integer.parseInt(stock)<=0){
			jedis.close();
			System.out.println("The second kill is over");
			return "nostock";
		}else if(jedis.sismember(userKey,uid)){//Whether the user has succeeded in the second kill. The user who succeeds in the second kill cannot continue the second kill
			jedis.close();
			System.out.println("The second kill has been completed. You can't kill any more");
			return "havesuccess";
		}
		//If other conditions are normal, the inventory will be reduced by 1, and the id of the user who succeeded in the second kill will be added
		jedis.decr(stockKey);
		jedis.sadd(userKey,uid);
		jedis.close();
		System.out.println("Second kill success");
		return "success";
	}
}
11.2 simulate concurrency using ab tool
In 11.1, the basic code does not consider concurrency. Use ab tool to simulate concurrency.
CentOS 6 default installation ab tool; CentOS 7 requires manual installation.
Under Linux system, use the command Yum install httpd tools to install ab tools.
Use the command: ab -n number of requests - c number of concurrency - p file for storing the parameters to be sent - T format request address for sending parameters to simulate concurrency.
In this example, the form sends prodid=0101. Therefore, create a new file locally in Linux, store this parameter, and then use the ab command to send it.

Destination server address:
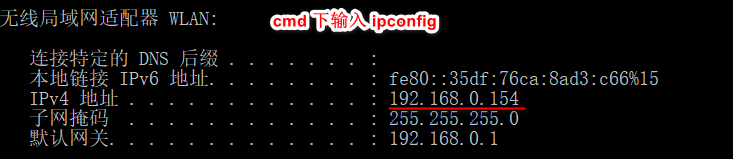
Set inventory: set seckill:0101:stock 20
Command used: ab -n 2000 -c 200 -p /opt/postfile -T application/x-www-form-urlencoded http://192.168.0.154:8080/doSecKill , send concurrent requests.
View remaining inventory: get seckill:0101:stock

Oversold.

Multiple users send requests at the same time. When processing, it is judged that the inventory quantity is greater than 1, so the second kill is successful. However, the correct scenario should be that only one of them succeeds in the second kill. After the user succeeds in the second kill, the inventory will be reduced by 1, and other concurrent users can no longer perform the second kill.
In addition, connection timeout may occur in the case of more concurrent connections.

11.3 use Redis database connection pool to solve the connection timeout problem
Connection pool parameters:
- MaxTotal: controls how many jedis instances can be allocated to a pool through pool Getresource(); If the value is - 1, it means there is no limit; If the pool has allocated MaxTotal jedis instances, the status of the pool is exhausted.
- maxIdle: controls the maximum number of jedis instances in idle status in a pool.
- MaxWaitMillis: indicates the maximum number of milliseconds to wait when applying for a jedis instance. If the waiting time exceeds, the JedisConnectionException will be thrown directly.
- Testonmirror: whether to check the connection availability (ping()) when obtaining a jedis instance. If true, all the jedis instances are available.
pom. Introducing connection pool dependency into XML:
<!-- spring2.X integrate redis what is needed common-pool2-->
<dependency>
    <groupId>org.apache.commons</groupId>
    <artifactId>commons-pool2</artifactId>
    <version>2.6.0</version>
</dependency>
JedisPoolUtil.java: get database connection pool.
public class JedisPoolUtil {
	private static volatile JedisPool jedisPool = null;

	private JedisPoolUtil() {
	}

	public static JedisPool getJedisPoolInstance() {
		if (null == jedisPool) {
			synchronized (JedisPoolUtil.class) {
				if (null == jedisPool) {
					JedisPoolConfig poolConfig = new JedisPoolConfig();
					poolConfig.setMaxTotal(200);
					poolConfig.setMaxIdle(32);
					poolConfig.setMaxWaitMillis(100*1000);
					poolConfig.setBlockWhenExhausted(true);
					poolConfig.setTestOnBorrow(true);  // ping  PONG

					jedisPool = new JedisPool(poolConfig, "192.168.61.128", 6379,
							60000,  "Redis password");
				}
			}
		}
		return jedisPool;
	}

	public static void release(JedisPool jedisPool, Jedis jedis) {
		if (null != jedis) {
			jedisPool.returnResource(jedis);
		}
	}
}
SecKill_redis.java
public class SecKill_redis {

	private static final  org.slf4j.Logger logger =LoggerFactory.getLogger(SecKill_redis.class) ;

	public static String doSecKill(String uid,String prodid) throws IOException {
		//Use the Redis database connection pool to solve the connection timeout problem.
		//Get database connection pool
		JedisPool jedisPoolInstance = JedisPoolUtil.getJedisPoolInstance();
		//Get Jedis connection
		Jedis jedis = jedisPoolInstance.getResource();

		//Save key to Redis
		String stockKey = "seckill:"+prodid+":stock";
		String userKey = "seckill:"+prodid+":user";
		//Get inventory
		String stock = jedis.get(stockKey);
		//Whether the goods are in stock. If not, the end of the second kill will be displayed
		if(stock==null||Integer.parseInt(stock)<=0){
			jedis.close();
			System.out.println("The second kill is over");
			return "nostock";
		}else if(jedis.sismember(userKey,uid)){//Whether the user has succeeded in the second kill. The user who succeeds in the second kill cannot continue the second kill
			jedis.close();
			System.out.println("The second kill has been completed. You can't kill any more");
			return "havesuccess";
		}
		//If other conditions are normal, the inventory will be reduced by 1, and the id of the user who succeeded in the second kill will be added
		jedis.decr(stockKey);
		jedis.sadd(userKey,uid);
		jedis.close();
		System.out.println("Second kill success");
		return "success";
	}
}
11.4 use transaction + monitoring to solve oversold problems
To monitor the inventory, multiple concurrent users put the second kill process in the transaction. When one of these concurrent users succeeds in the second kill, the inventory will be modified. At this time, due to the role of monitoring, the transactions of other users will be cancelled. As a result, only one of these concurrent users will succeed in the second kill, so the oversold problem is solved.
SecKillController.java
@Controller
public class SecKillController {
    @ResponseBody
    @PostMapping("/doSecKill")
    public String secKill(@RequestParam("prodid") String prodid) throws IOException {
        //Randomly generated userid
        String userid = new Random().nextInt(50000) +"" ;
        String status= SecKill_redis.doSecKill(userid,prodid);
        return status;
    }
}
SecKill_redis.java
public class SecKill_redis {

	private static final  org.slf4j.Logger logger =LoggerFactory.getLogger(SecKill_redis.class) ;

	public static String doSecKill(String uid,String prodid) throws IOException {
		//Use the Redis database connection pool to solve the connection timeout problem.
		//Get database connection pool
		JedisPool jedisPoolInstance = JedisPoolUtil.getJedisPoolInstance();
		//Get Jedis connection
		Jedis jedis = jedisPoolInstance.getResource();

		//Save key to Redis
		String stockKey = "seckill:"+prodid+":stock";
		String userKey = "seckill:"+prodid+":user";

		//Monitor inventory
		jedis.watch(stockKey);

		//Get inventory
		String stock = jedis.get(stockKey);
		//Whether the goods are in stock. If not, the end of the second kill will be displayed
		if(stock==null||Integer.parseInt(stock)<=0){
			jedis.close();
			System.out.println("Second kill failed");
			return "nostock";
		}else if(jedis.sismember(userKey,uid)){//Whether the user has succeeded in the second kill. The user who succeeds in the second kill cannot continue the second kill
			jedis.close();
			System.out.println("The second kill has been completed. You can't kill any more");
			return "havesuccess";
		}

		//Open transaction
		Transaction transaction = jedis.multi();
		//After a transaction is started, the operations to be performed in the transaction are completed by the transaction object
		//If other conditions are normal, the inventory will be reduced by 1, and the id of the user who succeeded in the second kill will be added
		transaction.decr(stockKey);
		transaction.sadd(userKey,uid);
		//Execute transaction
		List<Object> exec = transaction.exec();
		//Judge whether the transaction is executed successfully. The successful execution List contains the execution results of each command, and the failed execution List is empty or size=0
		if(exec==null || exec.size()==0){
			System.out.println("Second kill failed");
			jedis.close();
			return "nostock";
		}

		jedis.close();
		System.out.println("Second kill success");
		return "success";
	}
}

Solved the oversold problem.
However, another problem may occur at this time: inventory legacy.

When the inventory is increased, such as when the inventory is set to 500, after the second kill, the remaining inventory is not 0, but 230.
Only one concurrent process can succeed in the second kill, and other users fail. When the failed process does not continue the second kill, inventory will be left. This is very common in life. For example, there are 5 inventories and 800 requests in total. Every 200 requests is a concurrent process. When 200 concurrent user processes are spike killed, only one spike is successful. At this time, the other 199 users will not continue to spike. If this goes on, only 4 users spike successfully, resulting in one commodity left behind.
Moreover, the second kill realized by using transaction + monitoring is not in line with the reality of life. In the actual second kill, it is each user, whether concurrent or not, whose network speed is fast, who executes the code first, and who succeeds in the second kill. It is impossible to see the situation that the user who kills first fails and the user who kills later succeeds.
11.5 use LUA script to solve inventory leftover problems
-
Lua / Lua is not a powerful script library for embedded application development. However, it is not suitable for C / Lua + + to be used as a script interpreter. On the contrary, it is not suitable for C / Lua + + to provide a complete script. Lua / Lua can also be used as a script interpreter. Many applications and games use Lua as their own embedded scripting language to achieve configurability and scalability. Including Warcraft map, world of Warcraft, Bode's gate, angry birds and many other game plug-ins or plug-ins.
-
Write complex or multi-step redis operations into a Lua script and submit them to redis for execution at one time to reduce the number of repeated connections to redis. Improve performance.
-
Lua script is similar to redis transactions. It has certain atomicity and will not be cut in line by other commands. It can complete some redis transactional operations. However, note that the Lua script function of redis can only be used in redis versions above 2.6.
-
Lua script can be used to solve oversold and inventory problems. In fact, redis uses its single thread feature to solve the problem of multi task concurrency by means of task queue.
SecKill_redisByScript.java: handle second kill logic.
public class SecKill_redisByScript {

	private static final  org.slf4j.Logger logger =LoggerFactory.getLogger(SecKill_redisByScript.class) ;

	static String secKillScript ="local userid=KEYS[1];\r\n" +
			"local prodid=KEYS[2];\r\n" +
			"local stockKey='seckill:'..prodid..\":stock\";\r\n" +
			"local userKey='seckill:'..prodid..\":user\";\r\n" +
			"local userExists=redis.call(\"sismember\",userKey,userid);\r\n" +
			"if tonumber(userExists)==1 then \r\n" +
			"   return 2;\r\n" +
			"end\r\n" +
			"local num= redis.call(\"get\" ,stockKey);\r\n" +
			"if tonumber(num)<=0 then \r\n" +
			"   return 0;\r\n" +
			"else \r\n" +
			"   redis.call(\"decr\",stockKey);\r\n" +
			"   redis.call(\"sadd\",userKey,userid);\r\n" +
			"end\r\n" +
			"return 1" ;

	static String secKillScript2 =
			"local userExists=redis.call(\"sismember\",\"{sk}:0101:usr\",userid);\r\n" +
			" return 1";

	public static String doSecKill(String uid,String prodid) throws IOException {
		//Use the Redis database connection pool to solve the connection timeout problem.
		//Get database connection pool
		JedisPool jedisPoolInstance = JedisPoolUtil.getJedisPoolInstance();
		//Get Jedis connection
		Jedis jedis = jedisPoolInstance.getResource();

		String sha1=  jedis.scriptLoad(secKillScript);

		Object result= jedis.evalsha(sha1, 2, uid,prodid);

		String reString=String.valueOf(result);
		if ("0".equals( reString )  ) {
			System.err.println("Empty!!");
			jedis.close();
			return "nostock";
		}else if("1".equals( reString )  )  {
			System.out.println("Rush purchase succeeded!!!!");
			jedis.close();
			return "success";
		}else if("2".equals( reString )  )  {
			System.err.println("This user has robbed!!");
			jedis.close();
			return "havesuccess";
		}else{
			System.err.println("Panic buying exception!!");
			jedis.close();
			return "false";
		}
	}
}
SecKillController.java
@Controller
public class SecKillController {
    @ResponseBody
    @PostMapping("/doSecKill")
    public String secKill(@RequestParam("prodid") String prodid) throws IOException {
        String userid = new Random().nextInt(50000) +"" ;
        String status= SecKill_redisByScript.doSecKill(userid,prodid);
        return status;
    }
}

The problems of oversold and inventory left over have been solved.