development environment
ubuntu subsystem under Windows
Language c/c++
IDE:vscode
Environment construction
Open the windows subsystem option for Linux
Control panel - > Programs - > enable or disable Window functions - > windows subsystem options for Linux
Download and install Ubantu
In the Window10 version, open the app store and search for ubantu18 04 download and install.
Install ubantu18 04
You will be prompted for your user name and password during installation
Change ubantu18 04 mirror source
Backup: sudo CP / etc / apt / sources list /etc/apt/sources. list. bak
Edit sources List file
18.04 corresponding image source:
deb http://mirrors.aliyun.com/ubuntu/ bionic main restricted universe multiverse
deb-src http://mirrors.aliyun.com/ubuntu/ bionic main restricted universe multiverse
deb http://mirrors.aliyun.com/ubuntu/ bionic-security main restricted universe multiverse
deb-src http://mirrors.aliyun.com/ubuntu/ bionic-security main restricted universe multiverse
deb http://mirrors.aliyun.com/ubuntu/ bionic-updates main restricted universe multiverse
deb-src http://mirrors.aliyun.com/ubuntu/ bionic-updates main restricted universe multiverse
deb http://mirrors.aliyun.com/ubuntu/ bionic-proposed main restricted universe multiverse
deb-src http://mirrors.aliyun.com/ubuntu/ bionic-proposed main restricted universe multiverse
deb http://mirrors.aliyun.com/ubuntu/ bionic-backports main restricted universe multiverse
deb-src http://mirrors.aliyun.com/ubuntu/ bionic-backports main restricted universe multiverse
to update
sudo apt-get update
sudo apt-get upgrade
Install gcc
sudo apt-get install build-essential
Establish soft link of ubuntu file path
Create a new soft link of D / ubuntu files folder under ubuntu
ln -s /mnt/d/UbuntuFiles /home/ubuntu
Then the files stored in the D / Ubuntu files path can be accessed through the soft link Ubuntu files under wsl.
VSCode connection ubuntu subsystem
Open VSCode (which is installed under Window) and download the plug-in Remote - WSL
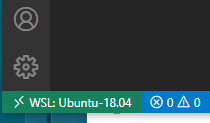
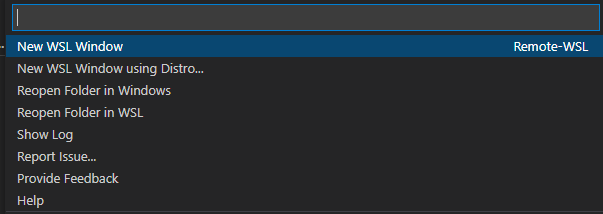
The lower left corner of VSCode will show the subsystems connected by wsl. Click to create a new wsl window
Run the first C language program
Create hellotest c
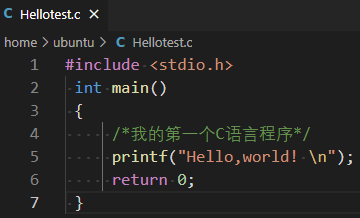
Terminal input GCC hellotest C compilation automatically generates a.out
Terminal input/ a.out execution program
gcc -o test test. The generated file name of C compilation is test

Run the first C + + program
Create main cpp
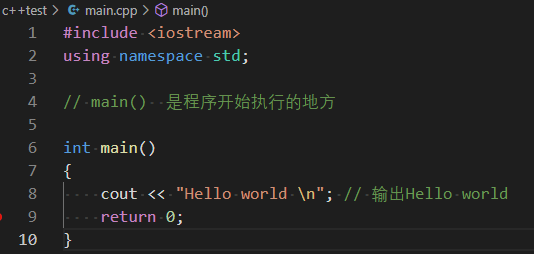
Compile G + + main CPP - O main compile to main
Running program:/ main
Debugging and compiling programs
Compile G + + main CPP - O main or GCC main c -o main
Compile and run: vscode installs the plug-in code runner and right-click run code to run
Debugging: gdb is used for debugging, and breakpoint debugging is available
Compiling using cmake to compile multiple files
Video case tutorial for C/C + + development based on VSCode and Cmake
Video address and program
Video case study link
C/C + + development based on VSCode and CMake | course 7 | source code download
Link: https://pan.baidu.com/s/1quqJFgyF4alAQSXaRWGiWg
Extraction code: bing
Compiling using cmake to compile multiple files
Create cmakelist Txt, set according to the contents of the project file.
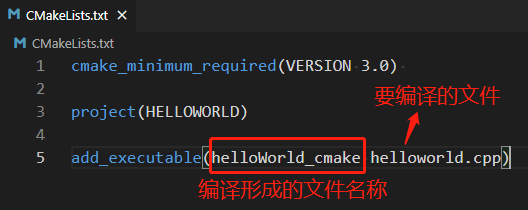
Click the build button in the Cmake column below to compile, and the generated compiled file is in the build folder
Or compile manually from the command line of your own terminal: create a new build folder, and enter cmake.., under the build path, Then enter make
Run the compiled file/ helloword_cmake
Debug and set launch JSON and task JSON file. Automatic compilation before debugging
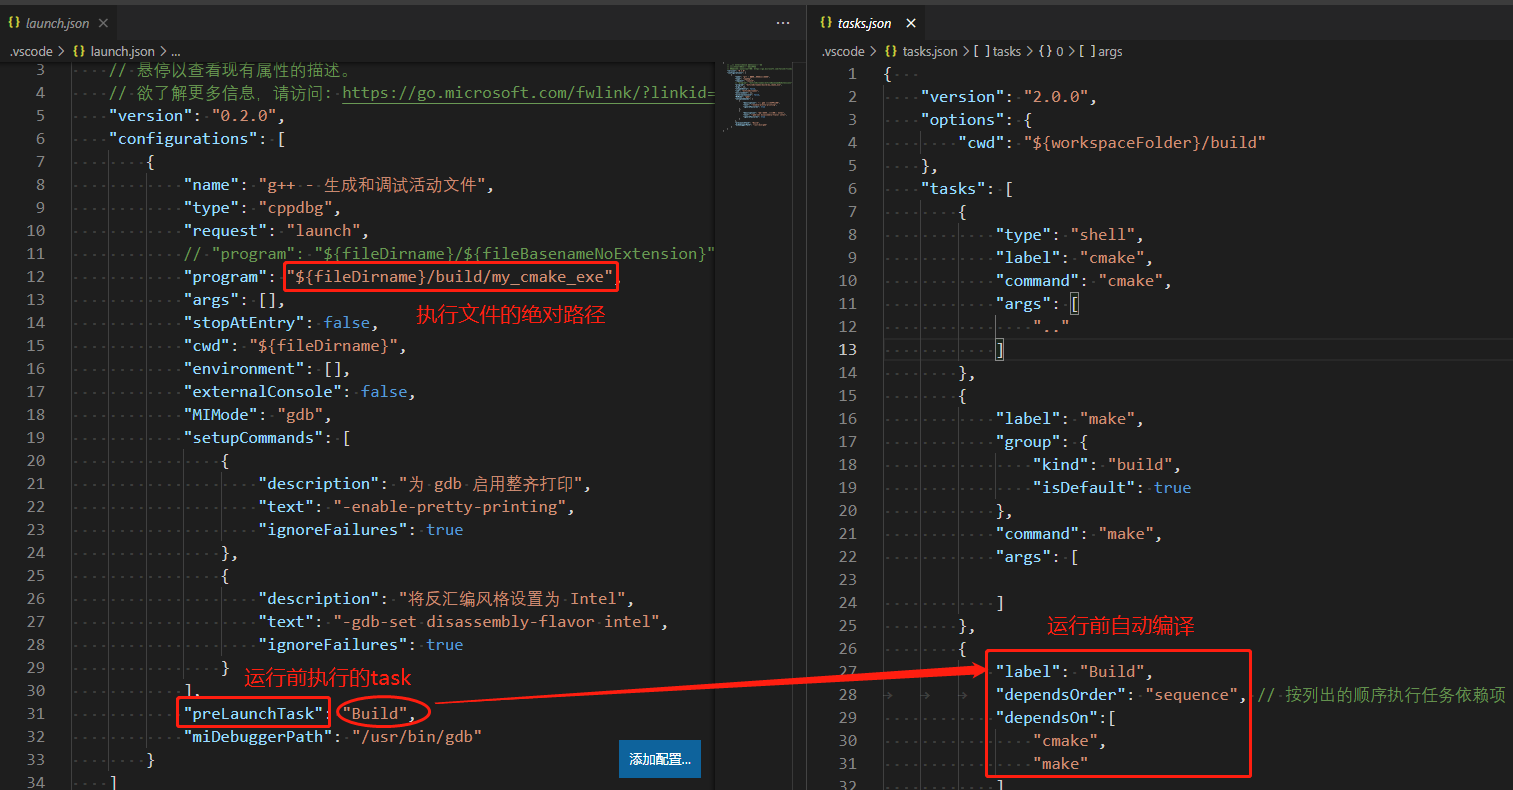
Ubuntu common instructions
cd pathname open path
cd... Go back to the previous directory
cd ~ return to home directory
Files in ls directory
rm delete file name