In this series, let's introduce ArcGIS Pro SDK for Microsoft Net, this is the third article in this series. After we re create a project demo, we can customize the system interface layout and menu.
Write in front
The previous article introduced ArcGIS Pro SDK for Microsoft Net development environment, and we added our own login interface for the demo we created, but the login logic in it did not give you a detailed introduction, because those things actually belong to the knowledge of WPF programming and have little to do with Pro SDK. In this article, let's introduce how to use ArcGIS Pro SDK for Microsoft Net development process, for our new project demo system layout, and add the corresponding menu options.
Operation steps
1. Re create a project demo by creating a demo in the first article, and then select an existing Pro project engineering file after starting the project. After entering, the default system layout of the project system is as follows:
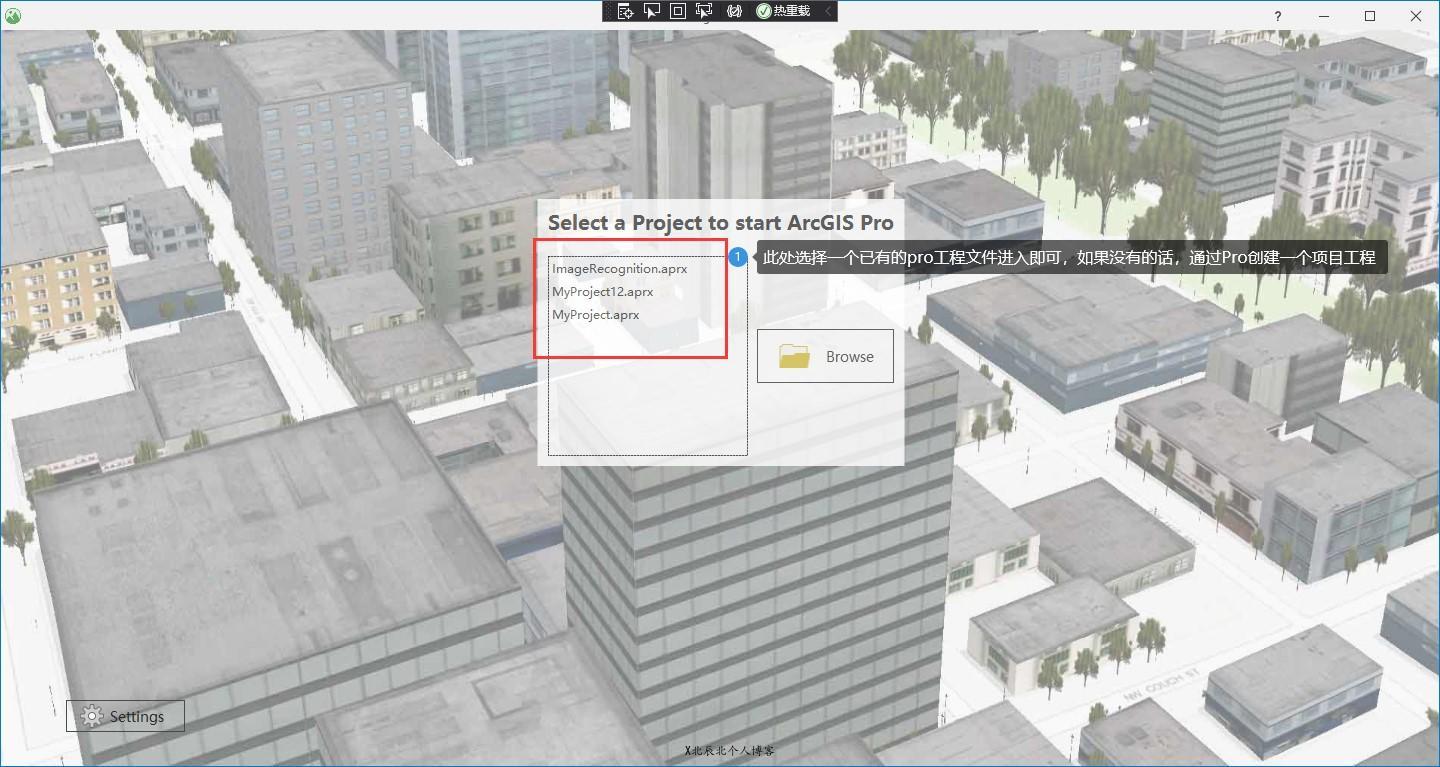
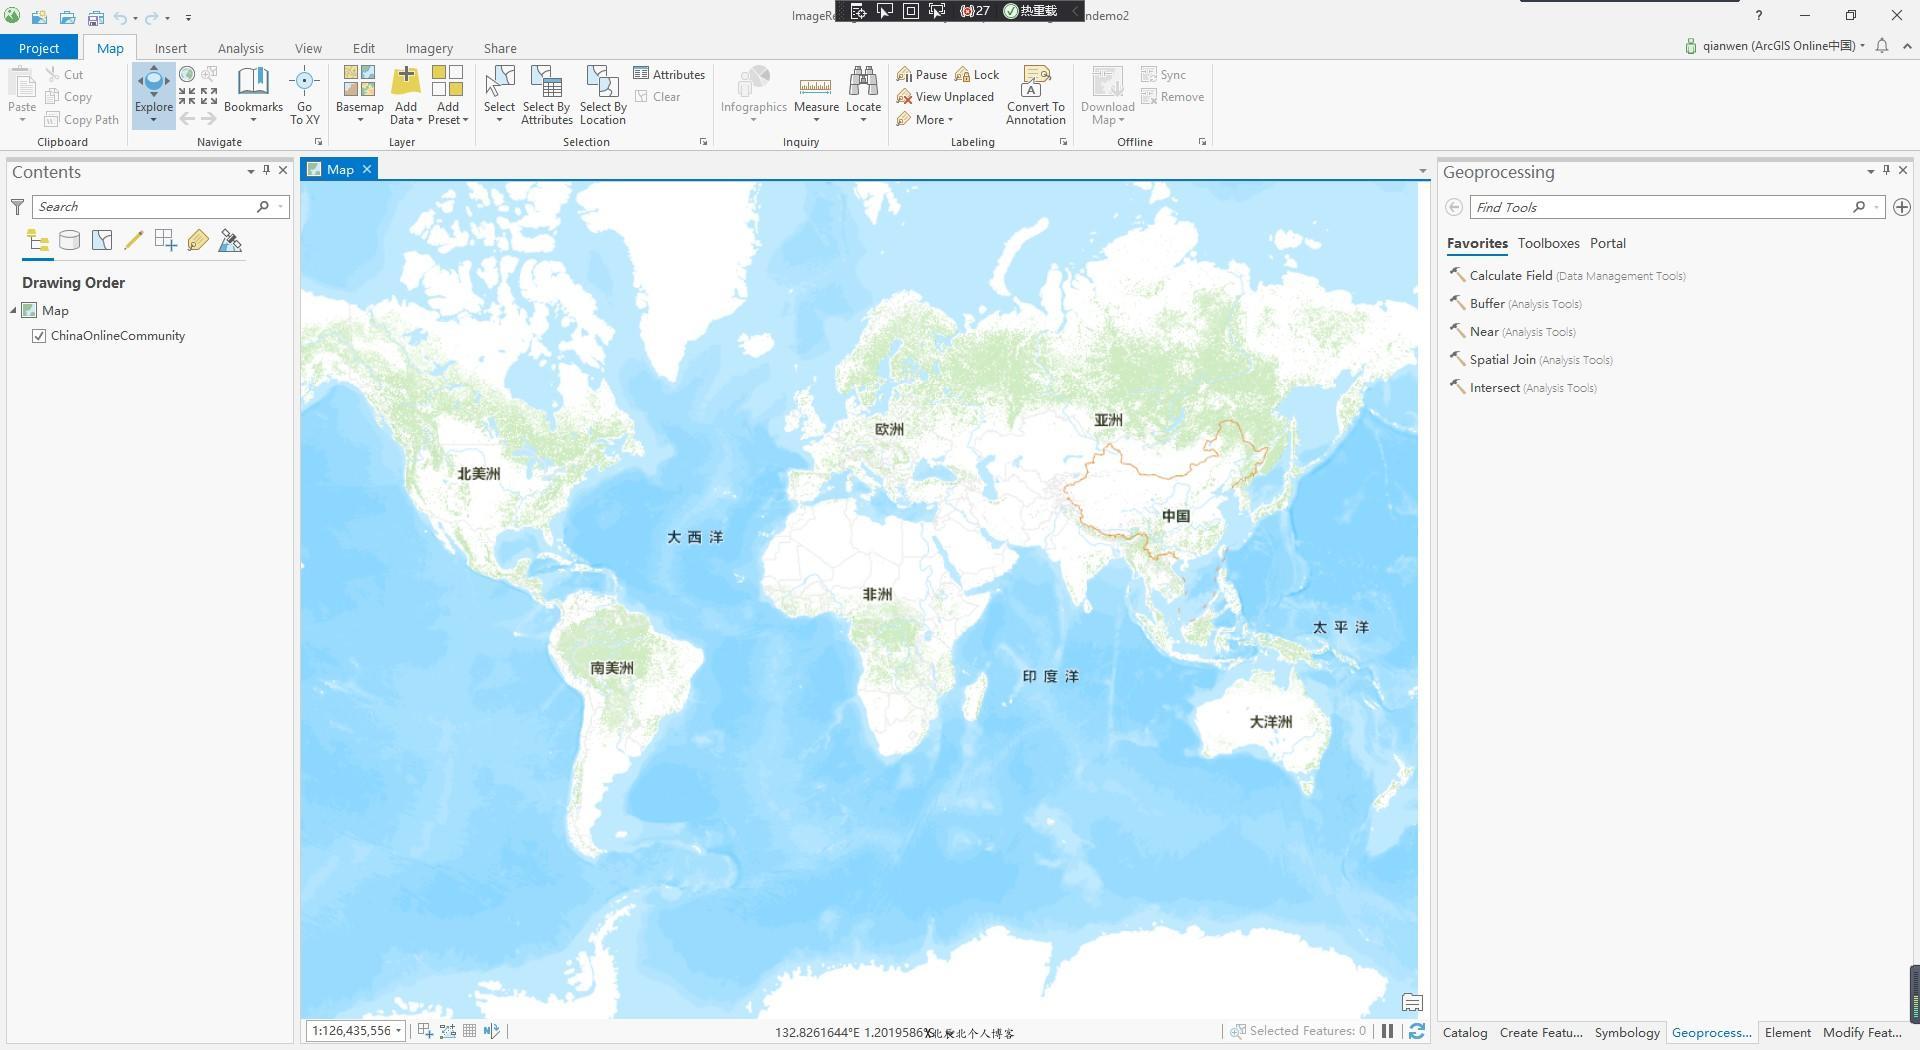
The above system layout is very familiar to the partners who have used ArcGIS Pro. This is the layout of Pro software. It just changes a favicon icon in the upper left corner and replaces the original Pro icon with a green circular icon after the project demo is created.
The next thing we need to do is to change the default layout of Pro. It is mainly to remove all menu items in the top menu bar and add our customized menus, but we will not change other layouts, such as the content panel on the left, the map area panel in the middle, the tool panel on the right, etc. the customization of these panels will be introduced in our subsequent articles.
2. Then, under the root directory of the project, configure Manager1 Rewrite the OnUpdateDatabase method in the. CS file. The specific implementation code of this method is as follows:
#region Override DAML Database
        protected override void OnUpdateDatabase(XDocument database)
        {
            var nsp = database.Root.Name.Namespace;
            // select all elements that are tabs
            var tabElements = from seg in database.Root.Descendants(nsp + "tab") select seg;
            // collect all elements that need to be removed
            var elements = new HashSet<XElement>();
            foreach (var tabElement in tabElements)
            {
                // skip root and backstage elements
                if (tabElement.Parent == null
                    || tabElement.Parent.Name.LocalName.StartsWith("backstage"))
                    continue;
                var id = tabElement.Attribute("id");
                if (id == null) continue;
                elements.Add(tabElement);
            }
            // remove the elements
            foreach (var element in elements)
            {
                element.Remove();
            }
        }
#endregion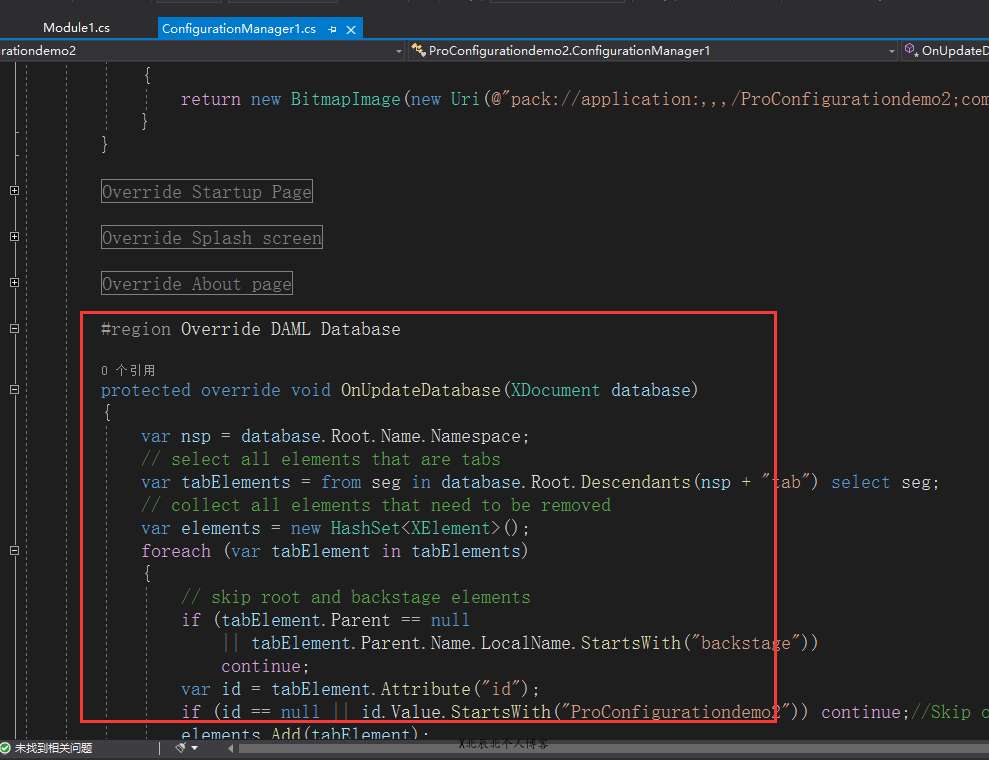
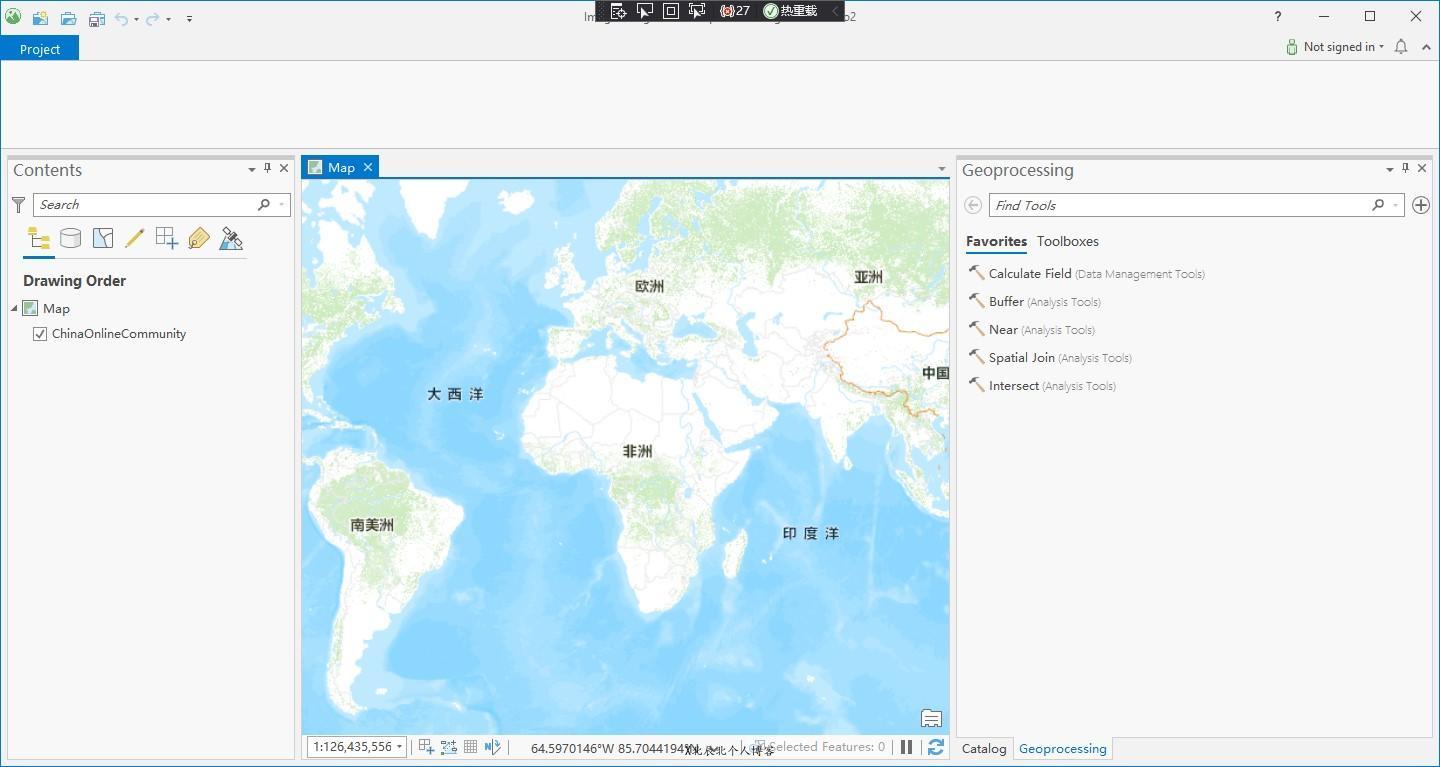
3. When you start the project, we will find that the menu bar has been cleared, as follows:
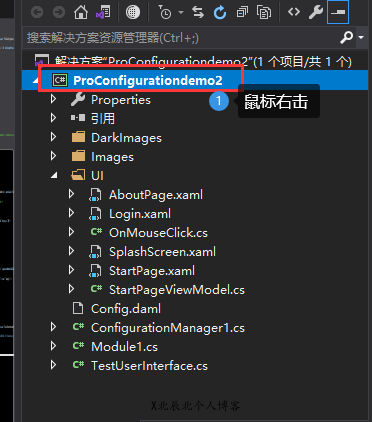
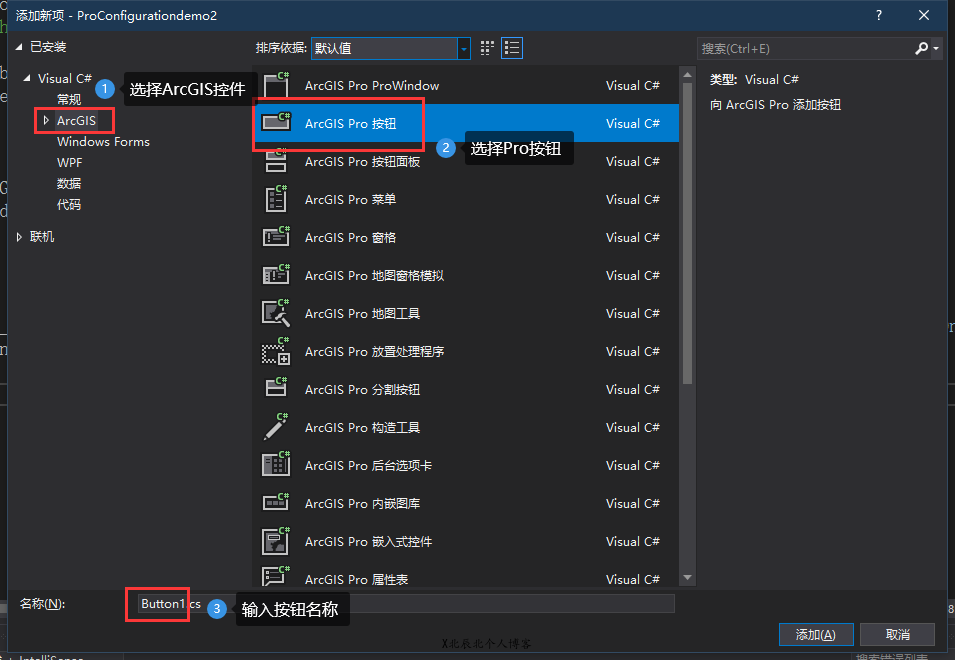
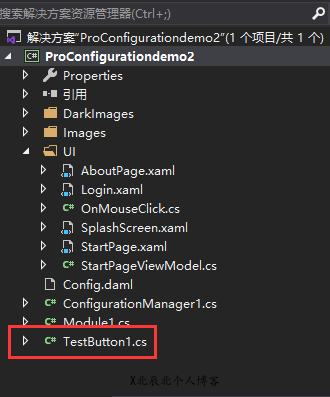
4. Next, we add a menu button. First, right-click the project root directory in VS, select [add | new item | ArcGIS Pro button], and then enter a button name. At this time, you will find that a cs code file named after the button name will be created under your project root directory, as follows:
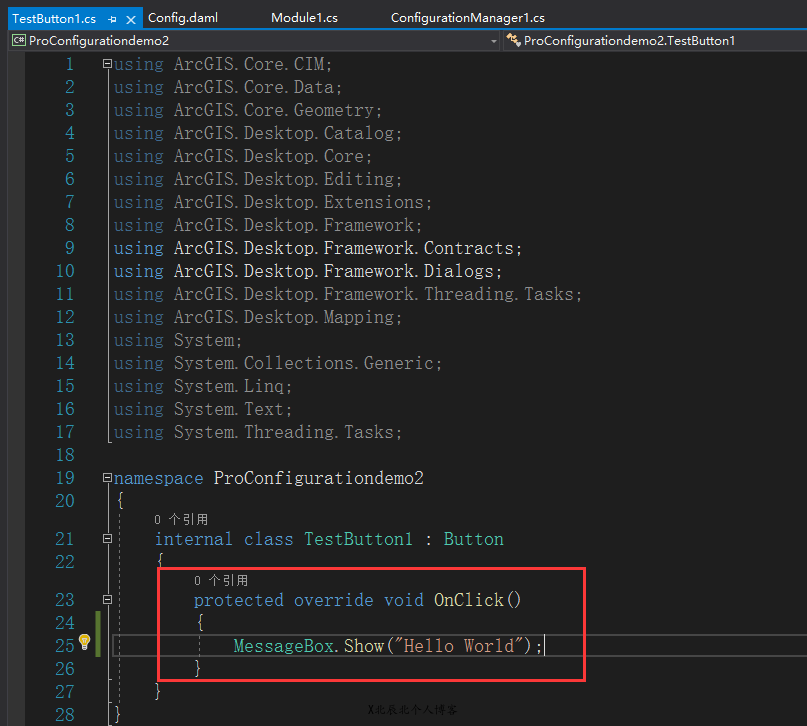
5. Then, in the cs code of the generated button file, find the button click event and add the following code. The code means that when the user clicks this button, a pop-up window containing "Hello World" will pop up:
6. Return to configurationmanager1 CS file, we replace the subordinate code in the OnUpdateDatabase method with the following code:
//Original code
protected override void OnUpdateDatabase(XDocument database)
{
   ...
   foreach (var tabElement in tabElements)
   {
      ...
      if (id == null) continue;


//Replaced code
protected override void OnUpdateDatabase(XDocument database)
{
   ...
   foreach (var tabElement in tabElements)
   {
      ...
      if (id == null || id.Value.StartsWith("MyConfiguration")) continue;//Skip our tabs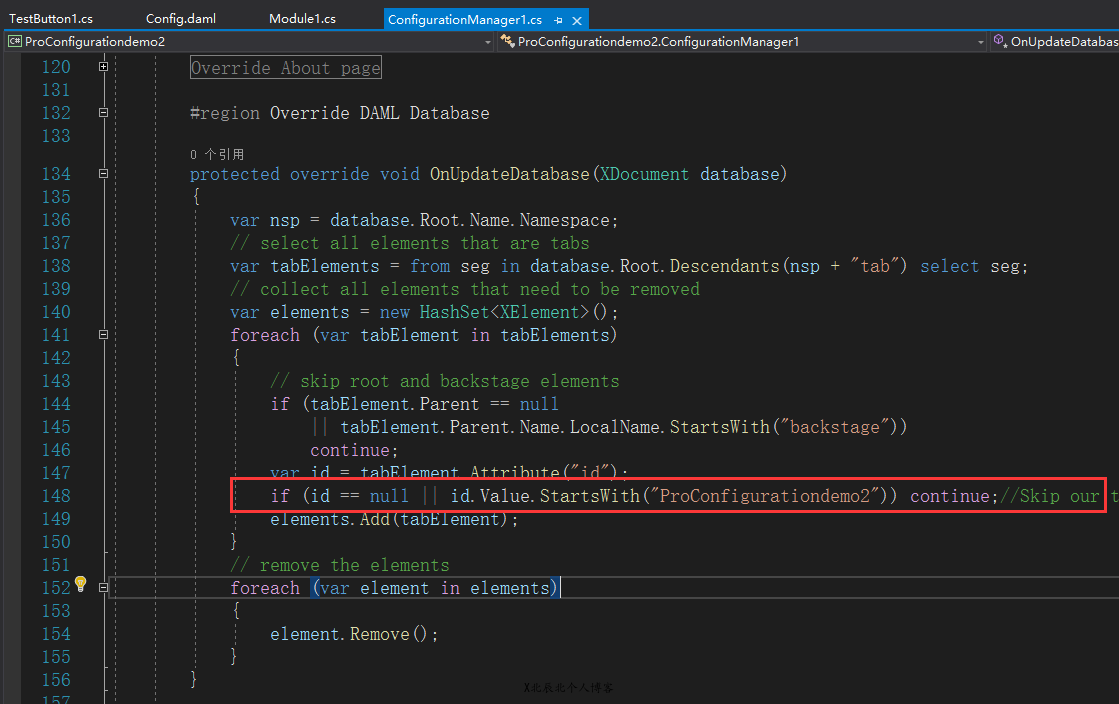
As can be seen from the above figure, it is actually the line of code that replaces 148 lines.
7. Open config. In the root directory of the project DAML file, let's organize the display mode of the menu. The final code is as follows:
<ArcGIS defaultAssembly="ProConfigurationdemo2.dll" defaultNamespace="ProConfigurationdemo2" xmlns="http://schemas.esri.com/DADF/Registry" xmlns:xsi="http://www.w3.org/2001/XMLSchema-instance" xsi:schemaLocation="http://schemas.esri.com/DADF/Registry file:///C:/Program%20Files/ArcGIS/Pro/bin/ArcGIS.Desktop.Framework.xsd">
  <AddInInfo id="{4730c594-cc37-48de-ac91-e94536cbb3a3}" version="1.0" desktopVersion="2.5.22081">
    <Name>ProConfigurationdemo2</Name>
    <Description>ProConfigurationdemo2 description</Description>
    <Image>Images\AddinDesktop32.png</Image>
    <Author>esri</Author>
    <Company>Acme</Company>
    <Date>2020/11/13 14:11:11, 2020</Date>
    <Subject>Framework</Subject>
    <!-- Note subject can be one or more of these topics:
                    Content, Framework, Editing, Geodatabase, Geometry, Geoprocessing, Layouts, Map Authoring, Map Exploration -->
  </AddInInfo>
  <Configuration>
    <ConfigurationManager className="ConfigurationManager1" />
  </Configuration>
  <modules>
    <insertModule id="ProConfigurationdemo2_Module" className="Module1" autoLoad="false" caption="Module1">
      <!-- uncomment to have the control hosted on a separate tab-->
      <tabs>
        <tab id="ProConfigurationdemo2_Tab1" caption="Test UI Tab" keytip="Z0">
          <group refID="ProConfigurationdemo2_Group1" />
        </tab>
      </tabs>
      <groups>
        <group id="ProConfigurationdemo2_Group1" caption="Group 1" appearsOnAddInTab="false" keytip="Z1">
          <button refID="ProConfigurationdemo2_TestButton1" size="large" />
        </group>
      </groups>
      <controls>
        <!-- add your controls here -->
        <button id="ProConfigurationdemo2_TestButton1" keytip="Z3" caption="Test button" className="TestButton1" loadOnClick="true" smallImage="pack://application:,,,/ArcGIS.Desktop.Resources;component/Images/GenericButtonBlue16.png" largeImage="pack://application:,,,/ArcGIS.Desktop.Resources;component/Images/GenericButtonBlue32.png">
          <tooltip heading="Tooltip Heading">Tooltip text<disabledText /></tooltip>
        </button>
      </controls>
    </insertModule>
  </modules>
</ArcGIS>
The useful code in the above code is the code between 16 lines and 36 lines. The package level of the code fragment in the middle is actually the menu package level during the development of Pro SDK. The simple understanding is: tab - > Group - > button. In addition, there are more detailed package levels. For details, please check the API on the official website of Pro SDK.
8. Run the project, and the final project is as follows:

Points needing attention:
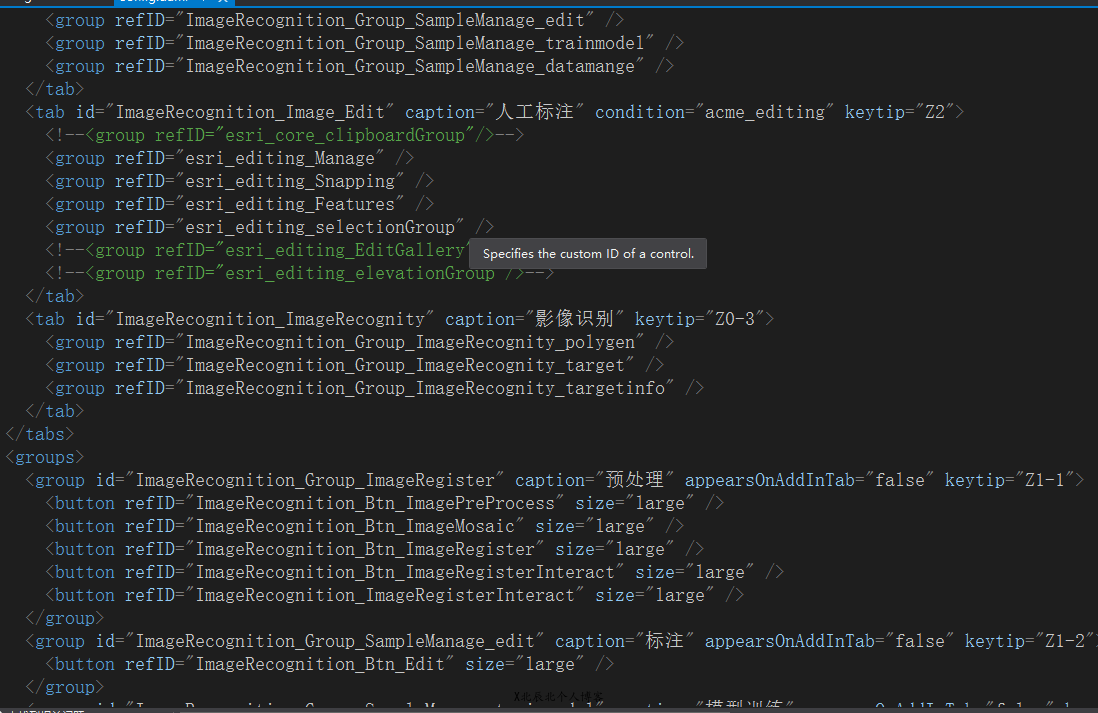
1. In the above rendering, you can see that there is only one tab, one group and one button. If you want to have more than one, directly in config These tags can be nested in the DAML file, such as the following:
2. After the button is added, the default icon is actually the default icon in the Pro SDK package, which is a blue rectangular box. If you want to change it, you can download 16X16 and 32X32 pixel icon files yourself, then right-click the Images directory under the project root directory in VS, and select [add existing items] in turn, Then select the icon you downloaded and load it into the Images file directory. Finally, click the icon file in the Images directory and change its "generation operation" to "AddInContent", as follows:
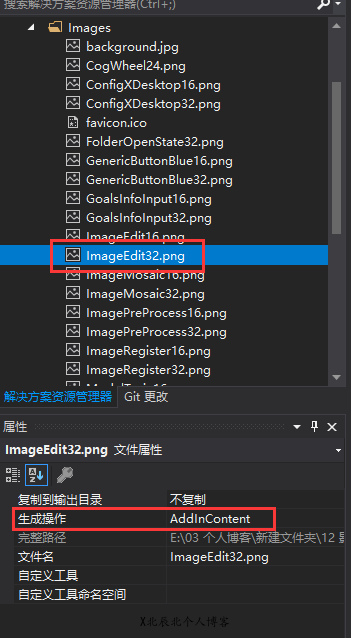
If you don't follow the above operation, you can directly download the icon to the Images file, and then you can't see the icon file in VS. you need to add it manually as in the above process. Finally, on the Button, change the icon address attribute to the Images directory, as follows:
<button id="ImageRecognition_Btn_ImageMosaic" caption="Image mosaic" keytip="Z2-2" className="ImageMosaic" loadOnClick="true" smallImage="Images/ImageMosaic16.png" largeImage="Images/ImageMosaic32.png">
<tooltip heading="Tooltip Heading">Tooltip text<disabledText /></tooltip>
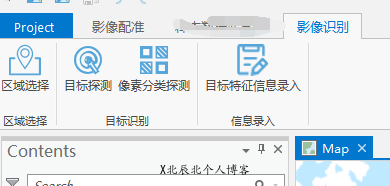
</button>smallImage and largeImage attributes are attributes that control the icon address. The final effect is similar to the following:
3. When adding a click event to the menu button, be sure to right-click the project root directory in VS and select [add | new item | ArcGIS Pro button] to operate, and then drag the corresponding button click file to other file directories. If you right-click the Add button file directly under other file directories at the beginning, the problem that the button click event cannot be triggered when clicking the button will appear. This may involve the namespace of relevant code files, which has not been studied too much here.
4. If you want to click a menu button and directly open the tool panel of ArcToolBoxes in Pro on the right panel of the project system, you can directly add the following code to the button click event:
protected override void OnClick()
        {
            //MessageBox.Show("sample export");
            string input_points = "";
            string output_polys = "";
            //string buffer_dist = "2000 Meters";
            var param_values = Geoprocessing.MakeValueArray(input_points, output_polys);
            Geoprocessing.OpenToolDialog("ia.ExportTrainingDataForDeepLearning", param_values);
        }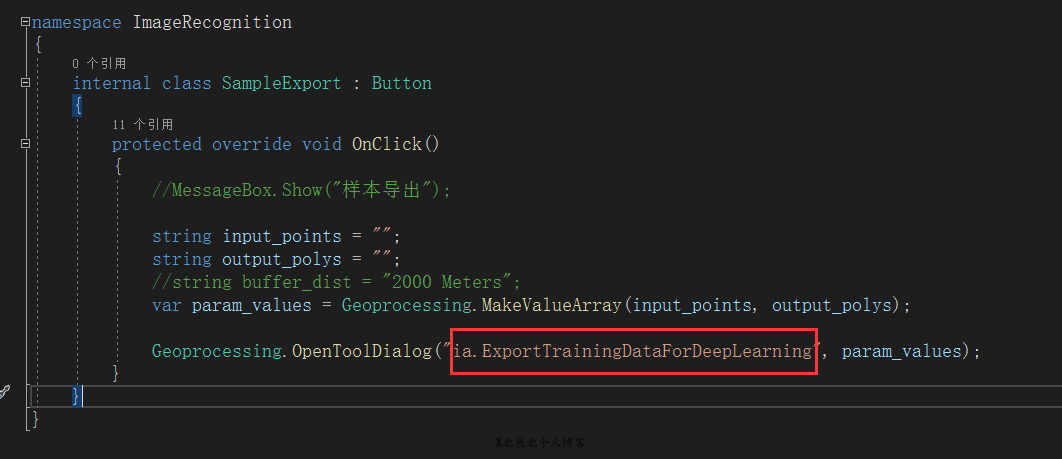
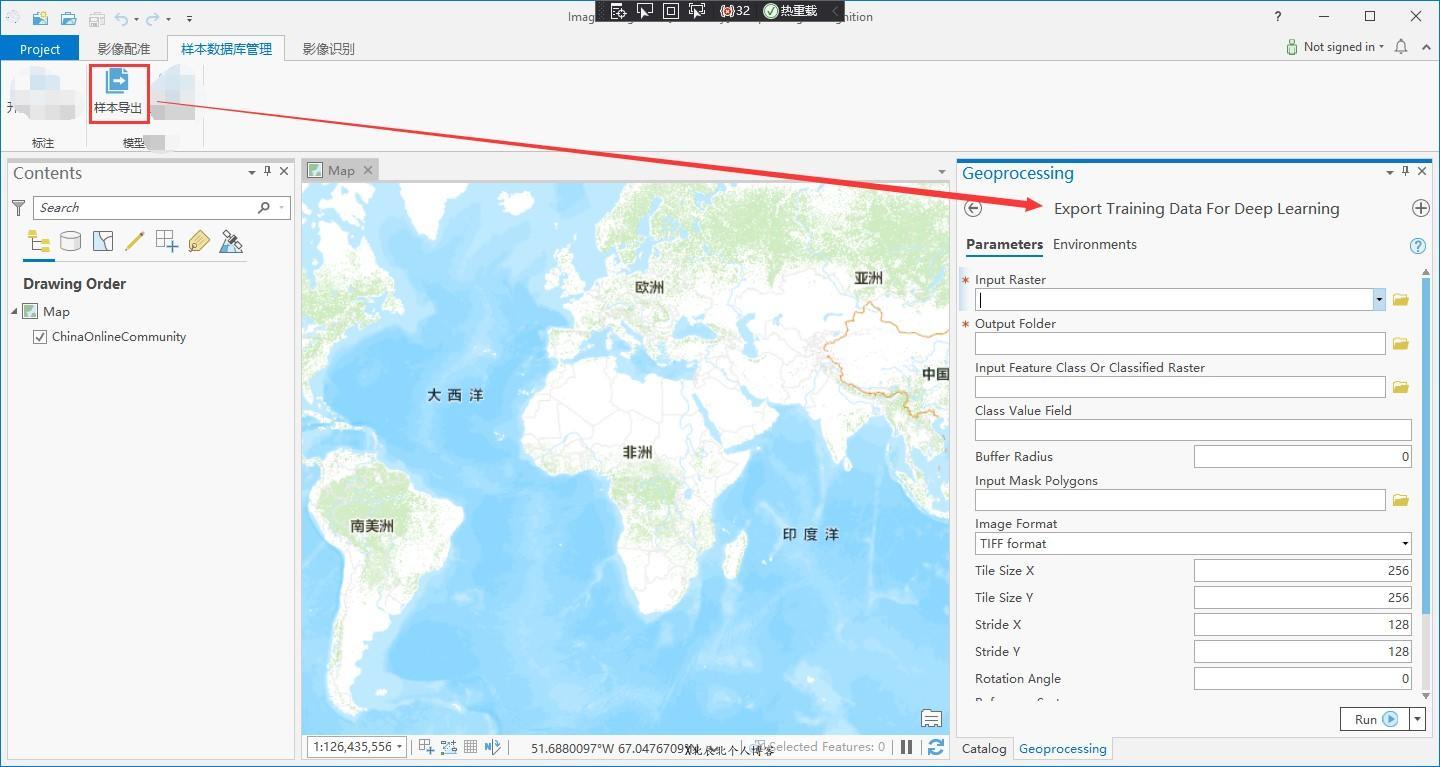
The box selection part in the above code is actually the specific tool name in ToolBoxes. The format is [tool directory abbreviation] [tool specific name], such as the above code, opens the exporttrainingdatafordeeplearning tool under image analyst. The final result is as follows:
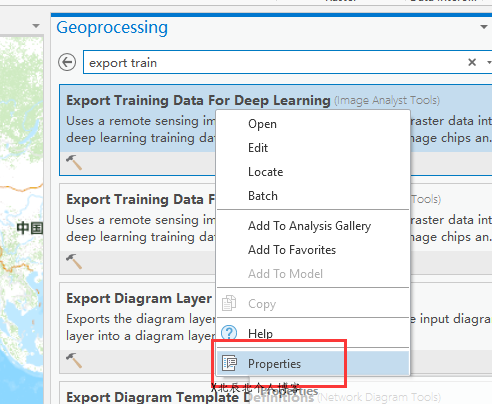
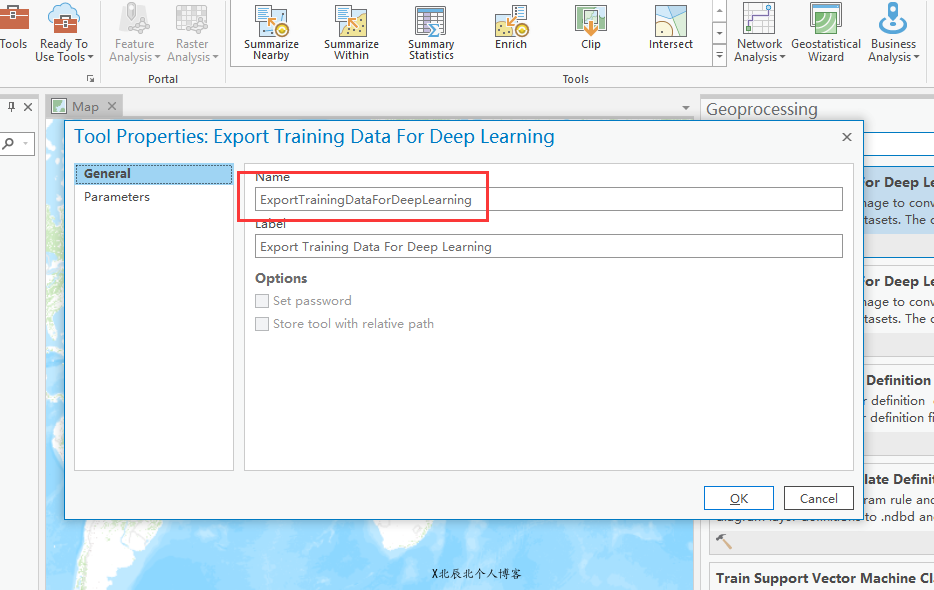
How to find the tool Name: after finding the specific tool in Pro, right-click to open the tool property panel, as follows:
5. The specific operation steps of Pro SDK are as follows:
1,customized Pro Menu panel:
https://github.com/esri/arcgis-pro-sdk/wiki/ProGuide-Configurations
https://github.com/esri/arcgis-pro-sdk/wiki/ProGuide-Ribbon-Tabs-and-Groups
2,Automatic code activation ToolBoxes Tools in:
https://github.com/esri/arcgis-pro-sdk/wiki/ProConcepts-Geoprocessing#open-the-tool-dialog-in-the-geoprocessing-pane