A simple classification training is carried out on the jetson nano development board
1. jetson inference Library Download, compilation and simple use
Here please refer to:
Github: https://github.com/dusty-nv/jetson-inference
Gitee: https://gitee.com/jinwei_1/jetson-inference#https://www.youtube.com/watch?v=QXIwdsyK7Rw&list=PL5B692fm6–uQRRDTPsJDp4o0xbzkoyf8&index=9
The description is quite detailed and specific. It is recommended to follow the link to go through the process.
2. Implementation of transfer learning training on jetson nano
(1) Create swap space for jetson nano to transfer training
sudo fallocate -l 4G /mnt/4GB.swap

sudo mkswap /mnt/4GB.swap

sudo swapon /mnt/4GB.swap
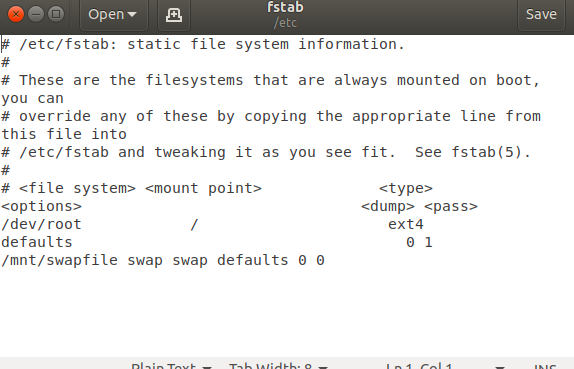
sudo gedit /etc/fstab
Add a line at the end
/mnt/4GB.swap none swap sw 0 0
(2) Create files and labels
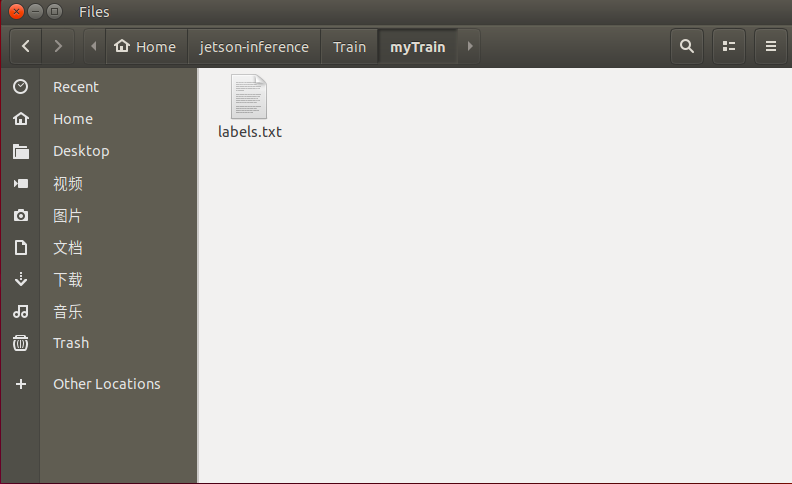
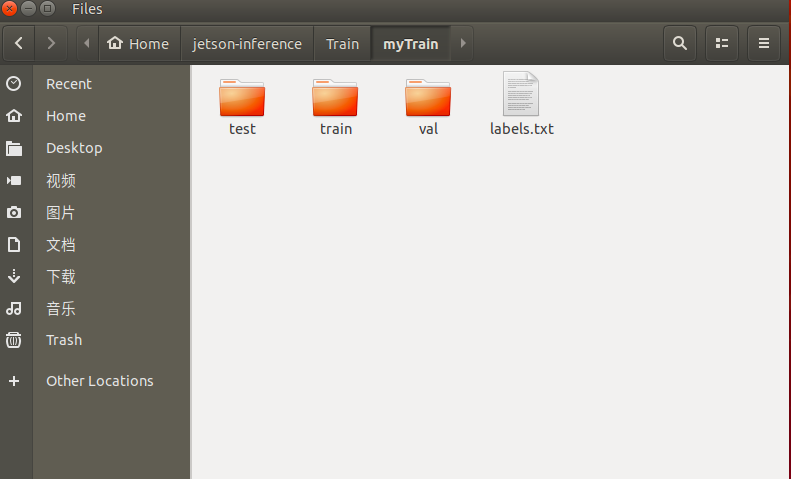
 cd jetson-inference
 #Create a directory for storing datasets and labels
 mkdir Train/myTrain
#Create a training tag file in the myTrain Directory:
 gedit labels.txt
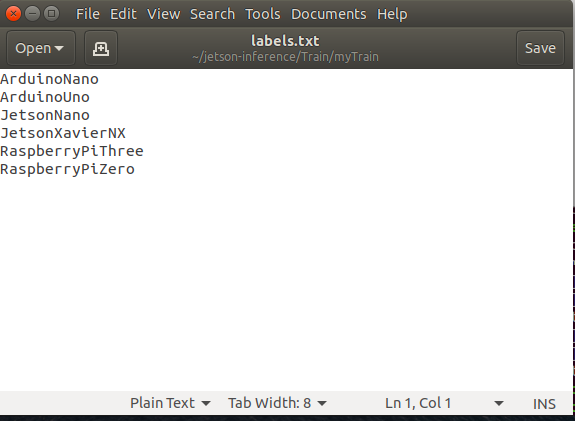
labels.txt file stores the label characters we need to classify. Here I want to do a classification training
: it is mainly divided into six categories: ArduinoNano
ArduinoUno
JetsonNano
JetsonXavierNX
RaspberryPiThree
RaspberryPiZero
Distinguish six development boards by training
So my labels Txt file is as follows:
Save labels Txt file
(3) Collection of data sets
Start to enter the directory and start the camera capture tool to collect data sets
cd /jetson-inference/tools
#Start the camera capture tool
camera-capture --width=800 --height=600 --camera=/dev/video0
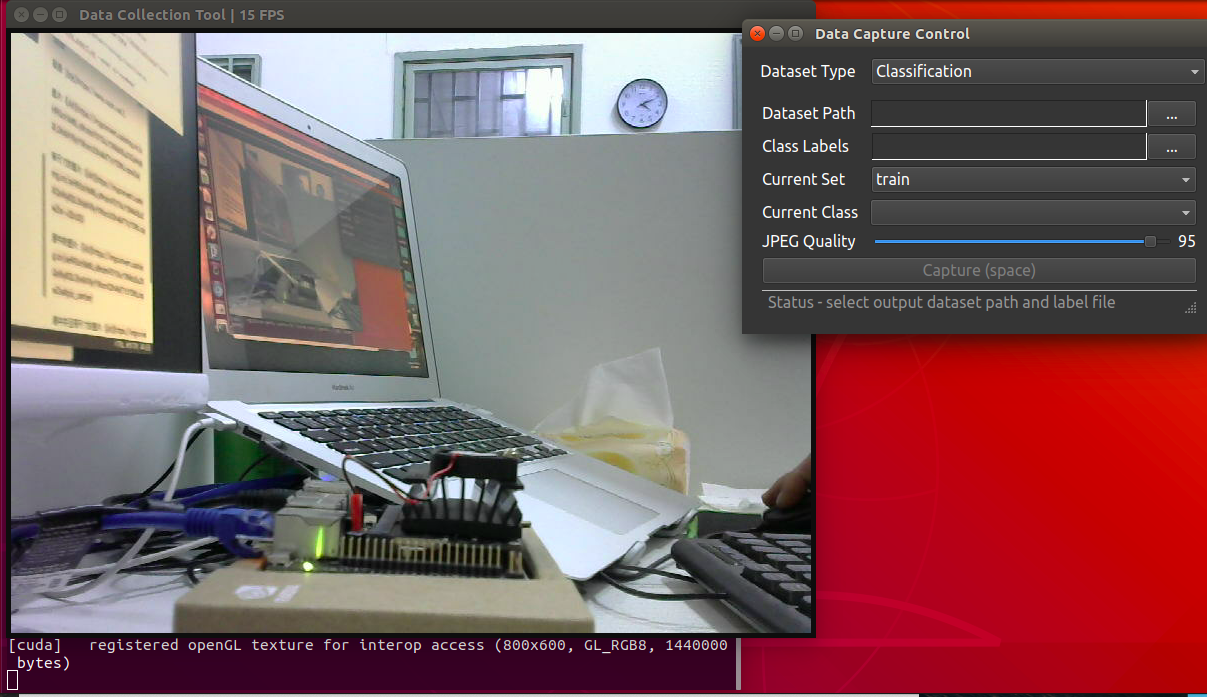
After opening the camera capture program, test, train and val will be automatically created in the myTrain directory we created, and the test set, training set and verification set will be stored respectively.
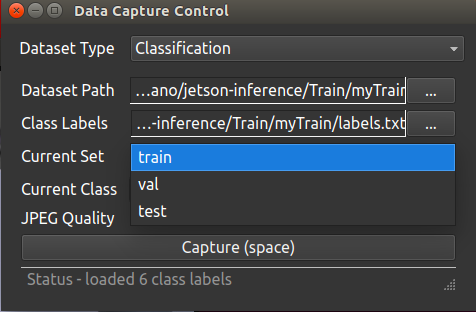
The capture control panel in the upper right corner is an option for us to use the camera to collect data:
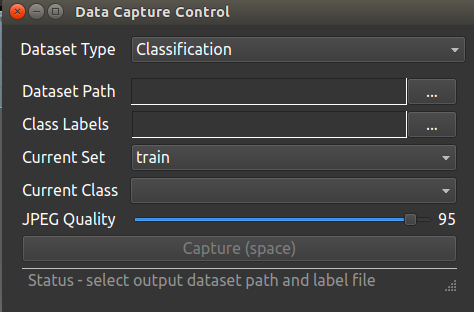
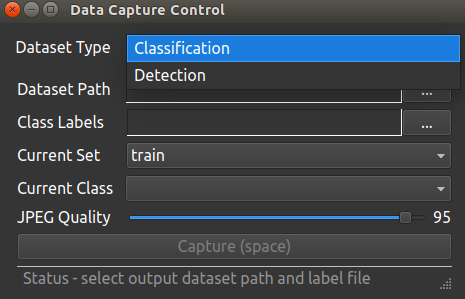
There are two options for the Dataset Type data setting type: classification and detection. Here we make a classification of six categories according to the training choices we want to make, so select classification - > calibration
Dataset Path: the data path is the package file we just created to store data labels (according to our actual situation). My directory is: / Jetson information / tain / mytrain
Class Labels: classification labels, which are created by us Txt file. My directory is: / Jetson information / tain / mytrain / labels txt
Current Set: training category selection, which is the collection category of our three data sets. The drop-down box has three options: train, test, Val ----- > training, test and verification
Current Class: for the Current Class, we do the classification training of six development boards, so there are six options in the drop-down box:
ArduinoUno
JetsonNano
JetsonXavierNX
RaspberryPiThree
RaspberryPiZero
After filling in, it is as follows:
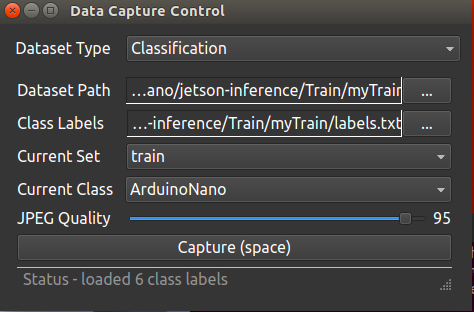

At this time, we select a training category and a label for camera image acquisition:
When collecting pictures, try to use a relatively single background color. From different angles, press the spacebar space to take pictures and collect about 100 train training set pictures, 20 val verification sets and 5 test sets (here are three kinds of samples, according to their own situation, do a small training here, the progress is OK, and the data set collection is not so large); Then change the category and do it separately
ArduinoNano
ArduinoUno
JetsonXavierNX
RaspberryPiThree
RaspberryPiZero
Collection of

(4) Start migration training
After data collection, start migration training:
Training model:
#Enter the training category directory:
cd jetson-inference/python/training/classification
#After running, the myModel folder will be created in the classification, and the training model data will be generated under this folder.
python3 train.py --model-dir=myModel ~/jetson-inference/Train/myTrain
Here is an explanation for the second command line:
--Model dir = myModel generate a model file in the current classification directory and name myModel
~/Jetson information / trains / mytrain is the path to our dataset
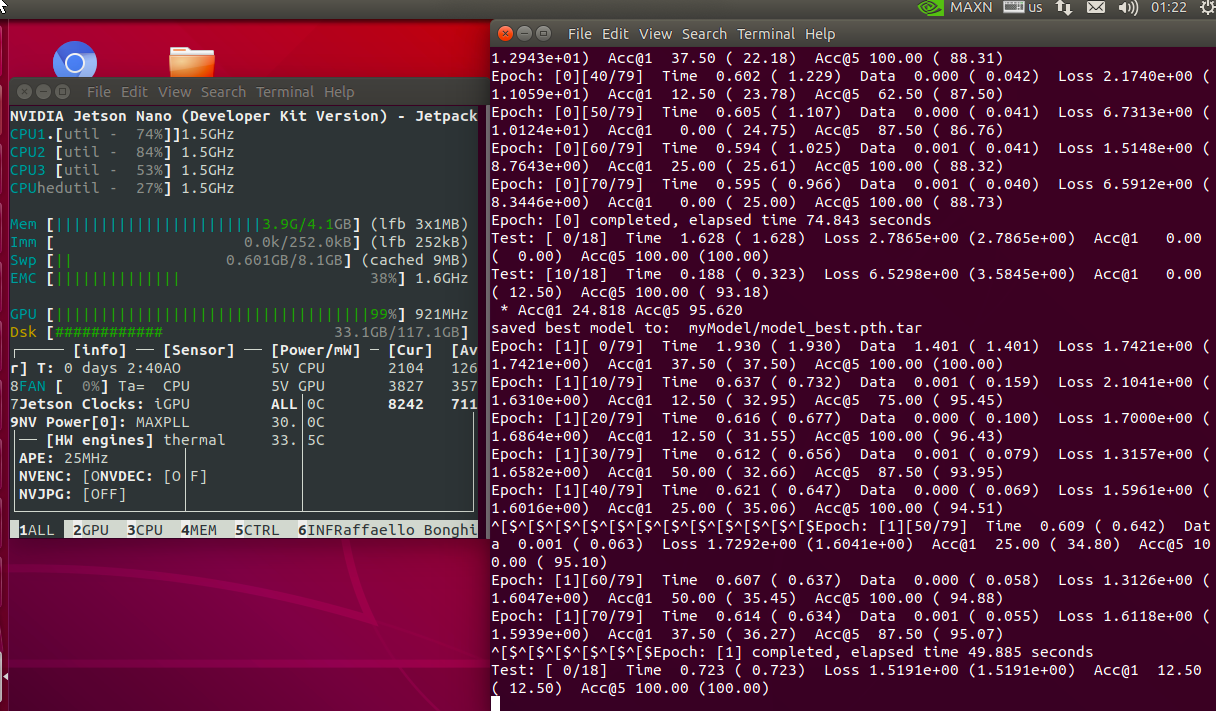
The training takes about 10 minutes. The training is a squeeze on the performance of the jetson nano. There may be a warning of insufficient memory, which requires us to exchange space at the beginning.
(5) Export the model of successful training
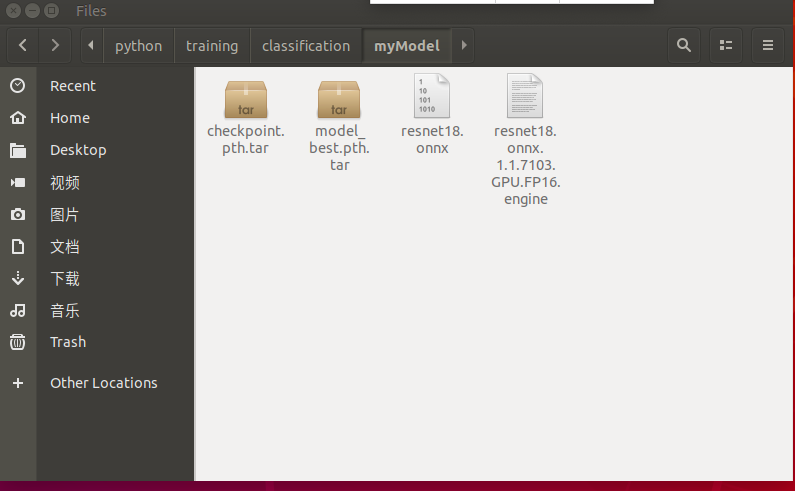
After training, export the model to myModel directory
cd jetson-inference/python/training/classification

python3 onnx_export.py --model-dir=myModel

Export succeeded:

At this point, our model file is in the directory:
3. Test training results
python introduces its own training model and key code. Add your own training model, add an array after pre training, and add your own model label
net=jetson.inference.imageNet('alexnet',['--model=/home/nano/jetson-inference/python/training/classification/myModel/resnet18.onnx','--input_blob=input_0','--output_blob=output_0','--labels=/home/nano/jetson-inference/myTrain/labels.txt'])
import jetson.inference
import jetson.utils
import cv2
import numpy as np
import time
width=1280
height=720
dispW=width
dispH=height
flip=2

#Here's how to use the nano onboard camera
#camSet='nvarguscamerasrc !  video/x-raw(memory:NVMM), width=3264, height=2464, format=NV12, framerate=21/1 ! nvvidconv flip-method='+str(flip)+' ! video/x-raw, width='+str(dispW)+', height='+str(dispH)+', format=BGRx ! videoconvert ! video/x-raw, format=BGR ! videobalance  contrast=1.5 brightness=-.3 saturation=1.2 ! appsink  '
#cam1=cv2.VideoCapture(camSet)

#The usb camera we use here
cam1=cv2.VideoCapture('/dev/video0')
#cam1.set(cv2.CAP_PROP_FRAME_WIDTH,dispW)
#cam1.set(cv2.CAP_PROP_FRAME_HEIGHT,dispH)

#Add your own training model, add array after pre training, and add your own model label!!
net=jetson.inference.imageNet('alexnet',['--model=/home/nano/jetson-inference/python/training/classification/myModel/resnet18.onnx','--input_blob=input_0','--output_blob=output_0','--labels=/home/nano/jetson-inference/myTrain/labels.txt'])
#Font settings
font=cv2.FONT_HERSHEY_SIMPLEX
timeMark=time.time()
fpsFilter=0

#The following is opencv processing
while True:
    _,frame=cam1.read()
    img=cv2.cvtColor(frame,cv2.COLOR_BGR2RGBA).astype(np.float32)
    img=jetson.utils.cudaFromNumpy(img)
    classID, confidence =net.Classify(img, width, height)
    item=''
    item =net.GetClassDesc(classID)
    dt=time.time()-timeMark
    fps=1/dt
    fpsFilter=.95*fpsFilter +.05*fps
    timeMark=time.time()
    cv2.putText(frame,str(round(fpsFilter,1))+' fps '+item,(0,30),font,1,(0,0,255),2)
    cv2.imshow('recCam',frame)
    cv2.moveWindow('recCam',0,0)
    if cv2.waitKey(1)==ord('q'):
        break
cam.releast()
cv2.destroyAllWindows()
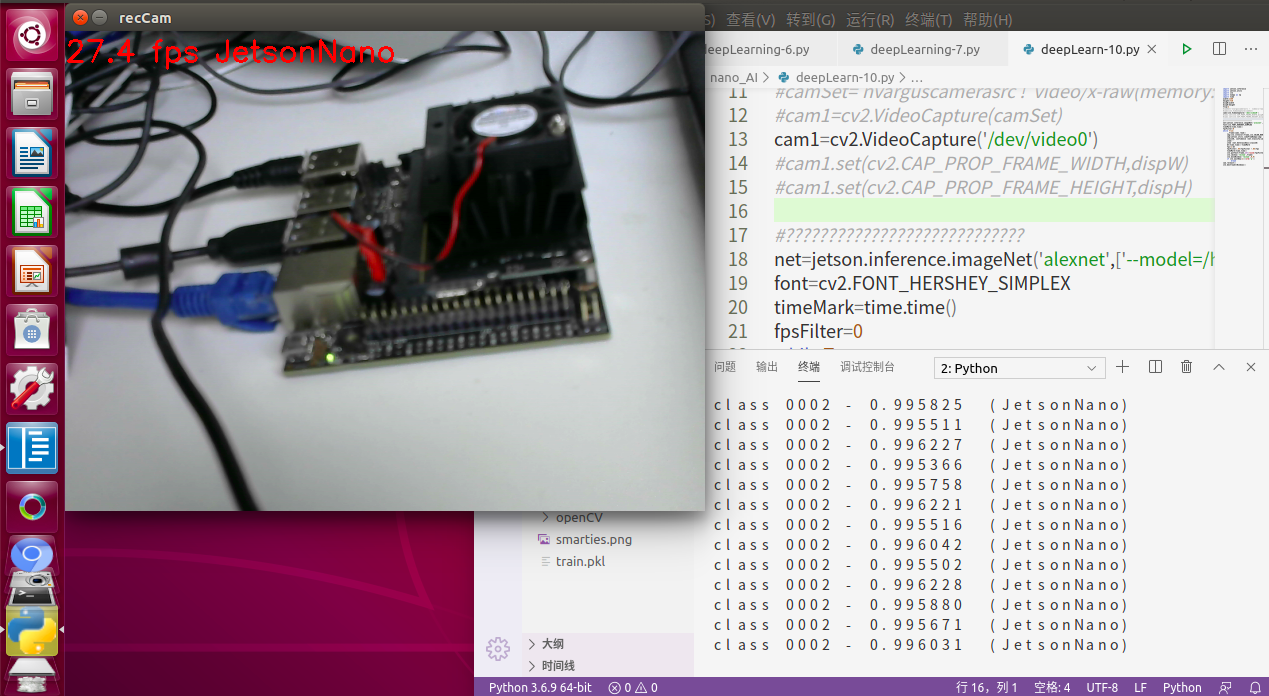
Here we can successfully identify our jetson nano. Hey, just play!
Ha ha, if you love technology as much as I do, please pay attention to me and explore the mystery of technology together.
No matter what, the truth is infinite, there is further joy!
jetson nano video learning link: https://www.youtube.com/playlist?list=PLGs0VKk2DiYxP-ElZ7-QXIERFFPkOuP4_