summary
The data of the Web application will be stored on the cloud side, and the data will not be cached locally. During data management, you will directly operate cloud side data. The Web SDK will guarantee the communication and communication security between your application and cloud database.
This sample application demonstrates how to quickly use Cloud DB to build a simple library management service. Through the quick start and sample applications, you will learn the following information:
-
How to use Cloud DB for application development.
-
How application data is written to Cloud DB.
-
How to realize data query.
-
Listen for changes to data in real time.
-
Experience cloud data synchronization and other functions.
Development preparation
To build an application service using Cloud DB, you need to complete the following preparations:
- You have registered your account on the official website of the developer alliance and passed the real name authentication. For details, see Account registration authentication.
- You have created projects and applications on the AppGallery Connect console. For details, see Create project.
- The sample application uses the relevant permissions of the authenticated user and needs to open the "anonymous account" service in the AppGallery Connect authentication service. See for details Certification services.
- You have obtained the sample code, please go to Sample code obtain.
matters needing attention
When the default value of the field in the object type is set to Chinese characters or other special characters, the default encoding format of the local editor or IDE should be set to utf-8, otherwise the end cloud data synchronization will fail.
Supported browsers
Browsers supported by Cloud DBJavaScript SDK:
service
Chrome
Edge
Firefox
Huawei browser
Safari
UC browser
QQ browser
IE11
Cloud DB
√
√
√
√
√
√
√
√
explain
Since IE11 only supports ES5, you need to configure ES6 to be compatible with ES5 through the following steps to make the JavaScript SDK support IE11.
-
Execute the following command to install Babel Polyfill into your project.
npm install --save-dev babel-polyfill
-
Import the Babel Polyfill component in the code entry main file.
import 'babel-polyfill';
-
Open the configuration file of the project, such as vue2 Webpack in X + Vue cli base. Conf.js file, modify the value of the entry field, assuming_ main.js_ Is the code entry master file.
entry:['babel-polyfill','./src/main.js']
-
In package Check whether Babel loader is included in the JSON file. If there is no Babel loader, execute the following command to install Babel loader.
npm install babel-loader
-
Add the following rules in the configuration file of the project, such as vue2 Webpack in X + Vue cli base. Conf.js file.
{
    test: /.js$/,
    loader: 'babel-loader',
    include: [resolve('node_modules/@agconnect/database')]
}
Enable service
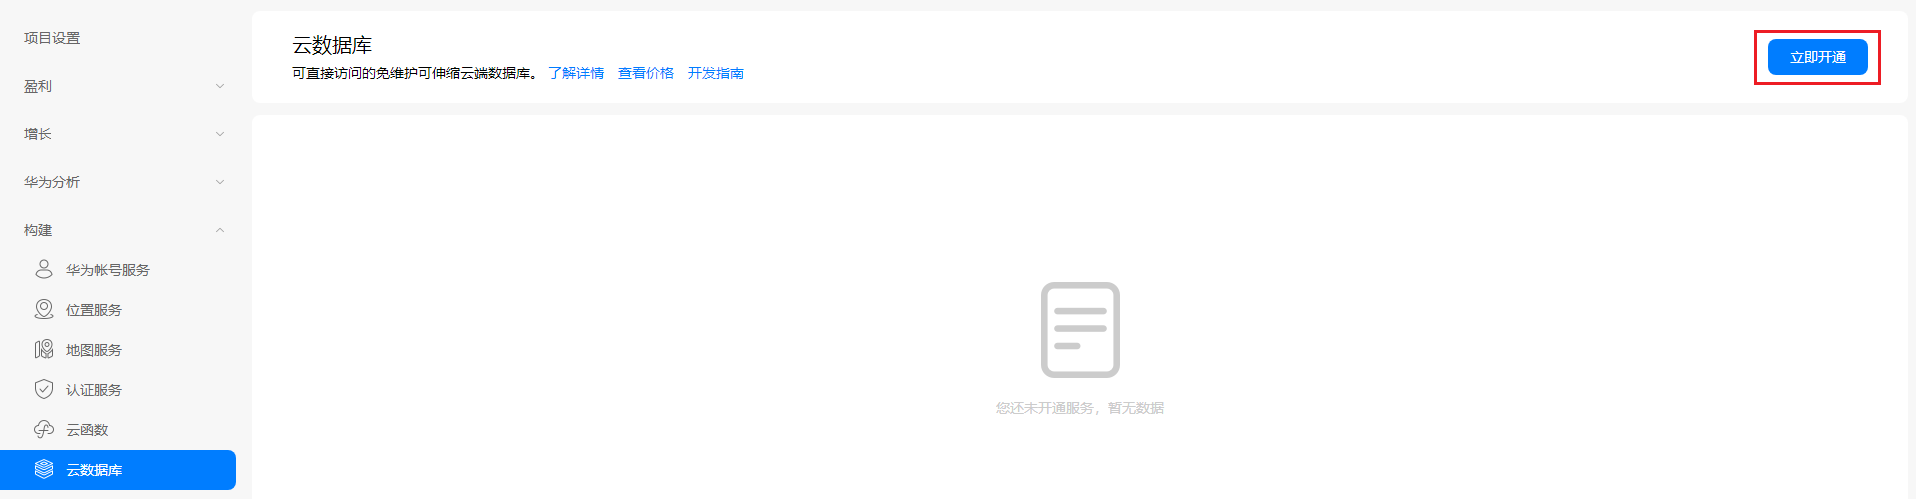
Before using Cloud DB service, you need to enable the service.
-
Sign in AppGallery Connect Website, select my project.
-
Select an item in the item list page, and click the application that needs to enable the cloud database service under the item.
-
Select build > cloud database from the navigation tree.
-
Click "open now" to open the cloud database service.
-
(optional) if you haven't selected the data processing location, you need to set the data processing location first. Please refer to Set data processing location.

-
After the service is initialized successfully, the cloud database service is enabled successfully.
Adding and exporting object types
You need to create object types based on the AppGallery Connect console. Please follow the steps to create the object types involved in the example and export json format and js format object type files for Web application development. It is not allowed to modify the exported json format and js format files, otherwise the data synchronization function will be abnormal.
-
Sign in AppGallery Connect Website, select my project.
-
Select an item in the item list page and click the application of the object type to be created under the item.
-
Select build > cloud database from the navigation tree.
-
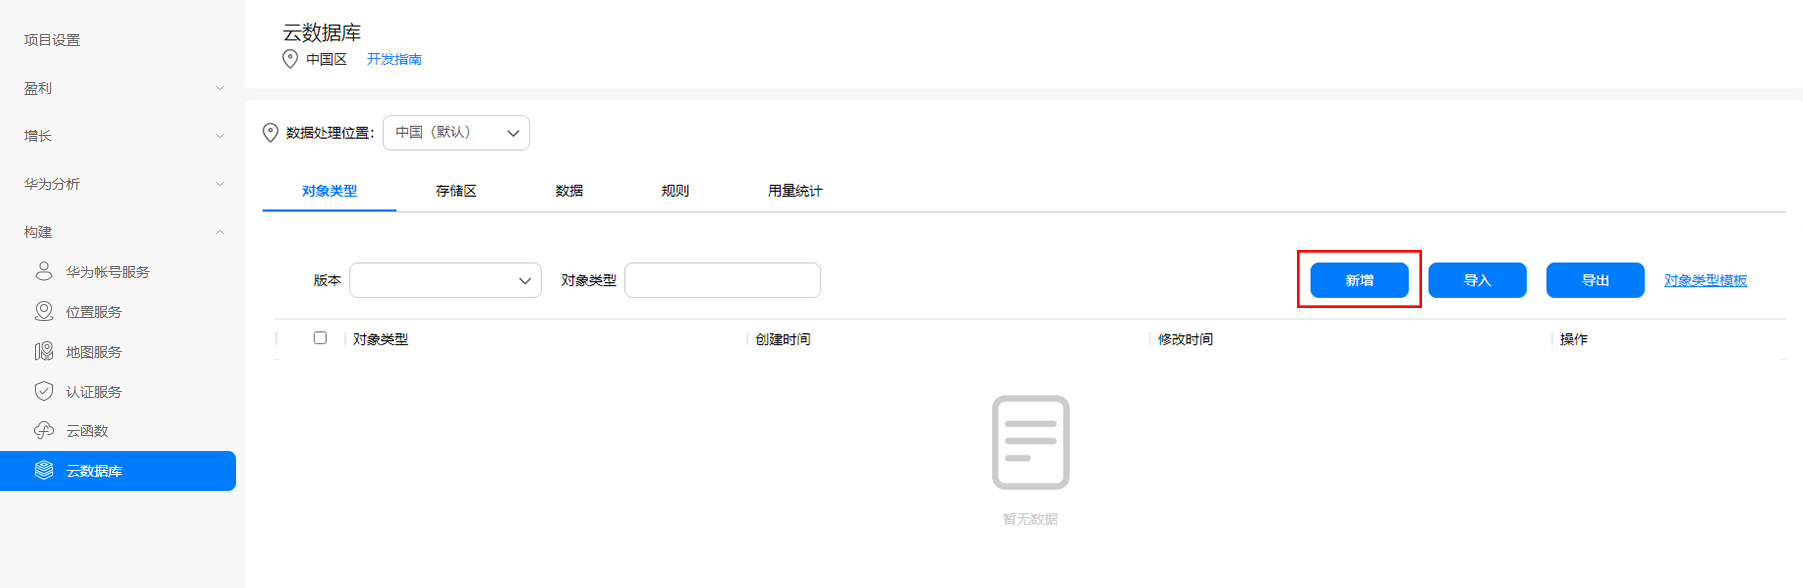
Click Add to enter the create object type page.
-
After entering the object type name "BookInfo", click next.
-
single click

, click next after adding the following fields.
Table 1 field definition
Field name
type
Primary key
Non empty
encryption
Default value
id
Integer
√
√
–
–
bookName
String
–
–
–
–
author
String
–
–
–
–
price
Double
–
–
–
–
publisher
String
–
–
–
–
publishTime
Date
–
–
–
–
shadowFlag
Boolean
–
–
–
true
-
single click

, set the index name to "bookName" and the index field to "bookName", and then click "next".
-
After setting the permissions of each role according to the following requirements, click next.
Table 2 permission configuration
role
query
upsert
delete
all
√
–
–
Authenticated user
√
√
√
Data creator
√
√
√
administrators
√
√
√
-
Click OK.
After creation, return to the object type list to view the created object types.
-
Click export.
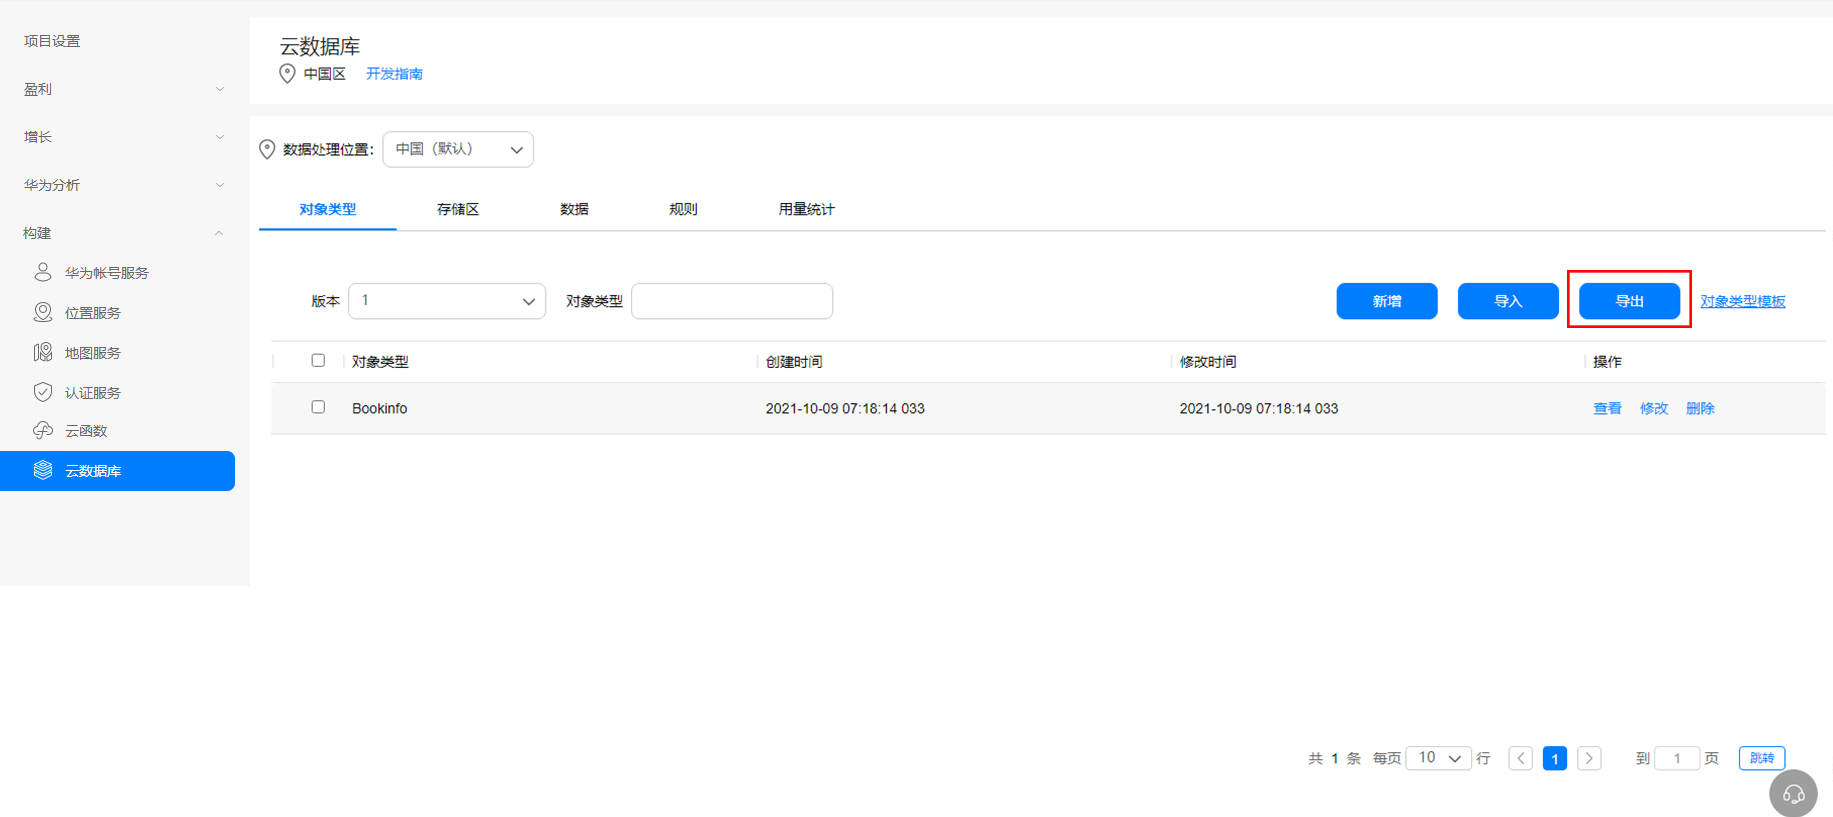
- Export "json format" and "js format" files. The exported files are used to add to the local development environment in subsequent steps.
*   export json Format file
    1.  Choose“ json Format.
    2.  Click export.
*   export js Format file
    1.  Choose“ js Format.
    2.  choice js File type, selecting“ js".
    3.  Click export.
New storage area
You can create a data store on the cloud side based on the AppGallery Connect console. Please follow the steps to create a store named "QuickStartDemo".
-
Sign in AppGallery Connect Website, select my project.
-
Select an item in the item list page, and click the application that needs to create a storage area under the item.
-
Select build > cloud database from the navigation tree.
-
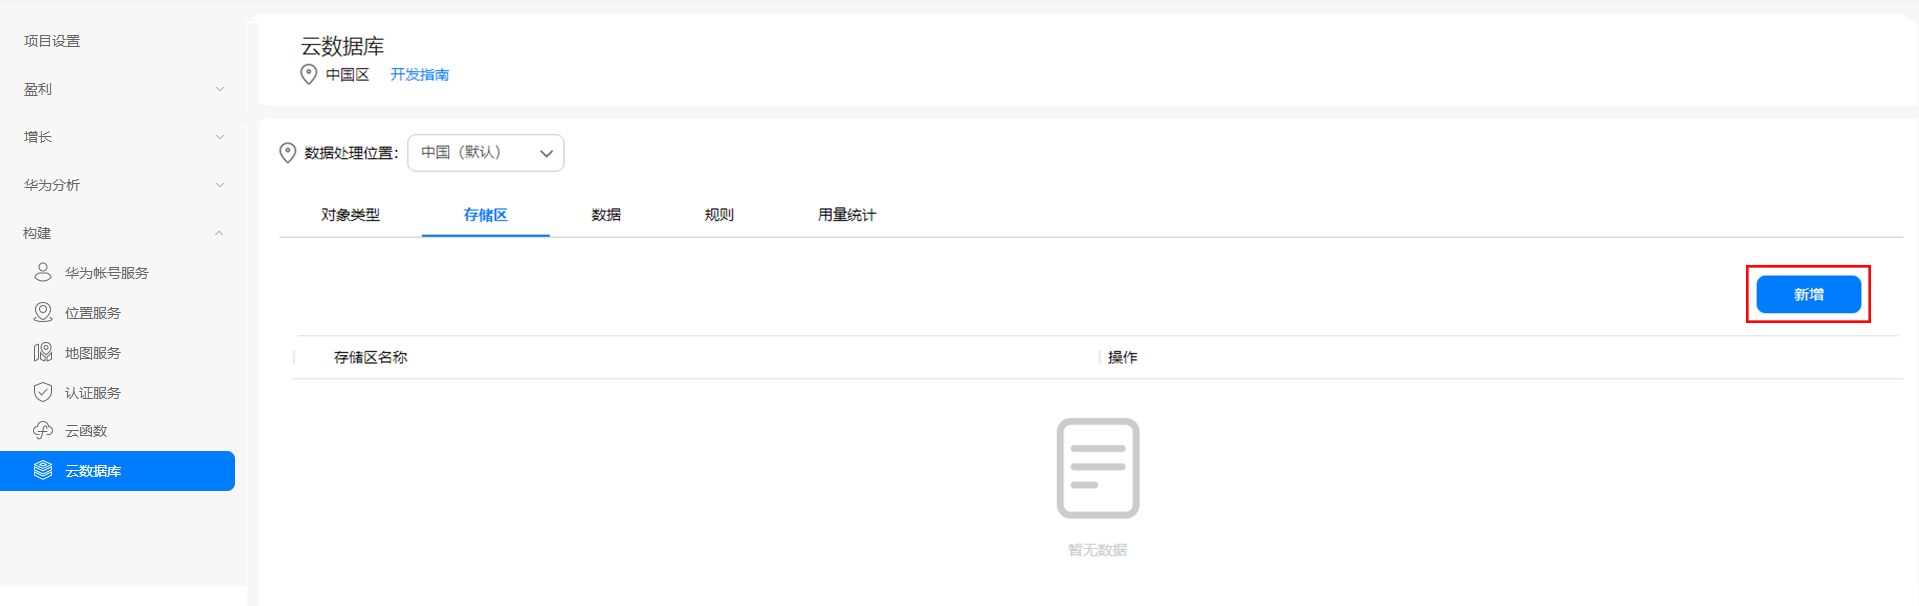
Select the storage area tab.
-
Click "add" to enter the page of creating storage area.
-
The input store name is "QuickStartDemo".
-
Click OK.
After creation, return to the storage area list to view the created storage area.
Configure development environment
- Open the sample project using the compilation platform.
- Integrated AGC SDK, see Integrated AGC SDK.
- Integrate Cloud DBSDK.
-
Execute the following commands to install the Cloud DBJavaScript SDK cloud database service module into your project.
npm install --save @agconnect/database
-
Import the database component in your project.
import "@agconnect/database";
-
Add object type file
When developing applications, you can directly add the json format and js format files exported from the AppGallery Connect console to the local development environment and use the createObjectType() Method implements the definition and creation of object types. When developing local applications, you do not need to create object types again.
- Add all json format and js format files exported on the AppGallery Connect console to the local development environment. If they exist, please overwrite the original file. The file location is as follows:
- json format: QuickStart JS SDK / SRC / components / config
- js format: QuickStart js SDK / SRC / components / model
- Initialize Cloud DB through the createObjectType() Method to implement the definition and creation of object types. For details, see initialization.
initialization
After adding object type files, you can use cloud database for application development. When developing applications, you need to perform initialization operations first, such as initializing AGConnectCloudDB, creating Cloud DB zone and object type.
-
adopt initialize() Initialize AGConnectCloudDB.
AGConnectCloudDB.initialize(context);
-
adopt getInstance() Method to obtain the AGConnectCloudDB instance and use the createObjectType() Create an object type.
const schema = require('./BookInfo.json'); agcCloudDB = AGConnectCloudDB.getInstance(); agcCloudDB.createObjectType(schema); -
Open Cloud DB zone.
const config = new CloudDBZoneConfig('QuickStartDemo');
cloudDBZone = await agcCloudDB.openCloudDBZone(config);
Write data
This section mainly introduces how to write data in the application, so that you can understand how to write data using Cloud DBSDK. In the application interface, the "add" button is added for users to add data, which is passed in the code executeUpsert() Realize data writing.
async function executeUpsert (book) {
    try {
        const cloudDBZoneResult = await cloudDBZone.executeUpsert(book);
        console.log('upsert' + cloudDBZoneResult + 'record' );
    } catch (e) {
        conso.log(e);
    }
}
View data
Get data changes
The data added by the user in the application interface will be stored on the cloud side. Register a data change listener on the end side. When the cloud side data changes, the end side can perceive the data changes. Through query criteria and subscribeSnapshot() Method can be used in combination to specify the listening object. When the data of the listening object changes, the end side will receive the data change notification and generate a new snapshot to trigger the user callback.
async function subscribeSnapshot () {
    const query = CloudDBZoneQuery.where(BookInfo);
    query.equalTo('shadowFlag', true);
    try {
        const onSnapshotListener = {
            onSnapshot: (snapshot, e) => {
                if (e !== null && e !== undefined && e.code !== AGConnectCloudDBExceptionCode.Ok) {
                    console.log('subscribeSnapshot error');
                    console.log(e);
                }
                return snapshot.getSnapshotObjects();
            }
        };
        const listenerHandler = await cloudDBZone.subscribeSnapshot(query, onSnapshotListener);
        console.log(listenerHandler);
    } catch (e) {
        console.log('subscribeSnapshot error');
        console.log(e);
        return null;
    }
}

function subscribeBookList() {
    subscribeSnapshot().then(snapshot => {
        snapshot.getDeletedObjects();
        const resultList = snapshot.getSnapshotObjects();
        console.log(resultList);
    })
}
Data query and sorting
In the application interface, the "query" button and sorting function are added executeQuery() Realize asynchronous query of data.
async function executeQuery() {
    try {
        const query = CloudDBZoneQuery.where(BookInfo);
        const snapshot = await cloudDBZone.executeQuery(query);
        const resultArray = snapshot.getSnapshotObjects();
        console.log(resultArray);
    } catch(e) {
        console.log(e);
    }
}
Through query and limit() Method combination to realize the function of limiting the number of query data display; And orderByAsc() Method or orderByDesc() Method combination to realize the sorting function of data.
async function executeQueryWithOrder (object)  {
    const query = CloudDBZoneQuery.where(BookInfo);
    if (object.name.length > 0) {
        query.equalTo('bookName', object.name);
    }
    if (parseFloat(object.minPrice) > 0) {
        query.greaterThanOrEqualTo('price', parseFloat(object.minPrice));
     }
    if (parseFloat(object.maxPrice) > 0 && parseFloat(object.maxPrice) > parseFloat(object.minPrice)) {
        query.lessThanOrEqualTo('price', parseFloat(object.maxPrice));
    }
    if (parseInt(object.bookCount) > 0) {
        query.limit(parseInt(object.bookCount));
    }
    query.orderByAsc('id');
    try {
        const snapshot = await cloudDBZone.executeQuery(query);
        console.log('resultArray');
        console.log(snapshot.getSnapshotObjects());
        return snapshot.getSnapshotObjects();
    } catch (e) {
        console.log('query failed with reason');
        console.log(e);
    }
}
Application compilation run
At this point, you have understood the development process of the sample application. You can run the sample application by executing the npm run serve command on the WebStorm compiler.