Notification manager
The NotificationManager class is a notification manager. This object is a service maintained by the system and is obtained in the form of singleton mode, so it is generally not instantiated directly. In Activity, you can use Activity Getsystemservice (string) method to get the notification manager object, Activity Getsystemservice (string) method can return the corresponding object through the handle of Android system level service. You need to return the NotificationManager here, so pass the context directly NOTIFICATION_ Service is enough.
manager=(NotificationManager) getSystemService(NOTIFICATION_SERVICE);
Notification channel
Android 8.0 introduces notification channel. The message machines notified by different channels have different responses, and users can customize the channel.
When creating a notification channel object, there are three parameters. id is the id of the channel, name is, and importance is the importance.
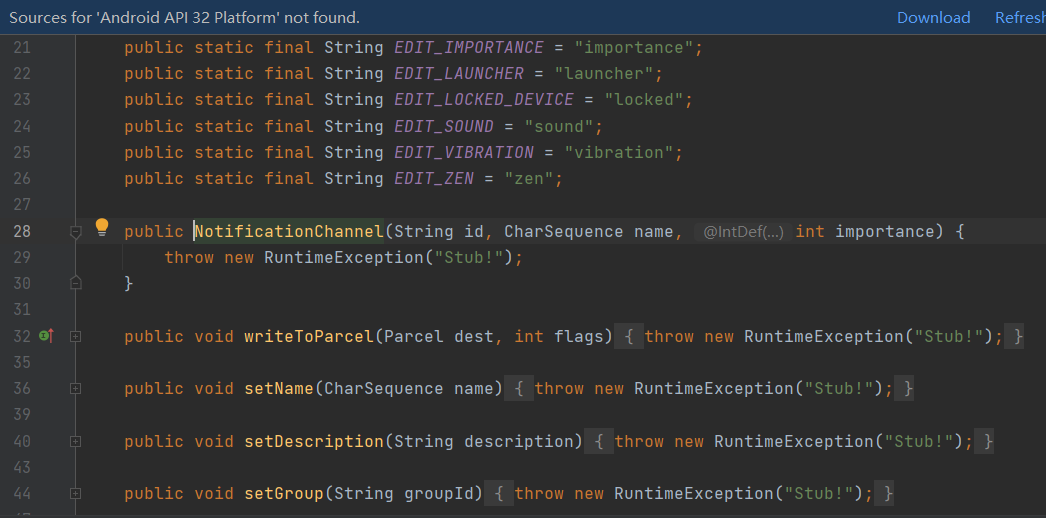
The following lists the notification importance settings in the notification manager class:
IMPORTANT_NONE close notification
IMPORTANT_MIN turns on the notification, does not pop up, there is no prompt tone, and the status bar is not displayed
IMPORTANT_LOW start notification, no pop-up, no prompt tone, and the status bar is displayed
IMPORTANT_ The default start notification will not pop up, a prompt tone will be given, and the status bar will be displayed
IMPORTANT_ When high is on, the notification will pop up, a prompt tone will be given, and the status bar will be displayed
if(Build.VERSION.SDK_INT>=Build.VERSION_CODES.O){
            NotificationChannel channel=new NotificationChannel("ShadyPi","ShadyPi Your blog pin doesn't poke",
                    NotificationManager.IMPORTANCE_HIGH);
            manager.createNotificationChannel(channel);
        }
notice
Using the Builder constructor of NotificationCompat class to create Notification objects can ensure that the program works normally on all versions. Android8.0 has added the concept of Notification channel. If it is not set, notifications cannot be displayed in Android 8 0 is displayed on the machine. Note that the channel id here must be declared before.
Notification common properties:
setContentTitle(String string) sets the title
setContentText(String string) sets the text content
setSmallIcon(int icon) sets the small icon
setLargeIcon(Bitmap icon) sets the large icon
setColor(int argb) sets the small icon color
Setcontentintent (pending intent) sets the jump intention after clicking the notification
Setautocancel (Boolean) set to automatically clear the notification after clicking the notification
setWhen(long when) sets the time when the notification is created
Note: the first three attributes must be set, and from Android 5.0, the icon in the notification bar should only use alpha layer, not RGB layer (simply speaking, there can be no color).
note=new NotificationCompat.Builder(this,"ShadyPi")
                .setContentTitle("Handsome treasure Blogger")
                .setContentText("ShadyPi")
                .setSmallIcon(R.drawable.ic_baseline_all_inclusive_24)
                .build();
Send notification
First set two buttons to send and cancel notifications.
<?xml version="1.0" encoding="utf-8"?>
<LinearLayout xmlns:android="http://schemas.android.com/apk/res/android"
    android:layout_width="match_parent"
    android:layout_height="match_parent"
    android:orientation="vertical">

    <Button
        android:onClick="send"
        android:text="Send notification"
        android:layout_width="wrap_content"
        android:layout_height="wrap_content"/>

    <Button
        android:onClick="cancel"
        android:text="Cancellation notice"
        android:layout_width="wrap_content"
        android:layout_height="wrap_content"/>

</LinearLayout>
First, write a simple send in the java code, and use notify(int id,Notification notification) to send a notification. The id can be filled in arbitrarily. The second parameter is the notification we want to send:
public void send(View view) {
        manager.notify(1,note);
    }
See the effect:
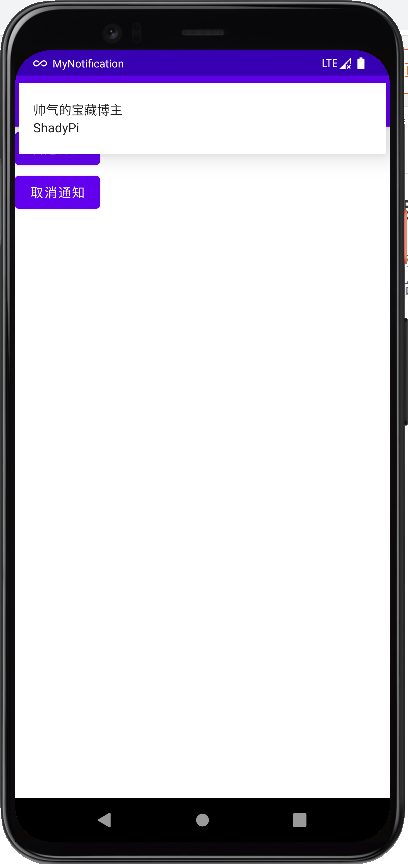
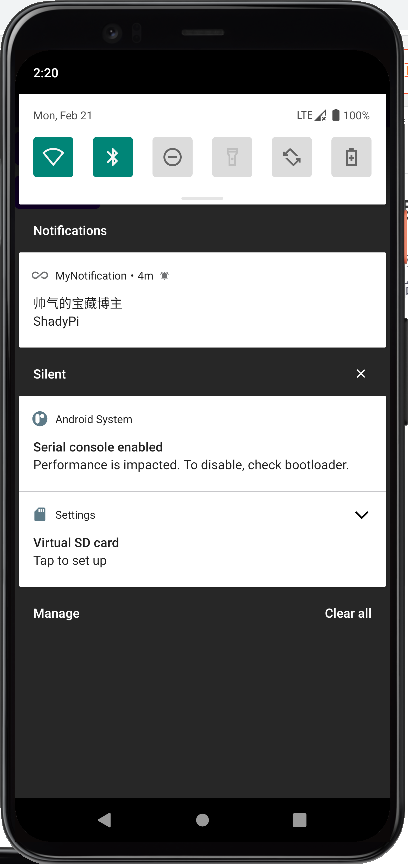
More effects
Add a large icon. Note that the picture should be converted to Bitmap first:
note=new NotificationCompat.Builder(this,"ShadyPi")
                .setContentTitle("Handsome treasure Blogger")
                .setContentText("ShadyPi")
                .setSmallIcon(R.drawable.ic_baseline_all_inclusive_24)
                .setLargeIcon(BitmapFactory.decodeResource(getResources(),R.drawable.image))
                .build();
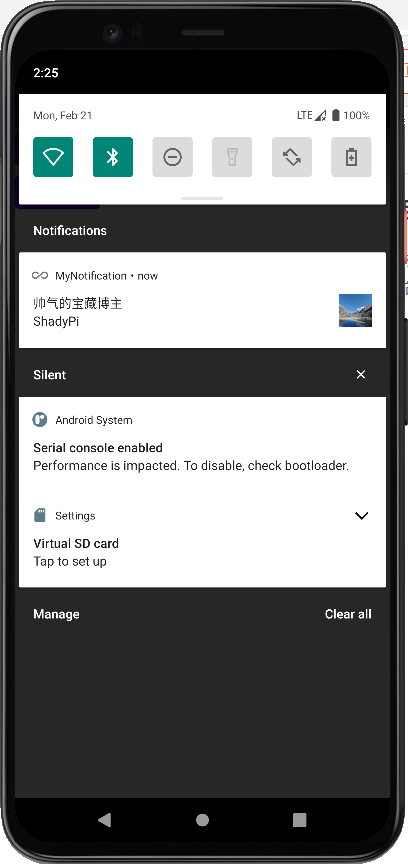
Set the color of the small icon. Pay attention to convert it to int first:
.setColor(Color.parseColor("#ff0000 ") / / set the small icon color
Set cancel notification after clicking:
.setAutoCancel(true)
Set the time when the notification is created. Generally, the notification displays the pop-up time (i.e. the current time), which is the default. Unless there are special needs, there is no special setting.
Add click event
Create the click action notificationactivity in the same folder as MainActivity java:
package com.example.mynotification;

import android.app.Activity;
import android.os.Bundle;
import android.util.Log;

import androidx.annotation.Nullable;

public class NotificationActivity extends Activity {

    @Override
    protected void onCreate(@Nullable Bundle savedInstanceState) {
        super.onCreate(savedInstanceState);

        Log.e("ShadyPi","Click notification");
    }
}
After writing, click the class name NotificationActivity in the mouse and use the shortcut key Alt+Enter to select the first pop-up option to register add to manifest.
After the action is written, declare the PendingIntent variable required by the click action in MainActivity, and then set it:
Intent intent=new Intent(this,NotificationActivity.class);
        PendingIntent pending=PendingIntent.getActivity(this,0,intent,0);

        note=new NotificationCompat.Builder(this,"ShadyPi")
                .setContentTitle("Handsome treasure Blogger")
                .setContentText("ShadyPi")
                .setSmallIcon(R.drawable.ic_baseline_all_inclusive_24)
                .setLargeIcon(BitmapFactory.decodeResource(getResources(),R.drawable.image))
                .setColor(Color.parseColor("#ff0000 ") / / set the small icon color
                .setContentIntent(pending)//Set click action
                .setAutoCancel(true)
                .build();
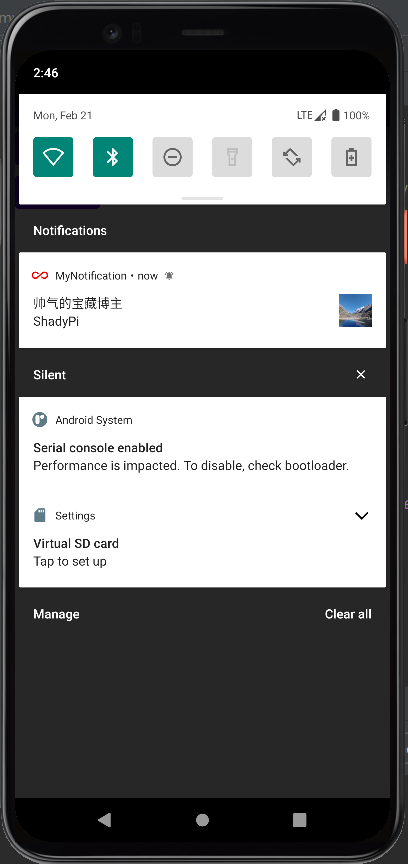
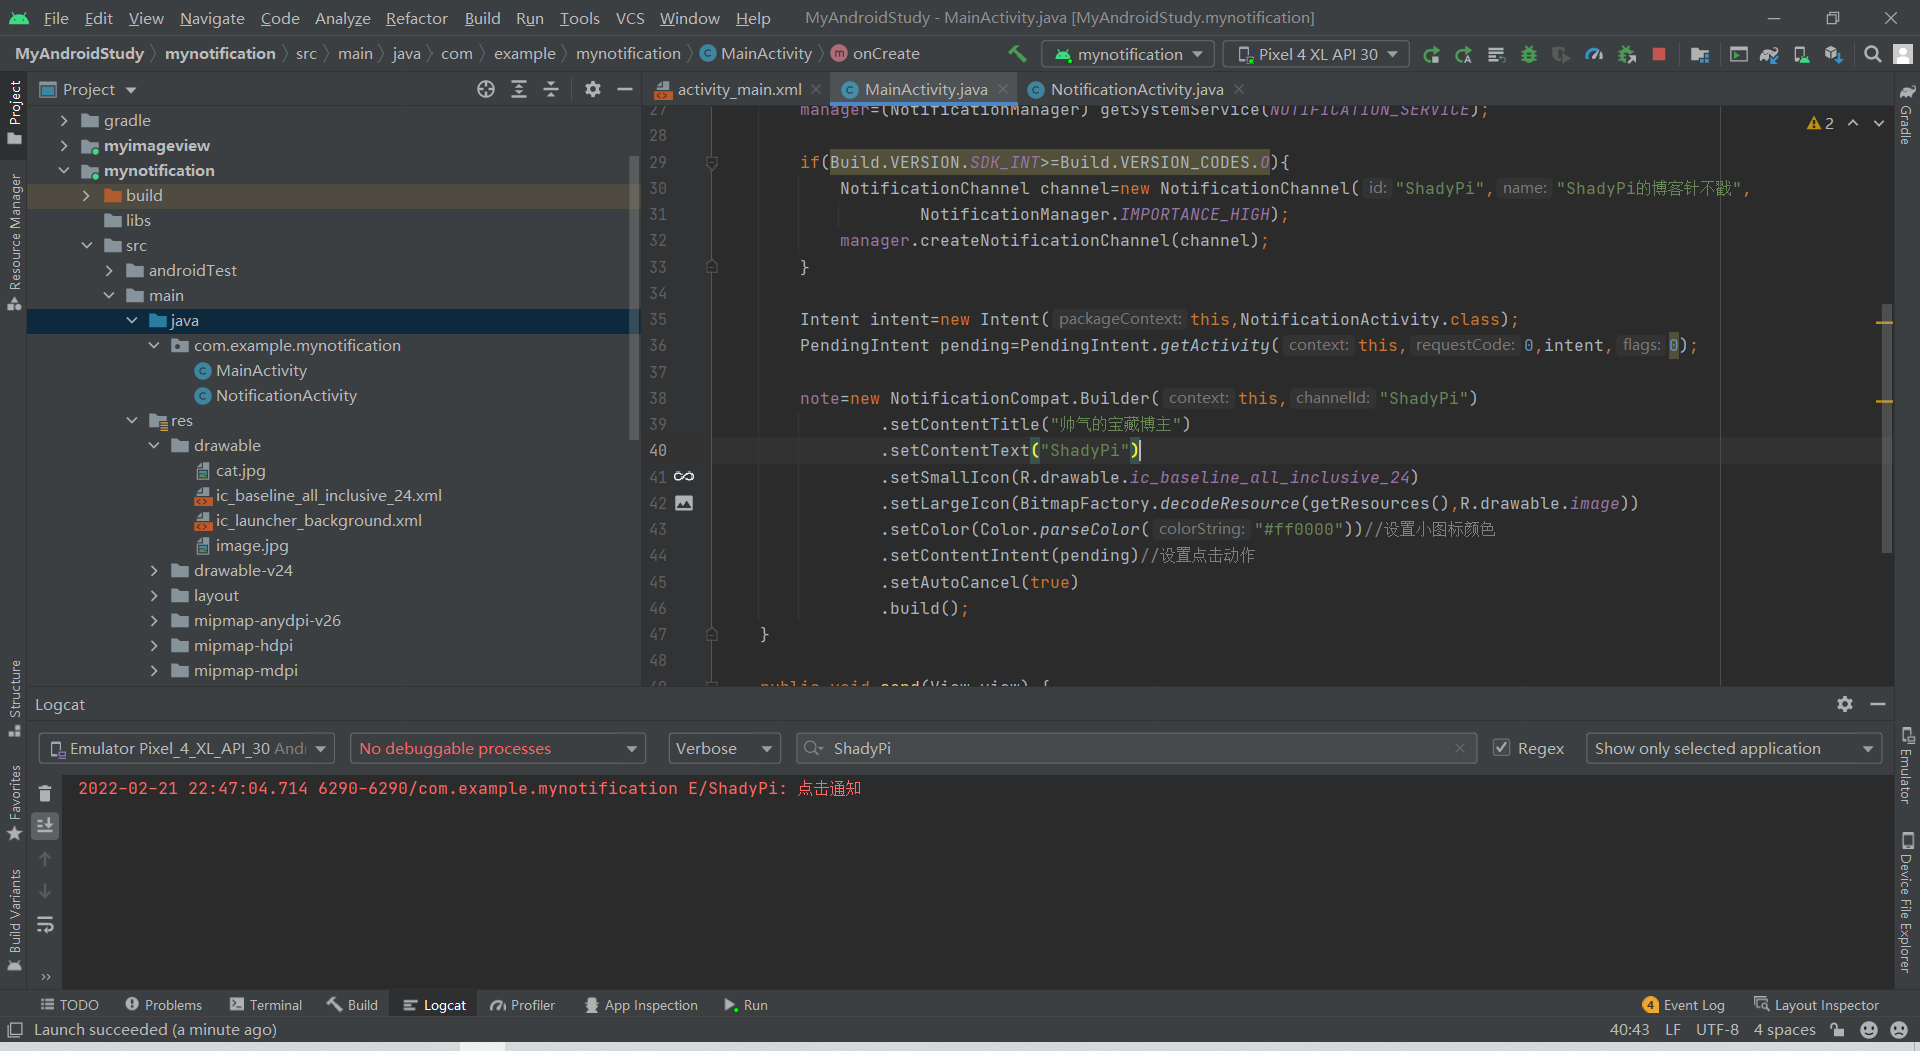
After clicking, you can see the output in the debugging log, indicating that the click action has been executed, and the message notification disappears automatically after clicking.
Cancel message
In addition to setting click auto cancel, you can also cancel the message manually. You can cancel the message with the corresponding id by using cancel(int id).
public void cancel(View view) {
        manager.cancel(1);
    }
MainActivity complete code:
package com.example.mynotification;

import androidx.appcompat.app.AppCompatActivity;
import androidx.core.app.NotificationCompat;

import android.app.Notification;
import android.app.NotificationChannel;
import android.app.NotificationManager;
import android.app.PendingIntent;
import android.content.Intent;
import android.graphics.BitmapFactory;
import android.graphics.Color;
import android.os.Build;
import android.os.Bundle;
import android.view.View;

public class MainActivity extends AppCompatActivity {

    private NotificationManager manager;
    private Notification note;

    @Override
    protected void onCreate(Bundle savedInstanceState) {
        super.onCreate(savedInstanceState);
        setContentView(R.layout.activity_main);

        manager=(NotificationManager) getSystemService(NOTIFICATION_SERVICE);

        if(Build.VERSION.SDK_INT>=Build.VERSION_CODES.O){
            NotificationChannel channel=new NotificationChannel("ShadyPi","ShadyPi My blog pin doesn't poke",
                    NotificationManager.IMPORTANCE_HIGH);
            manager.createNotificationChannel(channel);
        }

        Intent intent=new Intent(this,NotificationActivity.class);
        PendingIntent pending=PendingIntent.getActivity(this,0,intent,0);

        note=new NotificationCompat.Builder(this,"ShadyPi")
                .setContentTitle("Handsome treasure Blogger")
                .setContentText("ShadyPi")
                .setSmallIcon(R.drawable.ic_baseline_all_inclusive_24)
                .setLargeIcon(BitmapFactory.decodeResource(getResources(),R.drawable.image))
                .setColor(Color.parseColor("#ff0000 ") / / set the small icon color
                .setContentIntent(pending)//Set click action
                .setAutoCancel(true)
                .build();
    }

    public void send(View view) {
        manager.notify(1,note);
    }

    public void cancel(View view) {
        manager.cancel(1);
    }
}