I have nothing to do recently. I want to toss about the Mac during the weekend break. A friend recommended a tile desktop management software named "Yabai" to me a long time ago. Today, I'm tossing about it.
As usual, configure first. Because there was a little accident during this toss. Fortunately, it was solved by GitHub's friends.
PS: Unfortunately, I'm away on business and the network is poor. The status bar (something similar to I3 status) can't be clone d all the time. So there is no tossing diary in the status bar~
| system | MacOS Monterey 12.2.1 | system |
|---|---|---|
| Package manager | Homebrew 3.4.0 | Package manager |
| Yabai | 3.3.10 | Tile Desktop Manager |
| skhd | 0.3.5 | Shortcut key binding |
What is Yabai
Almost everyone who has played linux has heard i3wm it. Yabai can be regarded as an i3wm on Mac Os
install
PS:
- I'm here except for accidents. Because I installed it directly according to the document, but sudo yabai – install SA failed all the time in Monterey. So now I'll record it according to my successful operation.
- The premise of this installation is that Homebrew has been installed by default. As for how to install Homebrew in China. Then search by yourself. If I have time, I'll record an article in my blog~~
# Install yabai
brew install koekeishiya/formulae/yabai --HEAD

# Install skhd
brew install koekeishiya/formulae/skhd

# Install JQ - > mainly used when looking for desktop and monitor.
brew install jq

# After the command succeeds, you need to execute the command
sudo yabai --install-sa
sudo yabai --load-sa
# The following will talk about how to execute automatically
to configure
PS: don't rush to start after installation.
- Create a configuration file for yabai
- Create a profile for skhd
- Start yabai
- Start shkd
yabai profile
I directly put the yabai configuration file in ` ` ~ / config/yabai / ` next. Of course, this directory was created by yourself ==
mkdir ~/.config/yabai

# Attention, in Under config, yabairc is used. No oh
cp /usr/local/opt/yabai/share/yabai/examples/yabairc ~/config/yabai/yabairc

chmod u+x ~/config/yabai/yabairc
Location where yabai configuration files can be placed
- $XDG_CONFIG_HOME/yabai/yabairc
- $HOME/.config/yabai/yabairc
- $HOME/.yabairc
- Custom location, manual loading
skhd profile
cp /usr/local/opt/yabai/share/yabai/examples/skhdrc ~/.skhdrc
Start yabai
brew services start yabai
brew services start skhd
After starting skhd and yabai for the first time, macOS will prompt whether to allow them to access auxiliary functions. After adding permissions in System Preferences - > installability and privacy - > privacy, execute the above command or the following command again
brew services restart yabai
brew services restart skhd

Rendering after startup~
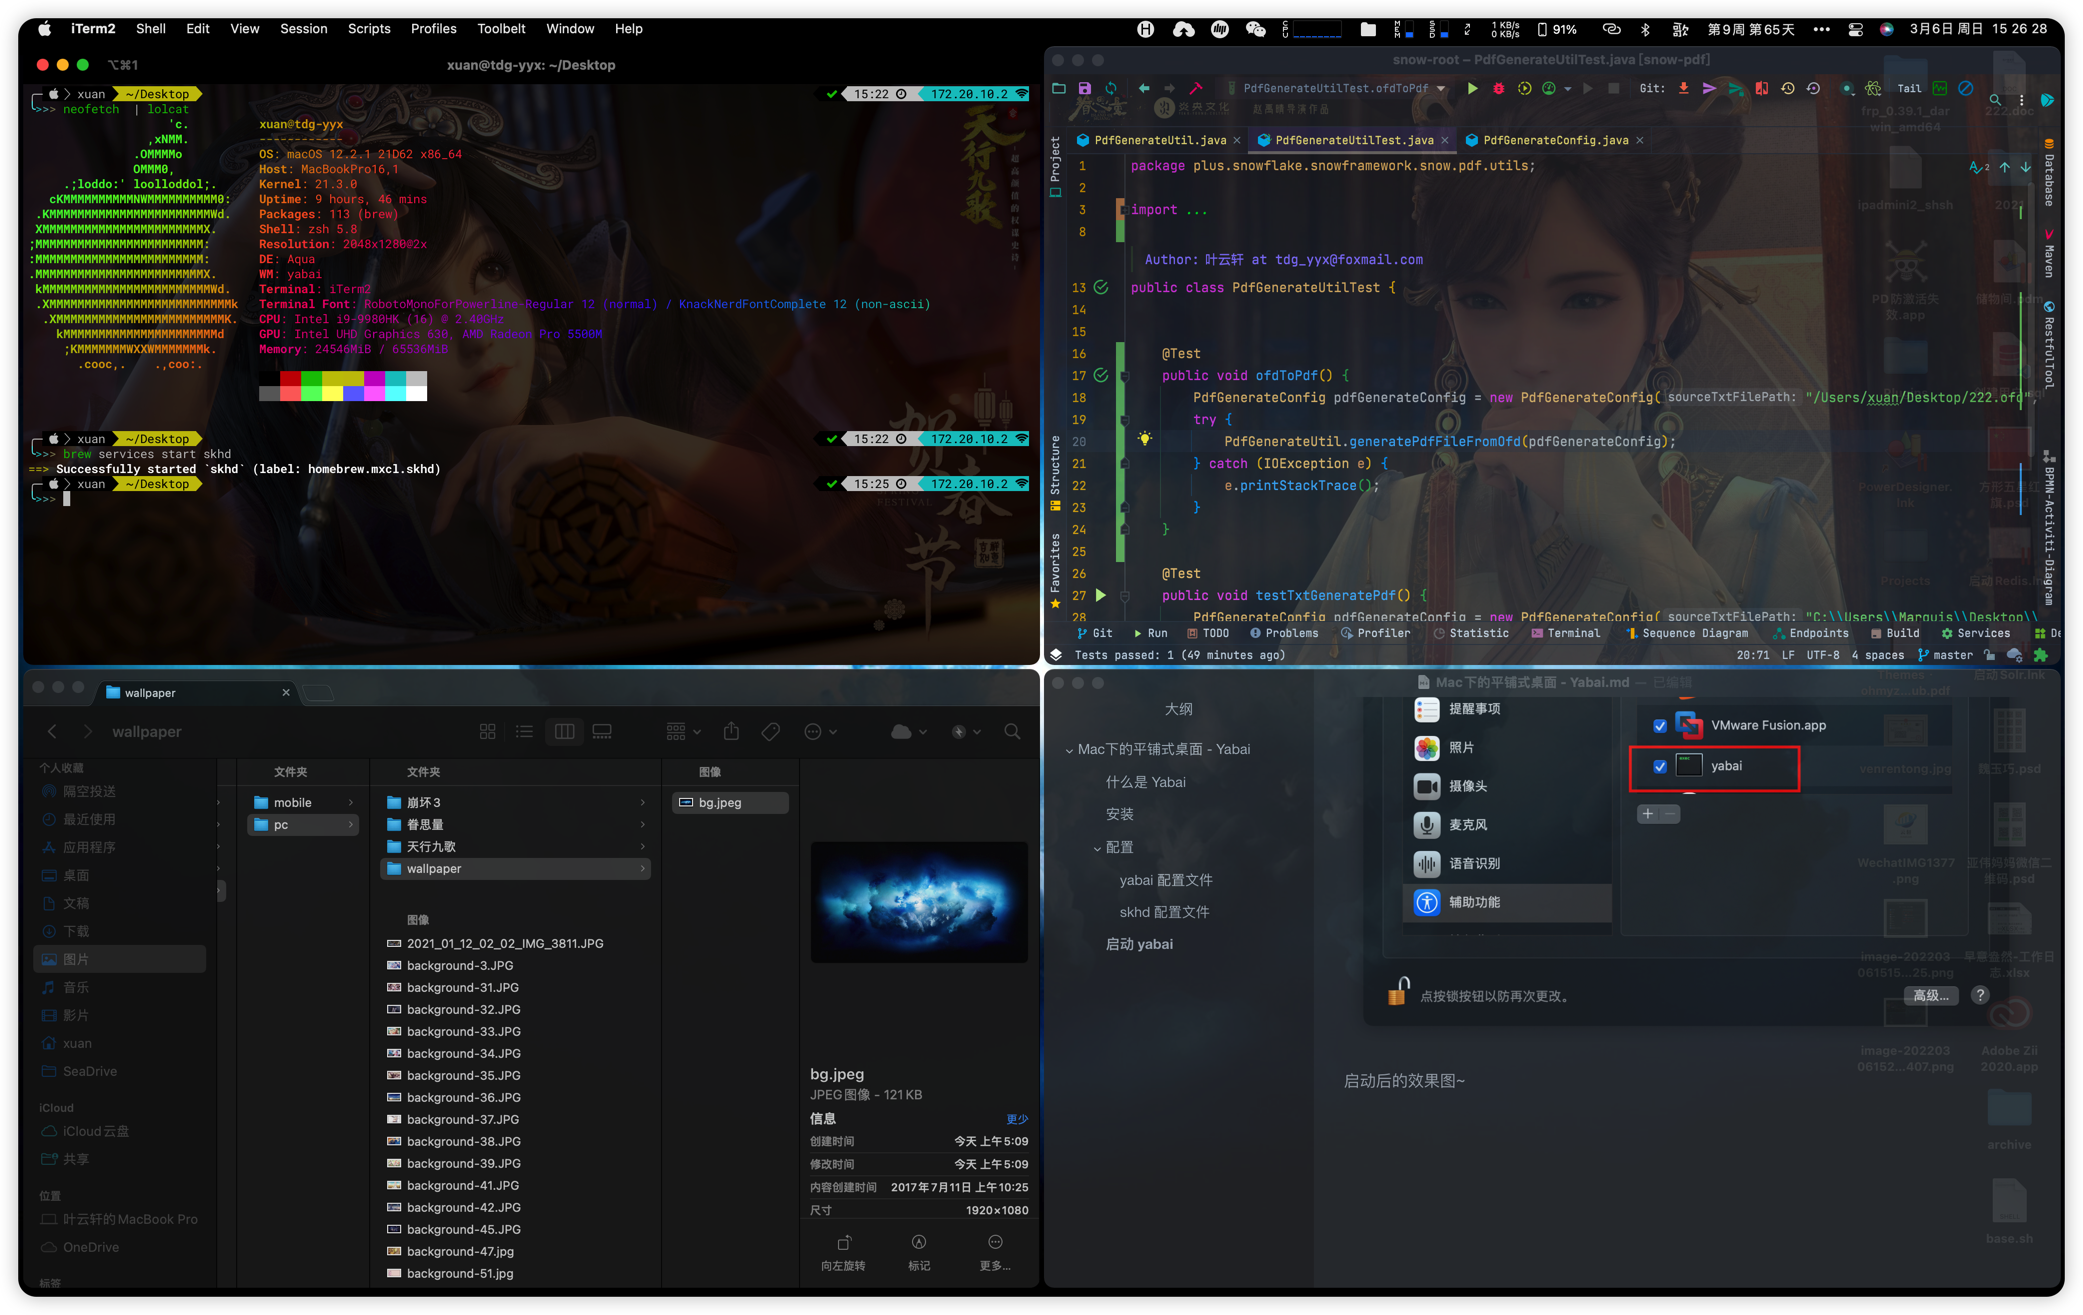
You can see ~ ~ the current window is Finder activated, and the transparency is increased in the background window, which is one of my favorite functions~
Next, let's go through the configuration. That's the core. As for how to use it, you can understand it by reading the notes of the configuration. Students who have played with a tiled desktop must be easier to get started.
Configuration article
yabairc
#!/usr/bin/env sh

# Here we refer to the wiki of yabai. The specific steps are described below
sudo yabai --load-sa
yabai -m signal --add event=dock_did_restart action="sudo yabai --load-sa"

# Window layout bsp: tile float: float
yabai -m config layout                       bsp
# Default split rule first_child second_child
yabai -m config window_placement             second_child
# Window spacing settings
yabai -m config top_padding                  5
yabai -m config bottom_padding               5
yabai -m config left_padding                 5
yabai -m config right_padding                5
yabai -m config window_gap                   4
# Auto balance all windows always occupy the same space
yabai -m config auto_balance                 off
# If auto balancing is disabled, this property defines the amount of space occupied by the new window. 0.5 means that the old window occupies 50%
yabai -m config split_ratio                 0.50
# The mouse modifier button means that you can use the mouse to modify the window size alone by pressing this button
yabai -m config mouse_modifier               fn
# fn + left key movement
yabai -m config mouse_action1                move
# fn + right click
yabai -m config mouse_action2                resize
# Focus follow mouse default off: turn off autoraise: Auto Lift autofocus: Auto Focus
yabai -m config focus_follows_mouse          autofocus
# Sets whether the mouse follows the current active window. The default is off: off: on: on
yabai -m config mouse_follows_focus          on

# Floating window problem at the top
yabai -m config window_topmost               on
# Modify window shadow on: open off: close float: only show the shadow of floating window
yabai -m config window_shadow                float

# Window transparency settings
yabai -m config window_opacity               on
# Configure the opacity of the active window
yabai -m config active_window_opacity        1.0
yabai -m config normal_window_opacity        0.9
yabai -m config window_opacity_duration      0.0

# Add 20 padding at the top and 0 padding at the bottom of each space on the main display
# yabai -m config external_bar main:20:0
# Add a 0 fill at the top and a 0 fill at the bottom of each space on all displays
yabai -m config external_bar all:0:5

# ================================Rules================================
# Turn on System Preferences without using tile mode
yabai -m rule --add app="^System Preferences $" manage=off
yabai -m rule --add app="^Reminders $" manage=off
yabai -m rule --add app="^About this machine $" manage=off

echo "yabai configuration loaded.."
.skhdrc
# ================================Window settings================================
# Window l: Right: window h: activate shortcut
alt - h : yabai -m window --focus west
alt - j : yabai -m window --focus south
alt - k : yabai -m window --focus north
alt - l : yabai -m window --focus east
# Swap window position
shift + alt - h : yabai -m window --swap west
shift + alt - j : yabai -m window --swap south
shift + alt - k : yabai -m window --swap north
shift + alt - l : yabai -m window --swap east
# Move window position
shift + cmd - h : yabai -m window --warp west
shift + cmd - j : yabai -m window --warp south
# This shortcut key is commented because it conflicts with IDEA shift + cmd + K push code
# shift + cmd - k : yabai -m window --warp north
shift + cmd - l : yabai -m window --warp east
# Floating window settings refer to Magent's default settings. Because I used to use it before....
# Restore original window size
ctrl + alt - 0 : yabai -m space --balance
# Divide the floating window left and right into the whole screen rows: cols: start-x: star-y: width: height M rows: n columns: x:y:w:h
# Maximize
ctrl + alt - return : yabai -m window --grid 1:1:0:0:1:1
# 2 split screen
ctrl + alt - up     : yabai -m window --grid 2:1:0:0:2:1
# 2 split screen left
ctrl + alt - left   : yabai -m window --grid 1:2:0:0:1:1
# 2 split screen right
ctrl + alt - right  : yabai -m window --grid 1:2:1:1:1:1
# 2 split screen
ctrl + alt - down   : yabai -m window --grid 2:1:0:1:2:1
# 4 split screen top left
ctrl + alt - u : yabai -m window --grid 2:2:0:0:1:1
# 4 split screen top right
ctrl + alt - i : yabai -m window --grid 2:2:0:1:1:1
# 4 split screen lower left
ctrl + alt - j : yabai -m window --grid 2:2:1:0:1:1
# 4 split screen lower right
ctrl + alt - k : yabai -m window --grid 2:2:1:1:1:1
# 3 split screen left 1
ctrl + alt - d : yabai -m window --grid 1:3:0:0:1:1
# 3 split screen left 2
ctrl + alt - e : yabai -m window --grid 1:3:0:0:2:1
# 3 split screen 1
ctrl + alt - f : yabai -m window --grid 1:3:1:0:1:1
# 3 split screen right 2
ctrl + alt - t : yabai -m window --grid 1:3:1:0:2:1
# 3 split screen right 1
ctrl + alt - g : yabai -m window --grid 1:3:3:0:1:1
# 9 split screen centered
ctrl + alt - c : yabai -m window --grid 3:3:1:1:1:1

# float / unfloat window and center on screen
alt - t : yabai -m window --toggle float;yabai -m window --grid 4:4:1:1:2:2

alt - r         : yabai -m space --rotate 90

# resize window
ctrl + alt + cmd - left : yabai -m window --resize left:-50:0; yabai -m window --resize right:-50:0
ctrl + alt + cmd - down : yabai -m window --resize bottom:0:50; yabai -m window --resize top:0:50
ctrl + alt + cmd - up : yabai -m window --resize top:0:-50; yabai -m window --resize bottom:0:-50
ctrl + alt + cmd - right : yabai -m window --resize right:50:0; yabai -m window --resize left:50:0

# Restart Yabai
cmd + alt - r : /usr/bin/env osascript <<< "display notification \"Restarting Yabai\" with title \"Yabai\""; launchctl kickstart -k "gui/${UID}/homebrew.mxcl.yabai"

# ================================Multi desktop configuration================================
# Create a new desktop, send the currently active window to the new desktop, and automatically jump to the new desktop. jq needs to support brew install jq
shift + cmd - n : yabai -m space --create && index="$(yabai -m query --spaces --display | jq '.| length')" && yabai -m window --space "${index}" && yabai -m space --focus "${index}"

# Switch back to the nearest desktop
alt - x : yabai -m space --focus recent
# Switch back to the first desktop
alt - 1 : yabai -m space --focus 1
alt - 2 : yabai -m space --focus 2
alt - 3 : yabai -m space --focus 3
alt - 4 : yabai -m space --focus 4
alt - 5 : yabai -m space --focus 5
alt - 6 : yabai -m space --focus 6
alt - 7 : yabai -m space --focus 7
alt - 8 : yabai -m space --focus 8
alt - 9 : yabai -m space --focus 9
# Close the current desktop
cmd + alt - w : yabai -m space --destroy

# send window to desktop and follow focus
shift + cmd - z : yabai -m window --space next; yabai -m space --focus next
shift + cmd - 1 : yabai -m window --space  1; yabai -m space --focus 1
shift + cmd - 2 : yabai -m window --space  2; yabai -m space --focus 2
shift + cmd - 3 : yabai -m window --space  3; yabai -m space --focus 3
shift + cmd - 4 : yabai -m window --space  4; yabai -m space --focus 4
shift + cmd - 5 : yabai -m window --space  5; yabai -m space --focus 5
shift + cmd - 6 : yabai -m window --space  6; yabai -m space --focus 6
shift + cmd - 7 : yabai -m window --space  7; yabai -m space --focus 7
shift + cmd - 8 : yabai -m window --space  8; yabai -m space --focus 8
shift + cmd - 9 : yabai -m window --space  9; yabai -m space --focus 9

# ================================ APPS ================================
# iTerm2
cmd - return : open -a iTerm

# ================================Multi display configuration================================
# focus monitora :
# ctrl + alt - z  : yabai -m display --focus prev
# ctrl + alt - 3  : yabai -m display --focus 3

# send window to monitor and follow focus
# ctrl + cmd - c  : yabai -m window --display next; yabai -m display --focus next
# ctrl + cmd - 1  : yabai -m window --display 1; yabai -m display --focus 1

# move floating window
# shift + ctrl - a : yabai -m window --move rel:-20:0
# shift + ctrl - s : yabai -m window --move rel:0:20

# increase window size
# shift + alt - a : yabai -m window --resize left:-20:0
# shift + alt - w : yabai -m window --resize top:0:-20

# decrease window size
# shift + cmd - s : yabai -m window --resize bottom:0:-20
# shift + cmd - w : yabai -m window --resize top:0:20

# set insertion point in focused container
# ctrl + alt - h : yabai -m window --insert west

# toggle window zoom
# alt - d : yabai -m window --toggle zoom-parent
# alt - f : yabai -m window --toggle zoom-fullscreen

# toggle window split type
# alt - e : yabai -m window --toggle split

# float / unfloat window and center on screen
#alt - t : yabai -m window --toggle float;yabai -m window --grid 4:4:1:1:2:2

# toggle sticky(+float), topmost, picture-in-picture
# alt - p : yabai -m window --toggle sticky;\
#           yabai -m window --toggle topmost;\
#           yabai -m window --toggle pip
Steps to start automatic script loading for MacOS BigSur and above
sudo visudo -f /private/etc/sudoers.d/yabai

# Then enter the content, where < user > is the user name of the current mac
<user> ALL = (root) NOPASSWD: /usr/local/bin/yabai --load-sa
# Then add the following command in yabairc, that is, 345 lines in the above configuration file, which has been added

sudo yabai --load-sa
yabai -m signal --add event=dock_did_restart action="sudo yabai --load-sa"
At this point, you can enjoy the pleasure of tiled desktop on mac~~