For small partners who have just come into contact with mobile UI automation, we should all start with appium, but appium needs a troublesome environment and is relatively troublesome to use (to obtain elements, we need to use adb's uiautomatorview2). Today, Xiaobian recommends a super easy-to-use library. Compared with appium, it's a "lazy" benefit~
1, Introduction
uiautomator2 is a python library used for UI automation testing of Android. Its bottom layer is based on Google uiautomator. The uiautomator library provided by Google can obtain any control attribute of any APP on the screen and operate it arbitrarily.
python-uiautomator2 encapsulates Google's own uiautomator2 testing framework and provides a convenient Python interface. He allows testers to write Python test code directly on PC, operate mobile applications and complete automation, which greatly improves the efficiency of automatic code writing.
2, Operating principle

As shown in the above figure (it's ugly in word):
The operation principle is mainly divided into two parts
Python: run the script and send a request to the mobile terminal
Mobile device: the mobile device runs the http rpc service encapsulated with uiautomator2, parses the received request, and calls the api of native uiautomator2 to realize the operation on the mobile phone.
The whole process:
- Install atx (daemon) on the mobile device, and then atx starts uiautomator2 service (default port 7912) to listen
- Write and execute the test script on the PC (equivalent to sending an HTTP request to the server side of the mobile device)
- The mobile device receives the HTTP request from the PC through WIFI or USB and performs the specified operation
Therefore, from this picture, we can know that we need to install things on the equipment!!!
3, Build environment
Understand the principle and introduction of uiautomator2, and then we will start to practice.
Install adb
First, we need to install Android adb. Xiaobian also went to other bloggers to find the installation tutorial.
Link hands: Ultra simple adb installation~
You can refer to the original blogger's method one!
Install uiautomator2
# Installation of terminal pip
pip install --upgrade --pre uiautomator2
Install ATX agent
The premise of installing ATX is that the device should be connected to the PC and the device number can be obtained with adb devices.
# init means that uiautomator2 is installed on all USB connected computer devices
python -m uiautomator2 init

# Specify the device to install uiautomator2, and use -- mirror
python -m uiautomator2 init --mirror --serial $SERIAL

# If you dislike slowness, you can use the domestic mirror image
python -m uiautomator2 init --mirror
Finally, success will be prompted, which means that ATX initialization is completed.
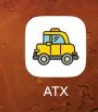
After success, we can see that on our device, a car icon appears, which is ATX agent.
Install weditor
pip install --pre -upgrade weditor
After the installation is completed, the next step is to start. Start method:
python -m weditor
After startup, a web page will be opened directly locally, and the next operations can be completed only on this web page.
Compared with appium, this function is not too powerful~~
4, A brief introduction to webitor
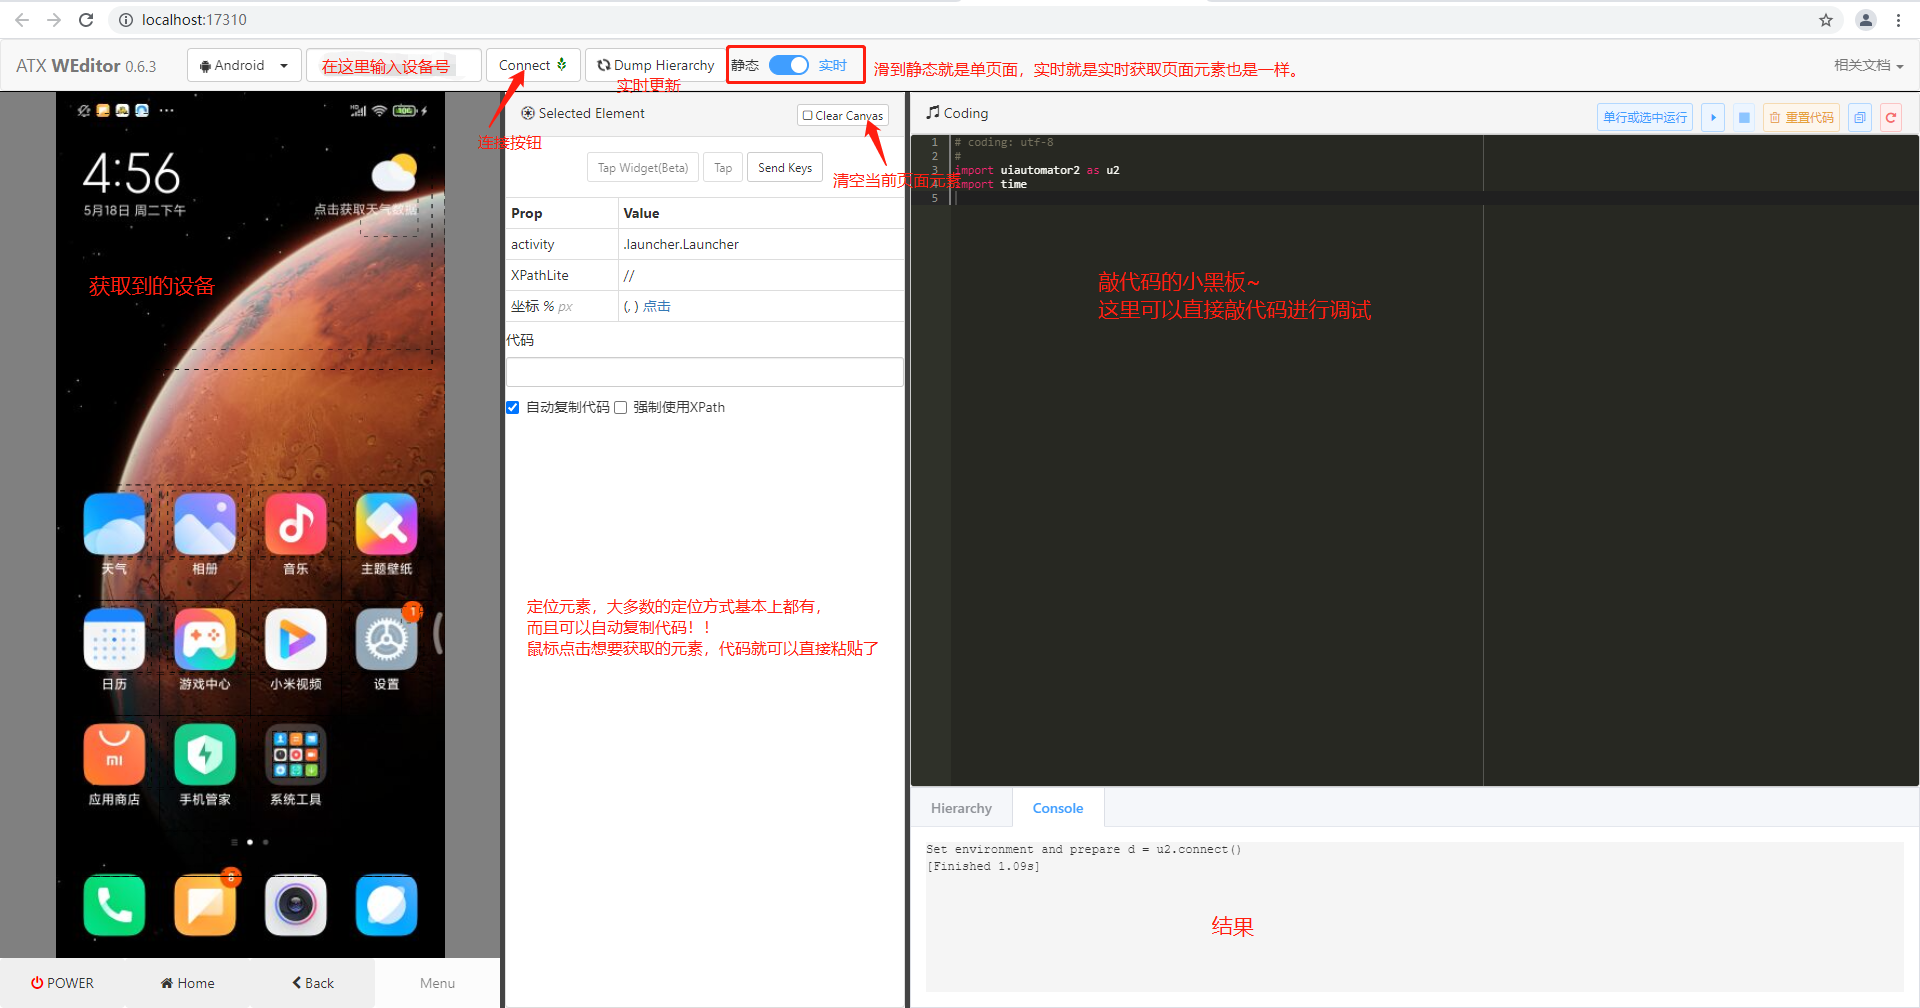
5, Application and operation of practice
Process using uiautomator2
- Configure equipment parameters and set which equipment is to be debugged
- Get the control of each element on the device and use the corresponding control for manipulation
There are two connection methods for equipment connection
1. Connect via USB
# After connecting through USB, enter the command of adb to obtain the device serial number
adb devices
# After obtaining the device number (assuming that the device number is aaa), input the command to connect on the console
import uiautomator2 as u2
d = u2.connect('aa') # USB link device. Or U2 connect_ usb('123456f')
#d = u2.connect_usb() # This can be used when there is only one device at present
2. Connect via wifi
# Assume that the device aaa and PC are under the same LAN
import uiautomator2 as u2
d = u2.connect('aaa') # WIFI link device. Or U2 connect_ WIFI('aaa')
Check and maintain the operation of the equipment end
d.healthcheck()
To install the test application, you can only install it from the url
# Download apk address in quotation marks
d.app_install('http://aaaa.com/aaa.apk')
We can also use the command to obtain the package name after manual installation
Start application process
# aaa is the package name of the test application. Note that it is not the active package name
d.start('aaa')
Stop the application process
#Force stop application
d.app_stop('aaa')
#Empty App data
d.app_clear('aaa')
# Stop all
d.app_stop_all()
# Stop all applications except aaa
d.app_stop_all(excludes=['aaa'])
Skip pop ups
# Automatically skip pop ups
d.disable_popups()
Interaction with devices
- Click the screen
d.click(x,y)
- Double click the screen
d.double_click(x,y)
#Add one more time parameter. By default, the interval between two clicks is 0.5 second
d.double_click(X,Y,0.5)
- Long press
d.long_click(x,y)
#Press and hold for 0.1 seconds
d.long_click(X,Y,0.1)
- slide
d.swipe(sx, sy, ex, ey)
# By default, the two coordinate sliding tracks are completed in 0.5s
d.swipe(sx, sy, ex, ey, 0.5)
- drag
d.drag(sx, sy, ex, ey)
# Drag for 0.5s
d.drag(sx, sy, ex, ey, 0.5)
- Sliding point
At that time, Xiaobian will specially publish a Jiugongge tutorial for interested partners to move forward~
# Slide from point (x0, y0) to point (x1, y1) and then to point (x2, y2)
# The sliding speed between two points is 0.2 seconds
d.swipe((x0, y0), (x1, y1), (x2, y2), 0.2)
ps: click, slide and drag operations support percentage position values. Example:
# Indicates long press the center of the screen
d.long_click(0.5, 0.5)
Push-pull file
- Push file to device
# Push aaa file to sdcard
d.push("aaa.txt", "/sdcard/")
# Push aaa file to sdcard and rename it
d.push("aaa.txt", "/sdcard/bar.txt")
# fileobj
with open("aaa.txt", 'rb') as a:
    d.push(a, "/sdcard/")
# Driving and changing file access patterns
d.push("aaa.sh", "/data/local/tmp/", mode=0o755)
- Pull the file off the device
# Pull down a file called aaa
d.pull("/sdcard/aaa.txt", "aaa.txt")

# If the file cannot be found on the device, FileNotFoundError will be raised
d.pull("/sdcard/abcd_error.txt", "aaa.txt")
Key events
- On / off screen
# Open screen
d.screen_on()
# Close screen
d.screen_off()
- Operation of hard keyboard and soft keyboard
d.press("home") # Click the home button, and you can also press the button directly in the view to trigger
d.press("back") # Click the back key, and you can also directly press the button in the view to trigger
d.press("left") # Click the left button
d.press("right") # Right click
d.press("up") # Click the up button
d.press("down") # Click the next button
d.press("center") # Click Select
d.press("menu") # Click the menu button
d.press("search") # Click the search button
d.press("enter") # Click enter
d.press("delete") # Click the delete button
d.press("recent") # Click the recent activity button
d.press("volume_up") # Volume+
d.press("volume_down") # Volume-
d.press("volume_mute") # Mute
d.press("camera") # camera
d.press("power") #Power key
- Unlock screen
d.unlock()
# The principle is equivalent to:
# 1. Launch activities
# 2. Press the home key
Being supplemented in succession