In this article, we first talk about the function of each part of the code in the previous article, then add the code to store data in the database in the SqlBlueprintFunctionLibrary class, and introduce how to add comments and expose them to the blueprint.
1. CAPI is a packaged third-party library for C and C + + to connect MySQL database. Among them, there are many functions, such as adding, deleting, checking and modifying. In the previous article, we used the database initialization and connection functions, and the code is as follows.
Database initialization function
        //Initialize MYSQL connection object
	ConnObj->Conn = mysql_init(nullptr);
The database initialization function initializes MYSQL * object with the return value of MYSQL *. For details, please refer to the official help document of CAPI. Its source code function is declared as follows.
MYSQL * STDCALL mysql_init(MYSQL *mysql);
Database connection function
        //Judge the connection status and return the corresponding information
	if (!mysql_real_connect(ConnObj->Conn,
                                 t_Host.c_str(),
                                 t_userName.c_str(),
                                 t_Password.c_str(),
                                 t_dbName.c_str(),
                                 (uint32)Port,
                                  nullptr, 0))
	{
		Msg = TEXT("Connection failed!");
	}
	else
	{
		Msg = TEXT("Connection succeeded!");
	}
The database connection function uses MYSQL * objects and database information to establish a connection with the database. Its parameters are MYSQL * object, database IP address, database user name, database password, database port number, unix connection mode (generally NULL), client identification (generally 0). If the connection is successful, the database connection handle will be returned, and if it fails, the NULL(0) will be returned. Please refer to the official help document of CAPI for details. Its source code function is declared as follows.
MYSQL *	STDCALL mysql_real_connect(MYSQL *mysql, const char *host,
					   const char *user,
					   const char *passwd,
					   const char *db,
					   unsigned int port,
					   const char *unix_socket,
					   unsigned long clientflag);
SqlBlueprintFunctionLibrary.cpp file
UMyConnectionObject* USqlBlueprintFunctionLibrary::ConnectToMySQL(FString Host, FString userName, FString Password, FString dbName, int32 Port, FString& Msg)
{
	//Character encoding format conversion
	std::string t_Host(TCHAR_TO_UTF8(*Host));
	std::string t_userName(TCHAR_TO_UTF8(*userName));
	std::string t_Password(TCHAR_TO_UTF8(*Password));
	std::string t_dbName(TCHAR_TO_UTF8(*dbName));
	//Database connection object creation
	UMyConnectionObject* ConnObj = NewObject<UMyConnectionObject>();
	//Initialize MYSQL connection object
	ConnObj->Conn = mysql_init(nullptr);
	//Judge the connection status and return the corresponding information
	if (!mysql_real_connect(ConnObj->Conn, t_Host.c_str(), t_userName.c_str(), t_Password.c_str(), t_dbName.c_str(), (uint32)Port, nullptr, 0))
	{
		Msg = TEXT("Connection failed!");
	}
	else
	{
		Msg = TEXT("Connection succeeded!");
	}
	//Return database connection object
	return ConnObj;
}
The above code segment is the connection function of the database. First, we transform the character encoding format (MySQL database is generally UTF-8 encoding), then create a blueprint type database connection object, and then use the database initialization function to initialize Conn in the connection object, and finally use the underlying encapsulated database connection function to establish a connection with the database. If the connection is successful, the "connection succeeded" string is returned from else. If the connection fails, the "connection failed" string is returned from if, and finally the database connection object is returned (the handle is returned after the MySQL [real] connect() function connects successfully, and NULL is returned after the connection fails, that is 0, while 0 represents false,! 0 represents true, so the "connection failed" string is returned.) . Here, the handle is actually a smart pointer.
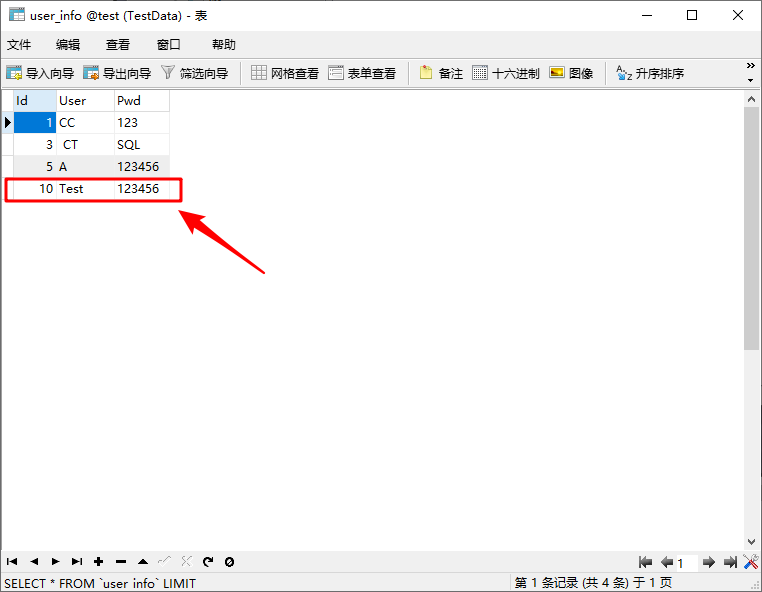
2. Now let's add logging to this plug-in. First, use the database management software (I use Navicat here) to create a new database, and then add a table, as shown below.

Before creating a database, you must install the database. You must install the database. You must install the database (for important things, I use version 5.5).
3. Open the previously created project, locate and open the SqlBlueprintFunctionLibrary.h and SqlBlueprintFunctionLibrary.cpp files. Add the following code after the database connection function.
SqlBlueprintFunctionLibrary.h file
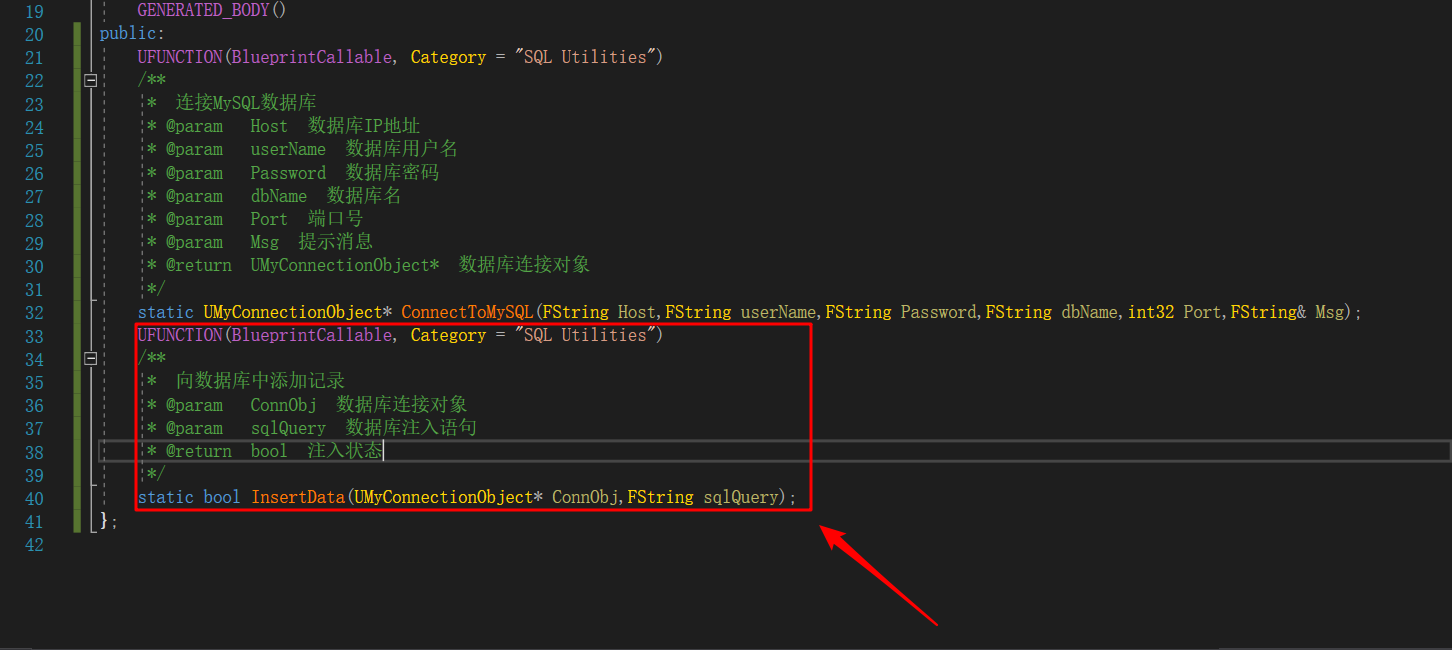
    UFUNCTION(BlueprintCallable, Category = "SQL Utilities")
    /**
     *  Add records to the database
     * @param   ConnObj  Database connection object
     * @param   sqlQuery  Database injection statement
     * @return  bool  Injection state
     */
    static bool InsertData(UMyConnectionObject* ConnObj,FString sqlQuery);
SqlBlueprintFunctionLibrary.cpp file
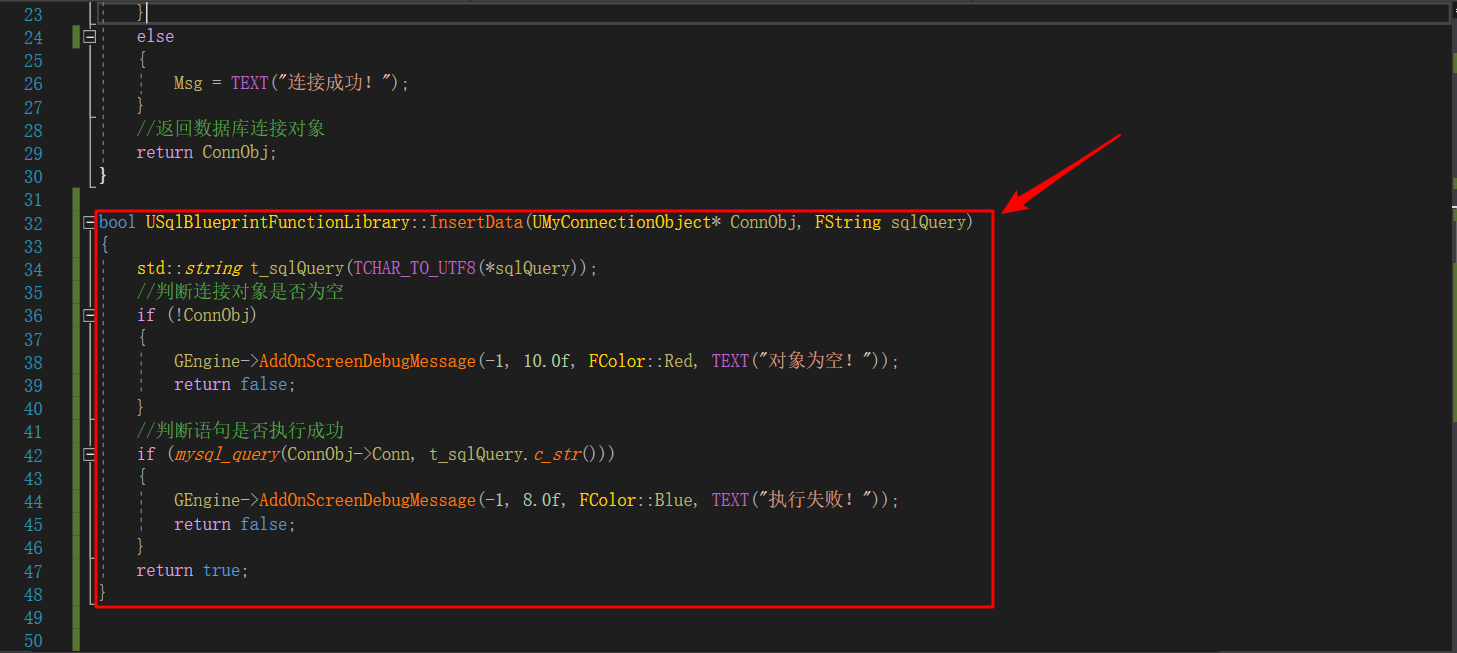
bool USqlBlueprintFunctionLibrary::InsertData(UMyConnectionObject* ConnObj, FString sqlQuery)
{
	std::string t_sqlQuery(TCHAR_TO_UTF8(*sqlQuery));
	//Judge whether the connection object is empty
	if (!ConnObj)
	{
		GEngine->AddOnScreenDebugMessage(-1, 10.0f, FColor::Red, TEXT("Object is empty!"));
		return false;
	}
	//Judge whether the statement is executed successfully
	if (mysql_query(ConnObj->Conn, t_sqlQuery.c_str()))
	{
		GEngine->AddOnScreenDebugMessage(-1, 8.0f, FColor::Blue, TEXT("Execution failed!"));
		return false;
	}
	return true;
}
In the above code, first check whether the database connection object is empty, and then execute the SQL statement with MYSQL query() function. The first input parameter is MYSQL * object, and the second input parameter is SQL statement. When the return value is 1, execution fails. The source code function is declared as follows.
int STDCALL mysql_query(MYSQL *mysql, const char *q);
The following code is a code commonly used by UE4 to output debugging information to the screen, which needs to introduce the header file "Engine.h".
GEngine->AddOnScreenDebugMessage(-1, 8.0f, FColor::Blue, TEXT("Execution failed!"));Adding records to a database is actually executing SQL statements.
4. When adding comments, I use tomato assistant here. I can go to Baidu to search and download the trial version or apply for the education Version (49 US dollars, non-commercial use). You need to customize comments as follows.
Step 1: click its button on the Visual Studio toolbar.

Step 2: after opening the setting interface, first select Suggestions, then click Edit VA Snippets, and finally click OK.

Step 3: first select the Refactoring option, then select the Document Methods option, add the following code to the coding area, and finally click the Ok button.
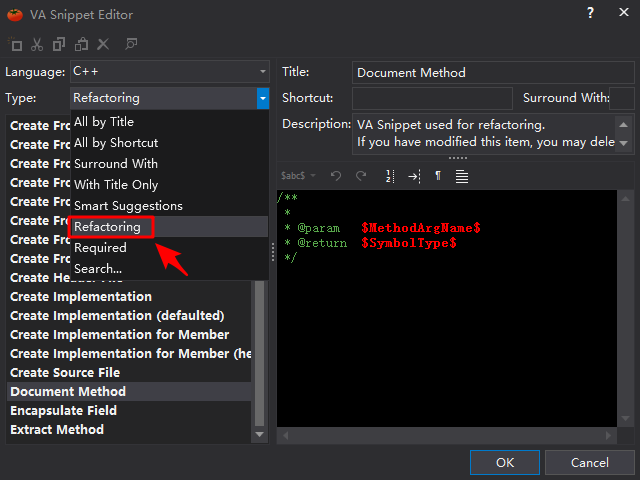
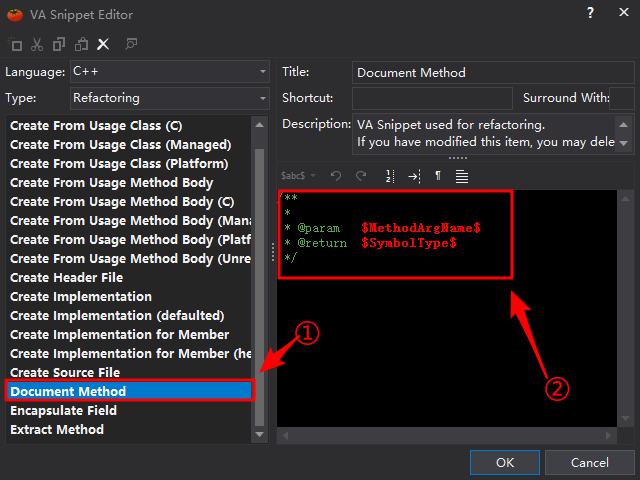
/**
 *
 * @param   $MethodArgName$
 * @return  $SymbolType$
 */
You can configure related comments according to your preferences.
5. Click the local Windows debugger button and wait for a moment. After compiling, the UE4 editor will be opened automatically to open the checkpoint blueprint, as shown in the figure below.
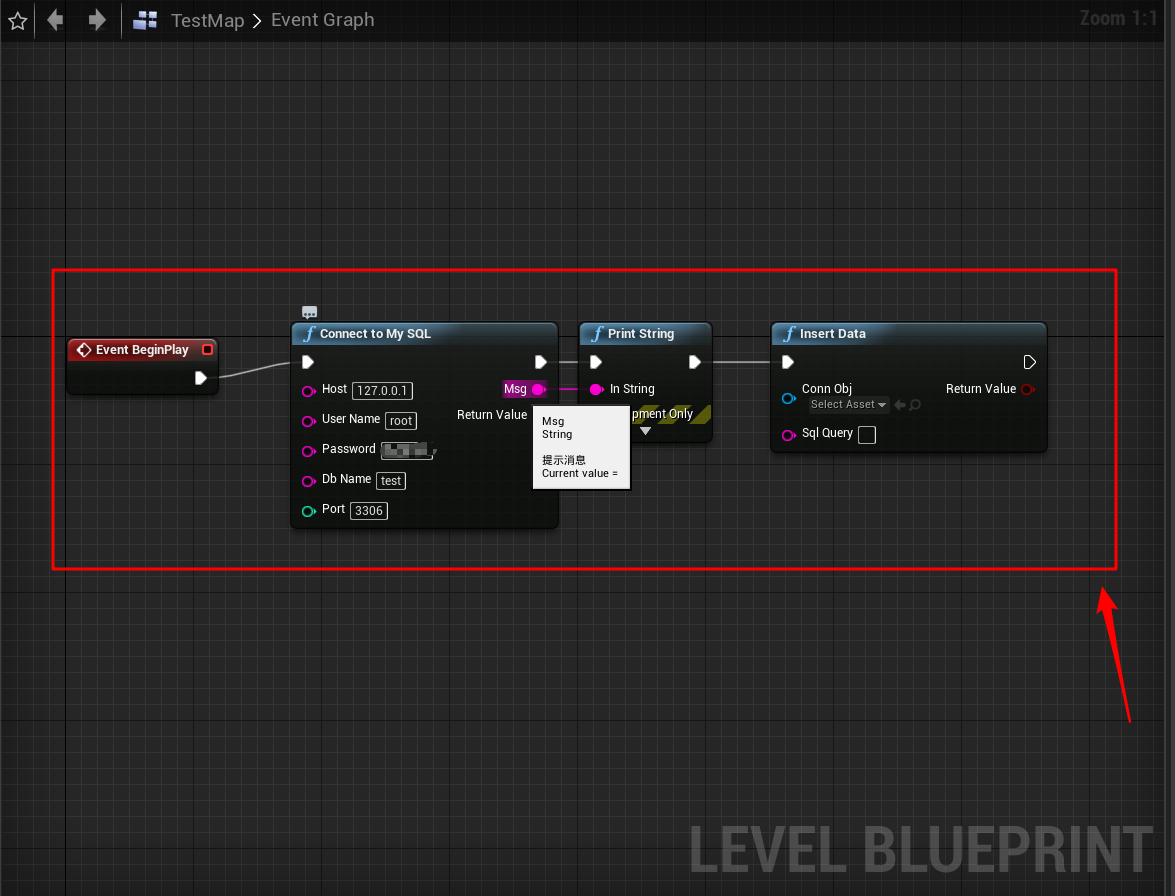
6. First, we fill in the relevant database information, establish the connection, and then give the InsertData node no database connection object. After compiling, play the checkpoint. The effect is as follows.
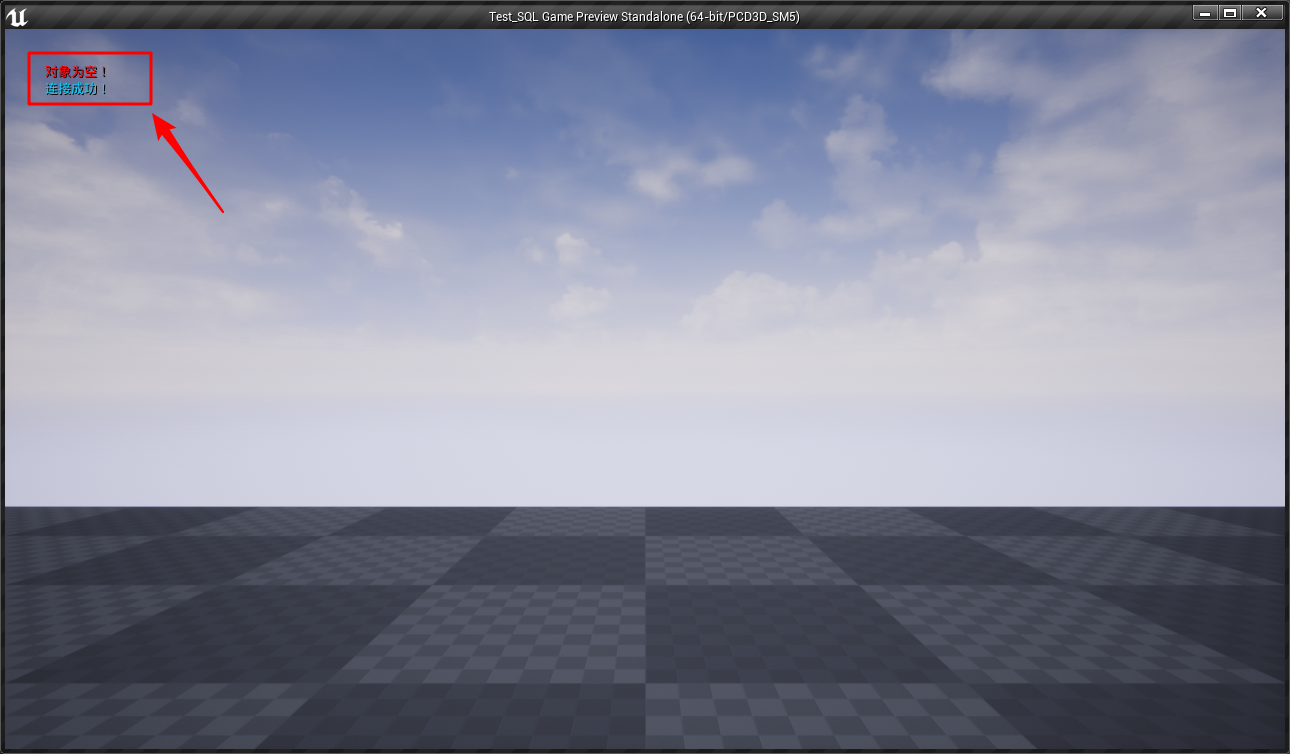
We will find that the database connection is successful, but the object is empty, which is actually the function of the following code.
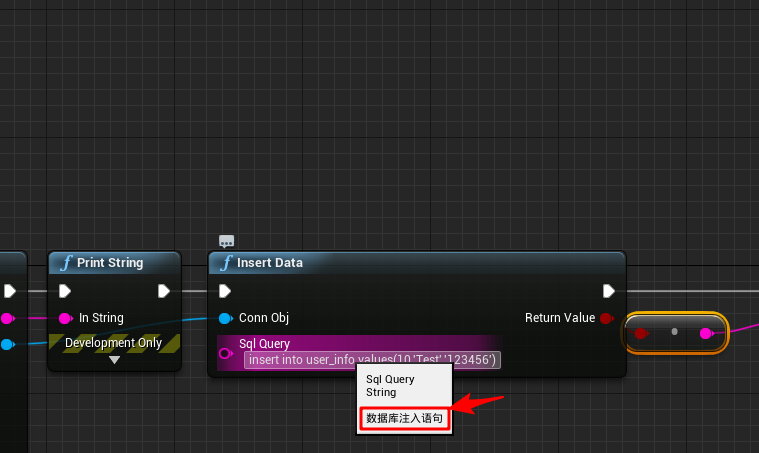
GEngine->AddOnScreenDebugMessage(-1, 10.0f, FColor::Red, TEXT("Object is empty!"));7. In the chart in the previous step, we connect the ConnObj object and fill in the SQL statement, the effect is as follows.
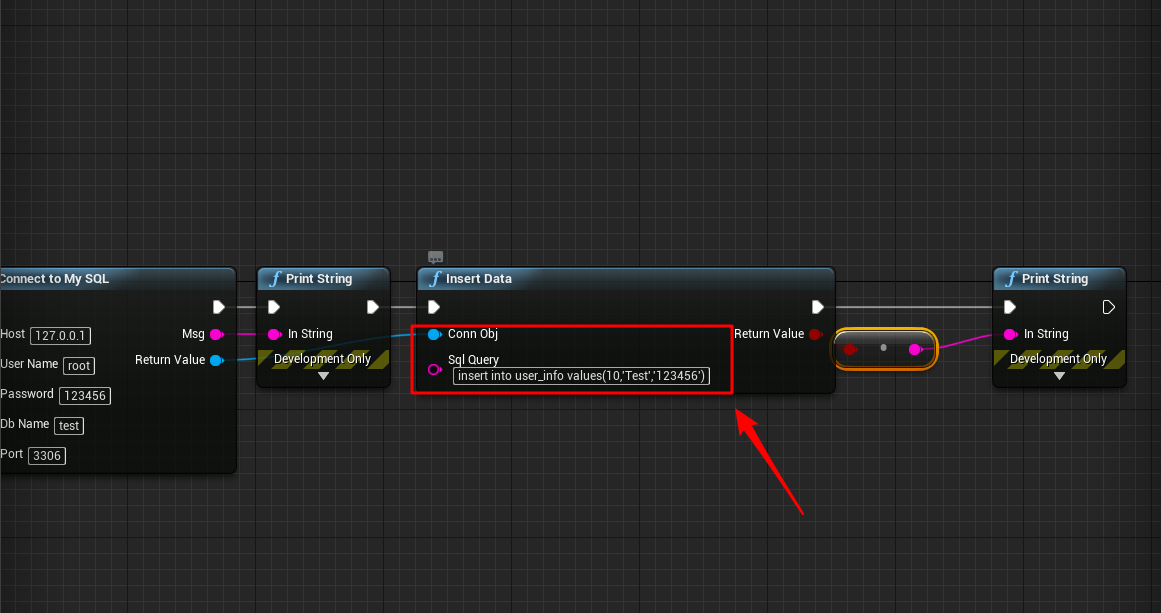
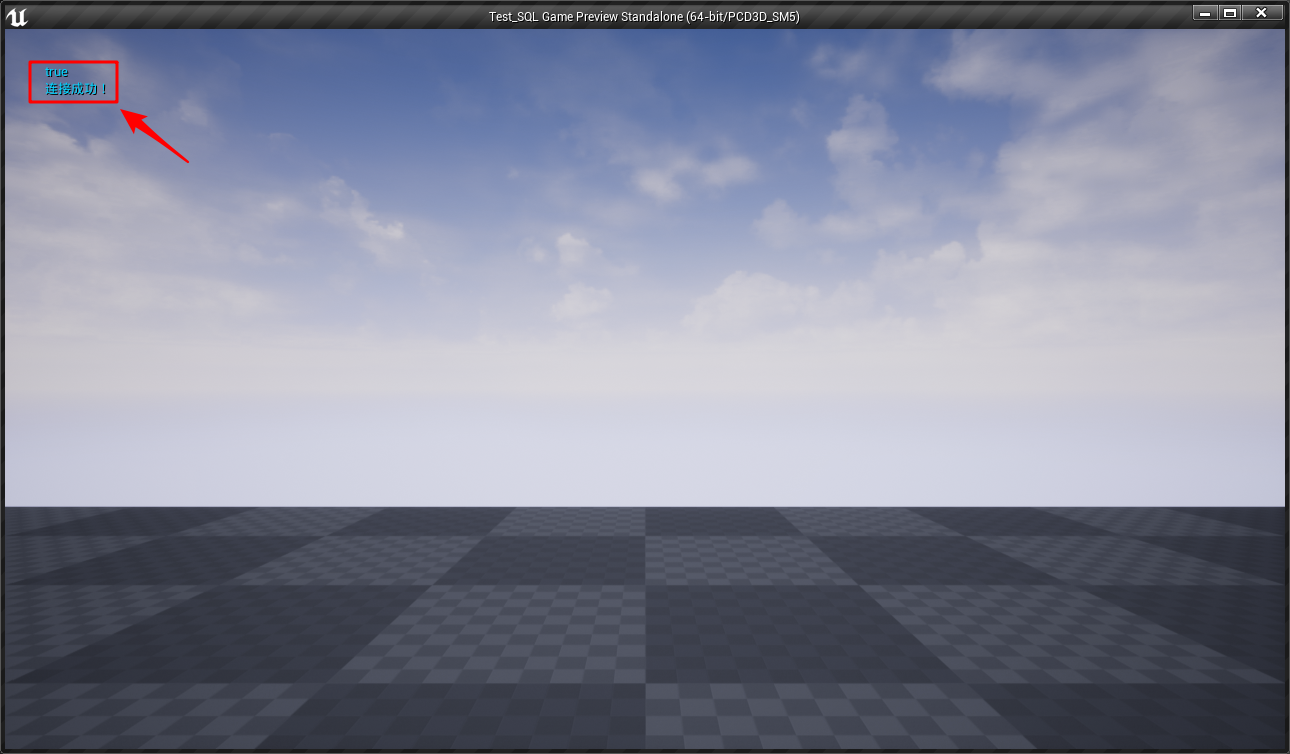
We will find that the database connection is successful and the data has been added.
8. The effect of the annotation is as follows.
At this point, the function of adding records to our database has been added. You can use FString to splice strings in the code, add values to the array, and realize the operability of the InsertData node. In the next part, we will talk about modifying and deleting data.


Published 8 original articles, won praise 0, visited 1488