catalogue
Experimental environment
Experimental environment:
1,win10,vmwrokstation Virtual machine;
2,k8s Cluster: 3 sets centos7.6 1810 Virtual machine, 1 master node,2 individual node node
   k8s version: v1.22.2
   containerd://1.5.5
Experimental software
nothing
1. Admission controller
Kubernetes provides methods to extend its built-in functions. The most commonly used are * * custom resource type (CRD) and custom controller (Operator) * *. In addition, kubernetes has some other very interesting functions, such as admission webhooks, which can be used to extend the API and modify the basic behavior of some kubernetes resources.
The admission controller is a code segment used to intercept * * (similar to the Middleware / interceptor in back-end development) the request of Kubernetes API Server before object persistence. After the request is authenticated and authorized * * passes. The admission controller may be Validating, mutating, or both. Mutating controllers can modify the resource objects they process; The Validating controller does not. If any controller in any stage rejects the request, the entire request is rejected immediately and the error is returned to the end user.
This means that there are special controllers that can intercept Kubernetes API requests and modify or reject them according to custom logic. Kubernetes has a list of controllers implemented by itself: https://kubernetes.io/docs/reference/access-authn-authz/admission-controllers/#what -Of course, you can also write your own controllers. Although these controllers sound powerful, they need to be compiled into Kube apiserver, And can only be started when apiserver starts.
You can also directly use the Kube apiserver startup parameters to view the built-in supported controllers:
kube-apiserver --help |grep enable-admission-plugins
Due to the limitations of the above controllers, we need to use the concept of dynamic instead of coupling with apiserver. Permission webhooks solves this limitation through a dynamic configuration method. (Note: this api is not the same as our aggregation api)
2. What is admission webhook
Kubernetes apiserver contains two special admission controllers: MutatingAdmissionWebhook and ValidatingAdmissionWebhook, * * these two controllers will send admission requests to the external HTTP callback service and receive an admission response** If both admission controllers are enabled, kubernetes administrators can create and configure an admission webhook in the cluster.
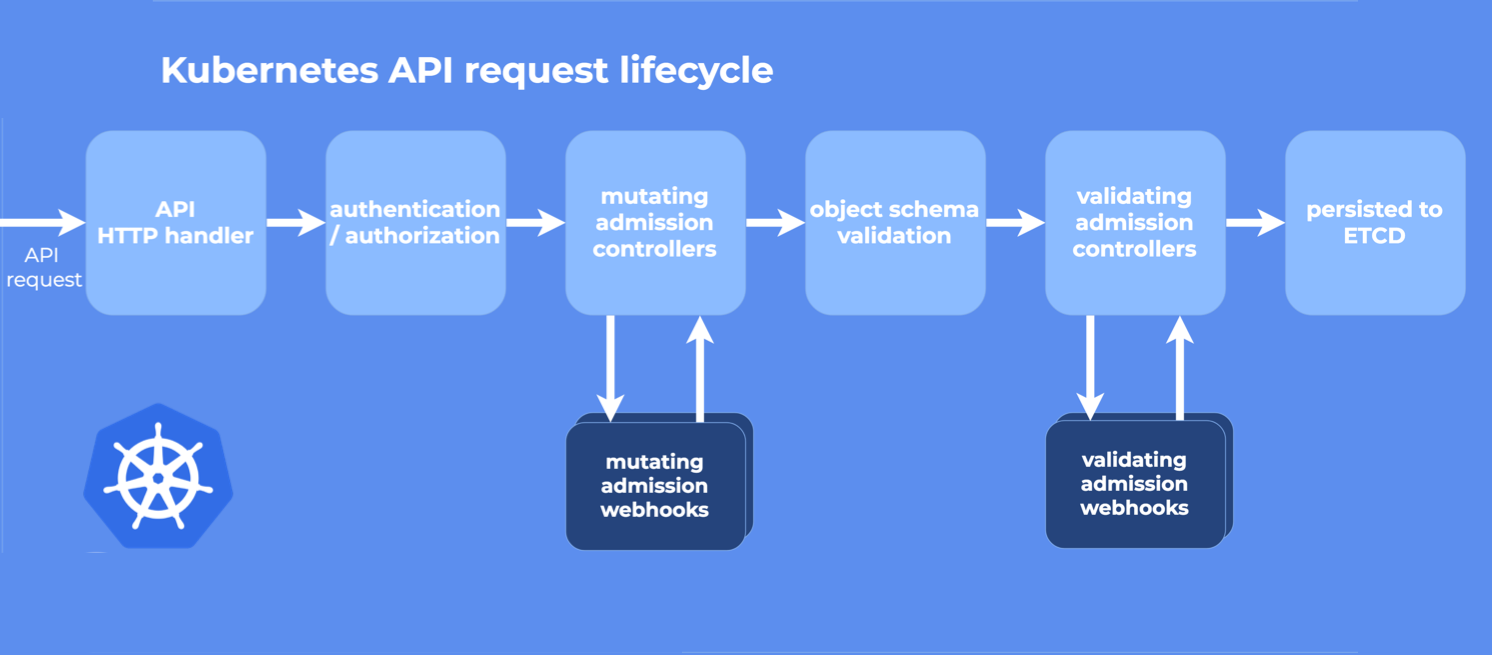
What we can modify are MutatingAdmissionWebhooks and ValidatingAdmissionWebhooks.; There can also be multiple webhooks here;
The overall steps are as follows:
- Check whether the admission webhook controller is enabled in the cluster and configure it as needed.
- Write an HTTP callback to handle admission requests. The callback can be a simple HTTP service deployed in the cluster or even a serverless function.
- Configure the admission webhook through the MutatingWebhookConfiguration and ValidatingWebhookConfiguration resources.
The difference between these two types of admission webhook s is very obvious: validating webhooks can reject a request, but they cannot modify the object obtained in the admission request, while mutating webhooks can modify the object by creating a patch before returning the admission response. If a webhook rejects a request, an error will be returned to the end user. (Note: mutating webhooks actually includes the function of validating webhooks, which can also directly reject requests.)
⚠️ The popular Service Mesh application istio automatically injects Envoy, a sidecar container, into the Pod through mutating webhooks: https://istio.io/docs/setup/kubernetes/sidecar-injection/ .
3. Create and configure an Admission Webhook
⚠️ Note: this actual combat is difficult because it involves code... Put aside learning...
Note: the content of this part must be mastered!!!
Above, we introduced the theoretical knowledge of Admission Webhook. Next, we will actually test it in a real Kubernetes cluster. Under this condition, we will create a webhook webserver, deploy it to the cluster, and then create a webhook configuration to see whether it takes effect.
First, make sure that the MutatingAdmissionWebhook and ValidatingAdmissionWebhook controllers are enabled in the apiserver. Configure them through the parameter -- enable admission plugins. The current v1.22 version has been built-in and enabled by default. If they are not enabled, you need to add these two parameters, and then restart the apiserver.
Then check whether the admission registration API is enabled in the cluster by running the following command:
[root@master1 ~]#kubectl api-versions |grep admission
admissionregistration.k8s.io/v1
1. Write webhook
After meeting the previous prerequisites, let's implement a webhook example to validate and mutating webhook by listening to two different HTTP endpoints (validate and mutate).
The complete code of this webhook can be obtained on Github: https://github.com/cnych/admission-webhook-example , the warehouse Fork from the project https://github.com/banzaicloud/admission-webhook-example . This webhook is a simple HTTP service with TLS authentication, which is deployed in our cluster in the way of Deployment.
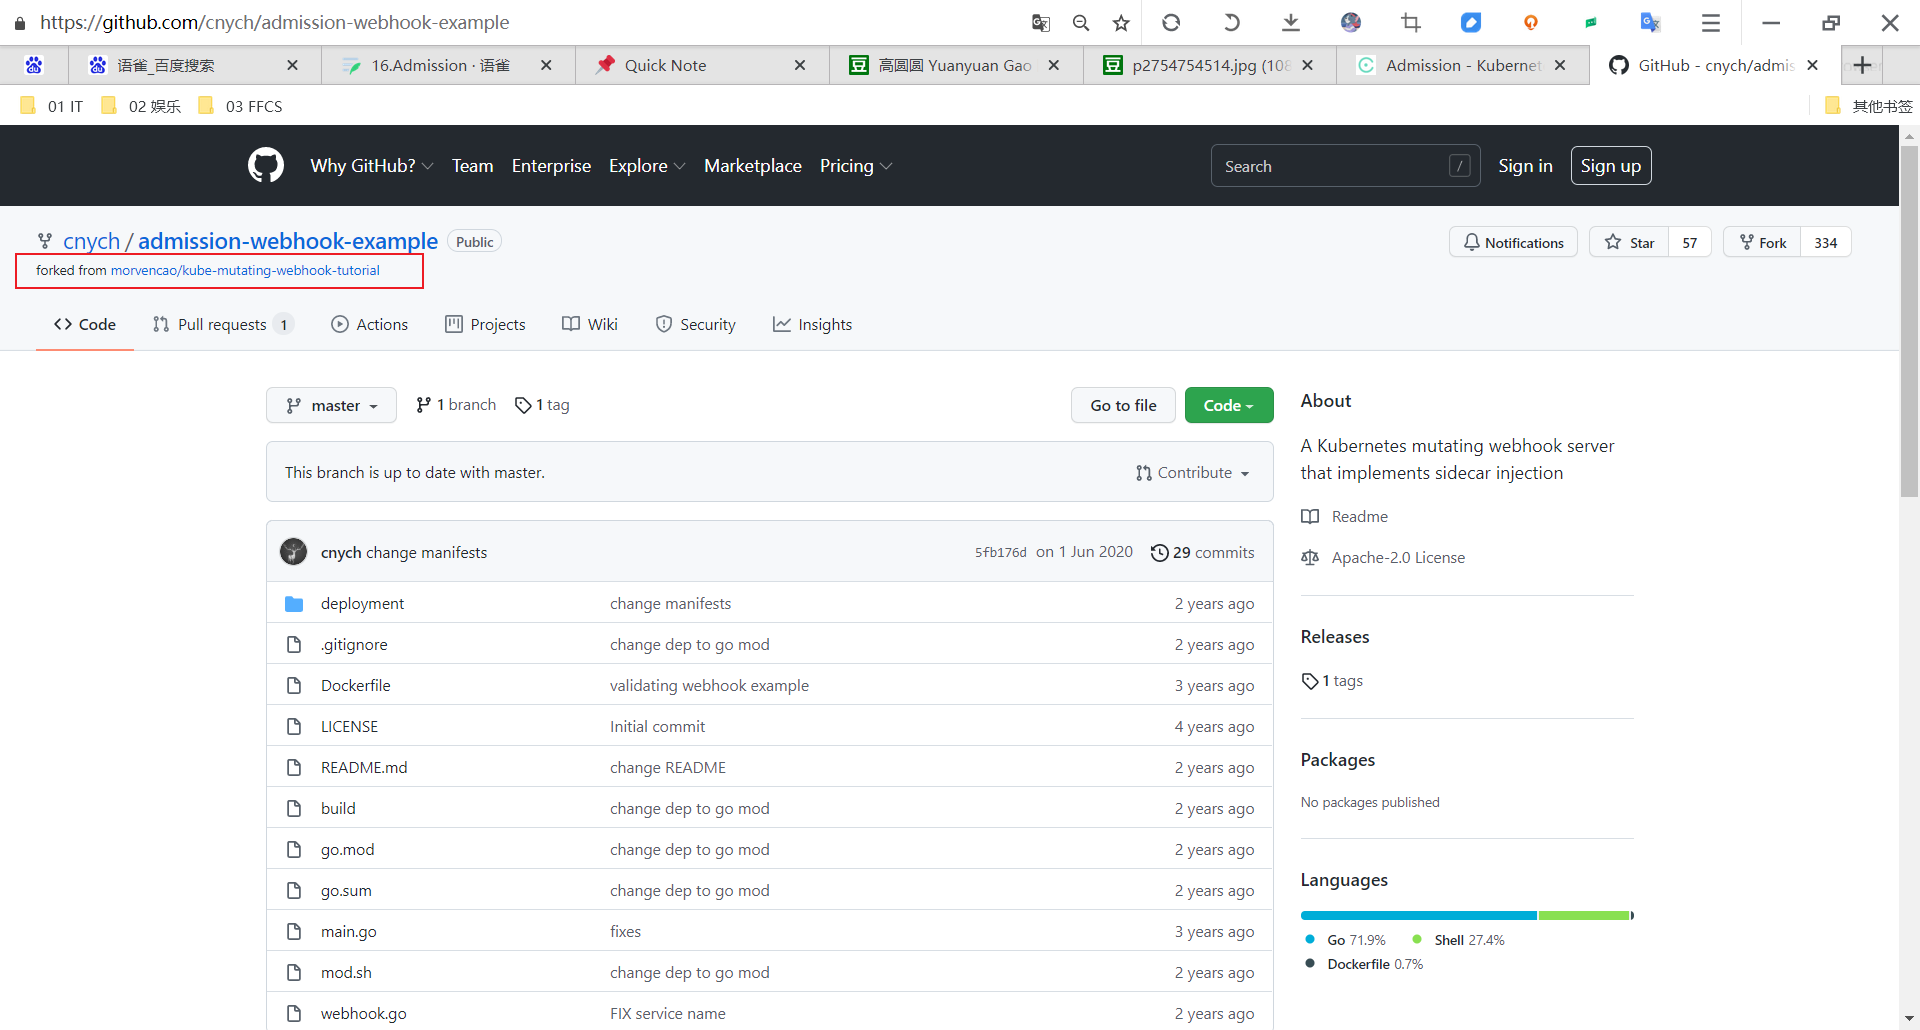
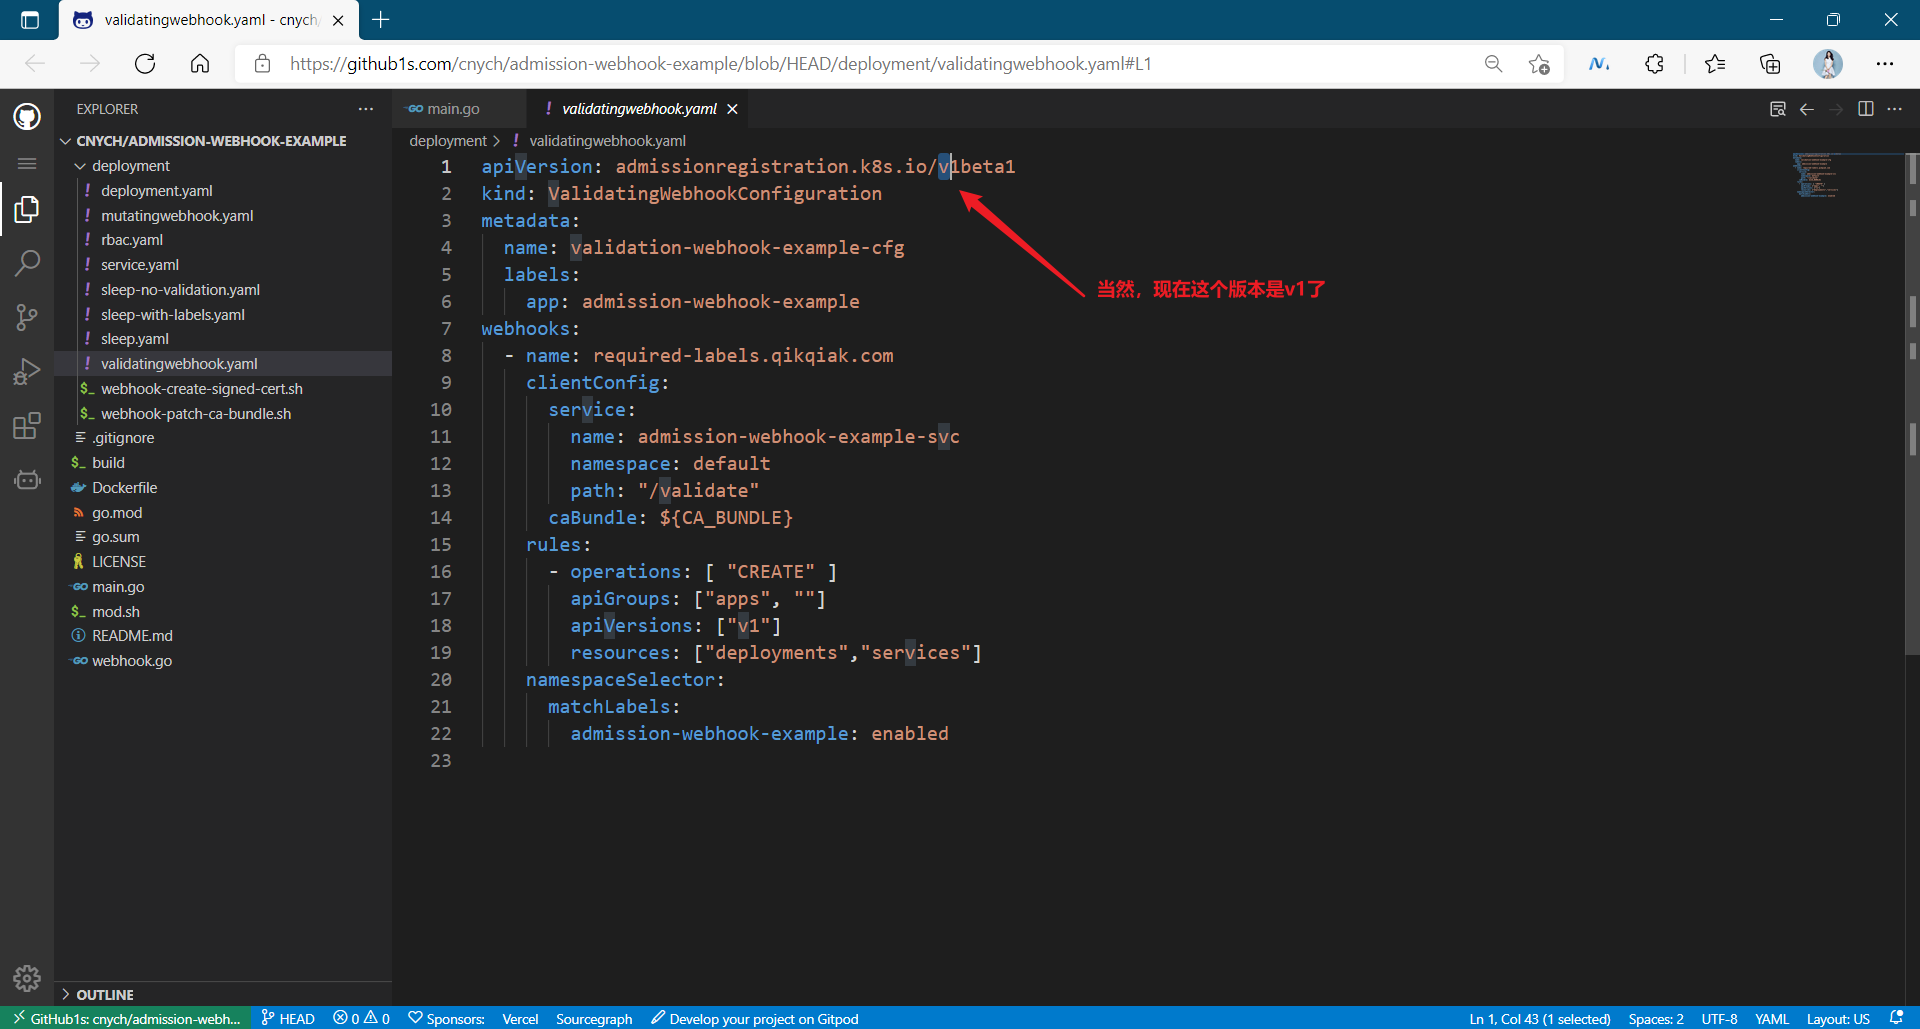
We enter https://github1s.com/cnych/admission-webhook-example1s Quickly open this item in the web page vscode:
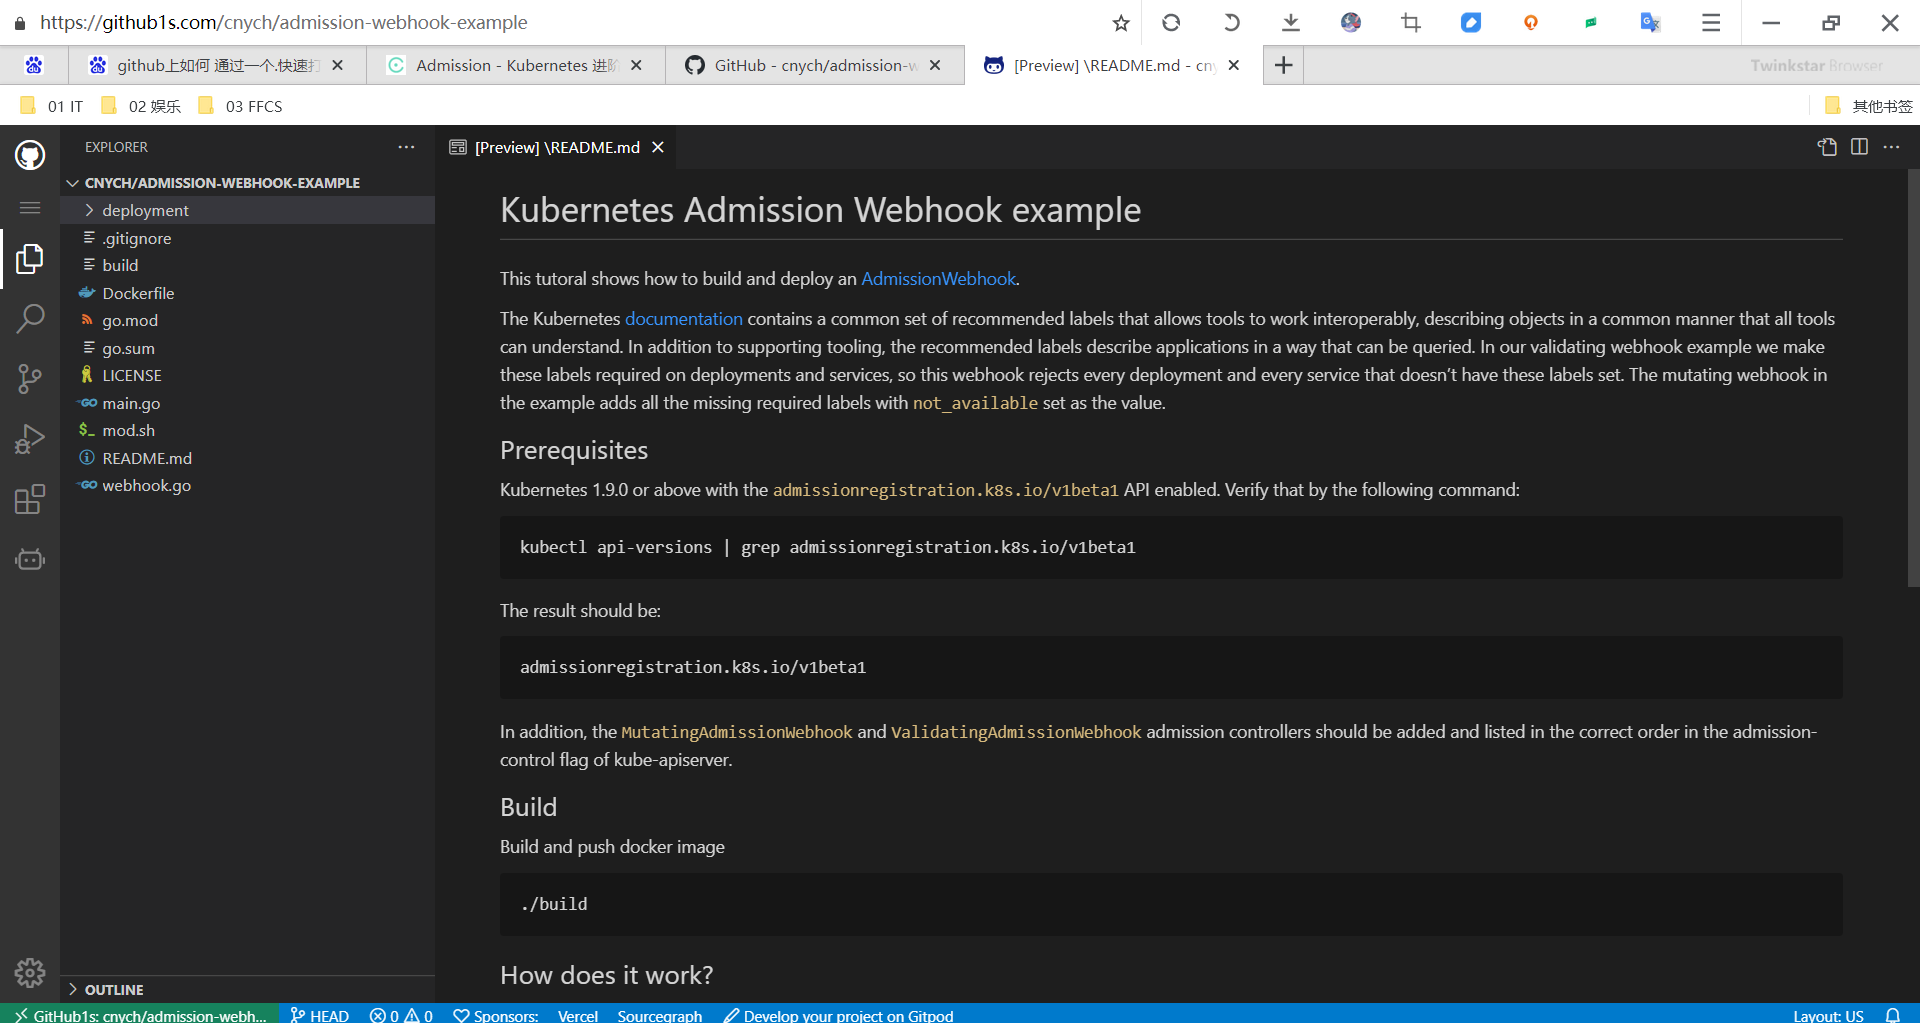
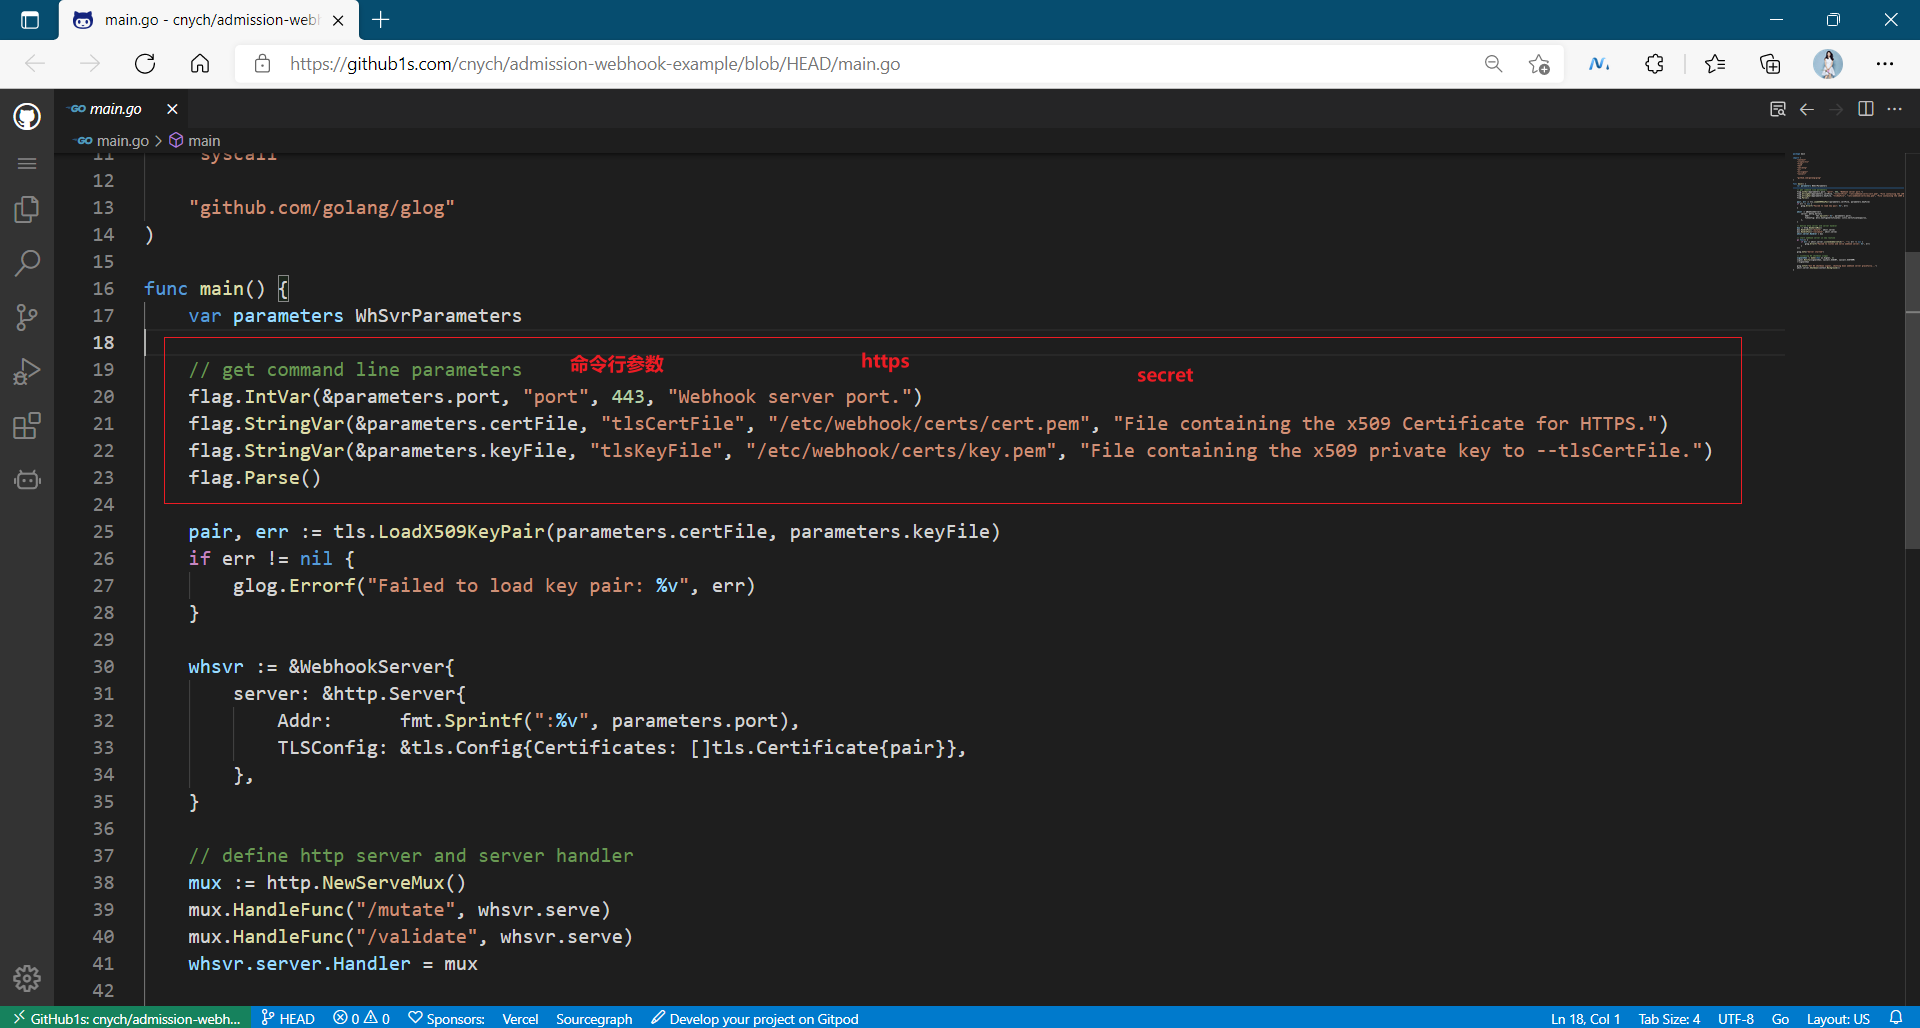
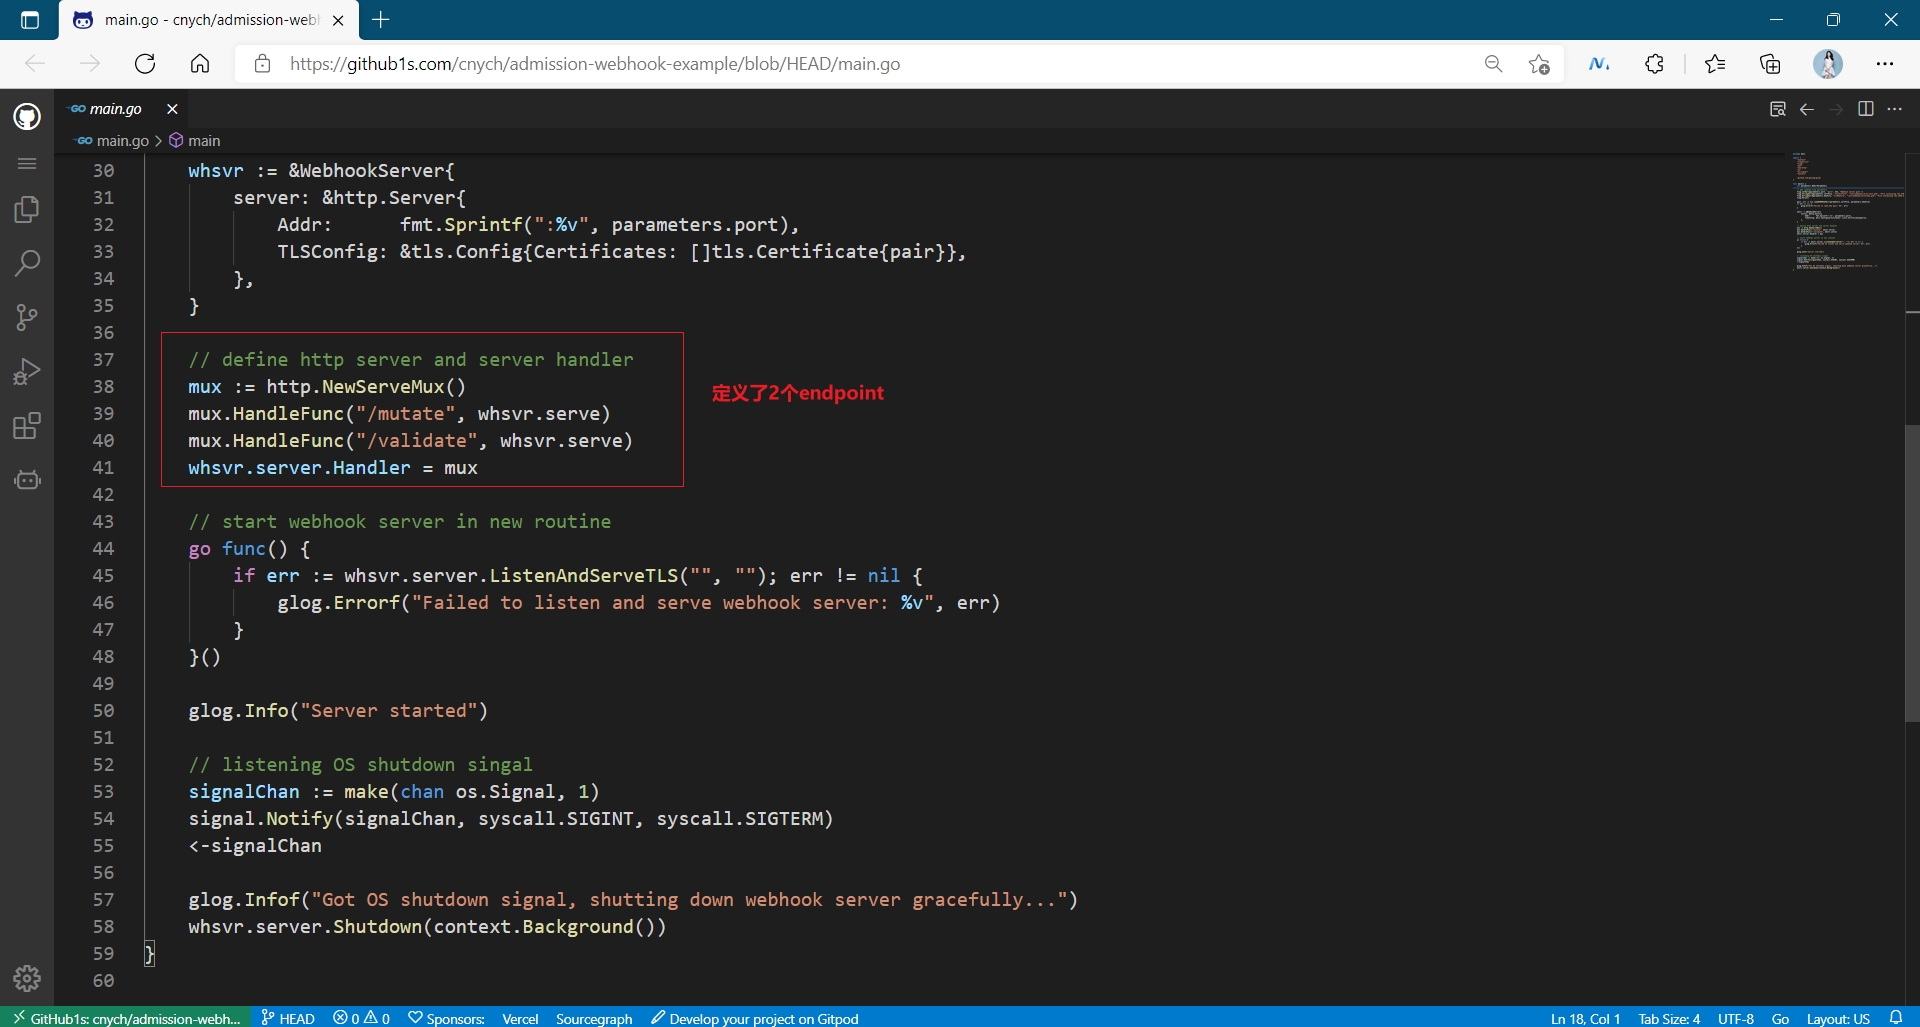
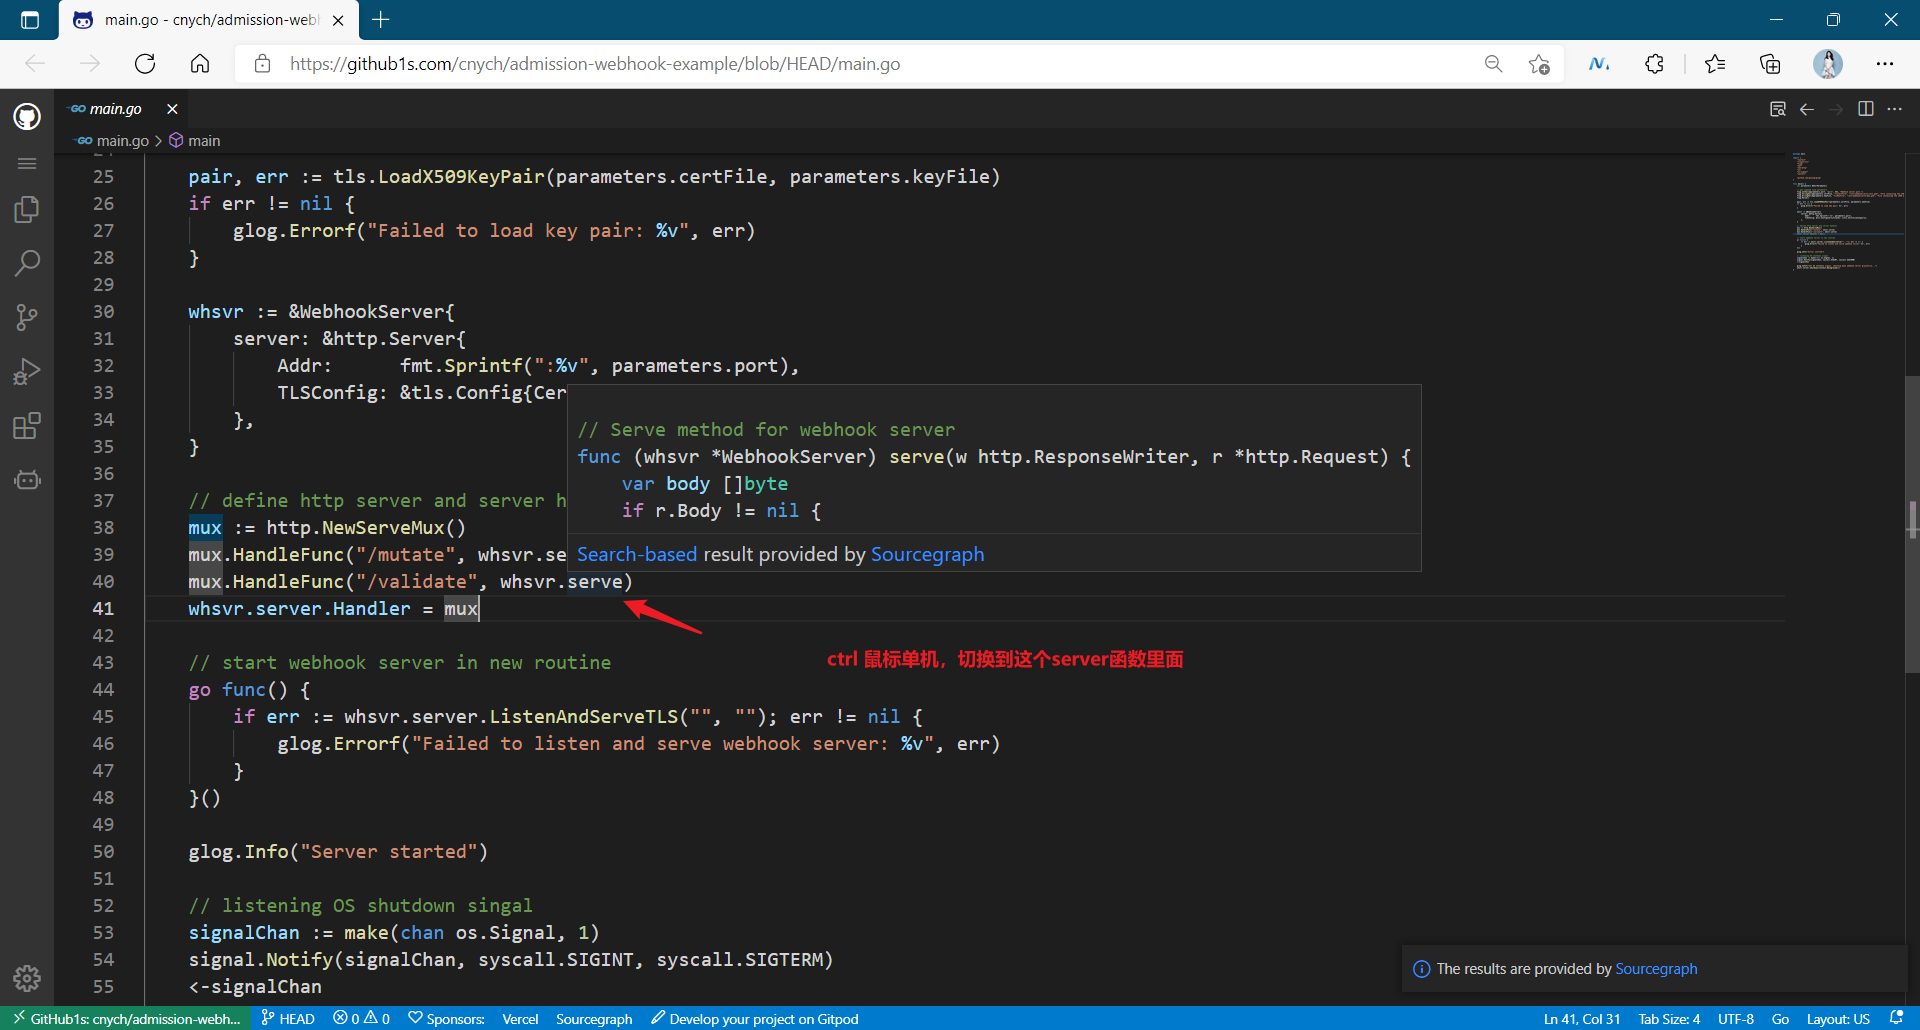
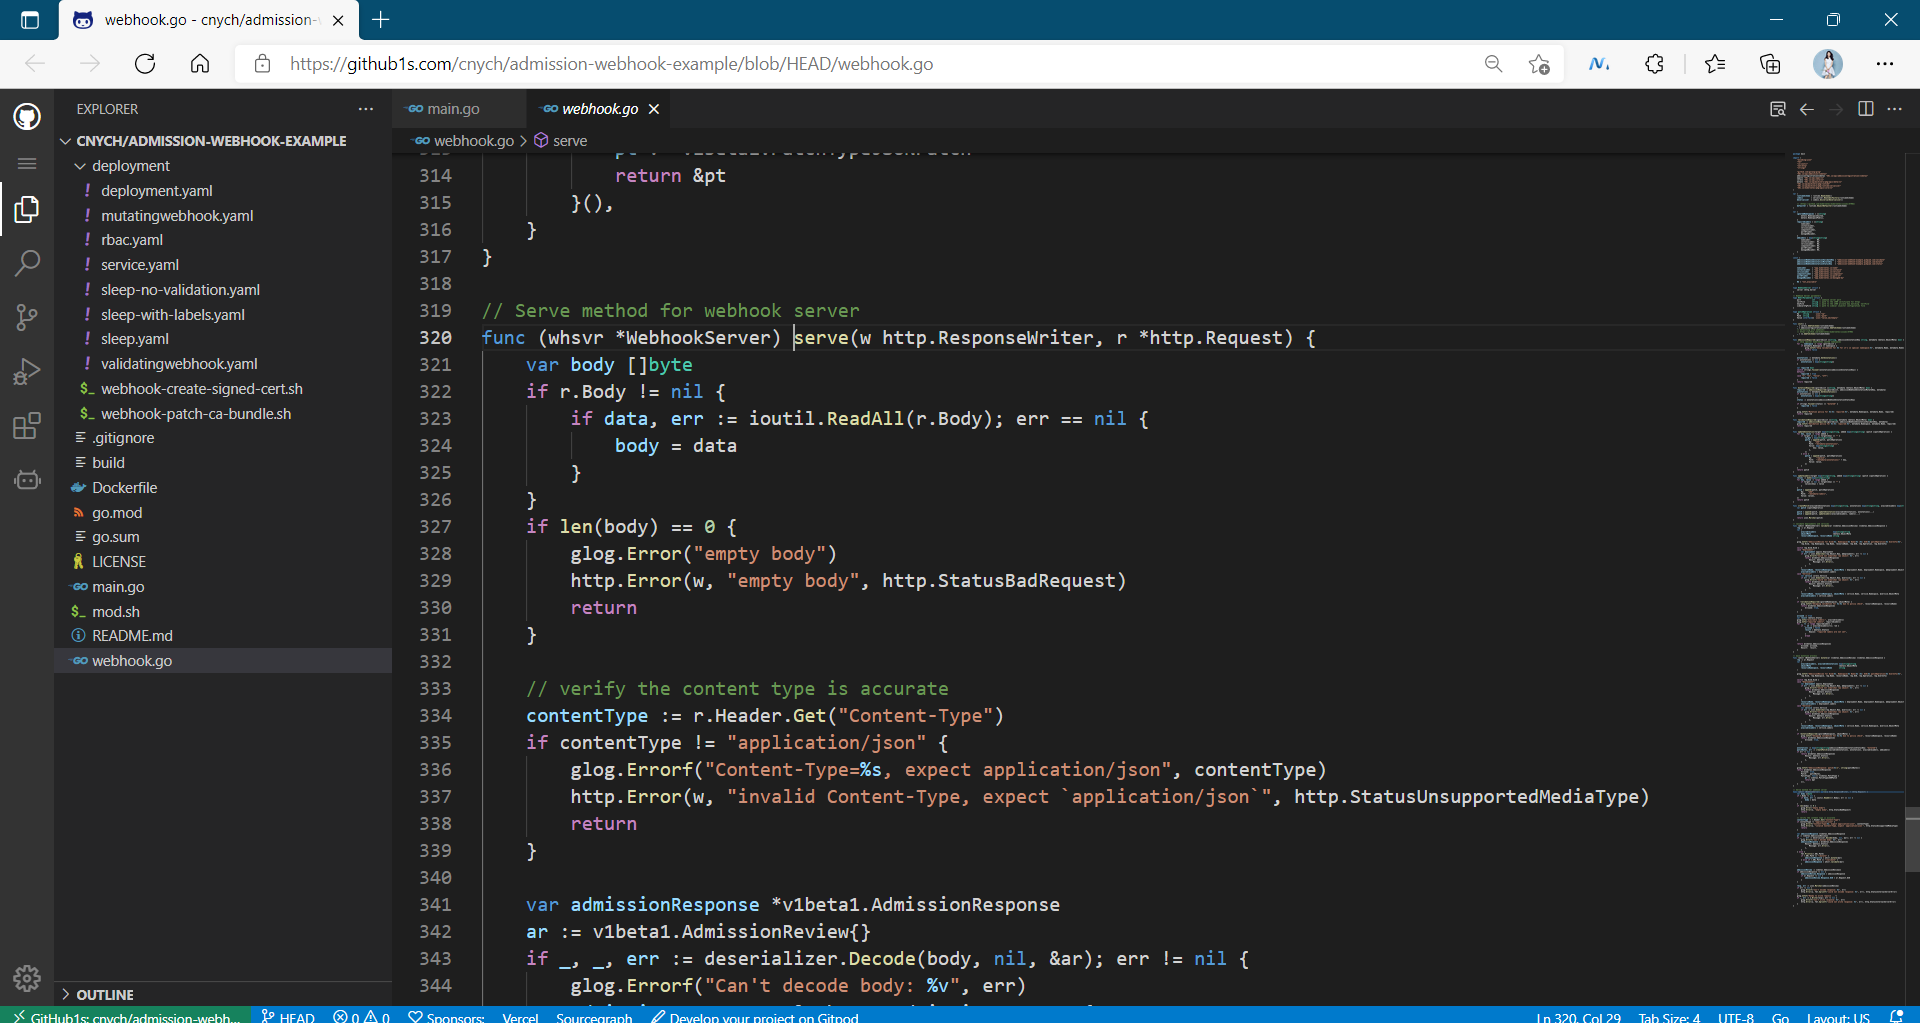
. . . . . shift, I don't understand the development part very well.....
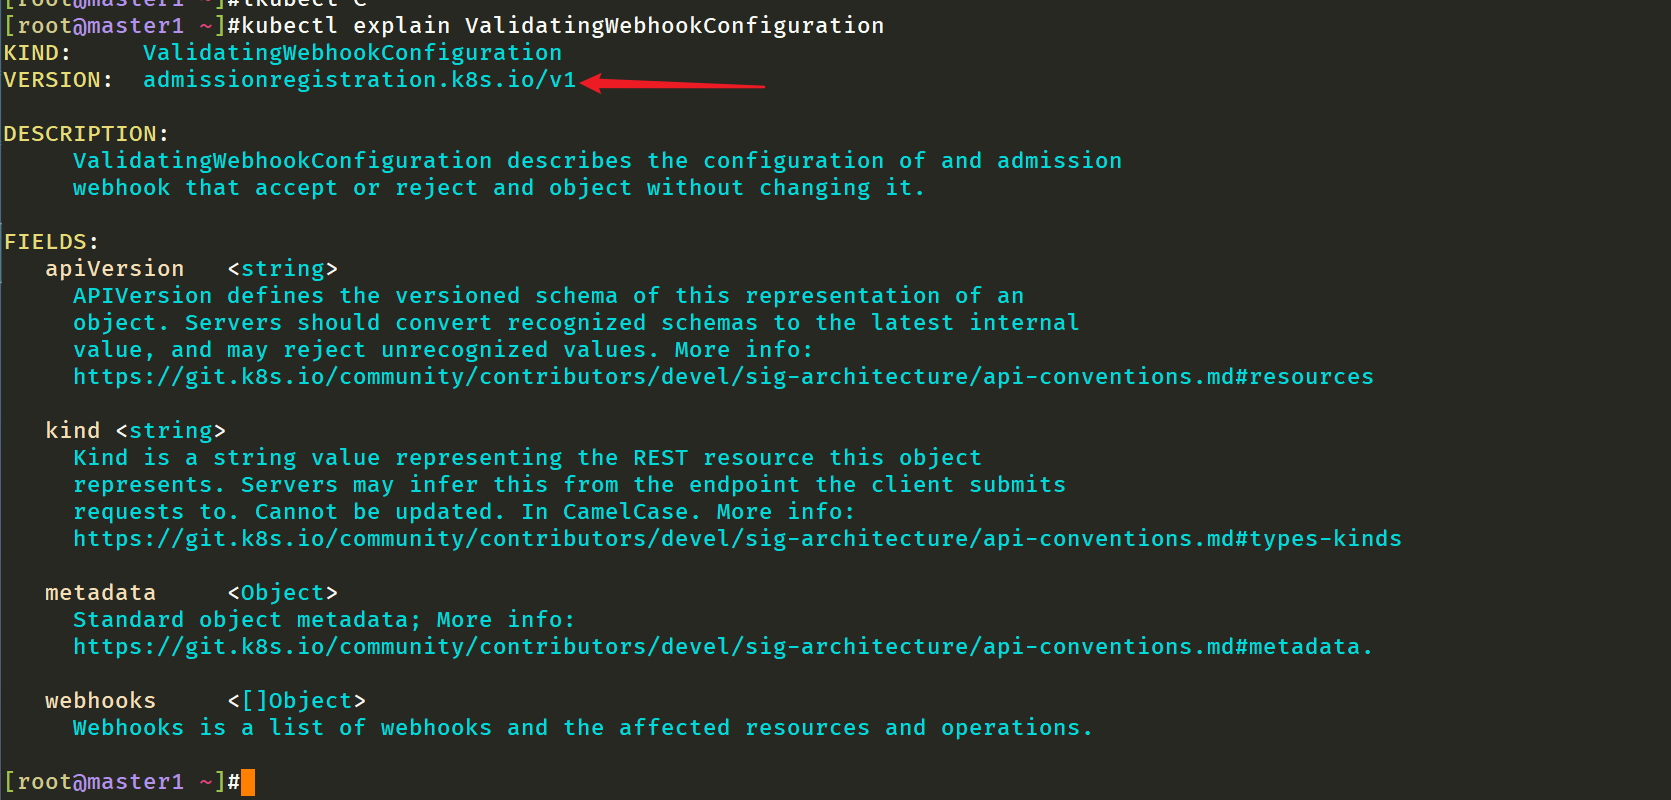
[root@master1 ~]#kubectl explain ValidatingWebhookConfiguration.webhooks
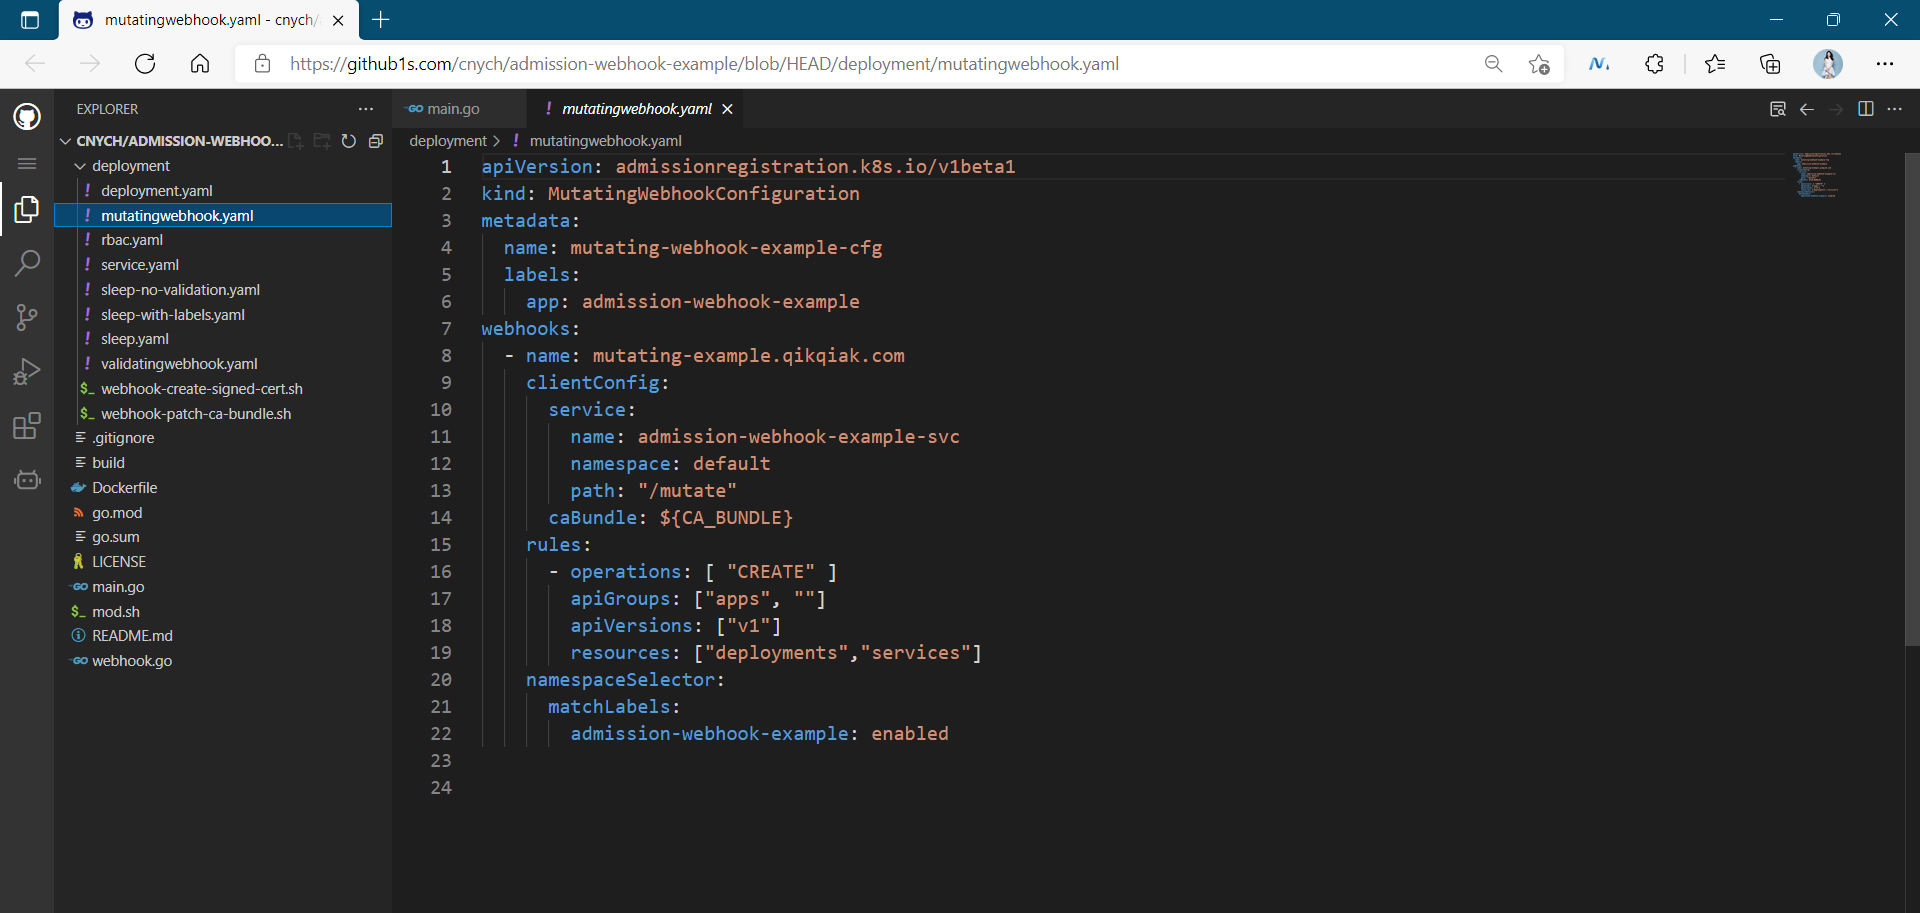
The main logic in the code is in two files: main.go and webhook.go. The main.go file contains the code for creating HTTP services, while webhook.go contains the logic of validates and changes. Most of the codes are relatively simple. First, check the main.go file to see how to use the standard golang package to start HTTP services, And how to read the certificate of TLS configuration from the command line flag:
flag.StringVar(¶meters.certFile, "tlsCertFile", "/etc/webhook/certs/cert.pem", "File containing the x509 Certificate for HTTPS.") flag.StringVar(¶meters.keyFile, "tlsKeyFile", "/etc/webhook/certs/key.pem", "File containing the x509 private key to --tlsCertFile.")
Then, a more important function is the serve function, which is used to process the HTTP requests of the incoming mutate and validating functions. This function deserializes the AdmissionReview object from the request, performs some basic content verification, calls the corresponding mutate and validate functions according to the URL path, and then serializes the AdmissionReview object:
func (whsvr *WebhookServer) serve(w http.ResponseWriter, r *http.Request) {
    var body []byte
    if r.Body != nil {
        if data, err := ioutil.ReadAll(r.Body); err == nil {
            body = data
        }
    }
    if len(body) == 0 {
        glog.Error("empty body")
        http.Error(w, "empty body", http.StatusBadRequest)
        return
    }

    // Verify content type
    contentType := r.Header.Get("Content-Type")
    if contentType != "application/json" {
        glog.Errorf("Content-Type=%s, expect application/json", contentType)
        http.Error(w, "invalid Content-Type, expect `application/json`", http.StatusUnsupportedMediaType)
        return
    }

    var admissionResponse *v1beta1.AdmissionResponse
    ar := v1beta1.AdmissionReview{}
    if _, _, err := deserializer.Decode(body, nil, &ar); err != nil {
        glog.Errorf("Can't decode body: %v", err)
        admissionResponse = &v1beta1.AdmissionResponse{
            Result: &metav1.Status{
                Message: err.Error(),
            },
        }
    } else {
        if r.URL.Path == "/mutate" {
            admissionResponse = whsvr.mutate(&ar)
        } else if r.URL.Path == "/validate" {
            admissionResponse = whsvr.validate(&ar)
        }
    }

    admissionReview := v1beta1.AdmissionReview{}
    if admissionResponse != nil {
        admissionReview.Response = admissionResponse
        if ar.Request != nil {
            admissionReview.Response.UID = ar.Request.UID
        }
    }

    resp, err := json.Marshal(admissionReview)
    if err != nil {
        glog.Errorf("Can't encode response: %v", err)
        http.Error(w, fmt.Sprintf("could not encode response: %v", err), http.StatusInternalServerError)
    }
    glog.Infof("Ready to write reponse ...")
    if _, err := w.Write(resp); err != nil {
        glog.Errorf("Can't write response: %v", err)
        http.Error(w, fmt.Sprintf("could not write response: %v", err), http.StatusInternalServerError)
    }
}
The main admission logic is the validate and mutate functions. The validate function checks whether the resource object needs validation: resources in the Kube system and Kube public namespaces are not validated. If the declaration you want to display does not validate a resource, you can declare it by adding an annotation of admission-webhook-example.qikqiak.com/validate=false to the resource object. If verification is required, the service or deployment resource is deserialized from the request by comparing the kind and tag of the resource type with its corresponding item. If some label tags are missing, Allowed in the response is set to false. If the validation fails, the reason for the failure is written in the response, and the end user receives a failure message when trying to create a resource. The validate function is implemented as follows:
// validate deployments and services
func (whsvr *WebhookServer) validate(ar *v1beta1.AdmissionReview) *v1beta1.AdmissionResponse {
    req := ar.Request
    var (
        availableLabels                 map[string]string
        objectMeta                      *metav1.ObjectMeta
        resourceNamespace, resourceName string
    )

    glog.Infof("AdmissionReview for Kind=%v, Namespace=%v Name=%v (%v) UID=%v patchOperation=%v UserInfo=%v",
        req.Kind, req.Namespace, req.Name, resourceName, req.UID, req.Operation, req.UserInfo)

    switch req.Kind.Kind {
    case "Deployment":
        var deployment appsv1.Deployment
        if err := json.Unmarshal(req.Object.Raw, &deployment); err != nil {
            glog.Errorf("Could not unmarshal raw object: %v", err)
            return &v1beta1.AdmissionResponse{
                Result: &metav1.Status{
                    Message: err.Error(),
                },
            }
        }
        resourceName, resourceNamespace, objectMeta = deployment.Name, deployment.Namespace, &deployment.ObjectMeta
        availableLabels = deployment.Labels
    case "Service":
        var service corev1.Service
        if err := json.Unmarshal(req.Object.Raw, &service); err != nil {
            glog.Errorf("Could not unmarshal raw object: %v", err)
            return &v1beta1.AdmissionResponse{
                Result: &metav1.Status{
                    Message: err.Error(),
                },
            }
        }
        resourceName, resourceNamespace, objectMeta = service.Name, service.Namespace, &service.ObjectMeta
        availableLabels = service.Labels
    }

    if !validationRequired(ignoredNamespaces, objectMeta) {
        glog.Infof("Skipping validation for %s/%s due to policy check", resourceNamespace, resourceName)
        return &v1beta1.AdmissionResponse{
            Allowed: true,
        }
    }

    allowed := true
    var result *metav1.Status
    glog.Info("available labels:", availableLabels)
    glog.Info("required labels", requiredLabels)
    for _, rl := range requiredLabels {
        if _, ok := availableLabels[rl]; !ok {
            allowed = false
            result = &metav1.Status{
                Reason: "required labels are not set",
            }
            break
        }
    }

    return &v1beta1.AdmissionResponse{
        Allowed: allowed,
        Result:  result,
    }
}
The method to determine whether verification is required is as follows, which can be ignored through namespace or configured through annotations settings:
func validationRequired(ignoredList []string, metadata *metav1.ObjectMeta) bool {
    required := admissionRequired(ignoredList, admissionWebhookAnnotationValidateKey, metadata)
    glog.Infof("Validation policy for %v/%v: required:%v", metadata.Namespace, metadata.Name, required)
    return required
}

func admissionRequired(ignoredList []string, admissionAnnotationKey string, metadata *metav1.ObjectMeta) bool {
    // skip special kubernetes system namespaces
    for _, namespace := range ignoredList {
        if metadata.Namespace == namespace {
            glog.Infof("Skip validation for %v for it's in special namespace:%v", metadata.Name, metadata.Namespace)
            return false
        }
    }

    annotations := metadata.GetAnnotations()
    if annotations == nil {
        annotations = map[string]string{}
    }

    var required bool
    switch strings.ToLower(annotations[admissionAnnotationKey]) {
    default:
        required = true
    case "n", "no", "false", "off":
        required = false
    }
    return required
}
The code of the change function is very similar, but instead of just comparing tags and setting Allowed in the response, create a patch, add the missing tag to the resource, and set not_available is set to the value of the tag.
// main mutation process
func (whsvr *WebhookServer) mutate(ar *v1beta1.AdmissionReview) *v1beta1.AdmissionResponse {
    req := ar.Request
    var (
        availableLabels, availableAnnotations map[string]string
        objectMeta                            *metav1.ObjectMeta
        resourceNamespace, resourceName       string
    )

    glog.Infof("AdmissionReview for Kind=%v, Namespace=%v Name=%v (%v) UID=%v patchOperation=%v UserInfo=%v",
        req.Kind, req.Namespace, req.Name, resourceName, req.UID, req.Operation, req.UserInfo)

    switch req.Kind.Kind {
    case "Deployment":
        var deployment appsv1.Deployment
        if err := json.Unmarshal(req.Object.Raw, &deployment); err != nil {
            glog.Errorf("Could not unmarshal raw object: %v", err)
            return &v1beta1.AdmissionResponse{
                Result: &metav1.Status{
                    Message: err.Error(),
                },
            }
        }
        resourceName, resourceNamespace, objectMeta = deployment.Name, deployment.Namespace, &deployment.ObjectMeta
        availableLabels = deployment.Labels
    case "Service":
        var service corev1.Service
        if err := json.Unmarshal(req.Object.Raw, &service); err != nil {
            glog.Errorf("Could not unmarshal raw object: %v", err)
            return &v1beta1.AdmissionResponse{
                Result: &metav1.Status{
                    Message: err.Error(),
                },
            }
        }
        resourceName, resourceNamespace, objectMeta = service.Name, service.Namespace, &service.ObjectMeta
        availableLabels = service.Labels
    }

    if !mutationRequired(ignoredNamespaces, objectMeta) {
        glog.Infof("Skipping validation for %s/%s due to policy check", resourceNamespace, resourceName)
        return &v1beta1.AdmissionResponse{
            Allowed: true,
        }
    }

    annotations := map[string]string{admissionWebhookAnnotationStatusKey: "mutated"}
    patchBytes, err := createPatch(availableAnnotations, annotations, availableLabels, addLabels)
    if err != nil {
        return &v1beta1.AdmissionResponse{
            Result: &metav1.Status{
                Message: err.Error(),
            },
        }
    }

    glog.Infof("AdmissionResponse: patch=%v\n", string(patchBytes))
    return &v1beta1.AdmissionResponse{
        Allowed: true,
        Patch:   patchBytes,
        PatchType: func() *v1beta1.PatchType {
            pt := v1beta1.PatchTypeJSONPatch
            return &pt
        }(),
    }
}
2. Construction
In fact, we have packaged the code into a docker image, which you can use directly. The image warehouse address is cnych / admission webhook example: v1. Of course, if you want to change part of the code, you need to rebuild the project. Because the project is developed in go language and the package management tool is changed to go mod, we need to ensure that the build environment installs the go environment in advance. Of course, docker is also essential, because what we need is to package it into a docker image.
Get project:
mkdir admission-webhook && cd admission-webhook
git clone https://github.com/cnych/admission-webhook-example.git
We can see that there is a build script under the code root directory. We only need to provide our own docker image user name and build it directly:
export DOCKER_USER=cnych
./build
3. Deployment
In order to deploy the webhook server, we need to create a service and deployment resource object in our Kubernetes cluster. The deployment is very simple, but we need to configure the TLS configuration of the service. We can view the certificate configuration statement in the deployment.yaml file under the deployment folder under the code root directory. We will find that the certificate and private key files read from the command line parameters are mounted through a secret object:
args:
    - -tlsCertFile=/etc/webhook/certs/cert.pem
    - -tlsKeyFile=/etc/webhook/certs/key.pem
[...]
    volumeMounts:
    - name: webhook-certs
        mountPath: /etc/webhook/certs
        readOnly: true
volumes:
- name: webhook-certs
  secret:
  secretName: admission-webhook-example-certs
In the production environment, the processing of TLS certificates (especially private keys) is very important. We can use tools like cert manager to automatically process TLS certificates, or store the private key in the Vault instead of directly in the secret resource object.
We can use any type of certificate, but it should be noted that the CA certificate we set here needs to be verified by apiserver. We can reuse the generated certificate signing request script in Istio project. By sending a request to the apiserver, obtain the authentication information, and then use the obtained results to create the required secret object.
first, Run the script Check whether there is certificate and private key information in the secret object:
➜  ~ ./deployment/webhook-create-signed-cert.sh
creating certs in tmpdir /var/folders/x3/wjy_1z155pdf8jg_jgpmf6kc0000gn/T/tmp.IboFfX97
Generating RSA private key, 2048 bit long modulus (2 primes)
..................+++++
........+++++
e is 65537 (0x010001)
certificatesigningrequest.certificates.k8s.io/admission-webhook-example-svc.default created
NAME                                    AGE   REQUESTOR          CONDITION
admission-webhook-example-svc.default   1s    kubernetes-admin   Pending
certificatesigningrequest.certificates.k8s.io/admission-webhook-example-svc.default approved
secret/admission-webhook-example-certs created

➜  ~ kubectl get secret admission-webhook-example-certs
NAME                              TYPE     DATA   AGE
admission-webhook-example-certs   Opaque   2      28s
Once the secret object is created successfully, we can directly create deployment and service objects.
➜  ~ kubectl apply -f deployment/rbac.yaml
➜  ~ kubectl apply -f deployment/deployment.yaml
deployment.apps "admission-webhook-example-deployment" created

➜  ~ kubectl apply -f deployment/service.yaml
service "admission-webhook-example-svc" created
4. Configure webhook
Now our webhook service is running and can receive requests from apiserver. But we also need to create some configuration resources on kubernetes. First, configure the validating webhook and check the webhook configuration. We will notice that it contains a ca_ Placeholder for bundle:
clientConfig:
  service:
        name: admission-webhook-example-svc
        namespace: default
        path: "/validate"
    caBundle: ${CA_BUNDLE}
The CA certificate should be provided to the admission webhook configuration so that apiserver can trust the TLS certificate provided by the webhook server. Because we have signed the certificate using the Kubernetes API above, we can use the CA certificate in our kubeconfig to simplify the operation. A small script is also provided in the code warehouse to replace the CA_BUNDLE is a placeholder. Run this command before creating a validating webhook:
cat ./deployment/validatingwebhook.yaml | ./deployment/webhook-patch-ca-bundle.sh > ./deployment/validatingwebhook-ca-bundle.yaml
After execution, you can view the Ca in the validatingwebhook-ca-bundle.yaml file_ Whether the value of the bundle placeholder has been replaced. It should be noted that the path in clientConfig is / validate, because our code integrates validate and mutate into a service.
Then we need to configure some RBAC rules. We want to intercept API requests when deployment or service is created, so the values corresponding to apiGroups and apiVersions are apps/v1 corresponding to deployment and v1 corresponding to service respectively.
The last part of webhook is to configure a namespaceSelector. We can define a selector for the working namespace of webhook. This configuration is not necessary. For example, we have added the following configuration:
namespaceSelector:
  matchLabels:
      admission-webhook-example: enabled
Then our webhook will only apply to namespaces with the admission webhook example = enabled tag set.
Therefore, you need to add the tag in the default namespace first:
➜  ~ kubectl label namespace default admission-webhook-example=enabled
namespace "default" labeled
Finally, create the validating webhook configuration object, which dynamically adds webhook to the webhook chain, so once the resource is created, it will intercept the request and then call our webhook service:
➜  ~ kubectl apply -f deployment/validatingwebhook-ca-bundle.yaml
validatingwebhookconfiguration.admissionregistration.k8s.io "validation-webhook-example-cfg" created
5. Testing
Now let's create a deployment resource to verify whether it is valid. There is a sleep.yaml resource list file under the code warehouse. You can create it directly:
➜  ~ kubectl apply -f deployment/sleep.yaml
Error from server (required labels are not set): error when creating "deployment/sleep.yaml": admission webhook "required-labels.qikqiak.com" denied the request: required labels are not set
Under normal circumstances, the above error message will appear when creating, and then deploy another sleep-with-labels.yaml resource list:
➜  ~ kubectl apply -f deployment/sleep-with-labels.yaml
deployment.apps "sleep" created
It can be seen that the deployment can be deployed normally. Then we delete the above deployment and deploy another sleep-no-validation.yaml resource list. The required tags do not exist in the list, but the annotation such as admission-webhook-example.qikqiak.com/validate=false is configured, so normal can also be created normally:
➜  ~ kubectl delete deployment sleep
➜  ~ kubectl apply -f deployment/sleep-no-validation.yaml
deployment.apps "sleep" created
6. Deploying mutating webhook
First, we delete the above validating webhook to prevent interference with mutating, and then deploy a new configuration. The configuration of mutating webhook is basically the same as that of validating webhook, but the path of webbook server is / mutate. Similarly, we also need to fill in the CA first_ Bundle is a placeholder.
➜  ~ kubectl delete validatingwebhookconfiguration validation-webhook-example-cfg
validatingwebhookconfiguration.admissionregistration.k8s.io "validation-webhook-example-cfg" deleted

➜  ~ cat ./deployment/mutatingwebhook.yaml | ./deployment/webhook-patch-ca-bundle.sh > ./deployment/mutatingwebhook-ca-bundle.yaml

➜  ~ kubectl apply -f deployment/mutatingwebhook-ca-bundle.yaml
mutatingwebhookconfiguration.admissionregistration.k8s.io "mutating-webhook-example-cfg" created
Now we can deploy the above sleep application again and check whether the label label is added correctly:
➜  ~ kubectl apply -f deployment/sleep.yaml
deployment.apps "sleep" created

➜  ~ kubectl get deploy sleep -o yaml
apiVersion: apps/v1
kind: Deployment
metadata:
  annotations:
    admission-webhook-example.qikqiak.com/status: mutated
    deployment.kubernetes.io/revision: "1"
  creationTimestamp: "2020-06-01T08:10:04Z"
  generation: 1
  labels:
    app.kubernetes.io/component: not_available
    app.kubernetes.io/instance: not_available
    app.kubernetes.io/managed-by: not_available
    app.kubernetes.io/name: not_available
    app.kubernetes.io/part-of: not_available
    app.kubernetes.io/version: not_available
  name: sleep
  namespace: default
...
Finally, we recreate the validating webhook to test together. Now try to create the sleep application again. Normal can be created successfully. We can check it Documentation for admission controllers.
Admission control is divided into two stages. In the first stage, the mutating admission controller is run, and in the second stage, the validating admission controller is run.
Therefore, the mutating webhook adds the missing labels label in the first stage, and then the validating webhook will not reject the deployment in the second stage because the label already exists. Use not_available sets their values.
➜  ~ kubectl apply -f deployment/validatingwebhook-ca-bundle.yaml
validatingwebhookconfiguration.admissionregistration.k8s.io "validation-webhook-example-cfg" created

➜  ~ kubectl apply -f deployment/sleep.yaml
deployment.apps "sleep" created
⚠️ However, if we have such relevant requirements, is it very troublesome and inflexible to develop a webhook for admission controller alone? In order to solve this problem, we can use some policy management engines provided by Kubernetes to realize our requirements without writing code, such as kyverno (this may be easier to use) Gatekeeper (this may be more complicated), etc. we will explain it in detail later.
About me
Theme of my blog: I hope everyone can make experiments with my blog, first do the experiments, and then understand the technical points in a deeper level in combination with theoretical knowledge, so as to have fun and motivation in learning. Moreover, the content steps of my blog are very complete. I also share the source code and the software used in the experiment. I hope I can make progress with you!
If you have any questions during the actual operation, you can contact me at any time to help you solve the problem for free:
-
Personal wechat QR Code: x2675263825 (shede), qq: 2675263825.

-
Personal blog address: www.onlyonexl.cn
-
Personal WeChat official account: cloud native architect real battle

-
Personal csdn
https://blog.csdn.net/weixin_39246554?spm=1010.2135.3001.5421
last
Well, that's all for the Admission experiment. Thank you for reading. Finally, paste the photo of my goddess. I wish you a happy life and a meaningful life every day. See you next time!
