GUI introduction
Graphical User Interface (GUI) refers to the computer operation user interface displayed graphically. Graphical User Interface is an interface display format for communication between human and computer. It allows users to use input devices such as mouse to manipulate icons or menu options on the screen to select commands, call files, start programs or perform other daily tasks. The Graphical User Interface has many advantages over the character interface that completes routine tasks by entering text or character commands through the keyboard. Graphical User Interface is composed of window, pull-down menu, dialog box and its corresponding control mechanism. It is standardized in various new applications, that is, the same operation is always completed in the same way. In Graphical User Interface, what users see and operate are graphical objects, and the technology of computer graphics is applied.
In the process of designing GUI program, the user interface needs to be rendered to achieve the integration of color, convenience and intelligence. In the Python built-in library, there is a self-contained tkinter library, which we can directly import and use.
Simple operation
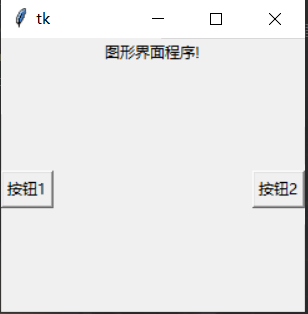
import tkinter
top=tkinter.Tk()#Generate a main window
# This can be used as a message loop and add window functions
label=tkinter.Label(top,text="Graphical interface program!")
label.pack()#Add label label to the window
button1=tkinter.Button(top,text="Button 1")
button1.pack(side=tkinter.LEFT)#Add button 1 to the window
button2=tkinter.Button(top,text="Button 2")
button2.pack(side=tkinter.RIGHT)#Add button 2 to the window
top.mainloop()#Enter message loop
- 1
- 2
- 3
- 4
- 5
- 6
- 7
- 8
- 9
- 10
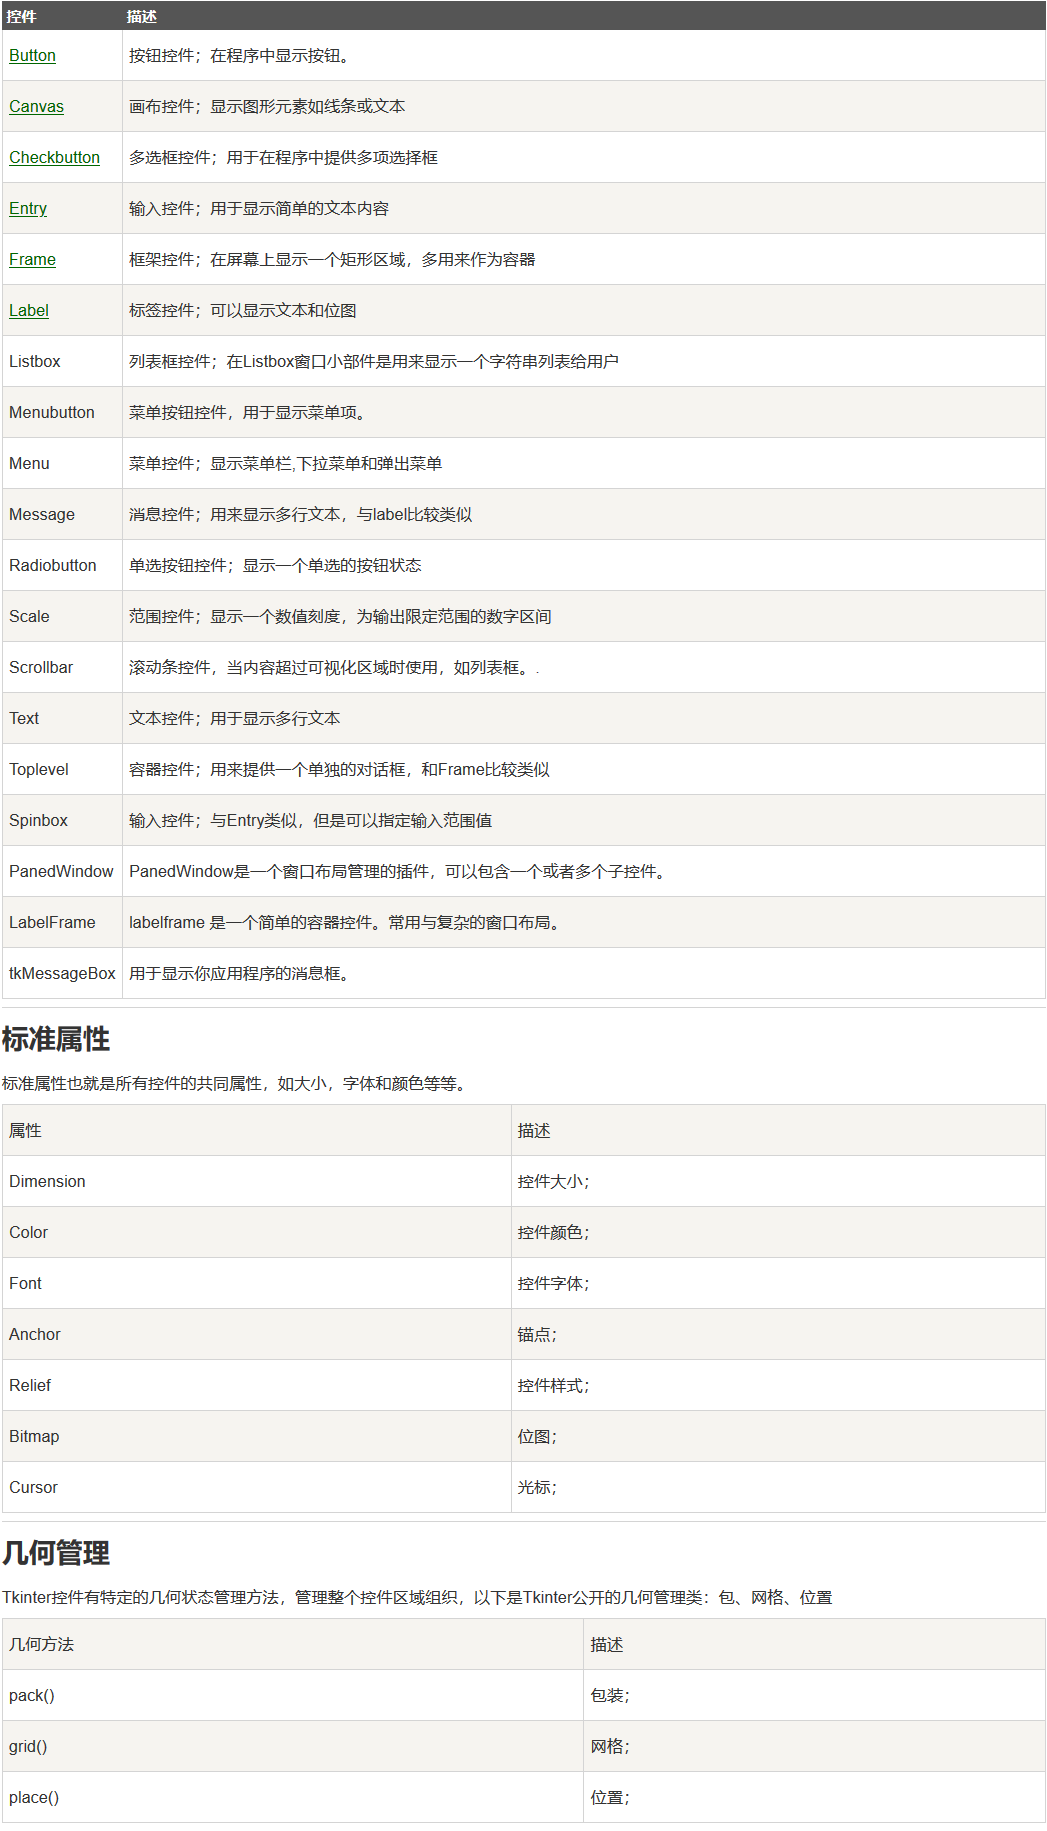
tkinter component introduction
import tkinter
import tkMessageBox
top = tkinter.Tk()
def helloCallBack():
tkMessageBox.showinfo("Hello Python", "Hello Runoob")
B = tkinter.Button(top, text = "click me", command=helloCallBack)
B.pack()
top.mainloop()
- 1
- 2
- 3
- 4
- 5
- 6
- 7
- 8
- 9
- 10
- 11
- 12
- 13
- 14

The most complete tkinter component
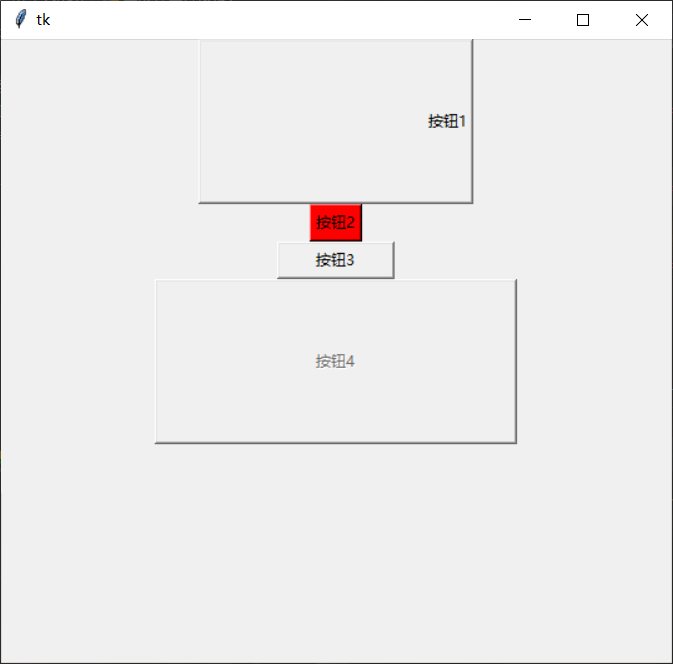
Add a button control to a form
import tkinter
root=tkinter.Tk()#Generate a main window object
button1=tkinter.Button(root,anchor=tkinter.E,#Set text alignment
text="Button 1",width=30,#Set button width
                       height=7)
button1.pack()#Add button to main window
button2=tkinter.Button(root,text="Button 2",bg="red")#Set background button color
button2.pack()
button3=tkinter.Button(root,text="Button 3",width=12,height=1)
button3.pack()
button4=tkinter.Button(root,text="Button 4",width=40,height=7,
                       state=tkinter.DISABLED)#Set button to disabled
button4.pack()
root.mainloop()
- 1
- 2
- 3
- 4
- 5
- 6
- 7
- 8
- 9
- 10
- 11
- 12
- 13
- 14
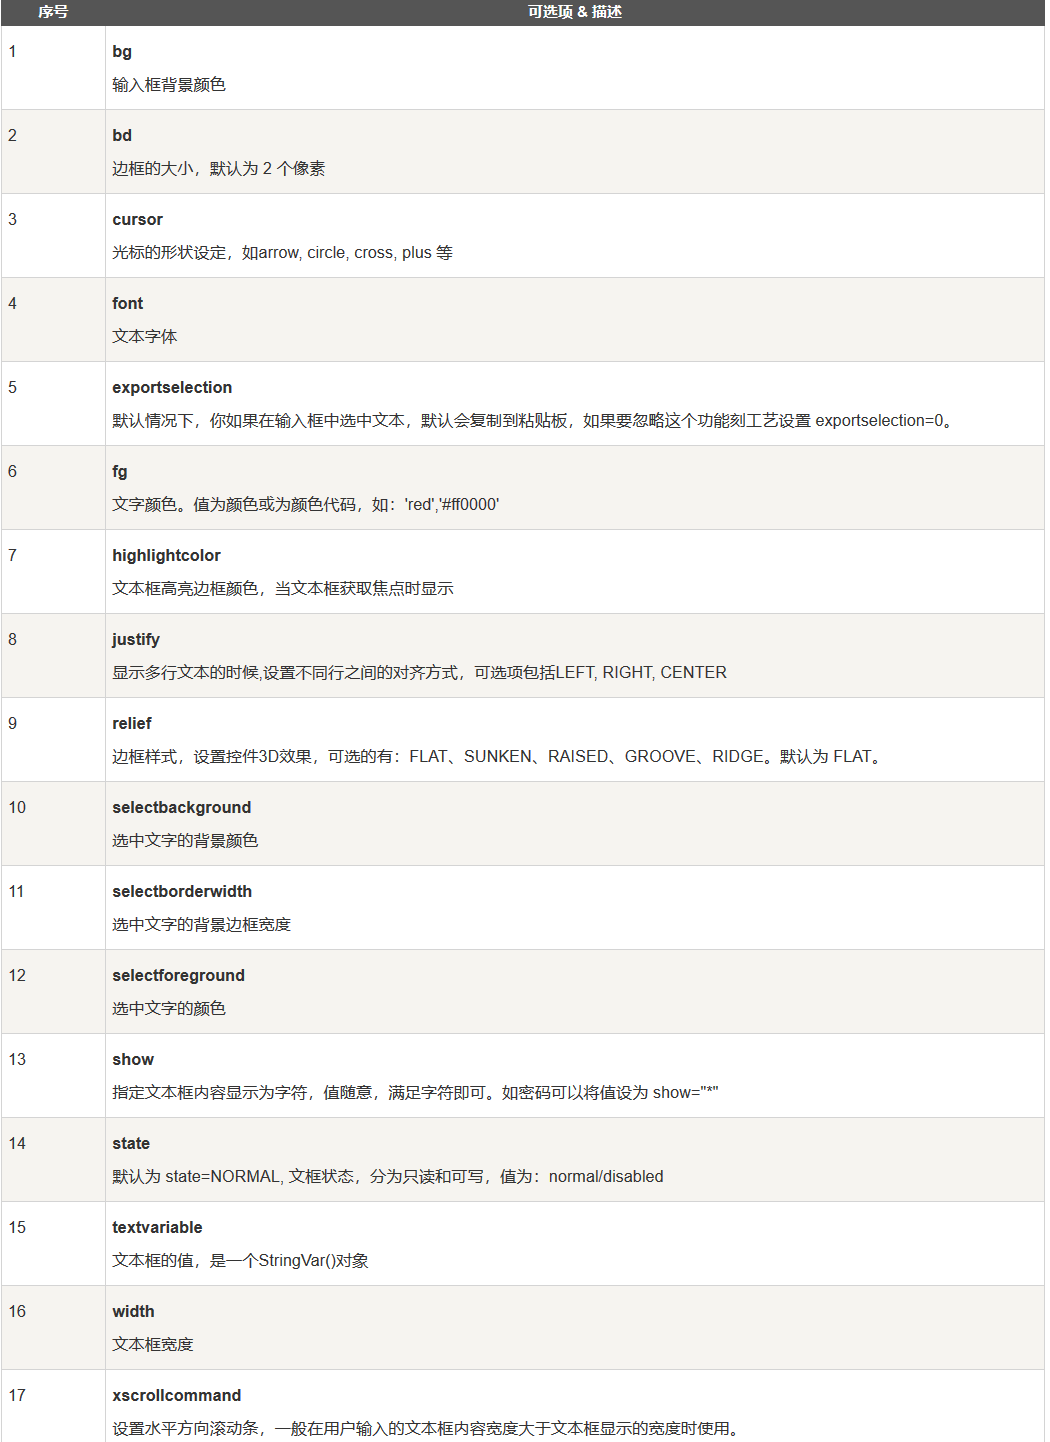
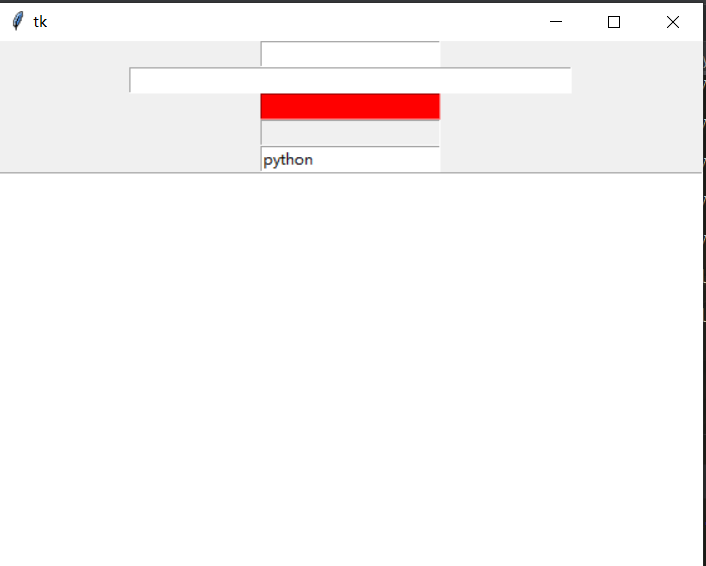
Using text box controls
Information receiving and user information input can be realized in tkinter library. In Python program, tkinter And enter TextYou can create single line text and multi line text box components to solve the color problem by passing some attributes.
import tkinter
root=tkinter.Tk()
entry1=tkinter.Entry(root,
                     show="*"#Set the display text to be an asterisk
)
entry1.pack()
entry2=tkinter.Entry(root,show="$",width=50)
entry2.pack()
entry3=tkinter.Entry(root,bg="red",fg="blue")#Sets the foreground color of the text box
entry3.pack()
entry4=tkinter.Entry(root,state=tkinter.DISABLED)
entry4.pack()
entry5=tkinter.Entry(root,selectbackground="red",selectforeground="gray")#Set the text background color and text foreground color respectively
entry5.pack()
edit1=tkinter.Text(root,selectbackground="red",selectforeground="gray")
edit1.pack()
root.mainloop()
- 1
- 2
- 3
- 4
- 5
- 6
- 7
- 8
- 9
- 10
- 11
- 12
- 13
- 14
- 15
- 16
- 17
 Using menu controls
When using the menu control, different from other controls, we need to use the method of creating the main window config() to add the menu to the window.
import tkinter
root=tkinter.Tk()
menu=tkinter.Menu(root)
# Add main menu options
submenu=tkinter.Menu(menu,tearoff=0)
submenu.add_command(label="open")
submenu.add_command(label="preservation")
submenu.add_command(label="close")
menu.add_cascade(label="file",menu=submenu)#Set header tag name
submenu=tkinter.Menu(menu,tearoff=0)
submenu.add_command(label = "copy")
submenu.add_command(label = "paste")
submenu.add_separator()
submenu.add_command(label = "cut")
menu.add_cascade(label = "Edit", menu=submenu)
submenu=tkinter.Menu(menu,tearoff=0)
submenu.add_command(label = "hacker mode")
submenu.add_command(label = "virus implantation")
submenu.add_command(label = "get password")
menu.add_cascade(label = "help", menu=submenu)
root.config(menu=menu) # adds a menu to the main window
root.mainloop()
- 1
- 2
- 3
- 4
- 5
- 6
- 7
- 8
- 9
- 10
- 11
- 12
- 13
- 14
- 15
- 16
- 17
- 18
- 19
- 20
- 21
- 22
- 23
- 24
- 25
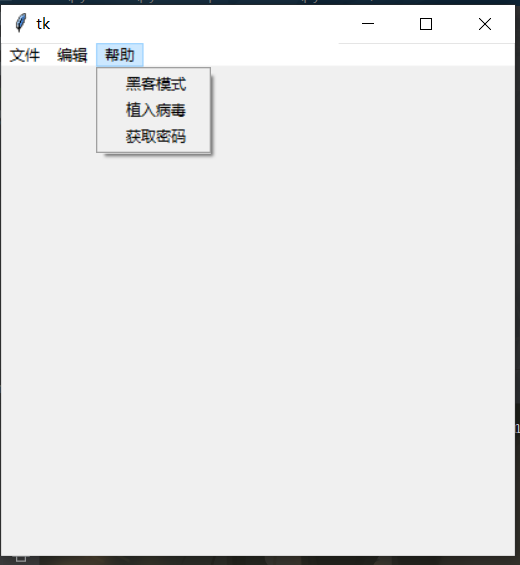 We can define different options, and then we embed different functions in the options, so as to achieve the development of a simple graphical interface software.
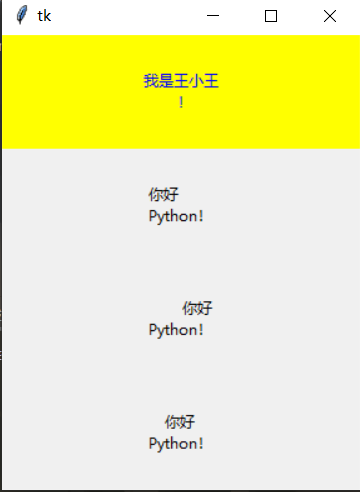
Using label controls
import tkinter
root=tkinter.Tk()
label1=tkinter.Label(root,
                     # anchor=tkinter.E,#Set label text position
                     bg="yellow",#Sets the background color of the label
                     fg="blue",#Sets the foreground color of the label
                     text="I'm wang Xiaowang\n!",#Sets the text displayed by the label
                     justify=tkinter.CENTER,
                     width=40,#Set label width
                     height=5#Set label height
                     )
label1.pack()#Add label 1 to the main window
label2=tkinter.Label(root,
                     text="Hello\nPython!",#Sets the text displayed by the label
                     justify=tkinter.LEFT,
                     width=40,#Set label width
                     height=5#Set label height
                     )
label2.pack()
label3=tkinter.Label(root,
                     text="Hello\nPython!",#Sets the text displayed by the label
                     justify=tkinter.RIGHT,
                     width=40,#Set label width
                     height=5#Set label height
                     )
label3.pack()
label4=tkinter.Label(root,
                     text="Hello\nPython!",#Sets the text displayed by the label
                     justify=tkinter.CENTER,
                     width=40,#Set label width
                     height=5#Set label height
                     )
label4.pack()
root.mainloop()
- 1
- 2
- 3
- 4
- 5
- 6
- 7
- 8
- 9
- 10
- 11
- 12
- 13
- 14
- 15
- 16
- 17
- 18
- 19
- 20
- 21
- 22
- 23
- 24
- 25
- 26
- 27
- 28
- 29
- 30
- 31
- 32
- 33
- 34
- 35
- 36
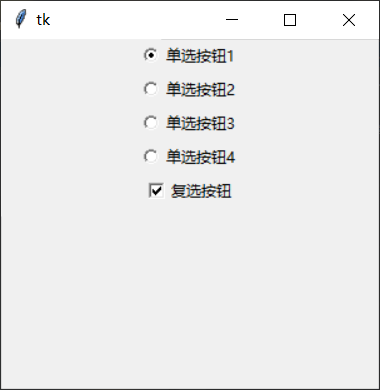
Use radio and check button components

import tkinter
root=tkinter.Tk()
r=tkinter.StringVar()#Generate string variable
r.set("1")
radio=tkinter.Radiobutton(root,
variable=r,
value="1",#Variable value when setting radio button
text="Radio button 1",
)
radio.pack()
radio=tkinter.Radiobutton(root,
variable=r,
value="2",#Variable value when setting radio button
text="Radio button 2",
)
radio.pack()
radio=tkinter.Radiobutton(root,
variable=r,
value="3",#Variable value when setting radio button
text="Radio button 3",
)
radio.pack()
radio=tkinter.Radiobutton(root,
variable=r,
value="4",#Variable value when setting radio button
text="Radio button 4",
)
radio.pack()
c=tkinter.IntVar()#Generate integer variable
c.set(1)
check=tkinter.Checkbutton(root,text="Check button",
variable=c,#The variable associated with the check button
onvalue=1,#Variable value 1 when setting the check button
offvalue=2)#Variable value when setting the check button 2
check.pack()
root.mainloop()
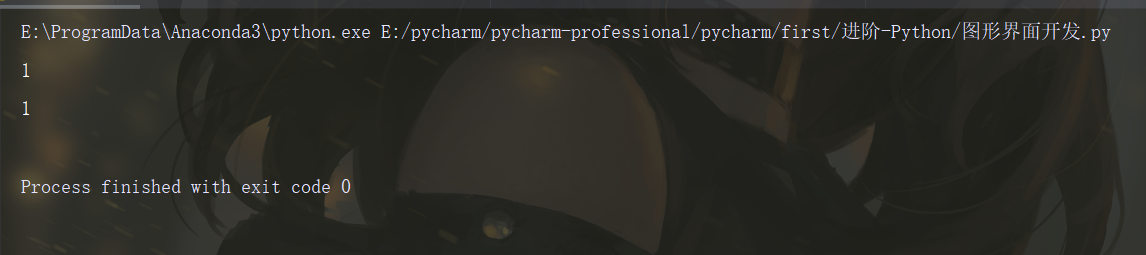
print(r.get())
print(c.get())
- 1
- 2
- 3
- 4
- 5
- 6
- 7
- 8
- 9
- 10
- 11
- 12
- 13
- 14
- 15
- 16
- 17
- 18
- 19
- 20
- 21
- 22
- 23
- 24
- 25
- 26
- 27
- 28
- 29
- 30
- 31
- 32
- 33
- 34
- 35
- 36
- 37
- 38
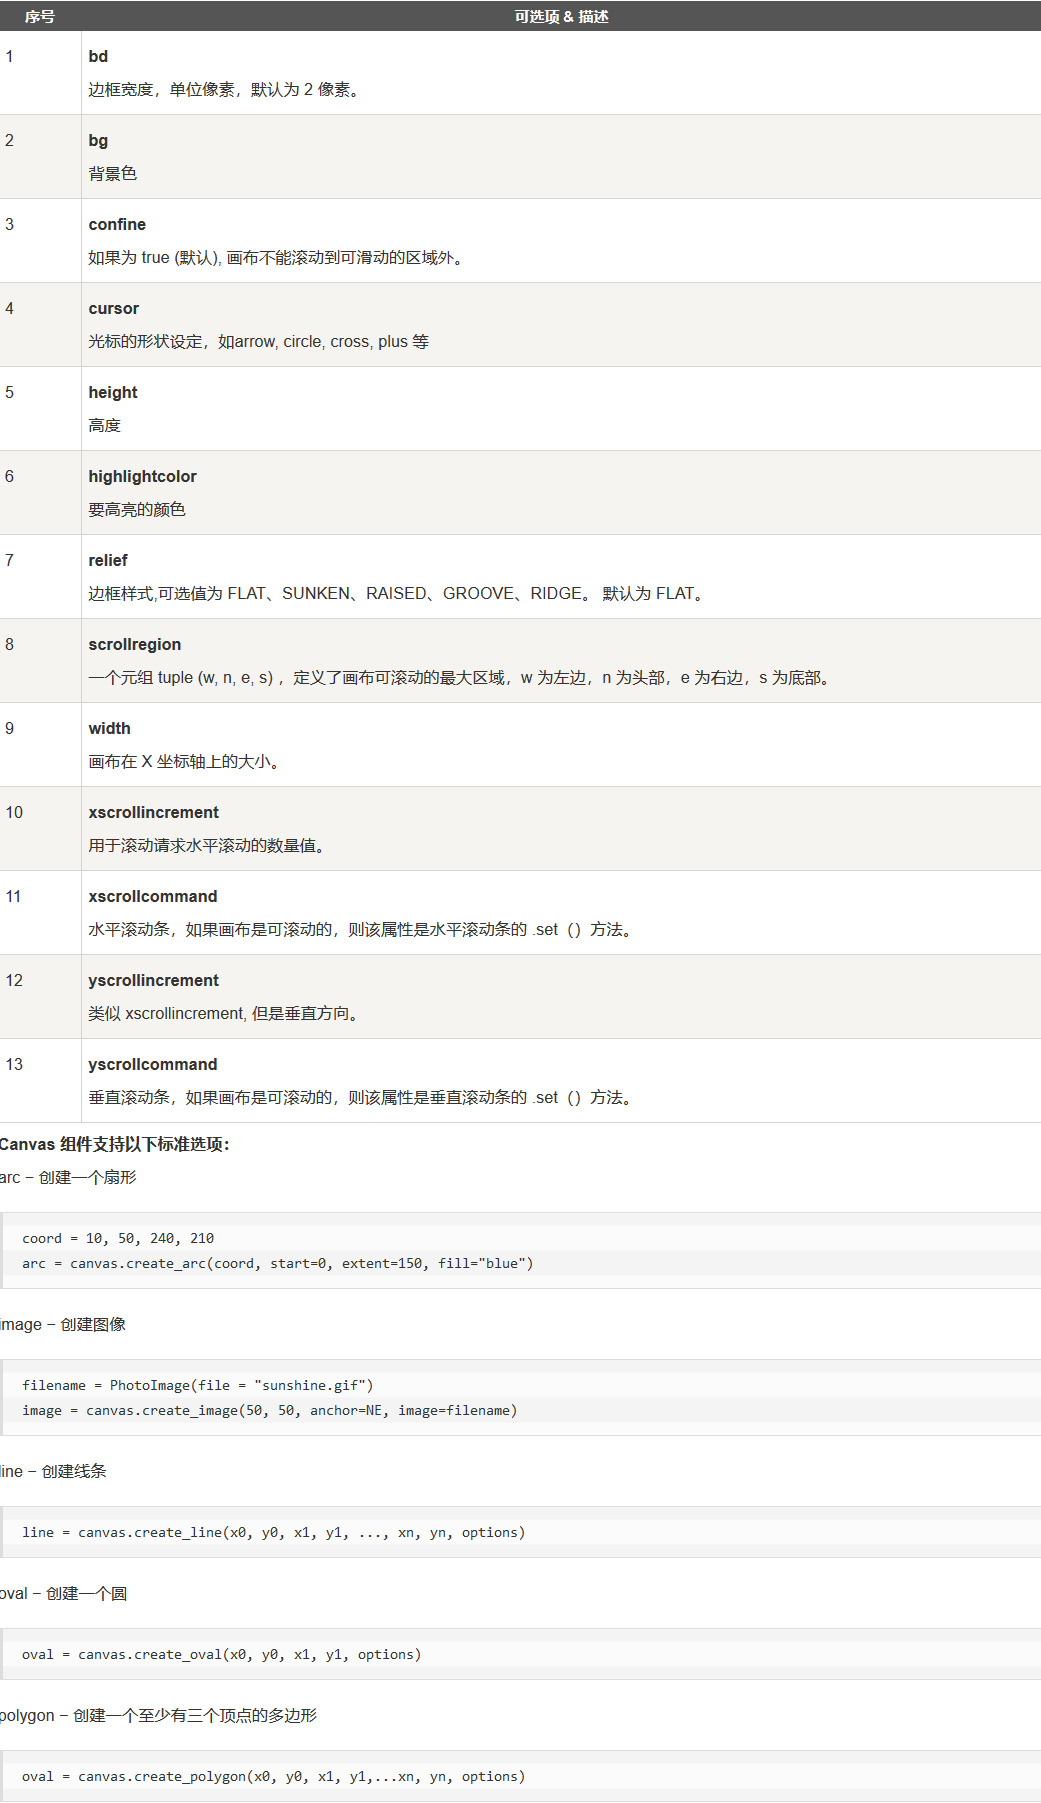
Using drawing components
import tkinter
root=tkinter.Tk()
canvas=tkinter.Canvas(root,
                      width=600,
                      height=480,
                      bg="white")#Sets the background color of the drawing control
''''
...............
'''
- 1
- 2
- 3
- 4
- 5
- 6
- 7
- 8
- 9
- 10
As for the development of graphical interface, we only know a concept here, such as how to design and render windows by ourselves, and how to add functions to the graphical interface. For example, we open a notepad with save and other functions. We can input a series of things for operation. In the next article, we will discuss tkinter events
Every word
Everyone has an awakening period, but the sooner or later of the awakening period determines a person's life!