catalogue
Overview and principle of DHCP:
Overview of network installation
Batch installation
Overview and principle of DHCP:
-Dynamic Host Configuration Protocol, organized and formulated by IETF (interente network engineer task force), is used to simplify host address allocation management
-The following network access references are mainly allocated
- IP address / subnet mask / broadcast address
-Default gateway address, DNS server address
1.
[ root@svr7 ~]#Yum - y install DHCP # package
Four sessions of DHCP address assignment
-DISCOVERY -> OFFER -> REQUEST -> ACK
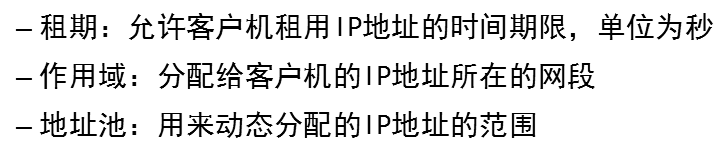
Basic concepts of server
2. Modify profile
[root@svr7 /]# vim /etc/dhcp/dhcpd.conf
In the last line mode: r / usr / share / Doc / DHCP * / dhcpd conf.example

In the last line mode: r / usr / share / Doc / DHCP * / dhcpd conf.example
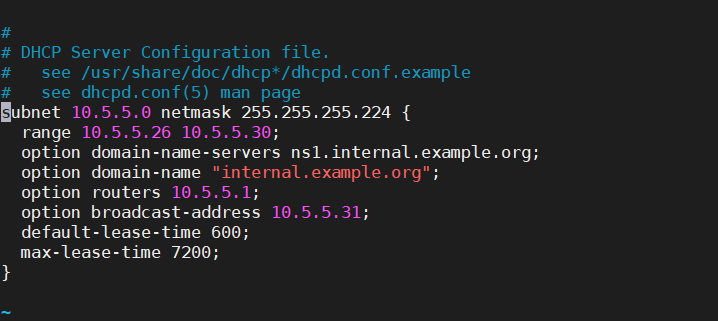
subnet  192.168.4.0   netmask   255.255.255.0  {  #Assign network segment
  range  192.168.4.100    192.168.4.200;     #Assign IP address range
  option  domain-name-servers   192.168.4.7;  #Assign DNS
  option  routers   192.168.4.254;    #Assigned gateway address
  default-lease-time   600;
  max-lease-time  7200;
}
Overview of network installation
- Large scale: assemble multiple hosts at the same time
- Automation: install the system and configure various services
- Remote implementation: no physical installation media such as optical disk and U SB flash disk are required
-
System startup item (where to find the operating system when the computer starts up)
1. Local hard disk
2. USB drive
3. Optical drive equipment
4. Network card (broadcast)
- PXE,Pre-boot eXecution Environment
- Pre start the execution environment and run it before the operating system
- Available for remote installation
- Working mode
- PXE client is integrated in the boot chip of the network card
- When the computer boots, call the PXE client from the network card chip into the memory for execution, obtain the PXE server configuration and display menu, and download the remote boot program to the local machine for operation according to the user's choice
- Network installed server:
- Service, assign IP address, locate boot program
- Service, providing bootstrap Download
- Service (or FTP/NFS), providing yum installation source
Configure DHCP service

  next-server 192.168.4.7;            #IP address of the next server
  filename "pxelinux.-0";            #Indicates the name of the network card boot file


[root@svr7 ~]# systemctl restart dhcpd         #Restart service
pxelinux.0: network card boot file (network installation manual)
Binary file, which can be obtained by installing a software
- Configure tftp service and transfer numerous boot files
tftp: simple file transfer protocol; default port: 69
tftp default shared home directory: / var/lib/tftpboot
- Install software
[root@svr7 /]# yum -y install tftp-server
[root@svr7 /]# systemctl restart tftp
- Deploy pxelinux 0 file
]# yum provides */pxelinux.0 # queries which package produces the file
]#yum -y install syslinux # install syslinux package
]# rpm -ql syslinux | grep pxelinux.0 # query the package installation list
]# cp /usr/share/syslinux/pxelinux.0 /var/lib/tftpboot/
]# ls /var/lib/tftpboot/
pxelinux.0
[root@svr7 ~]# yum -y install tftp-server

[root@svr7 ~]# systemctl restart tftp
- Deploy pxelinux 0 file
]# yum   provides   */pxelinux.0   #Query which package generates the file

]# yum -y install syslinux    #Install syslinux package

]# rpm -ql syslinux  |  grep  pxelinux.0    #Query package installation list

]# cp  /usr/share/syslinux/pxelinux.0    /var/lib/tftpboot/

]# ls   /var/lib/tftpboot/

pxelinux.0
Summary ideas:
- DHCP service: IP address, next server, filename, pxelinux 0
2.tftp service: pxelinux 0
3. pxelinux.0: /var/lib/tftpboot/pxelinux. CFG / default (default menu file)
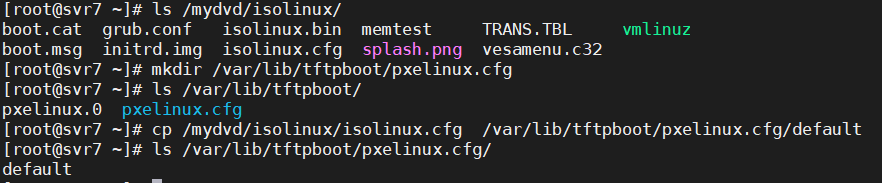
Deploy menu file (copy the menu file from the CD)
[root@svr7 ~]# ls /mydvd/isolinux/
boot.cat  grub.conf   isolinux.bin  memtest     TRANS.TBL     vmlinuz
boot.msg  initrd.img  isolinux.cfg  splash.png  vesamenu.c32
[root@svr7 ~]# mkdir /var/lib/tftpboot/pxelinux.cfg
[root@svr7 ~]# ls /var/lib/tftpboot/
pxelinux.0  pxelinux.cfg
[root@svr7 ~]# cp /mydvd/isolinux/isolinux.cfg  /var/lib/tftpboot/pxelinux.cfg/default
[root@svr7 ~]# ls /var/lib/tftpboot/pxelinux.cfg/
default
Deploy graphics module (vesamenu.c32) and background picture (splash.png)
[root@svr7 ~]# cp /mydvd/isolinux/vesamenu.c32  /mydvd/isolinux/splash.png /var/lib/tftpboot/
[root@svr7 ~]# ls /var/lib/tftpboot/
pxelinux.0  pxelinux.cfg  splash.png  vesamenu.c32
Deploy boot kernel (vmlinuz) and driver (initrd.img)
[root@svr7 ~]# cp /mydvd/isolinux/vmlinuz /mydvd/isolinux/initrd.img /var/lib/tftpboot/
[root@svr7 ~]# ls /var/lib/tftpboot/
initrd.img  pxelinux.0  pxelinux.cfg  splash.png  vesamenu.c32  vmlinuz

initrd.img} driver
pxelinux.0. Network card boot file
pxelinux.cfg # menu file storage directory
splash.png # background picture
vesamenu.c32 graphics module
vmlinuz# boot kernel
- Modify menu file content
[root@svr7 /]# vim /var/lib/tftpboot/pxelinux.cfg/default
Last line mode: set # nu enables the line number function
1 default vesamenu.c32 # default loading and running graphics module
2 timeout 600 # seconds reading time 60 seconds, 1 / 10 second
Ten thousand words are omitted here
10 menu background splash.png # background picture
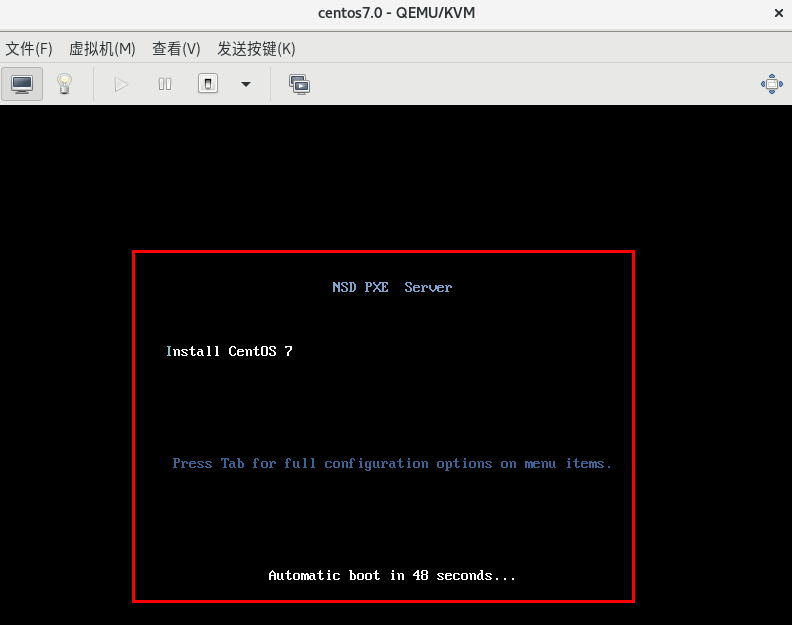
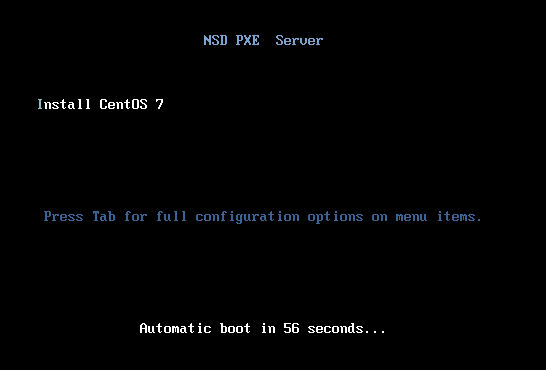
11 menu title NSD PXE Server # menu interface title
Ten thousand words are omitted here
61 label linux
62 # menu label ^ Install CentOS 7 # interface display content
63 # menu # default options after seconds reading
64 # kernel # vmlinuz loading kernel
65 append initrd=initrd.img # load driver
Delete all below
Summary ideas:
- DHCP service: IP address, next server, filename, pxelinux 0
2. tftp service: pxelinux 0
3. pxelinux.0: /var/lib/tftpboot/pxelinux. CFG / default (default menu file)
4. default: graphics module, background picture, kernel, driver


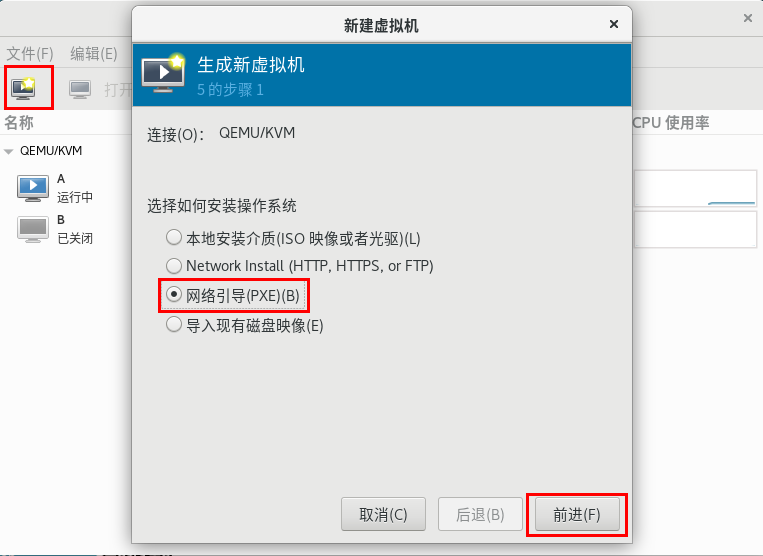
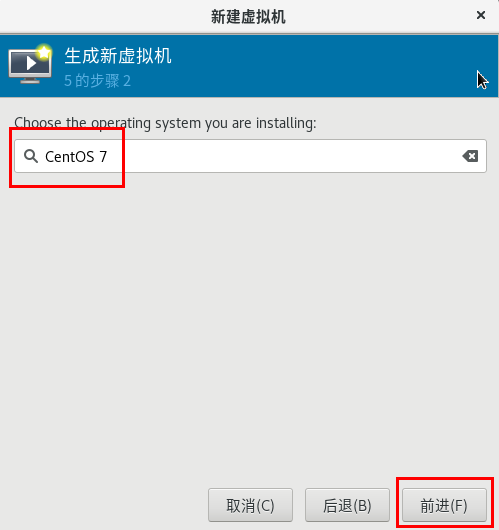
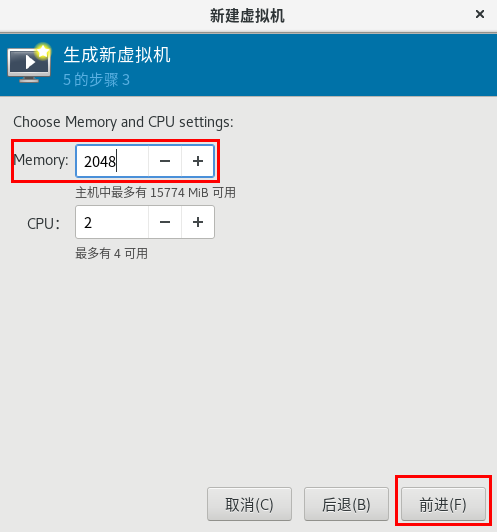
Preliminary test: KVM virtual machine
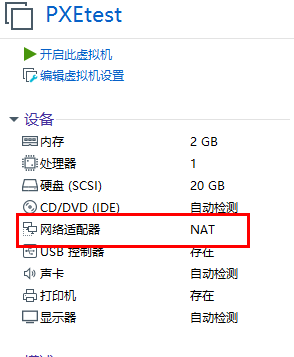
1. Create a new virtual machine


- Preliminary test: Vmware virtual machine
- Restart related services
[root@svr7 /]# systemctl restart dhcpd
[root@svr7 /]# systemctl restart tftp
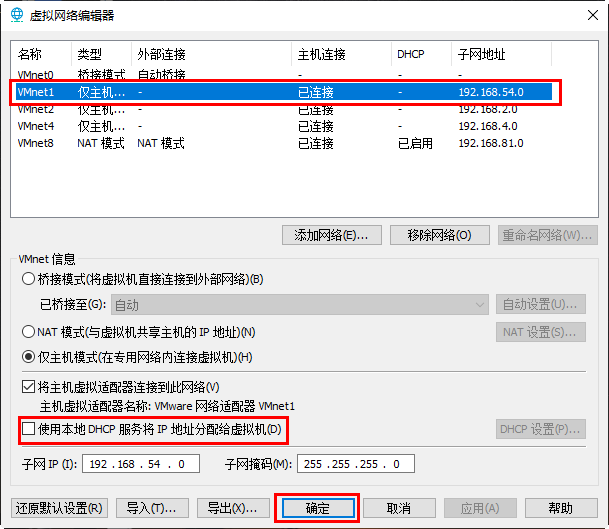
- Turn off the DHCP service for VMware software

Recess: class at 15:15
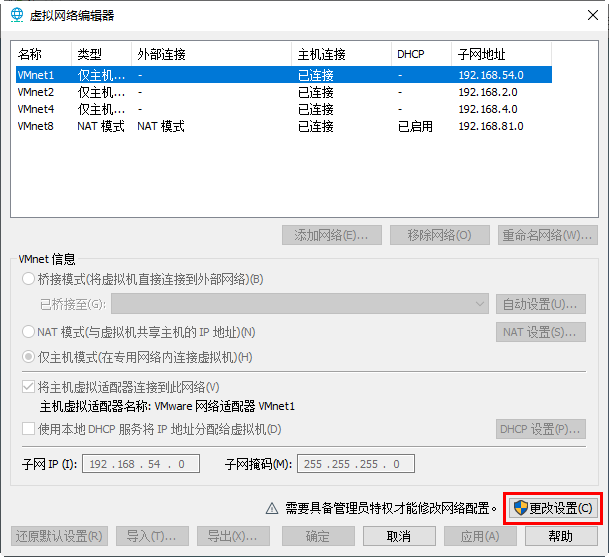
- New virtual machine, memory 2G, network type option vmnet1


- Display of menu interface
Troubleshooting ideas:
-
- View DHCP service profile
filename "pxelinux.0";
-
- View the contents of the / var/lib/tftpboot directory
[root@svr7 /]# ls /var/lib/tftpboot/
initrd.img pxelinux.cfg vesamenu.c32
pxelinux.0 splash.png vmlinuz
3. Name of menu file
[root@svr7 /]# ls /var/lib/tftpboot/pxelinux.cfg
default
4. Firewall
5. Restart necessary services
6. Test whether the memory of the machine is 2G
7. Test whether the network type of the machine is
Summary ideas:
- DHCP service: IP address, next server, filename, pxelinux 0
2. tftp service: pxelinux 0
3. pxelinux.0: /var/lib/tftpboot/pxelinux. CFG / default (default menu file)
4. default: graphics module, background picture, kernel, driver
- Build FTP service to provide CD content
FTP: file transfer protocol; default port: 21
Default home directory of shared data: / var/ftp
1. Install software package
[root@svr7 /]# yum -y  install  vsftpd

[root@svr7 /]# systemctl  restart   vsftpd
2. Establish a mount point
[root@svr7 /]# mkdir   /var/ftp/centos

[root@svr7 /]# mount   /dev/cdrom     /var/ftp/centos

mount: /dev/sr0 Write protected, will mount as read-only

[root@svr7 /]# ls    /var/ftp/centos
3. Test
[root@svr7 /]# curl ftp://192.168.4.7/centos/
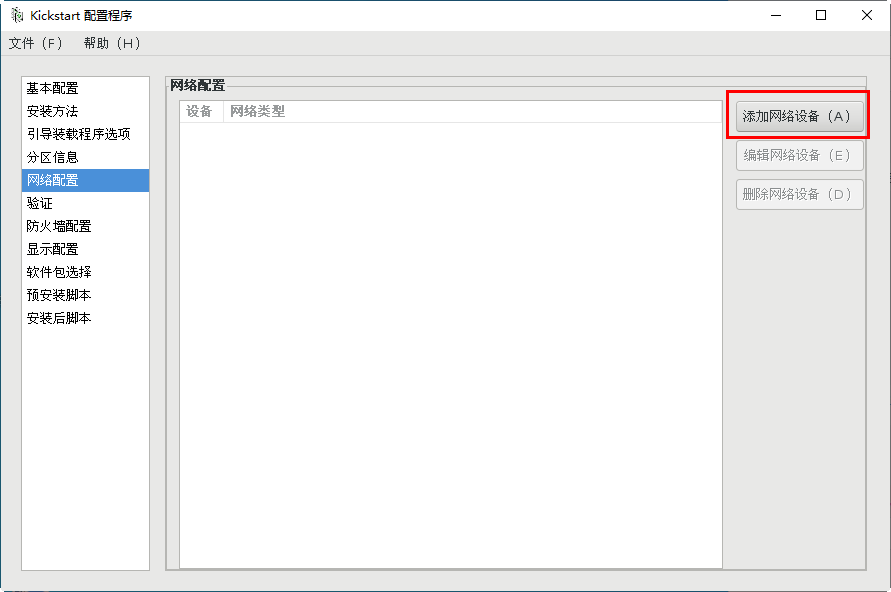
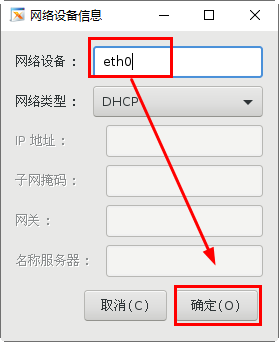
Realize unattended installation and generate response files
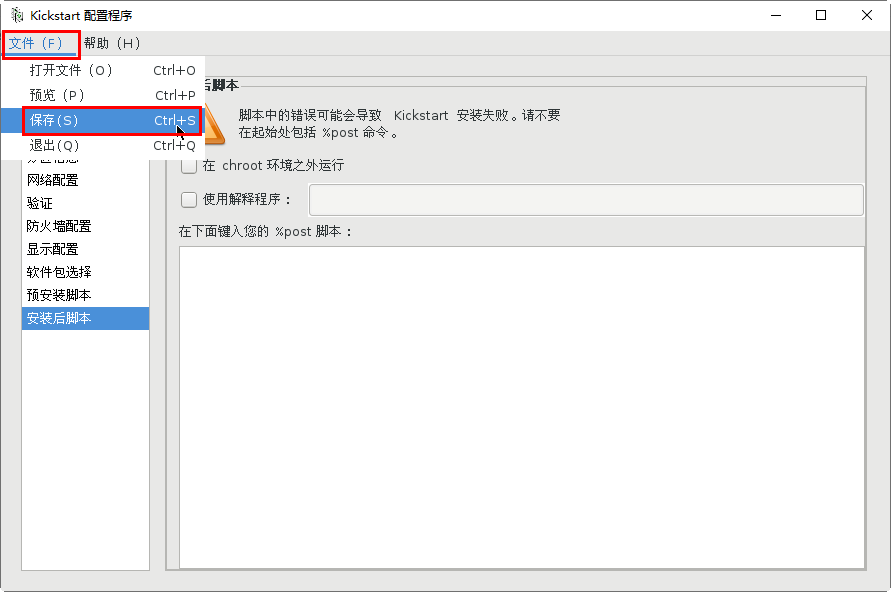
Tools for installing the system config kickstart graph
[root@svr7 /]# yum -y install  system-config-kickstart

[root@svr7 /]# system-config-kickstart    #function
The system config kickstart program requires the support of the Yum warehouse to display the selection of software packages. The identification of the Yum warehouse must be [development]
[root@svr7 /]# vim   /etc/yum.repos.d/mydvd.repo

[development]

name=centos7

baseurl=file:///mydvd

enabled=1

gpgcheck=0

[root@svr7 /]# system-config-kickstart
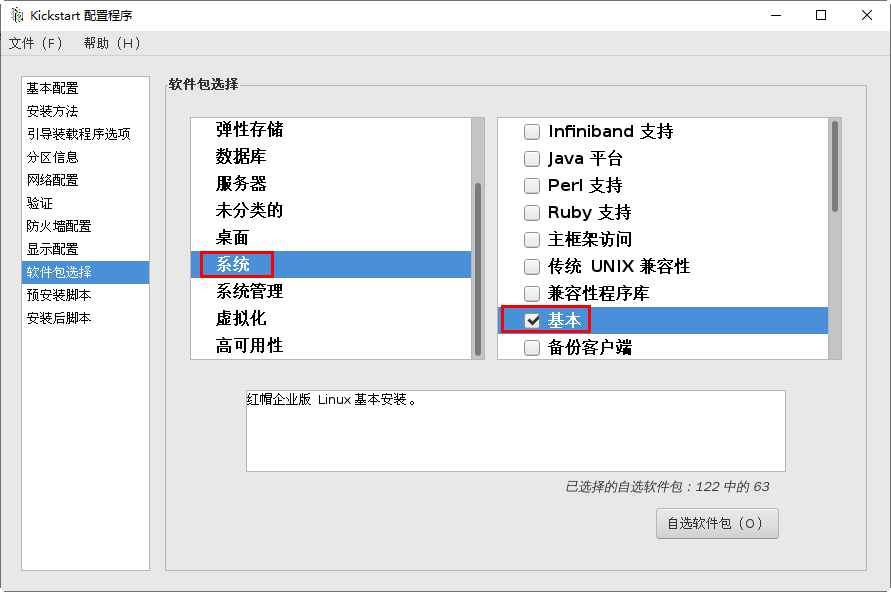
First check to see if package selection is available
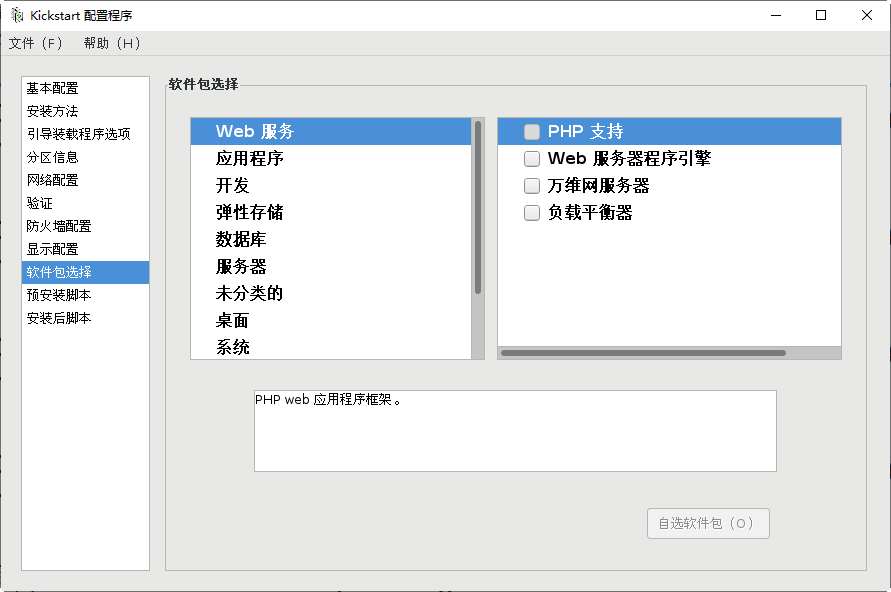
- run the graphical tool system config kickstart to select
[root@svr7 ~]# system-config-kickstart

ftp://192.168.4.7/centos

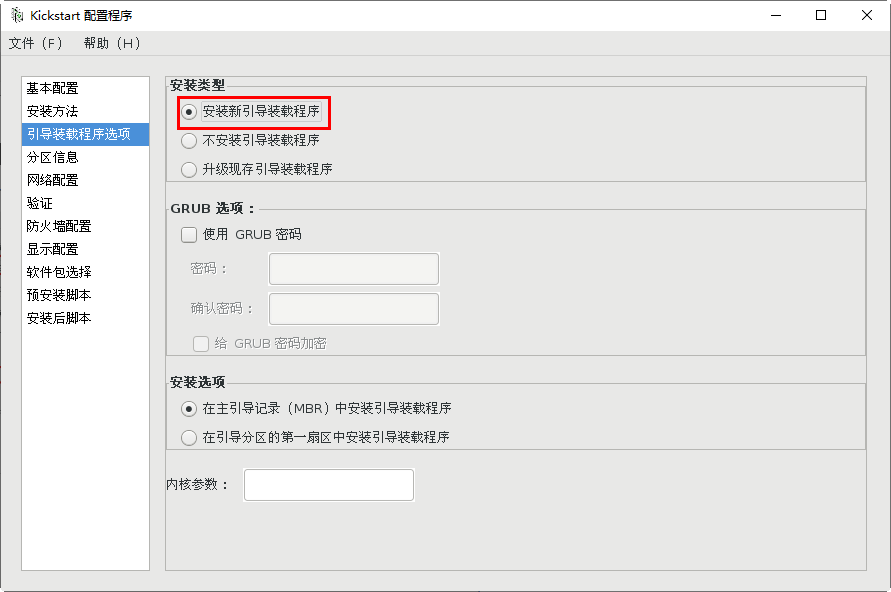
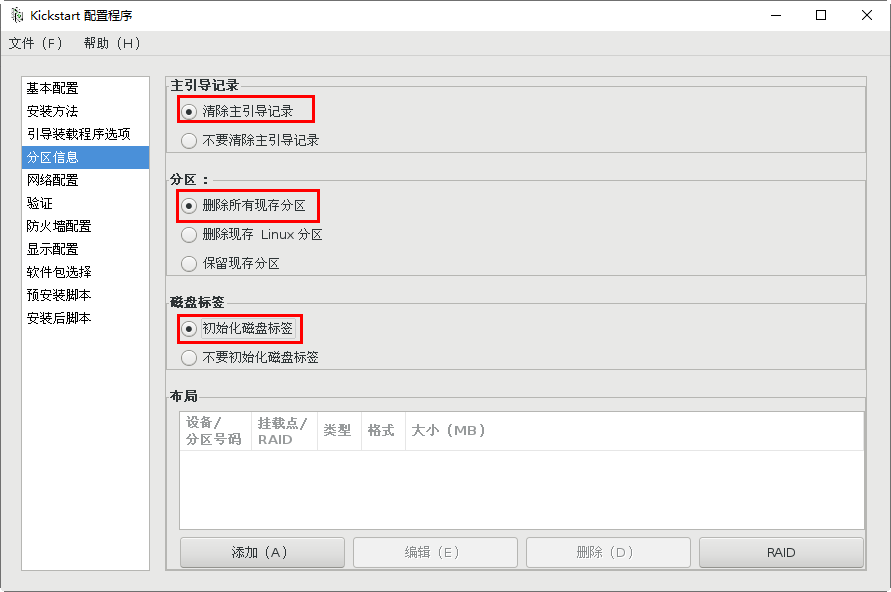
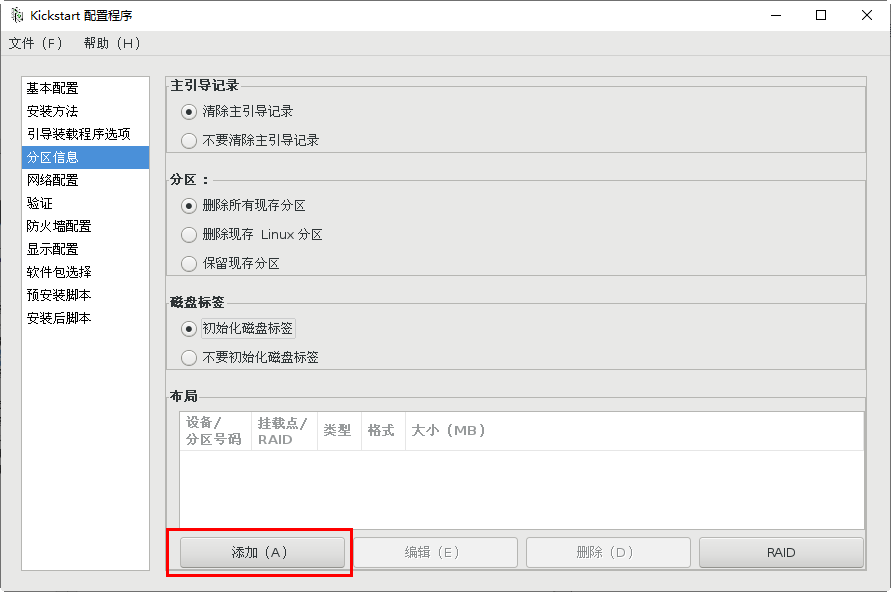
Repartition of new partitions
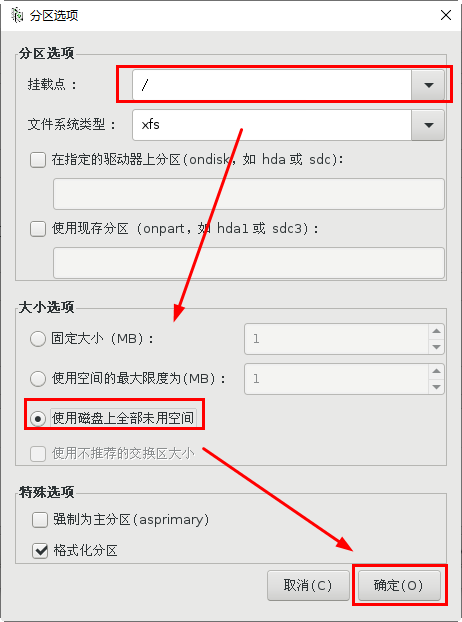
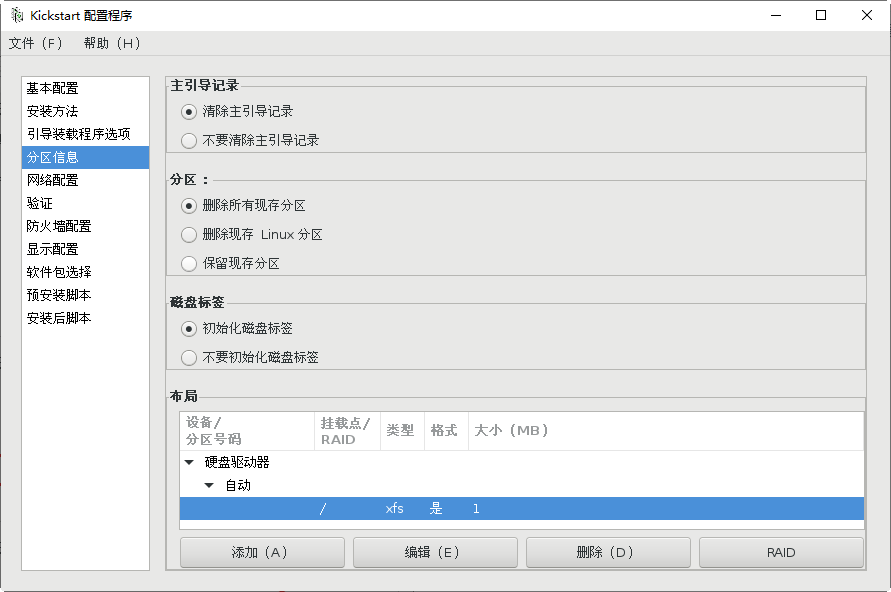
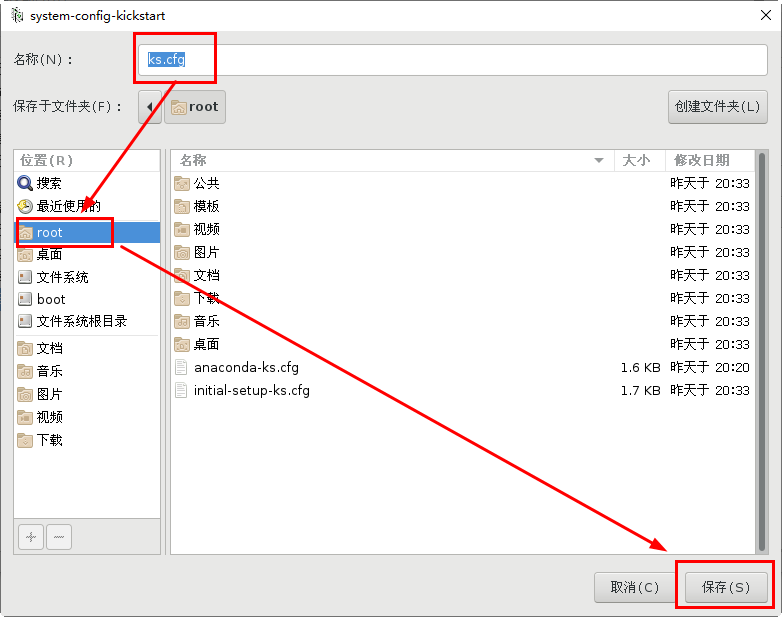
[root@svr7 /]# ls   /root/ks.cfg

/root/ks.cfg

[root@svr7 /]# vim   /root/ks.cfg

2.utilize FTP Service sharing answer file

[root@svr7 /]# cp   /root/ks.cfg    /var/ftp/

[root@svr7 /]# ls   /var/ftp/

centos  ks.cfg  pub

[root@svr7 /]#

[root@svr7 ~]# curl  ftp://192.168.4.7/ks.cfg


3.Modify the menu file and specify the acquisition method of the answer file

[root@svr7 /]# vim   /var/lib/tftpboot/pxelinux.cfg/default

........Ten thousand words are omitted here

label linux

menu label ^Install  CentOS  7

menu  default

kernel vmlinuz

append initrd=initrd.img   ks=ftp://192.168.4.7/ks.cfg
Summary ideas:
1.dhcp Service -- IP address, next server, filename "pxelinux.0"
2.tftp Service -- "pxelinux.0"
3.pxelinux.0 --- read the menu file / var / lib / tftpboot / pxelinux cfg/default
4.default--->vesamenu.c32, second reading time, vmlinuz, initrd img, ftp://192.168.4.7/ks.cfg
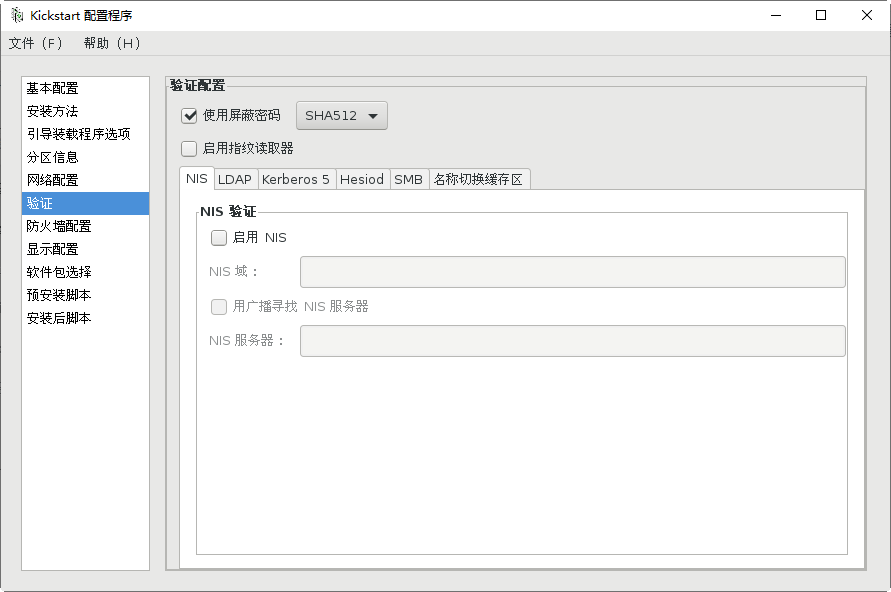
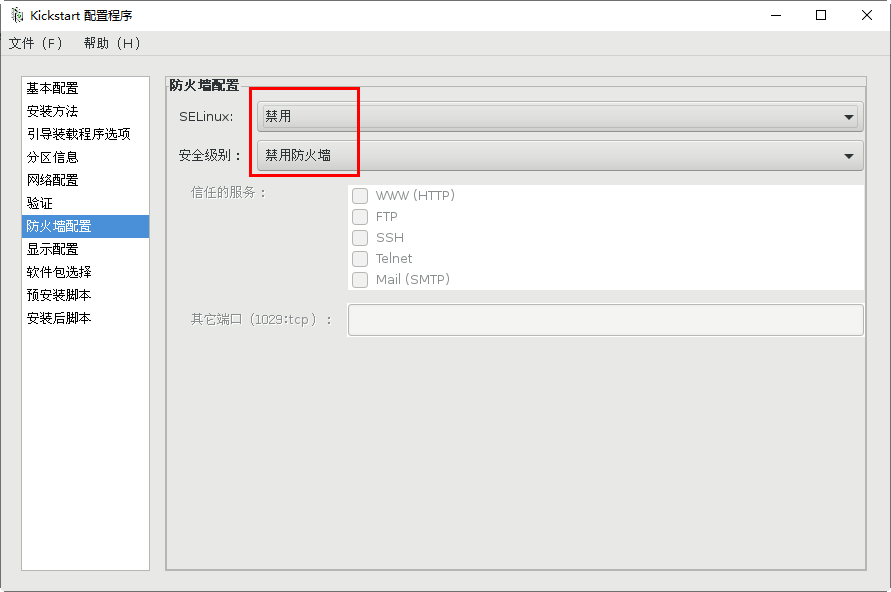
5.ks.cfg response file -- language, keyboard type, partition, installation method URL -- URL=“ ftp://192.168.4.7/centos "
When virtual machine B builds A network installation, turn off the DHCP service of virtual machine A to avoid conflicts