preface
since the last article, we have begun to enter Project application phase,Last article Introduce the basic playing method and environment installation of alien invasion, and finally set the background of the game; This article continues to introduce the relevant contents of armed spacecraft. First of all, let's introduce the image of the added spacecraft.
1, Add ship image
let's put the spaceship into the game. In order to draw the player's ship on the screen, we will load an image and draw it using the Pygame method blit().
because the project is Python programming from introduction to practice Therefore, when we choose picture materials, we can go from the official website of this book download . We log in to this website, click download with the book, and then click Python programming source code file - update. The specific operation is shown in the following figure:

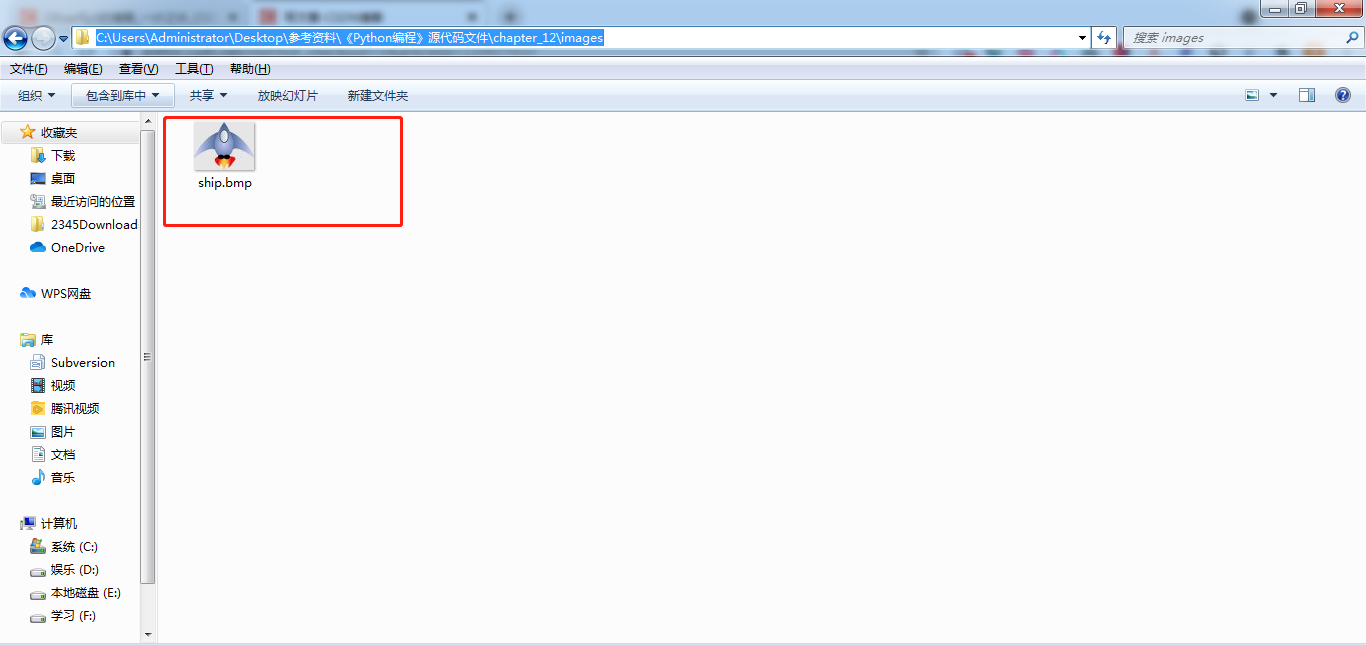
after downloading the local folder, it defaults to the download folder, and then unzip it and open it; Find chapter12, and there is an images folder below, which contains the ship BMP is the spacecraft we use in the project. The specific operations are as follows:
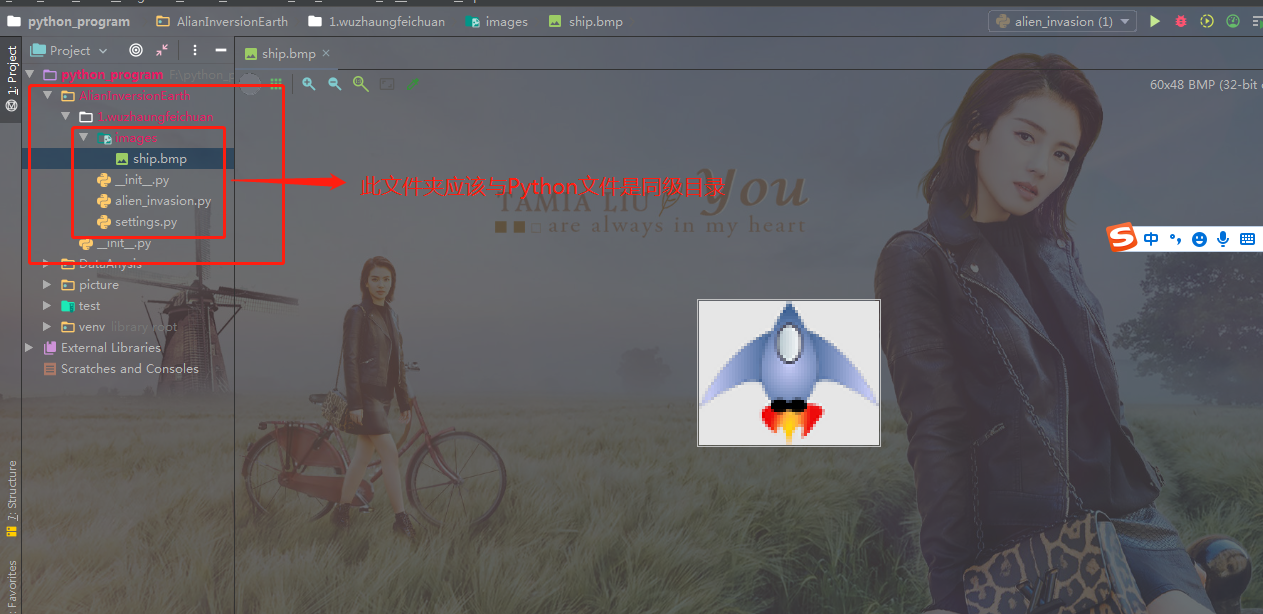
in principle, we can load pictures in any format in the game, but it is easiest to use bitmap (. bmp) files. Because pygame loads bitmaps by default. Of course, we can also configure pygame to load other types of pictures, but you need to install the corresponding image library on your computer. Most of the common image formats we generally see are jpg,. png,. gif format, of course, we can convert it into bitmap through ps and other software; However, the pictures we downloaded from the official website are in bitmap format, so you only need to use the downloaded pictures; The picture of the spacecraft is shown in the figure below:

then create a new folder under your project folder, preferably named images, which is specially used to put the pictures used in the project, and then put our ship BMP is saved in this folder. The specific directory structure is as follows:
1. Create Ship class
after selecting the image used to represent the spacecraft, it needs to be displayed on the screen. We will create a module called ship, which contains the ship class, which is responsible for managing most of the ship's behavior:
import pygame

class Ship():
    def __init__(self, screen):
        """Initialize the spacecraft and set its initialization position"""
        self.screen = screen

        # Load the ship image and obtain its external matrix
        self.image = pygame.image.load('images/ship.bmp')
        self.rect = self.image.get_rect()
        self.screen_rect = screen.get_rect()

        # Place each new ship in the center of the bottom of the screen
        self.rect.centerx = self.screen_rect.centerx
        self.rect.bottom = self.screen_rect.bottom

    def blitme(self):
        """Draw the ship at the specified location"""
        self.screen.blit(self.image, self.rect)
first, we imported the module pygame. Method of ship__ init__ () accepts two parameters: reference self and screen, where the latter specifies where to draw the spacecraft. To load the image, we called pygame image. load(). This function returns a surface representing the spacecraft, and we store this surface in self Image.
after loading the image, we use get_rect() gets the attribute rect of the corresponding surface. One reason why pygame is so efficient is that it allows you to process game elements like matrices (rect objects), even if their shape is not a matrix. Processing games like matrices is efficient because matrices are simple set shapes. This usually works so well that gamers hardly notice that we are not dealing with the actual shape of game elements.
when processing rect objects, you can use the x and y coordinates of the four corners and center of the rectangle. You can specify the position of the rectangle by setting these values.
to center the game element, set the attribute center, centerx or center of the corresponding rect object. To align game elements with the edge of the screen, use the attributes top, bottom, left, or right; To adjust the horizontal or vertical position of a game element, use the attributes x and y, which are the x and Y coordinates of the upper left corner of the corresponding rectangle, respectively. These properties let you do not need to do the game. Developers originally need to complete the calculation manually. You often use these properties.
what we need to pay attention to here is: in pygame, the origin (0,0) is located in the upper left corner of the screen. When moving to the lower right, the coordinate value will increase. On the 900X600 screen, the origin is located in the upper left corner and the coordinates in the lower right corner are (900, 600).
we will put the spacecraft in the center at the bottom of the screen. To do this, first store the rectangle representing the screen in self screen_ In rect, set self rect_ Centerx (the x coordinate of the center of the spaceship) is set to the attribute centerx representing the rectangle of the screen, and self rect_ Bottom (y coordinate of the lower edge of the spaceship) is set to the property bottom representing the rectangle of the screen. pygame will use these rect attributes to prevent the ship's image from being aligned with the lower edge of the screen and centered horizontally. Finally, we define the method blitme(), which is based on self Rect draws the image to the screen at the position specified.
2. Draw the ship on the screen
let's update alien_invasion.py to create a spaceship and call its method blitme(), which is implemented as follows:
import sys
import pygame
from settings import Settings
from ship import Ship


def run_game():
    # Initialize the game and create a screen object
    pygame.init()
    ai_settings = Settings()
    screen = pygame.display.set_mode((ai_settings.screen_width, ai_settings.screen_height))
    pygame.display.set_caption("Alian Invasion")
    # Create a spaceship
    ship = Ship(screen)
    # Start the main cycle of the game
    while True:
        # Monitor keyboard and mouse events
        for event in pygame.event.get():
            if event.type == pygame.QUIT:
                sys.exit()
        # Redraw the screen each time you cycle
        screen.fill(ai_settings.bg_color)
        ship.blitme()
        # Make recently drawn screens visible
        pygame.display.flip()
run_game()
we import the ship class and create a ship instance named ship. This instance must be created before the main while loop to avoid creating a spaceship each time the loop. After filling the background, we call ship Blitme () draws the spaceship onto the screen, making sure it appears in front of the background.
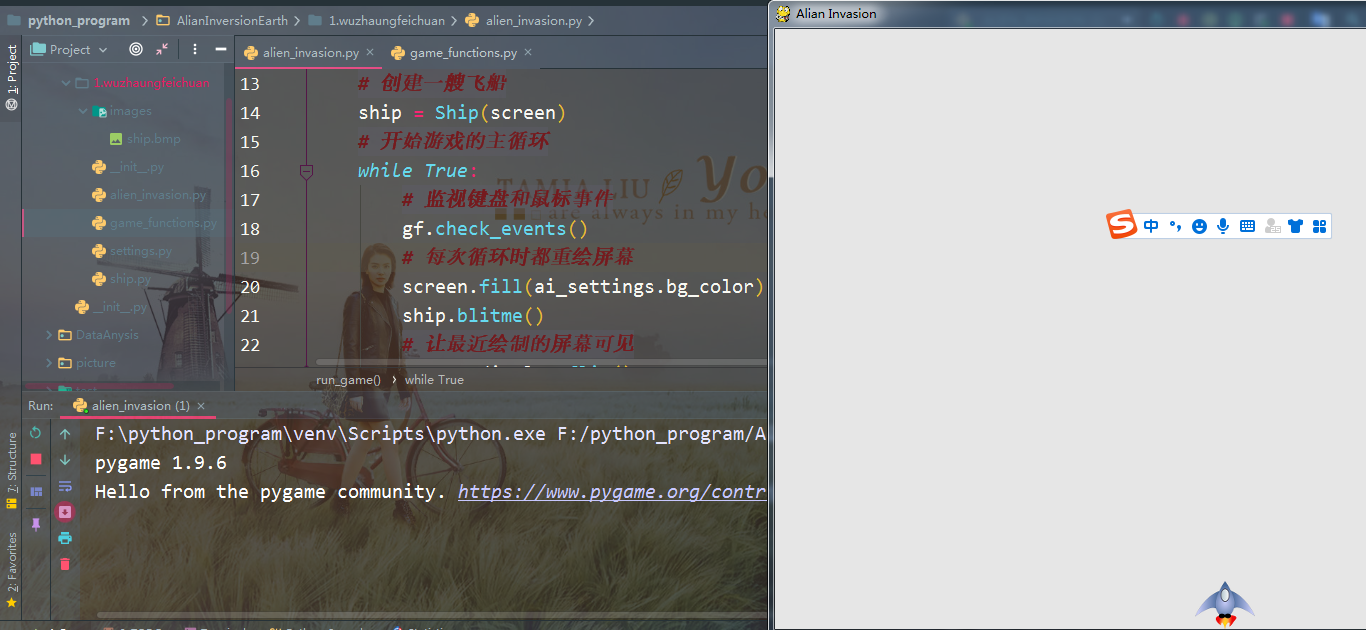
now if you run alien_invasion.py, you will see that the spaceship is located in the center of the bottom of the empty game screen, as follows:

2, Refactoring: module game_functions
in large projects, it is often necessary to refactor existing code before adding new code. Refactoring aims to simplify the structure of existing code and make it easy to expand. In this section, we created a game_functions, which will store a large number of functions to run the game alien invasion. By creating the module game_functions to avoid alien_invasion.py is too long and makes its logic easier to understand.
1. Function check_events()
we moved the code that first manages events to a code called check_events() to simplify run_ganme() and isolate the event management loop. By isolating event loops, event management can be separated from other aspects of the game, such as updating the screen.
check_events() is placed in a named game_ In the functions module:
import sys
import pygame
def check_events():
    """Respond to key and mouse events"""
    for event in pygame.event.get():
        if event.type == pygame.QUIT:
            sys.exit()
sys and pygame to be used by the event check loop are imported into this module. Current function check_envents() does not require any formal parameters, and its function body copies alien_invasions.py event loop.
let's modify alien_invasion.py to import it into the module game_functions, and replace the event loop with check to the function_ Call to points():
import sys
import pygame
from settings import Settings
from ship import Ship
import game_functions as gf

def run_game():
    # Initialize the game and create a screen object
    pygame.init()
    ai_settings = Settings()
    screen = pygame.display.set_mode((ai_settings.screen_width, ai_settings.screen_height))
    pygame.display.set_caption("Alian Invasion")
    # Create a spaceship
    ship = Ship(screen)
    # Start the main cycle of the game
    while True:
        # Monitor keyboard and mouse events
        gf.check_events()
        # Redraw the screen each time you cycle
        screen.fill(ai_settings.bg_color)
        ship.blitme()
        # Make recently drawn screens visible
        pygame.display.flip()
run_game()
in the main program file, it is no longer necessary to directly import sys, because currently it is only in the module game_ It is used in functions. For the purpose of simplification, we give the imported module game_functions specifies the alias gf. The specific effects are as follows:
2. Function update_screen()
to further simplify run_game(), the code for updating the screen is moved to another one named update_screen() and put this function in the module game_functions.py:
import sys
import pygame
def check_events():
    """Respond to key and mouse events"""
    for event in pygame.event.get():
        if event.type == pygame.QUIT:
            sys.exit()
def update_screen(ai_settings, screen, ship):
    """Update the image on the screen and switch to a new screen"""
    # Redraw the screen each time you cycle
    screen.fill(ai_settings.bg_color)
    ship.blitme()
    # Make recently drawn screens visible
    pygame.display.flip()
new function update_screen() contains three formal parameters: ai_settings, screen and ship. Now you need to set alien_ invasion. The code that updates the screen in the while loop of Py is replaced by the function update_ Call to screen():
import sys
import pygame
from settings import Settings
from ship import Ship
import game_functions as gf

def run_game():
    # Initialize the game and create a screen object
    pygame.init()
    ai_settings = Settings()
    screen = pygame.display.set_mode((ai_settings.screen_width, ai_settings.screen_height))
    pygame.display.set_caption("Alian Invasion")
    # Create a spaceship
    ship = Ship(screen)
    # Start the main cycle of the game
    while True:
        # Monitor keyboard and mouse events
        gf.check_events()
        # Redraw the screen each time you cycle
        gf.update_screen(ai_settings, screen, ship)
run_game()
these two functions make the while loop simpler and make subsequent development easier; In module game_functions instead of run_ Most of the work is done in game ().

since we only wanted to use one file at the beginning, we didn't introduce the module game immediately_ functions. This allows you to understand the actual development process: write the code as simple as possible at the beginning, and refactor as the project becomes more and more complex.
after refactoring the code line to make it easier to expand, you can start dealing with the dynamic aspects of the game!!!
summary
since the last article, we have begun to enter Project application phase,Last article Introduce the basic playing method and environment installation of alien invasion, and finally set the background of the game; This paper continues to introduce the relevant contents of armed spacecraft. This paper mainly introduces how to obtain the pictures required by this project from the website and realize a small function of adding spacecraft. In addition, with the deepening of the game function, we have reconstructed the code written earlier, so that the number of lines of our main code is relatively small, which more reflects the scalability and robustness of our code. In order to make you better absorb the knowledge points used in the project, each article only gives you a function of alien invasion. Therefore, I hope you can read it carefully, write the code carefully, understand the in-depth meaning, and maximize the value of the project. In fact, this project is already very typical, and the code is everywhere. However, if you simply paste and copy, it will not be of any value to your knowledge learning. You still have to follow it, and then you should know the meaning of each line of code or which knowledge point we introduced earlier. Only in this way can this project play a different value, I hope you will study hard and lay a solid foundation of basic knowledge. Python is a language that pays attention to practical operation. It is the simplest and the best entry among many programming languages. When you learn the language, it's easier to learn java, go and C. Of course, Python is also a popular language, which is very helpful for the implementation of artificial intelligence. Therefore, it is worth your time to learn. Life is endless and struggle is endless. We work hard every day, study hard, and constantly improve our ability. I believe we will learn something. come on.