I always want to configure continuous integration for my pi project, because there are not enough servers, it is impossible to build continuous integration services by myself. So I looked for an online hosting platform. At first I saw GO CD, because it was a foreign platform, without Chinese documents, I gave up. Inadvertently I saw Aliyun's cloud effect platform (free of charge) and could also be continuously integrated, so I spent some time doing it.
1. Opening Cloud Effect
First, you need to login to the Aliyun console, search for "cloud effect" in the left menu bar, and open it.
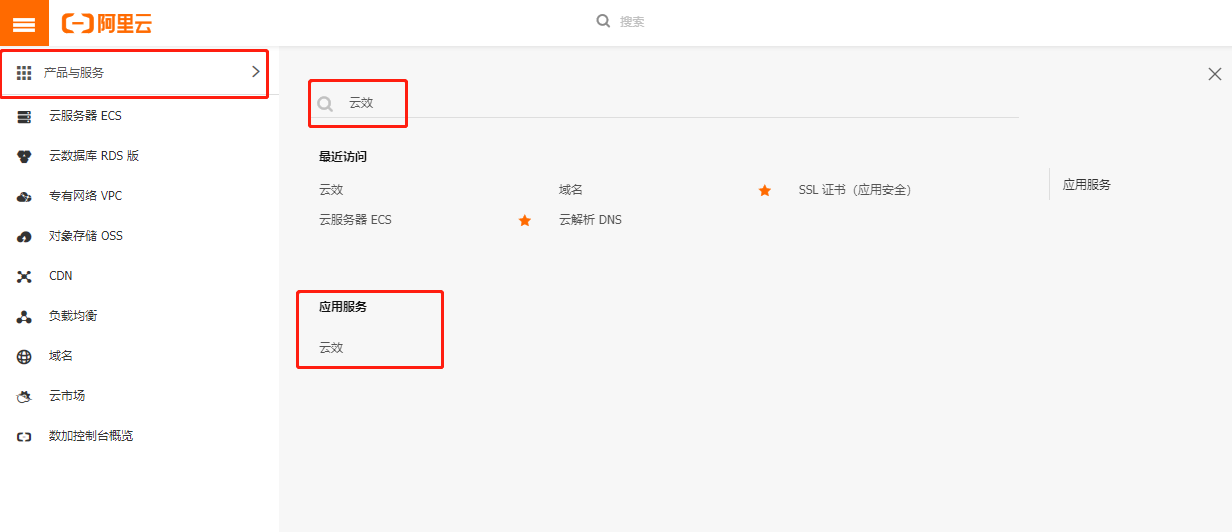
2. Configuration of enterprises
After entering the cloud effect platform, the first step is to build a new enterprise

3. Configuration application
After building a new enterprise, click on it and enter. The top menu bar chooses R&D-application in turn, and then creates a new application.
4. Configuration of Pipeline
After creating the application, click on the top menu bar, select R&D-pipeline in turn, and start building new pipeline.
The programming language chooses java and the template chooses to deploy to the host
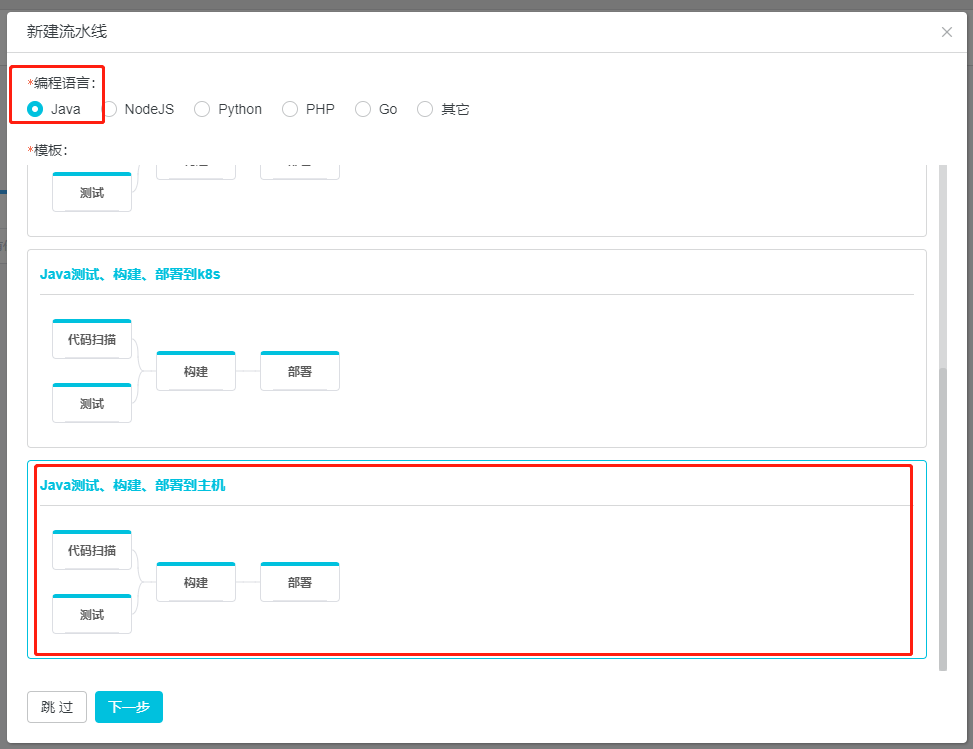
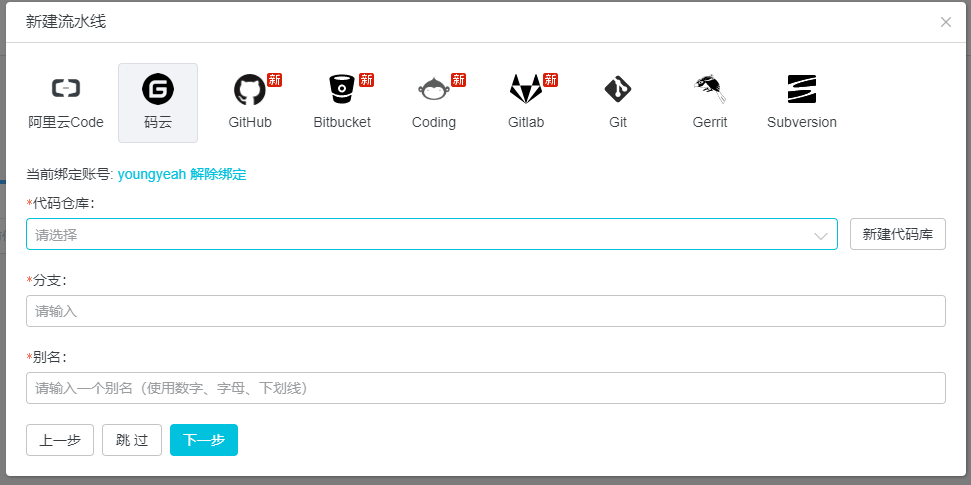
Then click on the next step to configure the code repository, which is configurable according to your actual situation.
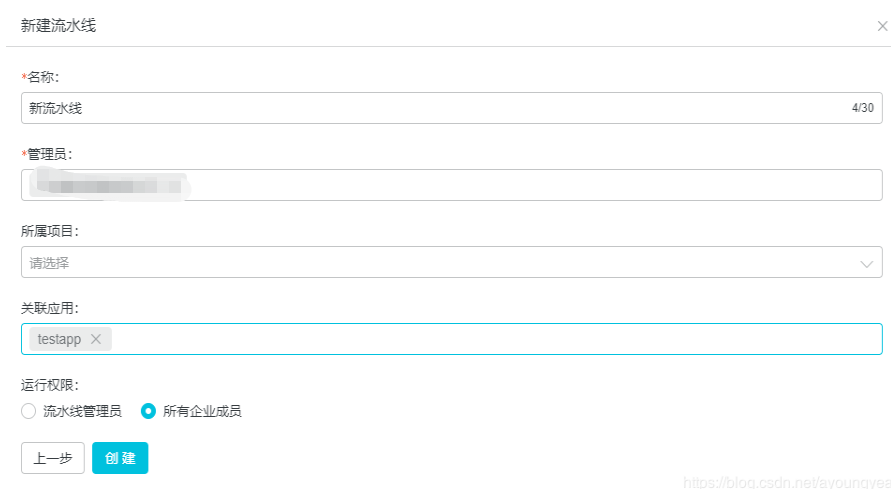
Then click on the next step, and finally configure the pipeline name, administrator, and associated application to select the application you just created. You can also use this step to create applications.
5. Configuring Tasks
Once the pipeline is created, you can see the pipeline task map.
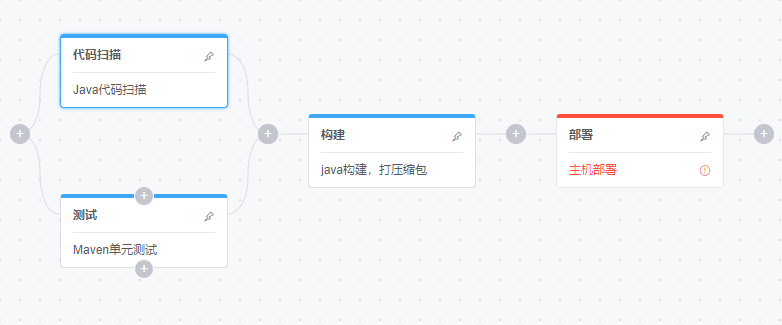
Here's an explanation of what's going on at all stages.
Code Scanning: Scanning code specifications, using the Ali code specifications, generally without configuration.
Test: Run the unit test, and delete this phase if there is no unit test.
Build: This step is actually two steps: build and upload, first using the maven build project, and then upload the built files to the Aliyun server for later deployment and download. Note: Packing paths should be noticed when uploading. If it is an aggregate project, it needs to be set to the address of a specific publishable module project. Otherwise, it will be prompted that the target directory cannot be found.
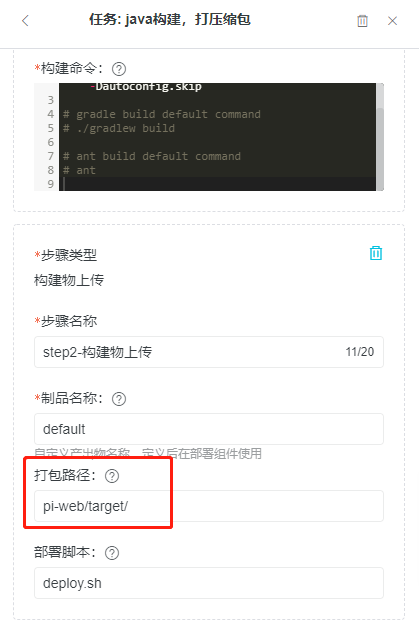
Deployment scripts are scripts for RDC deployment projects, which are placed in the project root directory by default.
Examples of scripts:
#!/bin/bash

# Modify APP_NAME as the application name on cloud effect
APP_NAME=pi-dev


PROG_NAME=$0
ACTION=$1
APP_START_TIMEOUT=20    # Waiting for application startup time
APP_PORT=8080          # Application Port
HEALTH_CHECK_URL=http://127.0.0.1:${APP_PORT}/hello# Application Health Check URL
HEALTH_CHECK_FILE_DIR=/home/admin/status   # The script generates nginx-status files in this directory
APP_HOME=/home/admin/${APP_NAME} # The jar package extracted from package.tgz is placed in this directory
JAR_NAME=${APP_HOME}/${APP_NAME}.jar # The name of the jar package
JAVA_OUT=${APP_HOME}/logs/start.log  #Application startup log

# Create relevant directories
mkdir -p ${HEALTH_CHECK_FILE_DIR}
mkdir -p ${APP_HOME}
mkdir -p ${APP_HOME}/logs
usage() {
    echo "Usage: $PROG_NAME {start|stop|restart}"
    exit 2
}

health_check() {
    exptime=0
    echo "checking ${HEALTH_CHECK_URL}"
    while true
        do
            status_code=`/usr/bin/curl -L -o /dev/null --connect-timeout 5 -s -w %{http_code}  ${HEALTH_CHECK_URL}`
            if [ "$?" != "0" ]; then
               echo -n -e "\rapplication not started"
            else
                echo "code is $status_code"
                if [ "$status_code" == "200" ];then
                    break
                fi
            fi
            sleep 1
            ((exptime++))

            echo -e "\rWait app to pass health check: $exptime..."

            if [ $exptime -gt ${APP_START_TIMEOUT} ]; then
                echo 'app start failed'
               exit 1
            fi
        done
    echo "check ${HEALTH_CHECK_URL} success"
}
start_application() {
    echo "starting java process"
    nohup java -jar ${JAR_NAME} > ${JAVA_OUT} 2>&1 &
    echo "started java process"
}

stop_application() {
   checkjavapid=`ps -ef | grep java | grep ${APP_NAME} | grep -v grep |grep -v 'deploy.sh'| awk '{print$2}'`

   if [[ ! $checkjavapid ]];then
      echo -e "\rno java process"
      return
   fi

   echo "stop java process"
   times=60
   for e in $(seq 60)
   do
        sleep 1
        COSTTIME=$(($times - $e ))
        checkjavapid=`ps -ef | grep java | grep ${APP_NAME} | grep -v grep |grep -v 'deploy.sh'| awk '{print$2}'`
        if [[ $checkjavapid ]];then
            kill -9 $checkjavapid
            echo -e  "\r        -- stopping java lasts `expr $COSTTIME` seconds."
        else
            echo -e "\rjava process has exited"
            break;
        fi
   done
   echo ""
}
start() {
    start_application
    health_check
}
stop() {
    stop_application
}
case "$ACTION" in
    start)
        start
    ;;
    stop)
        stop
    ;;
    restart)
        stop
        start
    ;;
    *)
        usage
    ;;
esac
Deployment phase: Deploy the built project on your server. This is also the most important step. Explain the meaning of each field:
Products: Packages built in the previous step
Application: Previously created applications. If it is not created, it can also be created at this step.
New environment:
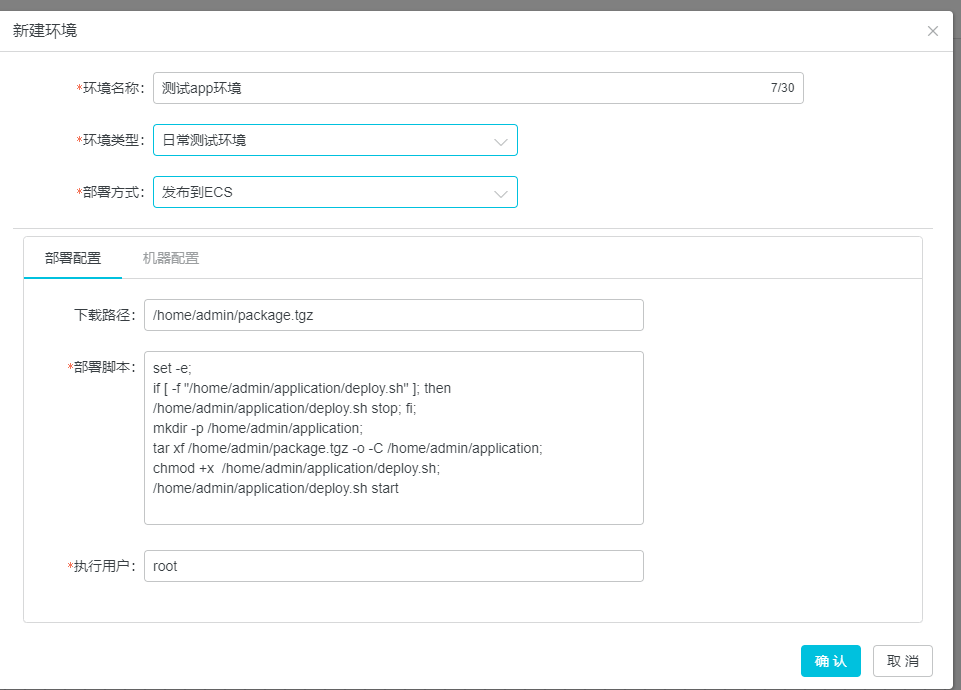
The name of the environment, the type of the environment should be filled in according to the actual situation, and the deployment mode should be chosen to publish to ECS.
Deployment configuration:
The download path is to download the built package from the Aliyun server to the address of your server.
Sample deployment scripts:
set -e;
if [ -f "/home/admin/application/deploy.sh" ]; then /home/admin/application/deploy.sh stop; fi;
mkdir -p /home/admin/application;
tar xf /home/admin/package.tgz -o -C /home/admin/application;
chmod +x  /home/admin/application/deploy.sh;
/home/admin/application/deploy.sh start
Here, / home/admin/application needs to be consistent with APP_HOME in deploy.sh.
The machine configuration can be added to your server as directed.
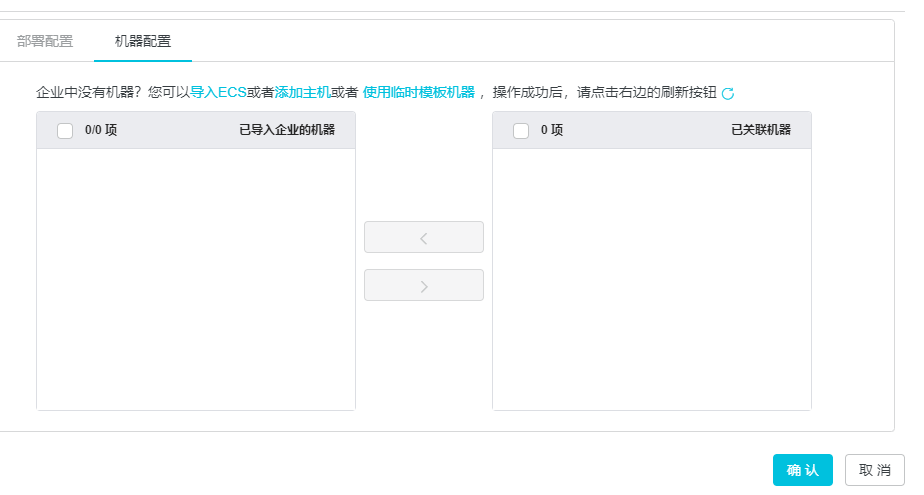
Once the configuration is complete, it can run.
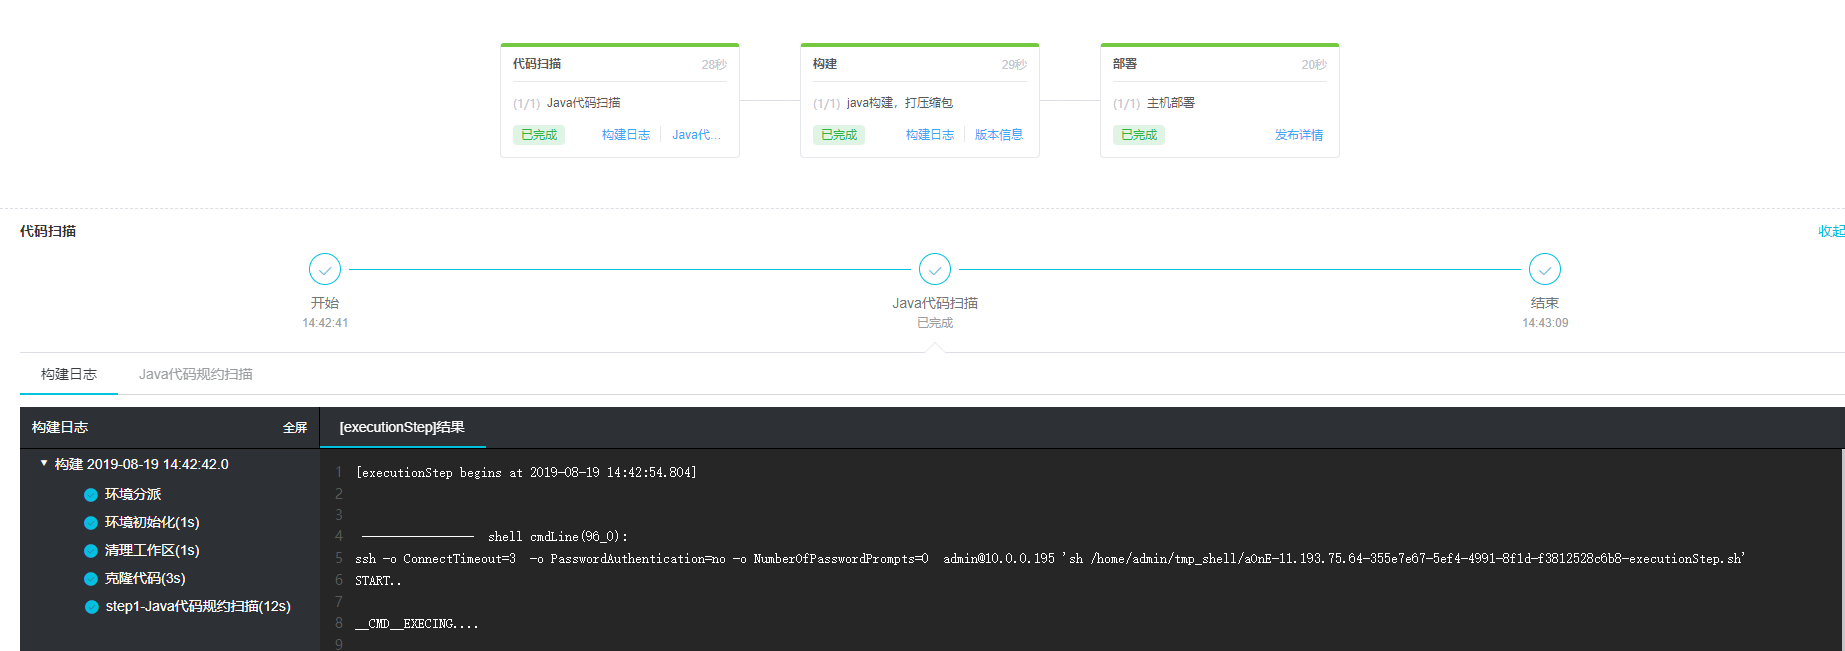
You can view the build logs and release details for each phase.
This way, your own project can also be continuously integrated, no longer need to publish the project manually, it sounds cool.
The next article will share with you how to configure front-end vue projects on cloud-based platforms.