Author: San Dishui
Blog: https://blog.csdn.net/qq_30285985/
preface
After understanding the principle of Alipay secret key setup, Alipay payment can be developed more quickly. Here is an example of Alipay's simpler payment scenario -- computer website payment.
This scenario is relatively friendly to back-end developers. html pages have been provided in the official demo, which can be run only by simple configuration.
1, Computer website payment
1.1 sandbox environment configuration
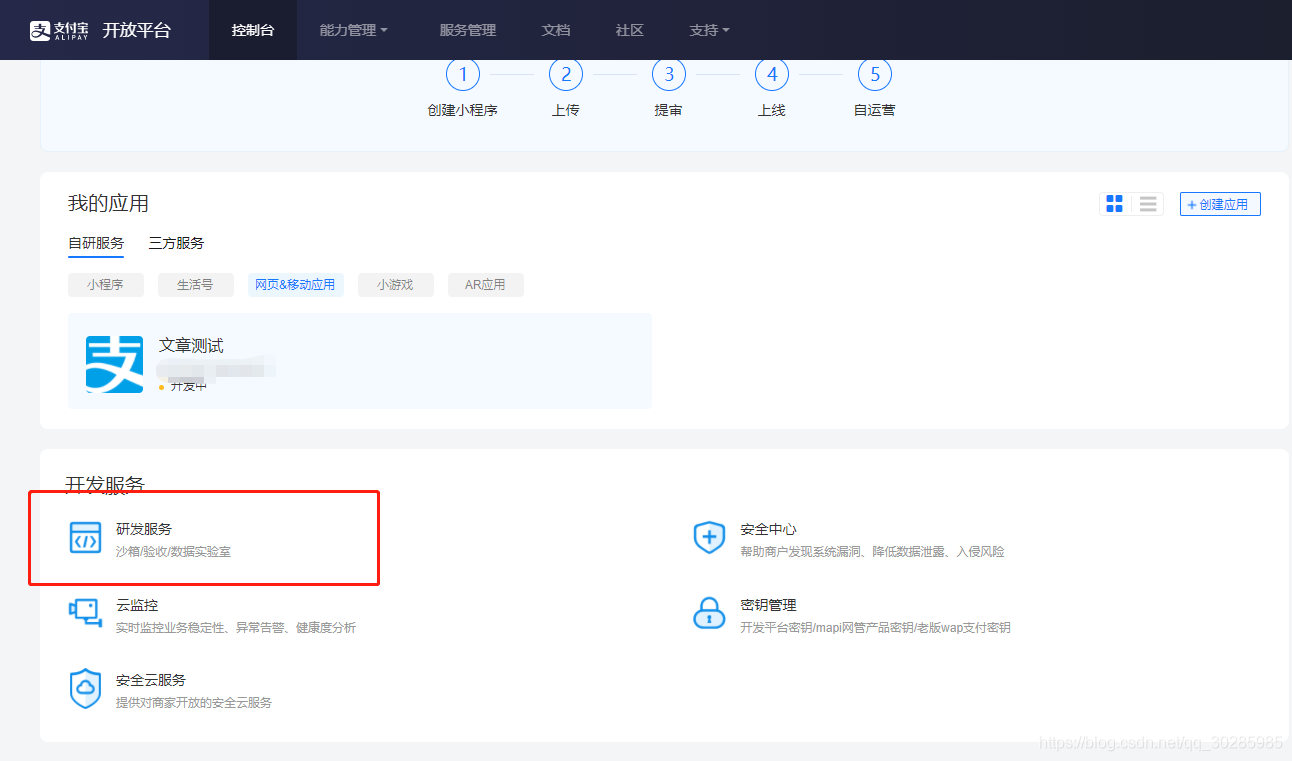
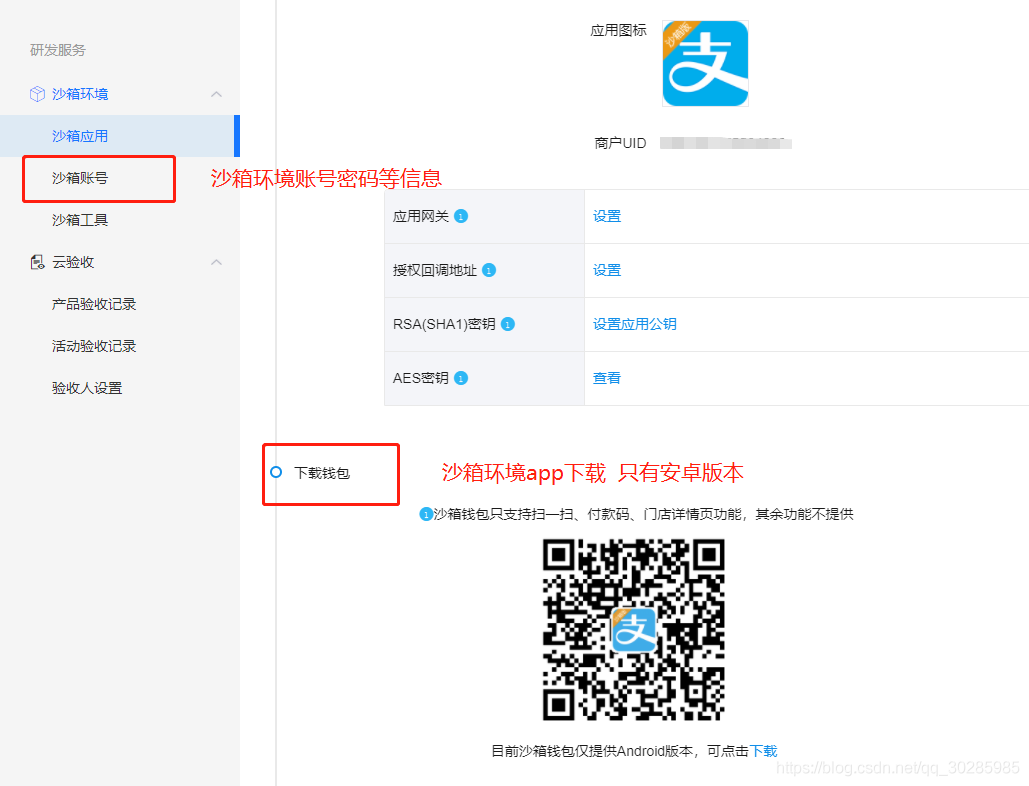
Log in to Alipay and enter the console to enter the sandbox environment.
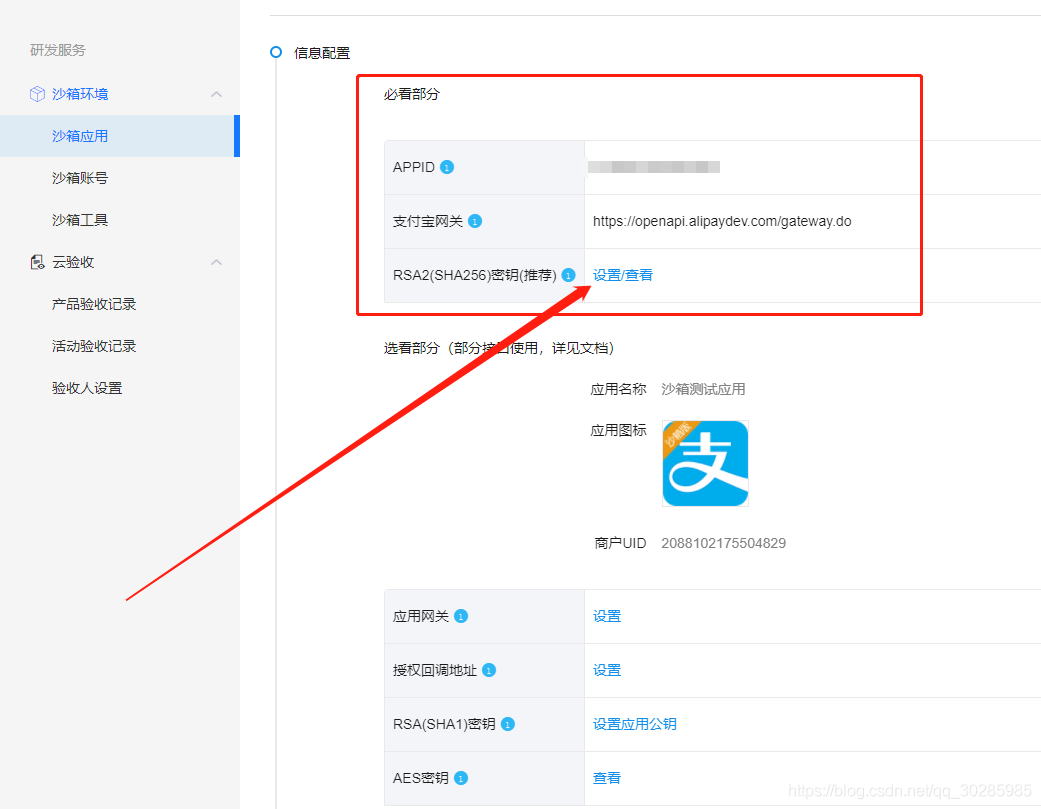
Configure the sandbox environment key after entering. As shown in the above figure, the RSA encryption used to compute the signature must be configured. The developer must download the Alipay development tool to get a pair of RSA secret keys. In addition, some application gateways and authorization addresses are easily confused.
Application Gateway
Used for receiving notification by Alipay server is mainly used for:
1. Life number passive notification
2. Passive notification of word-of-mouth stores
3. Single transfer to Alipay account.
4. Cash red envelope
5. And some other product and subscription messages
Authorization callback address
As the name suggests, it is only used for authorization interface, mainly for:
1. Third party application authorization
2. User information authorization
3. And other products involving authorization (such as merchant membership card)
No matter the authorization callback address or the application gateway, the web page address starting with http or https needs to be passed in. For more details, you can view Alipay official.
AES encryption is in the optional part. It can be seen that when docking Alipay, the official does not require the use of AES encryption. It can choose whether or not to use AES encryption according to its actual situation.
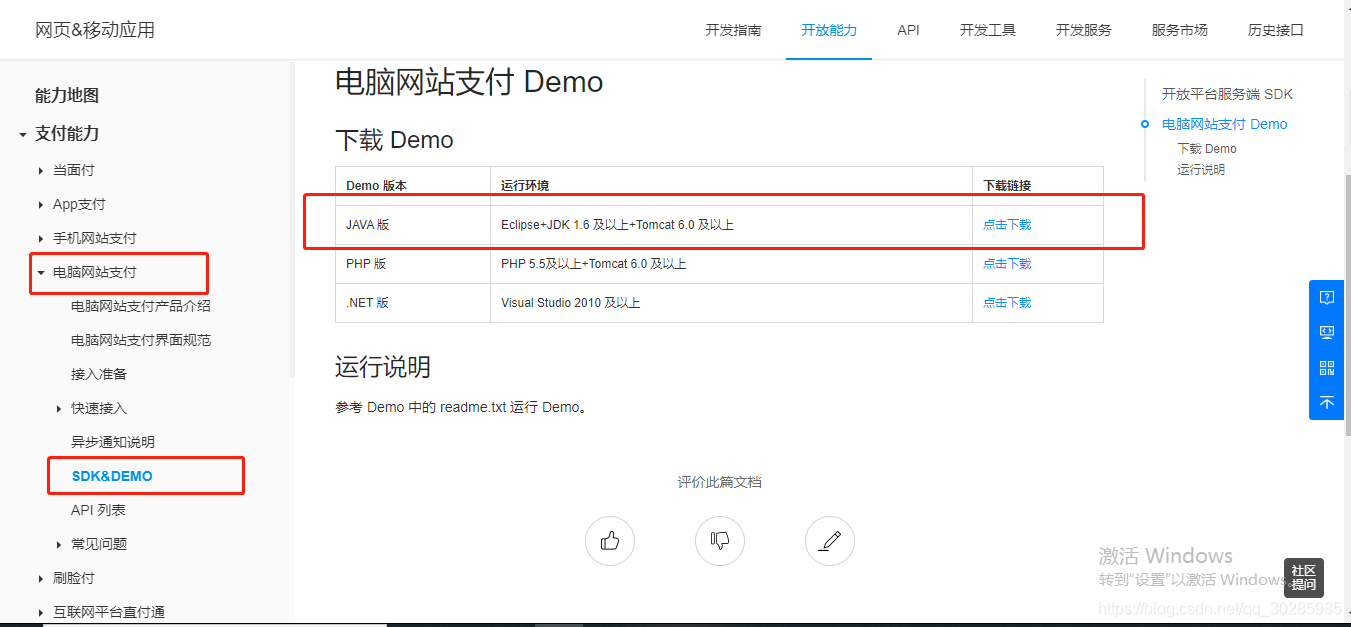
1.2. demo loading
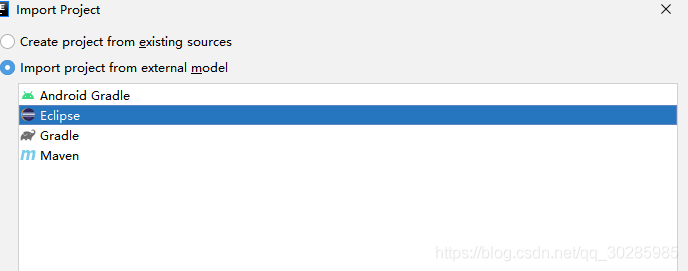
1.2.1 add idea directly
So far, the official demo is still a relatively old way, which is written by the Eclipse development tool. There are some simple jsp pages, which only need to be downloaded.
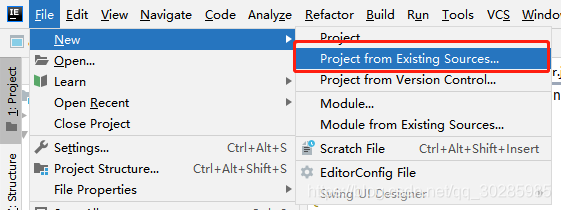
Now the development tools are basically changed to idea, or you can directly open the eclipse project through idea. In addition, the official account Java technology stack, back to the background: activation code, you can get the way I get the genuine IDEA activation code, many people get it.
1.2.2 addition of maven
Now most of them are maven projects, and there is no Java EE in my idea, which is very embarrassing. Therefore, I choose to directly convert them to springboot projects.
The basic Spring Boot tutorial will not be introduced. A series of tutorials can be seen here: https://github.com/javastacks/spring-boot-best-practice
Copy the jsp code and java configuration class into a pure springboot project. The structure is about the same. webapp needs to be created by itself. Just copy the class and jsp of the original project.
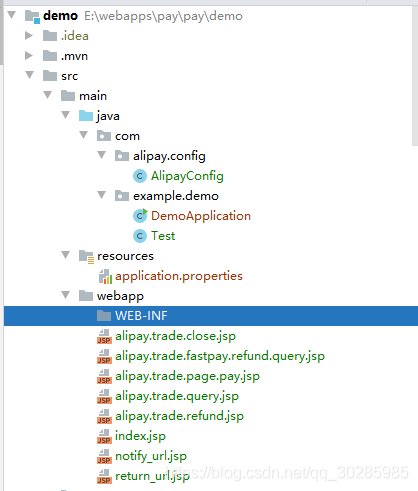
Add support for jsp in pom file. In addition, change the default jar package into war package when packaging. War package is more friendly to jsp. The configuration example is as follows.
<?xml version="1.0" encoding="UTF-8"?>
<project xmlns="http://maven.apache.org/POM/4.0.0" xmlns:xsi="http://www.w3.org/2001/XMLSchema-instance"
xsi:schemaLocation="http://maven.apache.org/POM/4.0.0 https://maven.apache.org/xsd/maven-4.0.0.xsd">
<modelVersion>4.0.0</modelVersion>
<parent>
<groupId>org.springframework.boot</groupId>
<artifactId>spring-boot-starter-parent</artifactId>
<version>2.2.5.RELEASE</version>
<relativePath/> <!-- lookup parent from repository -->
</parent>
<groupId>com.example</groupId>
<artifactId>alipay</artifactId>
<version>0.0.1-SNAPSHOT</version>
<name>alipay</name>
<packaging>war</packaging>
<description>Demo project for Spring Boot</description>
<properties>
<java.version>8</java.version>
</properties>
<dependencies>
<dependency>
<groupId>org.springframework.boot</groupId>
<artifactId>spring-boot-starter</artifactId>
</dependency>
<dependency>
<groupId>org.springframework.boot</groupId>
<artifactId>spring-boot-starter-web</artifactId>
</dependency>
<dependency>
<groupId>org.springframework.boot</groupId>
<artifactId>spring-boot-starter-test</artifactId>
<scope>test</scope>
</dependency>
<!-- Add support jsp-->
<dependency>
<groupId>javax.servlet</groupId>
<artifactId>javax.servlet-api</artifactId>
</dependency>
<dependency>
<groupId>javax.servlet</groupId>
<artifactId>jstl</artifactId>
</dependency>
<!-- tomcat Support of-->
<dependency>
<groupId>org.apache.tomcat.embed</groupId>
<artifactId>tomcat-embed-jasper</artifactId>
</dependency>
<dependency>
<groupId>org.springframework.boot</groupId>
<artifactId>spring-boot-starter-tomcat</artifactId>
<scope>provided</scope> <!-- This package is not required for compile time dependent running -->
</dependency>
</dependencies>
<build>
<finalName>${project.artifactId}</finalName>
<plugins>
<plugin> <groupId>org.springframework.boot</groupId>
<artifactId>spring-boot-maven-plugin</artifactId>
</plugin>
<!-- add to war plug-in unit -->
<plugin>
<groupId>org.apache.maven.plugins</groupId>
<artifactId>maven-war-plugin</artifactId>
<configuration>
<failOnMissingWebXml>false</failOnMissingWebXml>
</configuration>
</plugin>
</plugins>
</build>
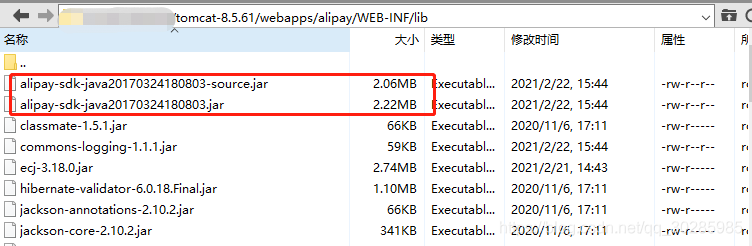
</project>In the official demo, three packages need to be added.
Because it is a test and the dependent code is written in the jsp, it does not affect the packaging. You can simply package it first, and then copy the three jar s to the lib directory of the server.

1.3 parameter configuration
A configuration class alipayconfig. Is provided in the demo java.
Here, you need to configure the parameters provided by the sandbox environment.
// With ID, your APPID account is your APPID corresponding Alipay account.
public static String app_id = "";

// Merchant private key, your RSA2 private key in PKCS8 format
public static String merchant_private_key = "";

// Alipay public key, see address: https://openhome.alipay.com/platform/keyManage.htm The Alipay public key corresponding to APPID.
public static String alipay_public_key = "";

// The server asynchronous notification page path requires a full path in the format of http: / / and cannot be added? User defined parameters such as id=123 must be accessible from the Internet
public static String notify_url = "http://{server IP} / Alipay trade. page. pay-JAVA-UTF-8/notify_ url. jsp";

// The page path of page Jump synchronization notification requires a full path in http: / / format, which cannot be added? User defined parameters such as id=123 must be accessible from the Internet
public static String return_url = "http://{server IP} / Alipay trade. page. pay-JAVA-UTF-8/return_ url. jsp";

// Signature method
public static String sign_type = "RSA2";

// Character encoding format
public static String charset = "utf-8";

// Alipay gateway
public static String gatewayUrl = "https://openapi.alipaydev.com/gateway.do";

// Log path
public static String log_path = "/";- app_id Application id. Each application has its own unique identifier. This parameter has appeared in many open platforms such as Alipay and WeChat.
- merchant_private_key and alipay_public_key this is the secret key used to calculate the signature.
- notify_url is the interface address to receive Alipay callback notification, which requires idempotent processing.
- return_url configure the page address to jump after successful payment.
- sign_type signature method, which is based on the default RSA2 encryption. Generally, it does not need to be modified.
- gatewayUrl Alipay gateway, which is provided in the app configuration, can be copied.
1.4 start up project
After the configuration is completed, you can start the project and enter the homepage index jsp.
My path is / Alipay / index JSP, for your reference.

The official demo provides payment, transaction query, refund, refund query, transaction closing and other functions. Developers can choose to debug.
In addition, the sandbox environment is an independent Alipay environment, which needs downloading the official sandbox Alipay app (only Android).
Click the pay button of the instant payment function to jump into the payment page. After payment, you will automatically jump to the configured return_url address.
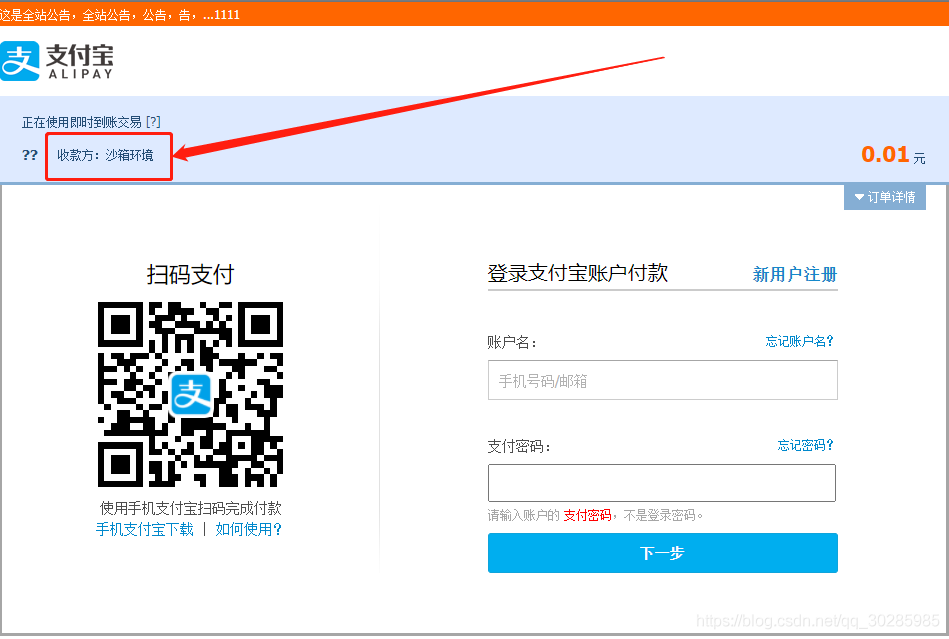
Note: sometimes you will be prompted that there is a phishing risk prompt page. Just close the browser and open the payment portal page index JSP, do not open other Alipay pages to solve it.
This article is from the author's official account. Thanks for sharing. You also welcome all technical friends who are interested in technology sharing to contribute to the "Java technology stack". Let more people see that the way of submission: pay attention to the public number "Java technology stack" in the background reply: contribute.
Recent hot article recommendations:
1.600 + Java interview questions and answers (2021 latest edition)
2.Finally got the IntelliJ IDEA activation code through the open source project. It's really fragrant!
3.Ali Mock tools are officially open source and kill all Mock tools on the market!
4.Spring Cloud 2020.0.0 is officially released, a new and subversive version!
5.Java development manual (Songshan version) is the latest release. Download it quickly!
Feel good, don't forget to like + forward!