Random talk about Autonomous vehicle_ 02
I ReadMe
- This paper aims to build a usable and pollution-free deep learning environment for children who are equipped with GPU in the computer and have deep learning needs.
- The article is based on the various methods of the great gods on the Internet, and then synthesized by myself. If there are similarities, it is a pure accident.
II Step 1: install Anaconda
- Download the installation package according to your computer: Link here.
- After downloading, unzip the installation package and complete it step by step according to the instructions.
- Verify that the installation was successful and create a virtual environment for subsequent configuration.
# Check whether the installation is successful: (input at cmd terminal)
conda --version
# Create virtual environment: (input at cmd terminal)
conda create -n Pytorch_GPU python=3.7
III Step 2: install cuda10 two
- Download cuda10 2: Link here . (it is recommended to download exe(local) version) Note: if you previously downloaded other versions of CUDA, you can delete other versions. Please move to the following steps for specific methods: Link here
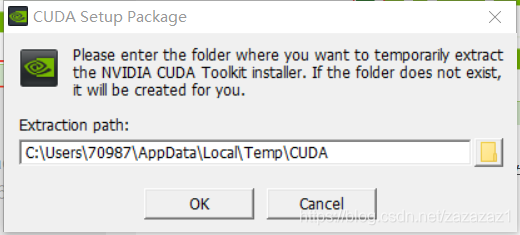
- When the download is complete, double-click exe file, enter the installation phase
Choose ok here
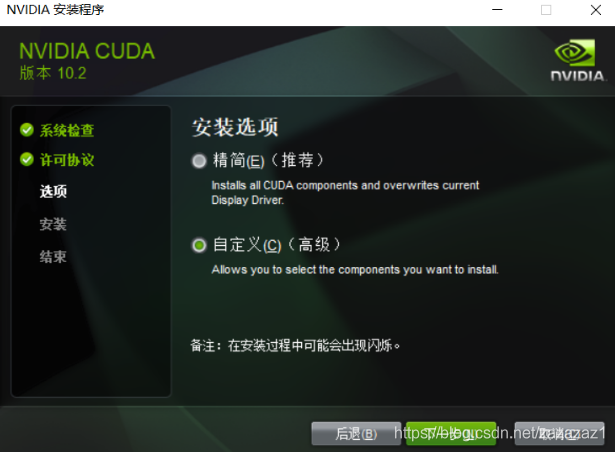
Select custom installation here
Uncheck the part as shown in the figure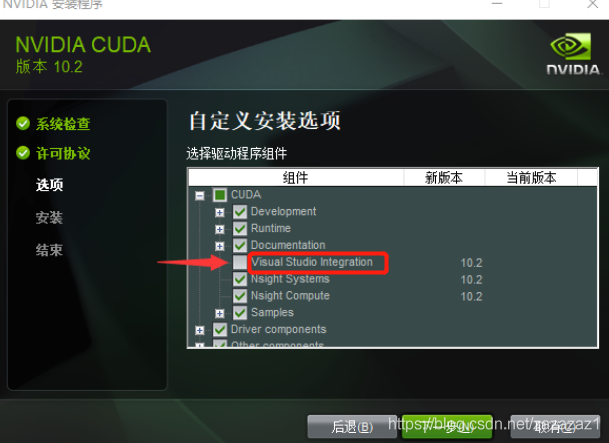
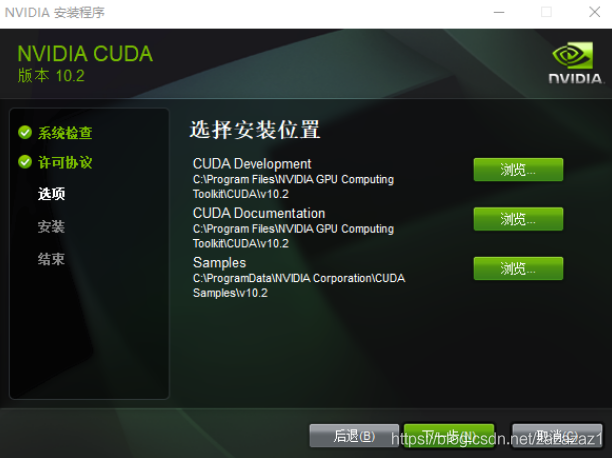
It is installed in drive C by default. It is best not to change the address casually
Wait for the installation to succeed
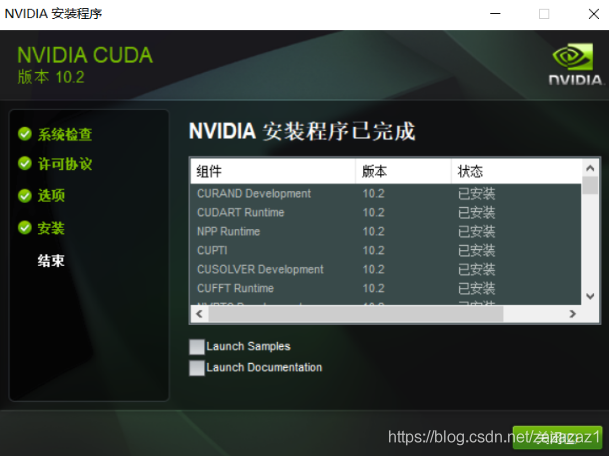
There is no need to configure the environment. Just check whether CUDA is installed successfully
# Enter at cmd terminal:
nvcc -V
# If you are prompted with the following information, the installation is successful:
nvcc: NVIDIA (R) Cuda compiler driver
Copyright (c) 2005-2019 NVIDIA Corporation
Built on Wed_Oct_23_19:32:27_Pacific_Daylight_Time_2019
Cuda compilation tools, release 10.2, V10.2.89
IV Step 3: install Cudnn and configure the system environment variables
- Download the Cudnn installation package (you need to register), Link here
- After registration, do not download the latest version, download the stable version v7 6.5:
Find stable version
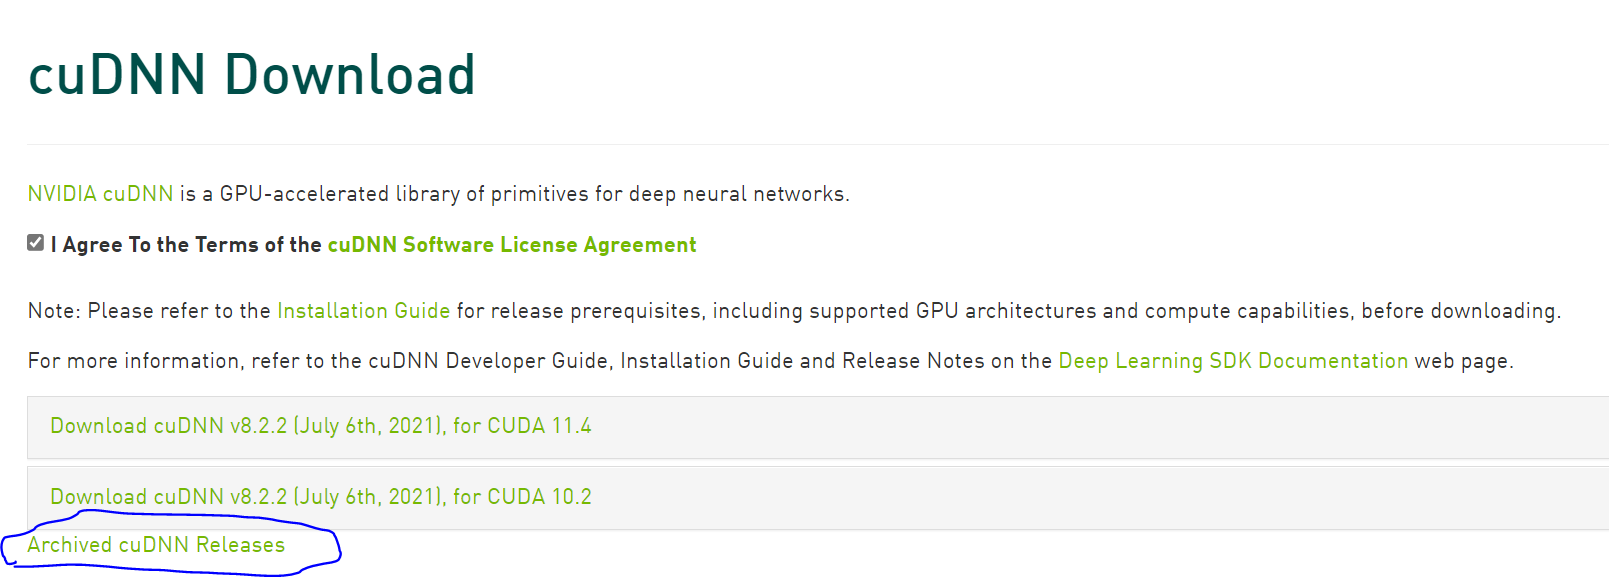
download

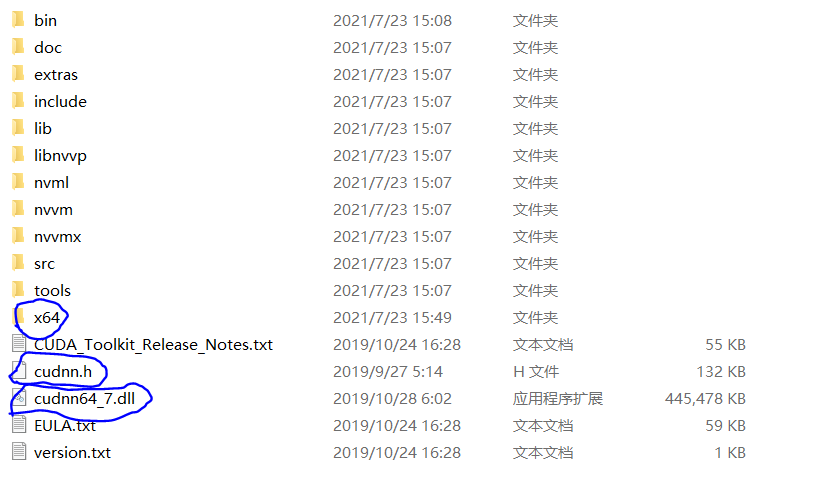
After downloading and decompressing, you will get a directory named CUDA. Copy the contents of bin,include and lib directories to the installation directory of CUDA (default: C:\Program Files\NVIDIA GPU Computing Toolkit\CUDA\v10.2). The final results are as follows:
Configure system environment variables
This computer -- > properties -- > advanced system settings -- > Advanced -- > environment variables
Click Path in the user variable, click new, and enter:
C:\Program Files\NVIDIA GPU Computing Toolkit\CUDA\v10.2
C:\Program Files\NVIDIA GPU Computing Toolkit\CUDA\v10.2\lib\x64
After input, confirm, confirm and confirm. Then check whether the installation is successful:
# Input in sequence at the terminal
cd C:\Program Files\NVIDIA GPU Computing Toolkit\CUDA\v10.2\extras\demo_suite
bandwidthTest.exe  # Display Result = Pass
deviceQuery.exe  # Display Result = Pass
V Step 4: install PyTorch
- Activate and enter the virtual environment prepared in advance in step 1
activate Pytorch_GPU
- pip download and install pytoch
pip3 install -i https://pypi.tuna.tsinghua.edu.cn/simple torch===1.6.0 torchvision===0.7.0 -f https://download.pytorch.org/whl/torch_stable.html
- After the download and installation is completed, check the installation results, and enter the following instructions in sequence at the current terminal. The result is that the installation is successful, as shown in the figure (the virtual environment named by the blogger here is Pytorch2, so it will be slightly different)
python
import torch
torch.__version__
torch.cuda.is_available()

Vi Step 5: configure pytoch to the project in pychart
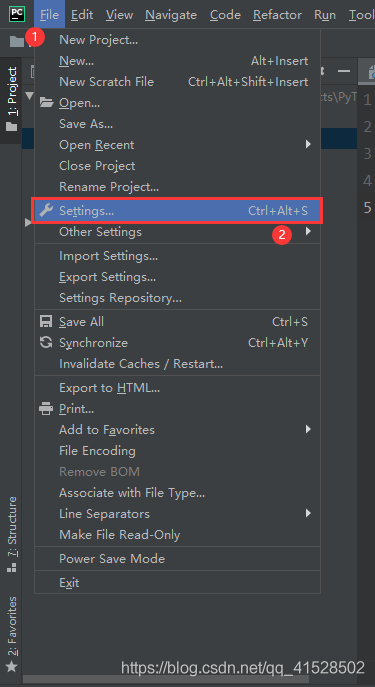
- File -> Settings
- Project Interpreter -> Show All...
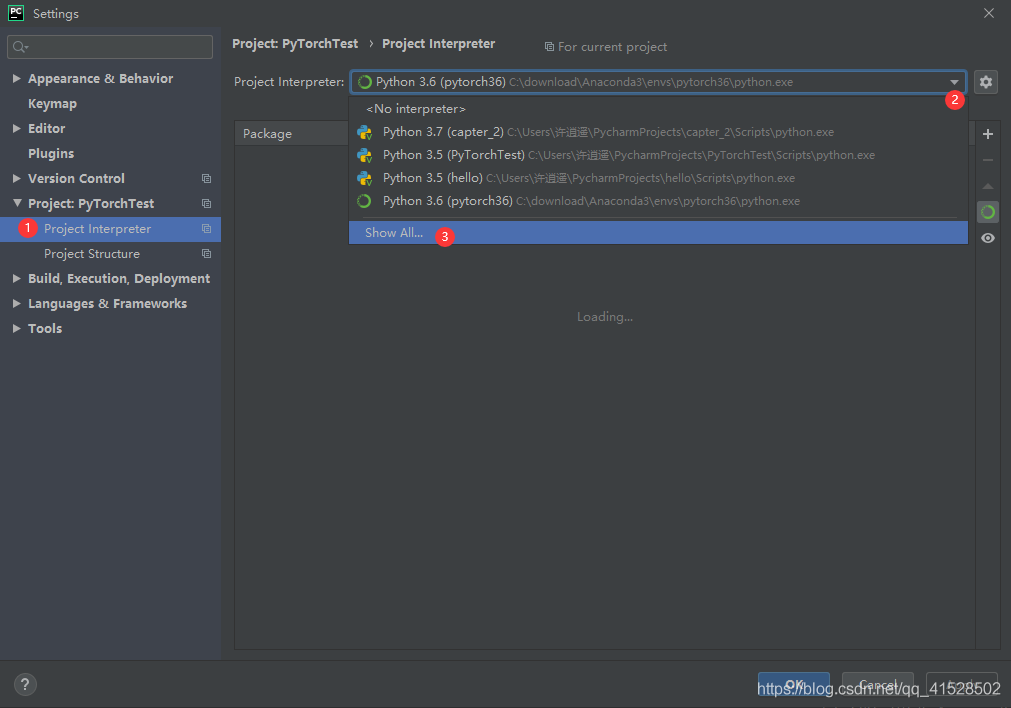
- If there is no Python environment just configured in Show All... We need to configure it ourselves
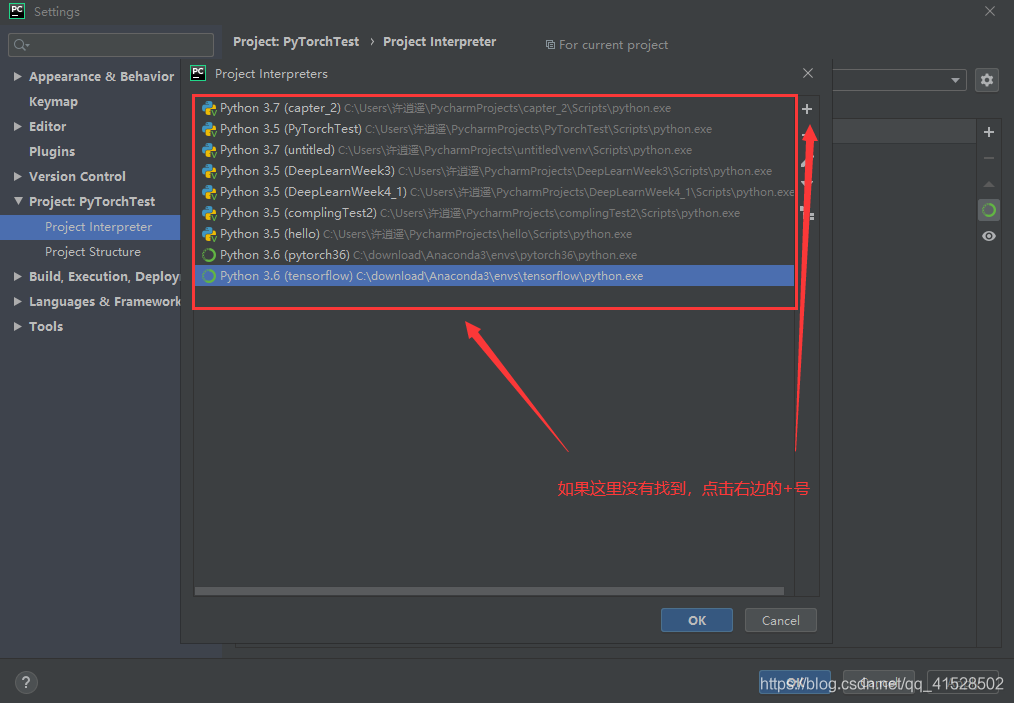
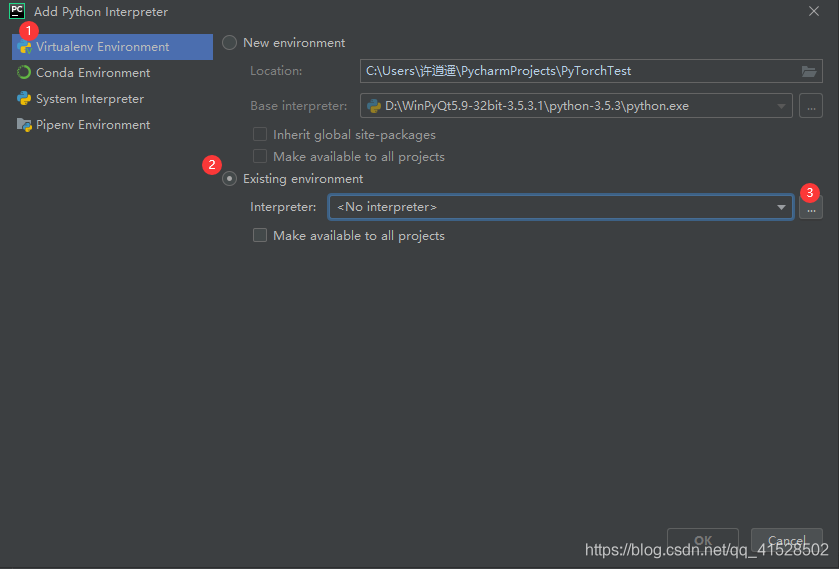
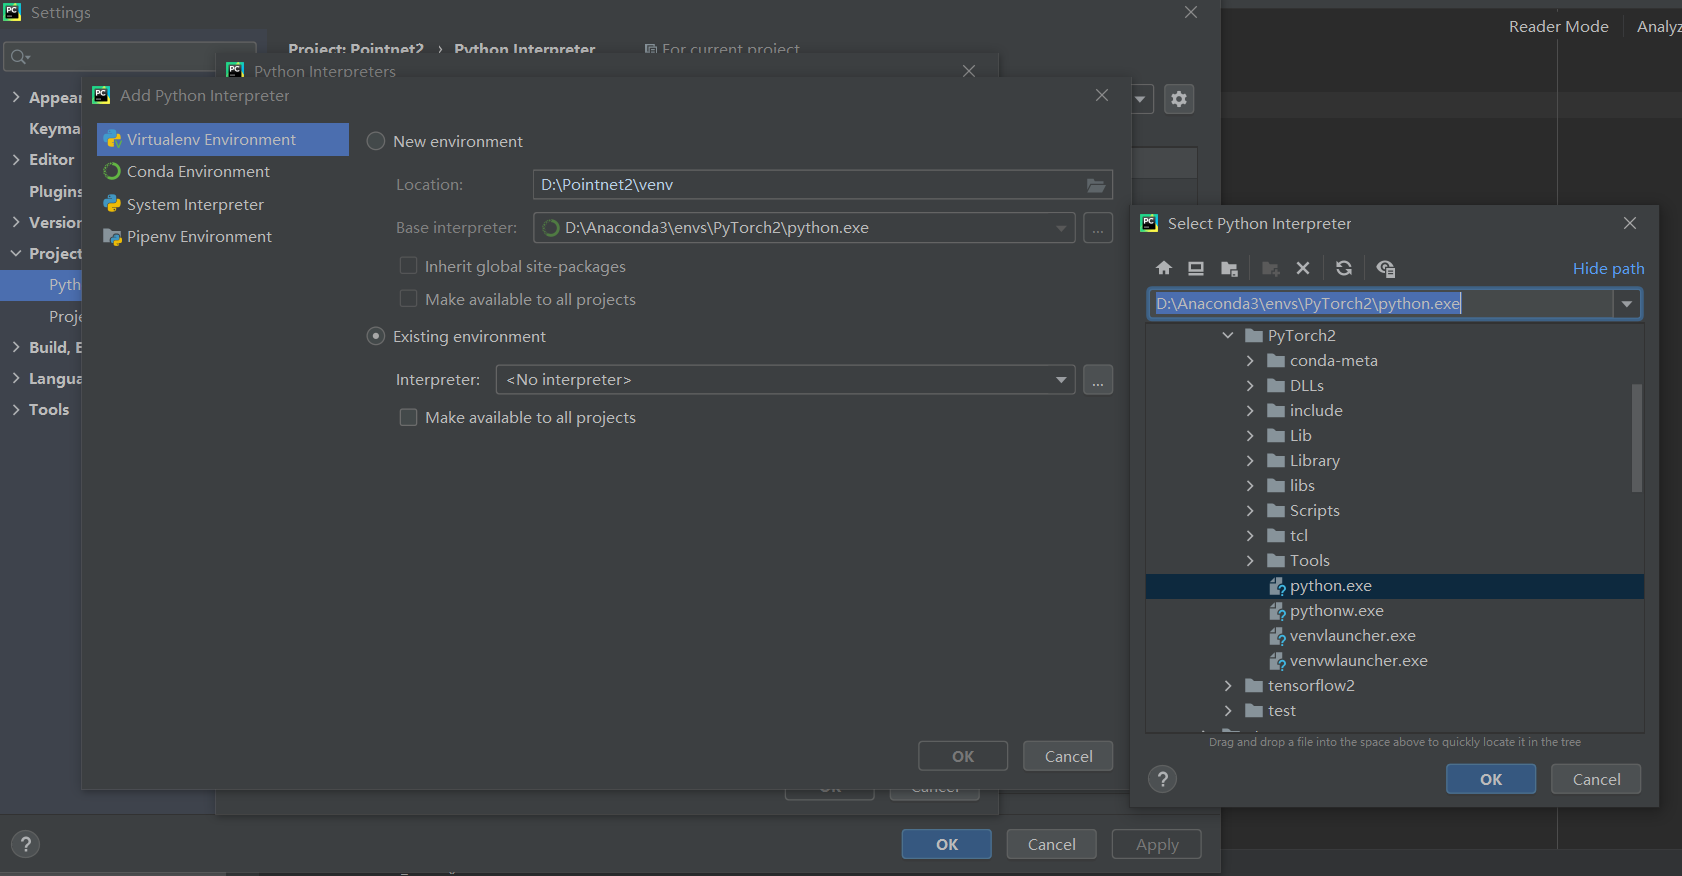
- After selecting, click ok continuously until the end.
- After a moment, complete the configuration and check whether the configuration is successful in the lower right corner of pychart as shown in the figure below

To sum up, complete the full set of configuration.
VII experience
- Pay attention to the matching between various software versions.
- The latest version of CUDA seems to no longer need to configure Cudnn for acceleration.
- A good environment configuration is more than half of success. It is difficult to finish at the beginning. Don't give up easily.
VIII Article reference:
- Windows system cuda10 2 + cudnn installation tutorial
- Win10 operating system: PyTorch virtual environment configuration + PyCharm configuration
- 2020.08 latest must see pytorch + cuda10 2 (or 10.1) + Python 3 The installation of version 7 is completed in 30min (five hours of blood and tears experience). The personal test is available!! Pit prevention!!
If you have any questions, please correct them. Reprint is welcome, but please indicate the source.