There are three ways to display the contents of QT view:
Assemble and splice directly with qt control
This advantage is that the existing controls can be used to unify the overall effect; The disadvantage is that the behavior of each control should be standardized. If the behavior of each line in the tree view is inconsistent, there will be a lot of additional interactive calls when developed, The arrangement layout inside the control conflicts with the arrangement layout between the external line numbers (for example, it is composed of several labels. The size of the control in a label is adjusted according to the text size, but the display rule of the whole line view may be to display a string of text first and squeeze a specific text content);
In the usage scenario, the rolling list will create a fixed number of controls in the general practice of the list, and the controls will set the data repeatedly at different frequencies during the rolling process. The preprocessing process before drawing is relatively heavy. The user-defined controls used need to consider the performance of each interface setting.
Another method is to use the display effect of a native control to draw the list.
void  QCustomizedDelegate::paint( QPainter * painter, const QStyleOptionViewItem & option, const QModelIndex & index ) const
{
    if(index.column()==1 && index.data().type() == QVariant::Int)     //Judge the number of columns and whether the index value is of int type (the temperature is represented by the value of int type)
    {
        int radio=14;
        int top = option.rect.top() + radio;
        int left = option.rect.left() + radio;
        int width = option.rect.width() - 2 * radio;
        int height = option.rect.height() - 2 * radio;

        QStyleOptionProgressBar bar;                   //Set parameters
        bar.rect.setRect(left, top, width, height);
        bar.state  = QStyle::State_Enabled;
        bar.progress = index.data().toInt();
        bar.maximum = 100;
        bar.minimum = 0;
        bar.textVisible = true;
        bar.text    =   QString("Current temperature:%1°").arg(bar.progress);
        bar.textAlignment = Qt::AlignCenter;

        QApplication::style()->drawControl(QStyle::CE_ProgressBar,&bar,painter, m_bar.data());
    }
    else
    {
        QItemDelegate::paint(painter,option,index);
    }
}
Even if the control is created here, it is only for display and will not do any interaction.
Disadvantages: like the scheme, there is conflict between internal layout and external layout; In addition, the controls that can be supported are limited. For example, If you want to draw a custom curve, or if you can't draw a circle (the reason is that it will not trigger the paintevent of the custom control. It will eventually enter the following code through layer by layer calls. You can see that it uses the element combination of the standard control to draw the control. It is not really done through the paintevent of the custom control. Now most of the components in the component library are implemented by overloading paintevent, so I We can't use it. Because it can't be drawn, it can show a certain style of standard controls through the qss and maps you set, and present the selected state effect set by the user (Hover enabled, etc.), that's all.
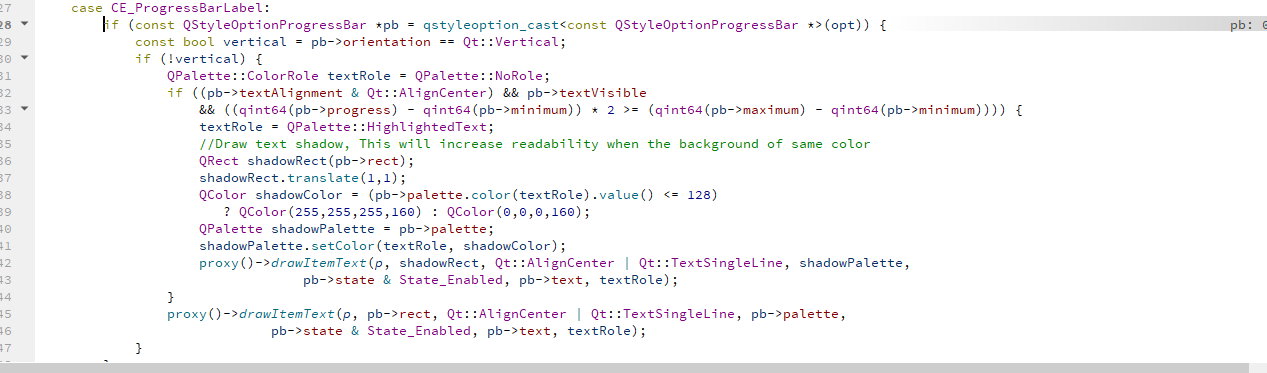
The stack is as follows:

Even if m_bar is a custom progress control
class CustomProgress:public QProgressBar
{
public:
    CustomProgress(QWidget* parent=nullptr);
    ~CustomProgress();
protected:
    void paintEvent(QPaintEvent* event);
};
void CustomProgress::paintEvent(QPaintEvent* event)
{
    QPainter p(this);
    p.setRenderHint(QPainter::Antialiasing);


    auto m_rotateAngle = 360*value()/100;


    int side = qMin(width(), height());
    QRectF outRect(0, 0, side, side);
    QRectF inRect(20, 20, side-40, side-40);
    QString valueStr = QString("%1%").arg(QString::number(value()));


    //Outer circle
    p.setPen(Qt::NoPen);
    p.setBrush(QBrush(QColor(97, 117, 118)));
    p.drawEllipse(outRect);
    p.setBrush(QBrush(QColor(255, 107, 107)));
    p.drawPie(outRect, (90-m_rotateAngle)*16, m_rotateAngle*16);
    //Draw mask
    p.setBrush(palette().window().color());
    p.drawEllipse(inRect);
    //Draw text
    QFont f = QFont("Microsoft YaHei", 15, QFont::Bold);
    p.setFont(f);
    p.setFont(f);
    p.setPen(QColor("#555555"));
    p.drawText(inRect, Qt::AlignCenter, valueStr);
    //QProgressBar::paintEvent(event);
}
The display size will not be the effect defined in this paintevent. However, this can be solved by customizing the styleoption. The next chapter will talk about how to transform it.
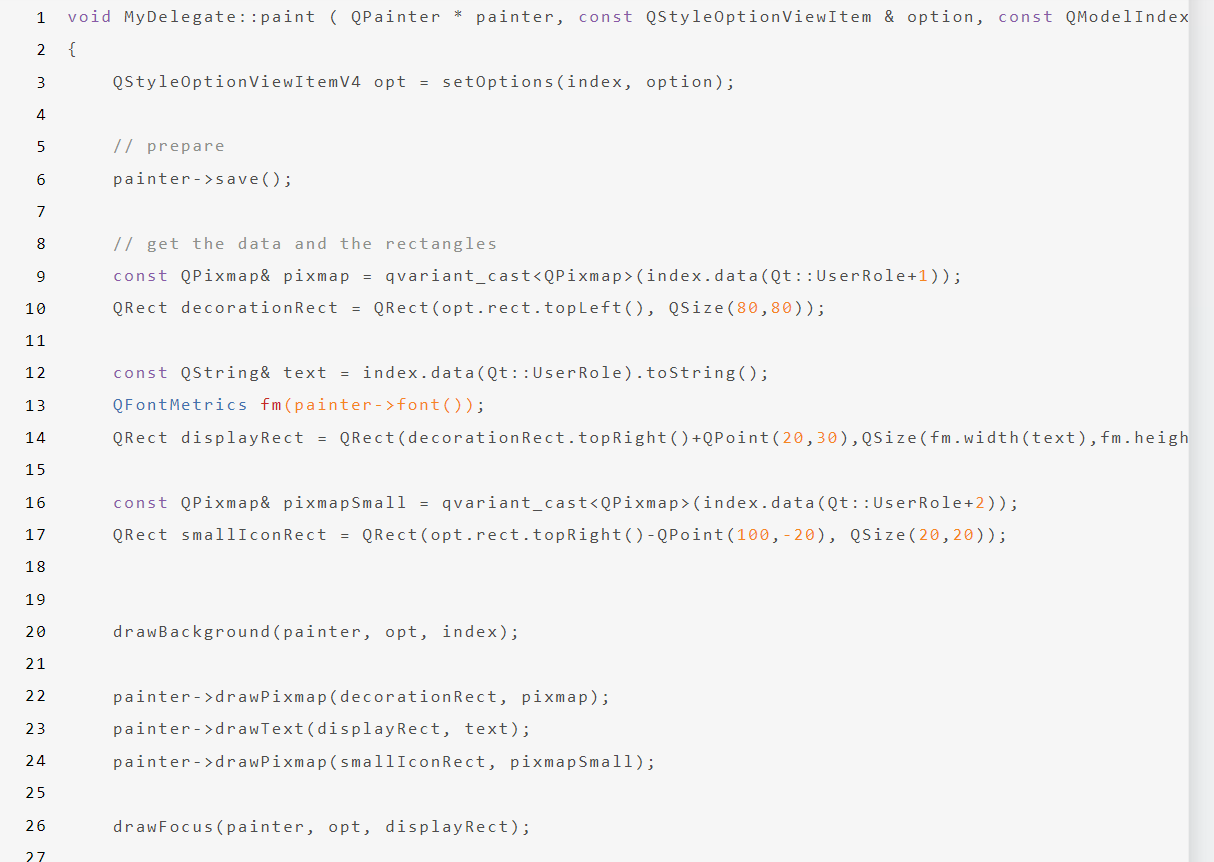
The third kind: manual pure paint without using the control
Link: Qt customized Model, View, Delegate | cloud notes | some technical summaries and writing skills
This advantage is that the code is direct and what you see is what you get. If the display is wrong, just put this function directly. Moreover, there is no redundant operation logic. In the second method, the bottom layer still needs to draw the icon or text through the drawing of the control, but the running code must have been remotely through this direct paint, and this method is better in execution efficiency;
The disadvantage is: if an icon resource cannot be used directly, but needs to be skinned, it needs to be developed and familiar with the skinning process. Moreover, the position layout calculation of the drawn control setting is repeated with the logic of the position calculation when clicking and then triggering the correct action. It is necessary to divide this layout into independent functions. This development work is a burden compared with the first scheme. After all, the first scheme is the system self