[Android] Activity of Android's four components (1)
preface
Activity is an important component in Android learning. If you want to systematically understand it, you can divide it into several parts. The content of this large chapter is about page Jump and data transfer between activities, followed by the explanation of the life cycle in activities.
1. Meet androidmanifest xml
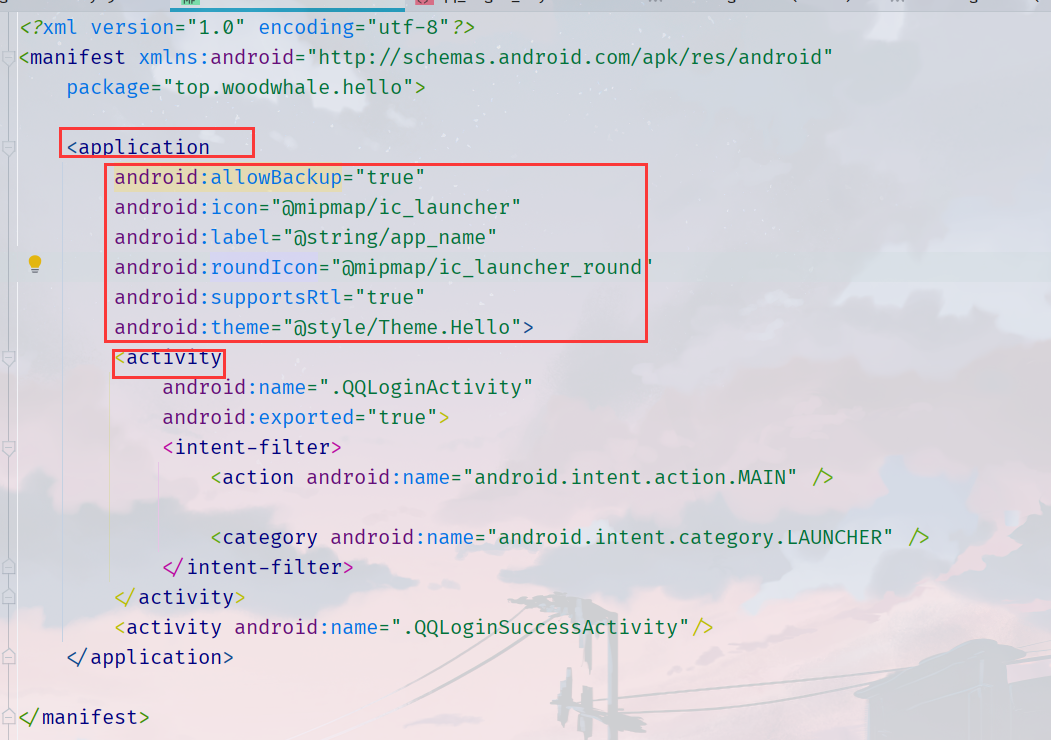
A manifest The outermost layer of XML is wrapped with the manifest tag. The following can be application. Of course, we have also learned uses permission before, which can be at the same level as application
Set properties in the application. allowBackup is allow backup, icon is the app icon, label is the name of the app, roundIcon is the rounded app icon, and supportsRtl is to declare whether your application is willing to support the layout from right to left (RTL is the abbreviation of right to left...). Of course, theme is the theme!
What the hell is Rtl? Have you ever seen Arabic in QQ? These languages are read from right to left, so you need to adapt from right to left. this is it!
Activity is the focus of this study. It is an activity and can also be used as different active pages (roughly understood). Different interfaces in our app can be realized by jumping between activities!
As for intent filter, it is an intention filter, in which the action is an action performed by the activity, and the category can be understood as the category of this intention. The category in the main interface of our APP is LAUNCHER
2. How to realize the jump between activities?
We can use the startActivity() method or startActivityForResult() method to jump to the page. In this section, we only talk about the use of startActivity and intent for single data transmission. In Section 4, we talk about how to use startActivityForResult for data transmission.
2.1 jump to the activity in the same APP through explicit Intent
Explicit Intent: Specifies the component to start by name (fully qualified class name).
You can see that two activities are registered in the following xml, corresponding to two activity classes respectively
<application
        android:allowBackup="true"
        android:icon="@mipmap/ic_launcher"
        android:label="@string/app_name"
        android:roundIcon="@mipmap/ic_launcher_round"
        android:supportsRtl="true"
        android:theme="@style/Theme.Hello">
        <activity
            android:name=".QQLoginActivity"
            android:exported="true">
            <intent-filter>
                <action android:name="android.intent.action.MAIN" />

                <category android:name="android.intent.category.LAUNCHER" />
            </intent-filter>
        </activity>
        <activity android:name=".QQLoginSuccessActivity"/>
    </application>
It should be noted that when you create an explicit Intent start Activity, the system will immediately start the application component specified in the Intent object.
So let me actually operate an example to see how explicit Intent jumps!
We write a jump test case of the login page. If the login is successful, we jump to another activity page to display the login information!
First page: login interface xml
<?xml version="1.0" encoding="utf-8"?>
<RelativeLayout xmlns:android="http://schemas.android.com/apk/res/android"
    xmlns:tools="http://schemas.android.com/tools"
    android:layout_width="match_parent"
    android:layout_height="match_parent"
    xmlns:app="http://schemas.android.com/apk/res-auto"
    android:background="@mipmap/bk">

    <LinearLayout
        android:layout_width="match_parent"
        android:layout_height="wrap_content"
        android:layout_marginTop="70dp"
        android:padding="30dp"
        android:orientation="vertical">

        <TextView
            android:layout_width="wrap_content"
            android:layout_height="wrap_content"
            android:drawableLeft="@mipmap/ic_launcher_round"
            android:text="QQ"
            android:textSize="40sp"/>
        <EditText
            android:id="@+id/et_account"
            android:layout_marginTop="25dp"
            android:layout_width="match_parent"
            android:layout_height="match_parent"
            android:textColor="@color/white"
            android:hint="QQ number/cell-phone number/mailbox"/>

        <EditText
            android:password="true"
            android:id="@+id/et_pwd"
            android:layout_width="match_parent"
            android:layout_height="match_parent"
            android:hint="password"
            android:textColor="@color/white"
            tools:ignore="Deprecated" />

        <Button
            android:id="@+id/bt_login"
            android:layout_width="match_parent"
            android:layout_height="wrap_content"
            android:text="land"
            android:textSize="20sp"/>

        <RelativeLayout
            android:layout_marginTop="15dp"
            android:layout_width="match_parent"
            android:layout_height="wrap_content">
            <TextView
                android:layout_width="wrap_content"
                android:layout_height="wrap_content"
                android:text="Forget password"
                android:textSize="16dp"
                android:textColor="#87C6F8"/>
            <TextView
                android:layout_width="wrap_content"
                android:layout_height="wrap_content"
                android:layout_alignParentRight="true"
                android:text="New user registration"
                android:textSize="16dp"

                android:textColor="#87C6F8"/>

        </RelativeLayout>

    </LinearLayout>

    <TextView
        android:layout_width="wrap_content"
        android:layout_height="wrap_content"
        android:layout_alignParentBottom="true"
        android:layout_centerHorizontal="true"
        android:layout_marginBottom="50dp"
        android:text="By logging in, you read and agree to the terms of service"
        android:textColor="#CCCFCF"
        android:textSize="20sp" />

</RelativeLayout>
Corresponding activity java class
package top.woodwhale.hello;

import android.app.Activity;
import android.content.Intent;
import android.os.Bundle;
import android.text.TextUtils;
import android.view.View;
import android.widget.Button;
import android.widget.EditText;
import android.widget.Toast;

import androidx.annotation.Nullable;

public class QQLoginActivity extends Activity implements View.OnClickListener {

    private EditText account;
    private EditText passwd;
    private Button login;

    @Override
    protected void onCreate(@Nullable Bundle savedInstanceState) {
        super.onCreate(savedInstanceState);
        setContentView(R.layout.qq_login_layout);
        initViews();
    }

    private void initViews() {
        account = this.findViewById(R.id.et_account);
        passwd = this.findViewById(R.id.et_pwd);
        login = this.findViewById(R.id.bt_login);
        // Add listener
        login.setOnClickListener(this);
    }


    @Override
    public void onClick(View v) {
        if (v == login && login != null) {
            String ac = account.getText().toString();
            String pwd = passwd.getText().toString();
            if (TextUtils.isEmpty(ac)) {
                Toast.makeText(this, "Account number cannot be empty", Toast.LENGTH_SHORT).show();
                return;
            }
            if (TextUtils.isEmpty(pwd)) {
                Toast.makeText(this,"Password cannot be empty", Toast.LENGTH_SHORT).show();
                return;
            }
            // If they are all filled in correctly, then jump
            Intent intent = new Intent(this,QQLoginSuccessActivity.class);
            intent.putExtra("ac",ac);
            intent.putExtra("pwd",pwd);
            // The current act jumps to the target act, that is, the login success interface
            this.startActivity(intent);
        }
    }
}
This part is the code for jump implementation:

new a intent, and if you need to set the key value pair information, use the putExtra() method to set the key value pair. Finally, call the startActivity() method in the current activity class to jump to the next activity.
Second page: login success xml
<?xml version="1.0" encoding="utf-8"?>
<FrameLayout xmlns:android="http://schemas.android.com/apk/res/android"
    android:layout_width="match_parent"
    android:layout_height="match_parent">

    <Button
        android:id="@+id/bt_ac_and_pwd"
        android:layout_width="wrap_content"
        android:layout_height="wrap_content"
        android:layout_gravity="center"
        android:text="account number:*** password:###"/>

</FrameLayout>
Corresponding activity java class
package top.woodwhale.hello;

import android.app.Activity;
import android.content.Intent;
import android.os.Bundle;
import android.view.View;
import android.widget.Button;

import androidx.annotation.Nullable;

public class QQLoginSuccessActivity extends Activity {

    private Button btn;

    @Override
    protected void onCreate(@Nullable Bundle savedInstanceState) {
        super.onCreate(savedInstanceState);
        setContentView(R.layout.frame_layout);

        Intent intent = getIntent();
        String ac = intent.getStringExtra("ac");
        String pwd = intent.getStringExtra("pwd");
        btn = findViewById(R.id.bt_ac_and_pwd);
        btn.setText(btn.getText().toString().replace("***",ac).replace("###",pwd));
    }
}
Here, we use the getStringExtra() method to obtain the key value pairs we set in the previous activity

Test effect:
Effect complete!
2.2 jump to the activity in the same APP through implicit Intent
Implicit Intent: instead of specifying a specific component, it declares the component to be executed, allowing components in other applications to process it.
For example, we are now going to call another page in an app using implicit intent, which can be as follows:
// Implicit intent to jump
Intent intent = new Intent();
intent.setAction("top.woodwhale.qqlogin.LOGIN_INFO");
intent.addCategory(Intent.CATEGORY_DEFAULT);
intent.putExtra("ac",ac);
intent.putExtra("pwd",pwd);
this.startActivity(intent);
Use the setAction() method to set the action. What is the action here?
Let's look at the first manifest xml
<activity
          android:name=".QQLoginActivity"
          android:exported="true">
    <intent-filter>
        <action android:name="android.intent.action.MAIN" />
        <category android:name="android.intent.category.LAUNCHER" />
    </intent-filter>
</activity>

<activity android:name=".QQLoginSuccessActivity">
    <intent-filter>
        <action android:name="top.woodwhale.qqlogin.LOGIN_INFO"/>
        <category android:name="android.intent.category.DEFAULT"/>
    </intent-filter>
</activity>
Here, we are different from the explicit intention. We have changed the < intent Filter >, that is, the intention filter, in the activity of QQLoginSuccessActivity. We have set a name to top in the action woodwhale. qqlogin. LOGIN_ Info, which is the same as intent. In our java code setAction("top.woodwhale.qqlogin.LOGIN_INFO"); corresponding! The same is true for category. Default is used, which is also the same as intent addCategory(Intent.CATEGORY_DEFAULT); corresponding.
In this way, we set the intent object to qqloginsuccess activity!
2.3 jump to other apps through explicit Intent
When we use the browser to access Zhihu, csdn and other web pages, will we jump to the app for use? In fact, this is the jump between different apps, that is, through the browser app, to the csdn app.
The above jump operations can also be implemented through Intent. We first implement them with explicit Intent:
For example, if I click login now and need to jump to the Chrome app, then explicit Intent needs to know the packageName of the Chrome app and the className of an activity. We can use logcat to grab these two String values, as shown in the following figure:
First select system_process system process, searching for cmp, which is the abbreviation of ComponentName. Then open Chrome on avd and logcat can grab it

Then the core code of our jump is:
Intent intent = new Intent();
intent.setClassName("com.android.chrome","com.google.android.apps.chrome.Main");
this.startActivity(intent);
Of course, you can also use ComponentName as middleware
Intent intent = new Intent();
ComponentName cmp = new ComponentName("com.android.chrome","com.google.android.apps.chrome.Main");
intent.setComponent(cmp);
this.startActivity(intent);
Test it

2.4 jump to other apps through implicit Intent
Generally, jumping to other apps is done using implicit Intent, and there are many constants in the Intent class for us to choose APP
Like intent ACTION_ Dial is the phone dialing action, and we use the setData() method to give a tel value, and then the number will be dialed. Note that the parameters passed in setData are of Uri type, which needs to be used The parse () method converts the format
Intent intent = new Intent();
intent.setAction(Intent.ACTION_DIAL);
intent.setData(Uri.parse("tel:"+ac));
this.startActivity(intent);
The effect is as shown in the following figure:
2.5 summary of Intent:
Common methods of explicit Intent:
- SetClass (context packagecontext, class classnmae. Class). This method cannot be called across applications
- SetClass (string packagename, string classname). This method can realize cross application calls
- setComponent(ComponentName component), which can be called across applications
Common methods of implicit Intent:
- setAction(String action)
- addCategory(String category)
- setData(Uri data)
Of course, Intent uses the putExtra() method most, which can transfer Extra data!
To sum up, what is the difference between implicit Intent and explicit Intent?
- Explicit Intent needs to give the specified class, that is, qualified class name
- Implicit Intent needs to give action and category, and can implicitly call other activities
To be frank, implicit Intent corresponds to a specific activity through the given action and category, while explicit Intent specifies an activity class
So, what kind of Intent is used in what situation?
- The display Intent is generally used to complete the jump between the same APP
- Implicit Intent is generally used to call other apps
- The above is not absolute. It shows that Intent can also complete the jump of different apps, and implicit Intent can also complete the jump of the same APP
3. How can data between activities be transferred in one direction?
There are two types of transfer data, one is ordinary data, and the other is object data
The data transfer between activities is realized through putExtra() method in Intent or setData() method
putExtra is actually putting a key value pair into the intent object. Taking out this value can be realized through the getXXXExtra() method
setData actually gives a data to the data attribute set in the intent filter
Let's talk about how these two methods transfer data!
3.1 putExtra() method transfer
3.1.1 general data transmission
For common data types:
// Implicit intent to jump
String ac = account.getText().toString();
String pwd = passwd.getText().toString();
Intent intent = new Intent();
intent.setAction("top.woodwhale.qqlogin.LOGIN_INFO");
intent.addCategory(Intent.CATEGORY_DEFAULT);
intent.putExtra("ac",ac);
intent.putExtra("pwd",pwd);
this.startActivity(intent);
We passed the data of two strings in the target login of the above implicit intent_ In the activity class of info, you can receive data in this way through the getStringExtra() method
Intent intent = getIntent();
String ac = intent.getStringExtra("ac");
String pwd = intent.getStringExtra("pwd");
btn = findViewById(R.id.bt_ac_and_pwd);
btn.setText(btn.getText().toString().replace("***",ac).replace("###",pwd));
Similarly, you can putExtra all kinds of ordinary data - int, boolean, etc
3.1.2 object data transmission
For passing objects, there are two overloaded methods in the putExtra() method:
putExtra(String name, Parcelable value)
putExtra(String name, Serializable value)
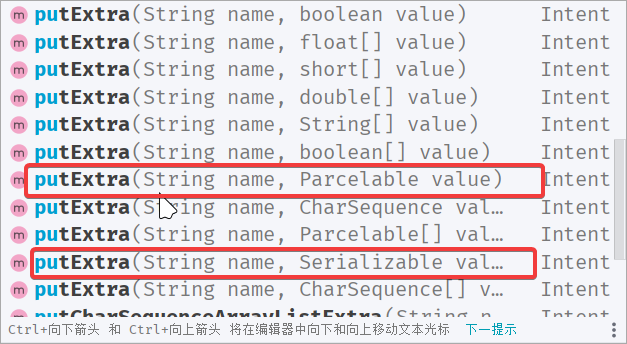
The second parameter of these two methods is particular.
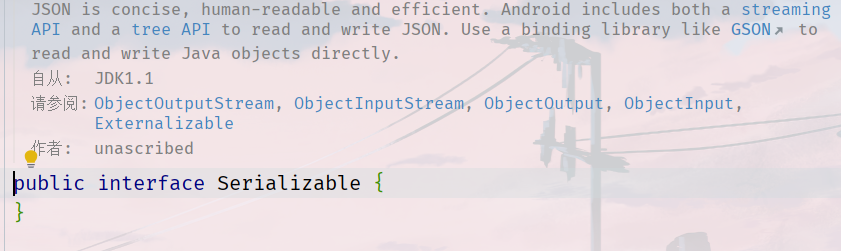
First, let's talk about Serializable. This is a serialization class in Java, which is jdk1 1 is used to identify Serializable interfaces, which are also very common in non Android programs.
The so-called serialization is a kind of compression, which can be understood as the compression of an object into JSON, but it is certainly not the format of JSON in the JVM
The serialized object can be deserialized to get the original object
Let's translate the description of the interface:


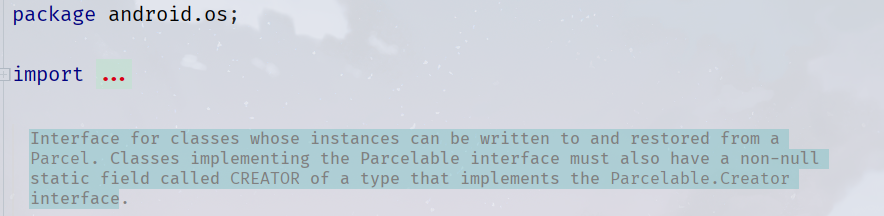
Secondly, there is this unseen Parcelable. This class is implemented by Google and is also used to compress memory. It is more efficient than Serializable.
We translate the description of this interface:

Therefore, if we need to transfer activities between an object, we can let the class to which the object belongs use one of the above two interfaces!
Here, we use the Pracelable interface to implement a User class:
package top.woodwhale.hello;

import android.os.Parcel;
import android.os.Parcelable;

public class User implements Parcelable {
    String username;
    String password;

    public User(String username, String password) {
        this.username = username;
        this.password = password;
    }

    public String getUsername() {
        return username;
    }

    public void setUsername(String username) {
        this.username = username;
    }

    public String getPassword() {
        return password;
    }

    public void setPassword(String password) {
        this.password = password;
    }

    protected User(Parcel in) {
        username = in.readString();
        password = in.readString();
    }

    public static final Creator<User> CREATOR = new Creator<User>() {
        @Override
        public User createFromParcel(Parcel in) {
            return new User(in);
        }

        @Override
        public User[] newArray(int size) {
            return new User[size];
        }
    };

    @Override
    public int describeContents() {
        return 0;
    }

    @Override
    public void writeToParcel(Parcel dest, int flags) {
        dest.writeString(username);
        dest.writeString(password);
    }
}
We transfer a user object to an activity:
// Implicit intent to jump
Intent intent = new Intent();
intent.setAction("top.woodwhale.qqlogin.LOGIN_INFO");
intent.addCategory(Intent.CATEGORY_DEFAULT);
intent.putExtra("user1",new User("woodwhale","1234567"));
this.startActivity(intent);
The activity classes we need to pass are as follows:
public class QQLoginSuccessActivity extends Activity {

    private Button btn;

    @Override
    protected void onCreate(@Nullable Bundle savedInstanceState) {
        super.onCreate(savedInstanceState);
        setContentView(R.layout.frame_layout);

        Intent intent = getIntent();
        User user1 = intent.getParcelableExtra("user1");
        String ac = user1.getUsername();
        String pwd = user1.getPassword();
        btn = findViewById(R.id.bt_ac_and_pwd);
        btn.setText(btn.getText().toString().replace("***",ac).replace("###",pwd));
    }
}
The effects are as follows:

3.2 setting data in intent filter
Do you remember that in the above example of implicit Intent jump to make a call, the Intent object has a method of setData(Uri data)? Why can the data after set be set and obtained here?
In fact, at manifest In the intent filter of activity in XML, in addition to the common action and category, there is also a data tag, which can be used to set the data transmitted in the intent object and different data forms. We can use scheme here
<activity android:name=".QQLoginSuccessActivity">
    <intent-filter>
        <action android:name="top.woodwhale.qqlogin.LOGIN_INFO"/>
        <category android:name="android.intent.category.DEFAULT"/>
        <data android:scheme="ac"/>
    </intent-filter>
</activity>
As long as the above data tag is set, we give the intent object pointing to QQLoginSuccessActivity * * intent setData(Uri.parse(“ac:1008611”));** In this way, you can pass AC data to the intent.
So how do you accept ac data in QQLoginSuccessActivity?
Use * * intent Getdata() * * can return a Uri object, and toString() can get ac
Some core codes:
Login activity
 // Implicit intent to jump
Intent intent = new Intent();
intent.setAction("top.woodwhale.qqlogin.LOGIN_INFO");
intent.addCategory(Intent.CATEGORY_DEFAULT);
intent.setData(Uri.parse("ac:"+ac));
intent.putExtra("pwd",pwd);
this.startActivity(intent);
this.finish();
Login successful activity
Intent intent = getIntent();
String pwd = intent.getData().toString();
btn = findViewById(R.id.bt_ac_and_pwd);
btn.setText(pwd);
The effects are as follows:

4. How can data be returned between activities (two-way transfer)?
Different from one-way information transmission, two-way information transmission is also very common. For example, when we visit the page, the page will return a status code. According to this status code, we can know the result of the access. For example, 200 means that the access is successful, 404 means that the resource cannot be found
We can also return data between different activities, that is, we can transfer the data of the first activity page to the second activity for processing, and the processed results of the second activity can be returned to the first activity for use!
So how to return data? We can use our own rewritten onActivityResult() method to judge which page is returned by judging the requestCode, and read the data in different situations through the passed resultCode and intent object.
4.1 example of login information return
for instance:
We now need to verify whether our login account is an administrator or an account. The administrator account passwords are root and 123456 respectively. If the login account and password do not match, we are not an administrator.
If you are an administrator after logging in, a Taost will pop up on the return interface, showing that you are an administrator!, Otherwise, you are not an administrator!
So how to implement the code?
Our QQLoginActivity is the login page
public class QQLoginActivity extends Activity implements View.OnClickListener {

    private static final String TAG = "QQLoginActivity";
    private EditText account;
    private EditText passwd;
    private Button login;

    @Override
    protected void onCreate(@Nullable Bundle savedInstanceState) {
        super.onCreate(savedInstanceState);
        setContentView(R.layout.qq_login_layout);
        initViews();
    }

    private void initViews() {
        account = this.findViewById(R.id.et_account);
        passwd = this.findViewById(R.id.et_pwd);
        login = this.findViewById(R.id.bt_login);
        // Add listener
        login.setOnClickListener(this);
    }


    @Override
    public void onClick(View v) {
        if (v == login && login != null) {
            String ac = account.getText().toString();
            String pwd = passwd.getText().toString();
            if (TextUtils.isEmpty(ac)) {
                Toast.makeText(this, "Account number cannot be empty", Toast.LENGTH_SHORT).show();
                return;
            }
            if (TextUtils.isEmpty(pwd)) {
                Toast.makeText(this,"Password cannot be empty", Toast.LENGTH_SHORT).show();
                return;
            }

            // Explicit Intent
            Intent intent = new Intent(this,QQLoginSuccessActivity.class);
            intent.putExtra("ac",ac);
            intent.putExtra("pwd",pwd);
            // The request code passed to qqloginsuccess activity is 1
            this.startActivityForResult(intent,1);
            // ...
            // We can set different request codes for different activities, and finally judge which activity returned the data through the request code
        }
    }


    @Override
    protected void onActivityResult(int requestCode, int resultCode, Intent data) {
        // Request code to jump from the current activity to another activity
        if (requestCode == 1) {
            Log.i(TAG,"from QQLoginSuccessActivity Return");
            if (resultCode == 0) {
                Log.i(TAG,"Login failed");
                Toast.makeText(this, data.getStringExtra("fail"), Toast.LENGTH_SHORT).show();
            } else if (resultCode == 1) {
                Log.i(TAG,"Login succeeded");
                Toast.makeText(this, data.getStringExtra("success"), Toast.LENGTH_SHORT).show();
            }
        }
    }
}
Our QQLoginSuccessActivity is the login success page
public class QQLoginSuccessActivity extends Activity implements View.OnClickListener {

    private Button btn;
    private String ac;
    private String pwd;

    @Override
    protected void onCreate(@Nullable Bundle savedInstanceState) {
        super.onCreate(savedInstanceState);
        setContentView(R.layout.frame_layout);
        initButtonOnclick();
    }

    private void initButtonOnclick() {
        Intent intent = getIntent();
        ac = intent.getStringExtra("ac");
        pwd = intent.getStringExtra("pwd");
        btn = findViewById(R.id.bt_ac_and_pwd);
        btn.setText(btn.getText().toString().replace("***", ac).replace("###", pwd));

        btn.setOnClickListener(this);
    }

    @Override
    public void onClick(View v) {
        Intent retIntent = new Intent();
        if (ac.equals("root") && pwd.equals("123456")) {
            retIntent.putExtra("fail","You are the administrator!");
            // Send information back
            setResult(0,retIntent);
        } else {
            retIntent.putExtra("success","You're not an administrator!");
            // Send information back
            setResult(1,retIntent);
        }

        // Close current page
        finish();
    }
}
Let's analyze the core code:
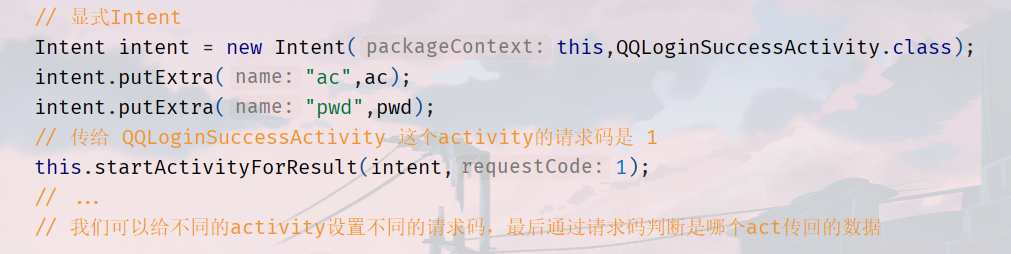
The first is the startActivityForResult on the QQLoginActivity page. It sets an intent ion to pass the past and a requestCode of 1, indicating that our request code for qqloginsccessactivity is 1. We pass a String type of ac and pwd.
After jumping to the QQLoginSuccessActivity page, we click the button to set the return information, and different information will be returned in different states

After returning, execute in QQLoginActivity. We rewrite the onActivityResult() method to determine the requestCode. If it is 1, it is the request returned to QQLoginSuccessActivity, and the returned result is resultCode. If it is 0, the login fails, and vice versa.

The effects are as follows:

4.2 examples of pictures taken and returned
Let's take a scene first - when using QQ or wechat, click the "shooting" option, a camera will be called up to take photos, and then the photos will be sent to friends.
In fact, this is also a common information return. First call the system album to take photos, and then send the taken photos back.
Now let's simulate this scenario - click a button to call the system's camera. If the photo is taken successfully, it will return and display the photo we took on the original page. If it fails, Taost will give a feedback of cancellation or failure.
First, create the layout page xml, which is a very simple layout
<?xml version="1.0" encoding="utf-8"?>
<RelativeLayout xmlns:android="http://schemas.android.com/apk/res/android"
    android:layout_width="match_parent"
    android:layout_height="match_parent">

    <ImageView
        android:id="@+id/iv_pic"
        android:layout_width="match_parent"
        android:layout_height="match_parent"/>

    <TextView
        android:id="@+id/tv_photograph"
        android:layout_width="60dp"
        android:height="60dp"
        android:layout_centerInParent="true"
        android:layout_alignParentBottom="true"
        android:layout_marginBottom="40dp"
        android:layout_height="wrap_content"
        android:background="@drawable/selector_orange_bg"/>

</RelativeLayout>
Our Photo button uses a selector. The effect is that the button will be gray when pressed, which has an obvious pressing effect. I have described the realization of this effect before Layout and events in [Android] Android It's written in.
Then register an activity in the manifest
<activity android:name=".study.test.CameraActivity" android:exported="true">
    <intent-filter>
        <action android:name="android.intent.action.MAIN" />
        <category android:name="android.intent.category.LAUNCHER" />
    </intent-filter>
</activity>
Then there is the code of the CameraActivity class
import ...;

public class CameraActivity extends Activity implements View.OnClickListener {

    private static final int REQUEST_CODE_FOR_PIC = 1;
    private static final String TAG = "CameraActivity";
    private TextView photo;
    private ImageView pic;

    @Override
    protected void onCreate(@Nullable Bundle savedInstanceState) {
        super.onCreate(savedInstanceState);
        setContentView(R.layout.activity_camera);

        photo = this.findViewById(R.id.tv_photograph);
        pic = this.findViewById(R.id.iv_pic);
        photo.setOnClickListener(this);
    }

    @Override
    public void onClick(View v) {
        // After the button to take a picture is clicked, you need to jump to the camera APP of the system, and then send back the picture
        Intent intent = new Intent();
        // Set action as the system camera
        intent.setAction(MediaStore.ACTION_IMAGE_CAPTURE);
        intent.addCategory(Intent.CATEGORY_DEFAULT);
        // The startActivityForResult() method is required
        startActivityForResult(intent, REQUEST_CODE_FOR_PIC);
    }

    @Override
    protected void onActivityResult(int requestCode, int resultCode, Intent data) {
        if (requestCode == REQUEST_CODE_FOR_PIC) {
            // Successful return
            if (resultCode == Activity.RESULT_OK && data != null) {
                Bitmap bitmap = data.getParcelableExtra("data");
                if (bitmap != null) {
                    pic.setImageBitmap(bitmap);
                    Toast.makeText(this, "Photo taken successfully!", Toast.LENGTH_SHORT).show();
                }
            }
            // Cancel or fail
            else if (resultCode == Activity.RESULT_CANCELED) {
                Toast.makeText(this, "You canceled taking photos!", Toast.LENGTH_SHORT).show();
            }
        }
    }
}
The effects are as follows:
Cancel taking photos:

Photo taken successfully:
As for why the pictures taken by the above methods are fuzzy thumbnails, you can see this article to understand: Android calls the system camera to take photos It also shows how to take a normal picture for echo.
Later words
This is the end of the preliminary understanding of activity. The page Jump and data transmission involved are the key points. Understanding code and being able to write code are two different things. After reading the examples, you might as well write code yourself, which can bring you new understanding!