The default tool for building JNI projects with Android Studio version 2.2 or later is CMake, which has been tried recently because of the need to compile C files and is really much more convenient than ndk-build.The following will be android-gpuimage Take this project as an example.
1. Download NDK and build tools
Open SDK Manager: Select Tools > Android > SDK Manager from the menu bar.Or click on the icon 
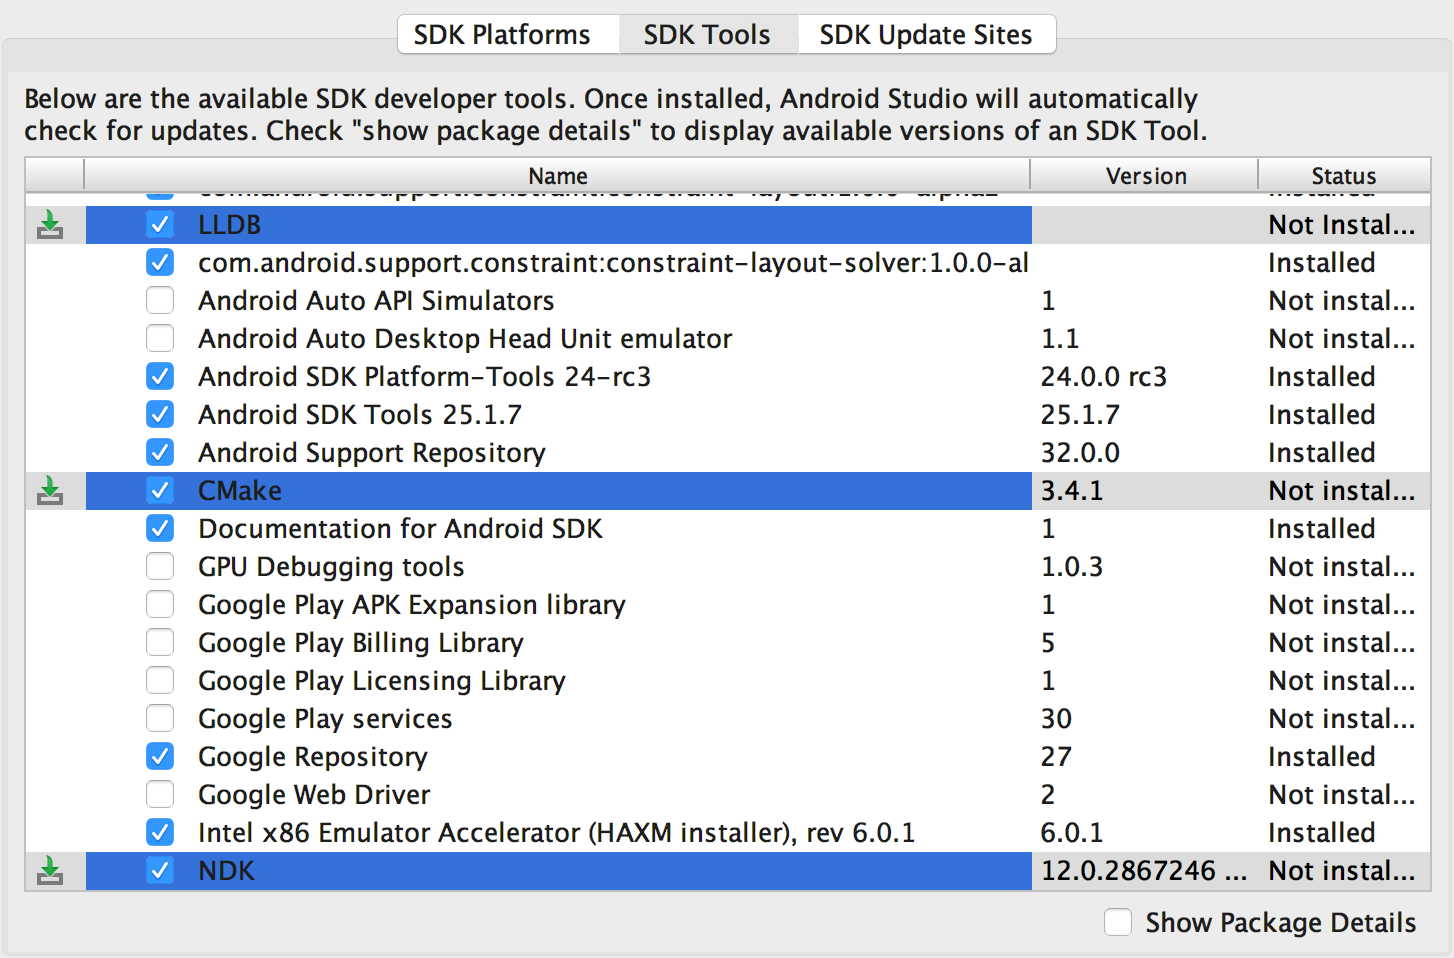
Download three items at the bottom of the diagram
NDK: This toolset allows you to use C and C++ code for Android and provides a number of platform libraries that allow you to manage native activities and access physical device components, such as sensors and touch inputs.
CMake: An external build tool that works with Gradle to build native libraries.If you only plan to use ndk-build, you do not need this component.
LLDB: A debugger that Android Studio uses to debug native code.
2. Construction Project
There are two projects to build NDK-enabled projects:
1. The first is to create a new project that supports C/C++, which is relatively simple. Select the Include C++ Support check box when creating a new project.That's fine. I won't say much here.Figure: 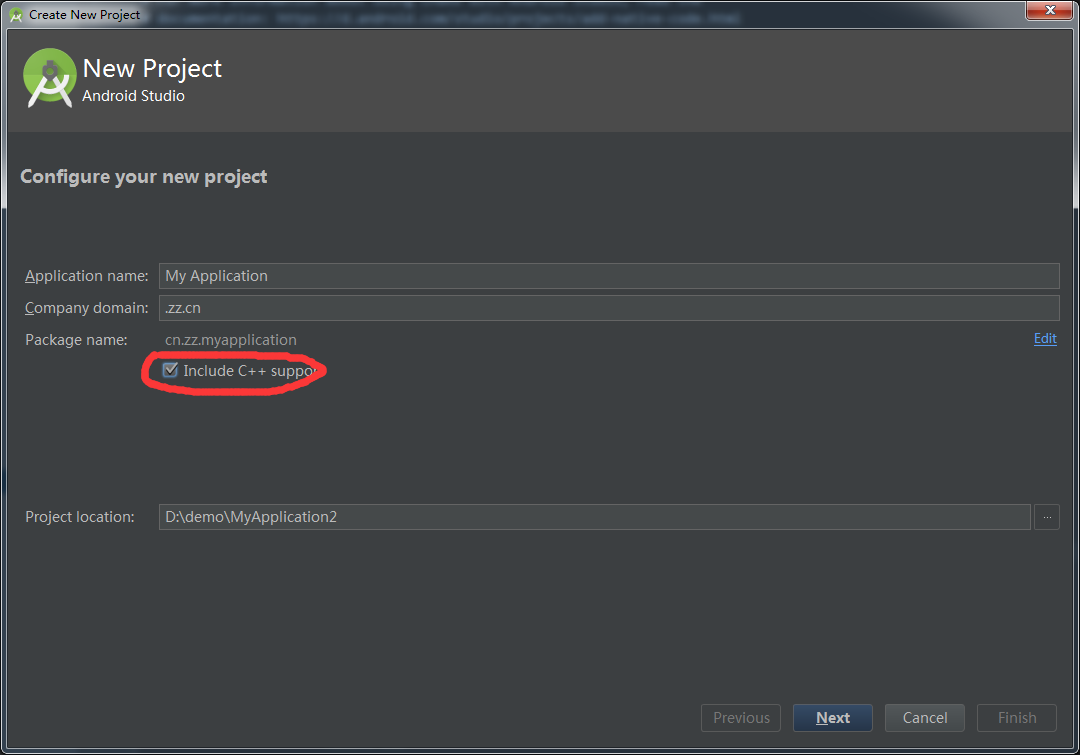
After successful creation, you can see a string output when running.
2. The second is to add C/C++ code to an existing project, where the android-gpuimage The library/jni/yuv-decoder.c inside is added to our own project as an example.
First add the source file:
(1) Open the Project pane from the left side of the IDE and select the Project view from the drop-down menu.
(2) Navigate to your module > src, right-click the main directory, and select New > Directory.
(3) Enter a name for the directory (such as cpp) and click OK.
(4) Right-click on the directory you just created and select New > C/C++ Source File.Name it here: gpuimage-library.c, which is the content of yuv-decoder.c above. Please copy it yourself.
(5) Then right-click on the directory you just created and select New > C/C++ Header File.Name: gpuimage-library.h, as follows:
#include <jni.h>
#ifndef CAMERA_GPUIMAGE_LIBRARY_H
#define CAMERA_GPUIMAGE_LIBRARY_H
#ifdef __cplusplus
extern "C" {
#endif

JNIEXPORT void JNICALL Java_cn_zz_camerasdk_filter_GPUImageNativeLibrary_YUVtoRBGA(JNIEnv *, jobject, jbyteArray, jint, jint, jintArray);
JNIEXPORT void JNICALL Java_cn_zz_camerasdk_filter_GPUImageNativeLibrary_YUVtoARBG(JNIEnv *, jobject, jbyteArray, jint, jint, jintArray);

#ifdef __cplusplus
}
#endif //CAMERA_GPUIMAGE_LIBRARY_H
#endif
Tips: Here's a note: The method name is the same as the previous method, Java_package_class_method name, please change it according to your project!!!
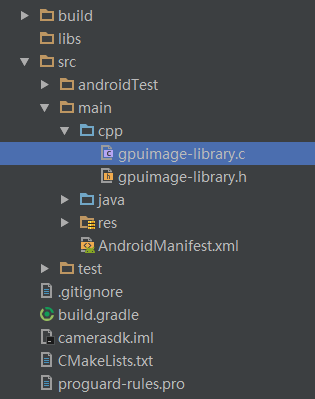
Once created, the directory is as follows:
Next, create a CMake build script:
If your native source file does not yet have a CMake build script, you need to create your own and include the appropriate CMake commands.The CMake build script is a plain text file and must be named CMakeLists.txt.
(1) Open the Project pane from the left side of the IDE and select the Project view from the drop-down menu.
(2) Right-click on the root directory of your module and select New > File.
(3) Enter "CMakeLists.txt" as the file name and click OK.
Edit CMakeLists.txt as follows:
# Sets the minimum version of CMake required to build your native library.
# This ensures that a certain set of CMake features is available to
# your build.

cmake_minimum_required(VERSION 3.4.1)

# Specifies a library name, specifies whether the library is STATIC or
# SHARED, and provides relative paths to the source code. You can
# define multiple libraries by adding multiple add.library() commands,
# and CMake builds them for you. When you build your app, Gradle
# automatically packages shared libraries with your APK.

add_library( # Specifies the name of the library.
             gpuimage-library

             # Sets the library as a shared library.
             SHARED

             # Provides a relative path to your source file(s).
             src/main/cpp/gpuimage-library.c)

find_library( # Sets the name of the path variable.
                         log-lib

                         # Specifies the name of the NDK library that
                         # you want CMake to locate.
                         log )

           # Specifies libraries CMake should link to your target library. You
           # can link multiple libraries, such as libraries you define in this
           # build script, prebuilt third-party libraries, or system libraries.

target_link_libraries( # Specifies the target library.
                                  gpuimage-library

                                  # Links the target library to the log library
                                  # included in the NDK.
                                  ${log-lib} )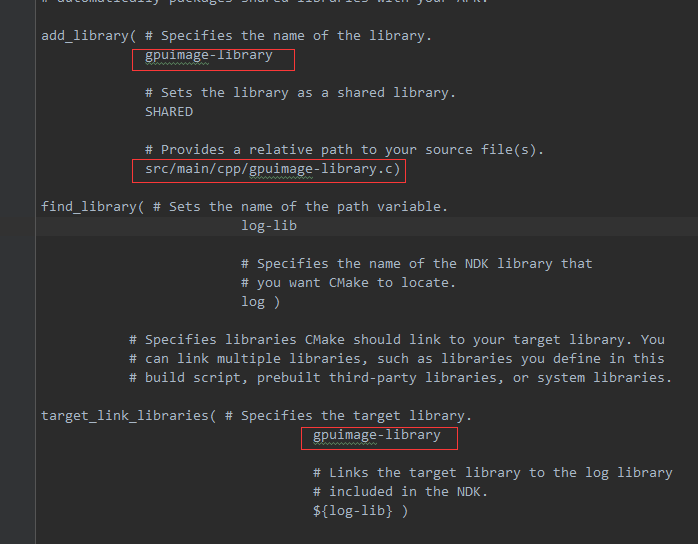
The red part is modified according to your project.The commands used can view the document: cmake_minimum_required(),add_library(), find_library().
Then the Gradle file configures CMake
android {
    compileSdkVersion 26
    buildToolsVersion "26.0.0"

    defaultConfig {
        minSdkVersion 16
        targetSdkVersion 26
        versionCode 1
        versionName "1.0"

        testInstrumentationRunner "android.support.test.runner.AndroidJUnitRunner"

        externalNativeBuild {
            cmake {
                cppFlags ""
            }
        }
        ndk {
          // Specifies the ABI configurations of your native
          // libraries Gradle should build and package with your APK.
          abiFilters 'x86', 'x86_64', 'armeabi', 'armeabi-v7a',
                   'arm64-v8a'
        }
    }
    buildTypes {
        release {
            minifyEnabled false
            proguardFiles getDefaultProguardFile('proguard-android.txt'), 'proguard-rules.pro'
        }
    }

    lintOptions {
        abortOnError false
    }

    externalNativeBuild {
        cmake {
            path "CMakeLists.txt"
        }
    }
}
Finally, add the Java code calls section:
This class also comes from android-gpuimage Inside the project.The effect can be downloaded and viewed.
public class GPUImageNativeLibrary {
    static {
        System.loadLibrary("gpuimage-library");
    }

    public GPUImageNativeLibrary() {
    }

    public static native void YUVtoRBGA(byte[] var0, int var1, int var2, int[] var3);

    public static native void YUVtoARBG(byte[] var0, int var1, int var2, int[] var3);
}
Once configured, we compile and run, noting that we clean each time we modify the native method name, and then Make Project again.
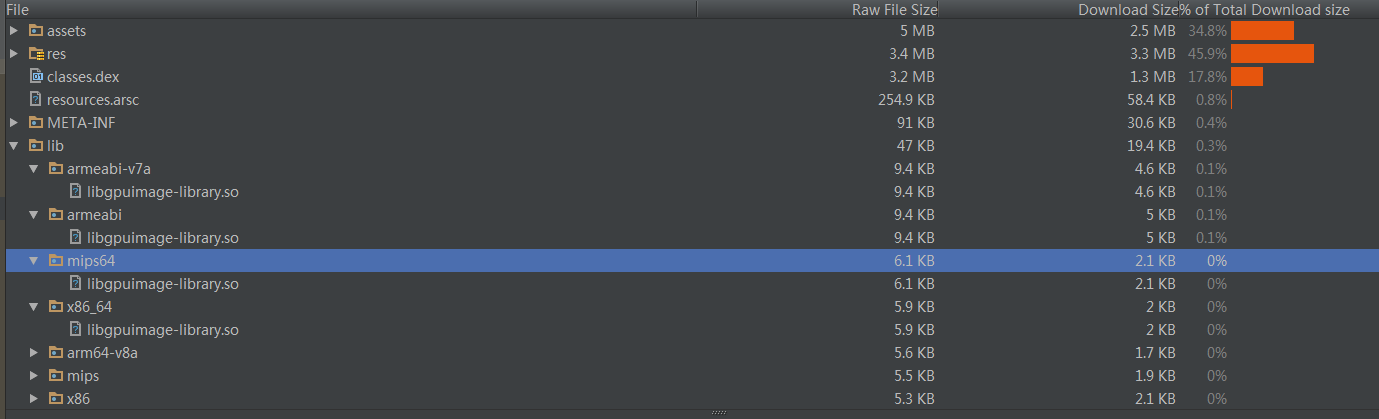
Select Build > Analyze APK after successful run.
Select the APK from the app/build/outputs/apk/directory and click OK.
You will see libnative-lib.so under lib//in the APK analyzer window.
Okay, that's all for today's sharing. More information can be seen: https://developer.android.com/studio/projects/add-native-code.html?hl=zh-cn#new-project