Recently, when I was writing some little Demo review basics, when I used EditText, I suddenly found that I hardly noticed the color of its cursor and underline before, so I spent a lot of time and read many blogs. Now I will summarize and share the harvest.
1. First impression: native EditText
We need to modify the native EditText, first of all, of course, we need to understand its true face. Create a new project in Android Studio that lets MainActivity inherit from AppCompatActivity (why do we do this, let's talk about it later), and then place an EditText in the layout of MainActivity:
<LinearLayout xmlns:android="http://schemas.android.com/apk/res/android"
    xmlns:app="http://schemas.android.com/apk/res-auto"
    android:orientation="vertical"
    xmlns:tools="http://schemas.android.com/tools"
    android:layout_width="match_parent"
    android:layout_height="match_parent"
    tools:context="com.lindroid.edittext.MainActivity">

    <EditText
        android:hint="Primitive EditText"
        android:layout_width="match_parent"
        android:layout_height="wrap_content" />


</LinearLayout>
Operating the project, careful observation can see that the cursor and underline are pink. Now let's go step by step and change its cursor color first. 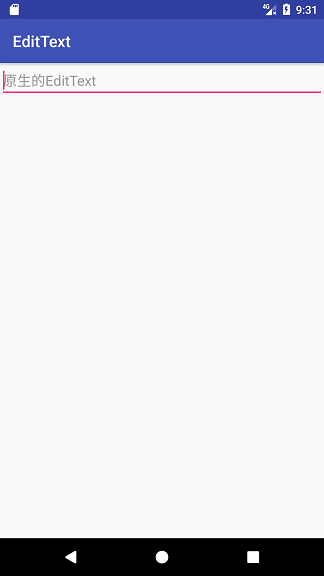
2. Custom cursor color
EditText has an attribute: android:textCursorDrawable, which is used to set the cursor style. In order to deepen our understanding, we will do a small experiment first: set textCursorDrawable to @null, which means removing the default style of the system, but we all remember that the attribute of the hidden cursor is android:cursorVisible, so what will the time scale look like? You can set different colors for text (android:textColor) and prompt text (android:textColorHint property), and when running, you will find that the color of the cursor is the same as that of the text.
After understanding the role of android:textCursorDrawable, we can create a cursor_color.xml file under the drawable resource folder, which reads as follows
<?xml version="1.0" encoding="utf-8"?>
<shape xmlns:android="http://schemas.android.com/apk/res/android"
    android:shape="rectangle">
    <size android:width="2dp" />
    <solid android:color="@android:color/holo_blue_light" />
</shape>
The color of the cursor is light blue with a width of 2 dp. Place a new EditText under the native EditText:
    <EditText
        android:textCursorDrawable="@drawable/cursor_color"
        android:hint="Custom cursor color"
        android:layout_width="match_parent"
        android:layout_height="wrap_content" />
The operation results are as follows: 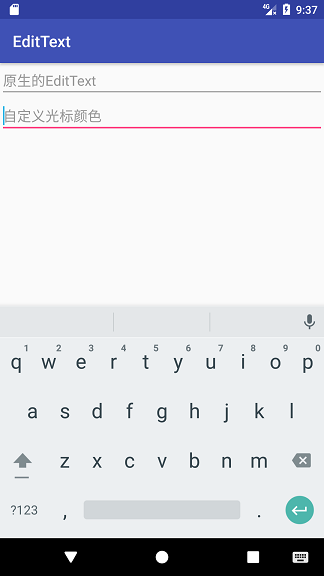
3. EditText after background cancellation
In Section 2, we set the attribute android:textCursorDrawable to "@null" and find that the cursor style will change to the same color as the text. What if we set the background of the entire EditText to "@null"? We can add an EditText and add the attribute android:background="@null":

As you can see, although the cursor's style has not changed, the underline has disappeared, but in addition, EditText's margin has disappeared. If the cursor is not blinking, it looks like a TextView at first glance.
This is how some custom EditText underscoring tutorials work on the Web. First remove the background, and then add a horizontal line below. This operation is not impossible, but in order to be beautiful, it is necessary to reset the spacing value.
4. Custom Subject Modification Underline
Remember when we created MainActivity, we inherited AppCompatActivity? Here's the answer. This is done to use the Material Design style in the appcompat-v7 package. For example, we can create a new MyEditText style in the Styles.xml file:
    <style name="MyEditText" parent="Theme.AppCompat.Light">
        <item name="colorControlNormal">@android:color/darker_gray</item>
        <item name="colorControlActivated">@android:color/holo_orange_dark</item>
    </style>
ColorControl Normal denotes the default color of the control, and colorControl Activated denotes the color when the control is activated, so that we can set the color when EditText is not selected and when it is selected, respectively. Here I set the selected color to orange.
Add an EditText to activity_main.xml, and add the android:theme="@style/MyEditText" attribute. The effect is as follows:

As you can see, the color of the cursor and underline will be changed, but the spacing will remain.
5. Global modification of EditText color
The previous approach is to modify an EditText. If you need to change all the colors of the EditText in the project, the workload will be too heavy. Is there any way to settle the situation?
I don't know if you've found out yet. Why does EditText default to a grumpy pink? In fact, you set up several other controls (such as ProgressBar, Switch, etc.) whose colors are basically powdery. Just take a look at styles.xml, and the code for AppTheme is as follows:
    <style name="AppTheme" parent="Theme.AppCompat.Light.DarkActionBar">
        <!-- Customize your theme here. -->
        <item name="colorPrimary">@color/colorPrimary</item>
        <item name="colorPrimaryDark">@color/colorPrimaryDark</item>
        <item name="colorAccent">@color/colorAccent</item>
    </style>
Did you see? The colour Accent inside is the cockroach pink. In order to understand these three colors, I specially found a picture: 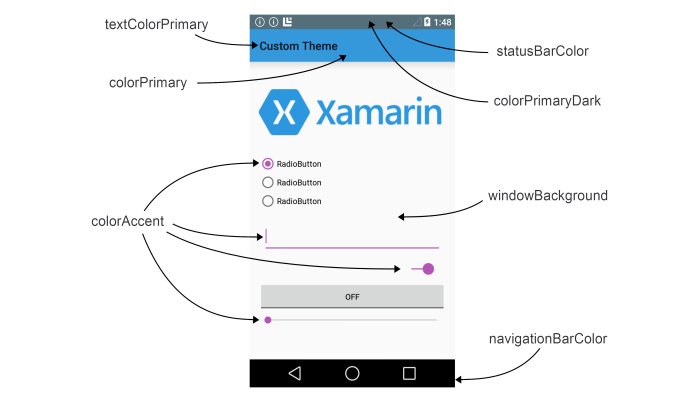
6. Customize underscores when inheriting Activity
Previous custom underlining operations are based on the premise of inheriting AppCompat Activity. If you change to Activity and then run on Android phones below 5.0, the effect is as follows: 
The Material Design style disappeared and the color of the cursor could be changed, but the color of the underline could not be changed. So we have to think of other ways.
EditText is an input box, which we can understand as follows: Underline is nothing more than adding a line to the lower border of the input box. This can be done with layer-list (layer) in Android. Create two new XML files: et_underline_unselected.xml and et_underline_selected.xml. The former is the background when EditText was selected, and the latter is the background when it was not selected:
et_underline_unselected.xml
<?xml version="1.0" encoding="utf-8"?>
<layer-list xmlns:android="http://schemas.android.com/apk/res/android">
    <item
        android:bottom="0dp"
        android:left="-2dp"
        android:right="-2dp"
        android:top="-2dp">
        <shape>
            <solid android:color="@android:color/transparent" />
            <stroke
                android:width="1dp"
                android:color="@android:color/darker_gray" />
            <padding android:bottom="4dp" />
        </shape>
    </item>

</layer-list>
et_underline_selected.xml
<?xml version="1.0" encoding="utf-8"?>
<layer-list xmlns:android="http://schemas.android.com/apk/res/android">

    <item
        android:bottom="0dp"
        android:left="-2dp"
        android:right="-2dp"
        android:top="-2dp">
        <shape>
            <solid android:color="@android:color/transparent" />
            <stroke
                android:color="@android:color/holo_green_light"
                android:width="2dp" />
            <padding android:bottom="4dp" />

        </shape>
    </item>

</layer-list>
I think of layer-list as a list of layers. Shape is an item in the list. Since we only need a horizontal line in the bottom border, we set it to a negative value except for the bottom margin of the list. There should be a little distance between the cursor and the underline, so set the inner margin below the shape to 4dp. Of course, the underline width is a little wider when selected.
Create a new Second Activity in the project, inherit from Activity, and then place two EditText s in the layout file. The background s are set to "@null" and the cursor is in our previous light blue.
<LinearLayout xmlns:android="http://schemas.android.com/apk/res/android"
    xmlns:app="http://schemas.android.com/apk/res-auto"
    xmlns:tools="http://schemas.android.com/tools"
    android:layout_width="match_parent"
    android:layout_height="match_parent"
    android:orientation="vertical"
    tools:context="com.lindroid.edittext.SecondActivity">

    <EditText
        android:id="@+id/editText1"
        android:layout_width="match_parent"
        android:layout_height="wrap_content"
        android:layout_margin="3dp"
        android:background="@null"
        android:hint="custom EditText Underline 1"
        android:textCursorDrawable="@drawable/cursor_color" />

    <EditText
        android:id="@+id/editText2"
        android:layout_width="match_parent"
        android:layout_height="wrap_content"
        android:layout_margin="3dp"
        android:background="@null"
        android:hint="custom EditText Underline 2"
        android:textCursorDrawable="@drawable/cursor_color" />
</LinearLayout>
Then set EditText's listening events in the code
        /**Initialize EditText, default unchecked**/
        editText1.setBackgroundResource(R.drawable.et_underline_unselected);
        editText2.setBackgroundResource(R.drawable.et_underline_unselected);
        /**The first EditText focus listening event**/
        editText1.setOnFocusChangeListener(new View.OnFocusChangeListener() {
            @Override
            public void onFocusChange(View v, boolean hasFocus) {
                if (hasFocus) {
                    Log.e(TAG, "EditText1 Getting Focus");
                    editText1.setBackgroundResource(R.drawable.et_underline_selected);

                } else {
                    Log.e(TAG, "EditText1 Losing focus");
                    editText1.setBackgroundResource(R.drawable.et_underline_unselected);
                }
            }
        });
        /**The second EditText focus listening event**/
        editText2.setOnFocusChangeListener(new View.OnFocusChangeListener() {
            @Override
            public void onFocusChange(View v, boolean hasFocus) {
                if (hasFocus) {
                    Log.e(TAG, "EditText2 Getting Focus");
                    editText2.setBackgroundResource(R.drawable.et_underline_selected);

                } else {
                    Log.e(TAG, "EditText2 Losing focus");
                    editText2.setBackgroundResource(R.drawable.et_underline_unselected);
                }
            }
        });
Note that all EditText s should be set to run first. The effect is as follows: 
The effect is that we implemented it, but then the code in Activity is too lengthy, so we can encapsulate the selected and unselected states into the state selector. Create a new et_underline_selector.xml file under the drawable folder:
<?xml version="1.0" encoding="utf-8"?>
<selector xmlns:android="http://schemas.android.com/apk/res/android">
    <item android:state_focused="false" android:drawable="@drawable/et_underline_unselected"/>
    <item android:state_focused="true" android:drawable="@drawable/et_underline_selected"/>
</selector>
android:state_focused indicates whether the control is focused. Then set android:background="@drawable/et_underline_selector" in the layout file, and delete the focus listening code of Activity. Running, you can see the same effect.
7. Postscript
This is the end of the article, but I still have a lot to learn. Some of the knowledge in the article may be inadequate or wrong because of my personal understanding. Welcome to make corrections!
Because the code here is relatively simple, the project will not be uploaded, you start knocking, I believe there is no problem.
Reference
Android EditText Change Border Color
Android's Method of Changing EditText Underline Color Style