The Android system actually has a built-in database. SQLite is a lightweight relational database. It has very fast operation speed and occupies very few resources. It usually only needs a few hundred KB of memory, so it is especially suitable for mobile devices. SQLite not only supports the standard SQL syntax, but also follows the ACID transaction of the database. SQLite is much simpler than the general database. It can be used without even setting the user name and password
After all, file storage and shared preferences storage are only suitable for saving some simple data and key value pairs. When you need to store a large number of complex relational data, you will find the above two storage methods difficult to cope with.
Create database
In order to make it easier for us to manage the database, Android provides a SQLiteOpenHelper help class. With this class, we can create and upgrade the database
SQLiteOpenHelper is an abstract class, which means that if we want to use it, we need to create our own help class to inherit it. SQLiteOpenHelper has two abstract methods, onCreate() and onUpgrade(). We must rewrite these two methods in our help class, and then implement the logic of creating and upgrading databases in these two methods.
There are also two very important instance methods in SQLiteOpenHelper: getReadableDatabase() and getWritableDatabase(). Both methods can create or open an existing database (if the database already exists, open it directly, otherwise create a new database) and return an object that can read and write to the database. The difference is that when the database is not writable (such as full disk space), getReadableDatabase() The object returned by the method will open the database in a read-only manner, and the getwritabledatabase () method will have an exception
There are two constructors in SQLiteOpenHelper that can be rewritten. Generally, the constructor with fewer parameters can be used. This construction method receives four parameters. The first parameter is Context. There is nothing to say about this. It is necessary to have it to operate the database. The second parameter is the database name. The name specified here is used when creating the database. The third parameter allows us to return a custom Cursor when querying data, usually null. The fourth parameter represents the version number of the current database, which can be used to upgrade the database. After building an instance of SQLiteOpenHelper, you can create a database by calling its getReadableDatabase() or getWritableDatabase() method, and the database file will be stored in the / data/data//databases / directory. At this time, the overridden onCreate() method will also be executed, so we usually deal with some logic for creating tables here.
The data type is very simple. Integer represents integer, real represents floating point, text represents text type, and blob represents binary type
public class MyDatabaseHelper extends SQLiteOpenHelper {

    public static final String CREATE_BOOK = "create table Book ("
            + "id integer primary key autoincrement, "
            + "author text, "
            + "price real, "
            + "pages integer, "
            + "name text)";

    private Context mContext;

    public MyDatabaseHelper(Context context, String name,
                            SQLiteDatabase.CursorFactory factory, int version) {
        super(context, name, factory, version);
        mContext = context;
    }

    @Override
    public void onCreate(SQLiteDatabase db) {
        db.execSQL(CREATE_BOOK);
        Toast.makeText(mContext, "Create succeeded", Toast.LENGTH_SHORT).show();
    }

    @Override
    public void onUpgrade(SQLiteDatabase db, int oldVersion, int newVersion) {
    }

}
<LinearLayout xmlns:android="http://schemas.android.com/apk/res/android"
    android:orientation="vertical"
    android:layout_width="match_parent"
    android:layout_height="match_parent"
    >

    <Button
        android:id="@+id/create_database"
        android:layout_width="match_parent"
        android:layout_height="wrap_content"
        android:text="Create database"
        />

</LinearLayout>
public class MainActivity extends AppCompatActivity {

    private MyDatabaseHelper dbHelper;

    @Override
    protected void onCreate(Bundle savedInstanceState) {
        super.onCreate(savedInstanceState);
        setContentView(R.layout.activity_main);
        dbHelper = new MyDatabaseHelper(this, "BookStore.db", null, 1);
        Button createDatabase = (Button) findViewById(R.id.create_database);
        createDatabase.setOnClickListener(new View.OnClickListener() {
            @Override
            public void onClick(View v) {
                dbHelper.getWritableDatabase();
            }
        });
    }

}
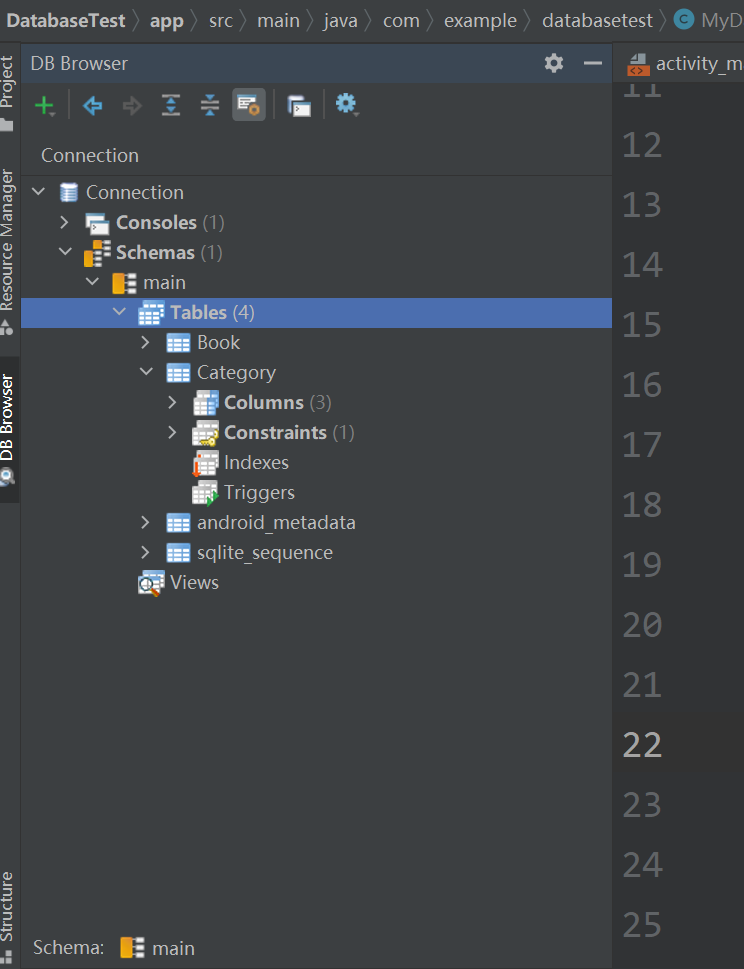
After the creation is successful, you can find the Database Navigator through flie - > settings, and then click the DB Browser on the left side of the compiler to view the created table
Upgrade database
At present, there is already a Book table in the DatabaseTest project to store various detailed data of books. What should we do if we want to add another Category table to record the classification of books
public class MyDatabaseHelper extends SQLiteOpenHelper {

    public static final String CREATE_BOOK = "create table Book ("
            + "id integer primary key autoincrement, "
            + "author text, "
            + "price real, "
            + "pages integer, "
            + "name text)";

    public static final String CREATE_CATEGORY = "create table Category ("
            + "id integer primary key autoincrement, "
            + "category_name text, "
            + "category_code integer)";

    private Context mContext;

    public MyDatabaseHelper(Context context, String name,
                            SQLiteDatabase.CursorFactory factory, int version) {
        super(context, name, factory, version);
        mContext = context;
    }

    @Override
    public void onCreate(SQLiteDatabase db) {
        db.execSQL(CREATE_BOOK);
        db.execSQL(CREATE_CATEGORY);
        Toast.makeText(mContext, "Create succeeded", Toast.LENGTH_SHORT).show();
    }

    @Override
    public void onUpgrade(SQLiteDatabase db, int oldVersion, int newVersion) {
    }

}
The operation will not succeed at this time because your Book table has been created, so the following code will not be executed. Our solution is either to delete the original database (but this is not advisable) or upgrade the database version. Please see the following code
public class MyDatabaseHelper extends SQLiteOpenHelper {

    ...

    @Override
    public void onUpgrade(SQLiteDatabase db, int oldVersion, int newVersion) {
        db.execSQL("drop table if exists Book");
        db.execSQL("drop table if exists Category");
        onCreate(db);
    }

}
Then modify the code in MainActivity to make its version greater than the value entered before, so that the onUpgrade() method can be executed
public class MainActivity extends AppCompatActivity {

    private MyDatabaseHelper dbHelper;

    @Override
    protected void onCreate(Bundle savedInstanceState) {
        super.onCreate(savedInstanceState);
        setContentView(R.layout.activity_main);
        dbHelper = new MyDatabaseHelper(this, "BookStore.db", null, 2);
        Button createDatabase = (Button) findViewById(R.id.create_database);
        createDatabase.setOnClickListener(new View.OnClickListener() {
            @Override
            public void onClick(View v) {
                dbHelper.getWritableDatabase();
            }
        });
    }

}

Add data
CRUD. Where C represents Create, R represents Retrieve, U represents Update, and D represents Delete
SQLiteDatabase provides an insert() method, which is specially used to add data. It receives three parameters. The first parameter is the table name. The name of the table we want to add data to is passed in here. The second parameter is used to automatically assign null to some nullable columns when adding data is not specified. Generally, we can pass null directly without this function. The third parameter is a ContentValues object, which provides a series of put() method overloads to add data to ContentValues. You only need to pass in each column name in the table and the corresponding data to be added
public class MainActivity extends AppCompatActivity {

    private MyDatabaseHelper dbHelper;

    @Override
    protected void onCreate(Bundle savedInstanceState) {
        super.onCreate(savedInstanceState);
        setContentView(R.layout.activity_main);
        dbHelper = new MyDatabaseHelper(this, "BookStore.db", null, 2);
        ...
        Button addData = (Button) findViewById(R.id.add_data);
        addData.setOnClickListener(new View.OnClickListener() {
            @Override
            public void onClick(View v) {
                SQLiteDatabase db = dbHelper.getWritableDatabase();
                ContentValues values = new ContentValues();
                // Start assembling the first data
                values.put("name", "The Da Vinci Code");
                values.put("author", "Dan Brown");
                values.put("pages", 454);
                values.put("price", 16.96);
                db.insert("Book", null, values); // Insert first data
                values.clear();
                // Start assembling the second data
                values.put("name", "The Lost Symbol");
                values.put("author", "Dan Brown");
                values.put("pages", 510);
                values.put("price", 19.95);
                db.insert("Book", null, values); // Insert second data
            }
        });
    }

}
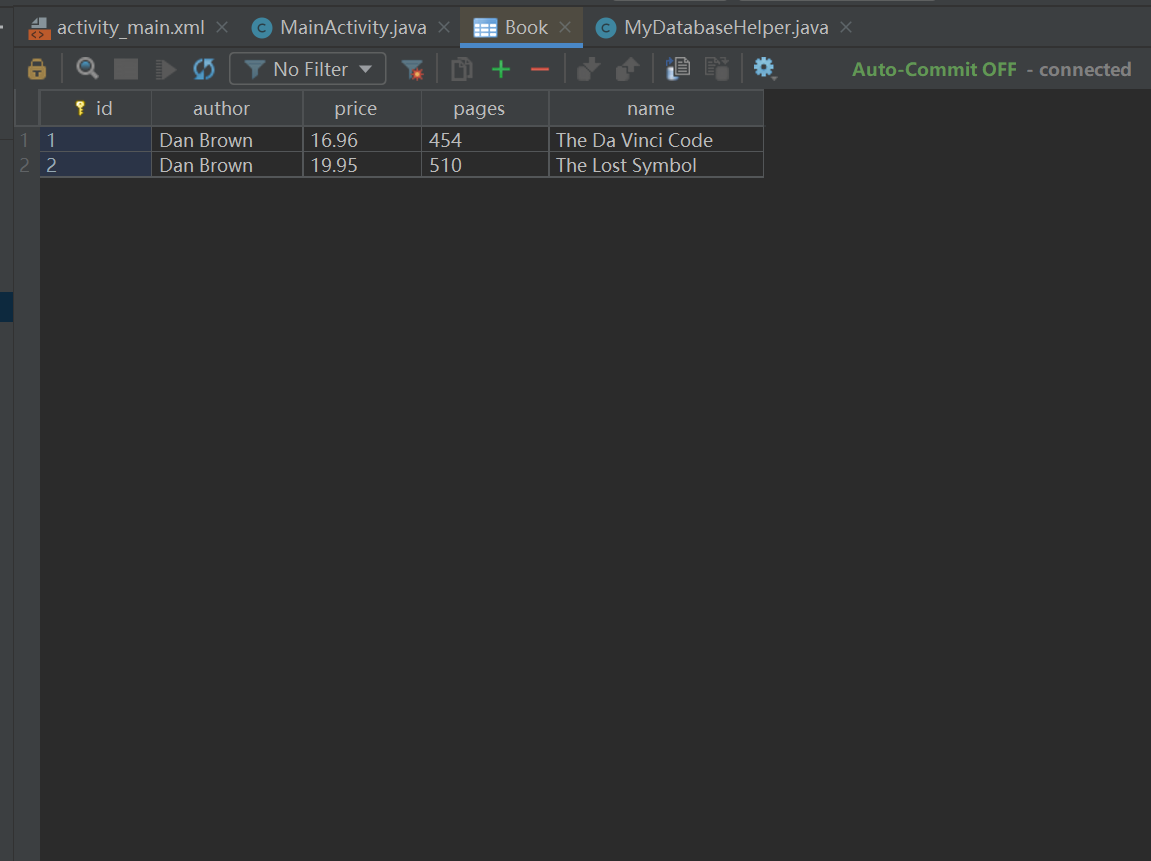
Double click Book in the DB Browser to query the data in the Book table we just added
