With CameraX for video recording, the steps to initialize the camera are much the same as when taking pictures, except that the video capturer VideoCapture is added. There are three main areas of code that need to be modified, described below.
The first place is in AndroidManifest. The XML is supplemented with the declaration of recording rights, and the complete permission declaration configuration is as follows:
<!-- camera -->
<uses-permission android:name="android.permission.CAMERA" />
<!-- Sound recording -->
<uses-permission android:name="android.permission.RECORD_AUDIO" />
<!-- Memory Card Read-Write -->
<uses-permission android:name="android.permission.WRITE_EXTERNAL_STORAGE" />
<uses-permission android:name="android.permission.READ_EXTERNAL_STORAGE" />
The second place is in the resetCamera method of resetting the camera, which builds the image capturer object, also builds the video capturer object, and sets the video recording parameters such as the width-height ratio, the video frame rate, the bit rate (the number of bits recorded per second of video), the rotation angle, and so on. An example of the building code for the video capturer is as follows:
if (mCameraMode == MODE_RECORD) { // videotape
    // Build a video capturer
    mVideoCapture = new VideoCapture.Builder()
            .setTargetAspectRatio(mAspectRatio) // Set aspect ratio
            .setVideoFrameRate(60) // Set Video Frame Rate
            .setBitRate(3 * 1024 * 1024) // Set Bit Rate
            .setTargetRotation(rotation) // Set rotation angle
            .setAudioRecordSource(MediaRecorder.AudioSource.MIC)
            .build();
}
The third place is in the bindCamera method of binding cameras. For video recording, it is necessary to bind the video capture to the life cycle of the camera provider instead of to the image capture. An example code snippet for binding a video capture is as follows:
if (captureMode == MODE_RECORD) { // videotape
    // Bind camera selectors, preview views, video captures to the life cycle of the camera provider
    Camera camera = mCameraProvider.bindToLifecycle(
            mOwner, mCameraSelector, mPreview, mVideoCapture);
}
Once the camera is initialized, you can call the startRecording method of the video capture to start recording or the stopRecording method to stop recording. An example video code is as follows:
private String mVideoPath; // Video Save Path
private int MAX_RECORD_TIME = 15; // Maximum recording time, default 15 seconds
// Get the path to save the video
public String getVideoPath() {
    return mVideoPath;
}

// Start Video Recording
public void startRecord(int max_record_time) {
    MAX_RECORD_TIME = max_record_time;
    bindCamera(MODE_RECORD); // Bind Camera
    mVideoPath = String.format("%s/%s.mp4", mMediaDir, DateUtil.getNowDateTime());
    VideoCapture.Metadata metadata = new VideoCapture.Metadata();
    // Output options for building video captures
    VideoCapture.OutputFileOptions options = new VideoCapture.OutputFileOptions.Builder(new File(mVideoPath))
            .setMetadata(metadata).build();
    // Start Video Action
    mVideoCapture.startRecording(options, mExecutorService, new VideoCapture.OnVideoSavedCallback() {
        @Override
        public void onVideoSaved(VideoCapture.OutputFileResults outputFileResults) {
            mHandler.post(() -> bindCamera(MODE_PHOTO));
            mStopListener.onStop("The video path to the completion of the recording is"+mVideoPath);
        }

        @Override
        public void onError(int videoCaptureError, String message, Throwable cause) {
            mHandler.post(() -> bindCamera(MODE_PHOTO));
            mStopListener.onStop("Recording failed with error message:"+cause.getMessage());
        }
    });
    // Stop recording automatically after the time limit arrives
    mHandler.postDelayed(() -> stopRecord(), MAX_RECORD_TIME*1000);
}

// Stop Video Recording
public void stopRecord() {
    mVideoCapture.stopRecording(); // Video Capturer Stops Video Recording
}
Of course, video recording also requires adding CameraXView nodes to the layout file first. For the convenience of observing the duration of the current recording, you can also add a timer node, Chronometer, to the layout file. The Java code is then supplemented with the initialization and video recording of the CameraXView object, with the following key code examples:
private CameraXView cxv_preview; // Declare an enhanced camera view object
private Chronometer chr_cost; // Declare a timer object
private ImageView iv_record; // Declare an image view object
private boolean isRecording = false; // Is Video Recording in Progress
// Initialize Camera
private void initCamera() {
// Turn on enhanced camera and specify stop video listener
cxv_preview.openCamera(this, CameraXView.MODE_RECORD, (result) -> {
runOnUiThread(() -> {
chr_cost.setVisibility(View.GONE);
chr_cost.stop(); // Stop Timing
iv_record.setImageResource(R.drawable.record_start);
iv_record.setEnabled(true);
isRecording = false;
Toast.makeText(this, result, Toast.LENGTH_SHORT).show();
});
});
}
// Processing Video Actions
private void dealRecord() {
if (!isRecording) {
iv_record.setImageResource(R.drawable.record_stop);
cxv_preview.startRecord(15); // Start Video Recording
chr_cost.setVisibility(View.VISIBLE);
chr_cost.setBase(SystemClock.elapsedRealtime()); // Set the base time for the timer
chr_cost.start(); // Start Timing
isRecording = !isRecording;
} else {
iv_record.setEnabled(false);
cxv_preview.stopRecord(); // Stop Video Recording
}
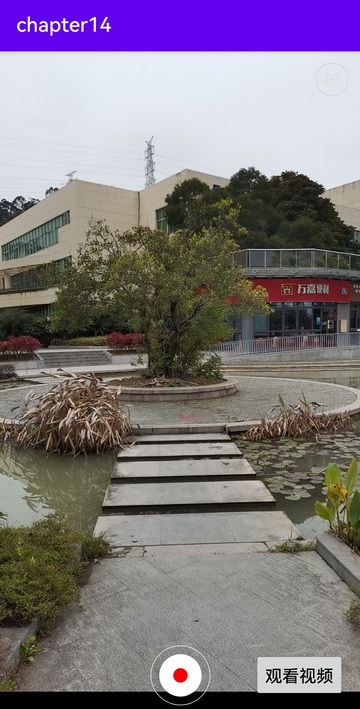
}Run the test App, and the initial effect of opening the video interface is shown in the image below. In addition to the preview screen, a recording button is displayed below the interface.
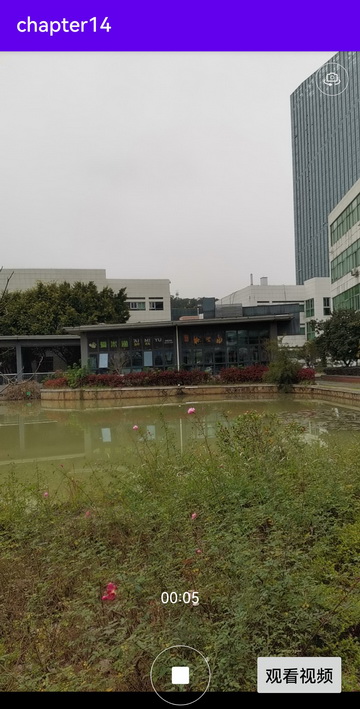
Click the Record button to start recording. The interface you are recording is shown in the following image. The Record button is replaced with a pause icon, which also pulsates with the number of recording lengths.
Click here to see the full catalog of Android Development Notes