Android MVVM framework construction (x) Hilt, ViewBinding and activity result APIs
preface
in the previous articles, we explained the use of various controls in the MVVM framework. In this article, we will use the Hlit component in JetPack to decouple the project. In this way, our MVVM framework will be more reasonable
text
I'll use hilt here. Hilt is a dependency injection framework used to decouple projects, improve code quality and optimize project structure. Anyway, there are many benefits. Is it true that the hype is exaggerated? Let's write and see.
1, Rely on
The first step is to add dependencies. There are a few steps to use Hilt, which is divided into three steps,
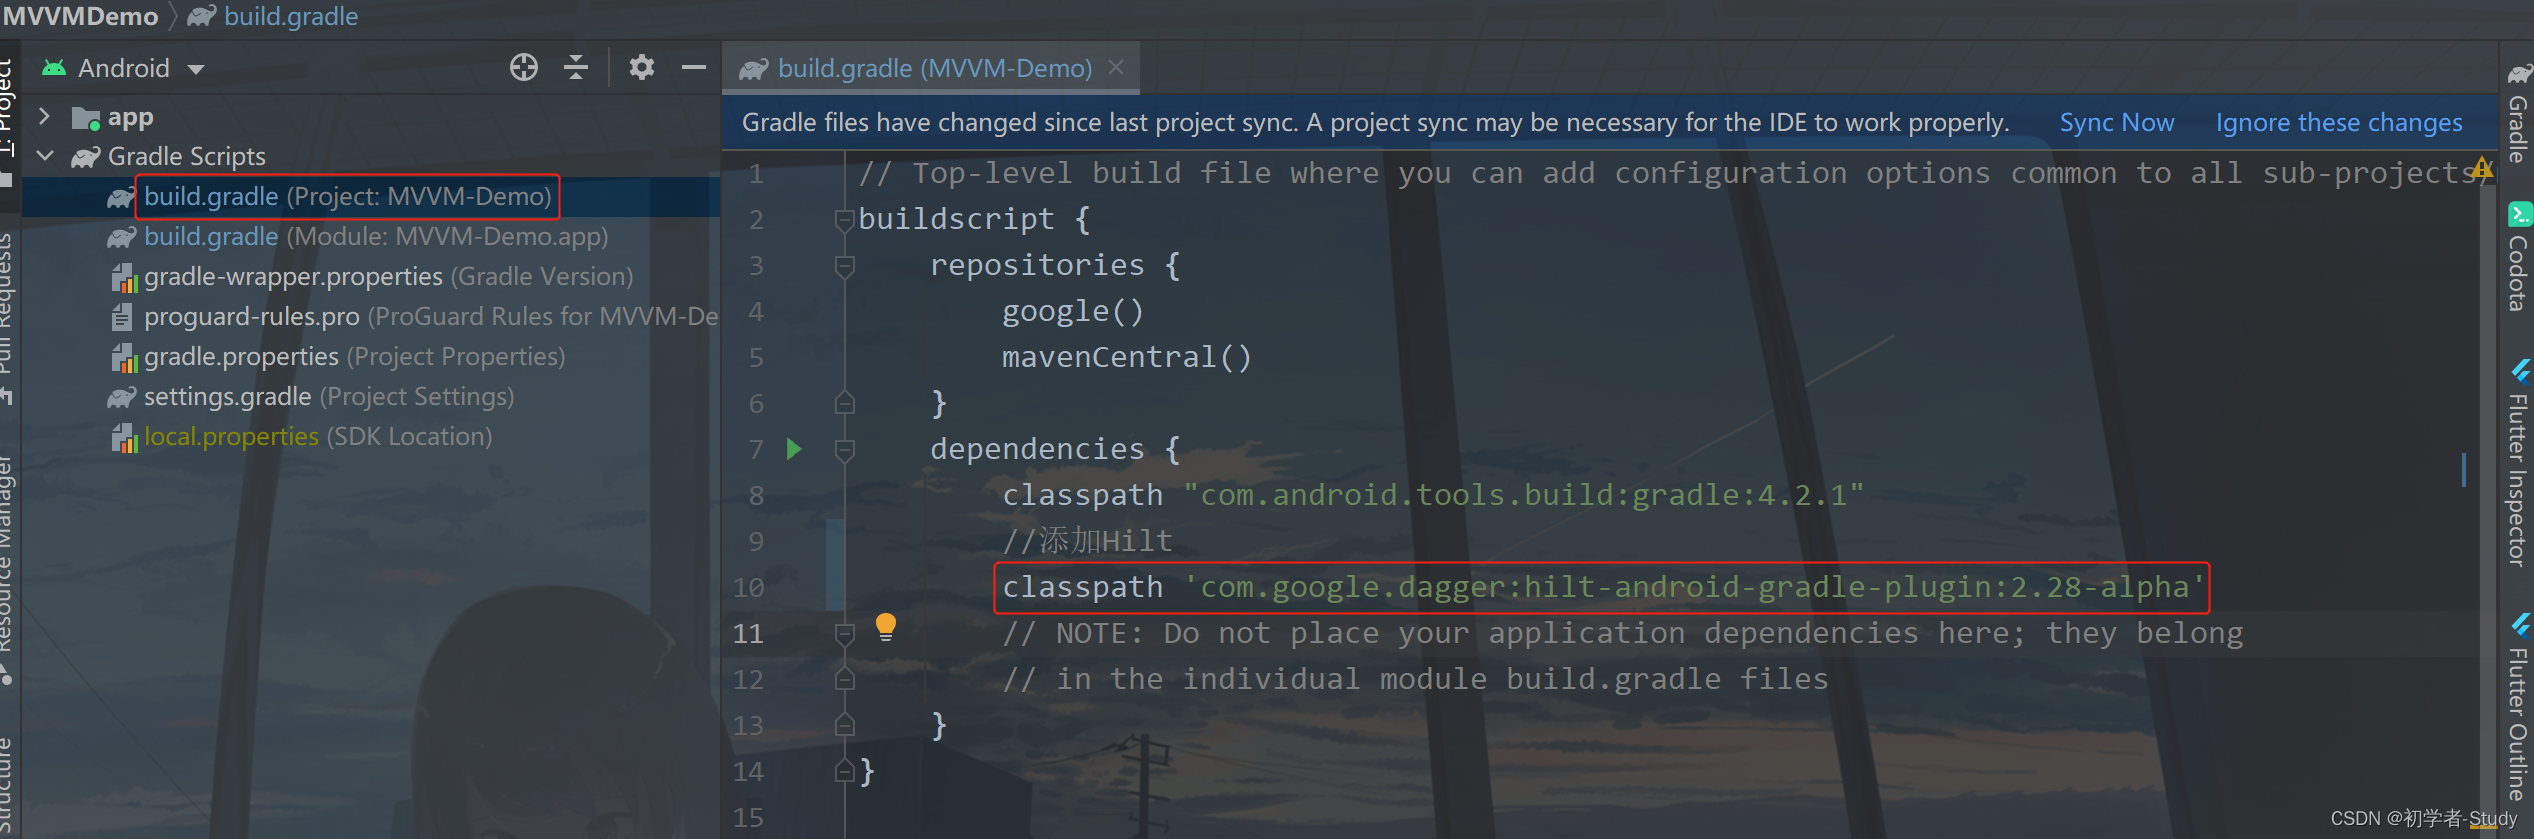
Step 1: first, in the project build Add the following code to gradle:
classpath 'com.google.dagger:hilt-android-gradle-plugin:2.28-alpha'
Add location as shown in the figure below:
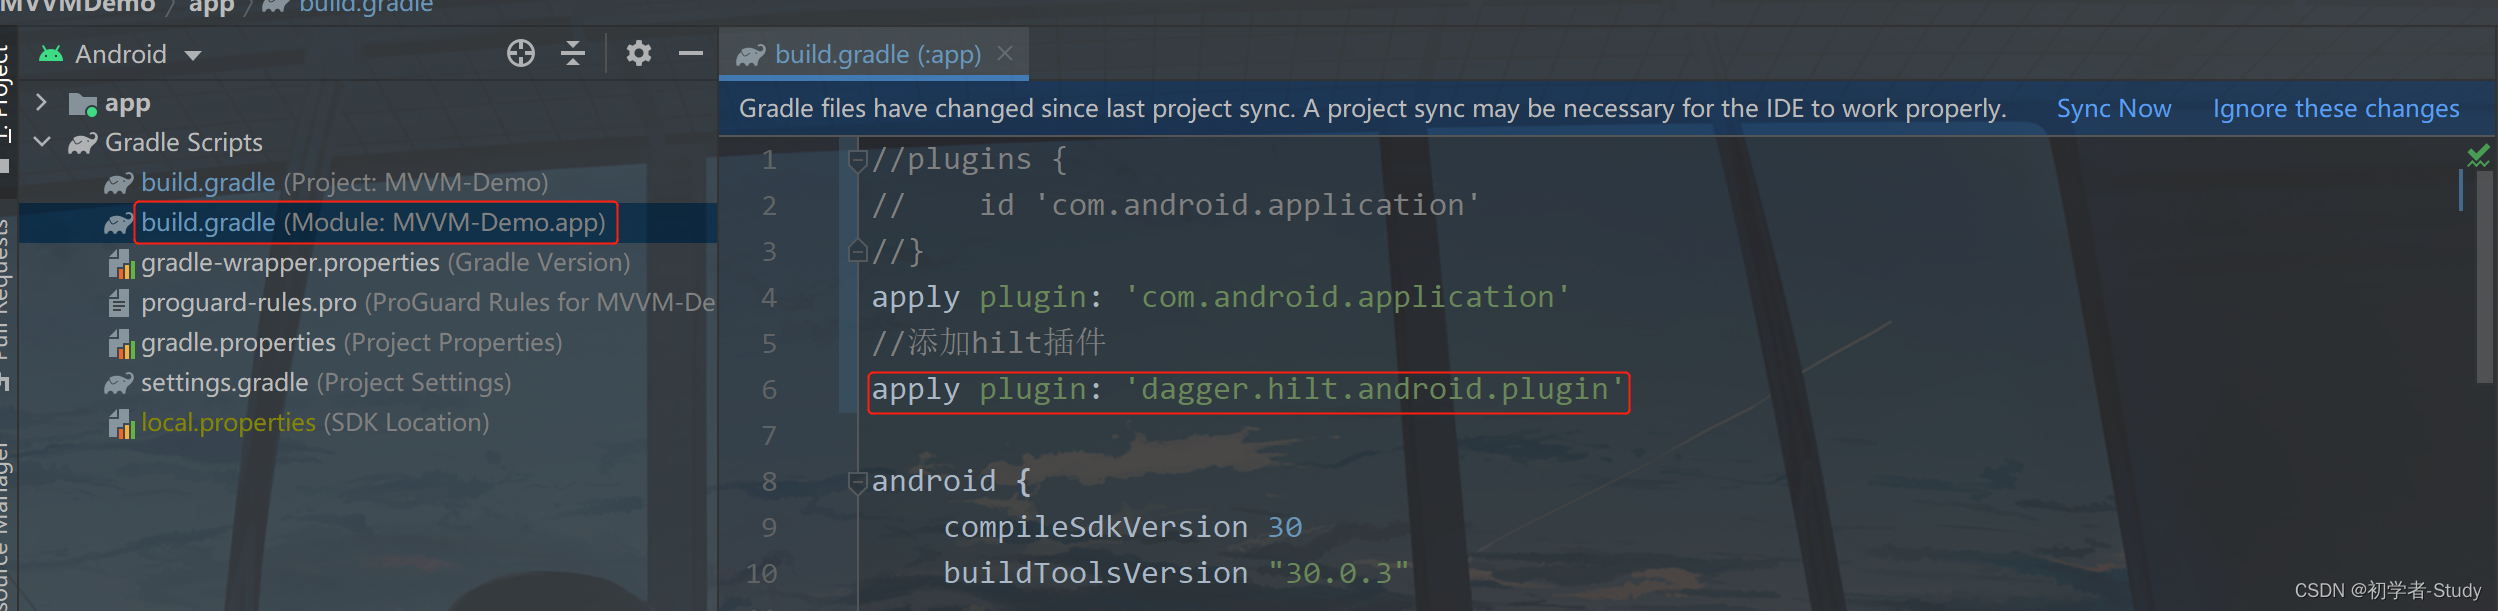
Step 2: build. Under app Add a plug-in to gradle with the following code:
apply plugin: 'dagger.hilt.android.plugin'
Add location as shown in the figure below:
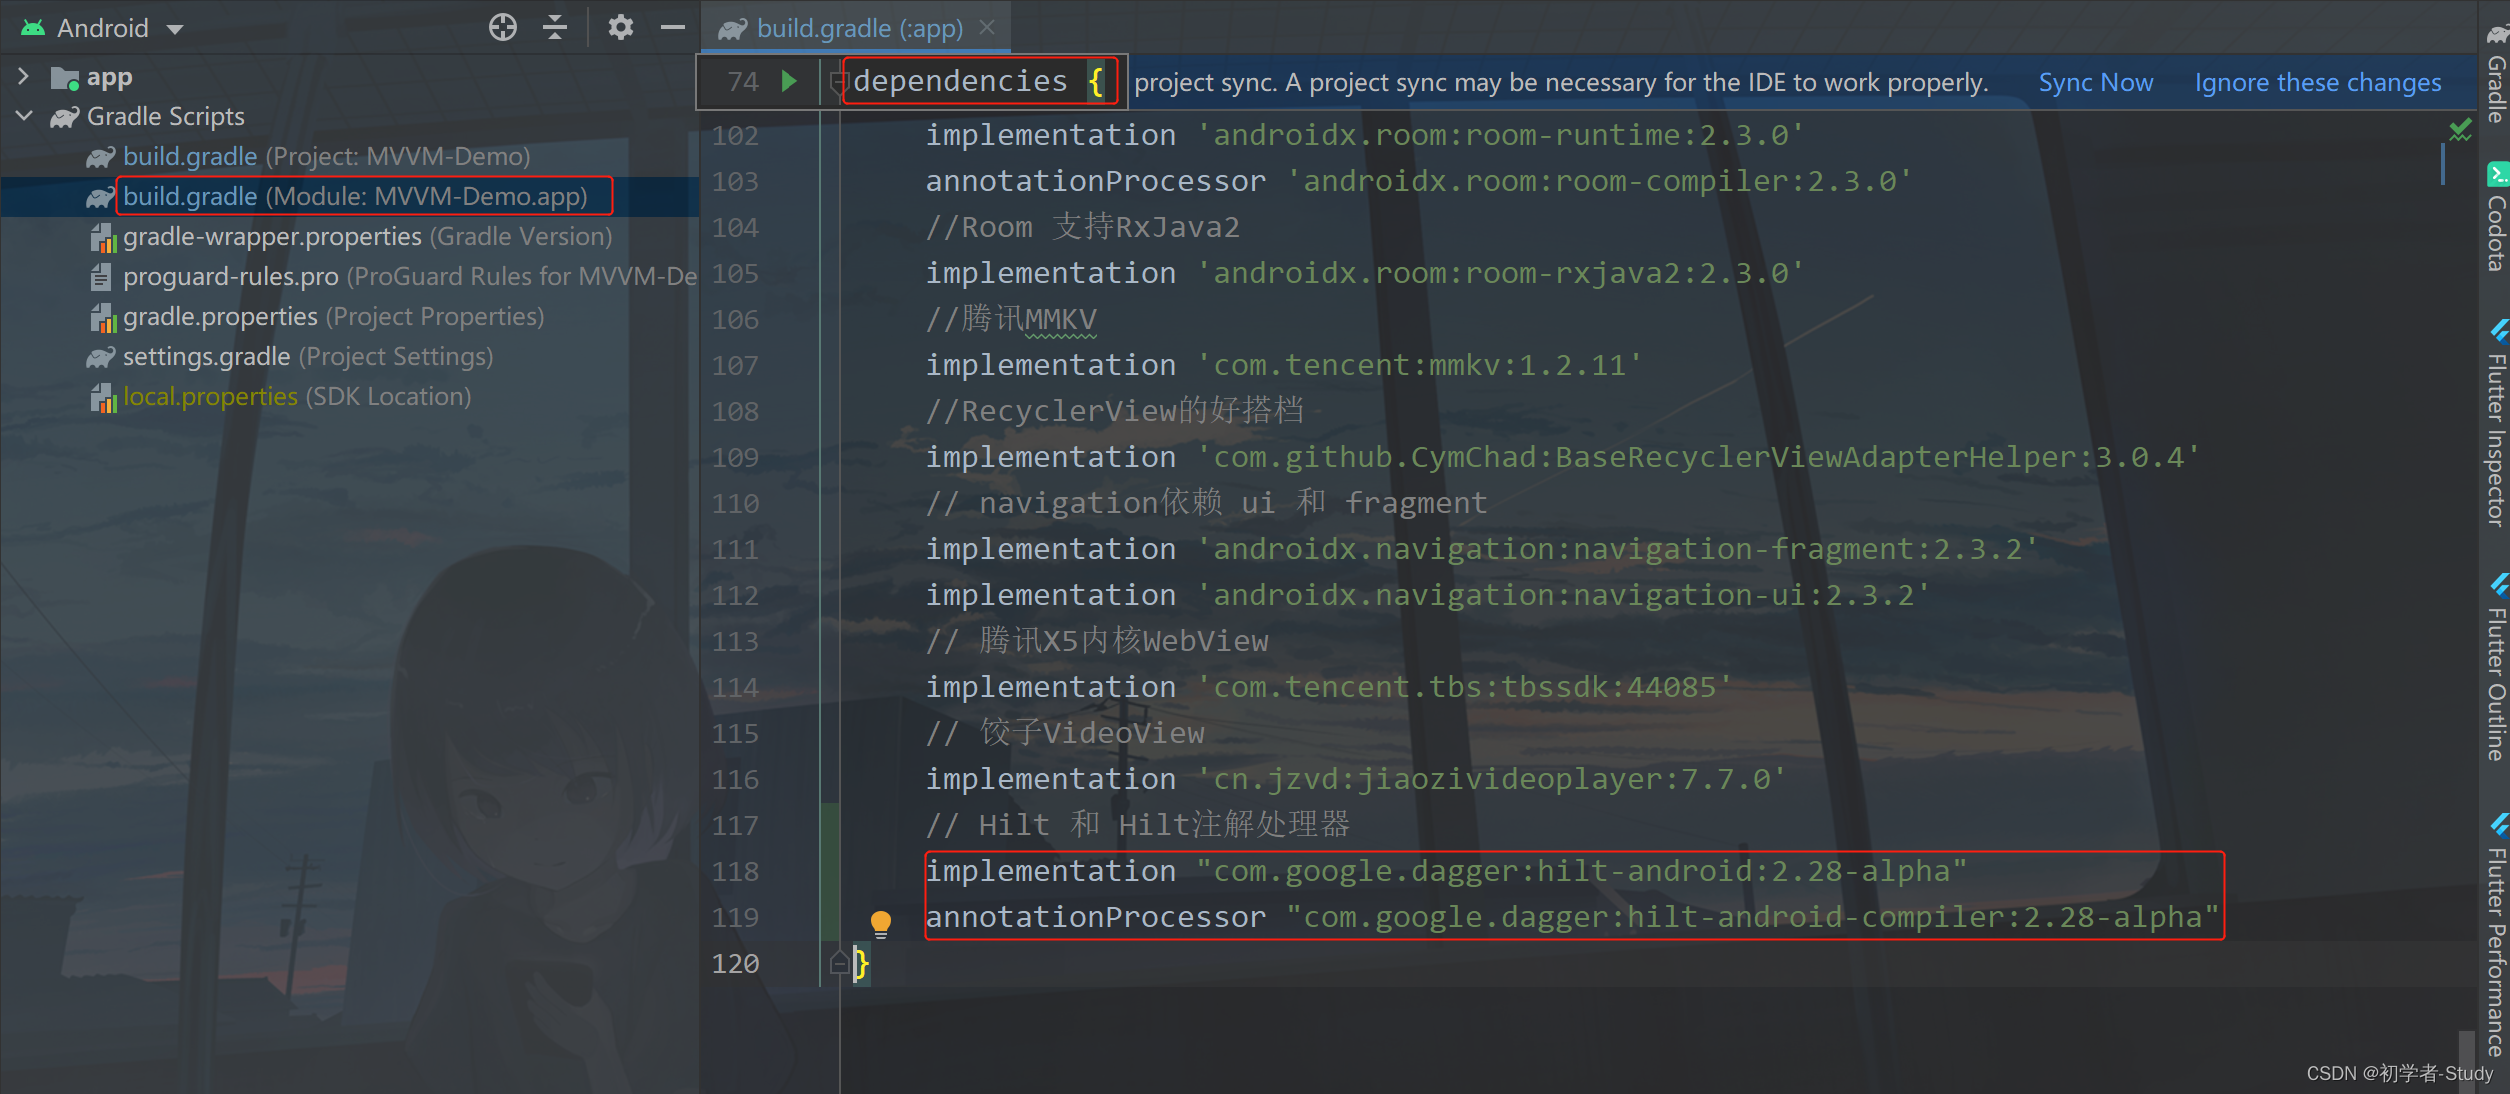
Step 3: build. Under app Add the following code to the dependencies {} closure in gradle:
	implementation "com.google.dagger:hilt-android:2.28-alpha"
    annotationProcessor "com.google.dagger:hilt-android-compiler:2.28-alpha"
Add location as shown in the figure below:
Here's another point to note. Projects using both Hilt and data binding require Android Studio 4.0 or higher, which is required by Google's official website. Therefore, you can upgrade AS if you haven't upgraded it yet, otherwise you can't use it in a lower version of AS. Another point is that you need to support Java 8 and above. I won't explain this much, because now Java 8 is the lowest.
After completing these operations, click Sync Now in the upper right corner to synchronize the project.
2, Hilt use
1. Hilt application class
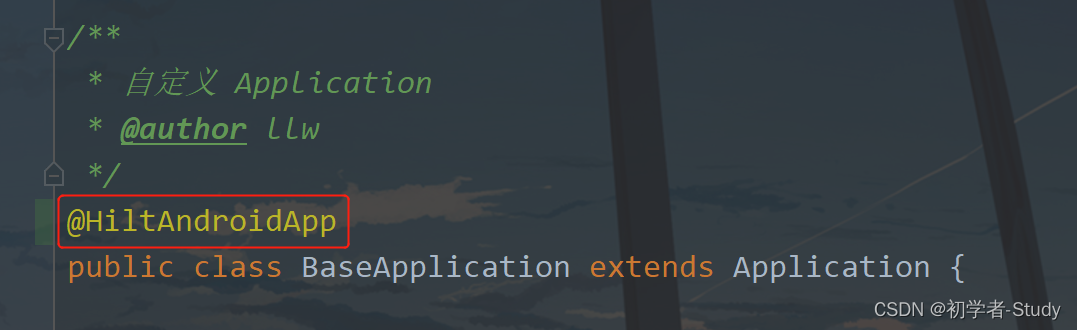
When using Hilt, there will be some common annotations, some of which are essential. All applications using Hilt must include an Application class with @ HiltAndroidApp annotation. I wrote a BaseApplication class in our project, so add this annotation. As shown in the figure below:
After adding, let's run it again to see if there are any problems in the project. Be careful when using new components, especially such annotated components. If you're not careful, find bug s and find you crash, but it's really easy to use.
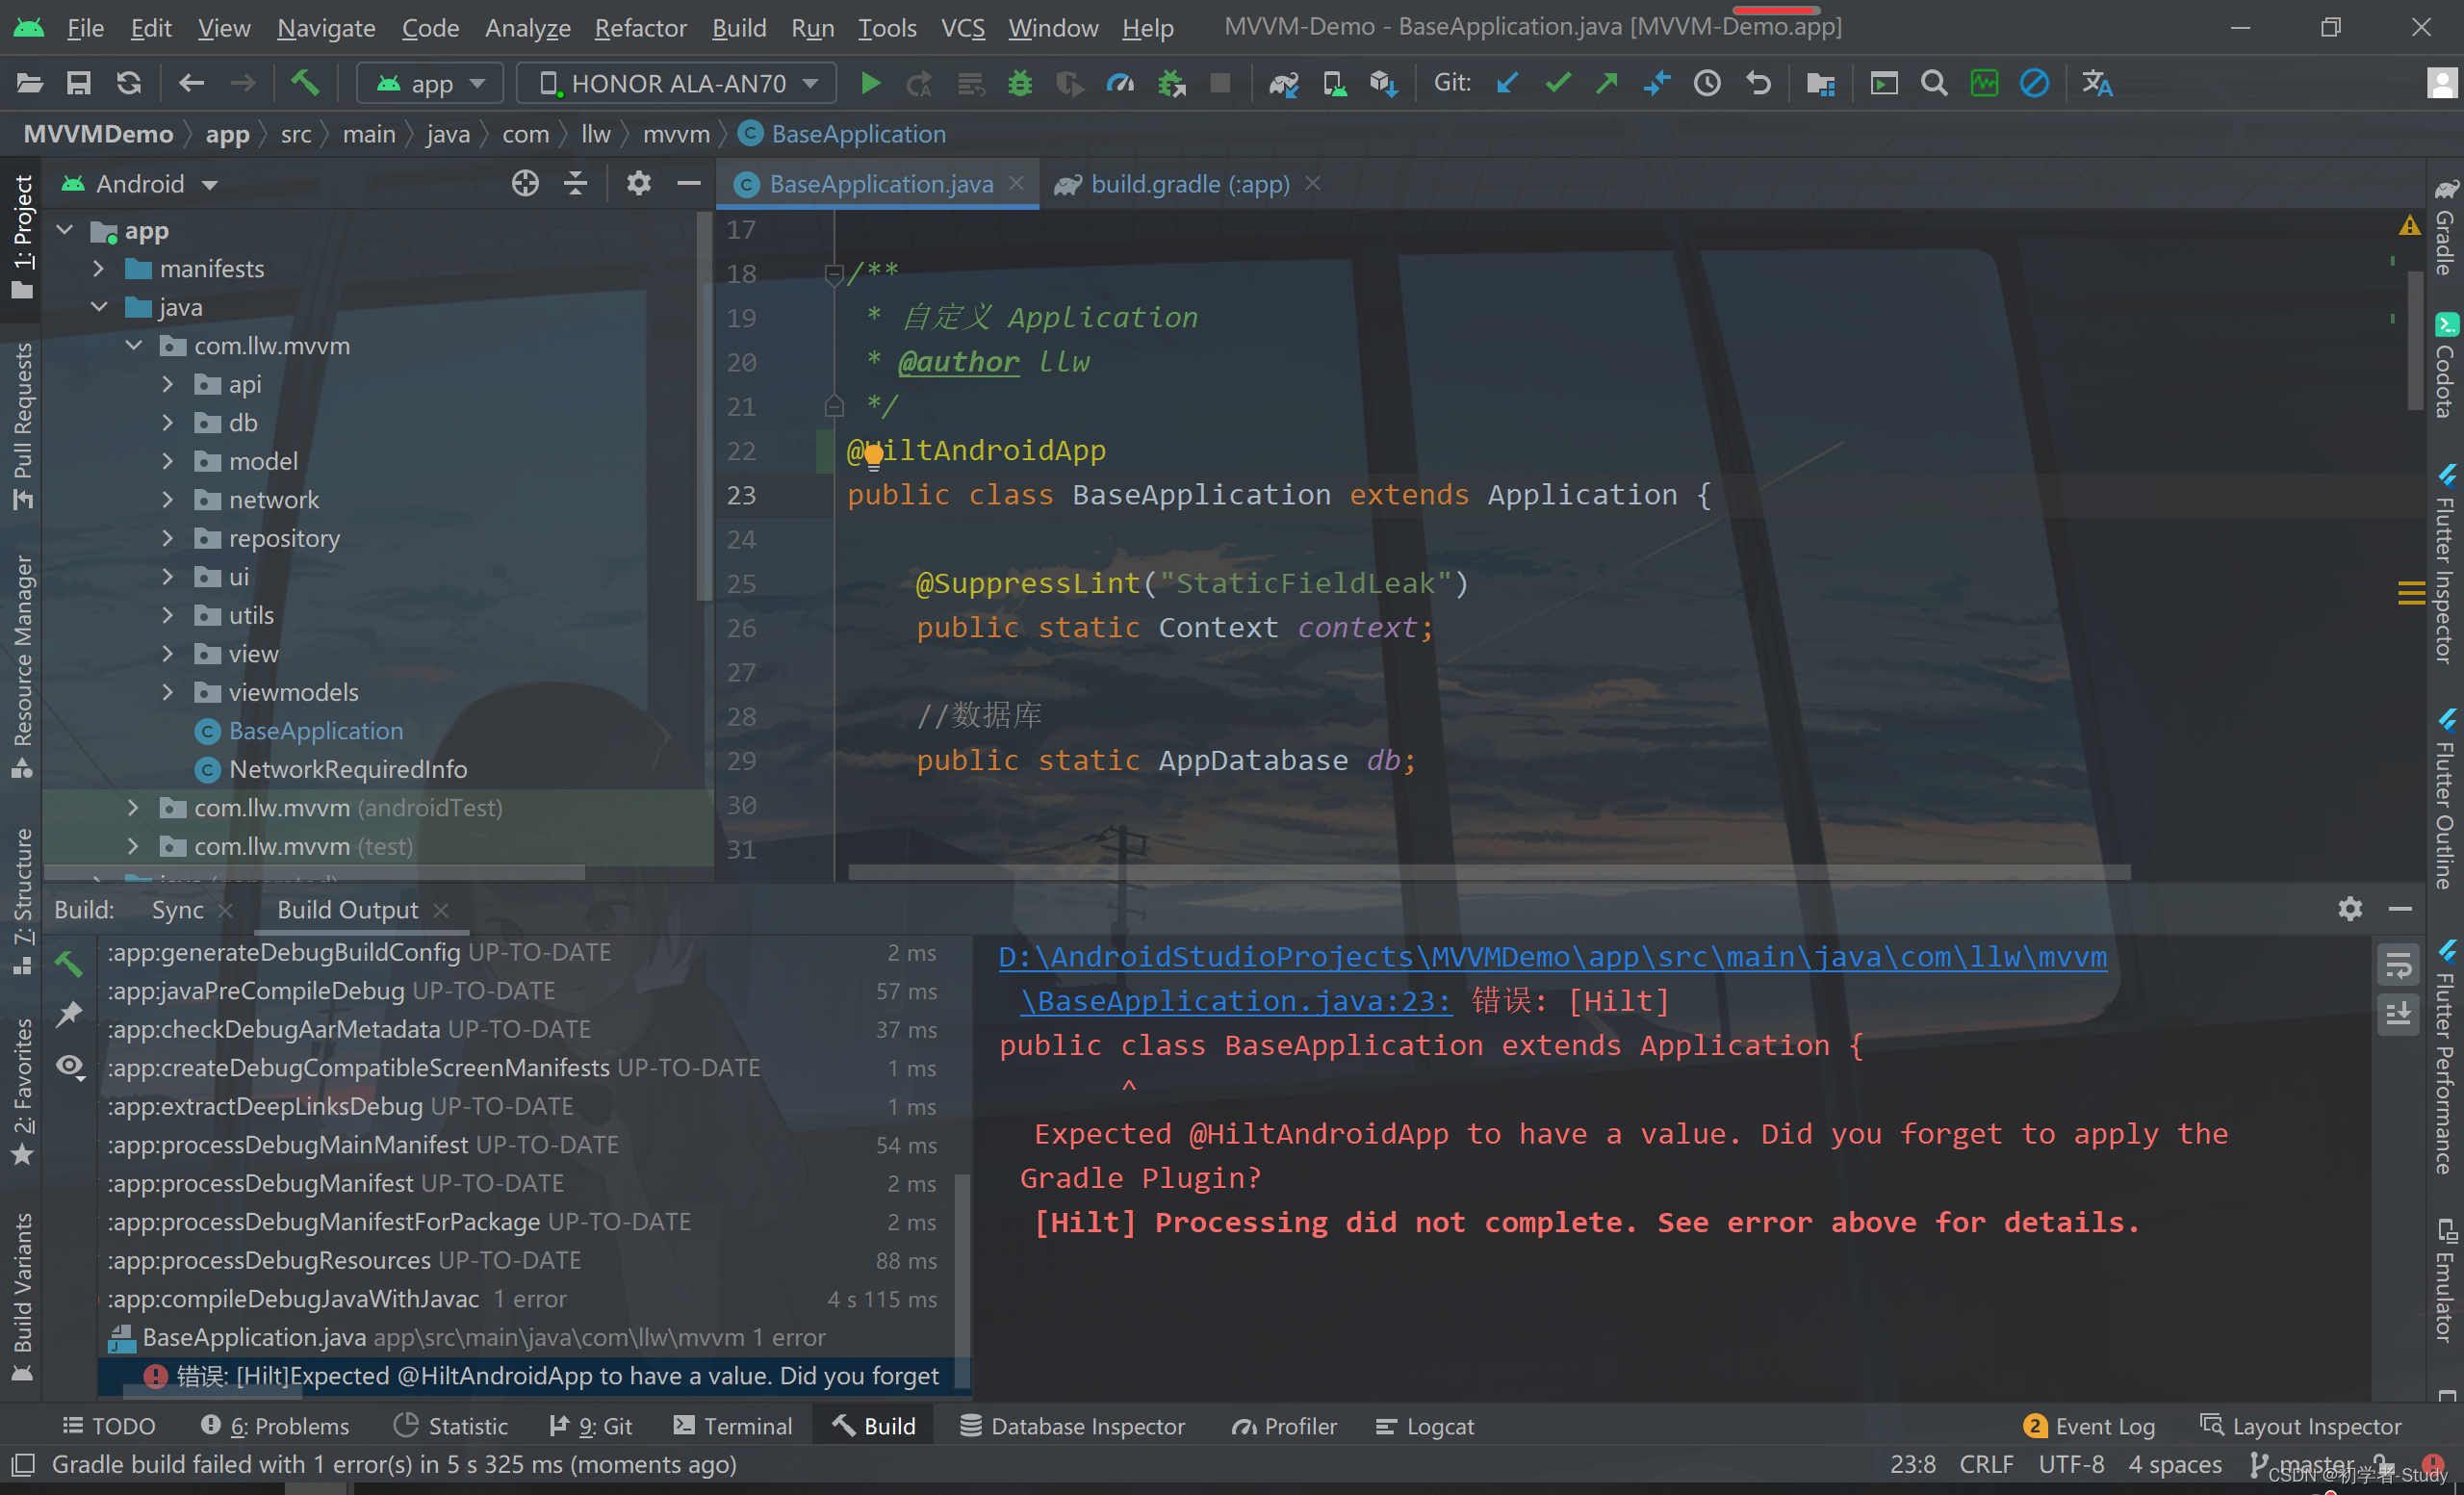
Sure enough, there was a problem. I thought it was my configuration problem. Then I recreated a project and found no problem. Then it should be that other configurations in my project led to Hilt problems. Through troubleshooting, I finally located it on the Room and modified the build of the app The code in gradle is shown in the figure below. The line above is the previous one, and the marked ones are the changes.
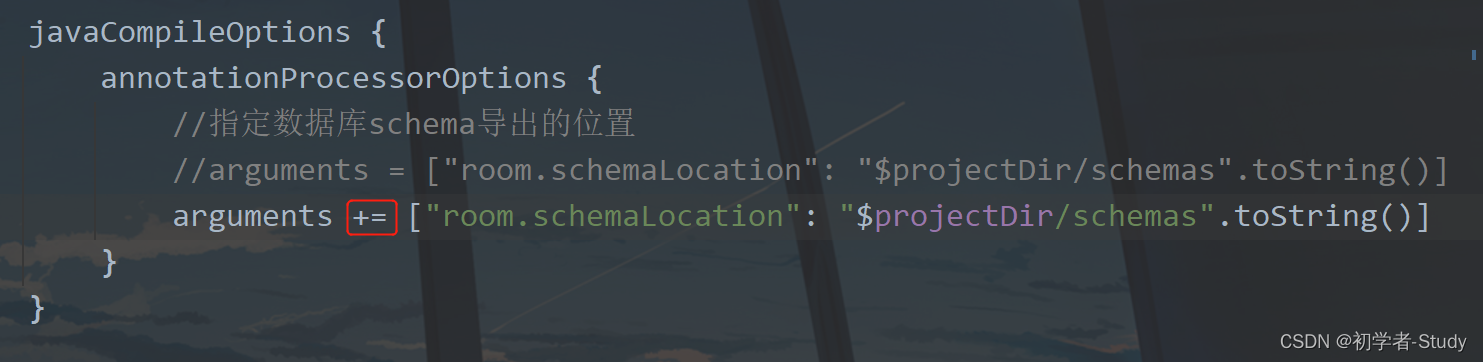
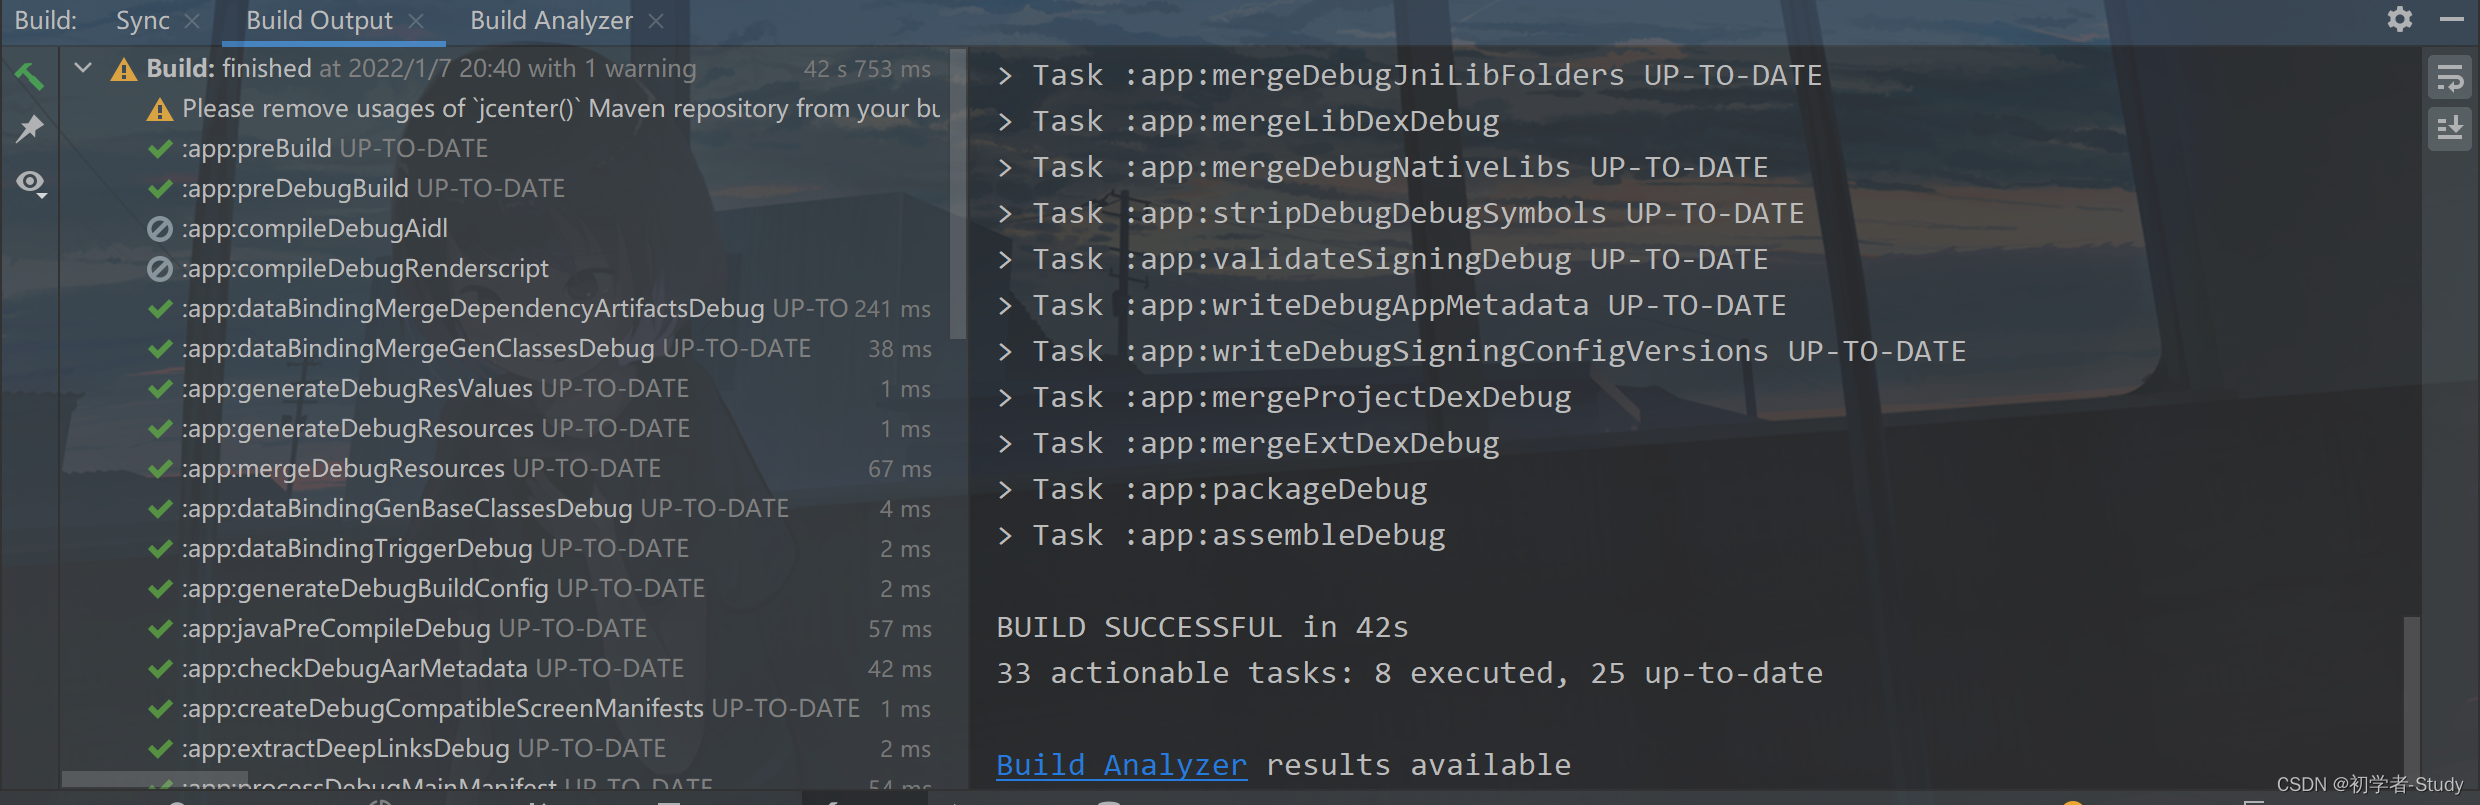
Run again and no error will be reported.
After no error is reported, we can use other annotations.
Hilt provides injection methods for some common classes. At present, hilt supports the following Android classes:
Application (by using @ HiltAndroidApp) Activity Fragment View Service BroadcastReceiver
If you use @ AndroidEntryPoint to annotate an Android class, you must also annotate Android classes that depend on that class. For example, if you add comments to a Fragment, you must also add comments to all activities that use the Fragment.
If you want to use injection for a custom class, you can use dagger2.
2. Use ViewModel
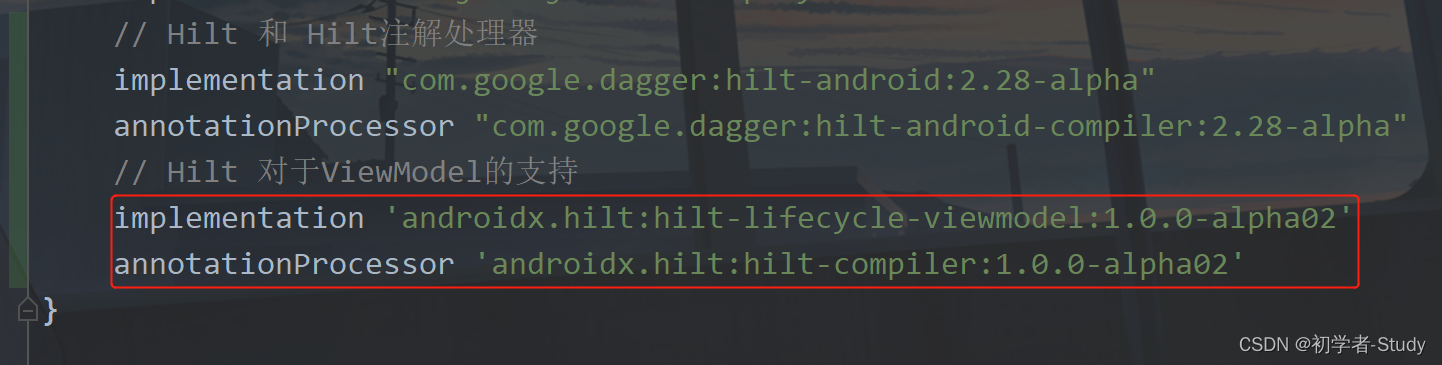
because we use MVVM, Hilt also supports the processing of ViewModel. How to do it? First, we need to go to app / build Add dependency in gradle, and the code is as follows:
	// Hilt support for ViewModel
    implementation 'androidx.hilt:hilt-lifecycle-viewmodel:1.0.0-alpha02'
    annotationProcessor 'androidx.hilt:hilt-compiler:1.0.0-alpha02'
Add location as shown in the figure below:
Next, let's change a ViewModel to test the water. Take MainViewModel as an example. First, modify the code in MainRepository, which provides data for MainViewModel.
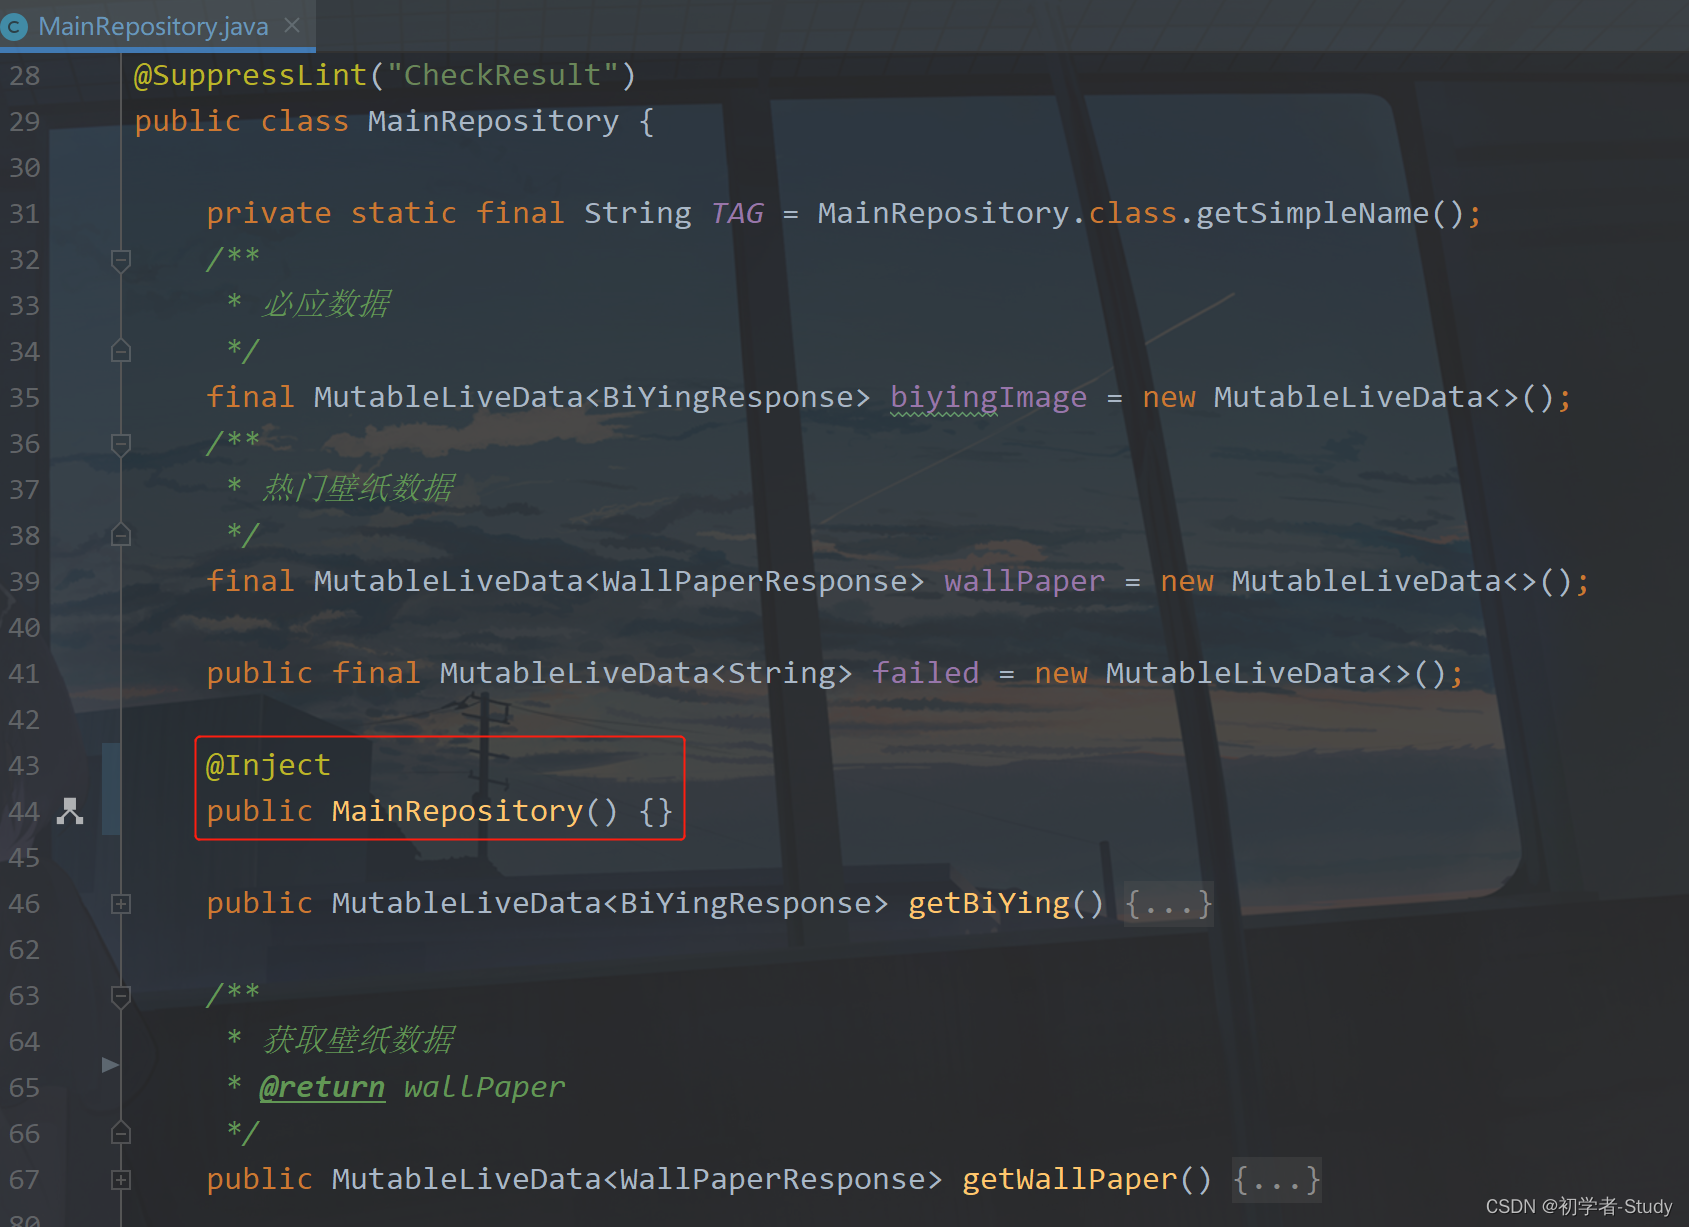
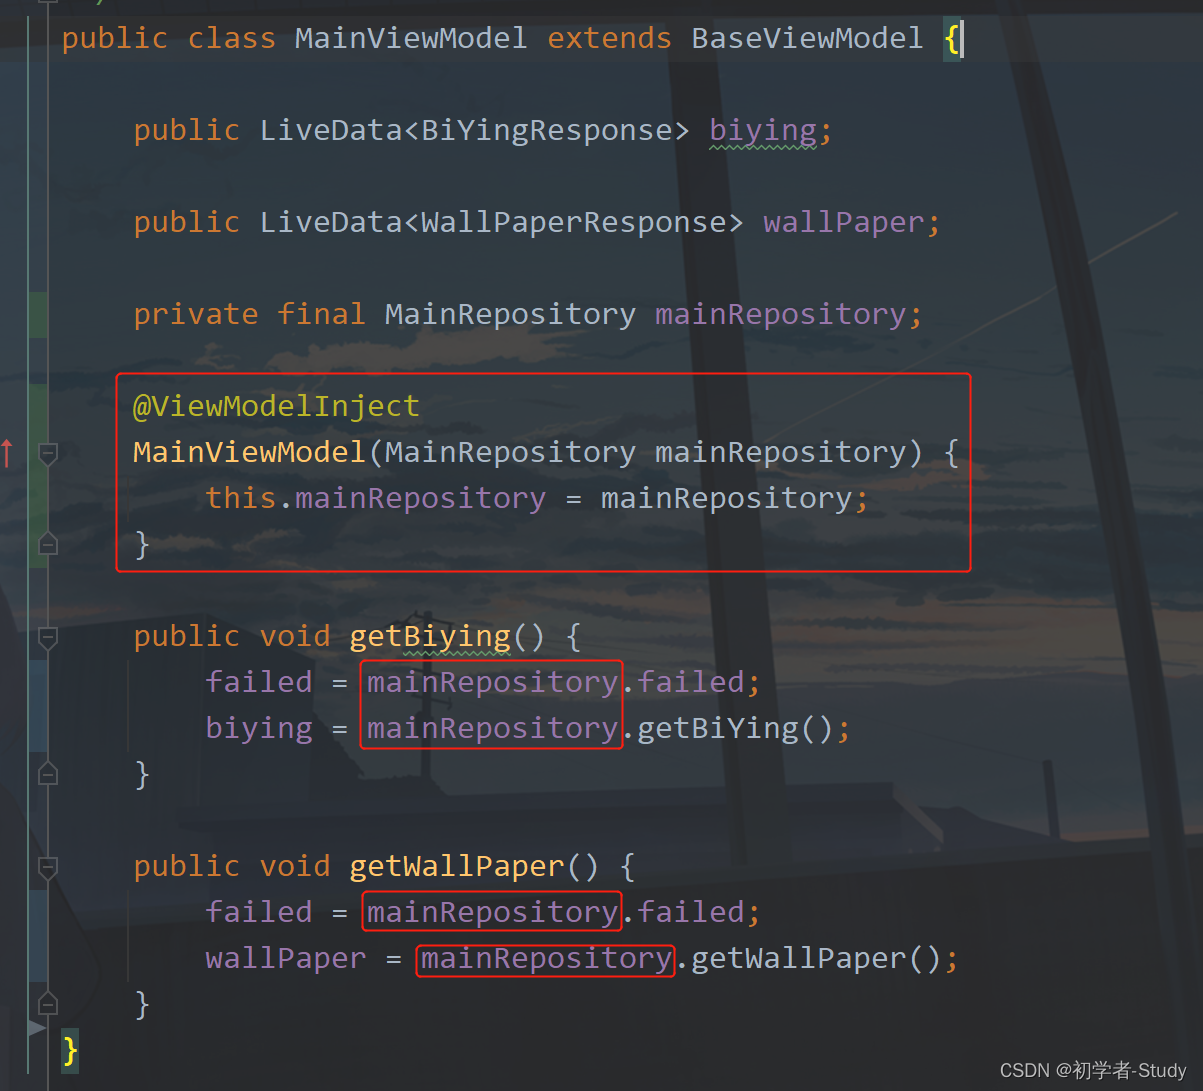
I removed the previous singleton, and here I directly use @ Inject to Inject annotations into a class constructor. Then go to the MainViewModel, which is also very simple.
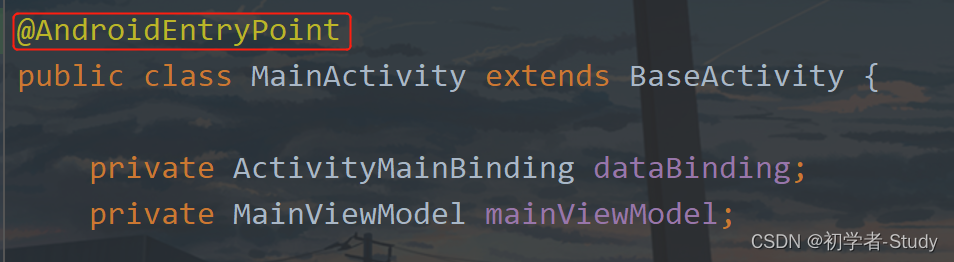
Finally, our MainViewModel will be used in MainActivity, so as an Activity, we need to use an @ AndroidEntryPoint annotation.
It's that simple. The use of ViewModel is completed. Don't be happy too early. It's not too late to celebrate without reporting an error. There is no problem with my operation, so the other ViewModel, Repository and Activity in the back can be changed according to the gourd. Of course, don't panic if you change the wrong one. You can look at my source code and follow it.
3. Single case use
As the Application is globally unique, many tool classes complete the singleton here. If it is completed through Hilt, it will reduce some code and ensure that there will be no OOM, because the system will process and release resources for you. For example, if we want to inject an object into the Application, how do we play? Very simple, for example
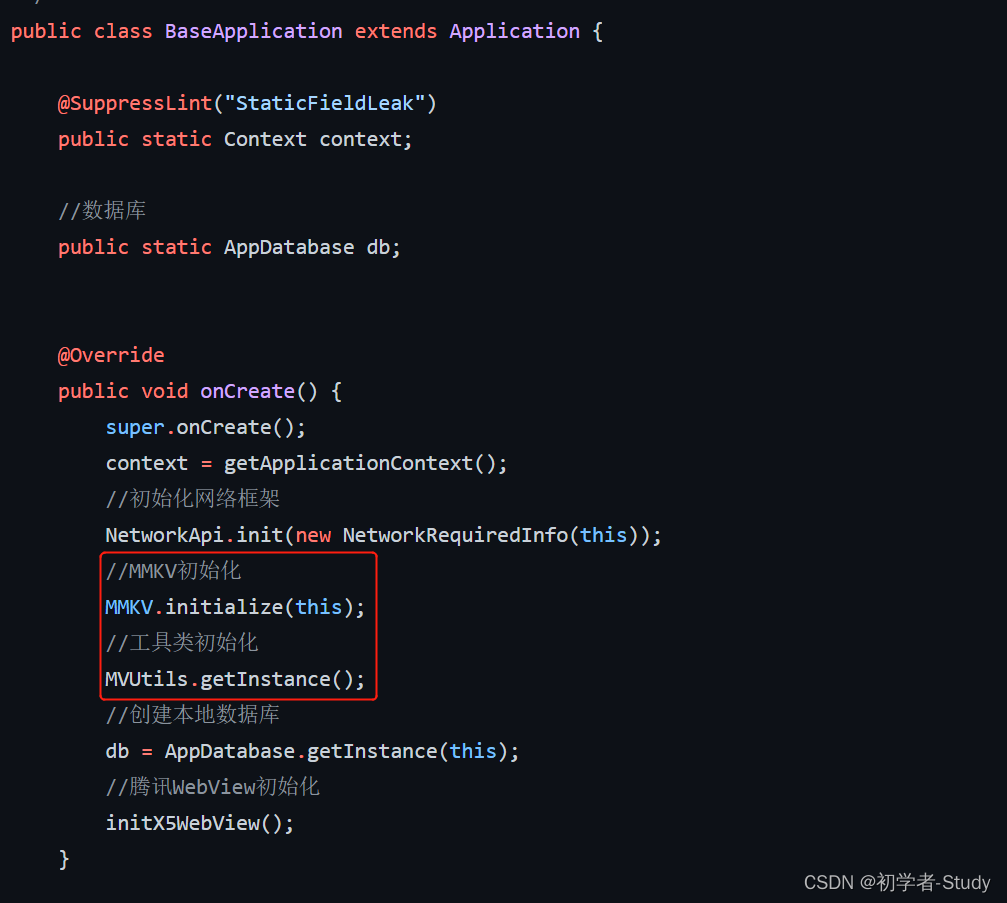
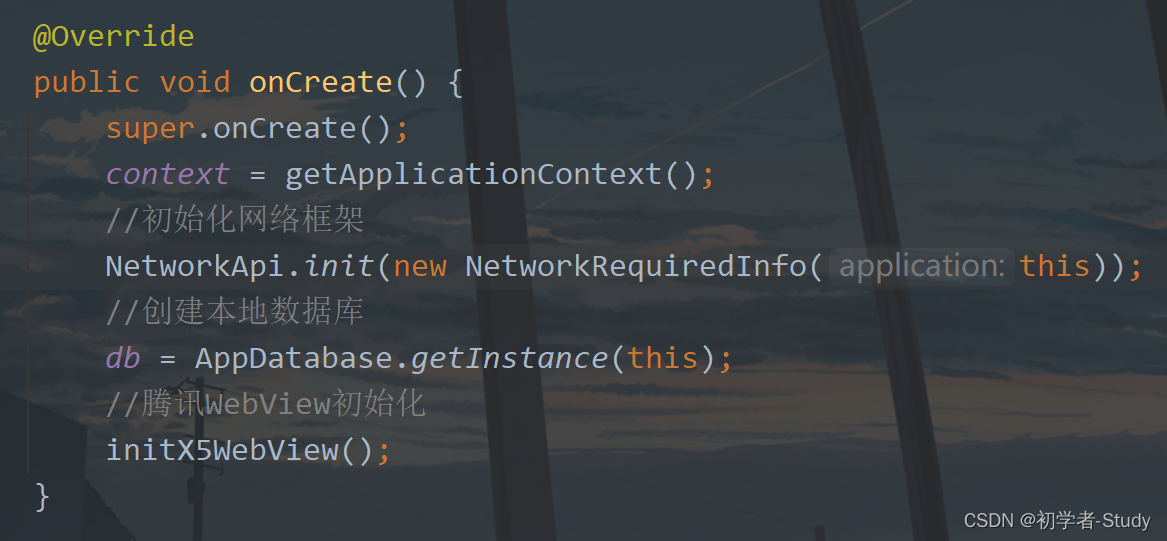
I use this MMKV in my project. One is library initialization and tool class initialization. Here I write it directly in onCreate of BaseApplication. What should I do with Hilt? Let's first look at the code in MVUtils,
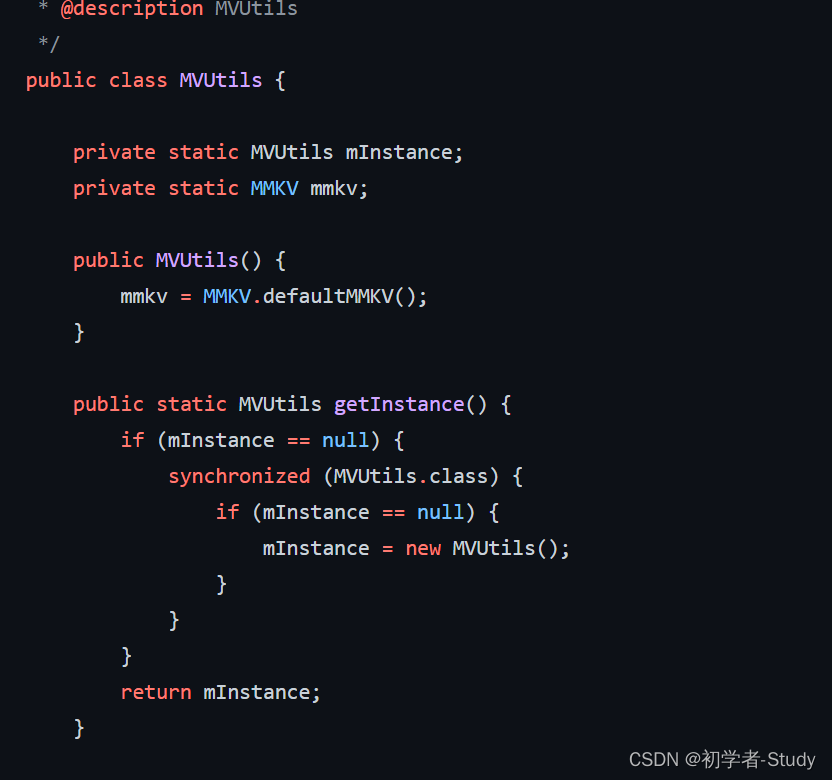
So what happens after using Hilt?
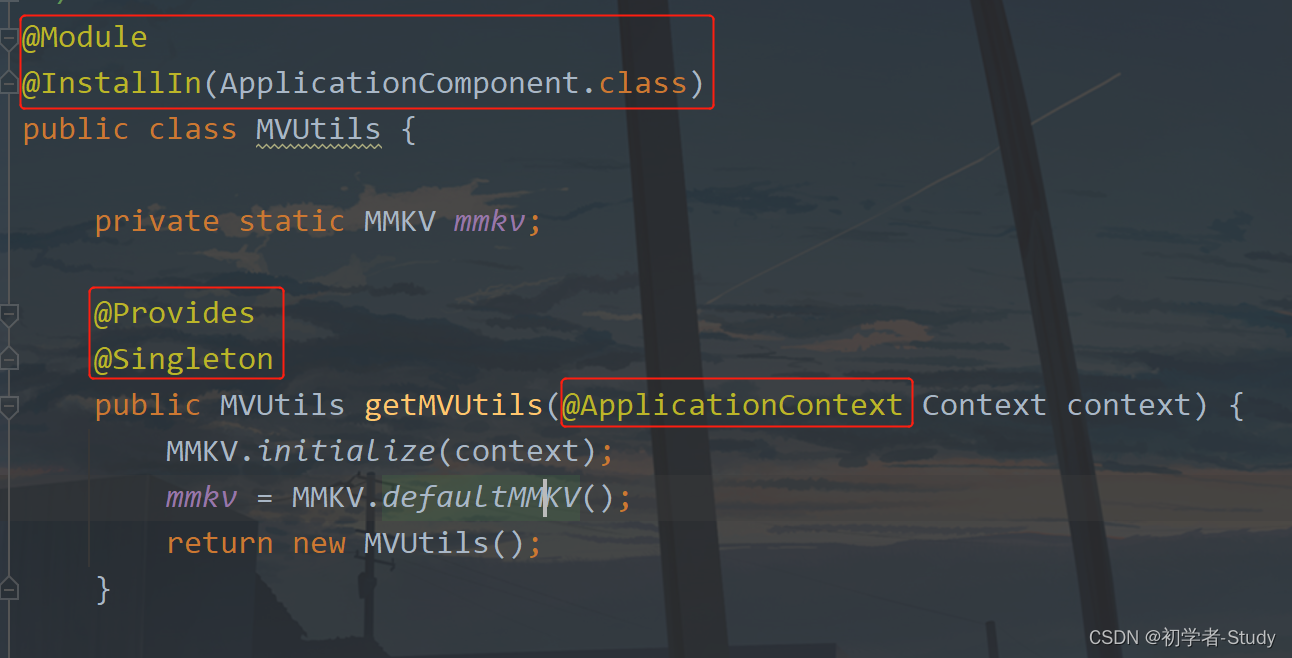
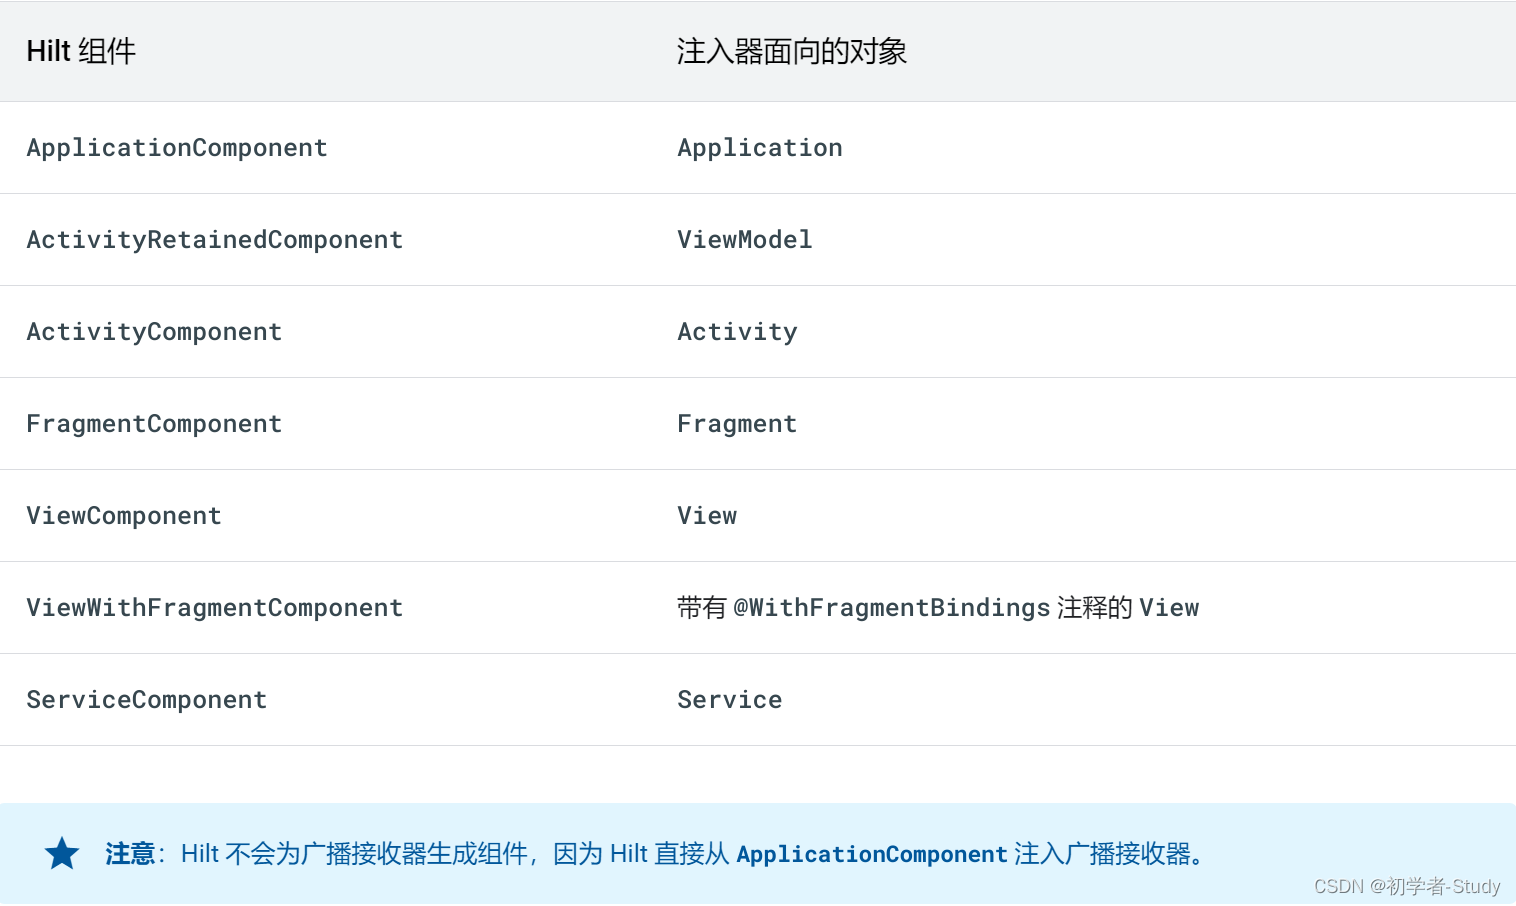
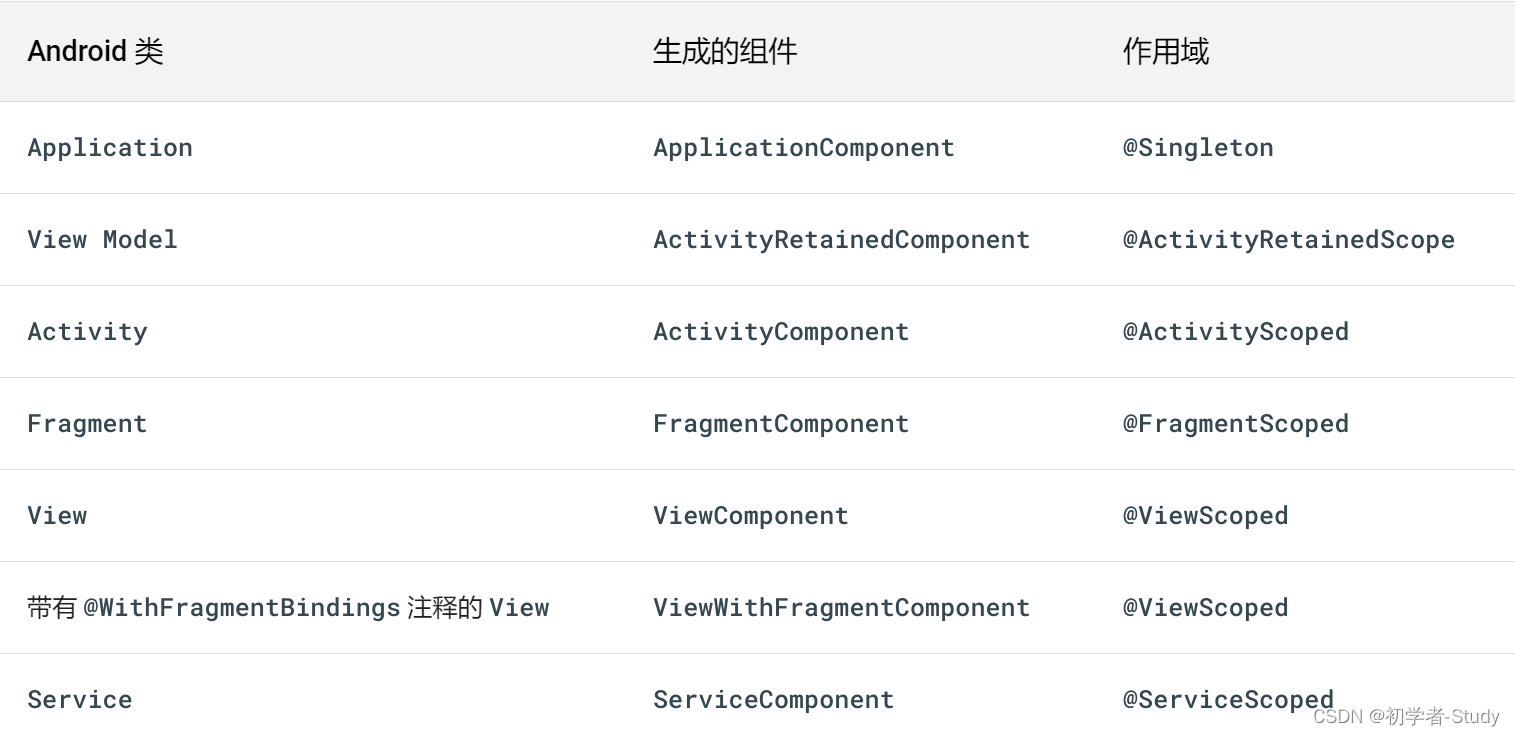
The @ Module annotated class here actually represents a Module and tells the container that binding can be used for installation through the specified component@ InstallIn(ApplicationComponent.class) indicates that it is specified to be installed in the Application, and then the annotation @ Provides on the getMVUtils method is the provider, @ Singleton indicates that it is a global Singleton, and its corresponding scope is ApplicationComponent. You can refer to the following figure
It's normal for you to be unfamiliar with these contents at the beginning. You can know them when you use them more. If we use annotation, we don't need to modify methods and variables through static in the tool class. Then we change the code in MVUtils as follows:
/**
 * MMKV Utils
 * @author llw
 */
@Module
@InstallIn(ApplicationComponent.class)
public class MVUtils {

    private static MMKV mmkv;

    @Provides
    @Singleton
    public MVUtils getMVUtils(@ApplicationContext Context context) {
        MMKV.initialize(context);
        mmkv = MMKV.defaultMMKV();
        return new MVUtils();
    }

    /**
     * Write basic data type cache
     *
     * @param key    key
     * @param object value
     */
    public void put(String key, Object object) {
        if (object instanceof String) {
            mmkv.encode(key, (String) object);
        } else if (object instanceof Integer) {
            mmkv.encode(key, (Integer) object);
        } else if (object instanceof Boolean) {
            mmkv.encode(key, (Boolean) object);
        } else if (object instanceof Float) {
            mmkv.encode(key, (Float) object);
        } else if (object instanceof Long) {
            mmkv.encode(key, (Long) object);
        } else if (object instanceof Double) {
            mmkv.encode(key, (Double) object);
        } else if (object instanceof byte[]) {
            mmkv.encode(key, (byte[]) object);
        } else {
            mmkv.encode(key, object.toString());
        }
    }

    public void putSet(String key, Set<String> sets) {
        mmkv.encode(key, sets);
    }

    public void putParcelable(String key, Parcelable obj) {
        mmkv.encode(key, obj);
    }

    public Integer getInt(String key) {
        return mmkv.decodeInt(key, 0);
    }

    public Integer getInt(String key, int defaultValue) {
        return mmkv.decodeInt(key, defaultValue);
    }

    public Double getDouble(String key) {
        return mmkv.decodeDouble(key, 0.00);
    }

    public Double getDouble(String key, double defaultValue) {
        return mmkv.decodeDouble(key, defaultValue);
    }

    public Long getLong(String key) {
        return mmkv.decodeLong(key, 0L);
    }

    public Long getLong(String key, long defaultValue) {
        return mmkv.decodeLong(key, defaultValue);
    }

    public Boolean getBoolean(String key) {
        return mmkv.decodeBool(key, false);
    }

    public Boolean getBoolean(String key, boolean defaultValue) {
        return mmkv.decodeBool(key, defaultValue);
    }

    public Float getFloat(String key) {
        return mmkv.decodeFloat(key, 0F);
    }

    public Float getFloat(String key, float defaultValue) {
        return mmkv.decodeFloat(key, defaultValue);
    }

    public byte[] getBytes(String key) {
        return mmkv.decodeBytes(key);
    }

    public byte[] getBytes(String key, byte[] defaultValue) {
        return mmkv.decodeBytes(key, defaultValue);
    }

    public String getString(String key) {
        return mmkv.decodeString(key, "");
    }

    public String getString(String key, String defaultValue) {
        return mmkv.decodeString(key, defaultValue);
    }

    public Set<String> getStringSet(String key) {
        return mmkv.decodeStringSet(key, Collections.<String>emptySet());
    }

    public Parcelable getParcelable(String key) {
        return mmkv.decodeParcelable(key, null);
    }

    /**
     * Remove a key pair
     *
     * @param key
     */
    public void removeKey(String key) {
        mmkv.removeValueForKey(key);
    }

    /**
     * Clear all key s
     */
    public void clearAll() {
        mmkv.clearAll();
    }
}
OK, let's change the code in BaseApplication.
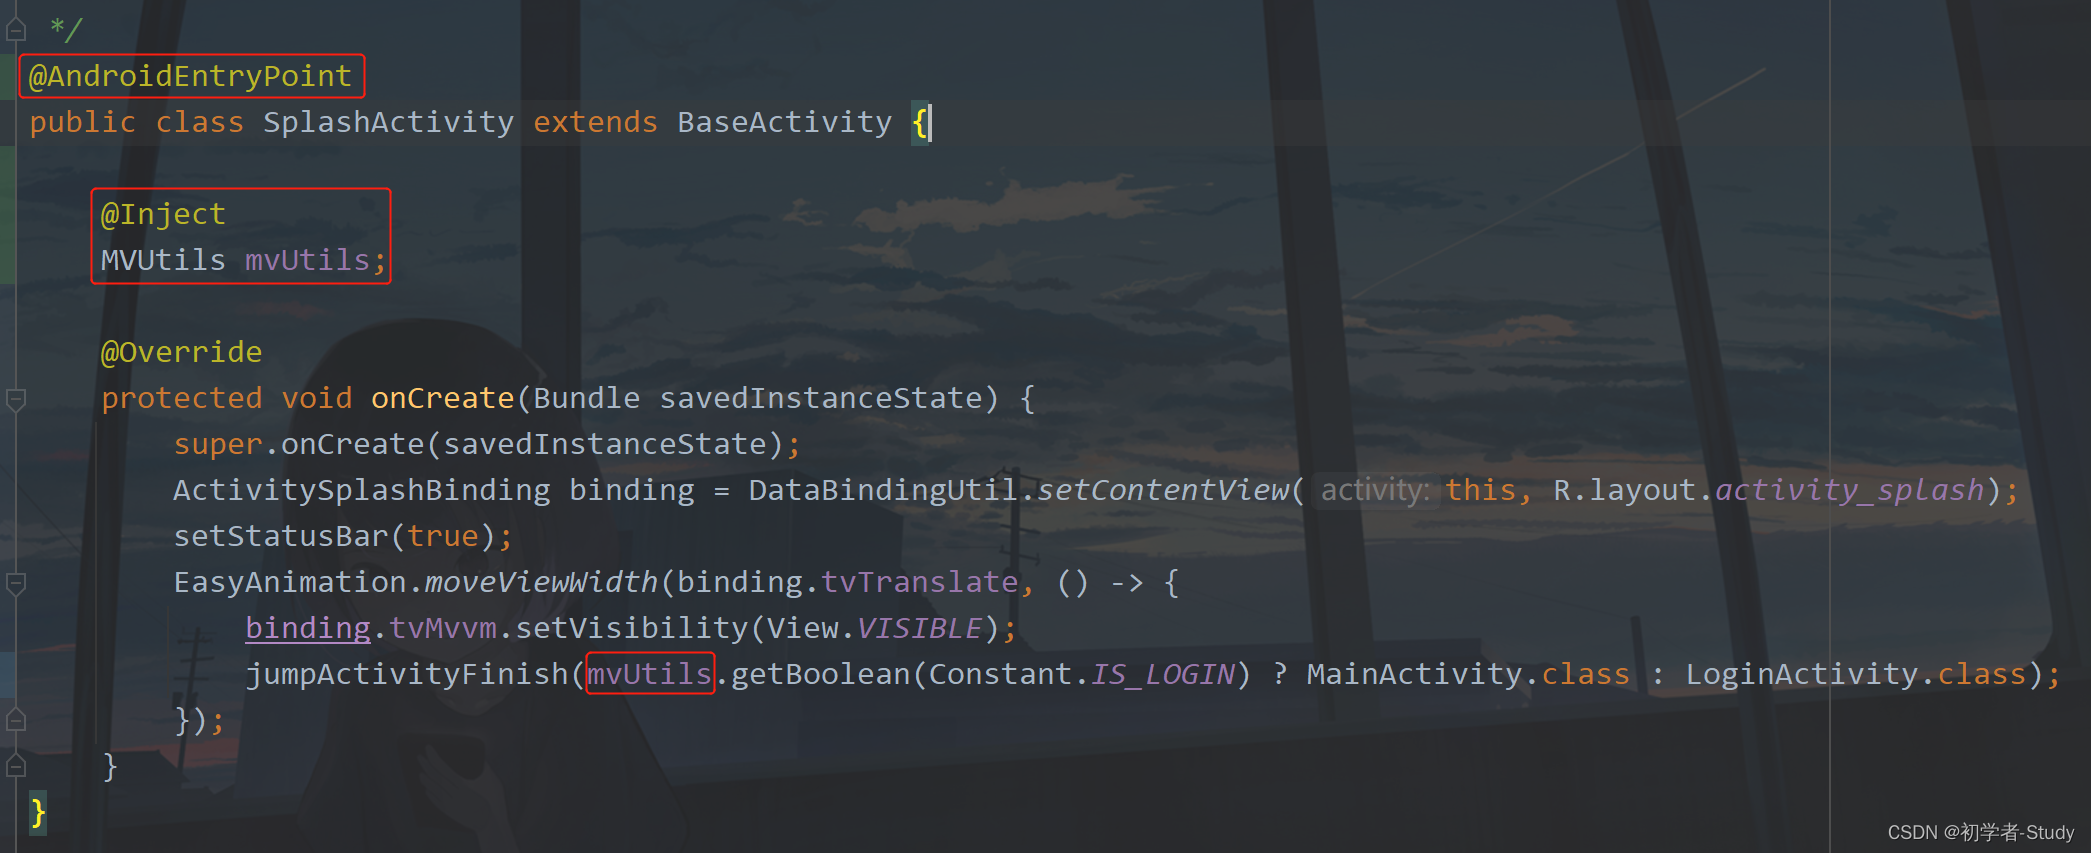
Just remove the previous code, so how to use it? Add an injection entry where it is used. For example, mvutils is used in SplashActivity Getboolean, it should report an error now,

As shown in the figure below, let's change it.
This change is OK. If you are not sure whether this single example is useful, it is also simple. Test it like this.

If the two hashcodes printed are the same, it means it's OK. Go and try it. The changes here are only in the current SplashActivity, and the changes in other places are the same. Follow the gourd and draw the gourd. Of course, this @ AndroidEntryPoint base Class must extend ComponentActivity, (support) Fragment, View, Service, or BroadcastReceiver. So if you are a custom Class, how do you inject it?

How to inject a Repository like this? In classes that do not support @ AndroidEntryPoint, you need to use the interface to complete the injection. Create a new MVUtilsEntryPoint interface under the utils package. The code is as follows:
@EntryPoint
@InstallIn(ApplicationComponent.class)
public interface MVUtilsEntryPoint {
MVUtils getMVUtils();
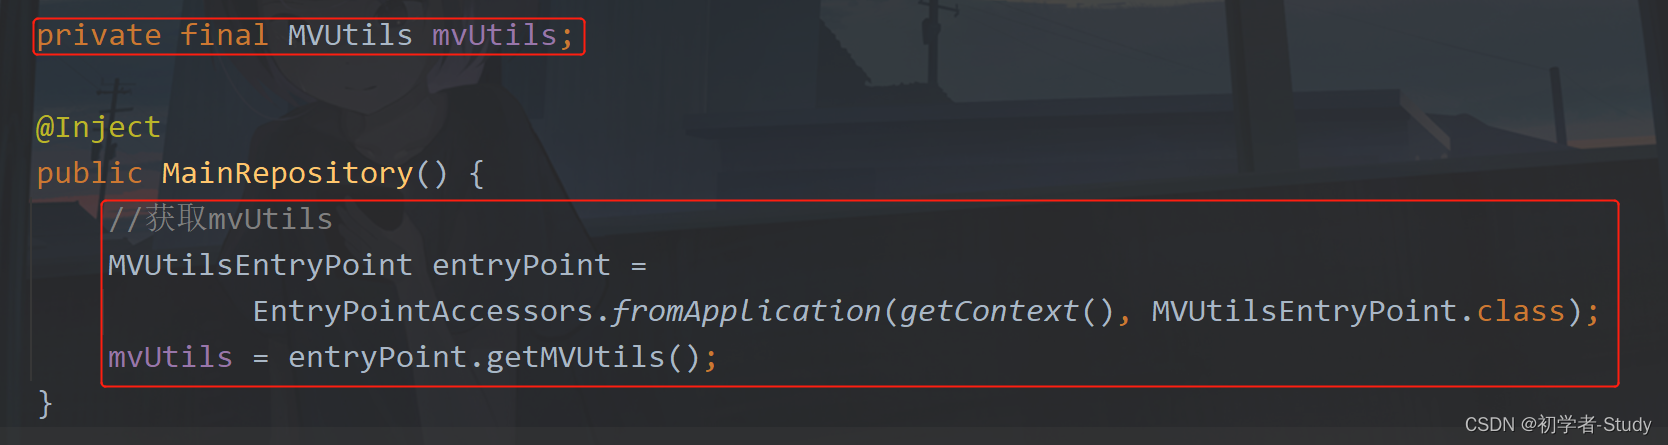
}The scope here needs to be consistent with that of MVUtils, so how to use this interface? The three error reporting places in the figure above need to be changed. Change one as an example, open MainRepository and add a variable
private final MVUtils mvUtils;
Then add the following code in the construction method:
		//Get mvUtils
        MVUtilsEntryPoint entryPoint =
                EntryPointAccessors.fromApplication(getContext(), MVUtilsEntryPoint.class);
        mvUtils = entryPoint.getMVUtils();
As shown in the figure below:
Then correct the error, as shown in the figure below:
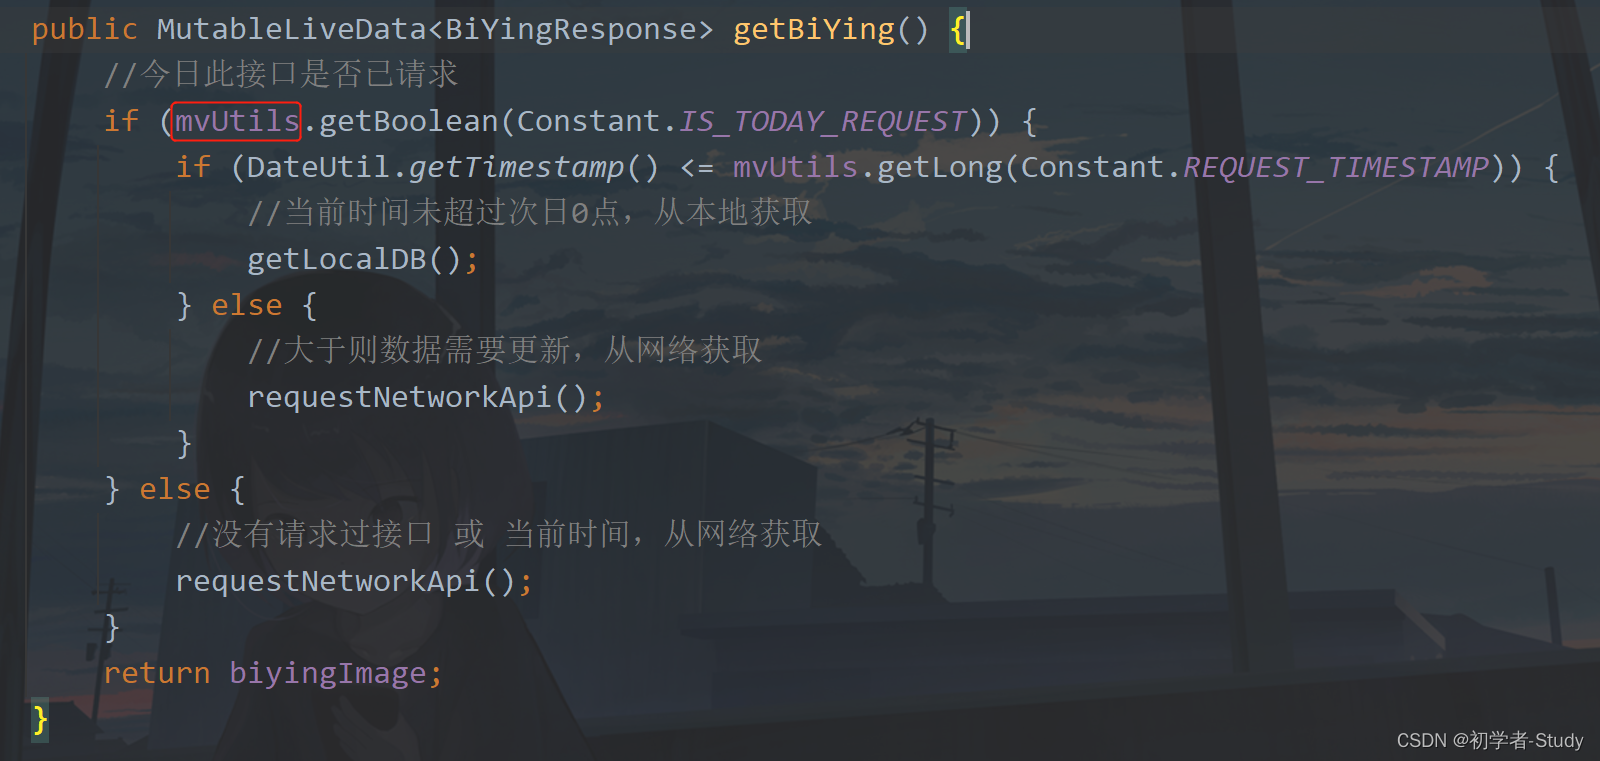
Just change the other two repositories. It's very simple. After the change, you should run it and go down without reporting an error. That's all for the introduction of the use of Hilt. After changing the project, some people who are not familiar with Hilt may not be able to adapt for a while. Therefore, some other uses will not be written first. I'll write them later if I need to supplement them, or add other uses of Hilt when I think it's appropriate.
3, ViewBinding using
only readers mentioned why ViewBinding is not used. Because I can't use ViewBinding when I have DataBinding, but since it is proposed, I still use some of this component. When will I use it? When you don't need data binding, or you don't want to operate through DataBinding, you can choose ViewBinding+LiveData. I secretly wrote about a page before, because it doesn't involve any knowledge points, so I didn't write it in the article. This time, I can say it with the help of explaining ViewBinding.
1. Introduction to viewbinding
ViewBinding is a new feature introduced by Android Studio 3.6 to replace findviewbyid (internal implementation or use findViewById).. After starting view binding, the system will generate a binding class for each xml file in the modification module. The instance of the binding class contains direct references to all views with ID S in the corresponding layout.
Advantages of View Binding
Null security: since view binding creates a direct reference to the view, there is no risk of null pointer exception due to invalid view ID. In addition, if the view appears only in some configurations of the layout, the fields in the binding class that contain its references are marked with @ Nullable.
Type safe: fields in each binding class have types that match the views they reference in the XML file. This means that there is no risk of class conversion exceptions.
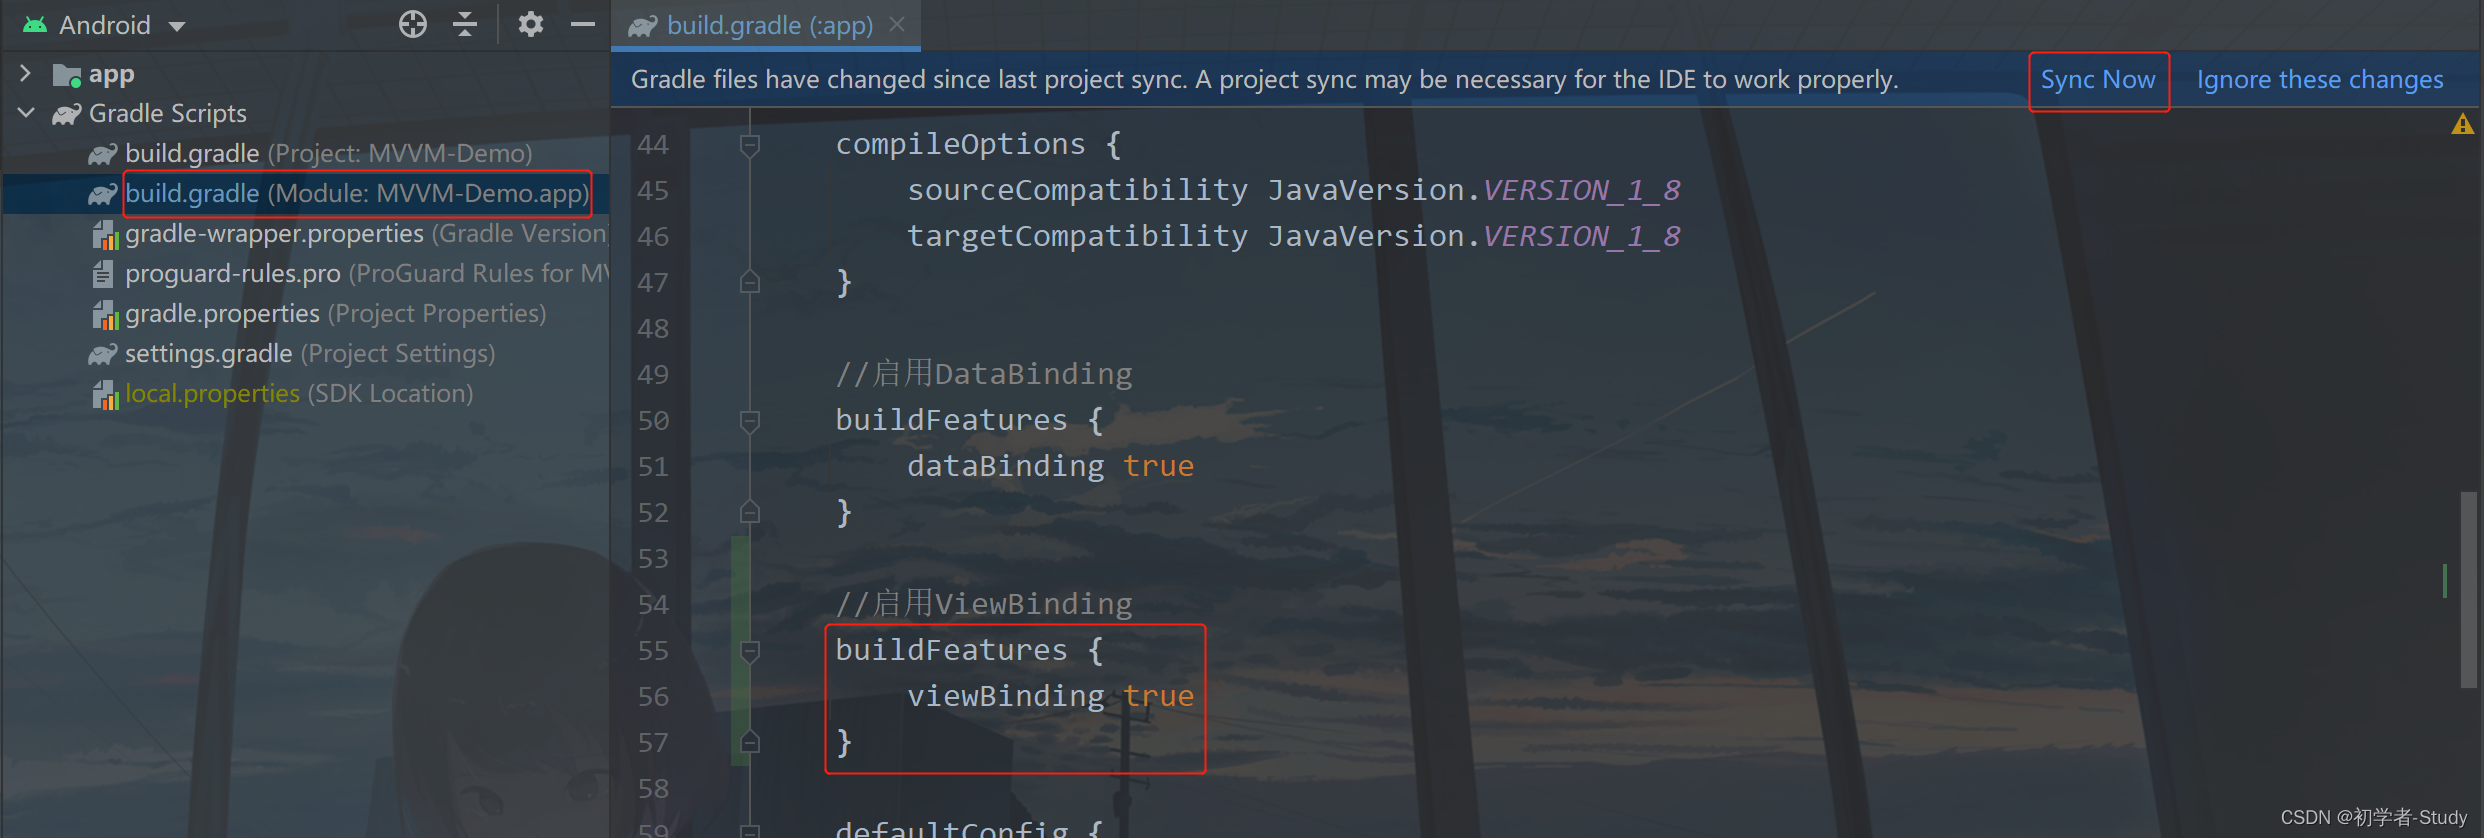
2. Enable ViewBinding
like DataBinding, ViewBInding only needs to be in APP / build Once configured in gradle, it can be used. Let's configure it, that is, one line of code:
	buildFeatures {
        viewBinding true
    }
Add location as shown in the figure below:
3. Introduction to viewbinding
Then click Sync Now to synchronize the project. After synchronization, enter the AboutActivity page. You should not have this page. Just have a look. Look at this xml file
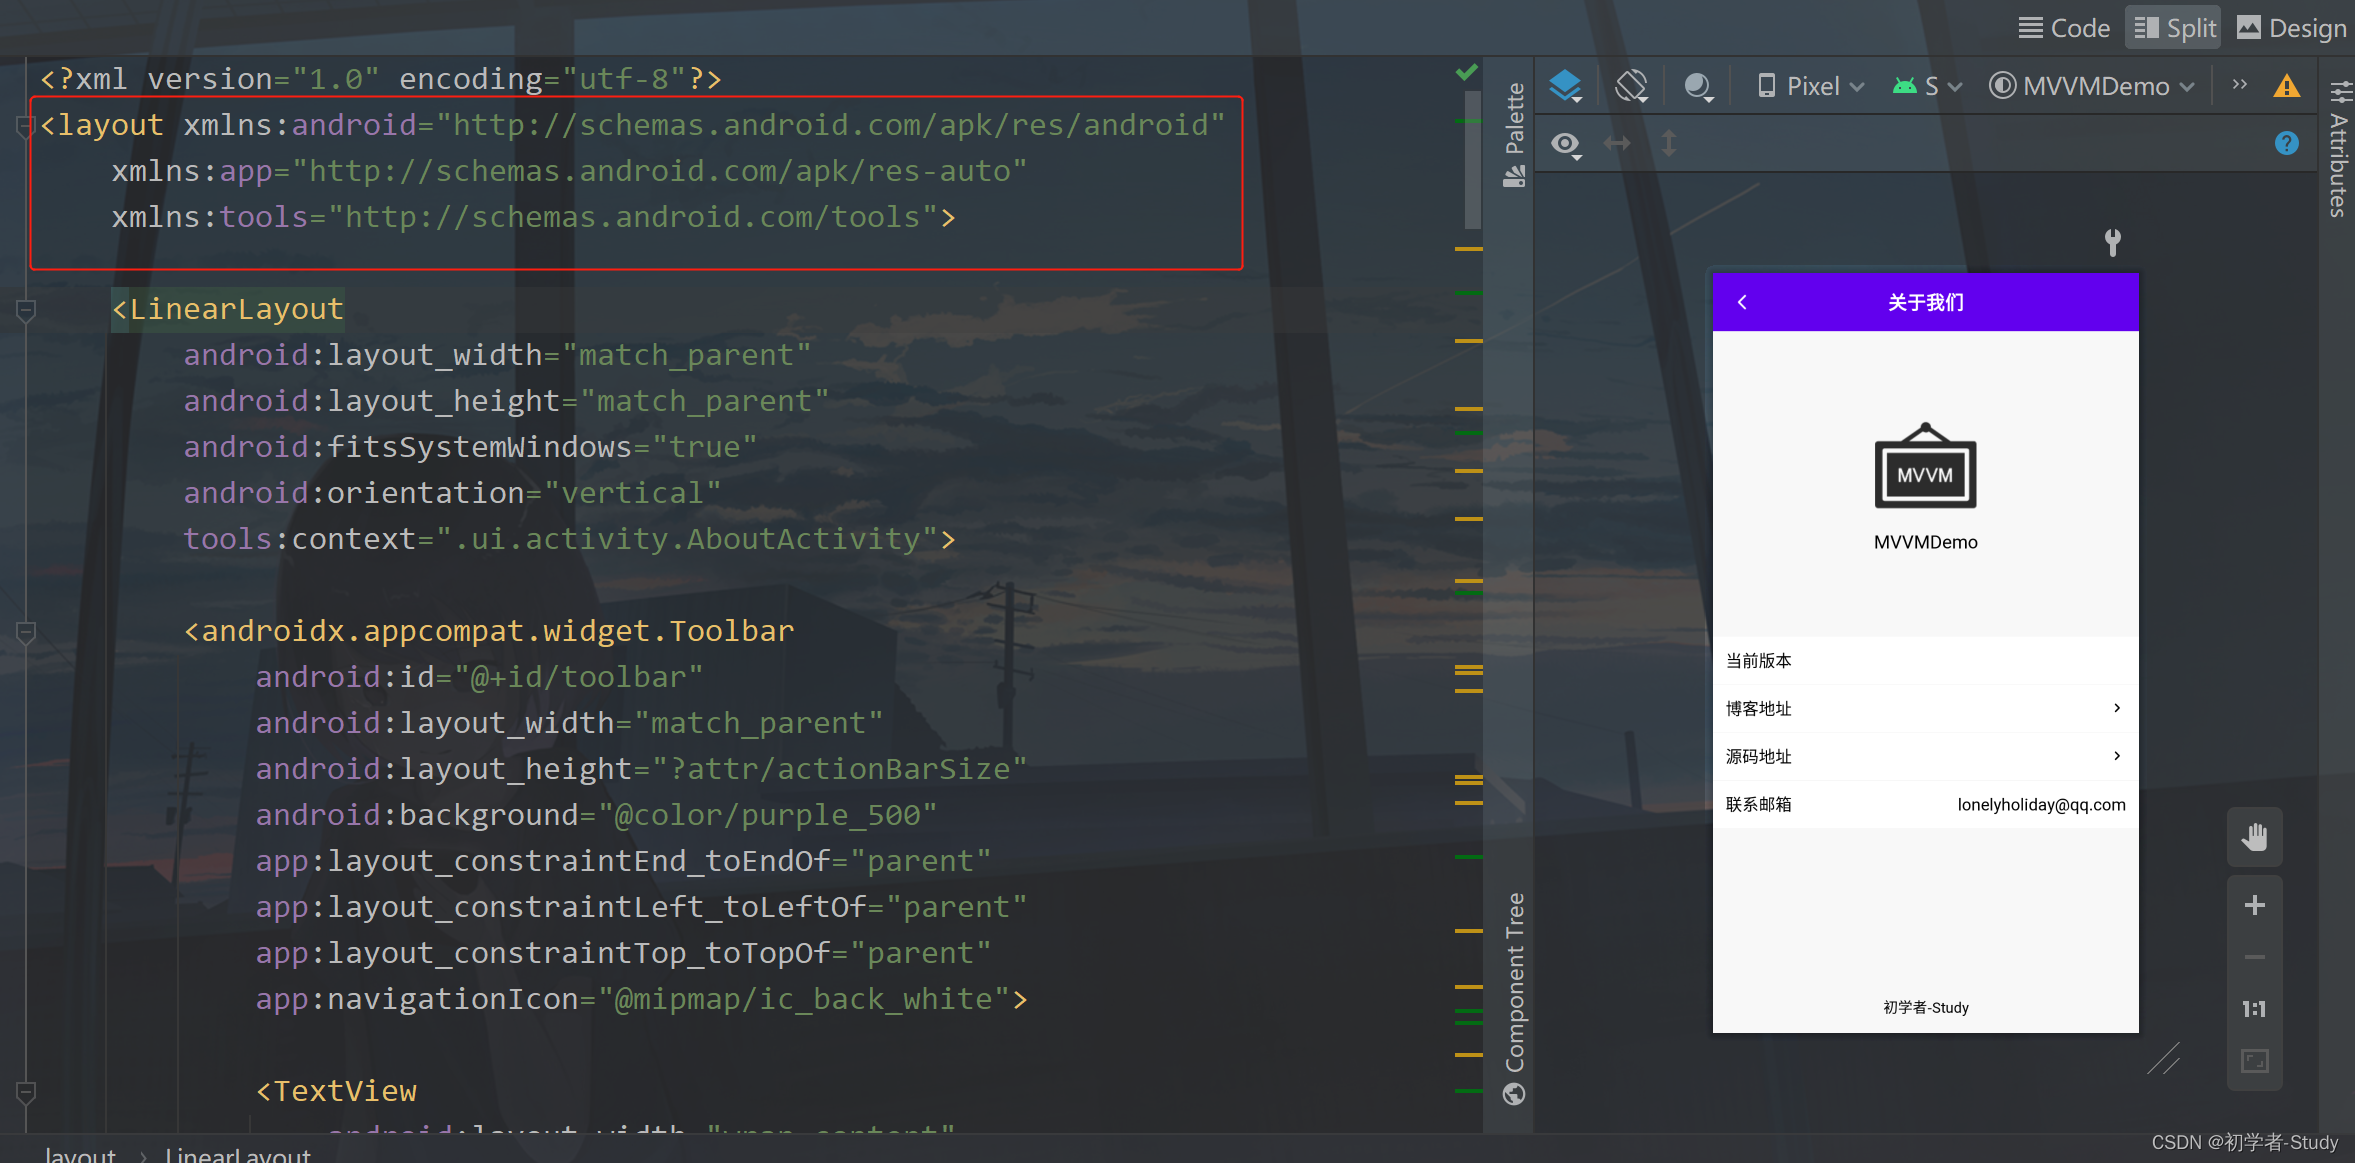
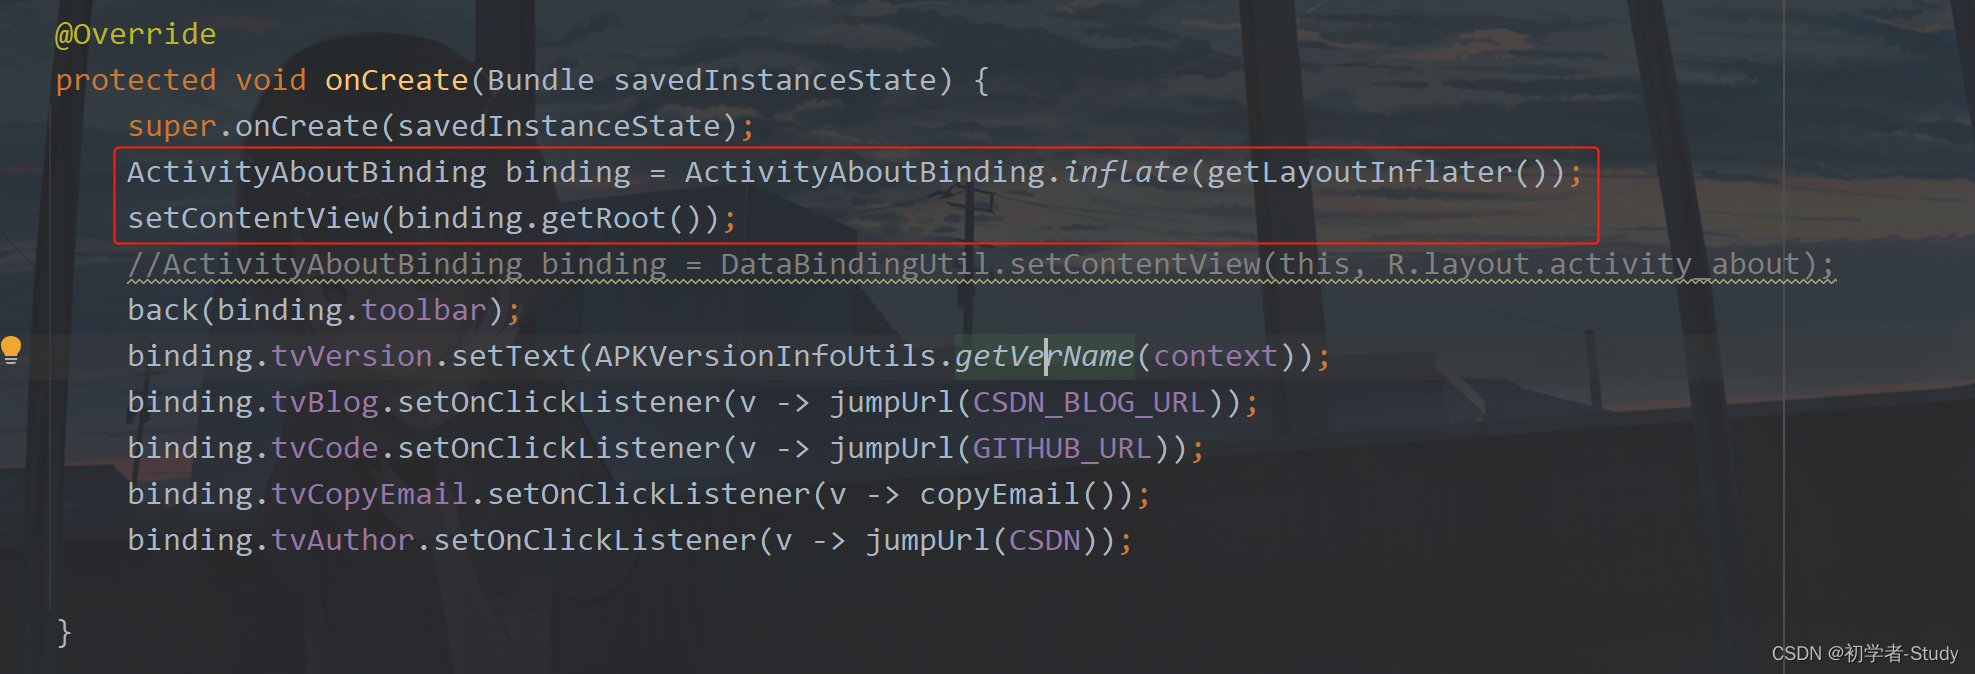
Here I see that when I didn't use ViewBinding before, I used DataBinding to get the id of the control in the Activity. Here we change:
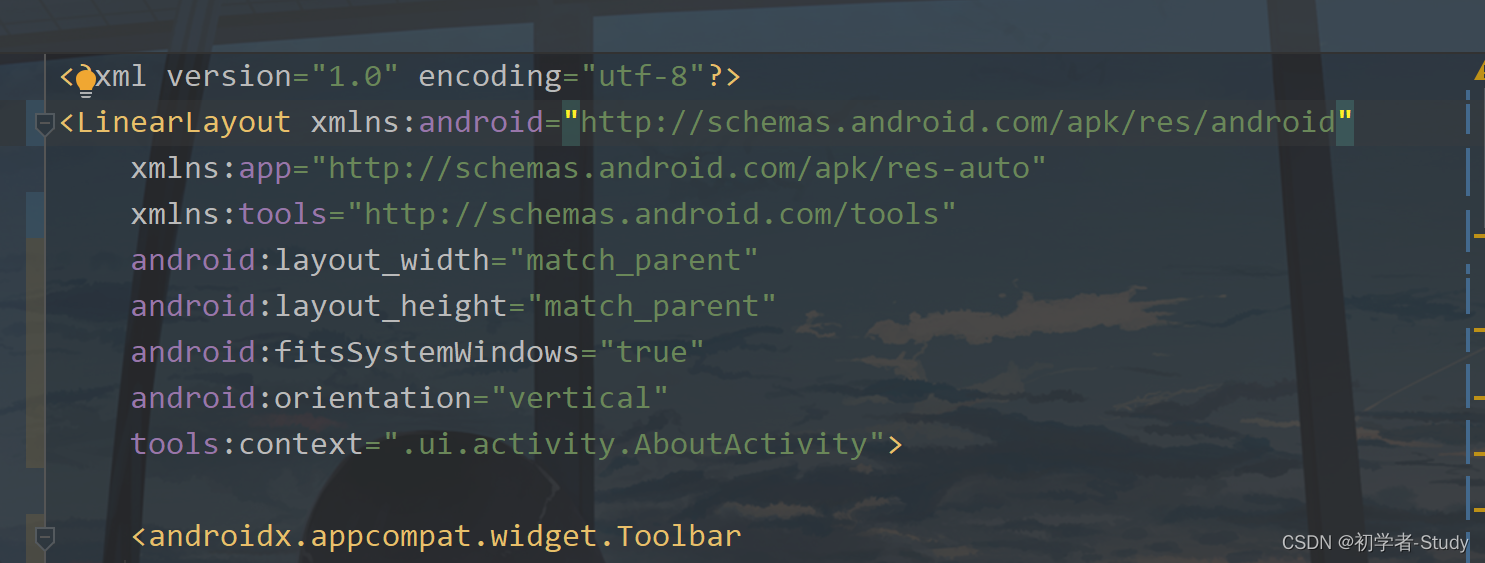
In fact, I no longer use DataBinding. Here I remove < layout > and how to change it in Activity.
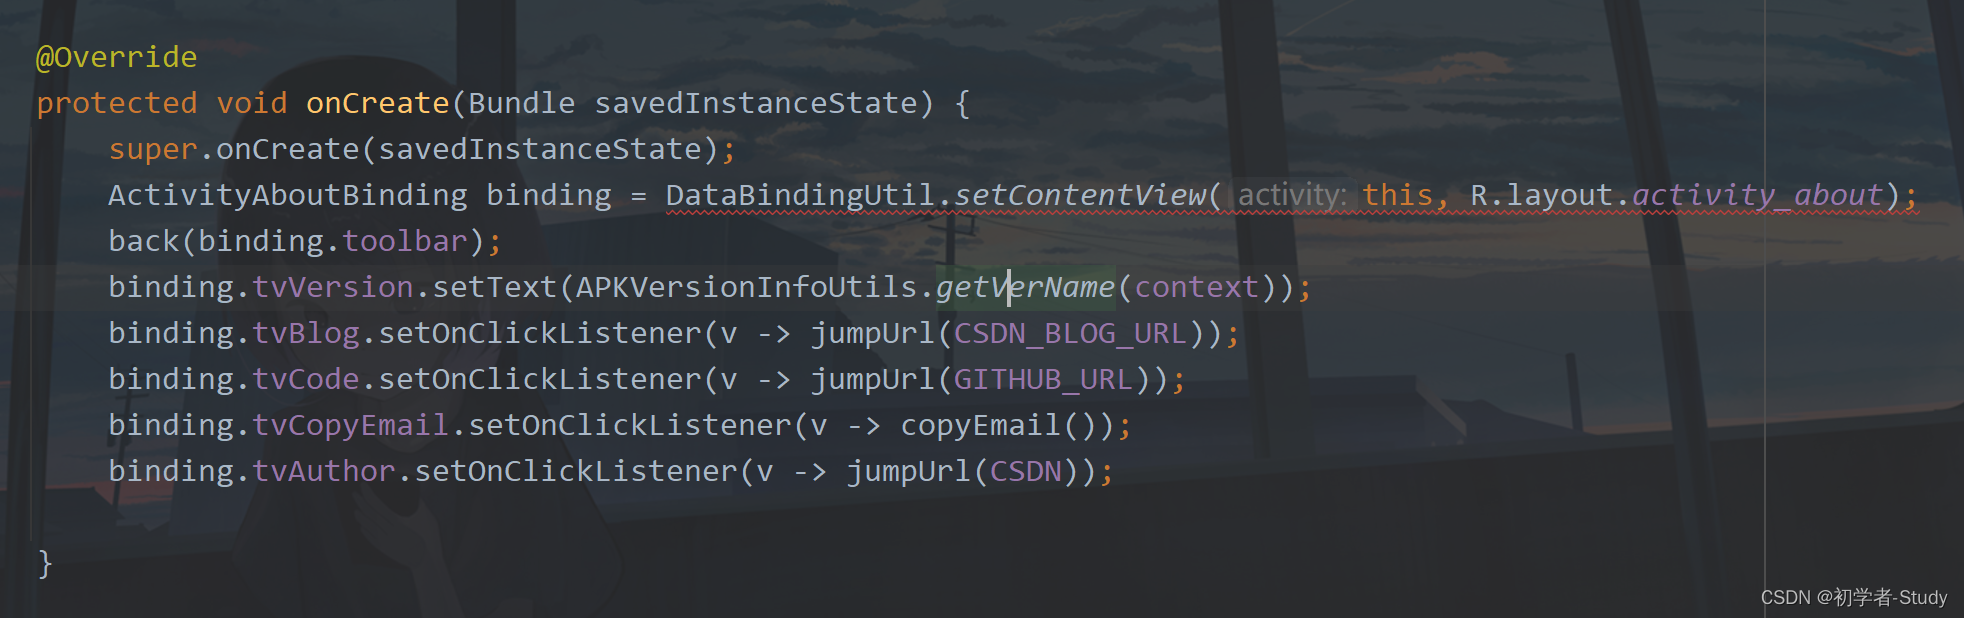
We found that there was an error in this place because the use of DataBinding was removed from our xml. What are the benefits of ViewBinding? As long as you configure which line of code, each xml layout file in your project will generate a corresponding class file, such as ActivityAboutBinding, which is generated in the same way as DataBinding. Let's first solve the problem of error reporting. It needs to be changed to use ViewBinding.
Here we can directly see the xml file corresponding to this Activity. You can run it again below:
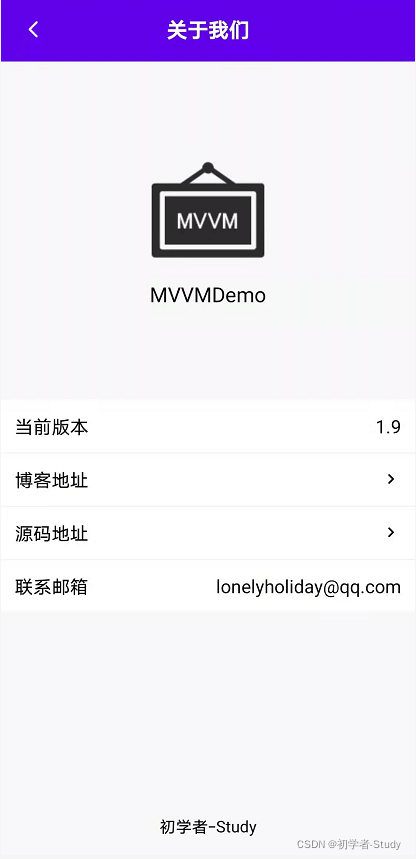
There will be no problem running.
4. Ignore layout file
Another problem here is that I just said that once ViewBinding is enabled, a class file will be generated for all xml files in the project. Can I not generate this file? Of course. Let's take the Activity just now as an example and add a line of code in xml.
tools:viewBindingIgnore="true"
Then you will report an error when you run it again. The error is as follows:
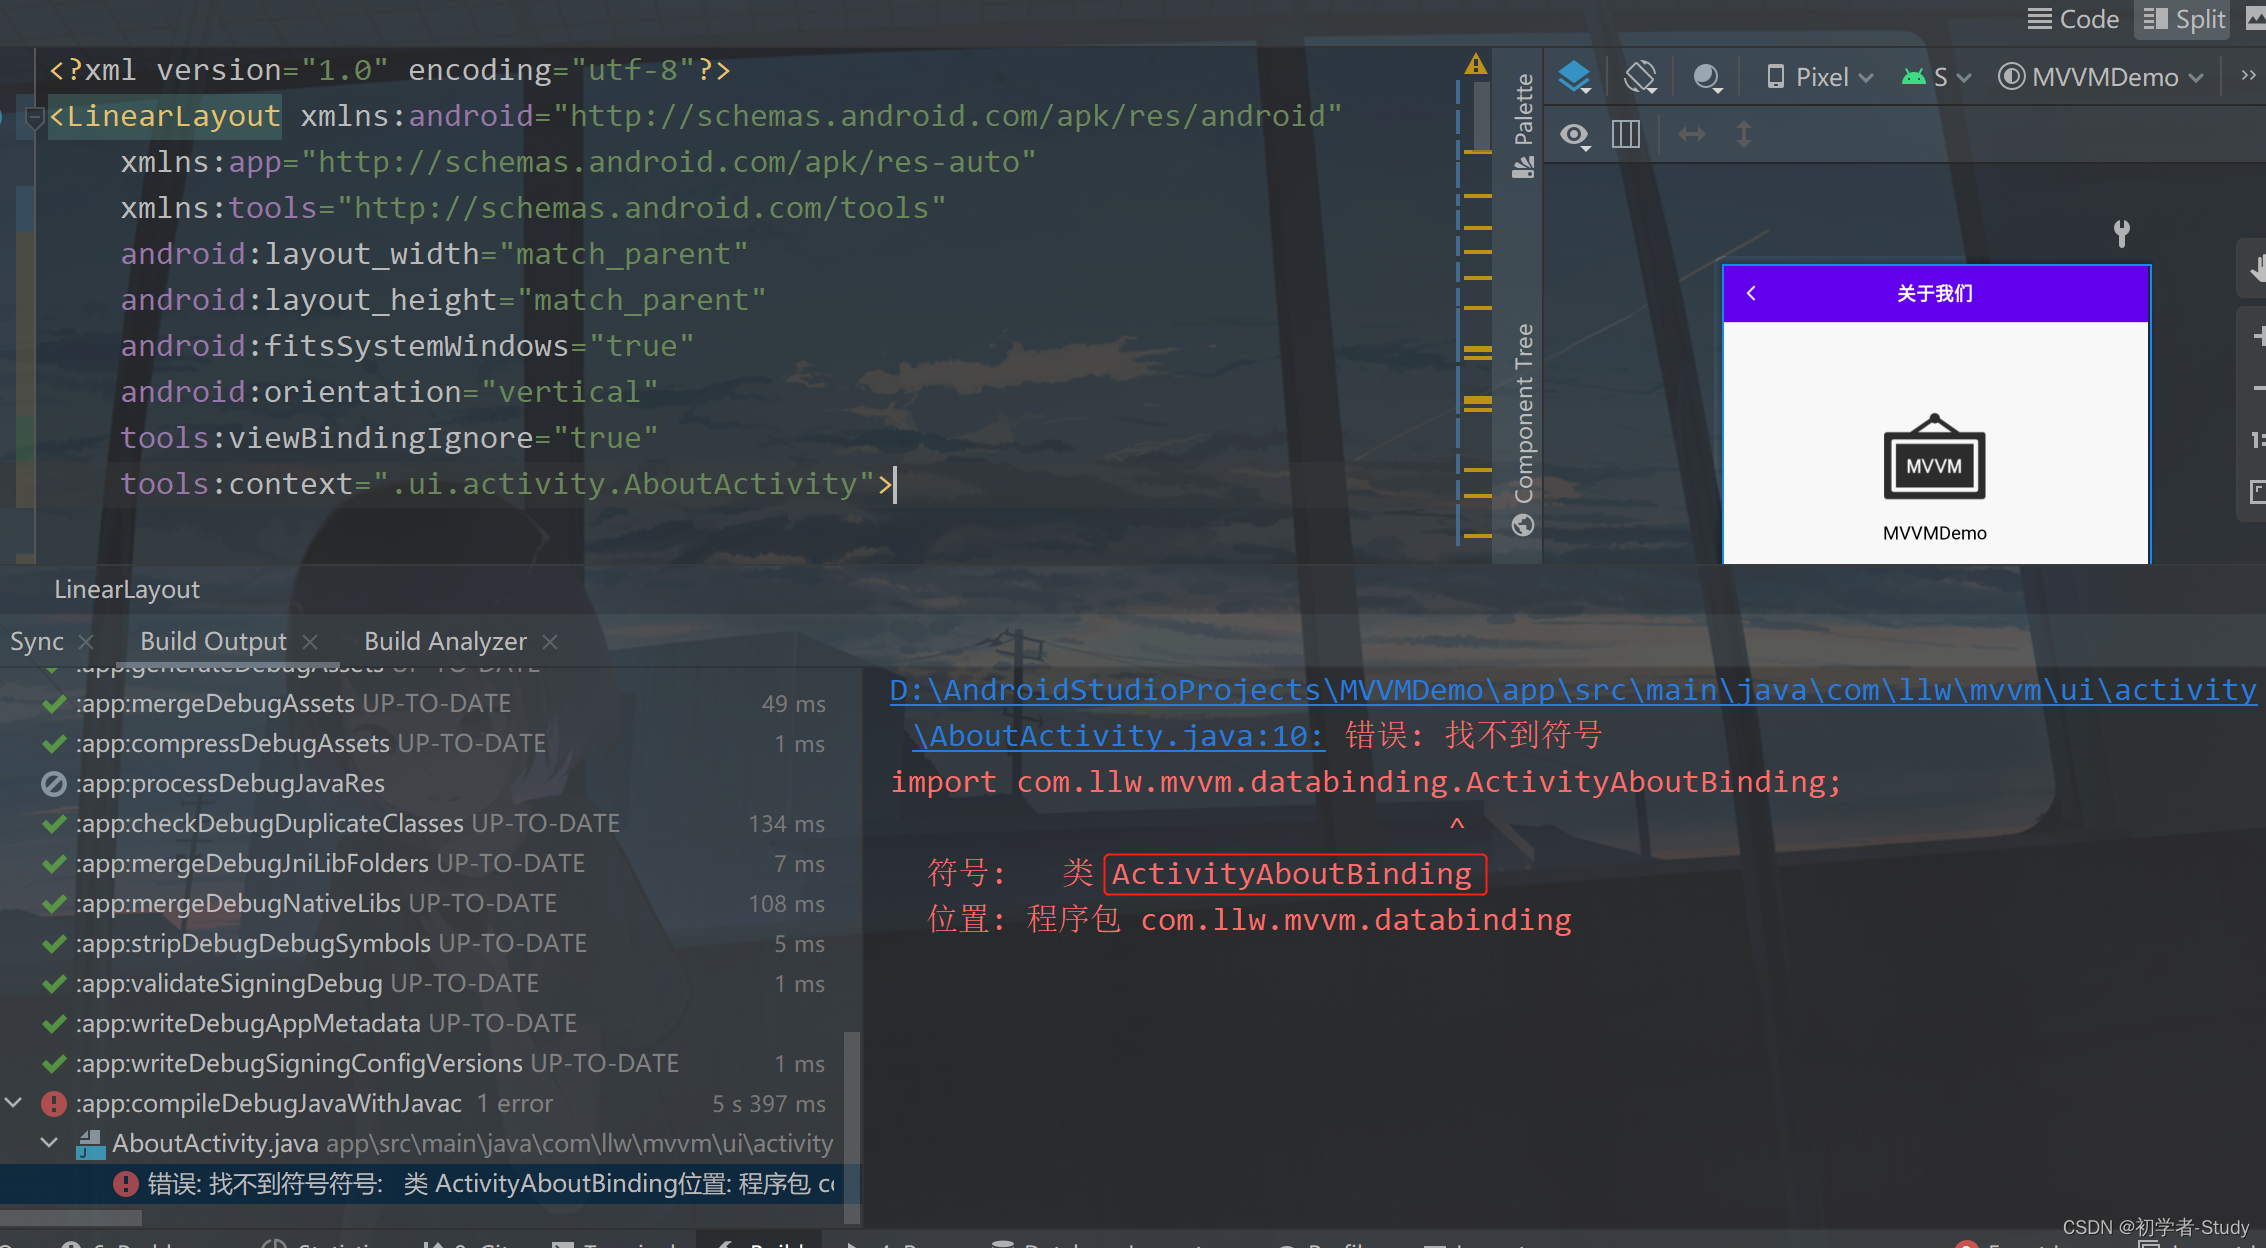
At this time, you can't use this class file. You need to use DataBinding or findViewById to obtain the control ID.
4, Activity Result API usage
if you upgrade the appcompat Library in the project to version 1.3.0 or later, you will find that the startActivityForResult() method has been abandoned. How is it abandoned?
This figure shows that although it is abandoned, it can still be used, but it is not guaranteed that it will be eliminated in a later version of Android. What can we use to replace it after it is abandoned? Using the Activity Result API, usually when we use startActivityForResult, we will open a system page, such as camera album, through the intention and request code, and then process the returned data in the onActivityResult callback, such as displaying the picture. This is what I did in the article on modifying the avatar, So what should we do if we want to make a replacement? In fact, it will be simpler than using this startActivityForResult now.
1. Page return processing
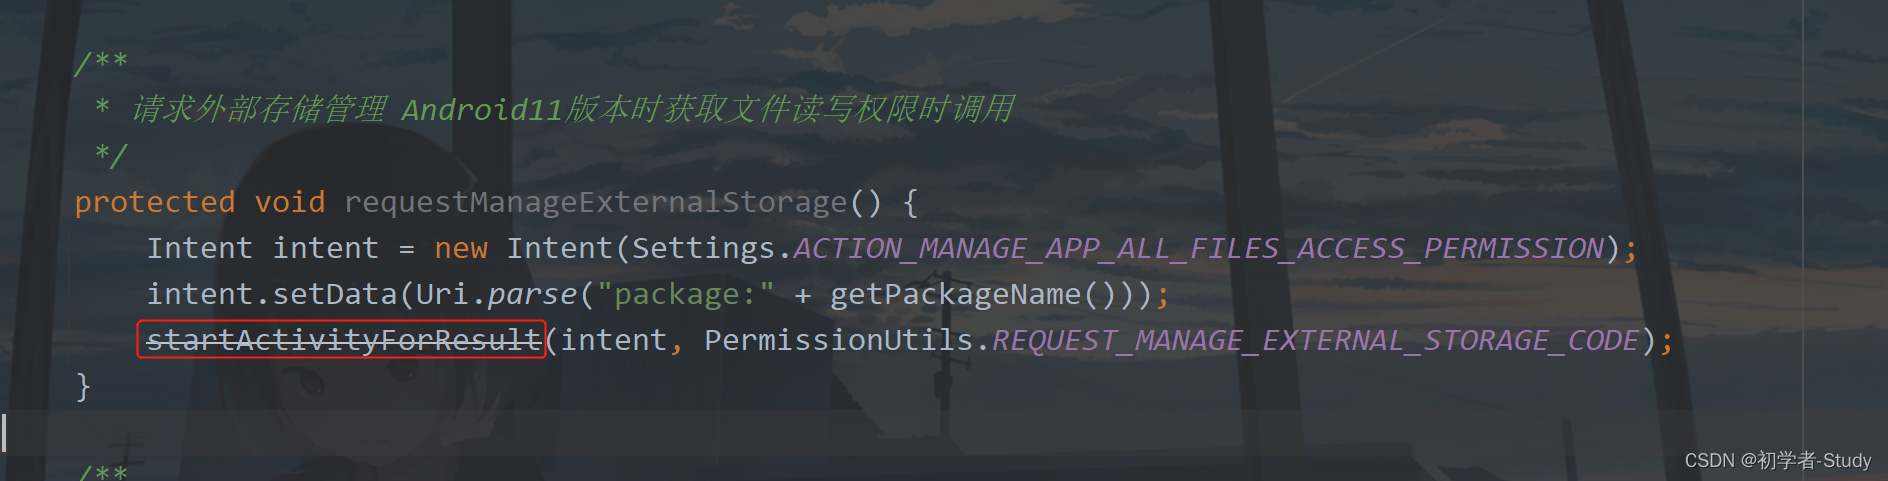
There is such a method in BaseActivity. The code is as follows:
	/**
     * Called when obtaining file read-write permission when requesting external storage management Android 11 version
     */
    protected void requestManageExternalStorage() {
        Intent intent = new Intent(Settings.ACTION_MANAGE_APP_ALL_FILES_ACCESS_PERMISSION);
        intent.setData(Uri.parse("package:" + getPackageName()));
        startActivityForResult(intent, PermissionUtils.REQUEST_MANAGE_EXTERNAL_STORAGE_CODE);
    }
This is aimed at the need to turn on the switch of external storage permission on Android 11 to access external storage. Here is a good example. What should we do with the new version of Activity Result API? Very simple, let's write such a method.
	/**
     * Call the new method when obtaining file read-write permission when requesting external storage management Android 11 version
     */
    protected void requestManageExternalStorage(ActivityResultLauncher<Intent> intentActivityResultLauncher) {
        Intent intent = new Intent(Settings.ACTION_MANAGE_APP_ALL_FILES_ACCESS_PERMISSION);
        intent.setData(Uri.parse("package:" + getPackageName()));
        intentActivityResultLauncher.launch(intent);
    }
Here you can see that I passed in a parameter. The intentActivityResultLauncher needs to be initialized where it is used. Before, it was used in HomeActivity, and now it is still used to create variables in HomeActivity:
	/**
     * General use jump through intention
     */
    private ActivityResultLauncher<Intent> intentActivityResultLauncher;
Then we write a registered method to initialize the variable in the register method.
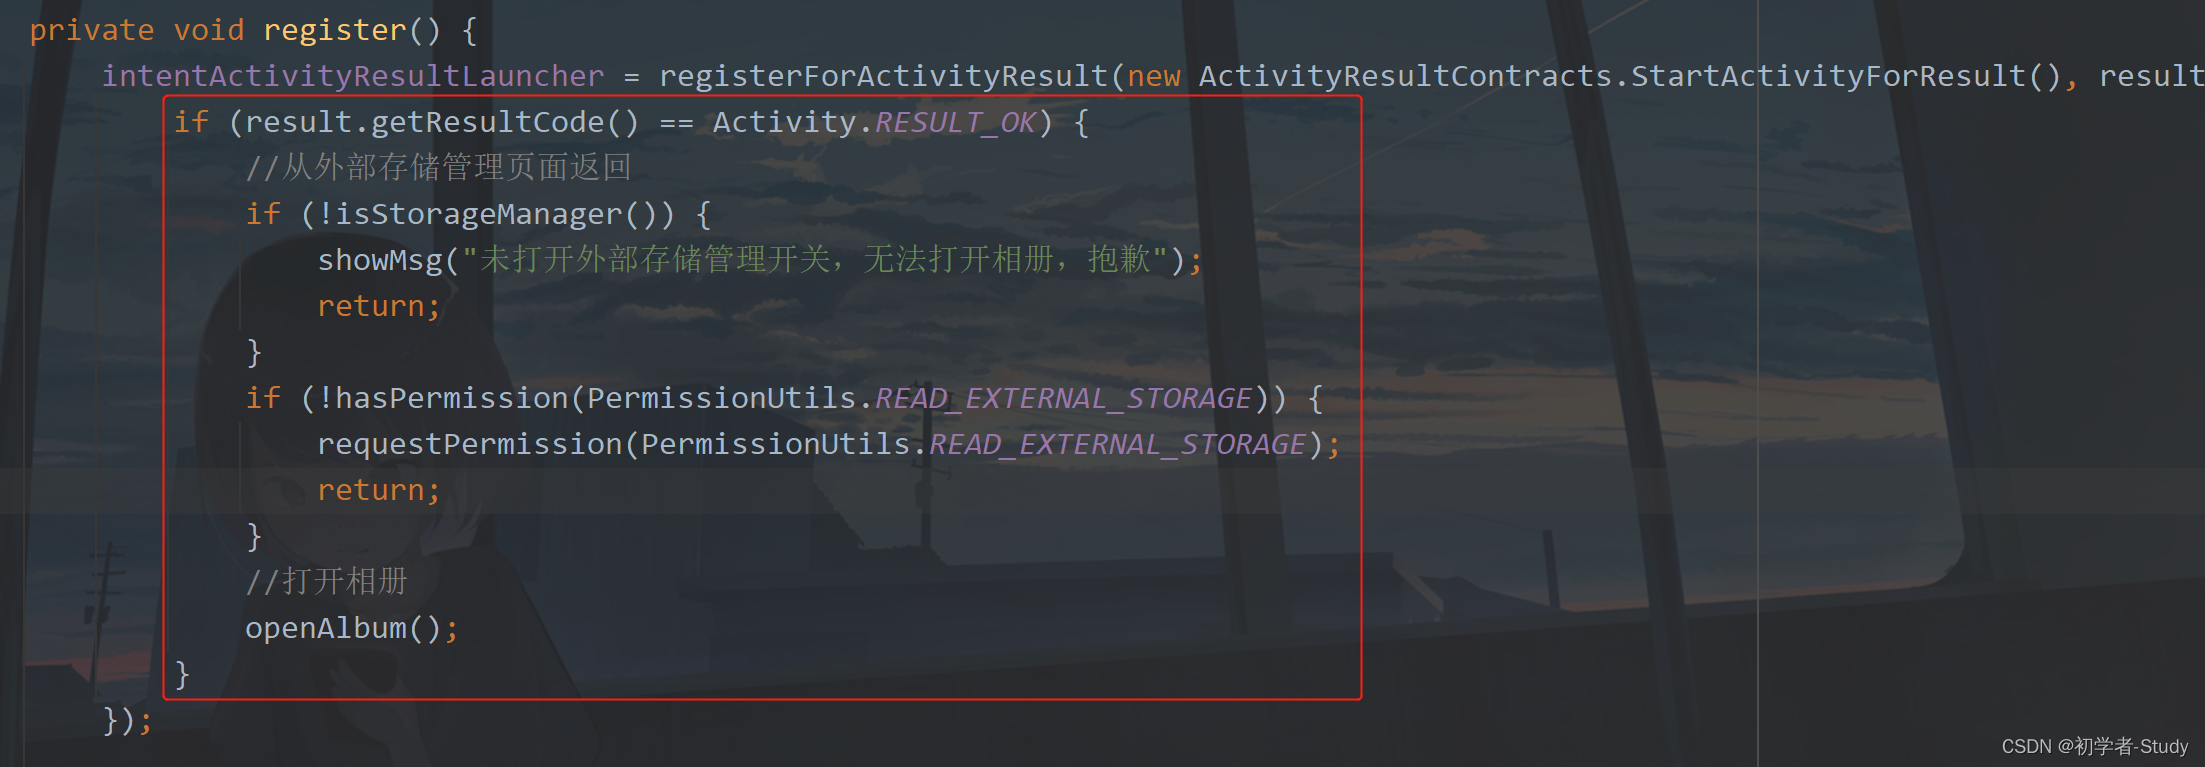
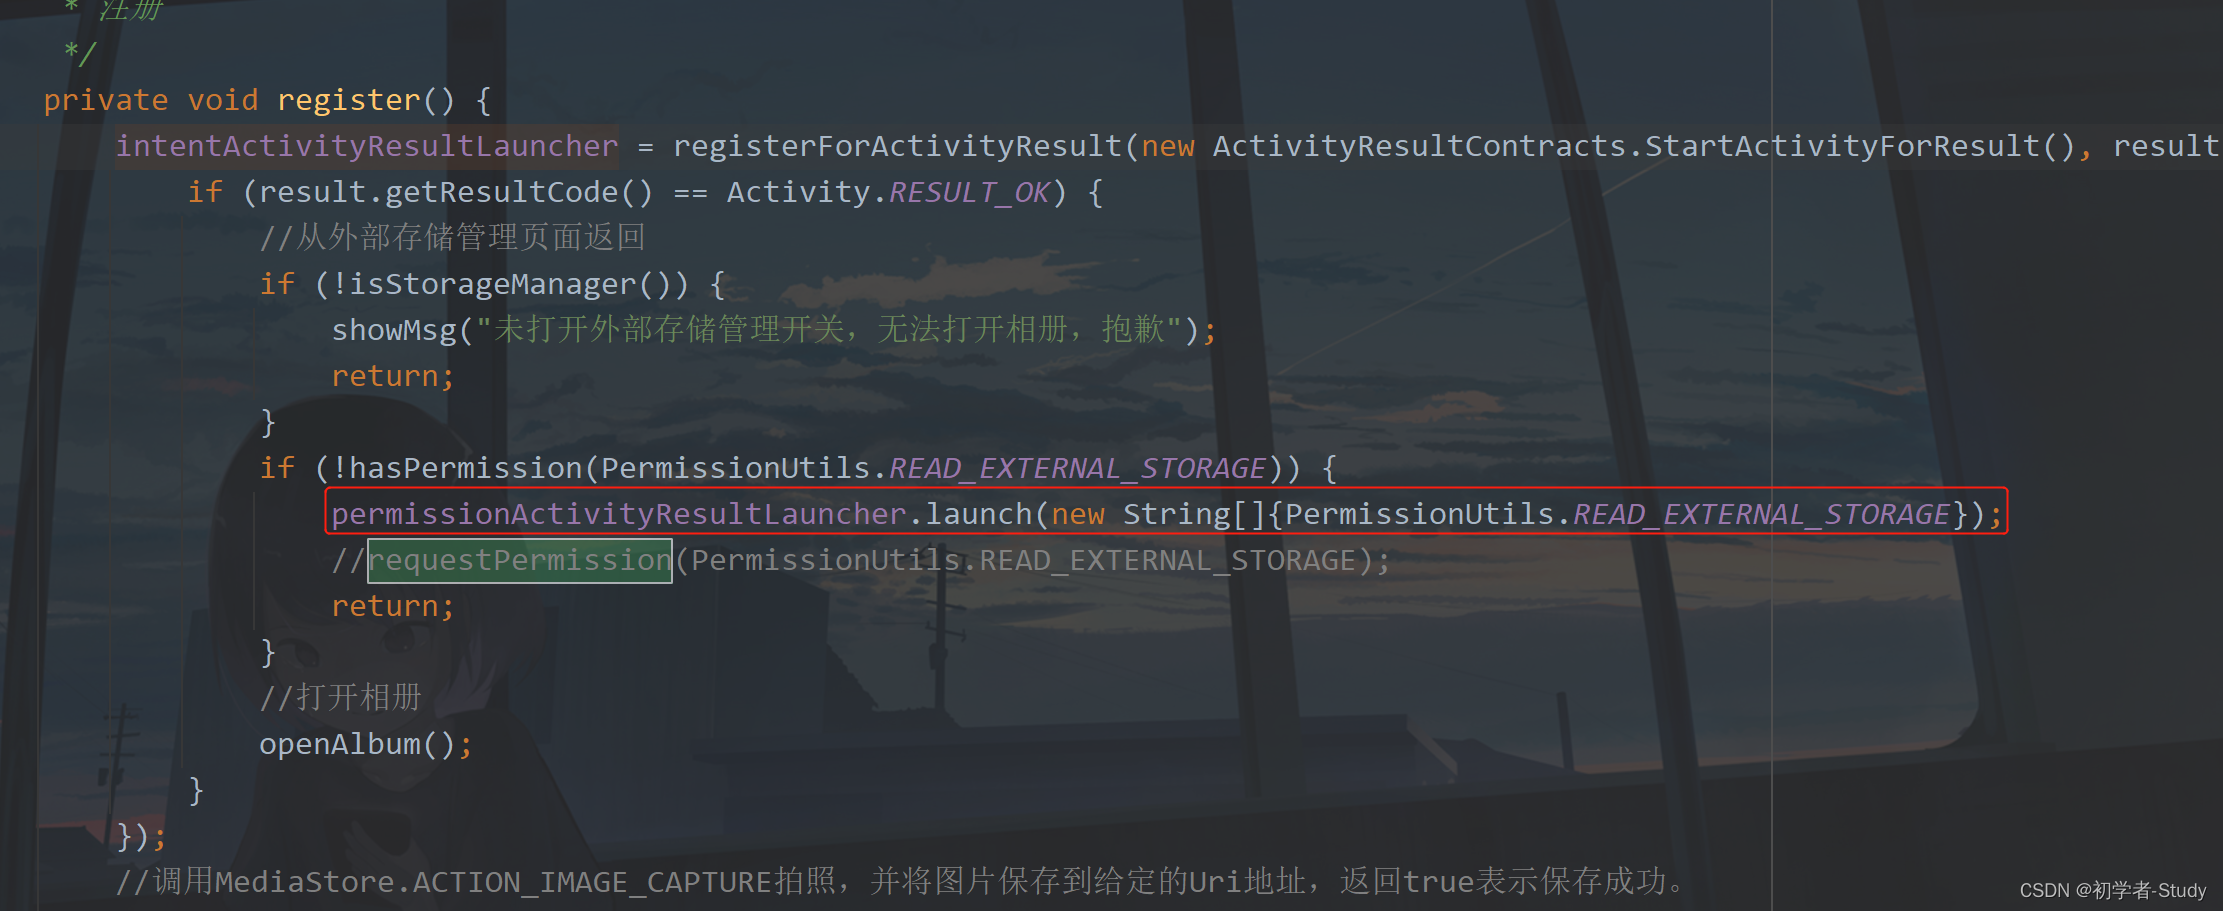
	private void register() {
        intentActivityResultLauncher = registerForActivityResult(new ActivityResultContracts.StartActivityForResult(), result -> {
            if (result.getResultCode() == Activity.RESULT_OK) {
                //Return from the external storage management page
                if (!isStorageManager()) {
                    showMsg("The external storage management switch is not turned on. We can't open the album. Sorry");
                    return;
                }
                if (!hasPermission(PermissionUtils.READ_EXTERNAL_STORAGE)) {
                    requestPermission(PermissionUtils.READ_EXTERNAL_STORAGE);
                    return;
                }
                //Open Album
                openAlbum();
            }
        });
    }
You will be familiar with this part of the code, as shown in the figure below:
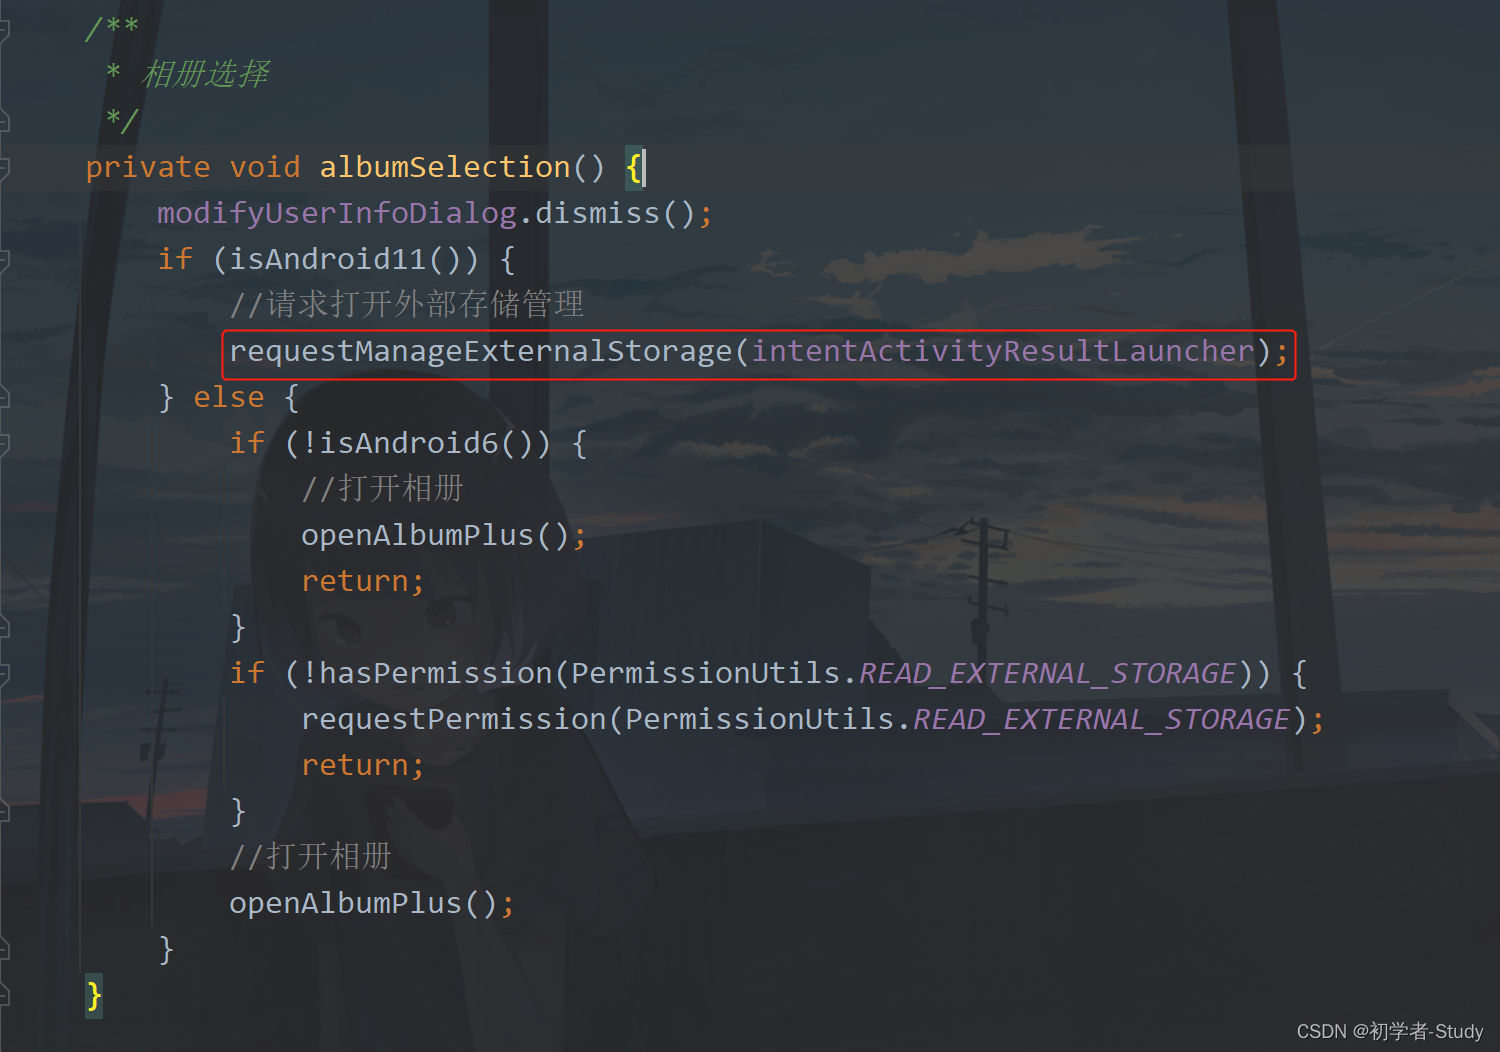
Because in the previous article, this code was written in the onActivityResult callback. Now we write it here, which means that the callback result can be obtained here. Then what we need to do is to change the place where requestManageExternalStorage is called and fill in the parameters, as shown in the following figure:
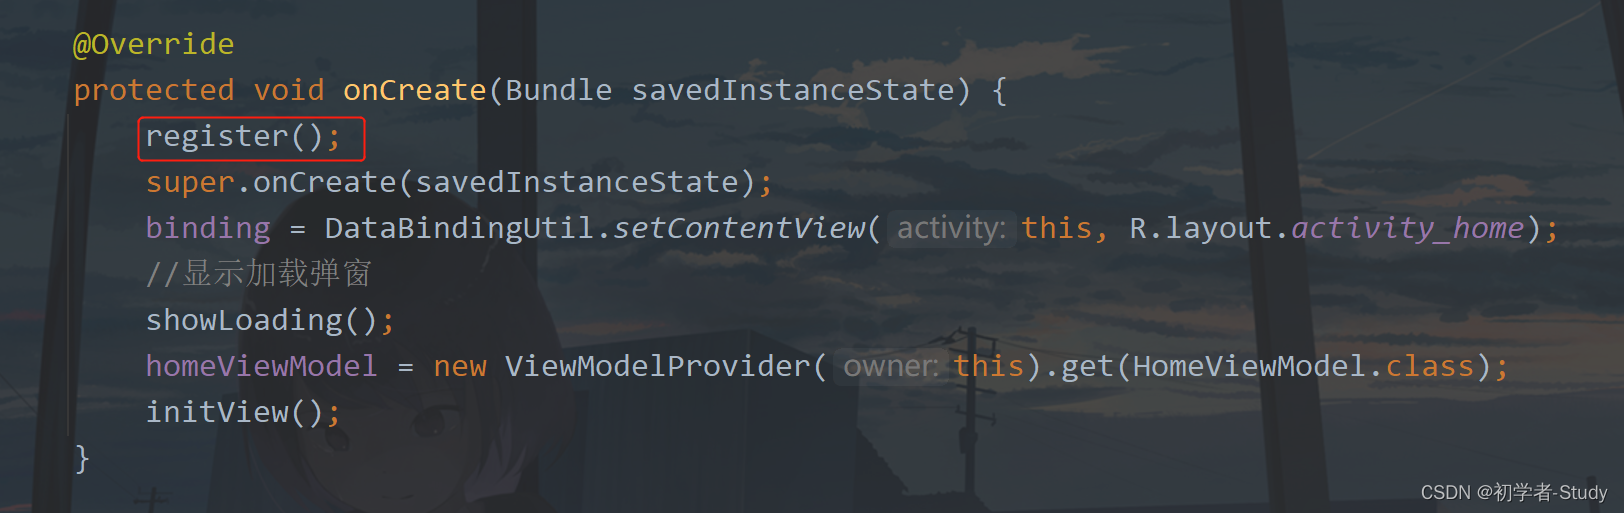
Due to the particularity of this Api, it needs to register when onCreate, and call it as shown in the figure below.
Here is the page return. Let's see how to deal with parameters, such as taking photos and obtaining pictures.
2. Photo return processing
Create a variable in HomeActivity with the following code
	/**
     * Photo activity result launcher
     */
    private ActivityResultLauncher<Uri> takePictureActivityResultLauncher;
Then we initialize this variable and still write it in the register method. The code is as follows:
		//Call mediastore ACTION_ IMAGE_ Capture takes pictures and saves the pictures to the given Uri address. Returning true indicates that the saving is successful.
        takePictureActivityResultLauncher = registerForActivityResult(new ActivityResultContracts.TakePicture(), result -> {
            if (result) {
                modifyAvatar(mCameraUri.toString());
            }
        });
This is through activityresultcontracts Takepicture calls the system to take photos. This is Google's encapsulated method API. We can call it directly. Returns a Boolean result value. If it is true, we will display this image.
The mCameraUri here has no value yet and needs to be assigned at startup. We add a new method in HomeActivity. The code is as follows:
	/**
     * New photos
     */
    private void takePicture() {
        mCameraUri = getContentResolver().insert(Environment.getExternalStorageState().equals(Environment.MEDIA_MOUNTED) ?
                MediaStore.Images.Media.EXTERNAL_CONTENT_URI : MediaStore.Images.Media.INTERNAL_CONTENT_URI, new ContentValues());
        takePictureActivityResultLauncher.launch(mCameraUri);
    }
Then replace the previous openCamera method. You can even comment out or delete this method. After the replacement, you can run it again and take pictures with the camera. You will find that it is still normal, but it looks much refreshing.
3. Get picture return processing
First, create a variable in HomeActivity. The code is as follows:
	/**
     * Album activity results launcher
     */
    private ActivityResultLauncher<String[]> openAlbumActivityResultLauncher;
Then, variable initialization is still carried out in register. The code is as follows:
		// Prompt the user to select a document and return its Uri.
        openAlbumActivityResultLauncher = registerForActivityResult(new ActivityResultContracts.OpenDocument(), result -> {
            modifyAvatar(result.toString());
        });
The last is the place to call. Here I will directly change the original method, as shown in the figure below.
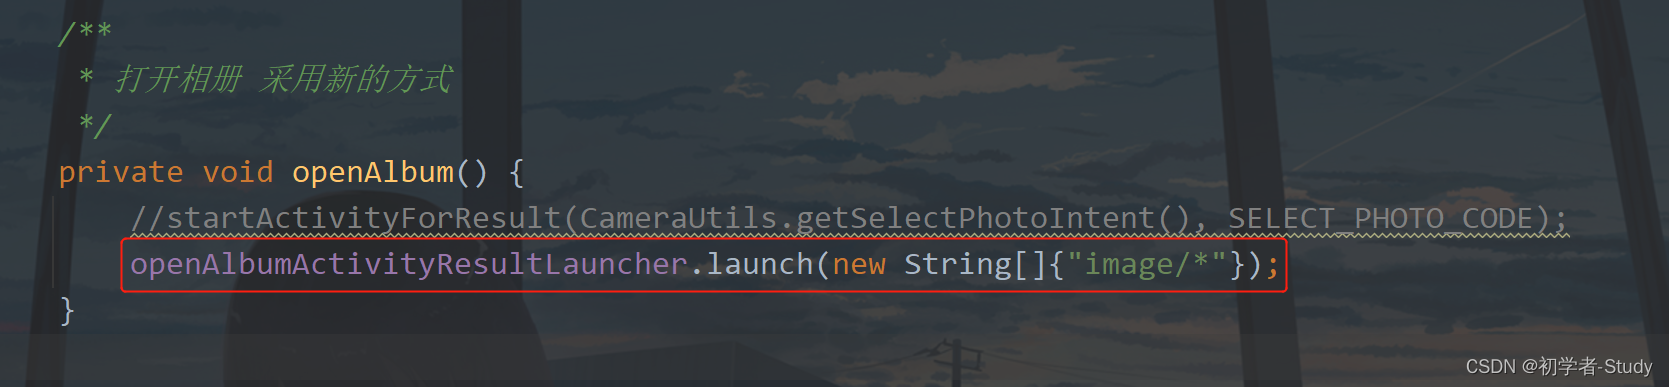
Now we basically have no request code, and we no longer need the onActivityResult method. Comment or delete it directly, and then let's run it to see the effect:

Relaxed and happy, isn't it? The Activity Result API also provides some common APIs, as shown in the following figure:
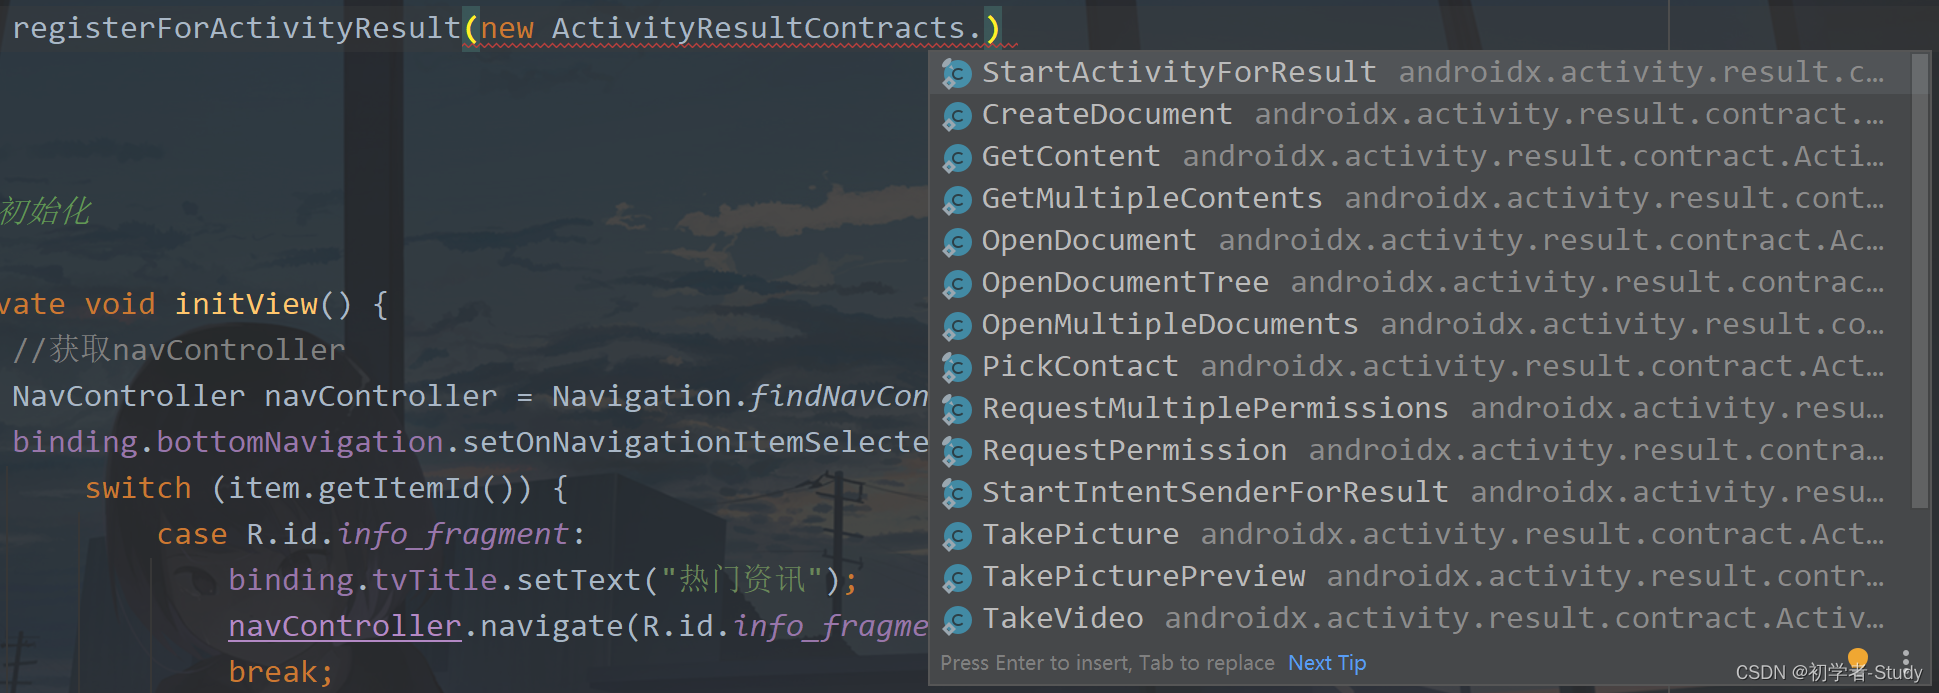
StartActivityForResult: //The general Contract does not make any conversion, with Intent as input and ActivityResult as output. This is also the most commonly used Contract.
RequestMultiplePermissions:  //Used to request a set of permissions
RequestPermission: //Used to request individual permissions
TakePicturePreview: //Call mediastore ACTION_ IMAGE_ Capture takes pictures, and the return value is Bitmap pictures
TakePicture: //Call mediastore ACTION_ IMAGE_ Capture takes pictures and saves the pictures to the given Uri address. Returning true indicates that the saving is successful.
TakeVideo: //Call mediastore ACTION_ VIDEO_ Capture captures a video, saves it to a given Uri address, and returns a thumbnail.
PickContact: //Get contacts from the address book APP
GetContent: //Prompt to select a content and return a Uri address (in the form of content: / /) that accesses the native data through ContentResolver#openInputStream(Uri). By default, it adds intent#category_ Open, returns the content that can represent the stream.
CreateDocument: //Prompt the user to select a document and return a Uri starting with (file:/http:/content:).
OpenMultipleDocuments: //Prompt the user to select documents (multiple documents can be selected), and return their URIs respectively in the form of List.
OpenDocumentTree: //Prompt the user to select a directory and return the selected as a Uri. The application can fully manage the documents in the returned directory.
I seem to see the permission request, so let's try whether this permission request can work.
4. Permission request return
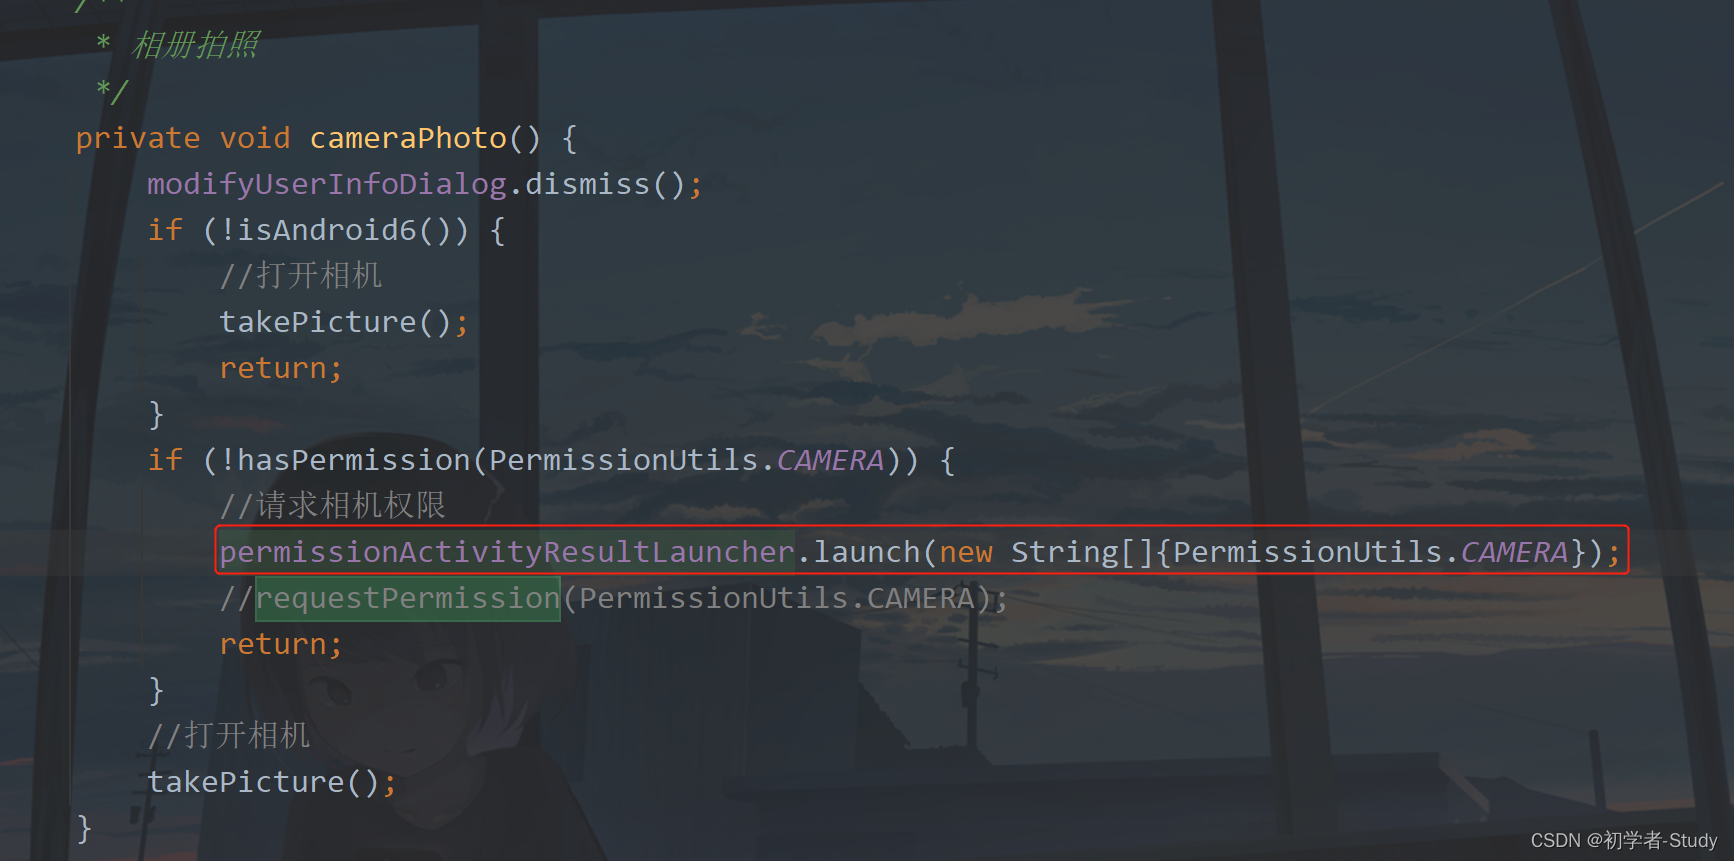
first of all, in HomeActivity, permission requests are only made when they are needed, rather than all requests. We need to let users know when and what permissions are needed. I did the same before, but I used the dynamic permission request method before Android, Will it be easier for us to use this new API? It will be simpler, but you need to be familiar with this usage first.
Since we request three different permissions on one page, we register the same result processor and request different permissions at different times. First, create a variable.
	/**
     * Page permission request result launcher
     */
    private ActivityResultLauncher<String[]> permissionActivityResultLauncher;
Then add the following code in the register method:
		//Multiple permissions return results
        permissionActivityResultLauncher = registerForActivityResult(new ActivityResultContracts.RequestMultiplePermissions(), result -> {
            if (result.containsKey(PermissionUtils.CAMERA)) {
                //Camera permissions
                if (!result.get(PermissionUtils.CAMERA)) {
                    showMsg("You have denied camera permission and cannot open the camera. Sorry.");
                    return;
                }
                takePicture();
            } else if (result.containsKey(PermissionUtils.READ_EXTERNAL_STORAGE)) {
                //file reservation
                if (!result.get(PermissionUtils.READ_EXTERNAL_STORAGE)) {
                    showMsg("You have denied permission to read and write files. We can't open the album. Sorry.");
                    return;
                }
                openAlbum();
            } else if (result.containsKey(PermissionUtils.LOCATION)) {
                //Location permission
                if (!result.get(PermissionUtils.LOCATION)) {
                    showMsg("You have rejected the location permission. You will not be able to use the map. Sorry.");
                }
            }
        });
There are three permissions here. Therefore, a Map is returned. Judge the corresponding Key in the return, and then deal with whether the permission is agreed or not.
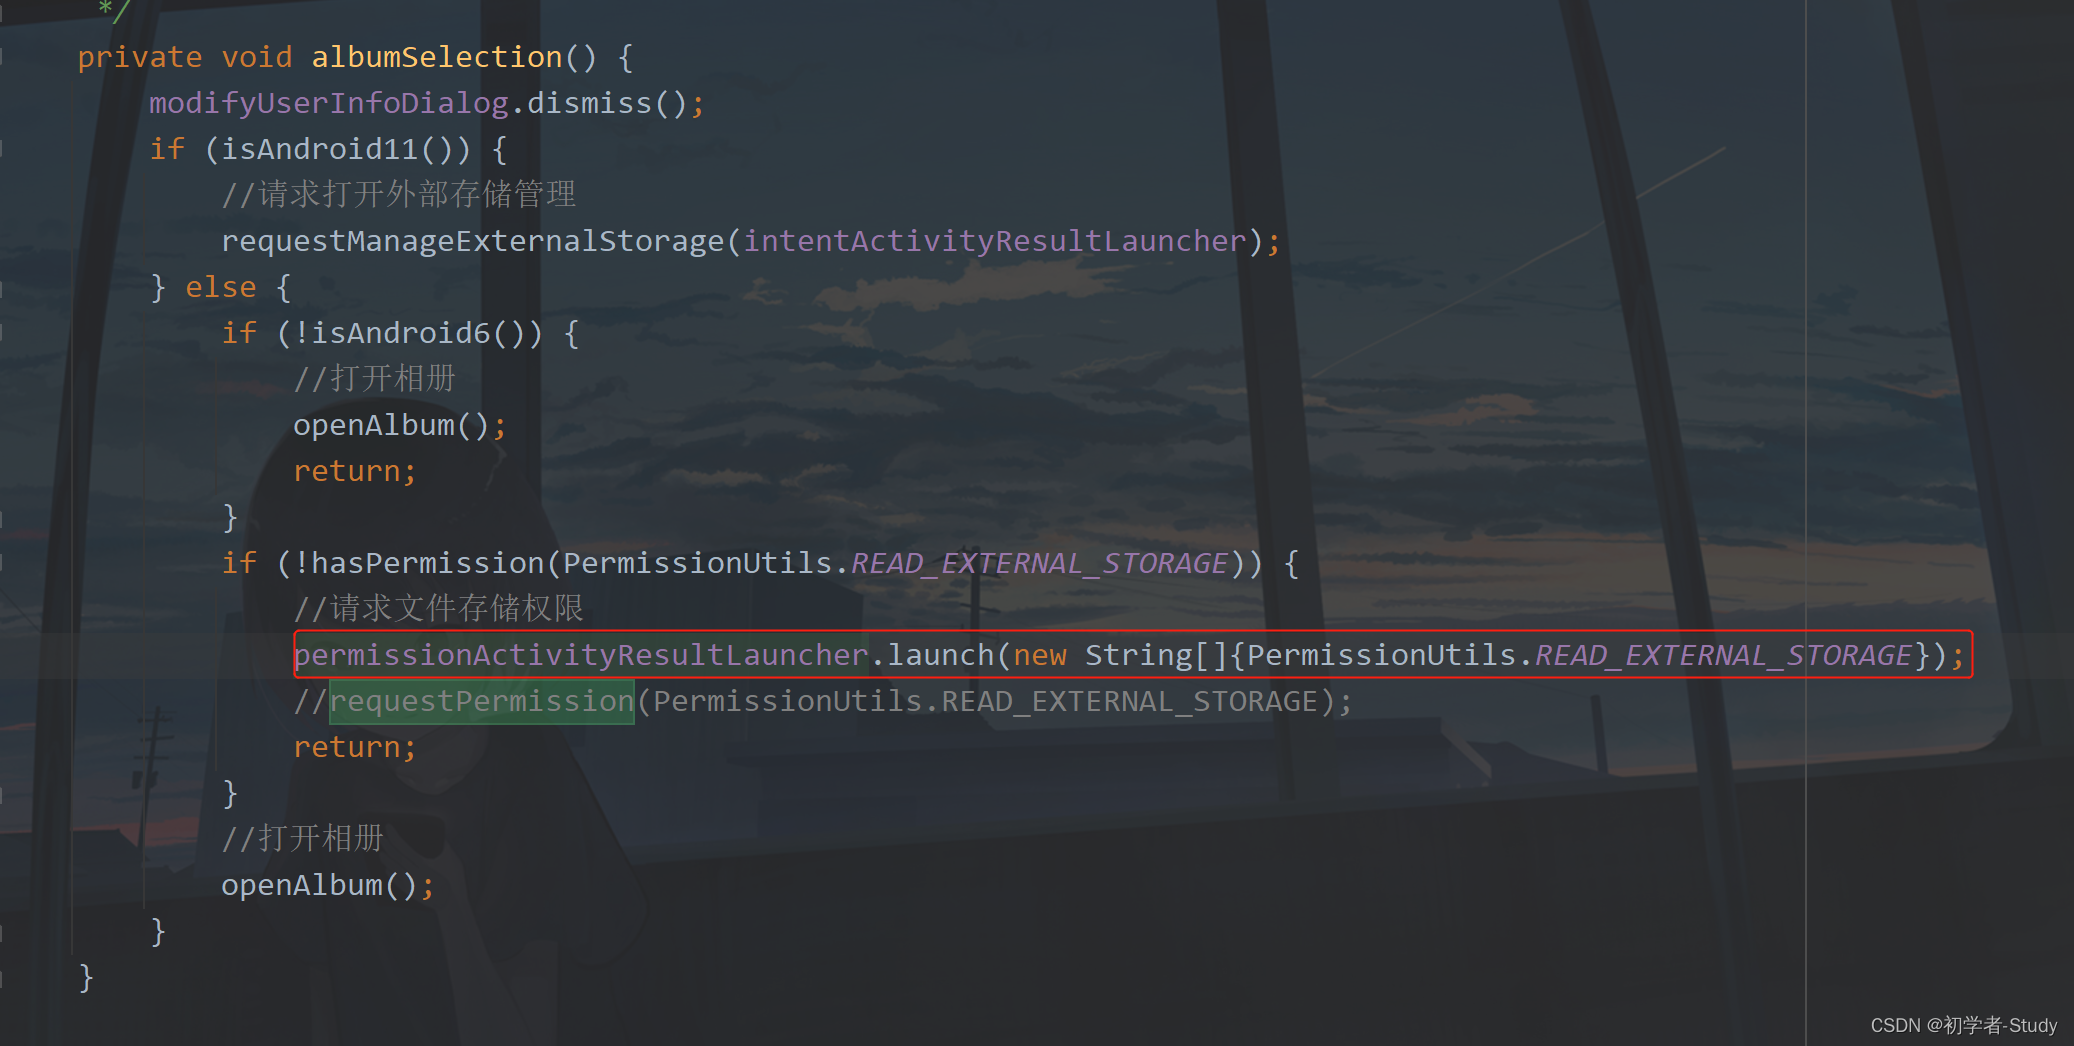
Then there are the places where permission is requested. We need to modify four places.
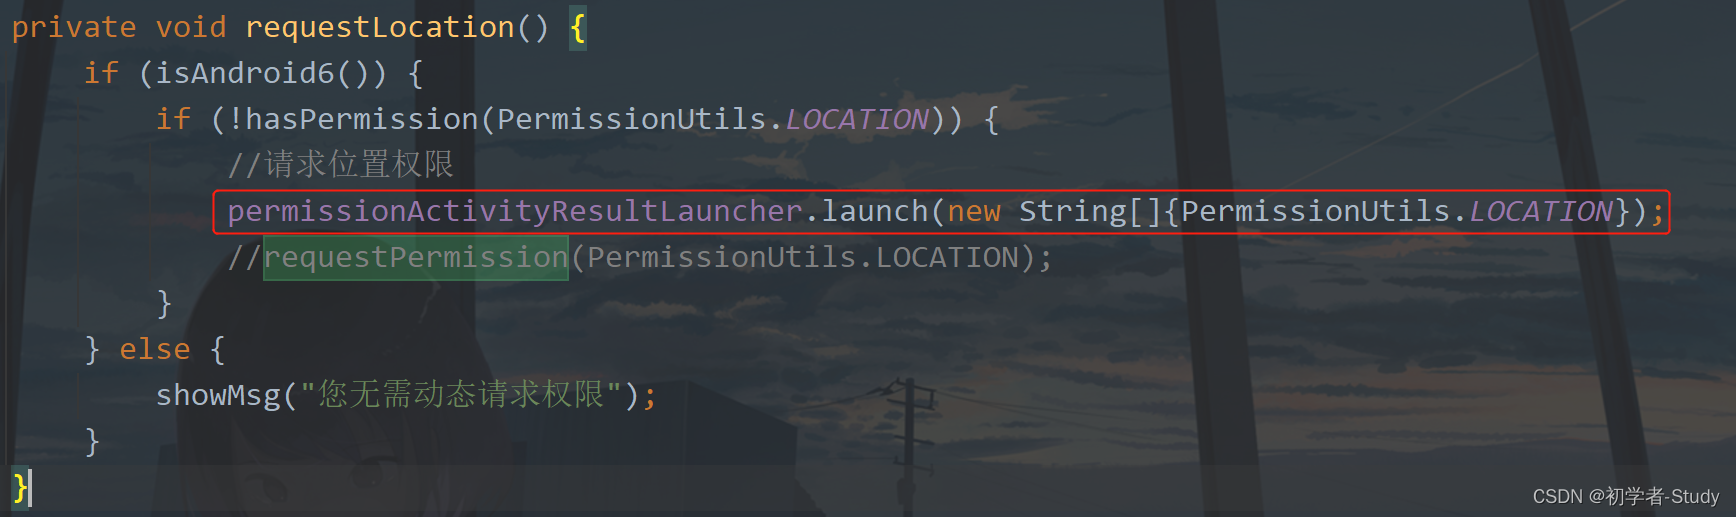
So far, our permission request and return have been handled. It's so simple. You can comment or delete the onRequestPermissionsResult method. Let's run it:

OK, there's no problem. This Activity Result API is still very easy to use. It's recommended to try it more. You won't know it's really fragrant until you use it. Now we can remove redundant code and useless comments from HomeActivity.
Well, that's all for this article. We'll see you later~
5, Source code
If it helps you, you can Fork or Star GitHub: MVVM-Demo CSDN: MVVMDemo_10.rar