Write in front
In the process of Android development, the author has encountered many pits. Without the accumulation of many years of development experience, it is difficult for a beginner to find out what the problem is. This article is the author's review of many pits encountered previously, records and sorts them out for beginners to learn and refer to. If a big man finds that what is wrong, please forgive and correct it. Thank you very much.
Long text warning!!
1, UI
In fact, I feel that the most common problem is the UI problem, so I put it in the front.
1. UI - Java code dynamically sets control width and height parameters
If we want to set the width of a UI control, for example, when modifying the width of TextView, we can't call TextView directly Setwidth () method, which means to set its maximum range,
2. UI - AlertDialog custom layout
I personally use two methods to customize the AlertDialog layout. Both methods can be implemented functionally. The difference is that the first method is convenient for single use and the second method is convenient for reuse.
Method 1: simple code customization
(start by throwing bricks and attracting jade)
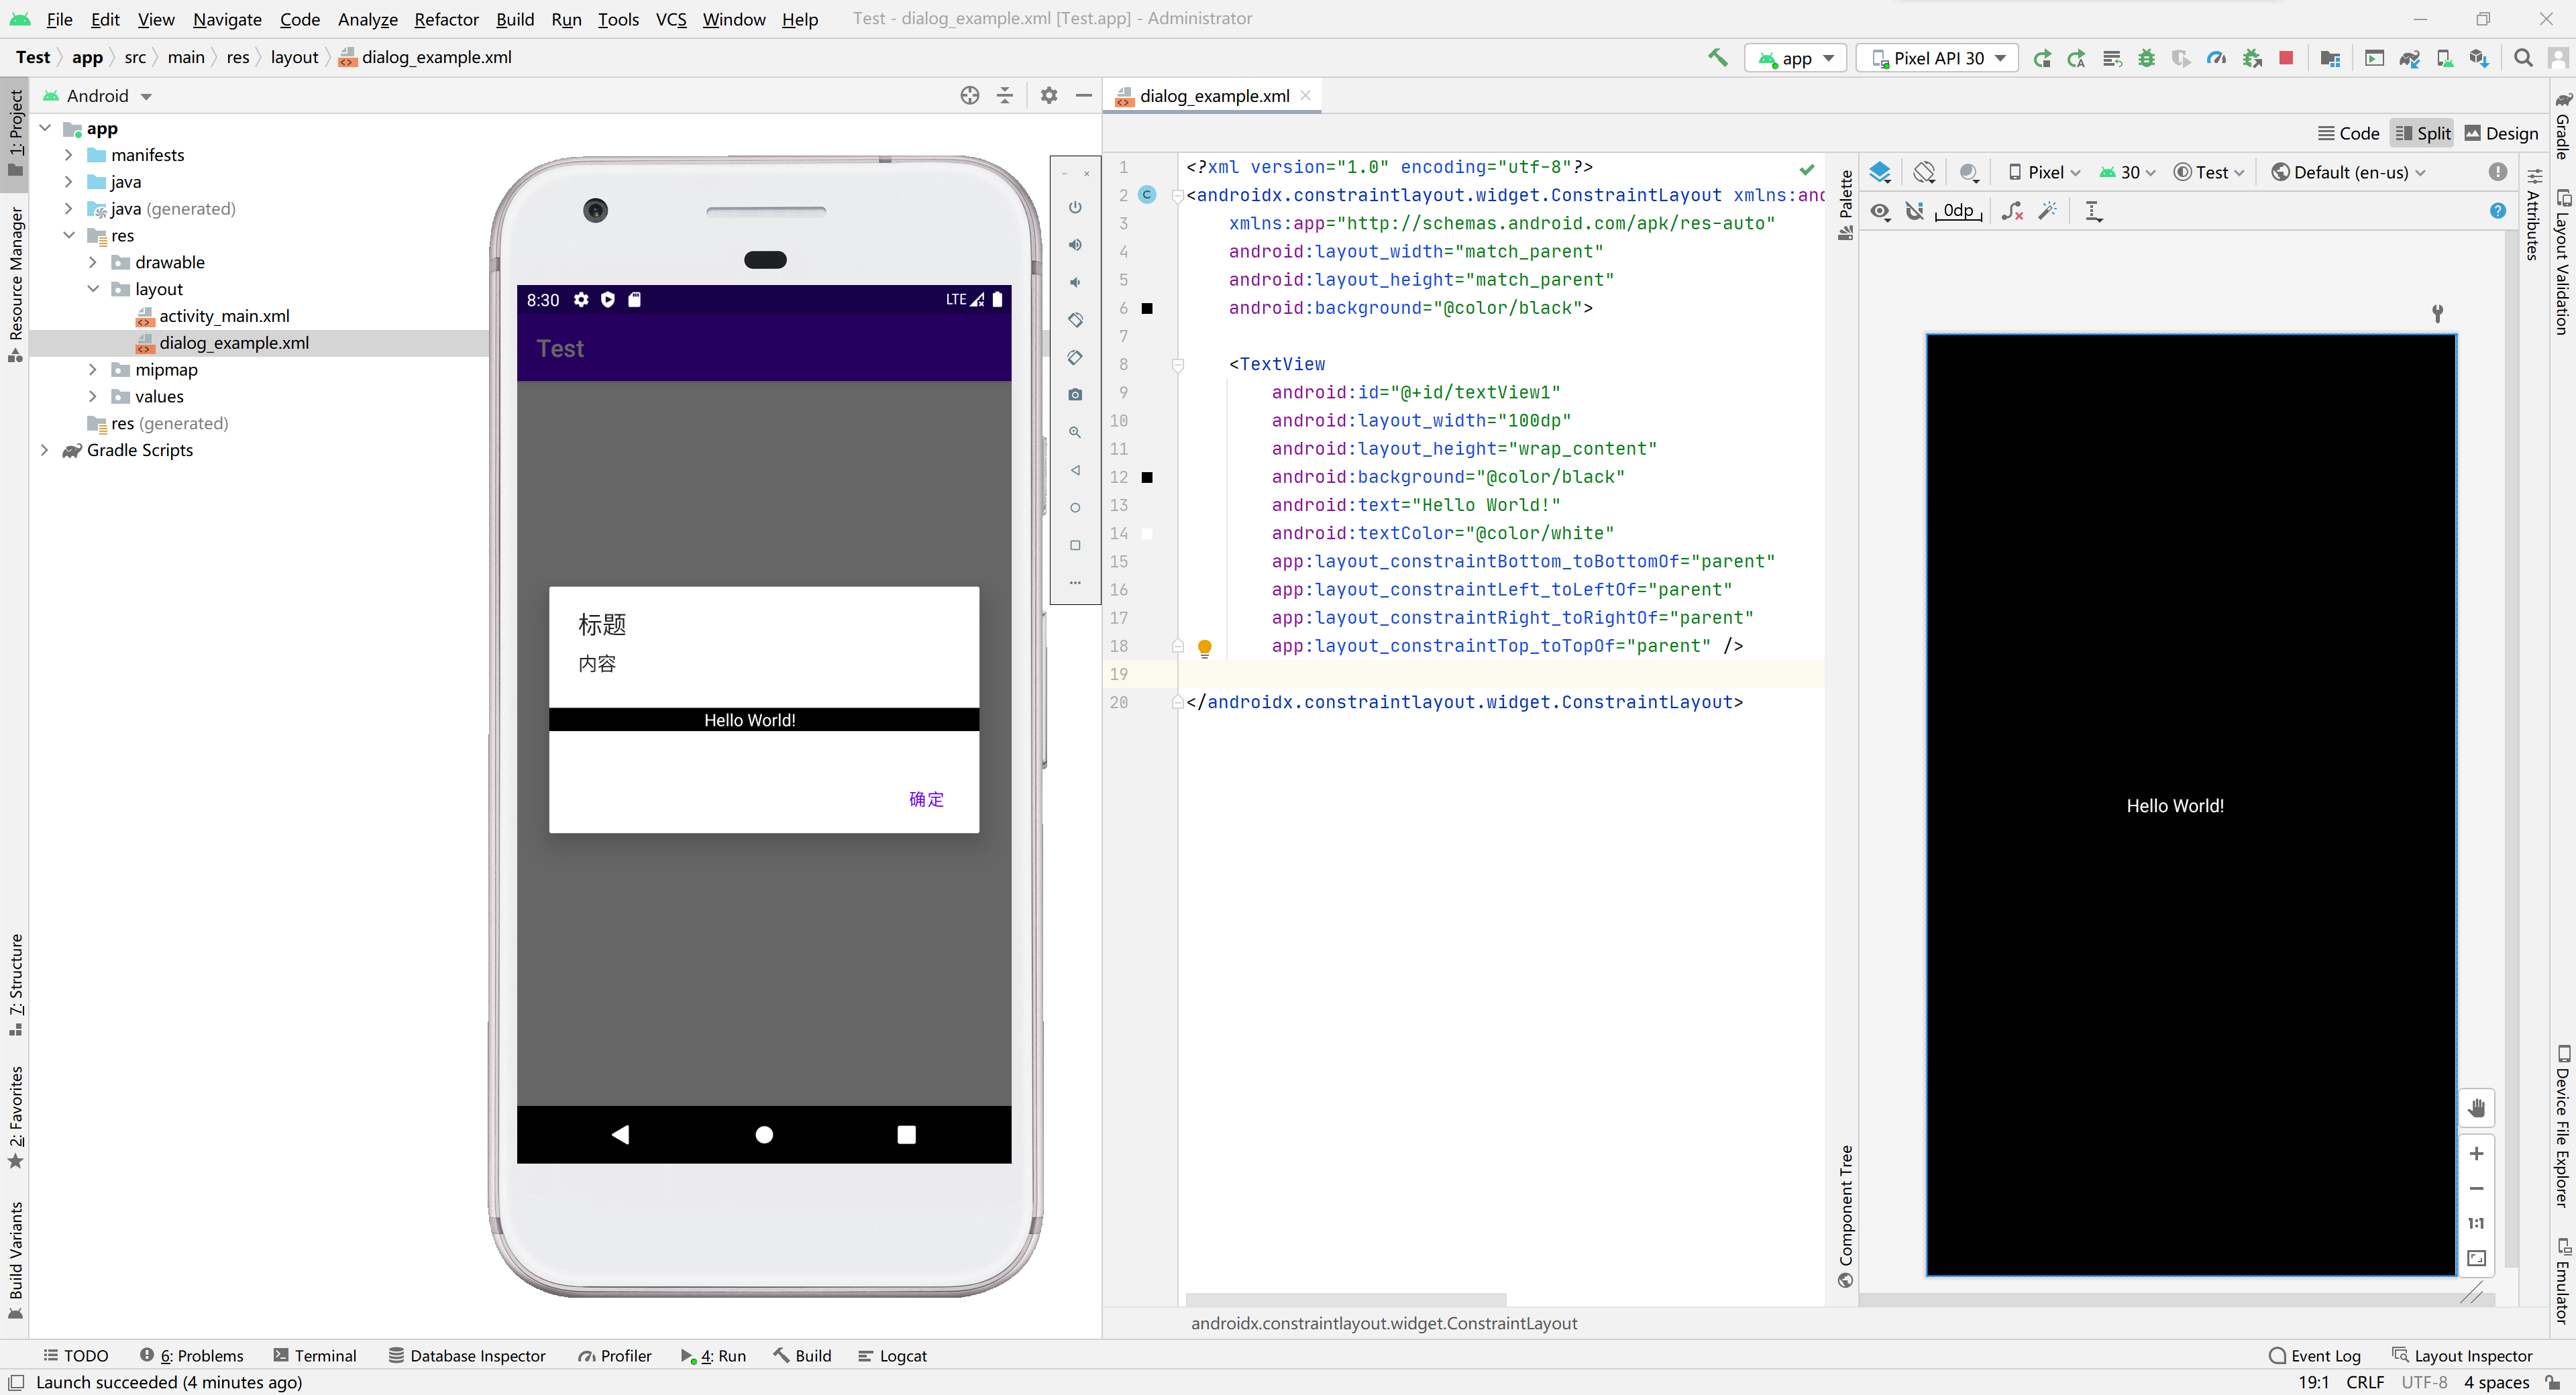
If you want to customize the AlertDialog layout, the easiest way is to setView while setTitle, setMessage and setPositiveButton. The following code is shown:
LayoutInflater inflater = LayoutInflater.from(MainActivity.this);
View view = inflater.inflate(R.layout.dialog_example,null);
new AlertDialog.Builder(MainActivity.this)
        .setView(view)
        .setTitle("title")
        .setMessage("content")
        .setPositiveButton("determine",null)
        .create().show();
Where, dialog_example is the layout you created under res/layout. Yes, it is the folder where the activity layout file is placed. The following is the effect diagram:
(end)
But some students asked, I clearly set the background for the root layout to be black. Why is there only a custom layout in the middle? If you want to customize the entire AlertDialog, there are two methods to choose from. If you don't need reuse, you can directly use the following method:
AlertDialog alertDialog = new AlertDialog.Builder(MainActivity.this).create();
// You must show first
alertDialog.show();
// Build the view layout displayed by alertDialog
View view = LayoutInflater.from(this).inflate(R.layout.dialog_example, null);
// Set layout
Window window = alertDialog.getWindow();
window.setContentView(view);
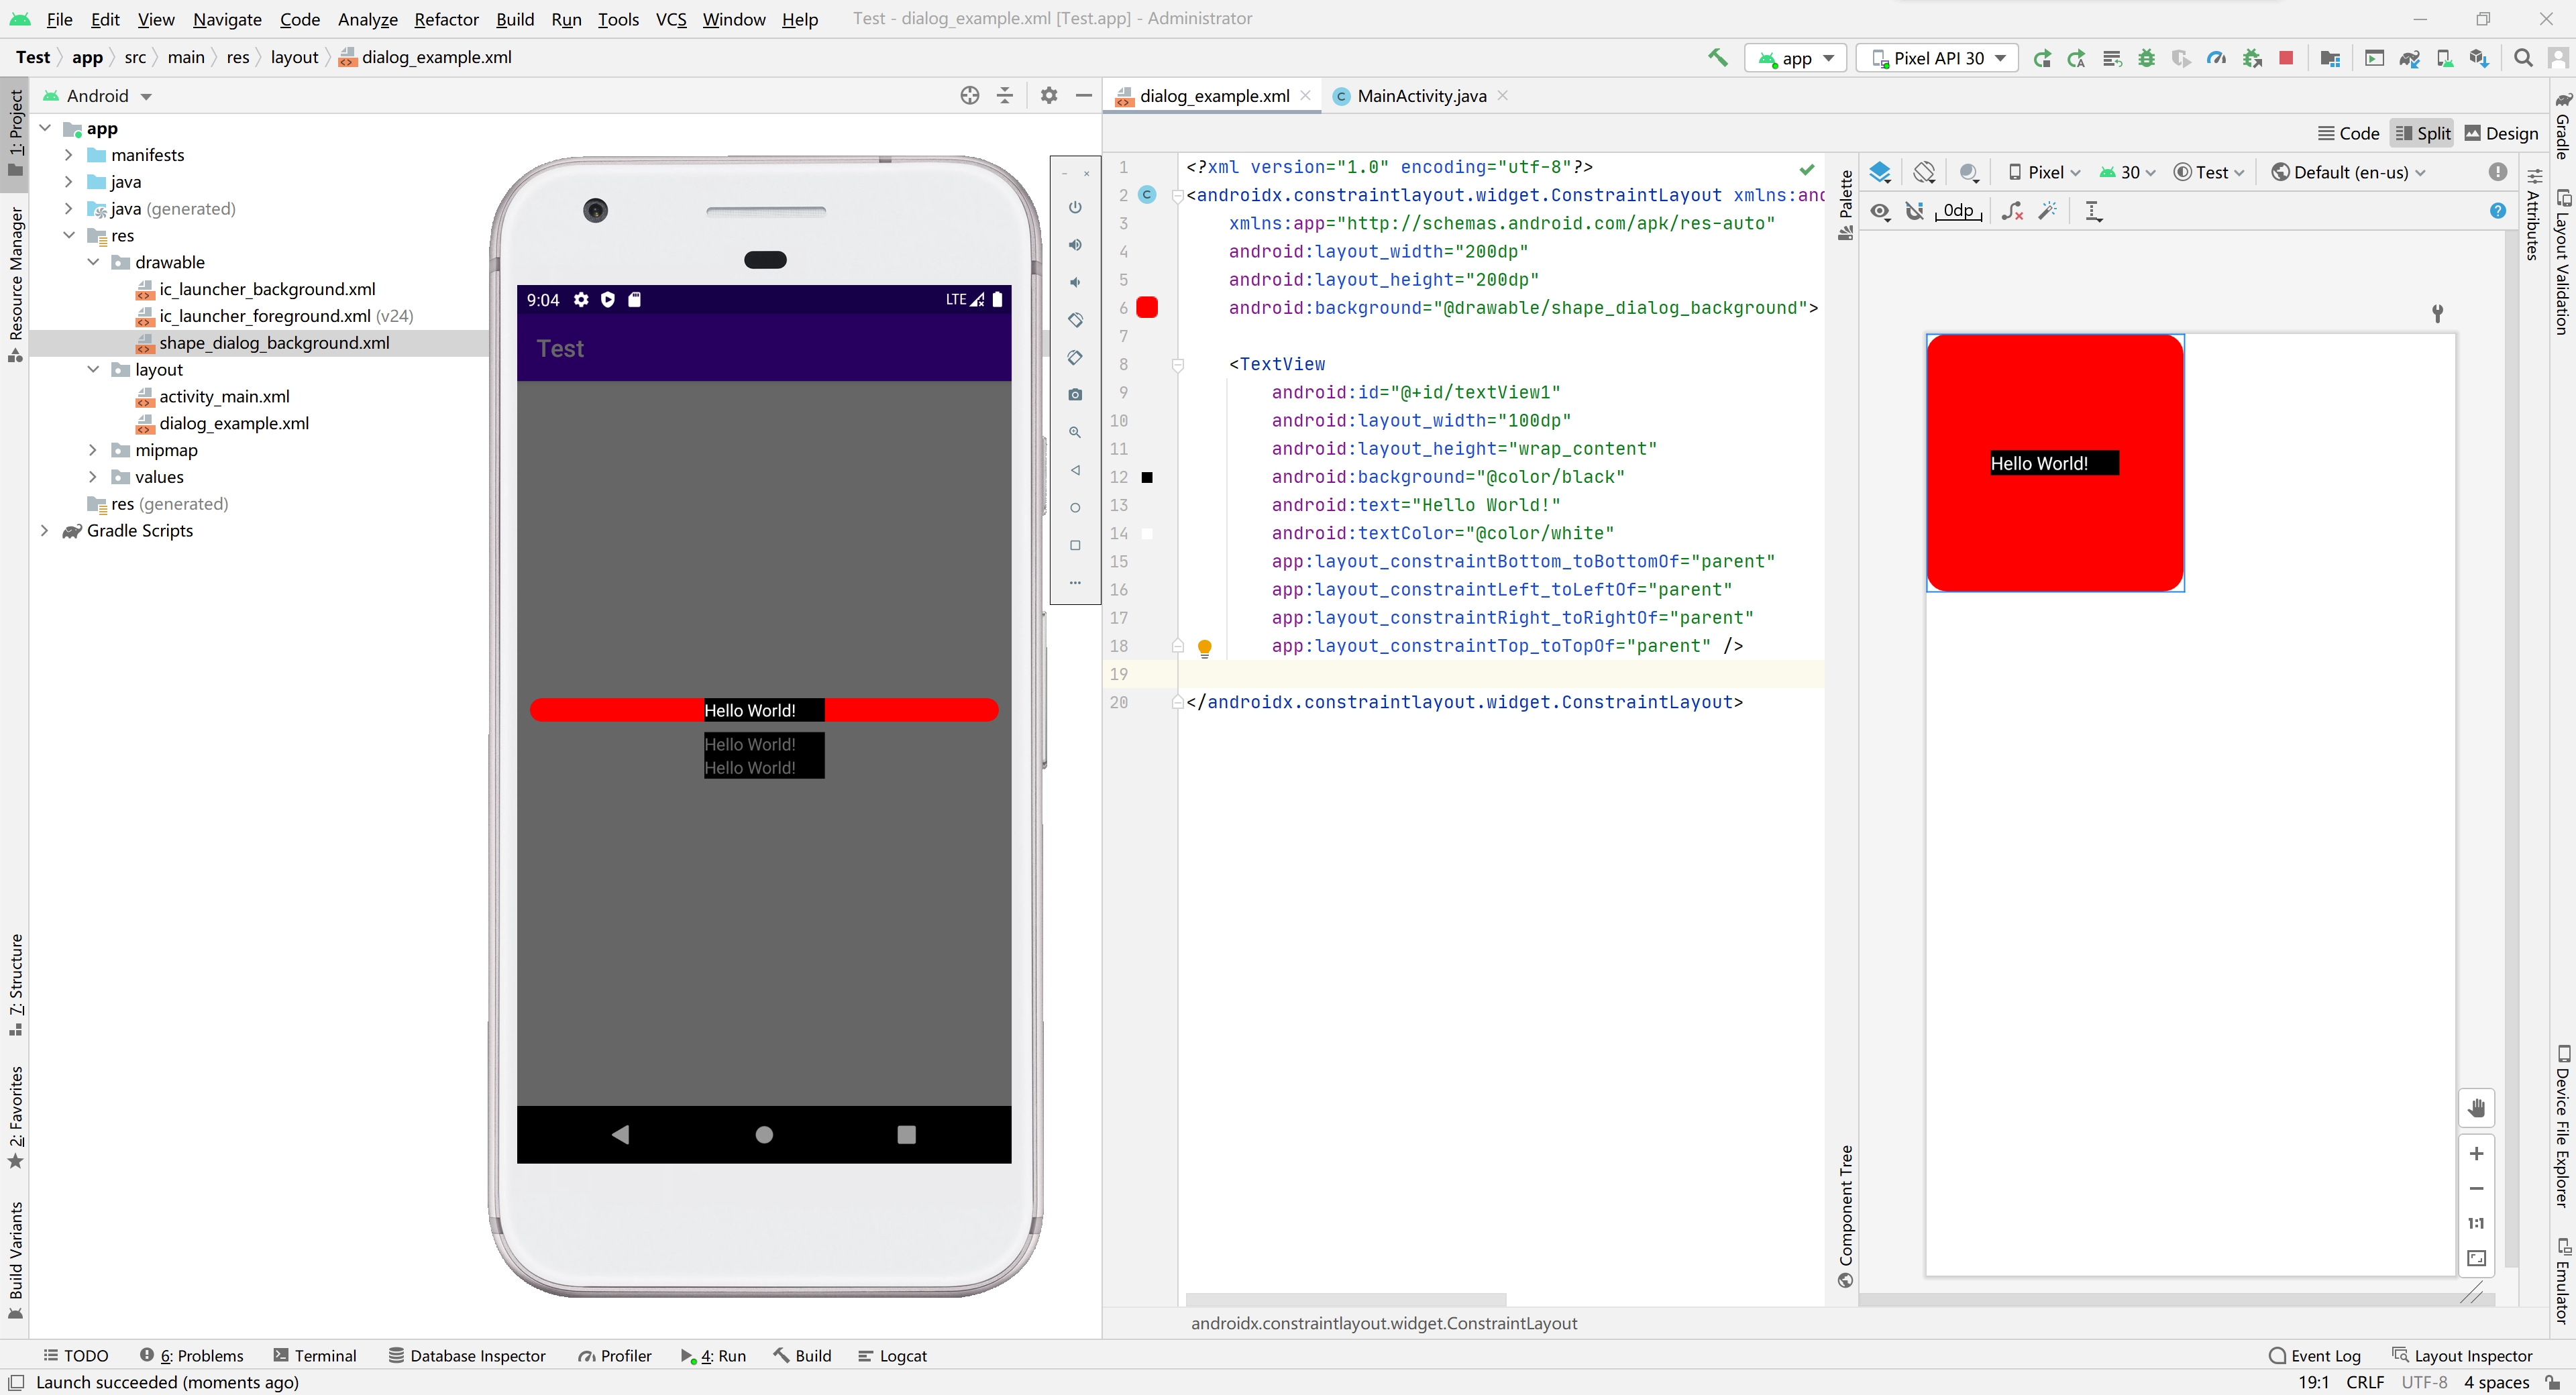
But new problems come one after another. I clearly set the width, height and fillet of 200dp for the layout, but it still doesn't display normally. Obviously, the height wrap_content, then we will add some code:
AlertDialog alertDialog = new AlertDialog.Builder(MainActivity.this).create();
// You must show first
alertDialog.show();
// Build the view layout displayed by alertDialog
View view = LayoutInflater.from(this).inflate(R.layout.dialog_example, null);
// Set layout
Window window = alertDialog.getWindow();
window.setContentView(view);
// Set the window background of dialog to transparent
window.setBackgroundDrawable(new ColorDrawable(Color.TRANSPARENT));
// Set the width and height of the window displaying dialog to 200dp
WindowManager.LayoutParams params = window.getAttributes();
params.width = UIUtils.getInstance().dp2px(MainActivity.this, 200);		// The unit needed here is pixel, that is px, and we are used to dp, so we need to make a conversion
params.height = UIUtils.getInstance().dp2px(MainActivity.this, 200);	// The unit needed here is pixel, that is px, and we are used to dp, so we need to make a conversion
window.setAttributes(params);
The UIUtils tool class goes to my Another article Get (it is uniformly called MyUtils tool class. You can create multiple tool classes according to your own purpose. My habit is to create UIUtils to be responsible for UI, HttpUtils to be responsible for network related things, and MyUtils to be responsible for other things). There are a lot of dry goods in this article.
You can think of window as root, that is, the root layout. If you write match in the outermost layer of the xml layout file_ Parent actually matches the size of the window. Of course, in order to highlight the error effect caused by not setting the window, I wrote 200dp for the outermost layer. You only need to write match_parent.
(careful friends may find that if you set several sharp corner controls in the corner of the xml layout, even if you set rounded corners in the shape in the background, the sharp corners will still be exposed. In order to make you use them thoroughly, I won't change the small bug s here. I hope you can find a solution by studying the rewrite Dialog below.)
effect:
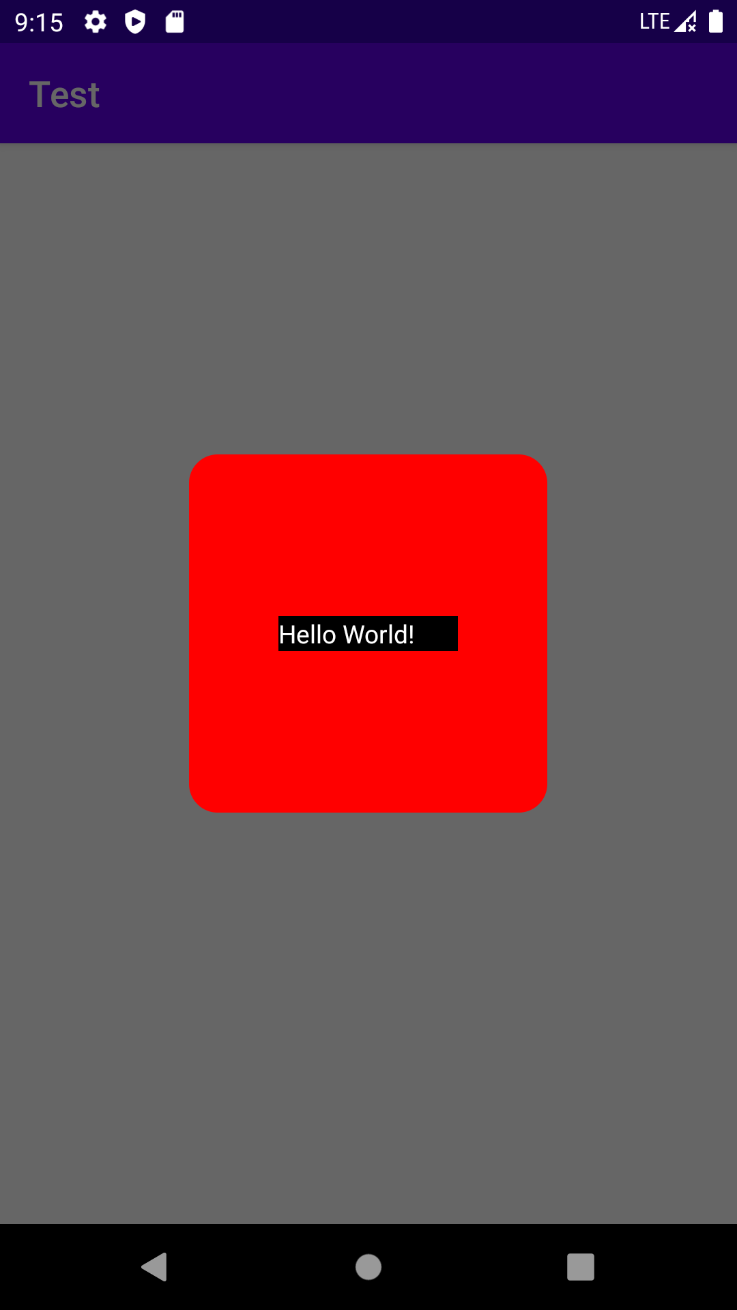
How can I set click events if there are buttons in my dialog? Add two lines of code, please draw inferences from one example:
AlertDialog alertDialog = new AlertDialog.Builder(MainActivity.this).create();
// You must show first
alertDialog.show();
// Build the view layout displayed by alertDialog
View view = LayoutInflater.from(this).inflate(R.layout.dialog_example, null);
// Set layout
Window window = alertDialog.getWindow();
window.setContentView(view);
// Set the window background of dialog to transparent
window.setBackgroundDrawable(new ColorDrawable(Color.TRANSPARENT));
// Set the width and height of the window displaying dialog to 200dp
WindowManager.LayoutParams params = window.getAttributes();
params.width = UIUtils.getInstance().dp2px(MainActivity.this, 200);		// The unit needed here is pixel, that is px, and we are used to dp, so we need to make a conversion
params.height = UIUtils.getInstance().dp2px(MainActivity.this, 200);	// The unit needed here is pixel, that is px, and we are used to dp, so we need to make a conversion
window.setAttributes(params);
// Get the components in the layout and operate
TextView textView = view.findViewById(R.id.textView_dialog);
textView.setText("Changed text");
effect:
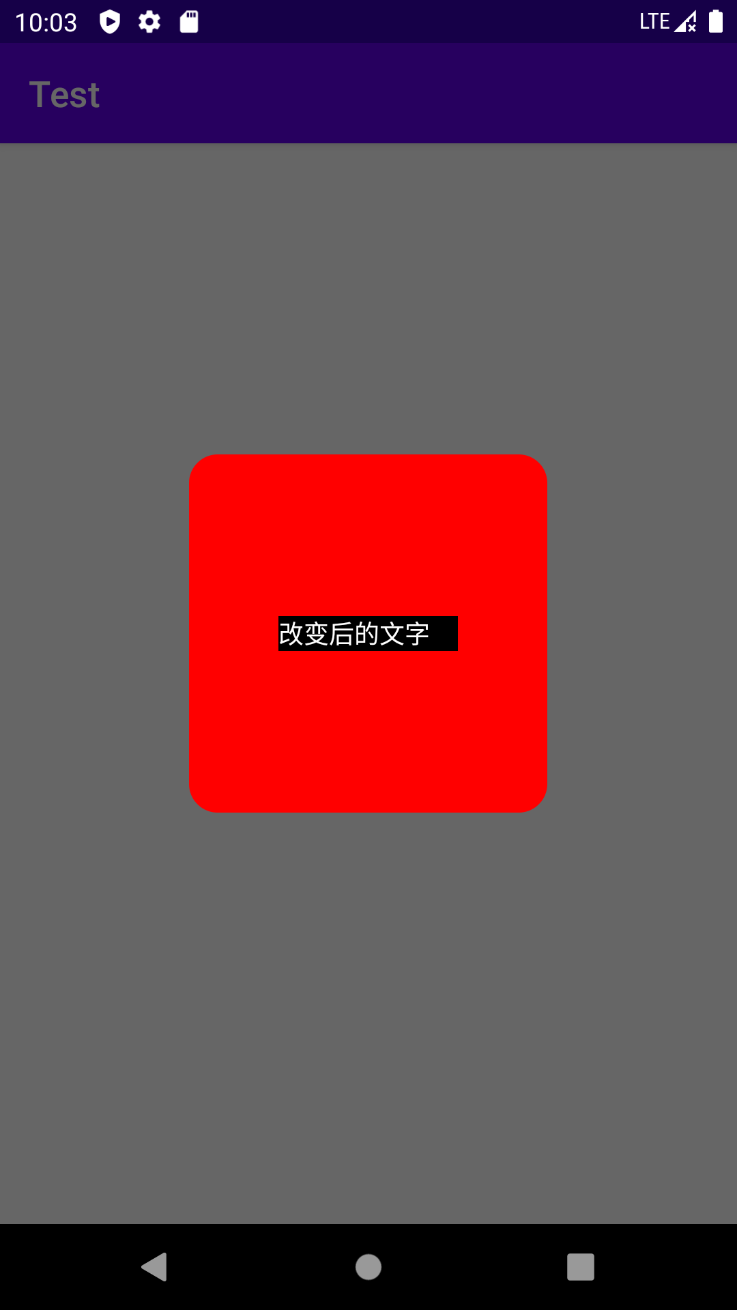
Well, it's done. You can customize your AlertDIalog style in the Activity through about ten lines of code. It's very simple.
Method 2: Rewrite Dialog
However, the requirements are always changing. If you need to unify the UI style of the whole app, you need to rewrite the Dialog and call your own Dialog instead of Android X appcompat. The AlertDialog under the app package (Android comes with it). Here is a myalertdialog I wrote myself class:
import android.app.Dialog;
import android.content.Context;
import android.content.DialogInterface;
import android.view.LayoutInflater;
import android.view.View;
import android.view.ViewGroup;
import android.view.Window;
import android.view.WindowManager;
import android.widget.Button;
import android.widget.TextView;

import androidx.annotation.NonNull;
import androidx.annotation.Nullable;

import com.wanfuxiong.training.R;
import com.wanfuxiong.training.util.UIUtils;

public class MyAlertDialog extends Dialog implements DialogInterface {

    public MyAlertDialog(@NonNull Context context) {
        super(context);
    }

    public MyAlertDialog(@NonNull Context context, int themeResId) {
        super(context, themeResId);
    }

    protected MyAlertDialog(@NonNull Context context, boolean cancelable, @Nullable OnCancelListener cancelListener) {
        super(context, cancelable, cancelListener);
    }

    public static class Builder {

        private View mLayout;

        private TextView mTextViewTitle;
        private TextView mTextViewMessage;
        private Button mButtonPositive;
        private Button mButtonNegative;

        private View.OnClickListener mButtonPositiveClickListener;
        private View.OnClickListener mButtonNegativeClickListener;

        private MyAlertDialog mDialog;

        public Builder(Context context) {
            mDialog = new MyAlertDialog(context, R.style.Theme_MaterialComponents_Dialog);
            LayoutInflater inflater = (LayoutInflater) context.getSystemService(Context.LAYOUT_INFLATER_SERVICE);
            //Load layout file
            mLayout = inflater.inflate(R.layout.dialog_alert, null, false);
            //Add layout file to Dialog
            mDialog.addContentView(mLayout, new ViewGroup.LayoutParams(ViewGroup.LayoutParams.MATCH_PARENT, ViewGroup.LayoutParams.WRAP_CONTENT));

            Window window = mDialog.getWindow();
            WindowManager.LayoutParams lp = mDialog.getWindow().getAttributes();
            lp.width = UIUtils.getInstance().dp2px(context,256);// Adjust this value to set the width of the dialog box display
            lp.height = ViewGroup.LayoutParams.WRAP_CONTENT;
            window.setAttributes(lp);
            window.setBackgroundDrawableResource(R.drawable.shape_dialog_background);// The answer is here
            // ↑ ↑ ↑ here, I set a fillet for the background of the window instead of the background of the xml root component. The example in the previous chapter only sets the window to be transparent. Therefore, when some components in the root component exceed the fillet, the fillet of the root component cannot wrap the sharp corner, so the sharp corner is exposed.

            mTextViewTitle = mLayout.findViewById(R.id.textView_dialog_my_title);
            mTextViewMessage = mLayout.findViewById(R.id.textView_dialog_my_message);
            mButtonPositive = mLayout.findViewById(R.id.button_dialog_my_positive);
            mButtonNegative = mLayout.findViewById(R.id.button_dialog_my_negative);
        }

        public TextView getTitle(){
            return mTextViewTitle;
        }

        public TextView getMessage(){
            return mTextViewMessage;
        }

        public Button getPositiveButton(){
            return mButtonPositive;
        }

        public Button getNegativeButton(){
            return mButtonNegative;
        }

        public Builder setTitle(@NonNull String title) {
            mTextViewTitle.setText(title);
            mTextViewTitle.setVisibility(View.VISIBLE);
            return this;
        }

        public Builder setMessage(@NonNull String message) {
            mTextViewMessage.setText(message);
            mTextViewMessage.setVisibility(View.VISIBLE);
            return this;
        }

        public Builder setPositiveButton(@NonNull String text, View.OnClickListener listener) {
            mButtonPositive.setText(text);
            mButtonPositiveClickListener = listener;
            return this;
        }

        public Builder setNegativeButton(@NonNull String text, View.OnClickListener listener) {
            mButtonNegative.setText(text);
            mButtonNegativeClickListener = listener;
            mButtonNegative.setVisibility(View.VISIBLE);
            return this;
        }

        public MyAlertDialog create() {
            mButtonNegative.setOnClickListener(v -> {
                mDialog.dismiss();
                if (mButtonNegativeClickListener != null) {
                    mButtonNegativeClickListener.onClick(v);
                }
            });
            mButtonPositive.setOnClickListener(v -> {
                mDialog.dismiss();
                if (mButtonPositiveClickListener != null) {
                    mButtonPositiveClickListener.onClick(v);
                }
            });
            mDialog.setContentView(mLayout);
            mDialog.setCancelable(false);                //The user clicks the back button to close the Dialog
            mDialog.setCanceledOnTouchOutside(false);    //The user clicks external to close the Dialog
            return mDialog;
        }
    }
}
Usage:
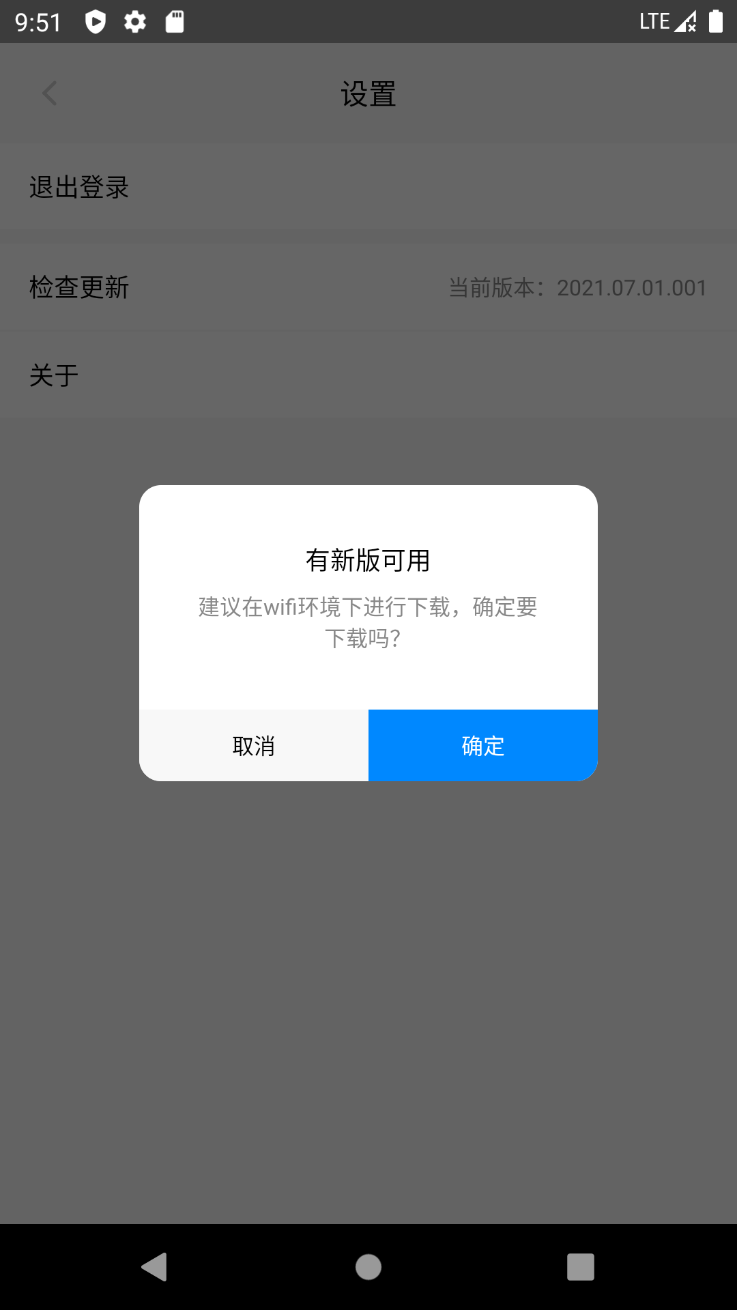
new MyAlertDialog.Builder(SettingsActivity.this)
        .setTitle("A new version is available")
        .setMessage("Recommended in wifi Download in environment. Are you sure you want to download?")
        .setPositiveButton("determine", v -> {
			// ...
        })
        .setNegativeButton("cancel", null)
        .create().show();
effect:
