Recruitment oriented
Tool requirements
Familiar with IDA Pro, GDB, JEB, JADX and other common reverse analysis tools, with strong reverse analysis ability;
Master Android decompilation, shelling, static analysis and dynamic debugging; Master jadx, IDA, JEB, unidbg and other tools;
Familiar with one of IDA, OllyDeBug, WinDeBug or similar debugging tools;
Proficient in various debugging tools: Smali, Dedexer, Dexdump, Apktool, Dex2jar, IDA and olydbg;
Master one or more debugging tools: Smali, Dedexer, Dexdump, Apktool, Dex2jar, JD GUI, AndroidKiller, Jeb and IDA, and have the foundation of Olly DBG.
Strong interest in reverse engineering, proficient in apktool, Dex2jar, jeb, IDA, GDB and other decompilation and debugging tools;
Framework requirements
Familiar with ARM, x86/64 assembly and smali, proficient in software reverse static analysis, dynamic debugging, code tracking, etc;
Proficient in android hook technology, familiar with DEX and ELF file formats, and familiar with DEX and ELF shelling and shelling;
Master one of the Hook tools such as Xposed, Cydia Substrate and Frida for reverse development.
Proficient in using Xposed, frida and other frameworks;
Understand the principle of injection and Hook technology, and be able to write Hook code using Frida, Xposed and other frameworks;
Familiar with Xposed, Theos, frida and other frameworks;
Understand that IDA is one of all tools:
IDA Pro
The best-of-breed binary code analysis tool, an indispensable item in the toolbox of world-class software analysts, reverse engineers, malware analyst and cybersecurity professionals.
The best binary code analysis tool in its class is an indispensable tool in the toolbox of world-class software analysts, reverse engineers, malware analysts and network security professionals.
IDA
IDA disassembler and debugger is an interactive, programmable, extensible, multiprocessor disassembler hosted on Microsoft Windows, Linux or Apple macOS. IDA has become the de facto standard for Analyzing Malicious Code, vulnerability research and commercial off the shelf verification.
Reference learning & Resource tools
Apktool Introduction
AndroidDevTools
Android_Tools
IDA_Pro_v7.5_Portable.zip
IDA Free
[my love cracking first] Android Killer repair
My love website: https://www.52pojie.cn/thread-1400404-1-1.html
https://cloud.189.cn/t/IZ3A7fUrmaq2 (access code: 5wdo)
The signature key password is 52pojie cn
The decompression password of the compressed package is 52pojie cn
java environment is required to install and use Android Killer:
JDK 16.0.2 general version (Java Development Kit)
Java SE 8 Archive Downloads (JDK 8u202 and earlier)
JRE means (Java Runtime Environment)
1. Create a new project hello world
Select create basic activity
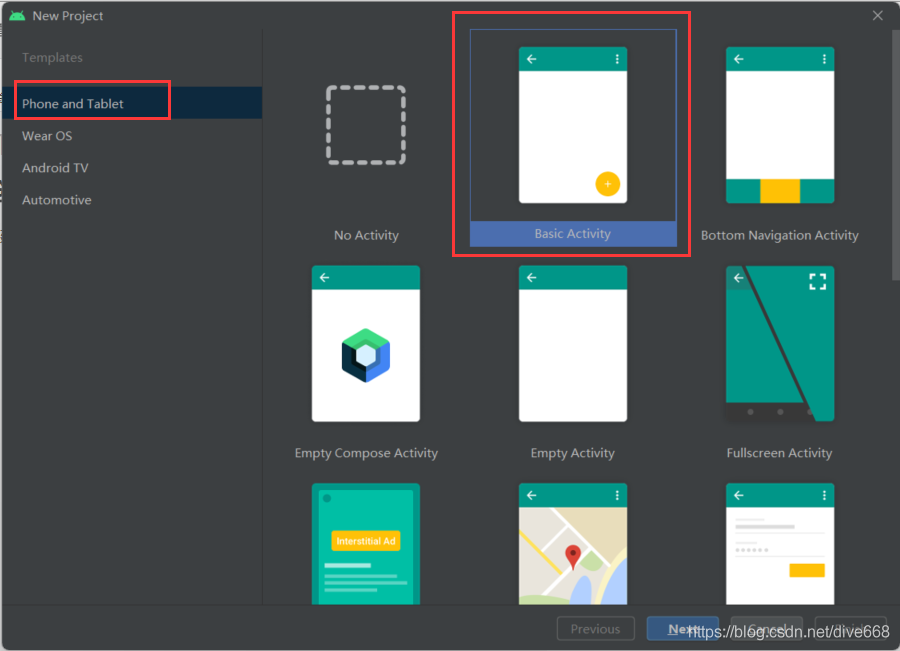
Note that the programming language is java, and set the Name and Android SDK version with the minimum requirements for the program

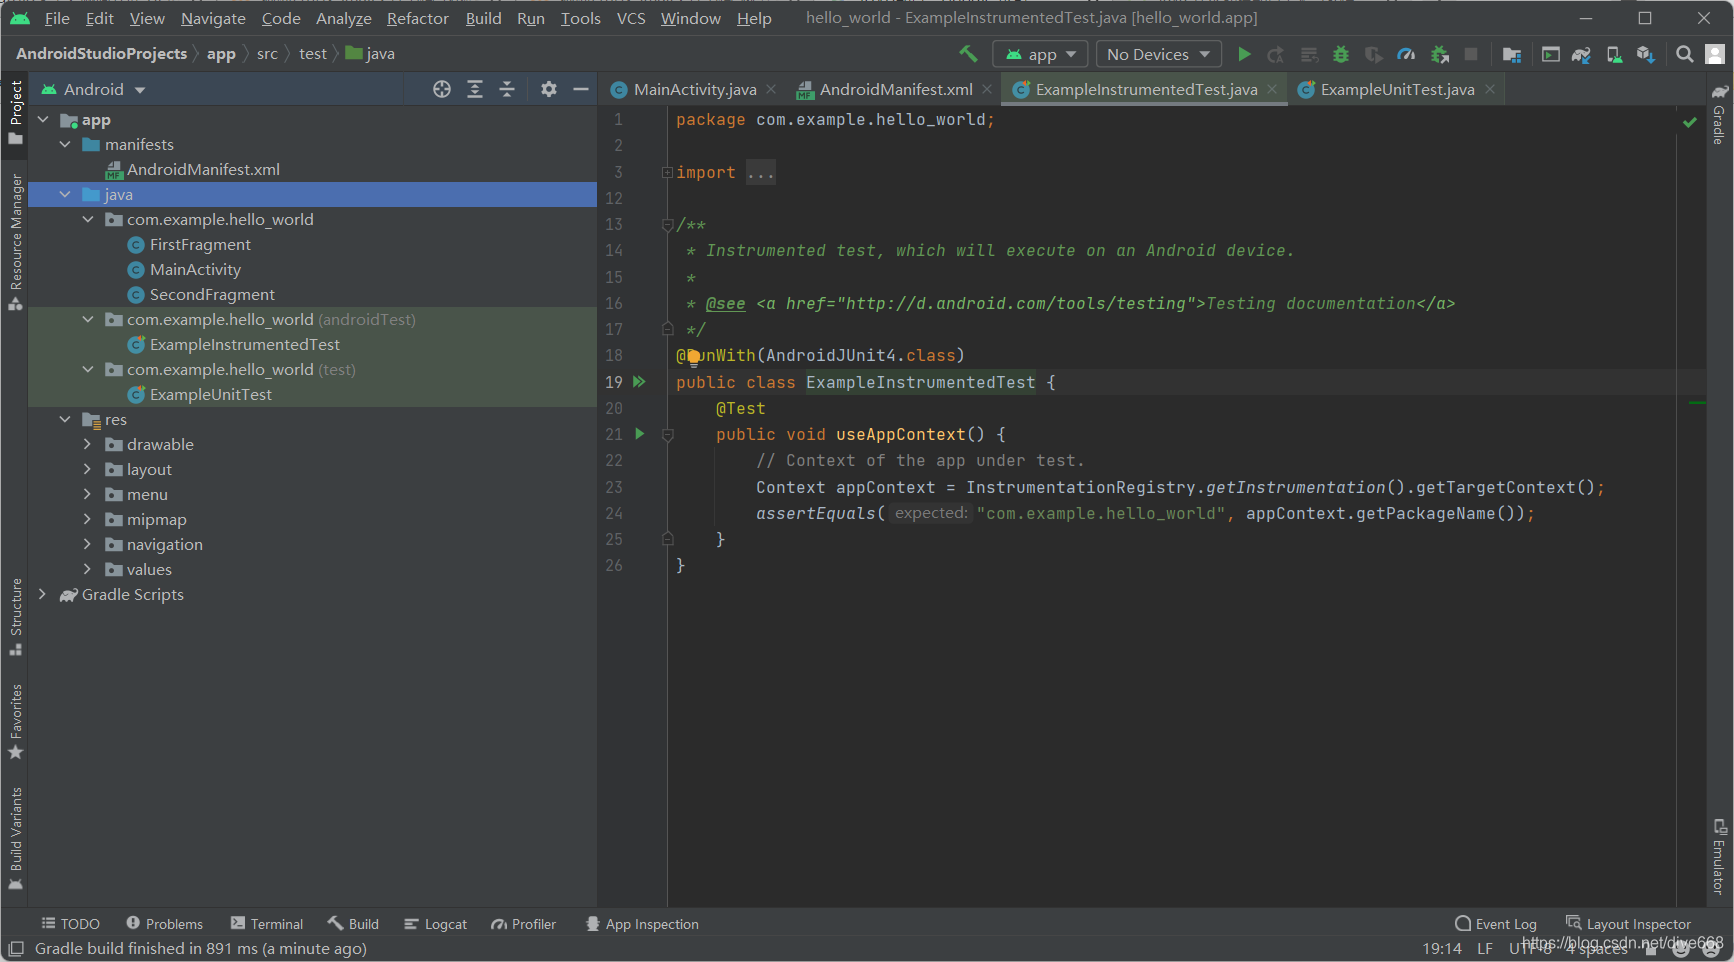
The construction project is as follows:
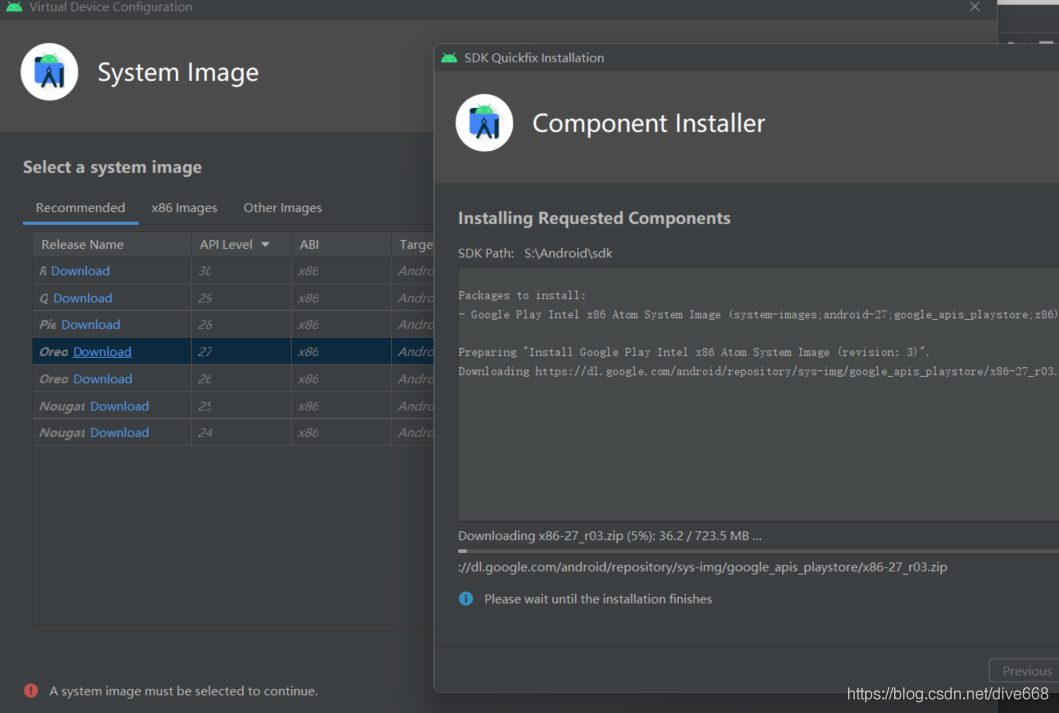
Select a virtual phone for our application. Here, I select pixel 2 and api level 27,system image x86, Orea's Android8, and download them.
Program composition before Compilation
- java stores the original program code
- res stores resource files such as layouts
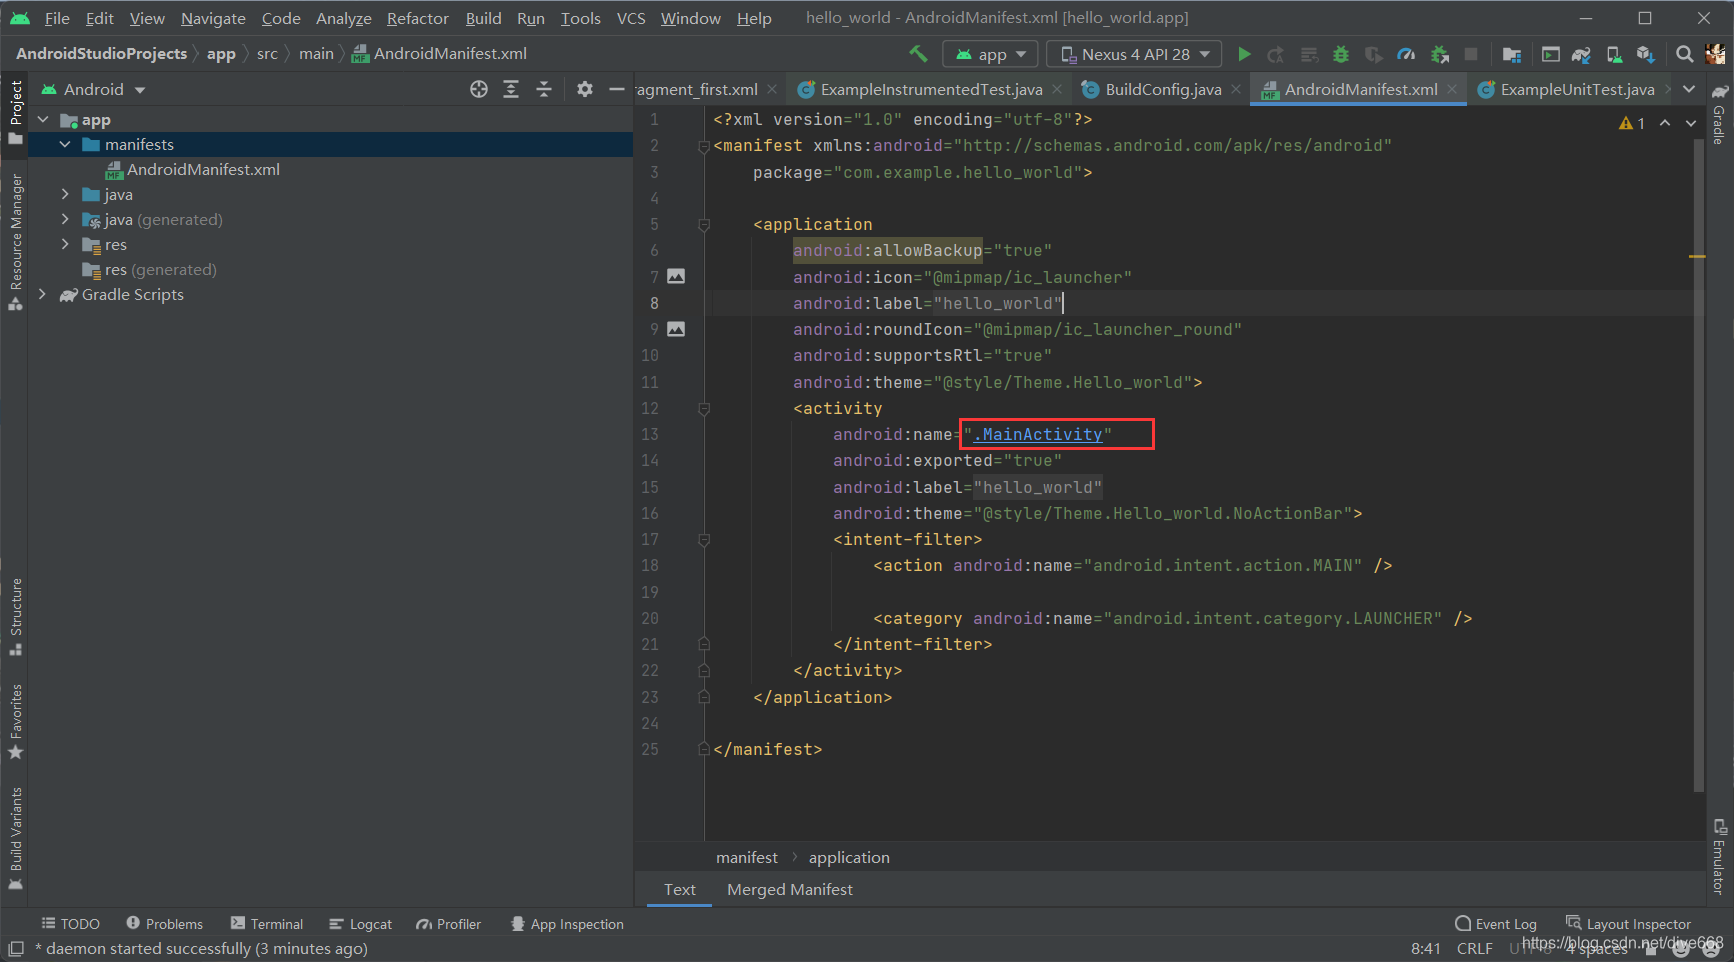
- AndroidManifest.xml is required by each apk. It describes the attributes, permissions and windows required in the entire Android application.
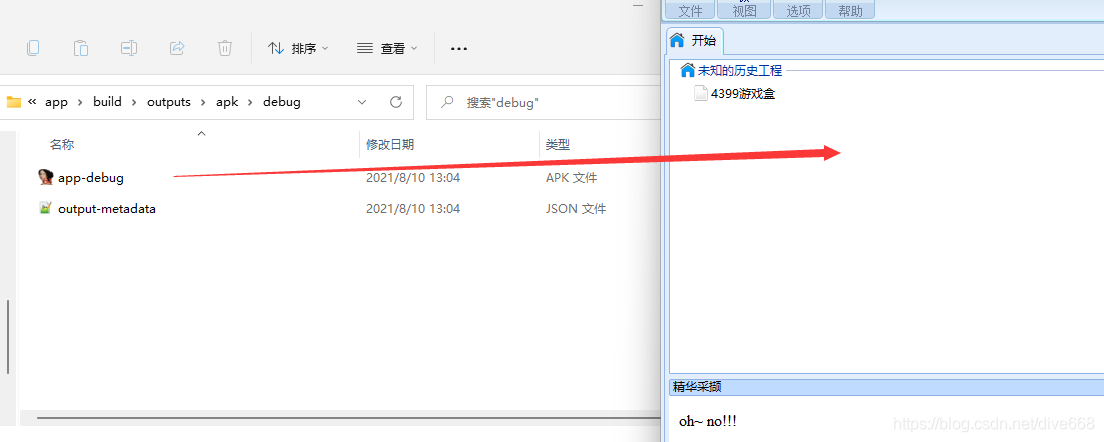
Find the apk file generated by compilation in build and drag it to winhex. You can see that the apk file has a feature header: pk.
You can use a compression tool to open it.
Compare the source code and apk compressed package file
The java source code is compiled into classes dex
Res becomes the res directory and resources ArsC file.
Decompile
The software android killer is used, but because the video was a few years ago:
activity Introduction (form)
activity is a form of Android. How is this form registered and run?
To have a form, you need to register it in Manifest now.
Register in < activity > MainActivity, press ctrl to jump to the internal registration code.
In the layout of the layout file under res, find the content_main.xml and activity_main.xml.

How to link layout and function methods? It depends on the oncreate() function in java

Create your own form
In layout, new a new layout named hello

After that, we need a class to describe it and establish a link. We create a new hello class and write its code with reference to MainActivity.

Derive from AppMainActivity and copy oncreate function and link method.
super.onCreate()
setContenView()
Then add this tag in the Manifest,
<activity android:name=".hello"/>
Start the hello form we created in mainactivity. The function startActivity() is required
Code to be added:

startActivity(new Intent(MainActivity.this,hello.class));
Create a new button resource and add code to it to edit the window.
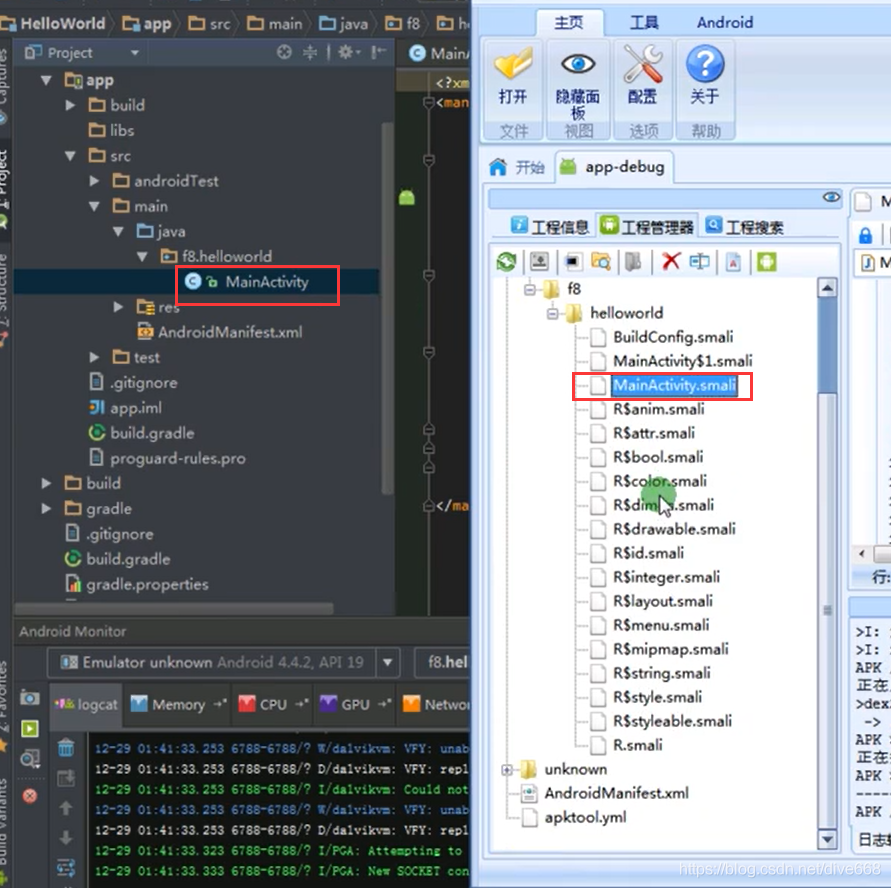
Android killer decompile
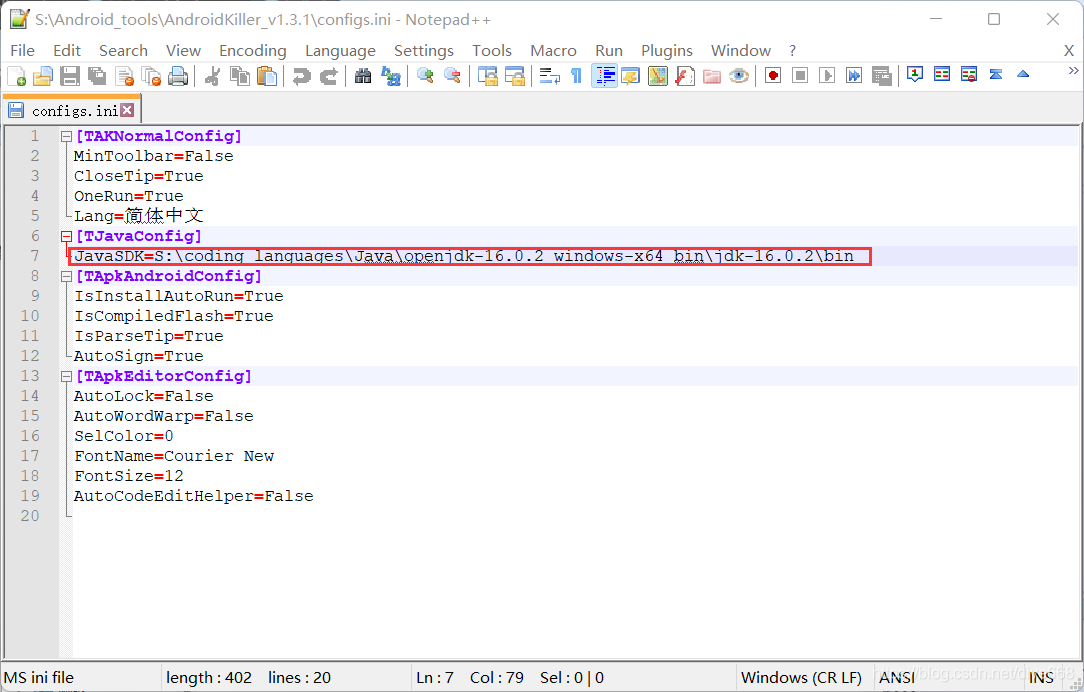
Note that the SDK in the config files is consistent with the bin directory of your computer's SDK:
Find the apk file generated by compilation in build and drag it to Android killer.
The following figure shows the decompiled smail file code.

Smail file
smail file structure: header definition, domain definition and function definition.

An smal corresponds to a class. You can make some simple modifications to it.
Some field descriptors in java are converted to character modifiers:
Void->V
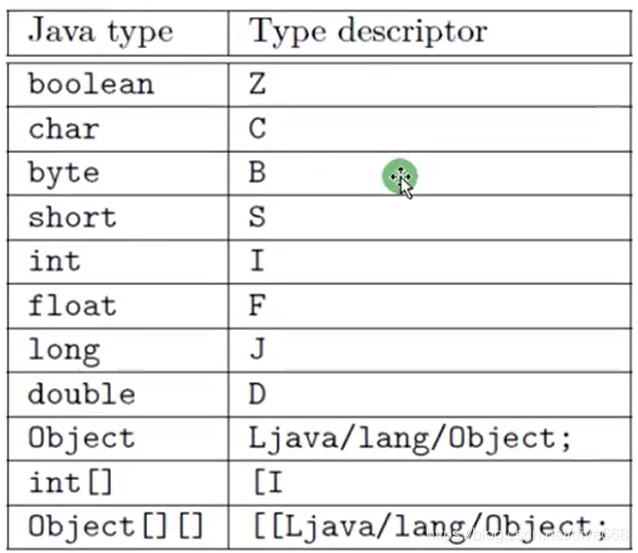
For the transformation of java objects, after completing its path, add L in front and set Convert to /.

The oncreate() function is converted as follows:
# virtual methods
.method protected onCreate(Landroid/os/Bundle;)V //V means that the returned is void type
    .locals 3
    .param p1, "savedInstanceState"    # Landroid/os/Bundle;

    .line 28
    invoke-super {p0, p1}, Landroidx/appcompat/app/AppCompatActivity;->onCreate(Landroid/os/Bundle;)V

    .line 30
    invoke-virtual {p0}, Lcom/example/hello_world/MainActivity;->getLayoutInflater()Landroid/view/LayoutInflater;

    move-result-object v0

    invoke-static {v0}, Lcom/example/hello_world/databinding/ActivityMainBinding;->inflate(Landroid/view/LayoutInflater;)Lcom/example/hello_world/databinding/ActivityMainBinding;

    move-result-object v0

    iput-object v0, p0, Lcom/example/hello_world/MainActivity;->binding:Lcom/example/hello_world/databinding/ActivityMainBinding;

    .line 31
    invoke-virtual {v0}, Lcom/example/hello_world/databinding/ActivityMainBinding;->getRoot()Landroidx/coordinatorlayout/widget/CoordinatorLayout;

    move-result-object v0

    invoke-virtual {p0, v0}, Lcom/example/hello_world/MainActivity;->setContentView(Landroid/view/View;)V

    .line 33
    iget-object v0, p0, Lcom/example/hello_world/MainActivity;->binding:Lcom/example/hello_world/databinding/ActivityMainBinding;

    iget-object v0, v0, Lcom/example/hello_world/databinding/ActivityMainBinding;->toolbar:Landroidx/appcompat/widget/Toolbar;

    invoke-virtual {p0, v0}, Lcom/example/hello_world/MainActivity;->setSupportActionBar(Landroidx/appcompat/widget/Toolbar;)V

    .line 35
    const v0, 0x7f080110

    invoke-static {p0, v0}, Landroidx/navigation/Navigation;->findNavController(Landroid/app/Activity;I)Landroidx/navigation/NavController;

    move-result-object v0

    .line 36
    .local v0, "navController":Landroidx/navigation/NavController;
    new-instance v1, Landroidx/navigation/ui/AppBarConfiguration$Builder;

    invoke-virtual {v0}, Landroidx/navigation/NavController;->getGraph()Landroidx/navigation/NavGraph;

    move-result-object v2

    invoke-direct {v1, v2}, Landroidx/navigation/ui/AppBarConfiguration$Builder;-><init>(Landroidx/navigation/NavGraph;)V

    invoke-virtual {v1}, Landroidx/navigation/ui/AppBarConfiguration$Builder;->build()Landroidx/navigation/ui/AppBarConfiguration;

    move-result-object v1

    iput-object v1, p0, Lcom/example/hello_world/MainActivity;->appBarConfiguration:Landroidx/navigation/ui/AppBarConfiguration;

    .line 37
    invoke-static {p0, v0, v1}, Landroidx/navigation/ui/NavigationUI;->setupActionBarWithNavController(Landroidx/appcompat/app/AppCompatActivity;Landroidx/navigation/NavController;Landroidx/navigation/ui/AppBarConfiguration;)V

    .line 39
    iget-object v1, p0, Lcom/example/hello_world/MainActivity;->binding:Lcom/example/hello_world/databinding/ActivityMainBinding;

    iget-object v1, v1, Lcom/example/hello_world/databinding/ActivityMainBinding;->fab:Lcom/google/android/material/floatingactionbutton/FloatingActionButton;

    new-instance v2, Lcom/example/hello_world/MainActivity$1;

    invoke-direct {v2, p0}, Lcom/example/hello_world/MainActivity$1;-><init>(Lcom/example/hello_world/MainActivity;)V

    invoke-virtual {v1, v2}, Lcom/google/android/material/floatingactionbutton/FloatingActionButton;->setOnClickListener(Landroid/view/View$OnClickListener;)V

    .line 46
    return-void
.end method
invoke represents the call. The in Android is a utf8 format string. Chinese characters are formatted in a similar format.
apktool
apktool introduction
apk is just a zip file containing resources and assembled Java code. If you simply unzip apk like this, you'll leave something like classes DEX and resources arsc.
$ apktool d testapp.apk
I: Using Apktool 2.0.0 on testapp.apk
I: Loading resource table...
I: Decoding AndroidManifest.xml with resources...
I: Loading resource table from file: 1.apk
I: Regular manifest package...
I: Decoding file-resources...
I: Decoding values */* XMLs...
I: Baksmaling classes.dex...
I: Copying assets and libs...
$
In addition to XML, resources such as 9 patch image, layout, string, etc. are correctly decoded into the source format.
What is 9 patch image and what is its use?
Framework document
As you may know, Android applications use code and resources found on the Android operating system itself. These are called framework resources, and Apktool relies on these resources to correctly decode and build apk.
Each apktool version internally contains the latest AOSP framework at the time of release. This allows you to decode and build most apks without problems. However, in addition to the regular AOSP files, manufacturers also add their own framework files. To use apktool for these manufacturer apks, you must first install the manufacturer framework files.
Before decoding this apk, we must obtain the HTC framework resources. We com htc. resources. apk pulled out of our device and installed it
$ apktool if com.htc.resources.apk
I: Framework installed to: 2.apk
Now we will try this decoding again.
$ apktool d HtcContacts.apk
I: Loading resource table...
I: Decoding resources...
I: Loading resource table from file: /home/brutall/apktool/framework/1.apk
I: Loading resource table from file: /home/brutall/apktool/framework/2.apk
I: Copying assets and libs...
As you can see. Apktool uses 1 Apk and 2 Apk framework file to decode the application correctly.
Find framework
In most cases / system/framework, any apk on the device will be a framework file. On some devices, they may reside in / data / system framework or even cleverly hidden in / system/app or / system / priv app. They are usually named after "resource", "resource", or "framework".
Internal framework
Apktool comes with an internal framework as described above. The file $home / apktool / framework / 1 Apk is copied to during use.
Management framework document
The framework is stored in different locations, depending on the relevant operating system.
- Unix - $HOME/.local/share/apktool
- windows- %UserProfile%\AppData\Local\apktool
- apple- $HOME/Library/apktool
apktool use
apktool blueplay cloud download link
apktool is a jar file, which needs to be opened by java virtual machine.
java -jar D:/xxx/apktool.jar
After entering
With parameter d(d means dcompile, decompile), with parameter o, output directory (at this time, drag app-debug.apk to get the path)
java -jar apktool.jar d -d F:\xxx\app-debug.apk -o
Debugging method
Source program modification
An older debugging method, using apktool's - d option
① java -jar apktool.jar d -d target apk - o result storage directory
② Modify Android Mainfest file, add Android in the application node: debuggable = "true"
③ Add in the onCreate method of the class of the entry point
invoke-static(), Landroid/os/Debug;->waitfordebugger()V
④ Decompile the modified apk file
java -jar apktool.jar b -d Code directory -o target apk name
⑤ Manually sign apk files
After signing, you can use adb install to install. Otherwise, an error will be reported
java-jar signapk.jar testkey.x509.pem testkey.pk8 Unsigned APK Name signature APK name
Import apk code
① Idea / Android studio file - > open, select the compiled file directory and import the code
Set the breakpoint at the corresponding position.

② Set remote debugging options
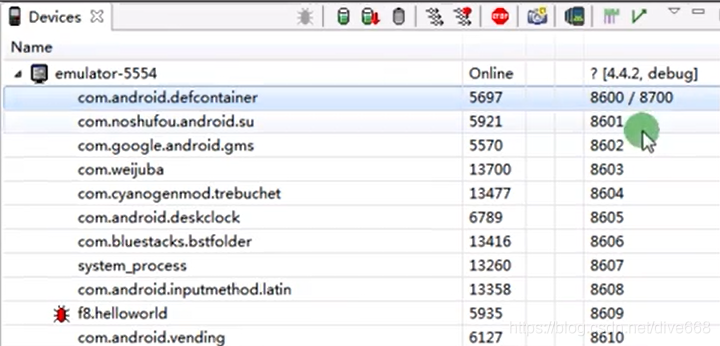
Run - > Debug configurations - > remote Java application, the host is filled in as localhost, and the port is 8700 opened by Debug. But in fact, it is not open at this time.
tools->Android->Android Device Monitor
Then open smail's mainactivity Java can Debug.
Open target apk file
① Open the apk file until you see the prompt wati for debugger
task
1. Write a simple apk file. There is a button in the first page (started Activity). Click it to open the second page (Activity)
2. Modify Hello, World!!! For you, world!!! (or other words)
3. Try debugging yourself below to get familiar with the smail code