By browsing this article, you can learn the following:
Generate signature files and pack them manually
First generate the signature file, click Build - > Generate Signed APK:
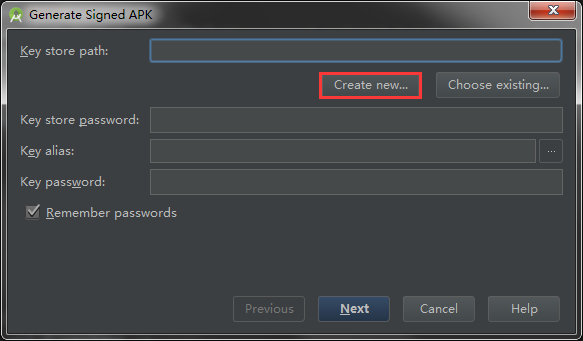
If there is no signature file, Click to construct a:
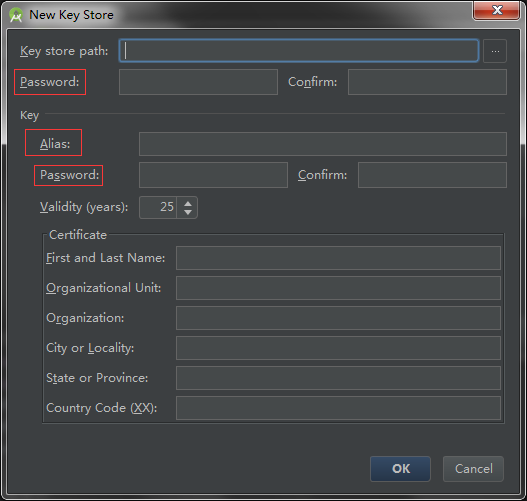
The three places enclosed in the picture are important information, and the rest are filled in at will.
After generation, the signature file can be used to continue signing and packaging:
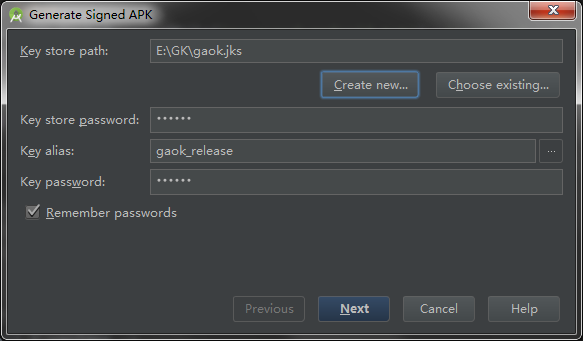
Fill in the information just now and continue:
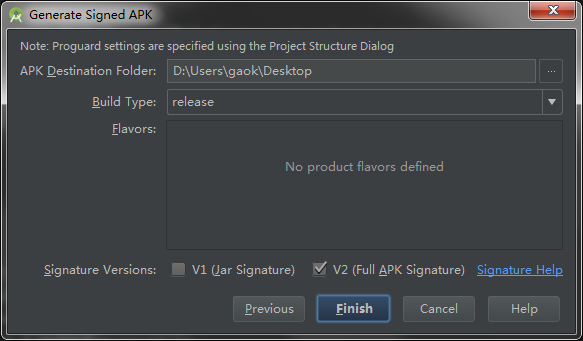
Choose the output path, choose the packaging type, complete!
Automatic Packing by Configuration
If you find the above packing steps too cumbersome, then we will start adding configuration to gradle and packing automatically.
Keyboard shortcut Ctrl+Alt+Shift+S or File-> Project Structure:
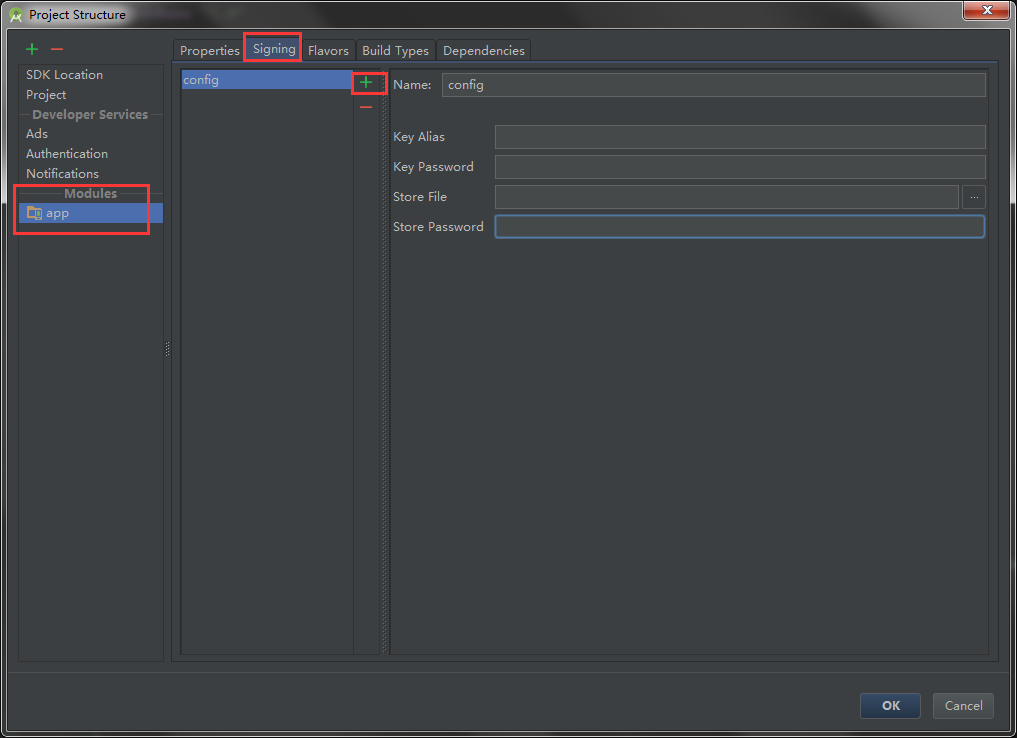
Select application and add the signature configuration under the igning tag, where Store File is our signature file.
We can also continue to add build types, select the Build Types tag, add release, and select the signature configuration just now:
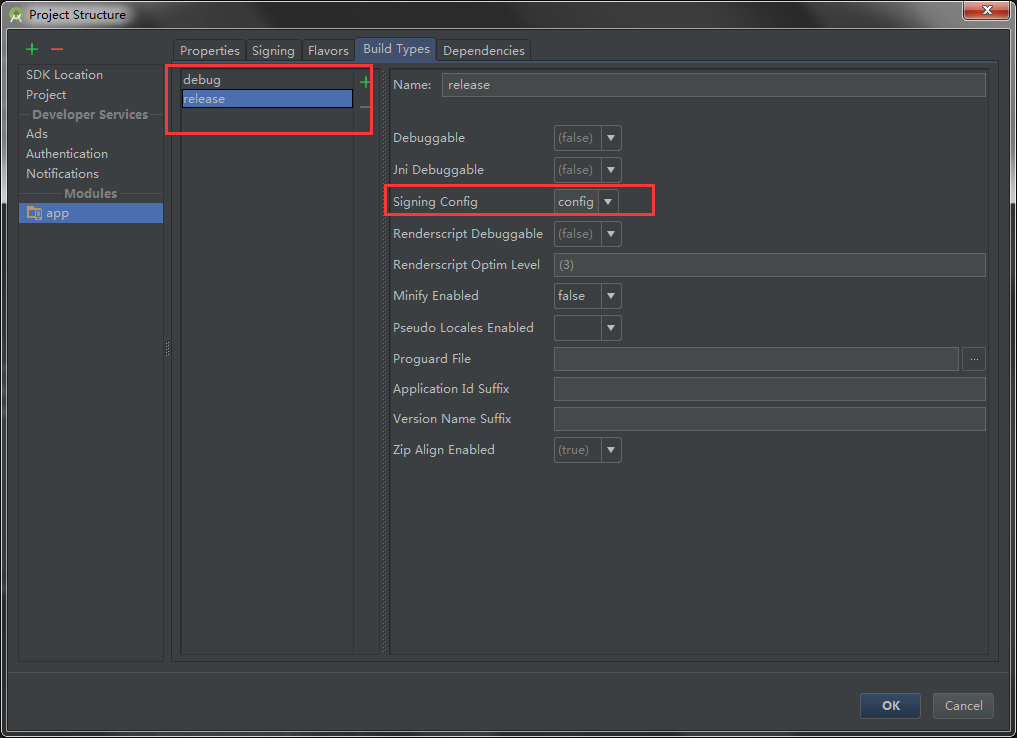
In this way, we have debug and production type of two packaging methods, after which we can automatically pack according to needs. Select the project, click Build - > Select Build Variant, and select release:
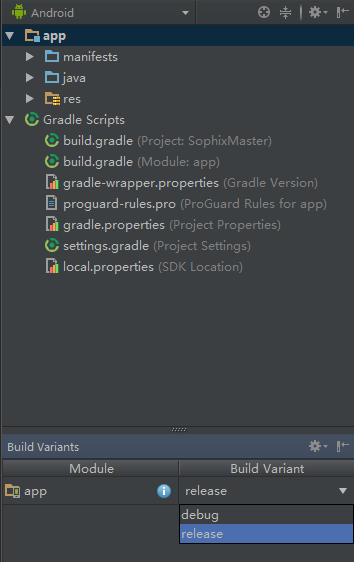
Then click Build - > Build APK, and the package file is in. app build outputs apk, so we can use our own signature file to make a production package. The debug package can also be typed out. If Signing Config is not set in Build Types, the system defaults to using its own debug signature file to package.
Hiding Signature File Sensitive Information
After we set up the packaging configuration, Gradle automatically Sync, which generates the following code in the application build.gradle file:
signingConfigs {
        config {
            keyAlias 'gaok_release'
            keyPassword '199110'
            storeFile file('E:/GK/gaok.jks')
            storePassword '199110'
        }
    }
These are sensitive information of signature files. If we are developing in collaboration, it is better to hide these information.
First, create a new keystore.properties file in the project root directory:
storePassword=199110
keyPassword=199110
keyAlias=gaok_release
storeFile=E:/GK/gaok.jks
Note here that all attributes do not have single quotation marks
Then add in the build.gradle file at the following location:
apply plugin: 'com.android.application'

// Create a variable called keystorePropertiesFile, and initialize it to your
// keystore.properties file, in the rootProject folder.
def keystorePropertiesFile = rootProject.file("keystore.properties")

// Initialize a new Properties() object called keystoreProperties.
def keystoreProperties = new Properties()

// Load your keystore.properties file into the keystoreProperties object.
keystoreProperties.load(new FileInputStream(keystorePropertiesFile))

android {
    ......
}
Read the keystore.properties file, and then change the configuration:
android {
    signingConfigs {
        config {
            keyAlias keystoreProperties['keyAlias']
            keyPassword keystoreProperties['keyPassword']
            storeFile file(keystoreProperties['storeFile'])
            storePassword keystoreProperties['storePassword']
        }
    }
}
In this way, all the sensitive information is put in the file, just save the keystore.properties file, remember not to pass the file to git!
Resource Replacement of Different Flavor Packages by Setting Flavors
What is flavor? Look at this picture:
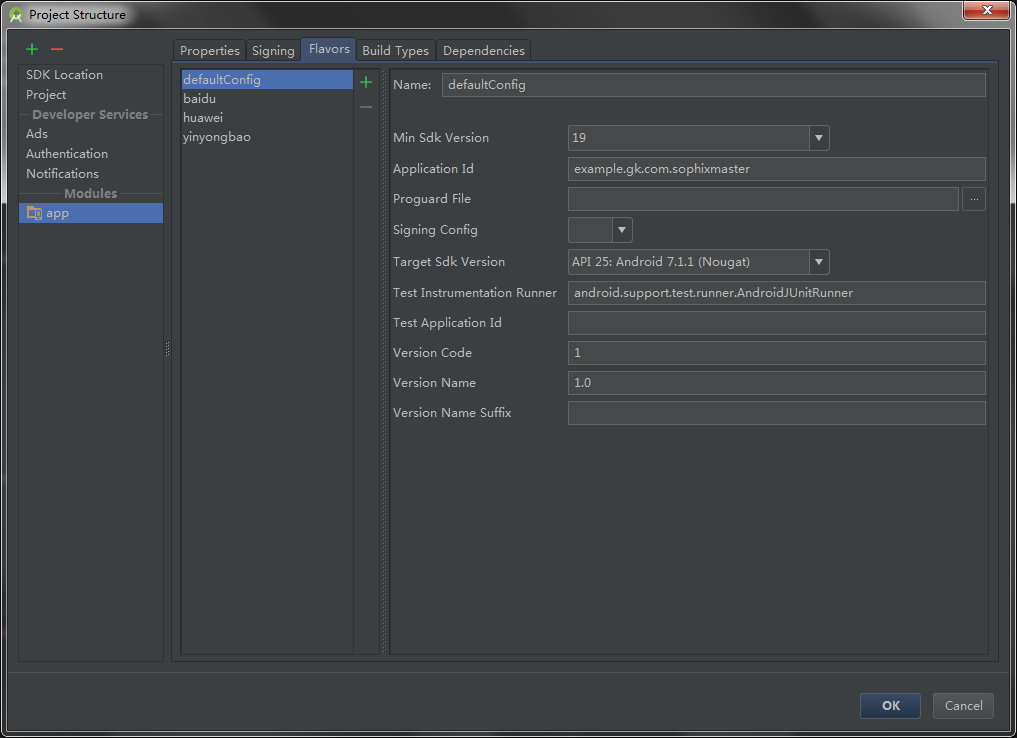
We can add multiple "flavors" under the Flavors tag to meet personalized needs.
After setting up the flavor, our build.gradle file will be generated as follows:
productFlavors {
     huawei {}       // HUAWEI store
     baidu {}        // Baidu Mobile Assistant
     yinyongbao {}   // Application treasure
 }
For example, here I have added several channels to the application market, each channel may be adapted to different SDK versions;
Maybe I want to implement different flavor packages (e.g. production and debug mode) with different logo s and different codes, so we can set up the source set directory to include code and resource files under different configurations.
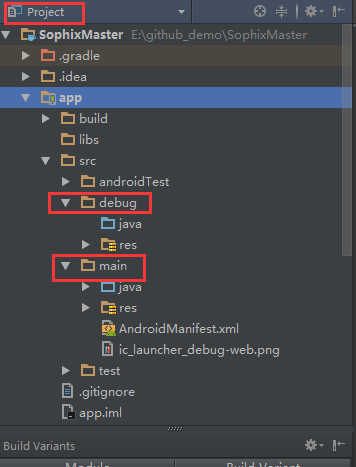
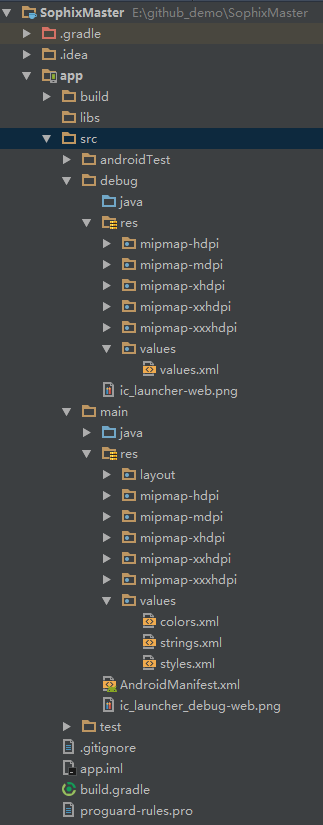
First, switch to the Project view. Our project defaults to only the main source set, that is.. / src/main.
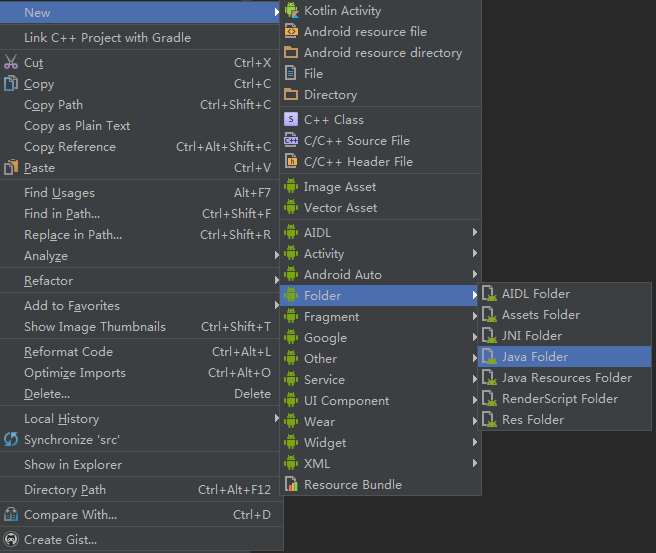
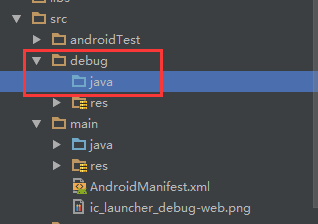
Next, add a source set of debug type:
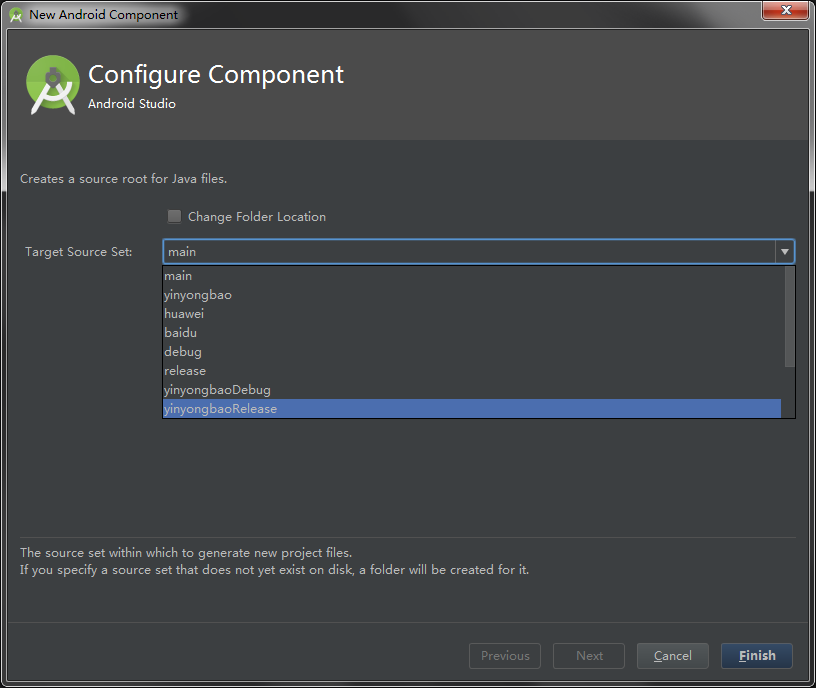
The Target Source Set here contains build Types, product Flavors, and a combination of variants of both. I set up debug and release here, huawei, yingyongbao and baidu, so there are so many options in the picture above. We choose debug, and the system automatically generates the corresponding directory for our project.
Similarly, you can add an XML file directory:

I've added the values file here, as well as the colors, strings, styles files.
Continue to add image resources: 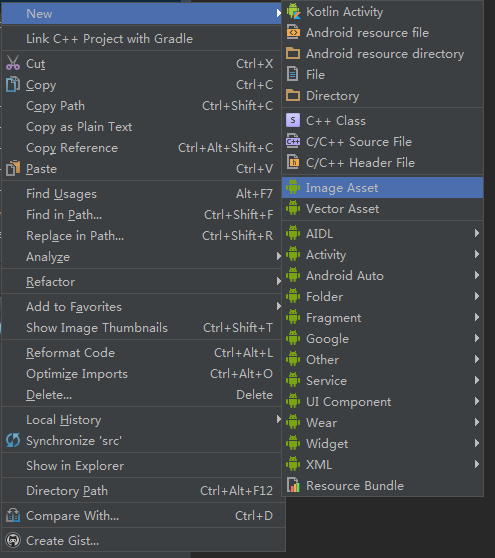
Here is just an example. I chose a different icon:
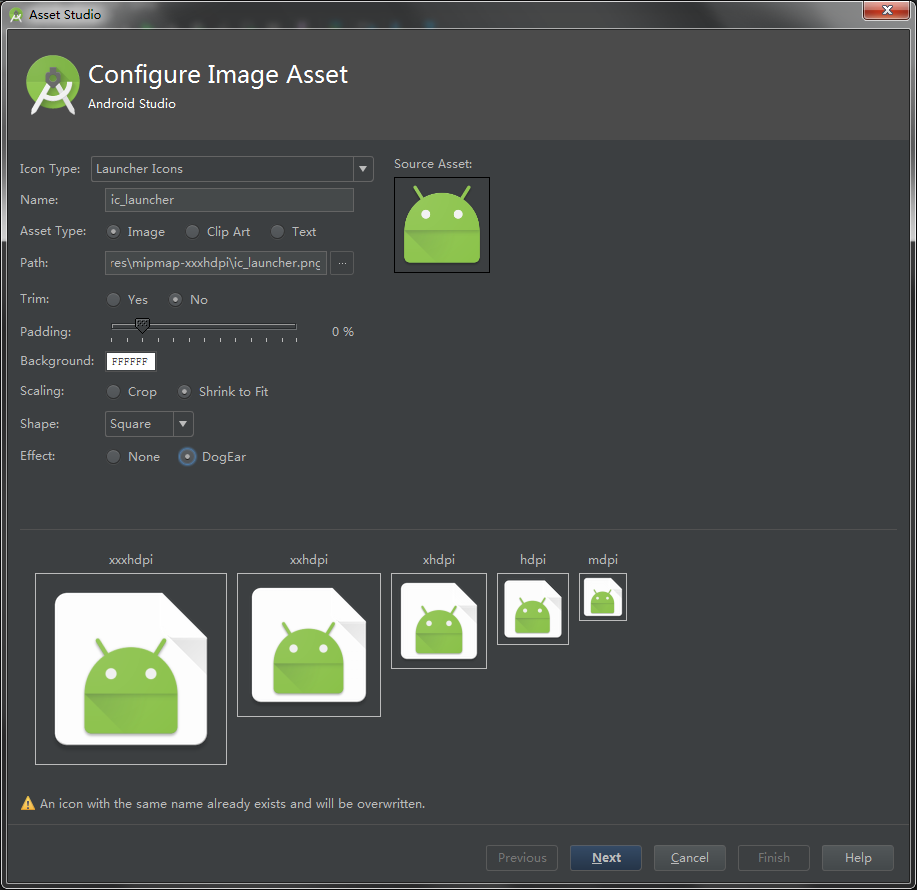
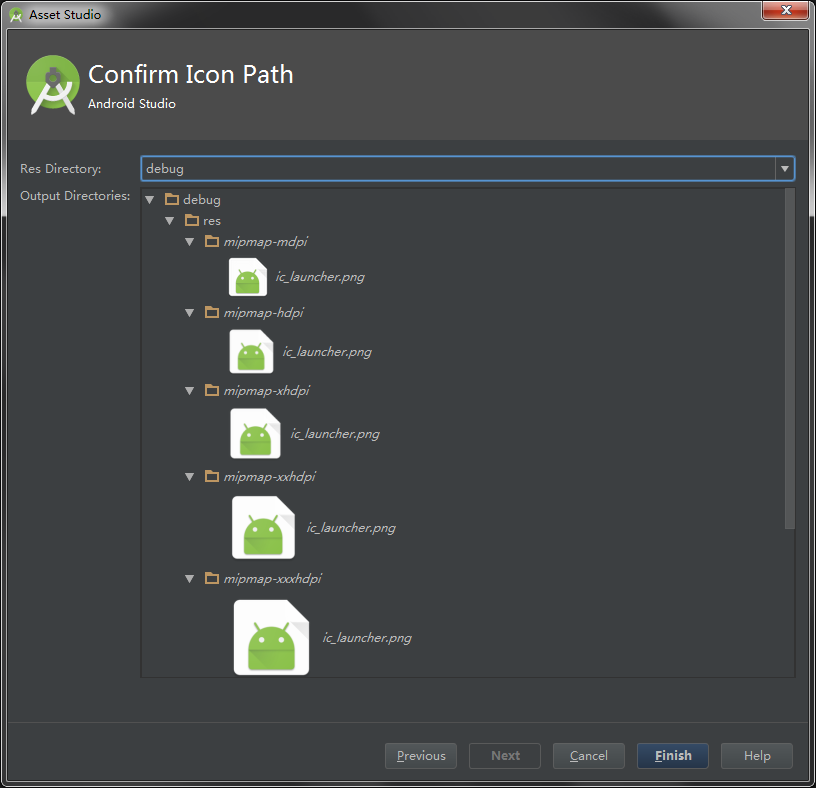
Here's a hint: The name of the icon is duplicated because the ic_launcher icon already exists in the main source set, but that's OK. Let's choose the debug source set in the next step:
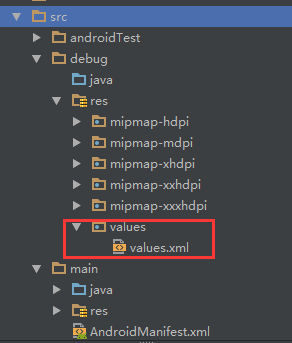
The final catalogue is as follows:
Now we have the debug source set. There is a different app logo in the source set. This means that if we hit the debug package now, its icon will be the icon under the debug source set. As shown below, the debug package is on the left and the release package is on the right.
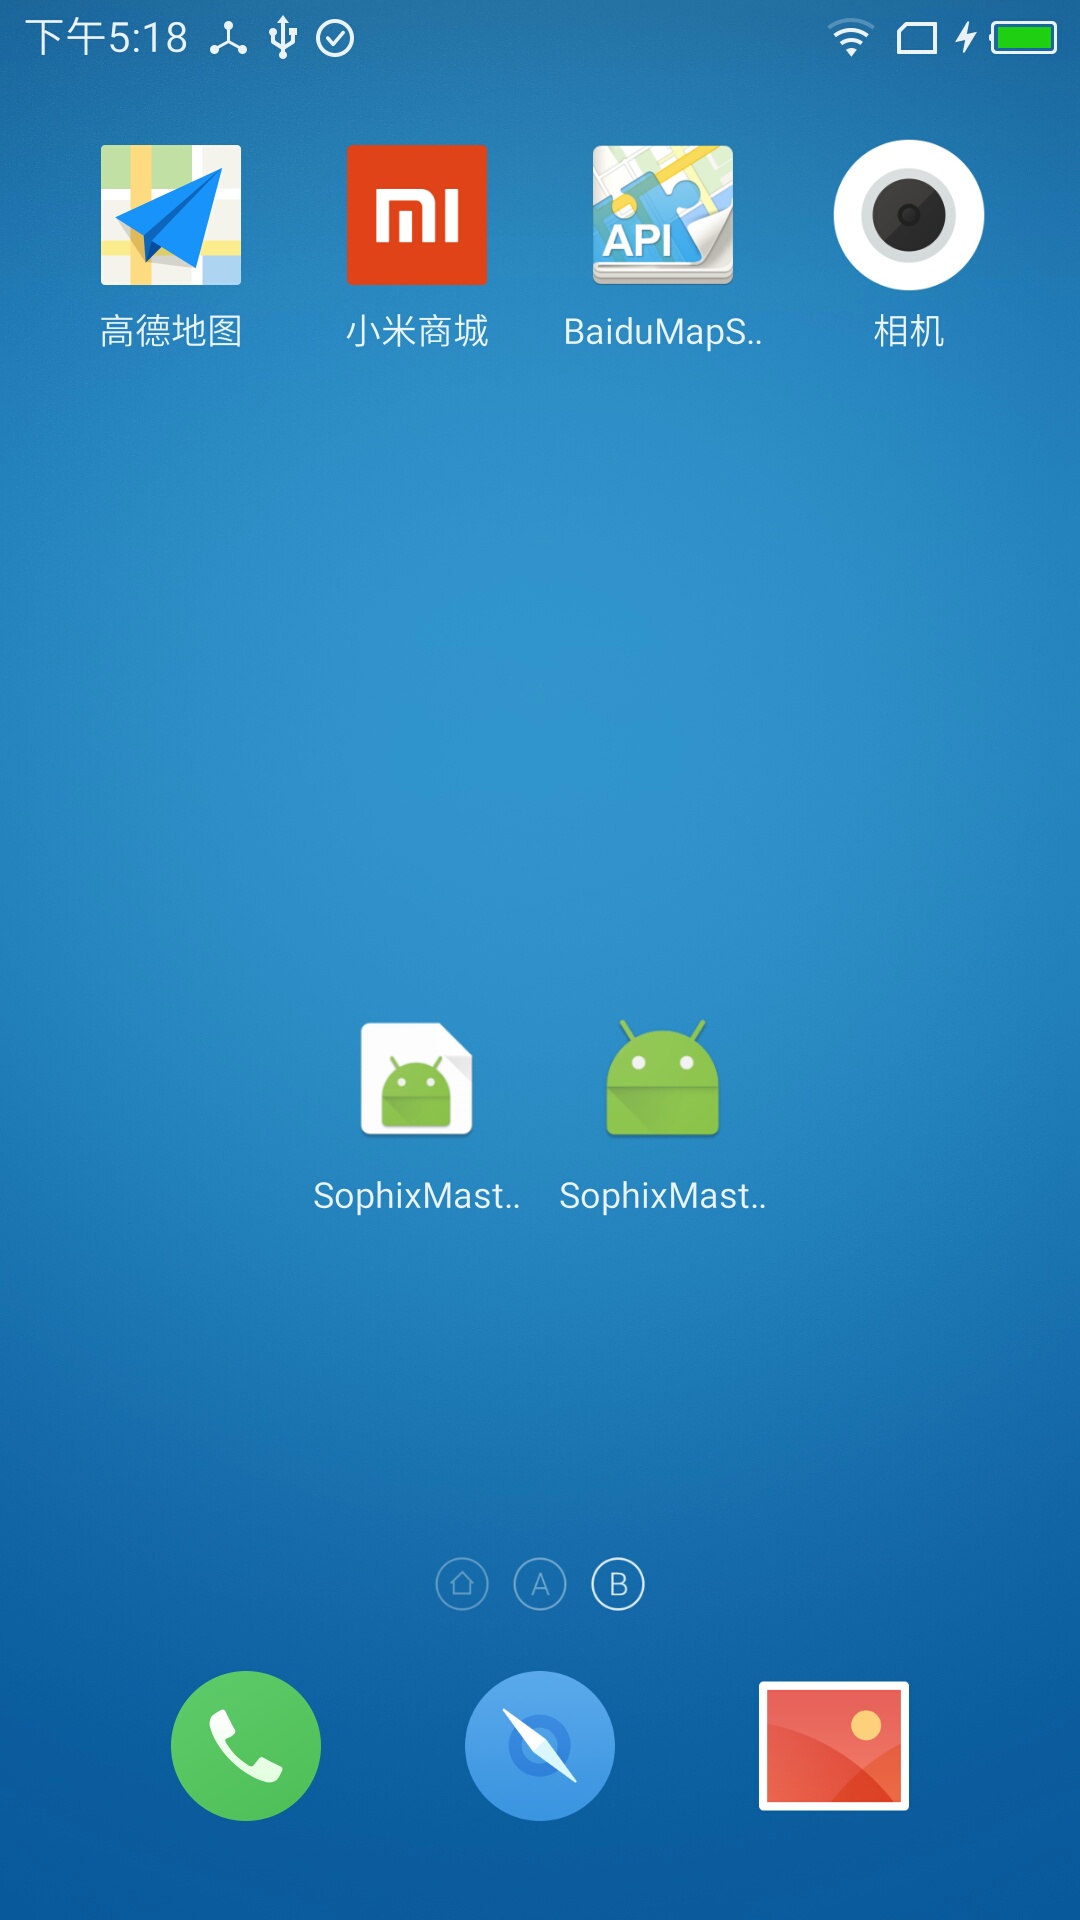
As for why I can load debug package and release package at the same time, because I added application Id Suffix:
buildTypes {
       release {
           minifyEnabled false
           proguardFiles getDefaultProguardFile('proguard-android.txt'), 'proguard-rules.pro'
           signingConfig signingConfigs.config
           applicationIdSuffix ".release"
       }
       debug {
           signingConfig signingConfigs.config
           applicationIdSuffix ".debug"
       }
   }
The application IdSuffix field indicates that, without changing your default program ID (package name), add a suffix to it. For example, if your package name is com.gk.app, but you want to distinguish between test packages and formal packages, then set application IdSuffix to. debug, and your application's corresponding package name becomes com.gk.app.debug.
Multi-channel Packaging
In work, the release of software packages is usually done by small partners. The format of package names is app + version number + channel. Different channels may have different configurations, so we must add corresponding flavors to all channels.
android{

    productFlavors {
        //Three channels
        huawei {}       // HUAWEI store
        baidu {}        // Baidu Mobile Assistant
        yinyongbao {}   // Application treasure
    }

    // Batch channel package value replacement, if your app does not integrate similar third-party libraries that require channel names, can be ignored
    productFlavors.all { flavor ->
        // Alliance, Aurora Push Channel Package, UMENG_CHANNEL is based on your Android Manifest. XML configuration, see below.
        flavor.manifestPlaceholders = [UMENG_CHANNEL: name, JPUSH_CHANNEL: name]
    }
}
Here UMENG_CHANNEL is configured in the Android Manifest. XML file:
<!--Variable adoption ${Variable name}Replacement in this way is not limited to<meta-data/> Label, anything you want to replace.-->
<meta-data
   android:name="UMENG_APPKEY"
   android:value="${UMENG_APPKEY}"/>
Then batch renaming:
android{
    ......
    // Output file configuration, channel package is in this format: app - {version number} - {channel name}. apk
    applicationVariants.all { variant ->
        variant.outputs.each { output ->
            def outputFile = output.outputFile
            if (outputFile != null && outputFile.name.endsWith('.apk')) {
                def dirName = outputFile.parent // Location of output folder

                // File name modification
                def fileName = "app-${defaultConfig.versionName}-${variant.flavorName}.apk"

                // For example, if you don't want to be so troublesome, just add the version number at the back.
                // def fileName = outputFile.name.replace(".apk", "-${defaultConfig.versionName}.apk")

                output.outputFile = new File(dirName, fileName)
            }
        }
    }
    ......
}
So look again at Select Build Variant:
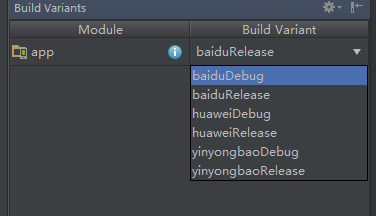
Let's make a baidu release package:
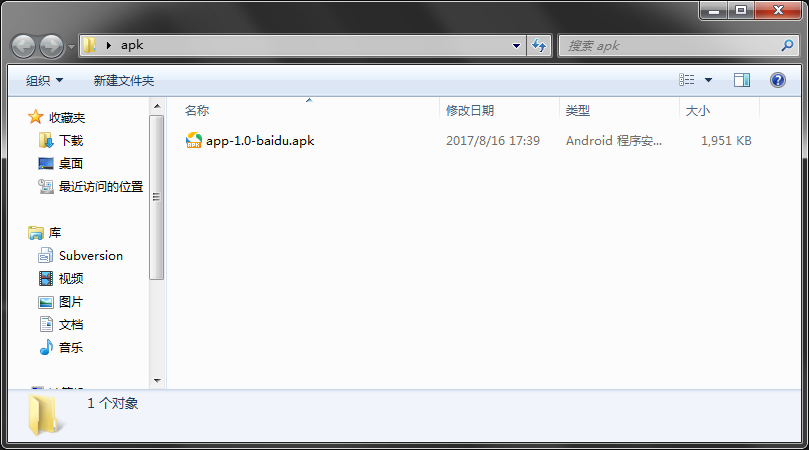
Similarly, multi-channel packaging is completed.