1, Ansible automatic deployment K8S cluster
1.1 introduction to ansible
Ansible is an it automation tool. It can configure systems, deploy software, and coordinate more advanced IT tasks, such as continuous deployment and rolling update. Ansible is suitable for managing enterprise IT infrastructure, from a small scale with a few hosts to an enterprise environment with thousands of instances. Ansible is also a simple automation language that perfectly describes it application infrastructure.
It has the following three characteristics:
-
Simple: reduce learning costs
-
Powerful: aligning application lifecycle
-
Agentless: predictable, reliable and secure
Use document: https://docs.ansible.com/
To install Ansible:
yum install ansible -y
-
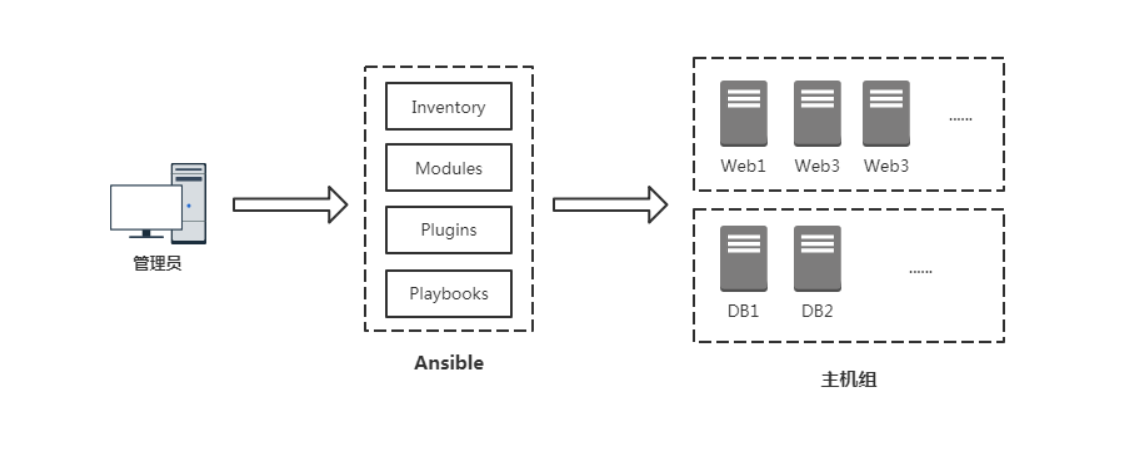
Inventory: host information of Ansible management, including IP address, SSH port, account, password, etc
-
Modules: all tasks are completed by modules, and modules can also be customized, such as frequently used scripts.
-
Plugins: use plug-ins to add Ansible core functions. Many plug-ins are provided by itself. You can also customize plug-ins. For example, the connection plug-in is used to connect to the target host.
-
Playbooks: "script", modular definition of a series of tasks for unified external calls. Ansible core functions.
1.2 host list
| service | Host name | IP address |
| Server side | master | 192.168.116.129 |
| Client | node1 | 192.168.116.130 |
| Client | node2 | 192.168.116.131 |
1.3 command line use
ad-hoc commands can input content and perform an operation quickly, but do not want to keep records.
ad-hoc command is the basic knowledge needed to understand Ansible and learn playbooks.
Generally speaking, Ansible's real ability lies in the script.
1. Connect remote host authentication
Configure host list directory / etc/ansible
Configure hosts: vim /etc/ansible/hosts
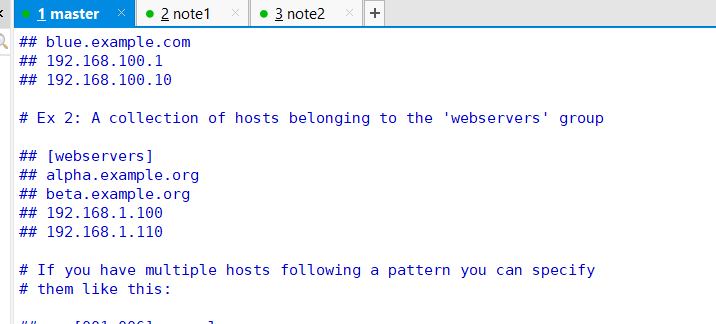
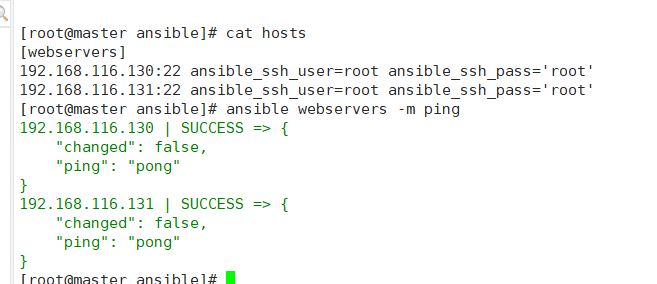
SSH password authentication: [host list configuration]
[webservers]
192.168.116.130:22 ansible_ssh_user=root ansible_ssh_pass='root'
192.168.116.131:22 ansible_ssh_user=root ansible_ssh_pass='root'
SSH key pair authentication:
ssh-keygen

ssh-copy-id root@192.168.116.130
[webservers]
192.168.116.130:22 ansible_ssh_user=root ansible_ssh_key=/root/.ssh/id_rsa
192.168.116.131:22 ansible_ssh_user=root
You can also specify ansible.cfg in the configuration file:
[defaults]
private_key_file = /root/.ssh/id_rsa  # Default path
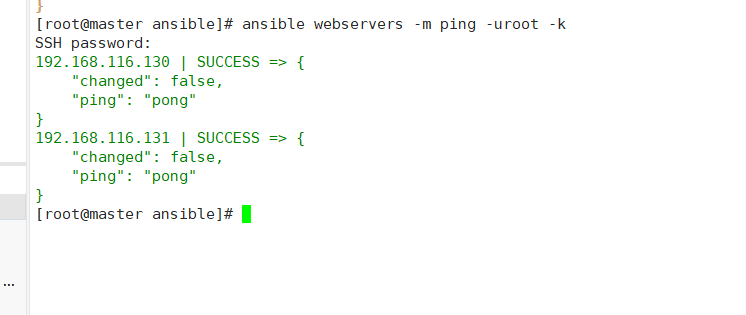
Whether speed measurement is connected


ansible webservers -m ping -uroot -k
2. Common options
| option | describe |
|---|---|
| -C, --check | Run check, do nothing |
| -e EXTRA_VARS,--extra-vars=EXTRA_VARS | Set the additional variable key=value |
| -u REMOTE_USER, --user=REMOTE_USER | SSH connection user, default None |
| -k, --ask-pass | SSH connection user password |
| -b, --become | Lifting authority, default root |
| -K, --ask-become-pass | Right password |
3. Command line use
ansible all -m ping
ansible all -m shell -a "ls /root" -u root -k
ansible webservers -m copy –a "src=/etc/hosts dest=/tmp/hosts"
1.4 common modules
Ansible doc – l view all modules
Ansible doc – s copy view module documents
Module documentation: https://docs.ansible.com/ansible/latest/modules/modules_by_category.html
1,shell
- name: Output command results to specified file
  shell: somescript.sh >> somelog.txt
- name: Switch directory execution command
  shell:
    cmd: ls -l | grep log
    chdir: somedir/
- name: Script writing
  shell: |
      if [ 0 -eq 0 ]; then
         echo yes > /tmp/result
      else
         echo no > /tmp/result
      fi
  args:
    executable: /bin/bash
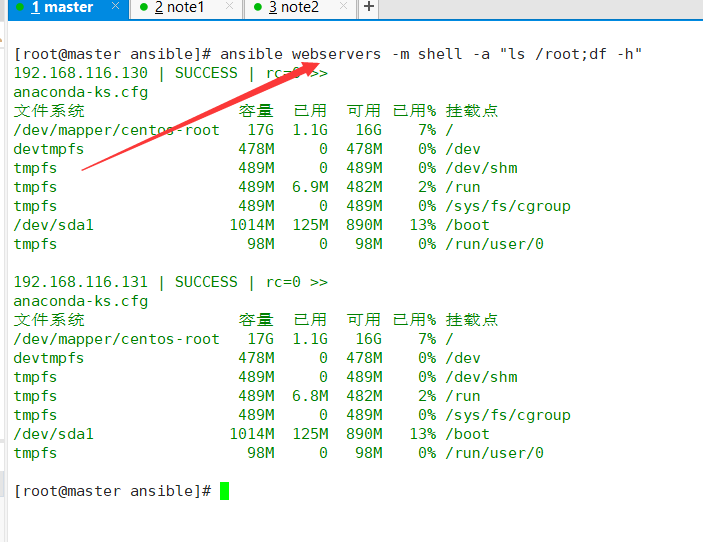
ansible webservers -m shell -a "ls /root;df -h"
2,copy
Copy files to the remote host.
- name: Copy file
  copy:
    src: /srv/myfiles/foo.conf
    dest: /etc/foo.conf
    owner: foo
    group: foo
    mode: u=rw,g=r,o=r
    # mode: u+rw,g-wx,o-rwx
    # mode: '0644'
    backup: yes
3,file
Manage files and file properties.
- name: Create directory
  file:
    path: /etc/some_directory
    state: directory
    mode: '0755'
- name: Delete files
  file:
    path: /etc/foo.txt
    state: absent
- name: Delete directory recursively
  file:
    path: /etc/foo
    state: absent
present, latest: indicates installation
absent: indicates uninstall
4,yum
Package management.
- name: Install the latest version apache
  yum:
    name: httpd
    state: latest
- name: Install all packages in the list
  yum:
    name:
      - nginx
      - postgresql
      - postgresql-server
    state: present
- name: uninstall apache package
  yum:
    name: httpd
    state: absent
- name: Update all packages
  yum:
    name: '*'
    state: latest
- name: install nginx From remote repo
  yum:
    name: http://nginx.org/packages/rhel/7/x86_64/RPMS/nginx-1.14.0-1.el7_4.ngx.x86_64.rpm
    # name: /usr/local/src/nginx-release-centos-6-0.el6.ngx.noarch.rpm
    state: present
5,service/systemd
Management services.
- name: Service management
  service:
    name: etcd
    state: started
    #state: stopped
    #state: restarted
    #state: reloaded
- name: Set startup
  service:
    name: httpd
    enabled: yes
- name: Service management systemd: name=etcd state=restarted enabled=yes daemon_reload=yes
6,unarchive
- name: decompression
  unarchive:
    src=test.tar.gz
    dest=/tmp
7,debug
Print statements during execution.
- debug:
    msg: System {{ inventory_hostname }} has uuid {{ ansible_product_uuid }}

- name: Display all variables known to the host
  debug:
    var: hostvars[inventory_hostname]
    verbosity: 4
1.5 Playbook
Playbooks is Ansible's configuration, deployment, and orchestration language. They can describe what you want to do on a remote machine or describe a series of steps in the IT process. Organize Playbook files in readable YAML format.
If Ansible module is a tool in your work, Playbook is your user manual, and your host asset file is your raw material.
Compared with ad hoc task execution mode, Playbooks is a completely different way to use ansible, and it is particularly powerful.
https://docs.ansible.com/ansible/latest/user_guide/playbooks.html
---
- hosts: webservers
  vars:
    http_port: 80
    server_name: www.ctnrs.com
  remote_user: root
  gather_facts: false
  tasks:
  - name: install nginx The latest version
    yum: pkg=nginx state=latest
  - name: Write in nginx configuration file
    template: src=/srv/httpd.j2 dest=/etc/nginx/nginx.conf
    notify:
    - restart nginx
  - name: ensure nginx Running
    service: name=httpd state=started
  handlers:
    - name: restart nginx
      service: name=nginx state=reloaded
1. Hosts and users
- hosts: webservers
  remote_user: lizhenliang
  become: yes
  become_user: root
ansible-playbook nginx.yaml -u lizhenliang -k -b -K
2. Defining variables
Variables are a convenient way to apply to multiple hosts; in fact, before the host executes, variables will be added to each host, and then referenced in the execution
-
Command line delivery
-e VAR=VALUE
-
Host and group variables
Define variables in Inventory.
[webservers] 192.168.1.100 ansible_ssh_user=root hostname=web1 192.168.1.100 ansible_ssh_user=root hostname=web2 [webservers:vars] ansible_ssh_user=root hostname=web1
-
Single file storage
The preferred practice in Ansible is not to store variables in Inventory.
In addition to storing variables directly in the Inventory file, host and group variables can also be stored in a single file relative to the Inventory file.
Group variables:
Group vars store group variables
Group? Vars / all.yml means all hosts are valid, which is equivalent to [all:vars]
Gross_vars / etcd.yml indicates that the etcd group host is valid, which is equivalent to [etcd:vars]
-
Defined in Playbook
- hosts: webservers
  vars:
    http_port: 80
    server_name: www.ctnrs.com
-
Register variable
- shell: /usr/bin/uptime
  register: result
- debug:
    var: result
3. Task list
Each play contains a series of tasks. These tasks are executed in order. In play, all hosts will execute the same task instructions. The purpose of play is to map the selected host to the task.
 tasks:
  - name: install nginx The latest version
    yum: pkg=nginx state=latest
4. Syntax checking and debugging
Syntax check: ansible playbook -- check / path / to / playbook.yaml
Test run, no actual operation: ANSI ble playbook - C / path / to / playbook.yaml
The debug module prints statements during execution without stopping play for debugging variables or expressions. Debugging with the 'when:' directive is better.
 - debug: msg={{group_names}}
  - name: host name
    debug:
      msg: "{{inventory_hostname}}"
5. Task control
If you have a large script, it might be useful to be able to run specific parts without running the entire script.
  tasks:
  - name: install nginx The latest version
    yum: pkg=nginx state=latest
    tags: install
  - name: Write in nginx configuration file
    template: src=/srv/httpd.j2 dest=/etc/nginx/nginx.conf
    tags: config
Use:
ansible-playbook example.yml --tags "install"
ansible-playbook example.yml --tags "install,config"
ansible-playbook example.yml --skip-tags "install"
6. Process control
Conditions:
tasks:
- name: Only 192.168.1.100 Operation task
  debug: msg="{{ansible_default_ipv4.address}}"
  when: ansible_default_ipv4.address == '192.168.1.100'
Circulation:
tasks:
- name:  Batch create users
  user: name={{ item }} state=present groups=wheel
  with_items:
     - testuser1
     - testuser2
- name: decompression
copy: src={{ item }} dest=/tmp
with_fileglob:
- "*.txt"Common loop statements:
| Sentence | describe |
|---|---|
| with_items | Standard cycle |
| with_fileglob | Traverse directory file |
| with_dict | Ergodic dictionary |
7, template
vars:
    domain: "www.ctnrs.com"
 tasks:
  - name: Write in nginx configuration file
    template: src=/srv/server.j2 dest=/etc/nginx/conf.d/server.conf
# server.j2
{% set domain_name = domain %}
server {
   listen 80;
   server_name {{ domain_name }};
   location / {
        root /usr/share/html;
   }
}
Use the ansible variable in jinja to reference directly {}}. Using ansible variable to assign jinja variable does not use {}} reference.
Define variables:
{% set local_ip = inventory_hostname %}
Conditions and cycles:
{% set list=['one', 'two', 'three'] %}
{% for i in list %}
    {% if i == 'two' %}
        -> two
    {% elif loop.index == 3 %}
        -> 3
    {% else %}
        {{i}}
    {% endif %}
{% endfor %}
For example: generate connection etcd string
{% for host in groups['etcd'] %}
    https://{{ hostvars[host].inventory_hostname }}:2379
    {% if not loop.last %},{% endif %}
{% endfor %}
You can also use the ansible variable.
1.6 Roles
Roles is a method to automatically load some variable files, tasks and handlers based on the known file structure. Grouping content by role is suitable for building complex deployment environment.
1. Define Roles
Roles directory structure:
site.yml
webservers.yml
fooservers.yml
roles/
   common/
     tasks/
     handlers/
     files/
     templates/
     vars/
     defaults/
     meta/
   webservers/
     tasks/
     defaults/
     meta/
-
Tasks - contains the main list of tasks to be performed by the role.
-
Handlers - contains handlers that can be used by this role even anywhere outside this role.
-
defaults - default variable for the role
-
vars - other variables for the role
-
Files - contains files that can be deployed through this role.
-
Templates - contains templates that can be deployed through this role.
-
meta - define some metadata for this role. See more details below.
It is common practice to include platform specific tasks from the tasks/main.yml file:
# roles/webservers/tasks/main.yml - name: added in 2.4, previously you used 'include' import_tasks: redhat.yml when: ansible_facts['os_family']|lower == 'redhat' - import_tasks: debian.yml when: ansible_facts['os_family']|lower == 'debian' # roles/webservers/tasks/redhat.yml - yum: name: "httpd" state: present # roles/webservers/tasks/debian.yml - apt: name: "apache2" state: present
2. Using roles
# site.yml
- hosts: webservers
  roles:
    - common
    - webservers
Define multiple:
- name: 0 gather_facts: false hosts: all roles: - common - name: 1 gather_facts: false hosts: all roles: - webservers
3. Role control
- name: 0.System initialization
  gather_facts: false
  hosts: all
  roles:
    - common
  tags: common
