1, Building a virtual web host
1. Introduction
①fictitious web Host refers to running multiple servers in the same server web Sites, in which each site does not actually occupy the entire server independently, so it is called "virtual" Web host. Through virtual Web Host service can make full use of the hardware resources of the server, so as to greatly reduce the cost of website construction and operation.
②.use httpd The service can easily build a virtual host server and only need to run one httpd Services can support a large number of services at the same time web site
2. web virtual host type
2.1. Domain name based
Use a different domain name for each virtual host, but its corresponding IP The address is the same. For example, www.aaa.com and www.bbb.com Common use of the same IP Address, which is the most commonly used virtual address web Host type
2.2. IP address based
Different domain names are used for each virtual host, and their corresponding IP The address is also different. This method requires multiple network interfaces for the server, so it is not very widely used
2.3. Port based
This method does not use domain names IP Address to distinguish different site content, but use different addresses TCP Port number, so when browsing different virtual sites, users need to specify the port number at the same time to access
3. Deploying domain name based virtual hosts
1. Domain name based virtual host
Provide domain name resolution for virtual host
 Method 1: Deployment DNS Domain name resolution server to provide domain name resolution
 Method 2: in/etc/hosts Temporarily configure the domain name and IP Address mapping
[root@localhost ~]# echo "192.168.100.6 www.hello.com" >> /etc/hosts		#Add dns domain name resolution
[root@localhost ~]# echo "192.168.100.6 www.word.com" >> /etc/hosts
[root@localhost ~]# cat /etc/hosts
127.0.0.1   localhost localhost.localdomain localhost4 localhost4.localdomain4
::1         localhost localhost.localdomain localhost6 localhost6.localdomain6
192.168.100.6 www.hello.com
192.168.100.6 www.word.com
2. Prepare web documents for the virtual host
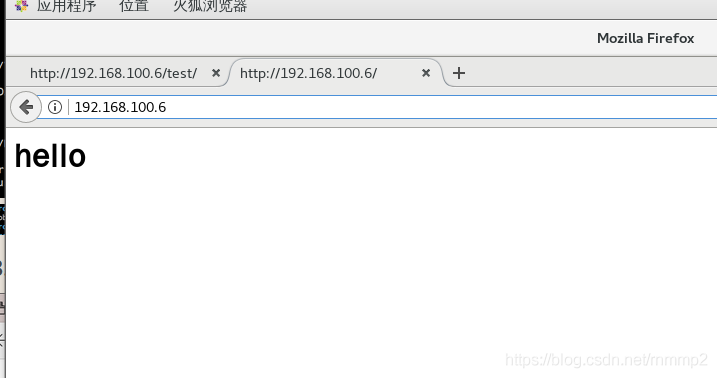
[root@localhost ~]# mkdir -p /var/www/html/hello	#Create directory
[root@localhost ~]# mkdir -p /var/www/html/word
[root@localhost ~]# echo "<h1>hello</h1>" > /var/www	/html/hello/index.html		#Edit web document
[root@localhost ~]# echo "<h1>word</h1>" > /var/www/html/word/index.html
[root@localhost ~]# cd /var/www/html/
[root@localhost html]# ls
hello  word
[root@localhost html]# cat hello/index.html 	#Check for success
<h1>hello</h1>
[root@localhost html]# cat word/index.html
<h1>word</h1>
3. Add virtual host configuration
vim /usr/local/httpd/conf/extra/httpd-vhosts.conf #Source code compilation and installation of virtual host configuration file path
perhaps vim /etc/httpd/conf.d/vhosts.conf #Path to the virtual host configuration file installed by RPM or YUM
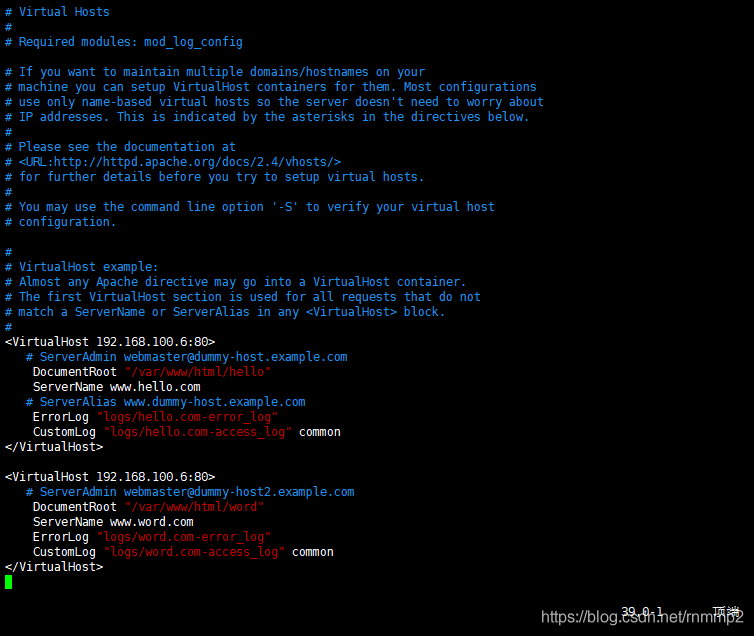
<VirtualHost 192.168.100.6:80> #Set virtual host zone
notes#ServerAdmin webmaster@dummy-host.example.com #Set the administrator mailbox, which can be ignored
DocumentRoot "/var/www/html/hello" #Set site root
ServerName www.hello.com
notes#ServerAlinas www.dummy-host.example.com
ErrorLog "logs/hello.com-error_log" #Set the path to the error log file
CustomLog "logs/hello.com-access_log" common #Set the path to access the log file
</VirtualHost>
<VirtualHost 192.168.100.6:80>
DocumentRoot "/var/www/html/word"
ServerName www.word.com
ErrorLog "logs/word.com-error_log"
CustomLog "logs/word.com-access_log" common
</VirtualHost>
4. Set access control
vim /usr/local/httpd/conf/extra/httpd-vhosts.conf
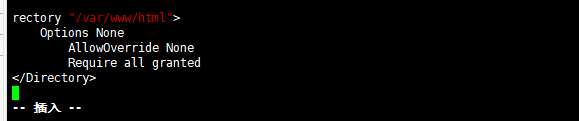
<Directory "/var/www/html"> #Set directory access
Options None #Do not enable any server features
AllowOverride None #Overriding the Apache default configuration is not allowed
Require all granted #Allow all hosts access
</Directory>
1. Options instruction explanation:
The main function of the Options directive is to control which server features will be enabled in a specific directory, which can be used in the virtual host configuration (VirtualHost), directory specific configuration (Directoty) and. htaccess files of the Apache service configuration file
| Options command common options | explain |
|---|---|
| None | Indicates that no server features are started |
| FollowSymLinks | The server allows symbolic connections (soft links) in this directory |
| Indexes | If the entered web address corresponds to a file directory on the server, and there is no file specified by the DirectoryIndex directive in the Apache configuration file in this directory (for example: DirectoryIndex.html index. PHP), all files in this directory will be listed |
| MultiViews | If the path requested by the client may correspond to multiple types of files, the server will automatically select a file that best matches the client's requirements according to the specific circumstances of the client's request. For example, in the file folder of the server site, there is a file named hello Jpg and hello Two files of HTML. At this time, the user enters http://localhost/file/hello , if there is no Hello subdirectory in the file folder, the server will try to find the shape of Hello. In the file folder* File, and then return the best matching Hello according to the specific situation of the user's request Jpg or hello html |
| All | Represents all features except MultiViews, which is also the default setting of the Options command |
2.AllowOverride instruction parsing:
①.htaccess(Distributed implicit configuration file): it provides a method to change the configuration for each directory, that is, a file containing specific instructions is placed in a specific directory, and the instructions act on this directory and all its subdirectories
②When AllowOverride Set as None In the corresponding configuration directory.htaccess The file is not read, that is, it cannot take effect
③When AllowOverride Set as All,Each time a request is made to access a file in the corresponding directory, it will be read.htaccess The configuration of the file means that the original Apache The command will be.htaccess Instruction rewriting in file
④Considering performance and safety,It is generally avoided as far as possible.htaccess File, anything you want to put in. htaccess The configuration in the file can be placed in the main configuration file(httpd. conf)And efficient. therefore AllowOverride Properties are generally configured to None
3. Address restriction policy:
| type | explain |
|---|---|
| Require all granted | Allow all hosts access |
| Require all denied | Deny all hosts access |
| Require local | Allow local host access only |
| Require [not] host < host name or domain name list > | Allow or deny access to the specified host or domain name |
| Require [not] IP < IP address or network segment list > | Allow or deny network access to the specified IP address |
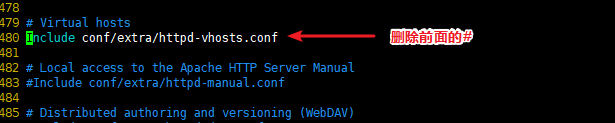
4. Load a stand-alone configuration file
vim /usr/local/httpd/conf/httpd.conf
#The main configuration file path of httpd service installed by source code compilation
------About 480 lines------note off
Include conf/extra/httpd-vhosts.conf    #Load a stand-alone configuration file
 perhaps vim /etc/httpd/conf/httpd.conf		#Path to the httpd service master profile installed by RPM or YUM
IncludeOptional conf.d/*.conf   		#The last line is enabled by default

systemctl restart httpd	#Restart httpd service
5. Accessing a virtual web host in a client
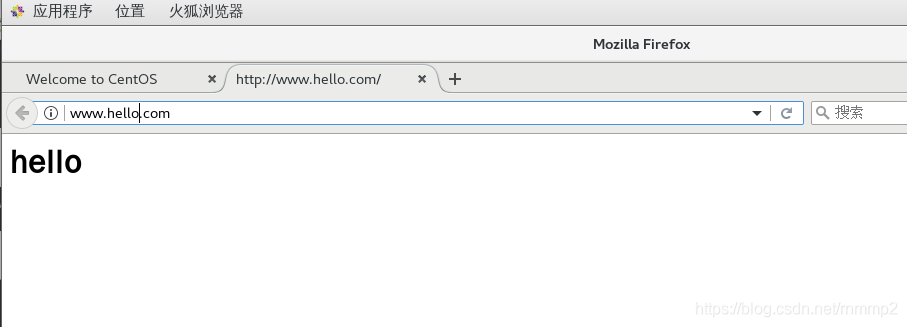
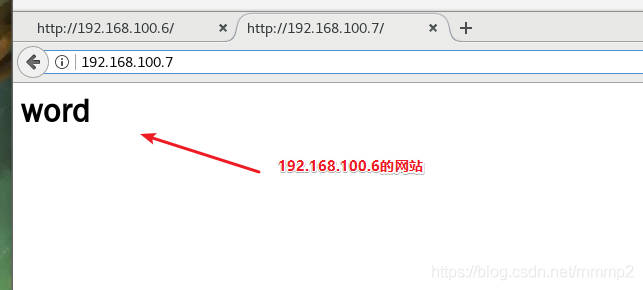
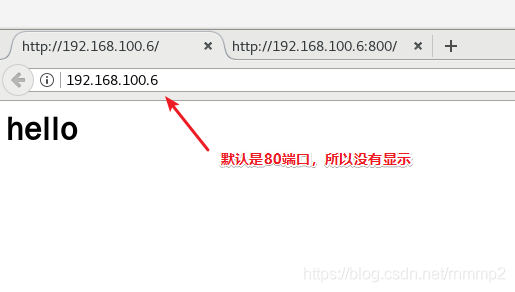
www.hello.com
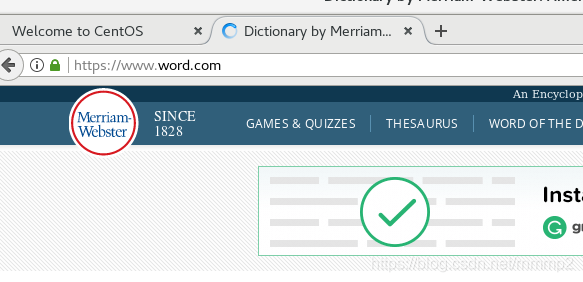
www.word.com (this website overlaps with the real website on the Internet, so it is not displayed.)
The correct display should be: word (because it coincides with the real website domain name, it is not displayed)
4, IP address based virtual host
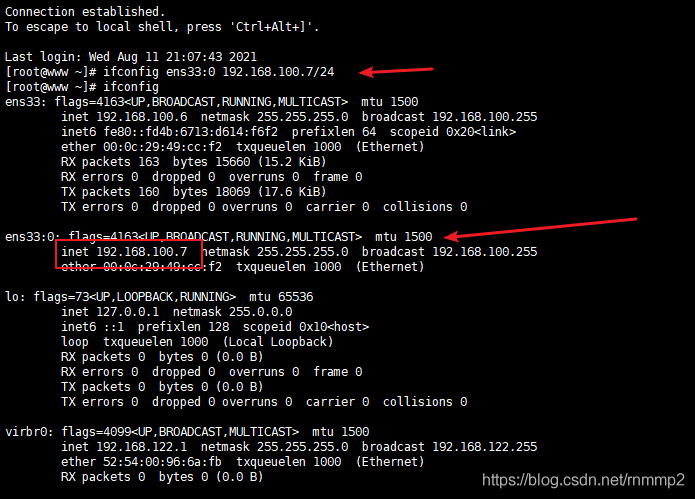
1. Configure the second network card (or virtual network card)
Add virtual network card
Note: after adding a virtual network card, do not restart the network card service. The virtual network card will be lost.
ifconfig ens33:0 192.168.100.7/24
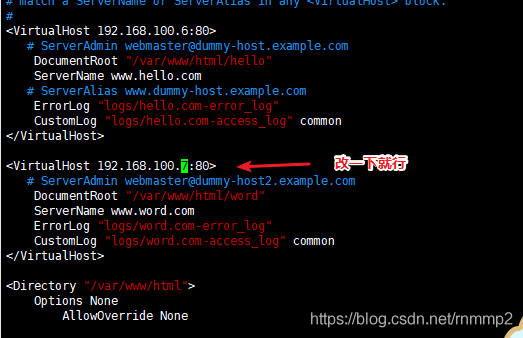
 2. Modify virtual host configuration
Just change it on the basis of the previous step
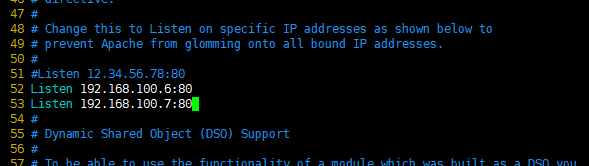
3. Add listening address
vim /usr/local/httpd/conf/httpd.conf
Listen 192.168.100.7
systemctl restart httpd		#Exit after saving and restart the service
4. IP address access virtual web host

5, Port based virtual host
1. Modify listening port
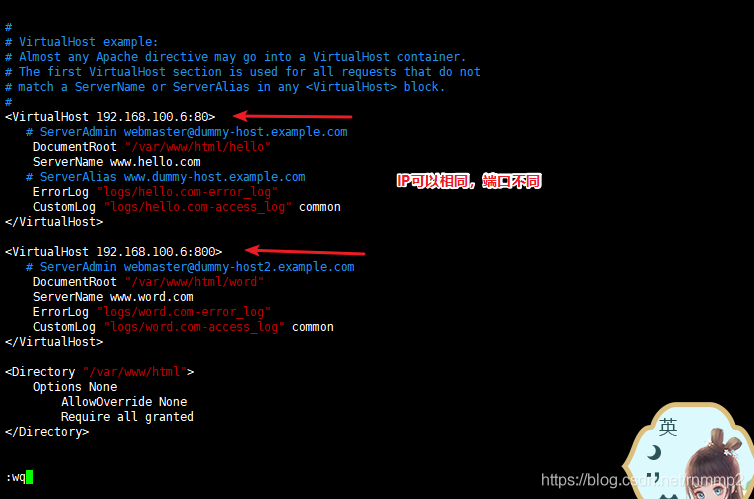
<VirtualHost 192.168.100.6:80>
   # ServerAdmin webmaster@dummy-host.example.com
    DocumentRoot "/var/www/html/hello"
    ServerName www.hello.com
   # ServerAlias www.dummy-host.example.com
    ErrorLog "logs/hello.com-error_log"
    CustomLog "logs/hello.com-access_log" common
</VirtualHost>

<VirtualHost 192.168.100.6:800>
   # ServerAdmin webmaster@dummy-host2.example.com
    DocumentRoot "/var/www/html/word"
    ServerName www.word.com
    ErrorLog "logs/word.com-error_log"
    CustomLog "logs/word.com-access_log" common
</VirtualHost>

<Directory "/var/www/html">
    Options None
        AllowOverride None
        Require all granted
</Directory>
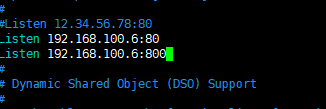
2. Modify listening port
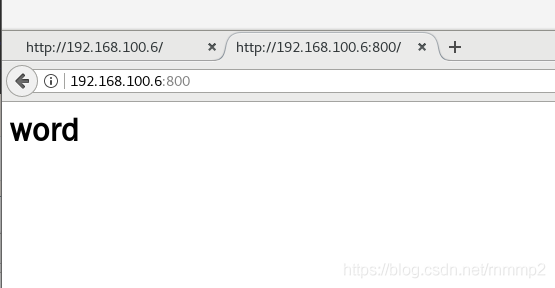
3. Using ports to access virtual web hosts
http://192.168. 100.6:80 # the default is port 80,
http://192.168.100.6:800
2, Building web virtual directory and user authorization restrictions
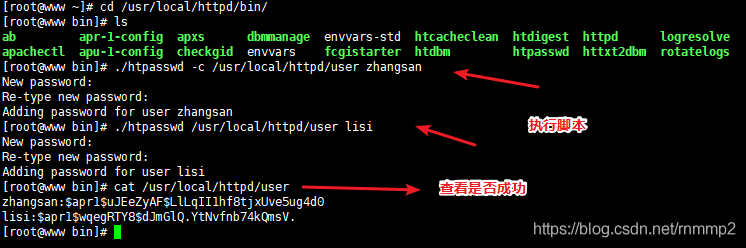
1. Create user authentication data file
cd /usr/local/httpd/bin
./htpasswd -c /usr/local/httpd/user zhangsan   #-c option means to create a new user data file. By default, it means that the specified user data file already exists. It is used to add a new user or modify the password of an existing user.
./htpasswd /usr/local/httpd/user lisi
cat /usr/local/httpd/user                      #Confirm user data file
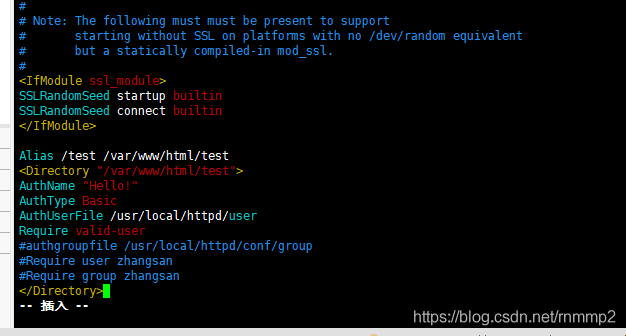
 2. Add user authorization configuration
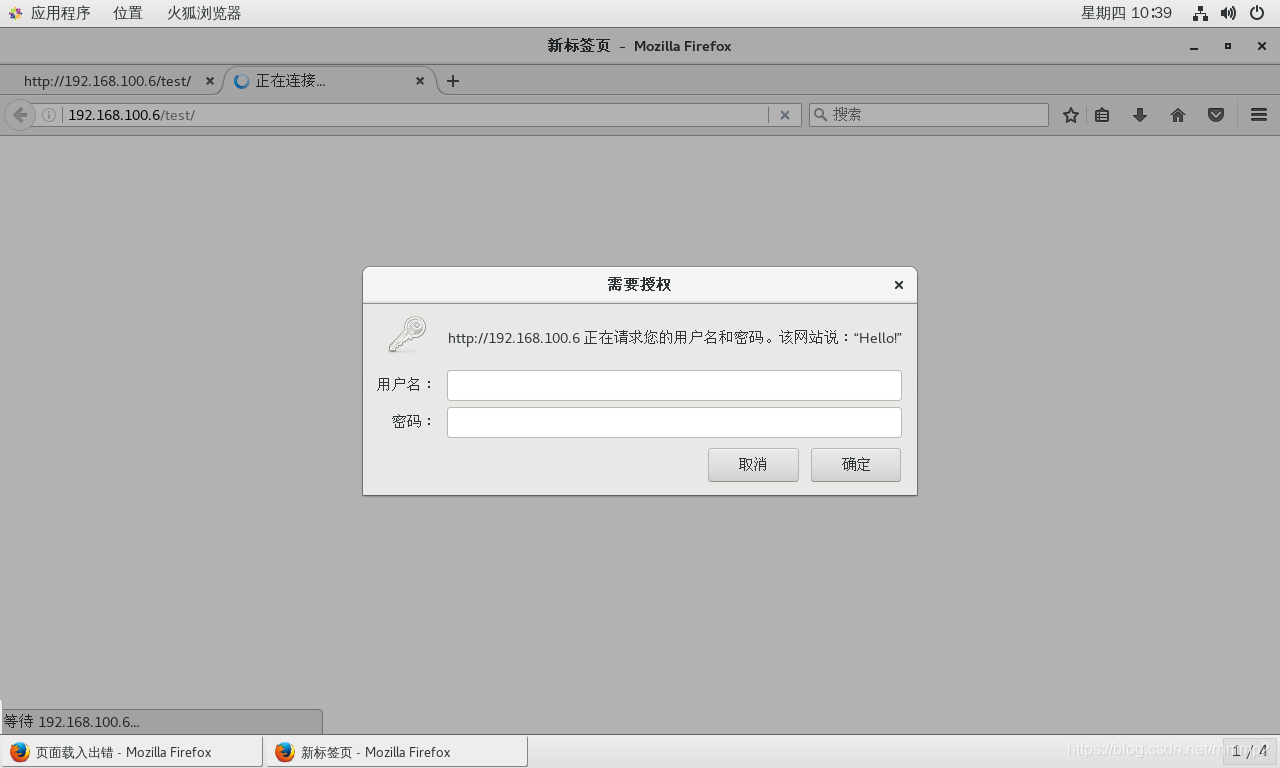
vim /usr/local/httpd/conf/httpd.conf

-----Last line add------
Alias /test /var/www/html/test               #Set the root directory of the virtual directory, / test is the name of the virtual directory
<Directory "/var/www/html/test">            #Set virtual directory configuration area
AuthName "Hello!"                           #Define the protected realm name, which is displayed in the authentication dialog box
AuthType Basic                              #Set the type of authentication. Basic represents basic authentication
AuthUserFile /usr/local/httpd/user     #Set the path of the authentication file used to save the user account and password
Require valid-user                          #Turn on user authentication. Only legal users in the authentication file can access it
#authgroupfile /usr/local/httpd/conf/group  #Set the path of the authentication file used to save the group account and password
#Require user zhangsan                      #Allow only specified users to access
#Require group zhangsan                     #Only the specified group is allowed to access
</Directory>
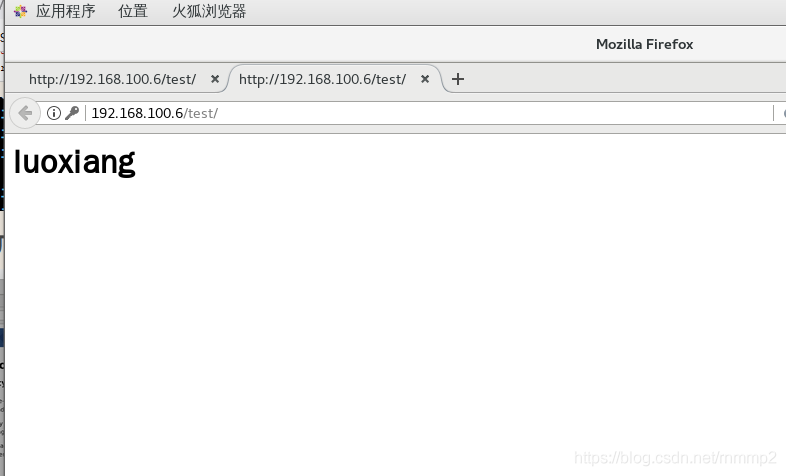
3. Verify user access
mkdir -p /var/www/html/test
echo "<h1>luoxiang</h1>" > /var/www/html/test/index.html
systemctl restart httpd

4. Browser access in client
3, Log segmentation
1. Apache log segmentation
1. Modify master profile
	use Apache Bring your own rotatelogs Split tool, set Apache The log of is automatically divided according to the date of each day.
	vim /usr/local/httpd/conf/httpd.conf
	or
	vim /etc/httpd.conf #The number of rows is different. Search ErrorLog and CustomLog to modify them

	--275 that 's ok--modify
	ErrorLog "| /usr/local/bin/rotatelogs -l /var/log/httpd/error_%Y%m%d.log 86400" #Split error log
	--305 that 's ok--modify
	CustomLog "| /usr/local/bin/rotatelogs -l /var/log/httpd/access_%Y%m%d.log 86400" combined #Split access log
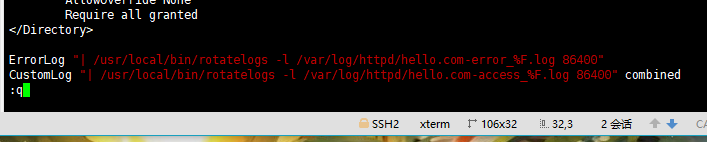
2. Modify virtual host profile
vim /usr/local/httpd/conf/extra/httpd-vhosts.conf
ErrorLog "| /usr/local/bin/rotatelogs -l /var/log/httpd/hello.com-error_%F.log 86400"
CustomLog "| /usr/local/bin/rotatelogs -l /var/log/httpd/hello.com-access_%F.log 86400" combined
#The beginning | is the pipe symbol.
#-The l option indicates that the local time is used as the time base.
#86400 means one day, that is, a new log file is generated every day.
Then restart the httpd service
3. To browser authentication
4. View log

4, AWStats analysis system
1. Introduction
AWStats Is to use Perl An open source log analysis system developed by language is used to complete automatic log statistics and analysis.
2. Transfer the software package required to install AWStats to the / opt directory
cd /opt
tar zxvf awstats-7.6.tar.gz
mv /opt/awstats-7.6 /usr/local/awstats
! [insert picture description here]( https://img-blog.csdnimg.cn/8004b6e3a82f4e7faa2df8f945776abb.png#pic_center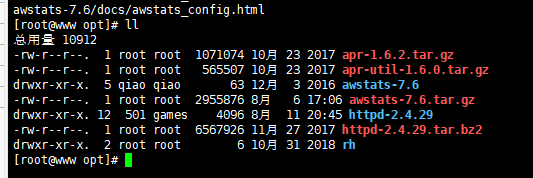
3. Create a configuration file for the sites to be counted
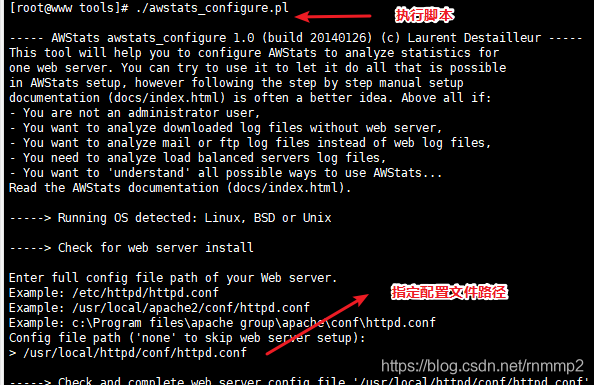
cd /usr/local/awstats/tools
./awstats_configure.pl
......
Config file path ('none' to skip web server setup):
> /usr/local/httpd/conf/httpd.conf #Enter the path to the httpd service master profile
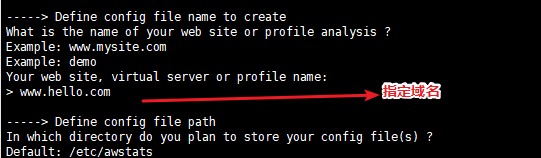
Your web site,virtual server or profile name:
> www.hello.com #Enter the domain name of the site to be counted
Everything else is y Or enter
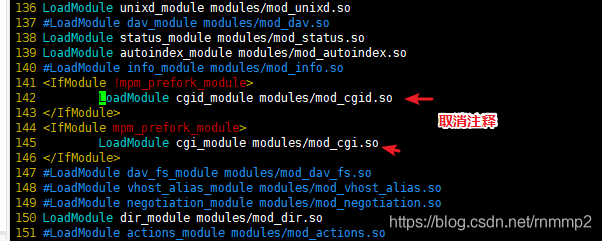
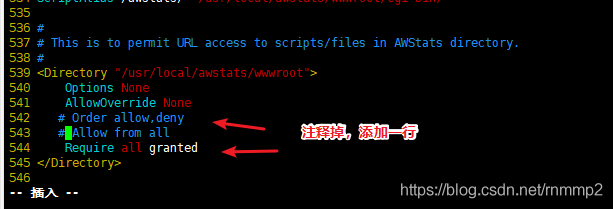
4. Modify the access permission of automatically generated awstats and load the CGI module (APACHE version 2.4 or above needs to load the CGI module)
5. Note 542 and 543 two line configuration, and then add one line configuration
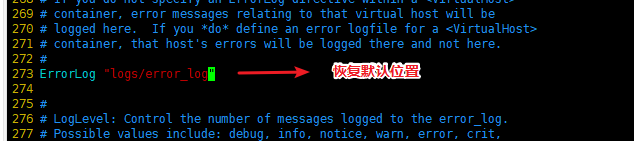
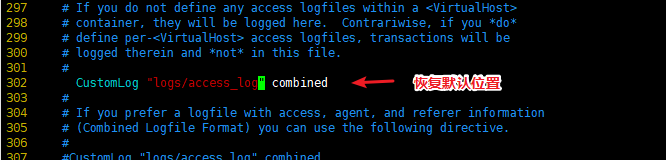
6. Restore default log file location
7. Modify site statistics configuration
vim /etc/awstats/awstats.www.hello.com.conf

8. Create a new awstats directory and restart the service

9. Perform log analysis
cd /usr/local/awstats/tools/
./awstats_updateall.pl now          #Update data

10. Set cron scheduled tasks
crontab -e # writes scheduled tasks and updates log file data every 6 minutes
*/6 * * * * /usr/local/awstats/tools/awstats_updateall.pl now
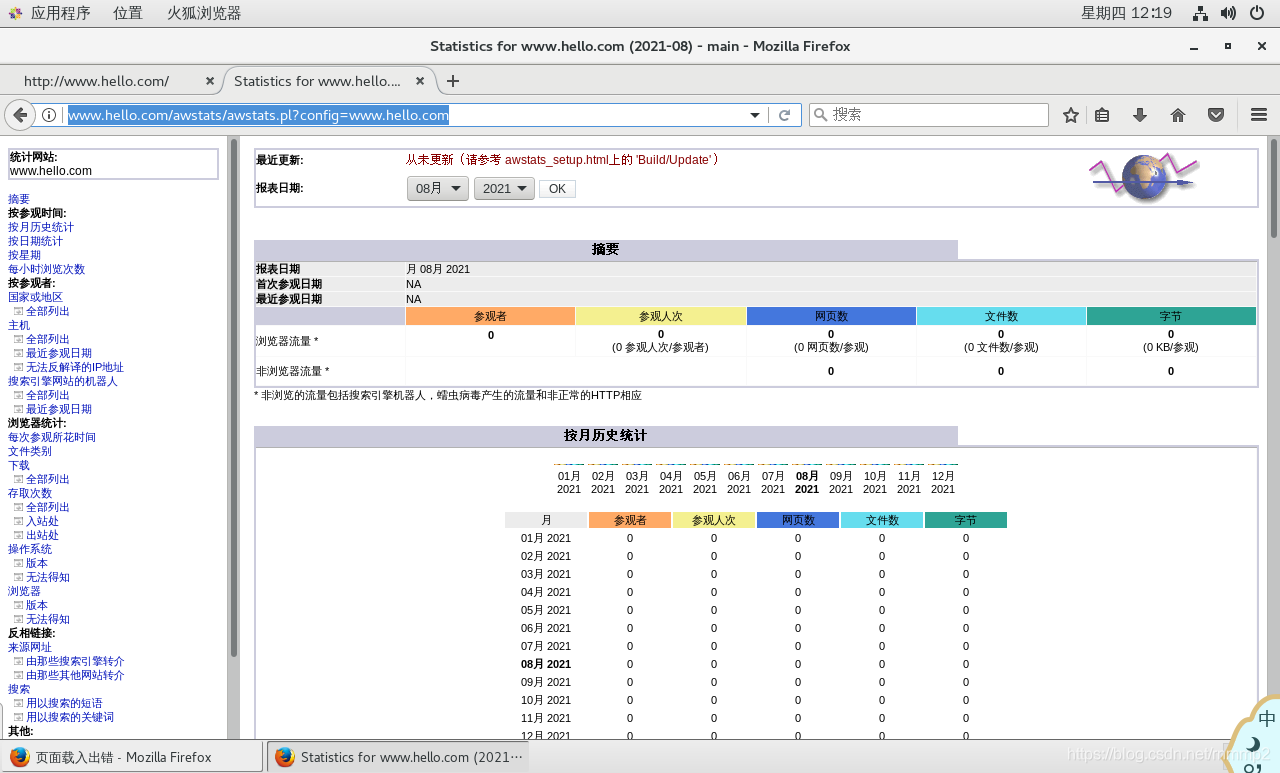
11. Visit the AwStats analysis system site
systemctl stop firewalld
systemctl disable firewalld
setenforce 0
echo "192.168.100.6 www.hello.com" >> /etc/hosts
http://www.hello.com/awstats/awstats.pl?config=www.hello.com 		# Browser access address