1, Data request
1. Interface setting
In consideration of security, the applet official requires that the interface requested by the applet must meet the following two conditions:
- Only https interfaces can be requested
- The domain name of the interface must be added to the trust list
(1) Developer tool configuration
The first way: use it when testing

The second way: use it when you really use it
Configure the domain name of your server in the background of applet management, add legitimacy, and you can access it normally.
Log in to the applet background and configure your domain name


After the applet background configuration is successful, you can see the information of your configured server in the settings - details of wechat developer tool. You can access the content below this website freely in the future.
Note: the wechat applet cannot recognize the server addresses of local tests such as localhost, unless you check not to verify the https legal domain name.
(2) Request mode and parameter transmission
get request syntax in applet:
wx.request({
      url: 'server address',
      method:'get',
      data:{
         name:xx,
         name:xx
      },
      success:(res)=>{
        console.log(res)
      }
    })
post request syntax in applet:
wx.request({
      url: 'server address',
      method:'post',
      data:{
         name:xx,
         name:xx
      },
      success:(res)=>{
        console.log(res)
      }
    })
(3) Supplement
-
There is no cross domain statement in the applet, because the hosting environment of the applet depends on the overall environment of wechat, not on the browser, so the applet does not exist in the cross domain problem.
-
The concept of ajax in applet the core of ajax is an XMLHTTPRequest object based on the browser, but the applet does not rely on the browser, so if it requests back-end data again, we don't call it sending ajax request, but it is more appropriate to initiate network request.
2, Page Jump
1. Declarative navigation
(1)tabBar page Jump
For example, our home page and test page are both pages in tabBar. If you want to click the home page to jump to another page in tabBar, the use method is as follows:

We add the following code on the home page:
<navigator url="/pages/search/search" open-type="switchTab">Jump to tabBar page</navigator>
Then click the jump button on the home page to jump to the search page.
(2) Non tabBar page Jump
If you want to jump from the index(tabBar page) to the details page (non TabBar page), first create the detail page yourself, and then add the following code on the home page.
<navigator url="/pages/detail/detail" open-type="navigate">Jump to details page</navigator>
(3) Return to previous page
For example, in the above case, we can add the following code on the details page:
<navigator open-type="navigateBack" delta="1">Return to the previous level</navigator>
2. Programming navigation
(1) Jump to tabBar page
For example, if we jump to the search page (tabBar page) on the index home page (tabBar page), we add the following code on the index page:
Add jump tag to wxml
<button bindtap="goToSearch">Jump to search page</button>
Add jump logic to js
goToSearch(){
    wx.switchTab({
      url: '/pages/search/search',
    })
  }
(2) Jump to non tabBar page
For example, if we want to jump from the home page (tabBar page) to the details page (non tabBar page), then we are in index Add the following code to wxml:
index. Add jump tag to wxml:
<button bindtap="goToDetail">Jump to details page</button>
index. Implementation of jump logic in JS
  goToDetail(){
    wx.navigateTo({
      url: '/pages/test/test'
    })
  }
(3) Navigation parameter transmission
index.wxml(tabBar page) Add button
<button bindtap="goToDetail">Jump to details page</button>
index. Processing login logic in JS
goToDetail(){
    wx.navigateTo({
      url: '/pages/detail/detail?id=1'
    })
  }
When the detail page is received, it can be obtained in the options object of the onload function.
 onLoad: function (options) {
    console.log(options)//{id:1}
  }
3, Pull down to touch the bottom
1. Introduction
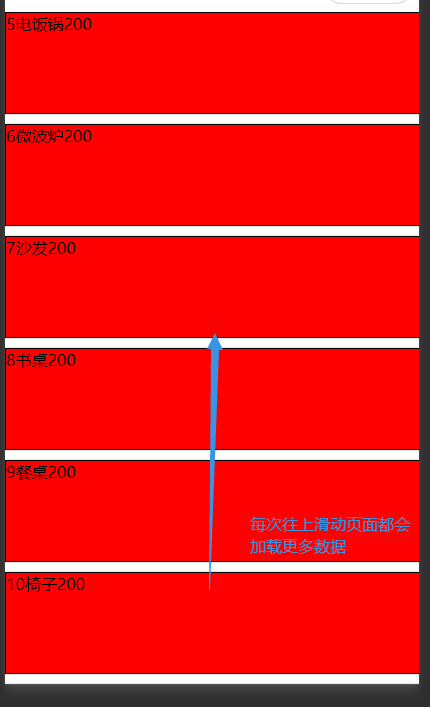
When the mobile terminal has a lot of data, it usually realizes the dynamic loading of data by pulling down the bottom touch time. (that is, when the user slides upward on the mobile phone, he can request the back-end interface to obtain more page data rendering)
2. Use cases
fastmock simulates the data of the back-end interface. You can use my
https://www.fastmock.site/mock/353e1f062bc5a256d2444434e8915fc3/news/news
Create a new test page, test JS to define the array and request back-end interface
Page({
  data: {
    goodsList:[]
  },
  getGoodsList:function(){
    wx.request({
      url: 'https://www.fastmock.site/mock/353e1f062bc5a256d2444434e8915fc3/news/news',
      type:'get',
      success:(res)=>{
      //This is to merge the loaded new data with the original data
        this.setData({
          goodsList:[...this.data.goodsList,...res.data.data]
        })
      }
    })
  },
  onLoad: function () {
    this.getGoodsList();
  },
 })
test.js (note that this is a fixed method name, and the name cannot be changed. This method exists when the page is created, not created by yourself)
Page({
  data:{...},
  getGoodsList:function(){...},
  onLoad: function () {...},
  onReachBottom: function () {
    this.getGoodsList()
  }

)}
Note: the above method must trigger the onReachBottom event when the page hits the bottom to re obtain the back-end interface data. It should be noted that if you simulate fake data yourself, there needs to be enough fake data. Only when it exceeds the width of one screen of the mobile terminal will more events be loaded from the drop-down.
- test. The styles defined in wxss are as follows:
.box{
  width:100%;
  height:100px;
  background-color: red;
  border:1px solid #000;
  box-shadow: 0px 0px 3px #ccc;
  margin:10px 0;
} 
Modify the default bottom touch distance. The default bottom touch distance in the applet is 50px, that is, when you slide the page upward, the onReachBottom event will be triggered when the page is 50px away from the bottom. If you want to
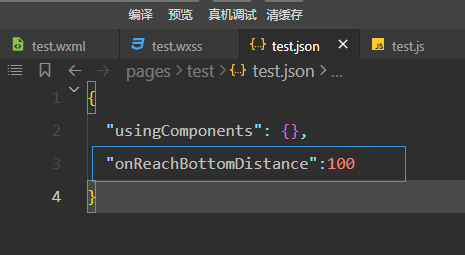
{
  "usingComponents": {},
  "onReachBottomDistance": 100
}- Add loading effect
getGoodsList:function(){
    // Add loading effect before sending request
    wx.showLoading({title:'loading....'})

    wx.request({
      url: 'https://www.fastmock.site/mock/353e1f062bc5a256d2444434e8915fc3/news/news',
      type:'get',
      success:(res)=>{
        console.log(res)
        this.setData({
          goodsList:[...this.data.goodsList,...res.data.data]
        })
      },
      complete:()=>{
        // In fact, we don't need to add settimeout because our data requests come back too fast. Sometimes we can add it to the effect
        setTimeout(function () {
          wx.hideLoading()
        }, 2000)
      }
    })
  },
The display effect of the page is as follows:

3. Throttling treatment
We print a sentence in the onReachBottom function to see how many times the user runs when dragging many times.
 getGoodsList:function(){
    console.log('Called')
    . . . .
}
We found that we will print many times when dragging, so the performance is not very good, so we use the throttle valve to solve it.
Specific operation steps
Step 1: define the isLoading variable in data
If isLoading is false, it means that subsequent requests can be allowed. If it is true, it means that all subsequent requests are not allowed.
 data: {
    goodsList:[],
    isLoading:false
  }
Step 2: in the getGoodsList method, network requests are allowed first, so set isLoading to true
getGoodsList:function(){
    this.setData({
      isLoading:true
    })
    ....
}
Step 3: after the data request is completed, set isLoading to false
    complete:()=>{
        setTimeout(function () {
          wx.hideLoading()
        }, 2000)
        <!--Reduction throttle valve-->
        this.setData({
          isLoading:false
        })
      }
Step 4: bottom event change
If the throttle valve is open, the request will not be made again, otherwise the data at the back end will be requested.
 onReachBottom: function () {
    if(this.data.isLoading==true)return ;
    this.getGoodsList()
  }
test.js complete code is as follows:
// pages/test/test.js
Page({
  data: {
    goodsList:[],
    isLoading:false
  },
  getGoodsList:function(){
    this.setData({
      isLoading:true
    })
    // Add loading effect before sending request
    wx.showLoading({title:'loading....'})
    wx.request({
      url: 'https://www.fastmock.site/mock/353e1f062bc5a256d2444434e8915fc3/news/news',
      type:'get',
      success:(res)=>{
        console.log(res)
        this.setData({
          goodsList:[...this.data.goodsList,...res.data.data]
        })
      },
      complete:()=>{
        // In fact, we don't need to add settimeout because our data requests come back too fast. Sometimes we can add it to the effect
        setTimeout(function () {
          wx.hideLoading()
        }, 2000)
        this.setData({
          isLoading:false
        })
      }
    })
  },
  onLoad: function () {
    this.getGoodsList();
  },
  onReachBottom: function () {
    if(this.data.isLoading==true) return ;
    this.getGoodsList()
  },

})