Spring framework 4
What is Spring AOP (aspect oriented programming)?
Aspect oriented programming (AOP), similar to object-oriented programming (OOP), is also a programming mode. Spring AOP is a framework based on AOP programming mode. Its use effectively reduces the repeated code between systems and achieves the purpose of loose coupling between modules.
The full name of AOP is "Aspect Oriented Programming", that is, Aspect Oriented Programming. It isolates all parts of business logic, so that developers can concentrate on the core business when writing business logic, so as to improve the development efficiency.
AOP adopts horizontal extraction mechanism to replace the repetitive code of the traditional vertical inheritance system. Its application is mainly reflected in transaction processing, log management, permission control, exception handling and so on.
At present, there are two most popular AOP frameworks, Spring AOP and AspectJ.
Spring AOP uses pure Java The implementation does not require a special compilation process and class loader, and the enhanced code is implanted into the target class by proxy during operation.
AspectJ is an AOP framework based on Java language. Since Spring 2.0, Spring AOP has introduced support for AspectJ. AspectJ extends the Java language and provides a special compiler to provide horizontal code implantation at compile time.
In order to better understand AOP, you need to have some understanding of AOP related terms. These professional terms mainly include Joinpoint, Pointcut, Advice, Target, Weaving, Proxy and Aspect. Their meanings are shown in the table below.
| name | explain |
| Joinpoint | It refers to those intercepted points. In Spring, the methods of the target class can be intercepted by dynamic proxy. |
| Pointcut | It refers to the joinpoints to be intercepted, that is, the intercepted connection points. |
| Advice | It refers to what to do after intercepting the Joinpoint, that is, the enhanced content of the pointcut. |
| Target | Refers to the target object of the proxy. |
| Weaving (implant) | It refers to the process of applying enhanced code to the target and generating proxy objects. |
| Proxy (proxy) | Refers to the generated proxy object. |
| Aspect (aspect) | Combination of entry point and notification. |
Spring JDK dynamic proxy
JDK dynamic proxy is through Java. Net in JDK lang.reflect. Implemented by proxy class. The following is a specific case to demonstrate the use of JDK dynamic agent.
1. Create project
2. Create the interface StudentDao
In the src directory of the project, create a file named com wangxing. jdkproxydemo1. Dao package. Create a StudentDao interface under the package. After editing, it is as follows.
package com.wangxing.jdkproxydemo1.dao;
public interface StudentDao {
    public void add(); // add to

    public void update(); // modify

    public void delete(); // delete

    public void find(); // query
}
3. Create the implementation class StudentDaoImpl
On COM wangxing. jdkproxydemo1. dao. Create the implementation class StudentDaoImpl of CustomerDao interface under impl package and implement all methods in the interface, as shown below.
package com.wangxing.jdkproxydemo1.dao.impl;
import com.wangxing.jdkproxydemo1.dao.StudentDao;
public class StudentDaoImpl implements StudentDao {
    @Override
    public void add() {
        System.out.println("Add student...");
    }
    @Override
    public void update() {
        System.out.println("Modify student...");
    }
    @Override
    public void delete() {
        System.out.println("Delete student...");
    }
    @Override
    public void find() {
        System.out.println("Query students...");
    }
}
4. Create facet class MyAspect
In the src directory, create a file named com wangxing. jdkproxydemo1. Jdkaspect package. Create a facet class MyAspect under the package. After editing, it is as follows.
package com.wangxing.jdkproxydemo1.jdkaspect;
public class MyAspect {
    public void myBefore() {
        System.out.println("Before method execution");
    }
    public void myAfter() {
        System.out.println("After method execution");
    }
}
In the above code, two enhanced methods are defined in the aspect, namely myBefore() method and myAfter() method, which are used to enhance the target class (CustomerDaoImpl).
5. Create proxy class MyBeanFactory
On COM wangxing. jdkproxydemo1. Create a class named MyBeanFactory under the jdkaspect package, and use Java lang.reflect. Proxy implements JDK dynamic proxy, as shown below.
package com.wangxing.jdkproxydemo1.jdkaspect;
import com.wangxing.jdkproxydemo1.dao.StudentDao;
import com.wangxing.jdkproxydemo1.dao.impl.StudentDaoImpl;
import java.lang.reflect.InvocationHandler;
import java.lang.reflect.Method;
import java.lang.reflect.Proxy;
public class MyBeanFactory {
    public static StudentDao getBean() {
        // Prepare target class
        final StudentDao studentDao = new StudentDaoImpl();
        // Create slice class instance
        final MyAspect myAspect = new MyAspect();
        // Use proxy classes for enhancements
        return (StudentDao) Proxy.newProxyInstance(
                MyBeanFactory.class.getClassLoader(),
                new Class[] { StudentDao.class }, new InvocationHandler() {
                    @Override
                    public Object invoke(Object proxy, Method method,
                                         Object[] args) throws Throwable {
                        myAspect.myBefore(); // Pre enhancement
                        Object obj = method.invoke(studentDao, args);
                        myAspect.myAfter(); // Post enhancement
                        return obj;
                    }
                });
    }
}
In the above code, a static getBean() method is defined, which simulates the IoC idea of the Spring framework, creates an instance by calling the getBean() method, and creates a customerDao instance in line 14.
The facet class instance created in line 16 is used to call the corresponding methods in the facet class; Lines 18 to 26 are the code that uses the Proxy class to enhance the methods in the created instance customerDao. The first parameter of Proxy's newProxyInstance() method is the class loader of the current class, the second parameter is the interface of the implementation class of the created instance, and the third parameter is the method to be enhanced.
Before and after the execution of the target class method, execute the myBefore() method and myAfter() method in the aspect class respectively.
6. Create test
@Test
public void test1(){
//Get proxy object
StudentDao studentDao=MyBeanFactory.getBean();
//Get ordinary objects
//StudentDao studentDao=new StudentDaoImpl();
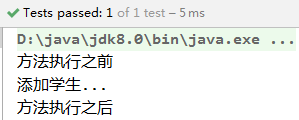
studentDao.add();
}In the code above, when you call the getBean() method, you get the proxy object of the StudentDao class, and then call the method in that object.
7. Run the project and view the results
Spring cglb dynamic proxy
Pass< Spring JDK dynamic proxy >From the study of the tutorial, we can know that JDK dynamic agent is very simple to use, but it also has certain limitations. This is because JDK dynamic agent must implement one or more interfaces. If you don't want to implement interfaces, you can use CGLIB agent.
CGLIB (Code Generation Library) is a high-performance open source code generation package. It is used by many AOP frameworks. Its bottom layer is ASM, a small and fast bytecode processing framework( Java Bytecode manipulation framework) converts bytecode and generates new classes. Therefore, CGLIB depends on ASM packages and decompresses them Spring Spring-core-5.1.5 RELEASE. Jar. The file directory is shown in Figure 1.
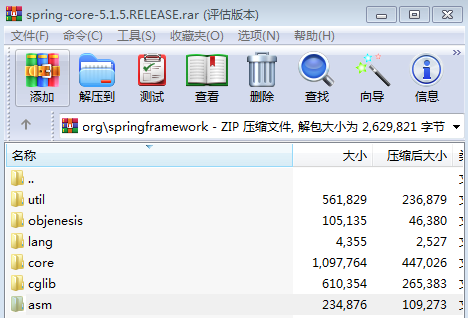
As can be seen from Figure 1, the extracted core package contains cglib and ASM, that is, spring-core-5.1.5 RELEASE. The core package of the JAR version has integrated the packages required by cglib, so there is no need to import the JAR package of ASM in the development.
The following is a case to demonstrate the agent process of CGLIB.
1. Create a project and import Spring dependencies
2. On COM wangxing. cglibdemo1. Create the interface UserDao under Dao package, define add, delete, modify and query methods in the class, and write output statements in each method, as shown below.
package com.wangxing.cglibdemo1.dao;

public interface UserDao {
    public void add(); // add to

    public void update(); // modify

    public void delete(); // delete

    public void find(); // query
}
3. On COM wangxing. cglibdemo1. dao. Create the implementation class of the interface UserDao under impl package
package com.wangxing.cglibdemo1.dao.impl;
import com.wangxing.cglibdemo1.dao.UserDao;
public class UserDaoImpl implements UserDao {
    @Override
    public void add() {
        System.out.println("add to User...");
    }
    @Override
    public void update() {
        System.out.println("modify User...");
    }
    @Override
    public void delete() {
        System.out.println("delete User...");
    }
    @Override
    public void find() {
        System.out.println("query User...");
    }
}
4. On COM wangxing. cglibdemo1. dao. Cglibdemo create facet class MyAspect
package com.wangxing.cglibdemo1.dao.cglibdemo;
public class MyAspect {
    public void myBefore() {
        System.out.println("Before method execution");
    }
    public void myAfter() {
        System.out.println("After method execution");
    }
}
5. Create proxy class MyBeanFactory
package com.wangxing.cglibdemo1.dao.cglibdemo;
import com.wangxing.cglibdemo1.dao.UserDao;
import com.wangxing.cglibdemo1.dao.impl.UserDaoImpl;
import org.springframework.cglib.proxy.Enhancer;
import org.springframework.cglib.proxy.MethodInterceptor;
import org.springframework.cglib.proxy.MethodProxy;
import java.lang.reflect.Method;
public class MyBeanFactory {
    public static UserDao getBean() {
        // Prepare target class
        final UserDao userDao = new UserDaoImpl();
        // Create slice class instance
        final MyAspect myAspect = new MyAspect();
        // Generate proxy classes. CGLIB generates subclasses of specified objects at run time. Enhance
        Enhancer enhancer = new Enhancer();
        // Identify classes that need to be enhanced
        enhancer.setSuperclass(userDao.getClass());
        // Add callback function
        enhancer.setCallback(new MethodInterceptor() {
            // intercept is equivalent to jdk invoke. The first three parameters are consistent with jdk invoke
            @Override
            public Object intercept(Object proxy, Method method, Object[] args,
                                    MethodProxy methodProxy) throws Throwable {
                myAspect.myBefore(); // Pre enhancement
                Object obj = method.invoke(userDao, args); // Target method execution
                myAspect.myAfter(); // Post enhancement
                return obj;
            }
        });
        // Create proxy class
        UserDao userDaoProxy = (UserDao) enhancer.create();
        return userDaoProxy;
    }
}
In the above code, the core class Enhancer of CGLIB is applied. In line 19, the code calls the setSuperclass() method of the Enhancer class to determine the target object.
Line 21 calls setCallback() method to add callback function; The intercept() method in line 24 is equivalent to the invoke() method in JDK dynamic proxy mode. This method will enhance the methods in the aspect class before and after the execution of the target method; Lines 33 to 34 call the create() method of Enhancer class to create a proxy class, and finally return the proxy class.
6 create test
@Test
public void test1() {
    UserDao userDao=MyBeanFactory.getBean();
    userDao.add();
}
In the above code, when you call the getBean() method, you still get the proxy object of UserDao, and then call the object's method.
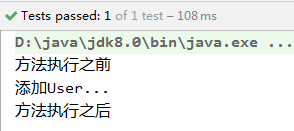
As can be seen from the output result in Figure 2, the enhanced code is also successfully called before and after calling the method of the target class, which shows that the manual proxy is also realized by using CGLIB proxy.
Spring notification type and creating AOP proxy using ProxyFactoryBean
In< Spring JDK dynamic proxy >And< Spring cglb dynamic proxy >The two methods of AOP manual agent are explained in the following Spring The notice describes how Spring creates an AOP proxy.
Spring notification type
From the previous study, we can know that advice is actually the content to enhance the target pointcut. Spring AOP provides org.org for advice aopalliance. aop. Advice interface.
Spring notifications can be divided into the following five types according to the connection point of the target class method, as shown in Table 1.
| Table 1 five types of spring notifications | |
| name | explain |
| org.springframework.aop.MethodBeforeAdvice (pre notification) | The notification automatically executed before the method is called pre notification, which can be applied to functions such as permission management. |
| org. springframework. aop. After returning advice | The notification automatically executed after the method is called post notification, which can be used to close the stream, upload files, delete temporary files and other functions. |
| org.aopalliance.intercept.MethodInterceptor (surround notification) | The notification automatically executed before and after the method is called surround notification, which can be applied to logging, transaction management and other functions. |
| org.springframework.aop.ThrowsAdvice (exception notification) | The notification automatically executed when the method throws an exception is called exception notification, which can be applied to functions such as handling exception logging. |
| org.springframework.aop.IntroductionInterceptor (Introduction notice) | Add some new methods and properties to the target class, which can be applied to modify the old version of the program (enhanced class). |
ProxyFactoryBean class of Spring AOP implements proxy
Spring's basic method of creating an AOP proxy is to use
org.springframework.aop.framework.ProxyFactoryBean, the corresponding pointcut and notification of this class provide complete control and can generate specified content.
The common configurable properties in the ProxyFactoryBean class are shown in Table 2.
| Table 2 common properties of proxyfactorybean | |
| Attribute name | Description |
| target | Target object of proxy |
| proxyInterfaces | The interface to be implemented by the agent. If there are multiple interfaces, the following format can be used for assignment: |
| proxyTargetClass | Whether to use CGLIB proxy when set to true for class proxy instead of interface |
| interceptorNames | Advice that needs to be implanted into the target |
| singleton | Whether the returned agent is a single instance. The default value is true (return a single instance) |
| optimize | When set to true, CGLIB is mandatory |
In Spring notification, surround notification is a very typical application.
The following is a case around notification to demonstrate the process of Spring creating an AOP proxy.
- Create a project, import dependencies, and improve the project structure
<!-- https://mvnrepository.com/artifact/org.springframework/spring-context -->
<dependency>
  <groupId>org.springframework</groupId>
  <artifactId>spring-context</artifactId>
  <version>5.1.5.RELEASE</version>
</dependency>
- Create business interfaces and implementation classes
package com.wangxing.proxyfactorybeandemo.service;
public interface PersonService {
    public  void  insertPerson();
    public  void  updatePerson();
    public  void  deletePerson();
    public  void  selectPerson();
}
package com.wangxing.proxyfactorybeandemo.service.impl;
import com.wangxing.proxyfactorybeandemo.service.PersonService;
public class PersonServiceImpl implements PersonService {
    @Override
    public void insertPerson() {
        System.out.println("add to Person. . . . . . ");
    }
    @Override
    public void updatePerson() {
        System.out.println("modify Person. . . . . . ");
    }
    @Override
    public void deletePerson() {
        System.out.println("delete Person. . . . . . ");
    }
    @Override
    public void selectPerson() {
        System.out.println("query Person. . . . . . ");
    }
}
3. Create facet class MyAspect
package com.wangxing.proxyfactorybeandemo.myaspect;
import org.aopalliance.intercept.MethodInterceptor;
import org.aopalliance.intercept.MethodInvocation;
public class MyAspect implements MethodInterceptor {
    @Override
    public Object invoke(MethodInvocation invocation) throws Throwable {
        System.out.println("Before method execution");
        // Execution target method
        Object obj = invocation.proceed();
        System.out.println("After method execution");
        return obj;
    }
}
In the above code, the MyAspect class implements org aopalliance. intercept. MethodInterceptor interface, and implements the invoke() method of the interface. The MethodInterceptor interface is provided by the JAR package of Spring AOP, and the invoke() method is used to determine the MethodInvocation of the target method and tell Spring which methods to execute before and after the target method. In order to demonstrate the effect, corresponding statements are output to the console before and after the target method.
3. Create Spring configuration file
<?xml version="1.0" encoding="UTF-8"?>
<beans xmlns="http://www.springframework.org/schema/beans"
       xmlns:xsi="http://www.w3.org/2001/XMLSchema-instance"
       xsi:schemaLocation="http://www.springframework.org/schema/beans http://www.springframework.org/schema/beans/spring-beans.xsd">
    <!--Object creation target-->
    <bean id="personService" class="com.wangxing.proxyfactorybeandemo.service.impl.PersonServiceImpl"></bean>
    <!-- notice advice -->
    <bean id="myAspect" class="com.wangxing.proxyfactorybeandemo.myaspect.MyAspect" />
    <!-- org.springframework.aop.framework.ProxyFactoryBean -->
    <bean  id="personServiceProxy" class="org.springframework.aop.framework.ProxyFactoryBean">
        <!--Interface implemented by agent -->
        <property name="proxyInterfaces" value="com.wangxing.proxyfactorybeandemo.service.PersonService"></property>
        <!--Target object of proxy -->
        <property name="target" ref="personService"></property>
        <!--Enhance goals with notifications -->
        <property name="interceptorNames" value="myAspect"></property>
        <!-- How to generate an agent, true:use cglib; false :use jdk Dynamic agent -->
        <property name="proxyTargetClass" value="true"></property>
    </bean>
</beans>
In the above code, first configure the target class and notification, and then use the ProxyFactoryBean class to generate the proxy object; The code in line 14 configures the interface implemented by the agent; The code in line 16 configures the target object of the agent; The code in line 18 configures the notification that the target needs to be implanted; When the value attribute value in the code in line 20 is true, it means that CGLIB agent is used. When the attribute value is false, it means that JDK dynamic agent is used.
4. Create test
@Test
public void test1() {
ApplicationContext applicationContext = new ClassPathXmlApplicationContext("applicationContext.xml");
PersonService personService = (PersonService) applicationContext.getBean("personServiceProxy");
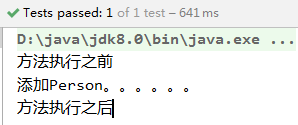
personService.insertPerson();
}5. Run the project and view the results
Spring uses AspectJ to develop AOP: XML based and Annotation based
AspectJ is a Java Language AOP framework, which extends the Java language. Spring After 2.0, support for AspectJ mode has been added. For the new version of Spring framework, it is recommended to use AspectJ mode to develop AOP.
There are usually two ways to develop AOP using AspectJ:
1. XML based declarative.
2. Annotation based declarative.
Next, we will explain the development methods of these two AOP s.
XML based declarative
XML based declarative means to define aspects, pointcuts and notification through Spring configuration files, and all aspects and notifications must be defined in the < AOP: config > element.
The following is a case to demonstrate how to use XML based declarative to realize AOP development in Spring.
1. Create a project, import dependent packages and improve the structure
<dependency>
  <groupId>org.aspectj</groupId>
  <artifactId>aspectjweaver</artifactId>
  <version>1.7.4</version>
</dependency>

<!-- https://mvnrepository.com/artifact/org.springframework/spring-context -->
<dependency>
  <groupId>org.springframework</groupId>
  <artifactId>spring-context</artifactId>
  <version>5.1.5.RELEASE</version>
</dependency>
- Create business interfaces and implementation classes
package com.wangxing.proxyfactorybeandemo.service;
public interface PersonService {
    public  void  insertPerson();
    public  void  updatePerson();
    public  void  deletePerson();
    public  void  selectPerson();
}
package com.wangxing.proxyfactorybeandemo.service.impl;
import com.wangxing.proxyfactorybeandemo.service.PersonService;
public class PersonServiceImpl implements PersonService {
    @Override
    public void insertPerson() {
        System.out.println("add to Person. . . . . . ");
    }
    @Override
    public void updatePerson() {
        System.out.println("modify Person. . . . . . ");
    }
    @Override
    public void deletePerson() {
        System.out.println("delete Person. . . . . . ");
    }
    @Override
    public void selectPerson() {
        System.out.println("query Person. . . . . . ");
    }
}
2. Create facet class MyAspect
package com.mengma.aspectj.xml;

import org.aspectj.lang.JoinPoint;

import org.aspectj.lang.ProceedingJoinPoint;

//Section class

public class MyAspect {

    // Before advice

    public void myBefore(JoinPoint joinPoint) {

        System.out.print("Pre notification, target:");

        System.out.print(joinPoint.getTarget() + "Method name:");

        System.out.println(joinPoint.getSignature().getName());

    }


    // Post notification

    public void myAfterReturning(JoinPoint joinPoint) {

        System.out.print("Post notification, method name:" + joinPoint.getSignature().getName());

    }


    // Around Advice

    public Object myAround(ProceedingJoinPoint proceedingJoinPoint)

            throws Throwable {

        System.out.println("Surround start"); // start

        Object obj = proceedingJoinPoint.proceed(); // Execute current target method

        System.out.println("End of surround"); // end

        return obj;

    }


    // Exception notification

    public void myAfterThrowing(JoinPoint joinPoint, Throwable e) {

        System.out.println("Exception notification" + "Error " + e.getMessage());

    }


    // Final notice

    public void myAfter() {

        System.out.println("Final notice");

    }

}
In the above code, several different notification type methods are defined respectively. In these methods, the class name, target method name and target method parameters of the target Object can be obtained through the JoinPoint parameter. It should be noted that the surround notification must receive a parameter of type ProceedingJoinPoint, the return value must be of type Object, and an exception must be thrown. A Throwable parameter can be passed in the exception notification to output exception information.
3. Create Spring configuration file
<?xml version="1.0" encoding="UTF-8"?>
<beans xmlns="http://www.springframework.org/schema/beans"
       xmlns:xsi="http://www.w3.org/2001/XMLSchema-instance"
       xmlns:aop="http://www.springframework.org/schema/aop"
       xsi:schemaLocation="http://www.springframework.org/schema/beans
       http://www.springframework.org/schema/beans/spring-beans.xsd
       http://www.springframework.org/schema/aop
            http://www.springframework.org/schema/aop/spring-aop.xsd">
    <!--Target class -->
    <bean id="personService" class="com.wangxing.aopdemo1.service.impl.PersonServiceImpl" />
    <!--Section class -->
    <bean id="myAspect" class="com.wangxing.aopdemo1.aspect.MyAspect"></bean>
    <!--AOP programming -->
    <aop:config>
        <!--Configuration section-->
        <aop:aspect ref="myAspect">
            <!--Create pointcuts-->
            <aop:pointcut id="mypointcut1" expression="execution ( * com.wangxing.aopdemo1.service.impl.PersonServiceImpl.insertPerson(..))"/>
            <aop:before method="myBefore" pointcut-ref="mypointcut1"></aop:before>
        </aop:aspect>
        <!--Configuration section-->
        <aop:aspect ref="myAspect">
            <!--Create pointcuts-->
            <aop:pointcut id="mypointcut2" expression="execution ( * com.wangxing.aopdemo1.service.impl.PersonServiceImpl.updatePerson(..))"/>
            <aop:after-returning method="myAfterReturning"
                                 pointcut-ref="mypointcut2" returning="joinPoint" />
        </aop:aspect>
        <!--Configuration section-->
        <aop:aspect ref="myAspect">
            <!--Create pointcuts-->
            <aop:pointcut id="mypointcut3" expression="execution ( * com.wangxing.aopdemo1.service.impl.PersonServiceImpl.deletePerson(..))"/>
            <aop:around method="myAround" pointcut-ref="mypointcut3" />
        </aop:aspect>
        <!--Configuration section-->
        <aop:aspect ref="myAspect">
            <!--Create pointcuts-->
            <aop:pointcut id="mypointcut4" expression="execution ( * com.wangxing.aopdemo1.service.impl.PersonServiceImpl.selectPerson(..))"/>
            <!--Action notification-->
            <!---->
            <!--Throw notification: used to handle exceptions in the program and receive exceptions generated by the current method -->
            <!-- *Note: if the program has no exceptions, the enhancement will not be performed -->
            <!-- * throwing Property: used to set the name and type of the second parameter of the notification Throwable -->
            <aop:after-throwing method="myAfterThrowing"
                                pointcut-ref="mypointcut4"  throwing="e" />
            <!--Final notice: no matter what happens to the program, it will be executed -->
            <!--<aop:after method="myAfter" pointcut-ref="myPointCut" />-->
        </aop:aspect>
    </aop:config>
</beans>
- Create test
@Test
public void test1() {
    ApplicationContext context=new ClassPathXmlApplicationContext("applicationContext.xml");
    PersonService personService=(PersonService)context.getBean("personService");
    personService.insertPerson();
    personService.updatePerson();
    personService.deletePerson();
    //personService.selectPerson();
}
5. Run the project and view the results
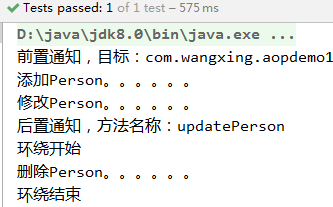
In order to better demonstrate the exception notification, next, add a line of code that will throw an exception in the selectPerson() method of the PersonServiceImpl class, such as "int i=1/0;", Rerun the test method and you can see that the exception notification is executed. At this time, the output result of the console is shown in Figure 2.
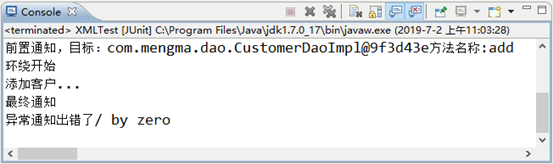
Fig. 2 operation results
As can be seen from the output results in Figure 1 and Figure 2, AOP development based on XML declarative has been successfully implemented.