TFT_eSPI Library Learning
TFT_eSPI library is an Arduino library that drives LCD screens through SPI, and supports one click download of platform ide. The screen development of Arduino mode development is convenient and stable.
At the same time, the underlying driver interface developed by lvgl GUI also uses TFT_ API for ESPI library.
TFT_eSPI library installation and configuration
Platform IO ide based explanation.
First, search and install TFT in Libraries_ ESPI library to your project file.

TFT_eSPI library file directory
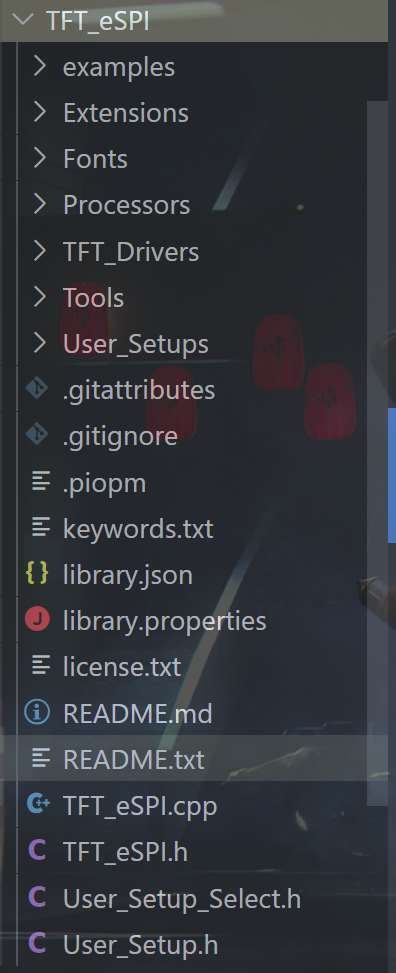 File directory
- The most important files (folders):
- TFT_Drivers
- User_Setups
- User_Setup_Select.h
- User_Setup_.h
These files are the most basic configuration files (clips), because different LCD screens use different driver chip models and RGB color matching modes. Therefore, after installing the library, we need to modify the configuration file according to the specific parameters of our LCD screen in the first step
TFT_eSPI is a graphics driver library based on SPI communication. Therefore, when using, the chip needs to support SPI communication, and ensure that the library files of SPI communication such as Arduino's SPI.h have been introduced into the project.
configuration file
There are two methods. One is through User_Setup_.h for configuration, you can configure the driver model and all information that needs to be modified.
The other is in user_ Setup_ Select the driver chip model in select. H, and then select the TFT_ Various information is configured in the driver configuration file in the driver folder.
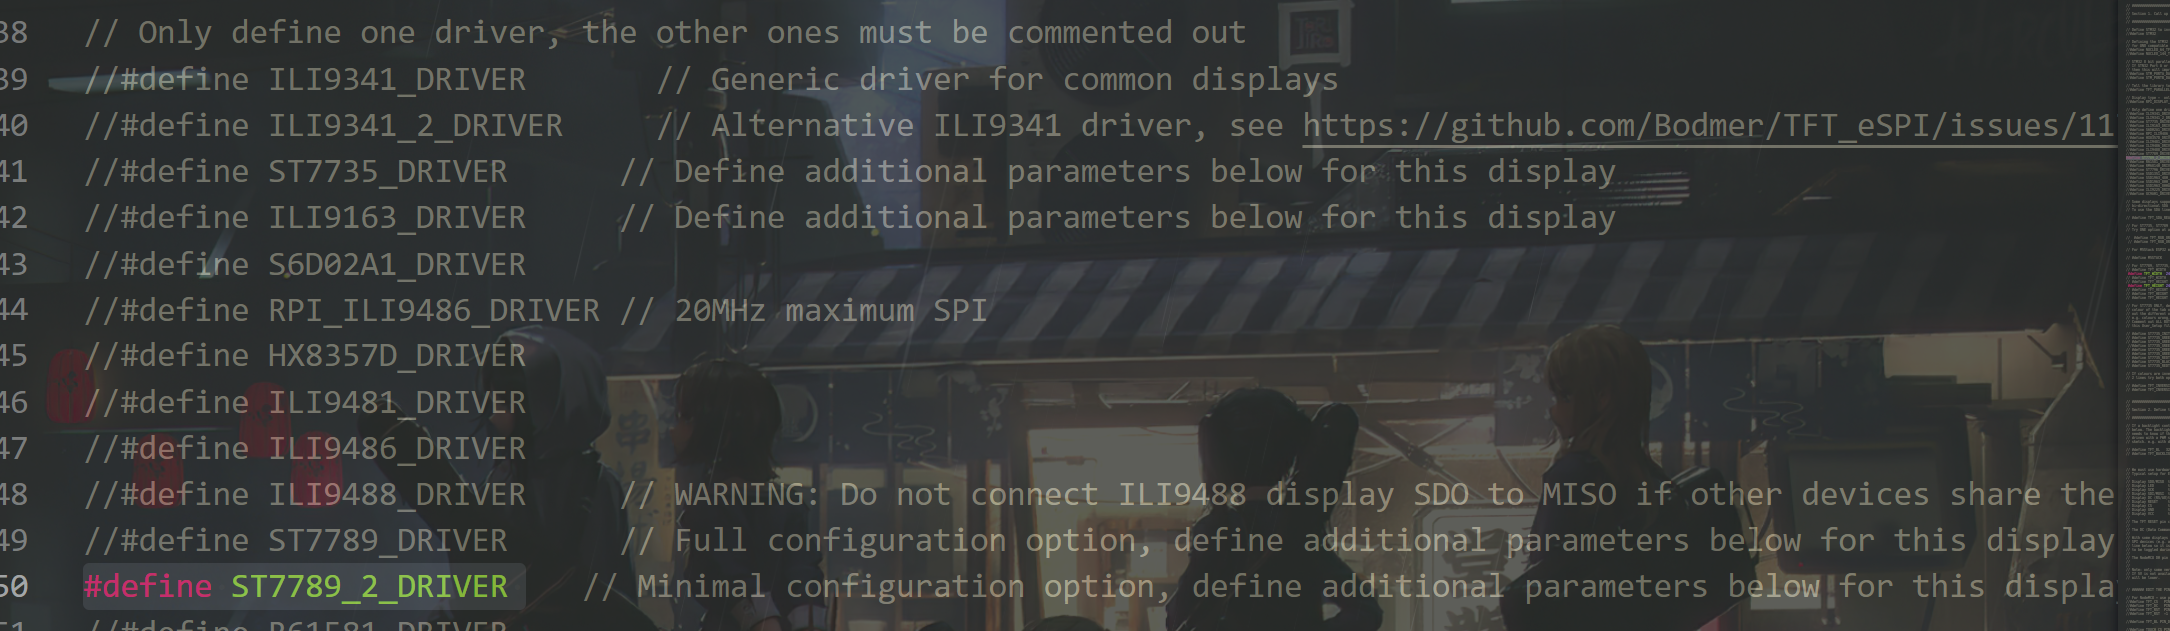
1.User_Setup_.h
-
First select the drive model, such as: #define ST7789_2_DRIVER, just remove the comment.
-
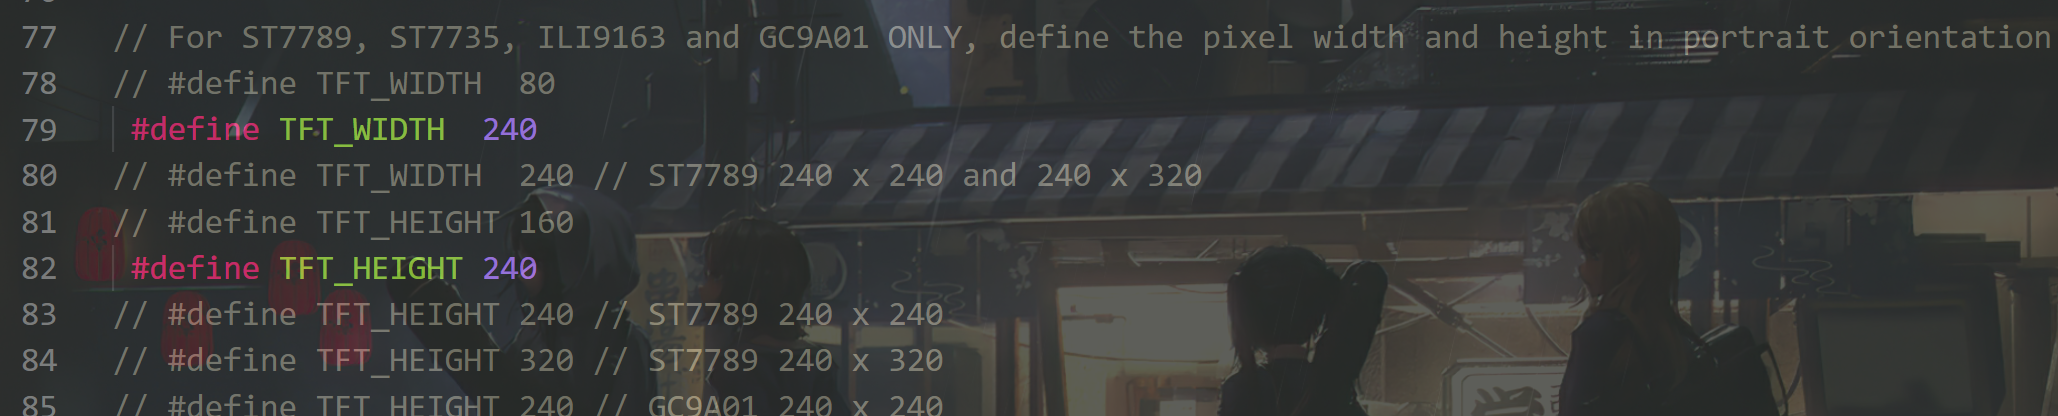
Configure screen size
-
Set the display conversion of LCD screen displayed by GBR

-
Configuration pin
The pins that can be used have been defined in the file. If it needs to be modified, cancel the comment and modify the value of the corresponding pin
Insert picture description here]( https://img-blog.csdnimg.cn/dd8b4e35f2254ebfbee2c9f8162ebde7.png?x-oss-process=image/watermark,type_ZHJvaWRzYW5zZmFsbGJhY2s,shadow_50,text_Q1NETiBAX-WiqOesul8=,size_20,color_FFFFFF,t_70,g_se,x_16) -
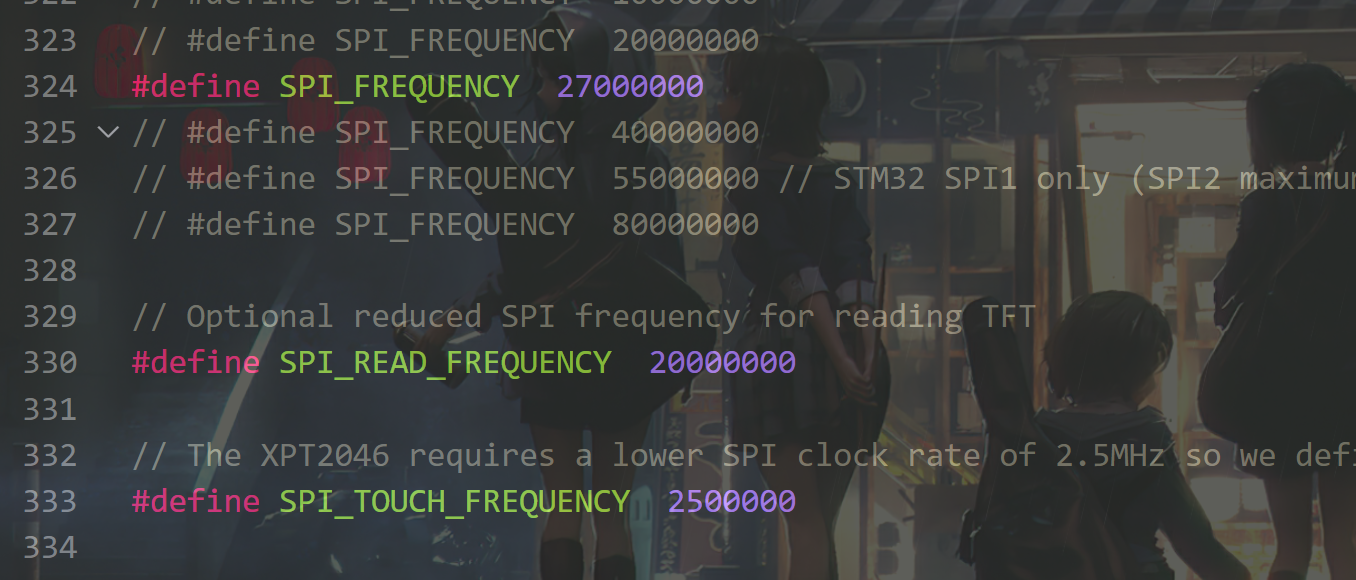
Configure SPI rate
Set the communication rate of SPI according to the performance of the hardware chip (generally keep the default)
2. User_Setup_Select.h
For learning, small work development is not recommended, preferably in user_ It is configured in setup. H to facilitate modification and search.
- Directly cancel the header file comment of LCD driver chip in the file. The pin definition follows the default or is modified in the file (not used).
3. Rotation.h - mirror setting
//Screen selection function
TFT_eSPI tft = TFT_eSPI();
tft.setRotation(4);//1-3 are 90 to 270 degrees of rotation
/*
To implement mirroring
 It needs to be set in the drive Rotation.h
 Add the case 4 option to the switch statement
 The code is as follows
*/
   case 4: // Inverter portrait & Mirror Y
#ifdef CGRAM_OFFSET
	if (_init_width == 135)
	{
		colstart = 53;
		rowstart = 40;
	}
	else
	{
		colstart = 0;
		rowstart = 0;
	}
#endif
	writedata(TFT_MAD_MX | TFT_MAD_COLOR_ORDER);

	_width = _init_width;
	_height = _init_height;
	break;
/*
Then use the function tft.setRotation(4); Just.
*/
TFT_eSPI library common API s
initialization
- Screen object instantiation
TFT_eSPI::TFT_eSPI(int16_t w, int16_t h)
//Set screen size
TFT_eSPI tft = TFT_eSPI(240, 240);
Parameters: width and height
- initialization
tft.init();
- Set screen orientation
tft.serRotation(3);
Parameters: 0, 1, 2 and 3 represent 0 °, 90 °, 180 ° and 270 ° respectively, and 4 can be set as mirror image.
- RGB color to GBR565
uint16_t TFT_eSPI::color565(uint8_t r, uint8_t g, uint8_t b)
// Color conversion
uint16_t yellow = tft.color565(255, 255, 0);
tft.setTextColor(yellow); //
- Screen clearing function
void TFT_eSPI::fillScreen(uint32_t color)
//Clear the default color of the screen, and you can set different colors
tft.fillScreen(TFT_BLACK);
Common functions
1. eSPI class
written words
void TFT_eSPI::setTextSize(uint8_t s)
//Set the font size to 2
tft.setTextSize(2);

void TFT_eSPI::setTextColor(uint16_t c)
//Font color green
tft.setTextColor(TFT_GREEN);

void TFT_eSPI::setCursor(int16_t x, int16_t y)
//Set text start coordinates (0,0)
tft.setCursor(0, 0);

void TFT_eSPI::setTextDatum(uint8_t d)
// Reference data
tft.setTextDatum(MC_DATUM);

int16_t TFT_eSPI::drawString(const String& string, int32_t poX, int32_t poY)
//Display text Moonbeam (10,10) position
tft.drawString("Moonbeam ", 10, 10);
/*In addition, there are functions such as text centered and right centered, and drawing floating-point numbers or integers are located in the header file TFT_ In ESPI. H*/
picture
Picture mold drawing, many blogs, take the array of RGB565 in bmp format
If you want to display jpg pictures, you need to use the picture decoding library
/*  */
void TFT_eSPI::setSwapBytes(bool swap)
// Turn on the display. Generally, you can add this function when you need to display pictures
tft.setSwapBytes(true);

void TFT_eSPI::drawBitmap(int16_t x, int16_t y, const uint8_t *bitmap, int16_t w, int16_t h, uint16_t color)
void TFT_eSPI::drawBitmap(int16_t x, int16_t y, const uint8_t *bitmap, int16_t w, int16_t h, uint16_t fgcolor, uint16_t bgcolor)
Drawing graphics
uint16_t TFT_eSPI::alphaBlend(uint8_t alpha, uint16_t fgc, uint16_t bgc)
// Translucent Clr
 tft.alphaBlend(a, TFT_RED,   TFT_WHITE);

void TFT_eSPI::drawFastHLine(int32_t x, int32_t y, int32_t w, uint32_t color)
//Draw line
tft.drawFastHLine(204, a, 12, tft.alphaBlend(a, TFT_RED,   TFT_WHITE));

void TFT_eSPI::drawPixel(int32_t x, int32_t y, uint32_t color)
//Draw point
tft.drawPixel(204,10,TFT_RED);

//Draw a vertical line
void TFT_eSPI::drawFastVLine(int32_t x, int32_t y, int32_t h, uint32_t color)

//Draw a circle
void TFT_eSPI::drawCircle(int32_t x0, int32_t y0, int32_t r, uint32_t color)
tft.drawCircle(100,100,50,TFT_RED);

//Draw a solid circle
void TFT_eSPI::fillCircle(int32_t x0, int32_t y0, int32_t r, uint32_t color)

//Draw rectangle
void TFT_eSPI::drawRect(int32_t x, int32_t y, int32_t w, int32_t h, uint32_t color)
void TFT_eSPI::fillRect(int32_t x, int32_t y, int32_t w, int32_t h, uint32_t color)

//Draw triangle
void TFT_eSPI::drawTriangle(int32_t x0, int32_t y0, int32_t x1, int32_t y1, int32_t x2, int32_t y2, uint32_t color)
void TFT_eSPI::fillTriangle( int32_t x0, int32_t y0, int32_t x1, int32_t y1, int32_t x2, int32_t y2, uint32_t color)
2. Sprite class
Sprite is theoretically an invisible graphical screen that is stored in the processor RAM. Graphics can be drawn into sprite just as they can be drawn directly onto the screen. Once sprite is complete, it can be drawn anywhere on the screen. If there is enough RAM, Sprite can be the same size as the screen and used as a frame buffer. By default, sprites use 16 bit colors, and the bit depth can be set to 8 bits (256 colors) or 1 bit (any 2 colors) to reduce the required RAM. On the ESP8266, the maximum 16 bit color sprite that can be created is about 160x128 pixels, which consumes 40 KB of RAM. On ESP32, sprite with 16 bit color depth is limited to about 200x200 pixels (~ 80KB), and sprite with 8-bit color depth is limited to 320x240 pixels (~ 76KB).
one or more sprites can be created. Sprites can be any pixel width and height, limited only by the available RAM. The ram required for 16 bit color depth sprites is (2 x width x height) bytes, and the ram required for 8-bit color depth sprites is (width x height) Bytes. Sprite can be dynamically created and deleted in the program as needed, which means that ram can be released after sprite is drawn on the screen, and then more RAM intensive WiFi Based code can be run, and normal graphics operation can still work.
drawing graphics into sprite is very fast. For those familiar with the example Adafruit "graphicstest", the whole test can be completed in 18ms with 160x128 Sprite. The example of Sprite use can be found in the "examples/Sprite" folder. Sprite can be drawn into TFT, and one color is specified as "transparent" , see the Transparent_Sprite_Demo example.
if SPIRAM (PSRAM) is installed on the ESP32 development board, Sprite will use PSRAM memory and can create a large full screen buffer sprite. Full screen sprite takes longer to render (320 x 240 16 bit sprite takes about 45 milliseconds)!!!
-------------------- official interpretation--------------------------
sprite class API
Human words: it can solve the problem of refreshing the flash screen - that's it for the time being.
/*instantiation */
TFT_eSprite clk = TFT_eSprite(&tft);
//Create a sprite with width x height pixels and return a pointer to RAM
//If necessary, Sketch can convert the return value to (uint16_t *) to get a 16 bit depth
void*  createSprite(int16_t width, int16_t height, uint8_t frames = 1);
void*  getPointer(void);//If it is not created, a pointer to sprite or nullptr is returned, and the user must convert it to pointer type
bool   created(void);   //Returns true if the sprite has been created
void   deleteSprite(void);//Delete sprite to free RAM

//Sets or gets the color depth of 4, 8, or 16 bits. Can be used to change the depth of an existing Sprite, but clears it to black, and returns a new pointer if the sprite is recreated.
void*  setColorDepth(int8_t b);
int8_t getColorDepth(void);

void     drawChar(int32_t x, int32_t y, uint16_t c, uint32_t color, uint32_t bg, uint8_t font);//Draw a single character in Adafruit GLCD or freefont

//Draw a unicode glyph on the screen. Any UTF-8 decoding must be completed before calling drawChar()
int16_t  drawChar(uint16_t uniCode, int32_t x, int32_t y, uint8_t font);
int16_t  drawChar(uint16_t uniCode, int32_t x, int32_t y);

//Set the scrolling area and define x,y, width and height from the upper left corner. Color (optional, default is black) is used to fill the gap after scrolling
void 	 setScrollRect(int32_t x, int32_t y, int32_t w, int32_t h, uint16_t color = TFT_BLACK);

//Scroll the definition area dx,dy pixels. Negative values scroll up and left; Positive values scroll right and down. Scrolling up and down is optional (the default is no scrolling up / down).
//Sprite coordinate system does not move, moving pixels
void     scroll(int16_t dx, int16_t dy = 0),

void     setRotation(uint8_t rotation);//Set the rotation coordinates of Sprite (only applicable to sprite with 1-bit color depth) and CGRAM rotation in the internal hardware of the display
uint8_t  getRotation(void);

//Push a rotating copy of Sprite to a TFT with an optional transparent color
bool     pushRotated(int16_t angle, uint32_t transp = 0x00FFFFFF);   // Using fixed point maths

//Push a rotating copy of Sprite to another different Sprite with an optional transparent color
bool     pushRotated(TFT_eSprite *spr, int16_t angle, uint32_t transp = 0x00FFFFFF);

//Gets the TFT bounding box for this Sprite rotated copy
bool     getRotatedBounds(int16_t angle, int16_t *min_x, int16_t *min_y, int16_t *max_x, int16_t *max_y);

//Gets the target Sprite bounding box for the rotated copy of this Sprite
bool     getRotatedBounds(TFT_eSprite *spr, int16_t angle, int16_t *min_x, int16_t *min_y,
                                                           int16_t *max_x, int16_t *max_y);

//Gets the TFT bounding box of the rotated Sprite wrt pivot
void     getRotatedBounds(int16_t angle, int16_t w, int16_t h, int16_t xp, int16_t yp,
                          int16_t *min_x, int16_t *min_y, int16_t *max_x, int16_t *max_y);

uint16_t readPixel(int32_t x0, int32_t y0);//Reads the color of the pixel at x,y and returns the value in 565 format
uint16_t readPixelValue(int32_t x, int32_t y);//Returns the value of the pixel at x,y (used when scrolling)
The functions of other eSPI libraries can be used in sprite class, which is not repeated.
Sample code
void TFT_init(){
  tft.init();
  tft.setRotation(4);                 //initialization
  Serial.println("TFT_INIT_OK");
}
/******************************************************************************/
void drawAr(){

  clk.setColorDepth(8);
  clk.createSprite(64, 64);//create a window
  clk.fillSprite(0x0000);   //Filling rate
  clk.setTextDatum(CC_DATUM);   //Set text data
  clk.setTextColor(TFT_WHITE, bgColor);
  clk.setSwapBytes(true);
  clk.pushImage(0, 0,  64, 64, Astronaut[i]);
  clk.println("ok");
  clk.pushSprite(64,64);  //window position
  clk.deleteSprite();// (10,55) display 64 ×  64 pixel picture
  if(millis() - imgtime>150){
    imgtime = millis();		//delayed
    i+=1;								//Next frame
    if(i>8){i=0;}
}
}
/**********************************************************************************************/
void setup() {
  Serial.begin(115200);
 TFT_init();

  Serial.println("OKKKK");
   tft.fillScreen(TFT_BLACK);
   scanNetworks();						//Scan wifi and print information
   connect();							//Connect to the specified wifi
   timeClient.begin();                 //Connect to NTP server
   timeClient.setTimeOffset(28800);    //Time zone offset
   wea.Get();
//    Serial.println(land.post(IPdata,land.url_land));
//    delay(5000);
//    land.post(IPdata,land.url_unland);
   //imu.init();

                   //Get weather
}

void loop() {
  clk.loadFont(MY_FONT_Z);
  clk.setColorDepth(8);
  clk.createSprite(128, 128);//create a window
  clk.fillSprite(0x0000);   //Filling rate
  clk.setTextDatum(CC_DATUM);   //Set text data
  clk.setTextColor(TFT_WHITE, bgColor);
  clk.setCursor(20,20,2);
  clk.setSwapBytes(true);
  //Serial.println(timeClient.getFormattedTime());
  clk.println(timeClient.getFormattedTime());
  clk.println(wea.now_address);
  clk.println(wea.now_weather);
  clk.println(wea.now_temperature+"℃");
  clk.pushImage(60, 55,  64, 64, Astronaut[i]); // (10,55) display 64 ×  64 pixel picture
  clk.pushSprite(0,0);  //window position
  clk.deleteSprite();
  clk.unloadFont();
    if(millis() - imgtime>150){
    imgtime = millis();		//delayed
    i+=1;								//Next frame
    if(i>8){i=0;}
    }
Display effect
eSPI library learning results when developing astronaut small TV based on ESP32
Did a mirror flip.
