Asyncpy working with documents
1 create project
Install the required environment python version > = 3.6
Installation command:
pip install asyncpy
After the installation is complete, you can start creating a crawler project.
Create project command:
asyncpy genspider demo
Create a project called demo.
After successful creation, open the project file. The project structure is shown in the following figure:

2 send get and post requests
2.1 using start_urls send GET request
At start_ Add a link to the URL list. In parse, print out the response status code and content.
# -*- coding: utf-8 -*-

from asyncpy.spider import Spider
import settings


class DemoSpider(Spider):
    name = 'demo'
    settings_attr = settings

    start_urls = ['http://httpbin.org/get']

    async def parse(self, response):
        print(response.status)
        print(response.text)

DemoSpider.start()
Right click Run to complete the request capture.
2.2 using start_requests sends a POST request
Import the Request module of Asyncpy and clear start_urls, and then override start_ The requests method completes the Post Request.
from asyncpy.spider import Spider
import settings
from asyncpy.spider import Request
class DemoSpider(Spider):
name = 'demo'
settings_attr = settings
start_urls = []
async def start_requests(self):
url = 'http://httpbin.org/post'
yield Request(callback=self.parse,url=url,method="POST",data={"Say":"Hello Asyncpy"})
async def parse(self, response):
print(response.status)
print(response.text)
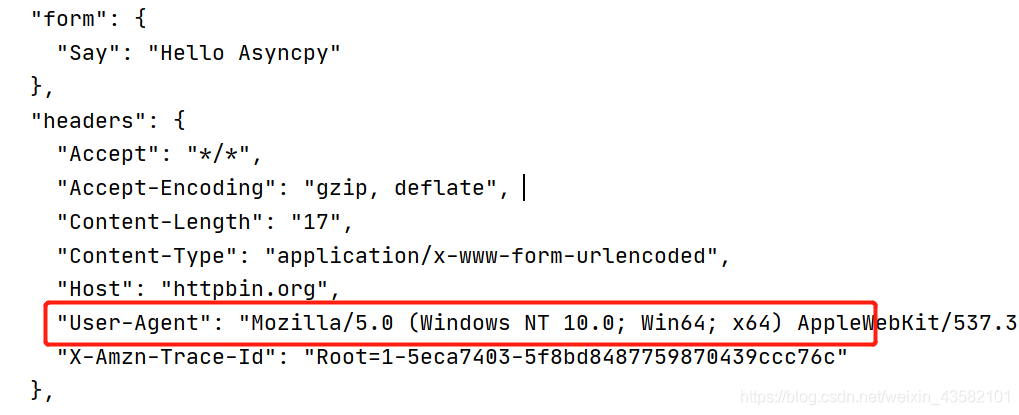
DemoSpider.start()Response result: You can see the parameters submitted by Post.

3. Custom request header
Here, take the user agent in the modification request header as an example. It can be seen from the above figure that the current user agent is the default user agent of aiohttp.
3.1 setting request header in settings
Open the settings file and find the lowest USER_AGENT parameter, after uncovering the annotation, add a browser UA.
3.2 add request header in middlewares
Open the middleware file and find the UserAgentMiddleware method (available by default). You can also customize a method.
# -*- coding: utf-8 -*-
from asyncpy.middleware import Middleware
from asyncpy.request import Request
from asyncpy.spider import Spider

middleware = Middleware()

@middleware.request
async def UserAgentMiddleware(spider:Spider, request: Request):
    ua = "Mozilla/5.0 (Windows NT 10.0; Win64; x64) AppleWebKit/537.36 (KHTML, like Gecko) Chrome/60.0.3100.0 Safari/537.36"
    request.headers.update({"User-Agent": ua})
Then go to the spider crawler file (demo.py) and introduce Middleware in the middleware file. Pass in middleware in the start method.
# -*- coding: utf-8 -*-

from asyncpy.spider import Spider
import settings
from asyncpy.spider import Request
from middlewares import middleware

class DemoSpider(Spider):
    name = 'demo'
    settings_attr = settings

    start_urls = []

    async def start_requests(self):
        url = 'http://httpbin.org/post'
        yield Request(callback=self.parse,url=url,method="POST",data={"Say":"Hello Asyncpy"})

    async def parse(self, response):
        print(response.text)

DemoSpider.start(middleware=middleware)
Run demo.py and you can see that the current "user agent" has been changed to our customized UA.
3.3 add proxy IP
Similar to 3.1.1, open the middlewares file and add an agent under the method. (you can redefine a method) Note that it is in aiohttp_ Add proxy to kwargs. Remember to pass in middleware in the start method.
@middleware.request
async def UserAgentMiddleware(spider:Spider, request: Request):
ua = "Mozilla/5.0 (Windows NT 10.0; Win64; x64) AppleWebKit/537.36 (KHTML, like Gecko) Chrome/60.0.3100.0 Safari/537.36"
request.headers.update({"User-Agent": ua})
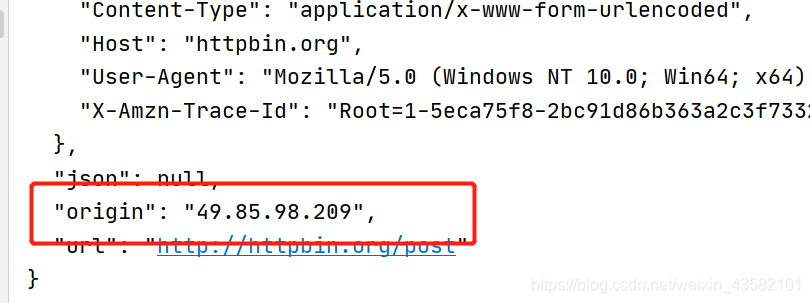
request.aiohttp_kwargs.update({"proxy": "http://49.85.98.209:4253"})Run demo.py and you can see that the current ip has been changed to our custom proxy. (the proxy ip has expired)
4. Modify concurrent delay retry and other configurations
4.1 modify the configuration in settings
The following supported configurations can be modified in the settings file.
"""
CREATE YOUR DEFAULT_CONFIG !

Some configuration:
        CONCURRENT_REQUESTS     Concurrent quantity
        RETRIES                 retry count
        DOWNLOAD_DELAY          Download delay
        RETRY_DELAY             Retry delay
        DOWNLOAD_TIMEOUT        Timeout limit
        USER_AGENT              user agent
        LOG_FILE                Log path
        LOG_LEVEL               Log level
"""
4.2 modify the configuration of the specified crawler file
If you need to configure different crawler files differently, you can use custom_settings customize the configuration in the crawler file. And you need to pass in custom in yield_ settings. For the custom configuration to take effect.
# -*- coding: utf-8 -*-

from asyncpy.spider import Spider
import settings
from asyncpy.spider import Request
from middlewares import middleware

class DemoSpider(Spider):
    name = 'demo'
    settings_attr = settings
    custom_settings = {
        "DOWNLOAD_TIMEOUT":60,
        "RETRIES":3
    }

    start_urls = []

    async def start_requests(self):
        url = 'http://httpbin.org/post'
        yield Request(callback=self.parse,url=url,
                      method="POST",
                      data={"Say":"Hello Asyncpy"},
                      custom_settings=self.custom_settings
                      )

    async def parse(self, response):
        print(response.text)

DemoSpider.start(middleware=middleware)
5 generate log files
5.1 modify settings configuration
# '' generate log file '' '
# LOG_FILE = '../asyncpy.log'
# LOG_LEVEL = 'DEBUG'
The global log can be configured and generated in the settings file.
5.2 multiple crawler designated log files
    custom_settings = {
        "LOG_FILE" : "../asyncpy.log"
    }
This is the same as the above. For the log of the specified crawler file, you need to delete the log configuration of settings, and then pass custom_settings. If log is not specified_ If level, the log level defaults to INFO
6 analyze the response and extract the data
I have introduced the parsel parsing module in graph, so the default parsing method here is the same as that of graph. You can also choose other methods.
    async def parse(self, response):
        print(response.text)
        print(response.xpath('//text()'))
        print(response.css(''))
6.1 response.text
Return the page text content, which can be imported into the regular module for matching
6.2 response.xpath('')
- getall(): returns a list containing multiple string s
- get(): the returned string is the first string in the list
- extract() equals getall()
- extract_first() equals get()
6.3 response.css(),response.re()
The parsel.css selector and parsel.re can find their own usage methods.
7 using pipelines to save data
Use the callback method to determine whether the yield is an item of dict type. If yes, use pipelines to save the data.
- First define an item, and then use yield to callback the item.
- By default, the SpiderPipeline class exists in the pipelines file of the project. Import SpiderPipeline and pass in start() to start the pipeline.
# -*- coding: utf-8 -*-
# Crawler file
from asyncpy.spider import Spider
import settings
from asyncpy.spider import Request
from middlewares import middleware
from pipelines import SpiderPipeline

class DemoSpider(Spider):
    name = 'demo'
    settings_attr = settings
    start_urls = []

    async def start_requests(self):
        url = 'http://httpbin.org/post'
        yield Request(callback=self.parse,url=url,
                      method="POST",
                      data={"Say":"Hello Asyncpy"},
                      custom_settings=self.custom_settings
                      )

    async def parse(self, response):
        item = {}
        item['text'] = response.text
        yield item
DemoSpider.start(middleware=middleware,pipelines=SpiderPipeline)
# -*- coding: utf-8 -*-
# pipelines file
class SpiderPipeline():
def __init__(self):
pass
def process_item(self, item, spider_name):
print(item)8 start multiple Crawlers
At present, multiple crawler files can be started in a multi process manner. Create a test file, import the Spider of two crawler files, and start it with multiprocessing.
from Demo.demo import DemoSpider
from Demo.demo2 import DemoSpider2
import multiprocessing

def open_DemoSpider2():
    DemoSpider2.start()

def open_DemoSpider():
    DemoSpider.start()

if __name__ == "__main__":
    p1 = multiprocessing.Process(target = open_DemoSpider)
    p2 = multiprocessing.Process(target = open_DemoSpider2)
    p1.start()
    p2.start()