1, Virtual machine preparation
- Update virtual machine, command: yum -y update
- Modify the hostname. The command is hostnamectl set hostname atlas
- Close the firewall. The command is systemctl stop firewalld Service and systemctl disable firewalld service
- reboot
2, Install jdk
- Uninstall openjdk, command:
rpm -e --nodeps java-1.7.0-openjdk
rpm -e --nodeps java-1.7.0-openjdk-headless
rpm -e --nodeps java-1.8.0-openjdk
rpm -e --nodeps java-1.8.0-openjdk-headless
- Unzip jdk, command:
tar -xzvf jdk-8u161-linux-x64.tar.gz -C /home/atlas/
mv jdk1.8.0_161/ jdk1.8
- Configuring environment variables, commands
vim /etc/profile.d/my_env.sh

export JAVA_HOME=/home/atlas/jdk1.8
export PATH=$PATH:$JAVA_HOME/bin

source /etc/profile
3, Configure password free login
- Generate key, command: SSH keygen - t RSA
- get into. SSH directory, command: CD / root / ssh
- Configure password free, command:
cat id_rsa.pub >> authorized_keys
chmod 600 ./authorized_keys
4, Configure handoop 2 seven point two
- Unzip the installation package, command:
tar -xzvf hadoop-2.7.2.tar.gz -C /home/atlas/
mv hadoop-2.7.2/ hadoop
- Configure environment variables
vim /etc/profile.d/my_env.sh

export HADOOP_HOME=/home/atlas/hadoop
export PATH=$PATH:$HADOOP_HOME/bin
export PATH=$PATH:$HADOOP_HOME/sbin

source /etc/profile
- Modify core site XML, command:
vim /home/atlas/hadoop/etc/hadoop/core-site.xml


<configuration>
    <property>
        <name>hadoop.tmp.dir</name>
        <value>file:/home/atlas/hadoop/tmp</value>
    </property>
    <property>
        <name>fs.defaultFS</name>
        <value>hdfs://localhost:9000</value>
    </property>
    <property>
		<name>hadoop.http.staticuser.user</name>
		<value>atguigu</value>
	</property>
	<property>
		<name>hadoop.proxyuser.atguigu.hosts</name>
		<value>*</value>
	</property>
	<property>
		<name>hadoop.proxyuser.atguigu.groups</name>
		<value>*</value>
	</property>
	<property>
		<name>hadoop.proxyuser.atguigu.groups</name>
		<value>*</value>
	</property>
</configuration>
- Modify HDFS site XML, command:
vim /home/atlas/hadoop/etc/hadoop/hdfs-site.xml

<configuration>
    <property>
        <name>dfs.replication</name>
        <value>1</value>
    </property>
    <property>
        <name>dfs.namenode.name.dir</name>
        <value>file:/home/atlas/hadoop/tmp/dfs/name</value>
    </property>
    <property>
        <name>dfs.datanode.data.dir</name>
        <value>file:/home/atlas/hadoop/tmp/dfs/data</value>
    </property>
</configuration>
- Modify Yard site XML, command:
vim /home/atlas/hadoop/etc/hadoop/yarn-site.xml

<configuration>
    <property>
        <name>yarn.nodemanager.aux-services</name>
        <value>mapreduce_shuffle</value>
    </property>
</configuration>
- Modify mapred site XML, command:
cp /home/atlas/hadoop/etc/hadoop/mapred-site.xml.template /home/atlas/hadoop/etc/hadoop/mapred-site.xml

vim /home/atlas/hadoop/etc/hadoop/mapred-site.xml

<configuration>
    <!-- appoint MR Run in YARN upper -->
    <property>
        <name>mapreduce.framework.name</name>
        <value>yarn</value>
    </property>
</configuration>
- Start hadoop, command:
hdfs namenode -format
start-dfs.sh
start-yarn.sh
5, Install mysql
- Delete mysql from the system. Command:
rpm -qa|grep mariadb
rpm -e --nodeps mariadb-libs
- Decompress the compressed package. The command is tar -xvf mysql-5.7.28-1 el7. x86_ 64.rpm-bundle. tar
- To install mysql, command:
rpm -ivh mysql-community-common-5.7.28-1.el7.x86_64.rpm
rpm -ivh mysql-community-libs-5.7.28-1.el7.x86_64.rpm
rpm -ivh mysql-community-libs-compat-5.7.28-1.el7.x86_64.rpm
rpm -ivh mysql-community-client-5.7.28-1.el7.x86_64.rpm
rpm -ivh mysql-community-server-5.7.28-1.el7.x86_64.rpm
- Initialize database, command: mysqld --initialize --user=mysql
- View the password of the temporarily generated root user. The command is cat / var / log / mysqld log
- Start mysql service, command: systemctl start mysqld
- Log in to the MySQL database with the command: mysql -uroot -p, and then enter the previous temporary password to enter the database
- Modify the password: set password = password("new password");
- Modify the root user in the user table under the MySQL database to allow any ip connection. Command 1: update mysql user set host='%' where user='root';, Command 2: flush privileges;
6, Install hive
- Unzip the installation package, command:
tar -xzvf apache-hive-3.1.2-bin.tar.gz -C /home/atlas/
mv apache-hive-3.1.2-bin/ hive
- To configure environment variables for Hive, command:
vim /etc/profile.d/my_env.sh

export HIVE_HOME=/home/atlas/hive
export PATH=$PATH:$HIVE_HOME/bin

source /etc/profile
- Configure driver, command: cp /home/atlas/rar/3_mysql/mysql-connector-java-5.1.37.jar /home/atlas/hive/lib/
- Edit hive site XML, command
vim /home/atlas/hive/conf/hive-site.xml
<?xml version="1.0"?>
<?xml-stylesheet type="text/xsl" href="configuration.xsl"?>
<configuration>
<!-- jdbc Connected URL -->
<property>
<name>javax.jdo.option.ConnectionURL</name>
<value>jdbc:mysql://localhost:3306/metastore?useSSL=false&useUnicode=true&characterEncoding=UTF-8</value>
</property>
<!-- jdbc Connected Driver-->
<property>
<name>javax.jdo.option.ConnectionDriverName</name>
<value>com.mysql.jdbc.Driver</value>
</property>
<!-- jdbc Connected username-->
<property>
<name>javax.jdo.option.ConnectionUserName</name>
<value>root</value>
</property>
<!-- jdbc Connected password -->
<property>
<name>javax.jdo.option.ConnectionPassword</name>
<value>970725</value>
</property>
<!-- Hive Validation of metadata store version -->
<property>
<name>hive.metastore.schema.verification</name>
<value>false</value>
</property>
<!--Metadata store authorization-->
<property>
<name>hive.metastore.event.db.notification.api.auth</name>
<value>false</value>
</property>
</configuration>
- Modify HIV Env SH, command:
mv /home/atlas/hive/conf/hive-env.sh.template /home/atlas/hive/conf/hive-env.sh
vim /home/atlas/hive/conf/hive-env.sh
 take#export HADOOP_HEAPSIZE=1024 open
- Modify hive-log4j2 Properties, command:
mv /home/atlas/hive/conf/hive-log4j2.properties.template /home/atlas/hive/conf/hive-log4j2.properties
vim /home/atlas/hive/conf/hive-log4j2.properties
 modify property.hive.log.dir = /home/atlas/hive/logs
- Log in to mysql and the command is mysql -uroot -p
- Exit after creating Hive metabase. Command: create database metastore;
- Initialize Hive metabase, command: schematool -initSchema -dbType mysql -verbose
- To configure metastore database coding, command:
mysql -uroot -p
use metastore
alter table COLUMNS_V2 modify column COMMENT varchar(256) character set utf8;
alter table TABLE_PARAMS modify column PARAM_VALUE varchar(4000) character set utf8;
alter table PARTITION_PARAMS modify column PARAM_VALUE varchar(4000) character set utf8;
alter table PARTITION_KEYS modify column PKEY_COMMENT varchar(4000) character set utf8;
alter table INDEX_PARAMS modify column PARAM_VALUE varchar(4000) character set utf8;
alter table TBLS modify column view_expanded_text mediumtext character set utf8;
alter table TBLS modify column view_original_text mediumtext character set utf8;
7, Installing zookeeper
- Unzip the installation package, command:
tar -xzvf apache-zookeeper-3.5.7-bin.tar.gz -C /home/atlas/
mv apache-zookeeper-3.5.7-bin/ zookeeper
- Create folder zkData, command: mkdir -p /home/atlas/zookeeper/zkData
- Write file: myper / zoeam / data, write command / zoeam / zoeam
- Rename zoo_sample.cfg file is zoo CFG, command: mv /home/atlas/zookeeper/conf/zoo_sample.cfg /home/atlas/zookeeper/conf/zoo.cfg
- Modify zoo Cfg file
#modify
dataDir=/home/atlas/zookeeper/zkData
#Append at the end of text
#######################cluster##########################
server.1=hadoop01:2888:3888
server.2=hadoop02:2888:3888
server.3=hadoop03:2888:3888
- Start zookeeper with the command: / home / atlas / zookeeper / bin / zkserver sh start
- Stop: / home / atlas / zookeeper / bin / zkserver sh stop
- View status: / home / atlas / zookeeper / bin / zkserver sh stauts
8, Install kafka
- Unzip the installation package, command:
tar -xzvf kafka_2.11-2.4.1.tgz -C /home/atlas/
mv kafka_2.11-2.4.1/ kafka
- Create logs folder, command: mkdir -p /home/atlas/kafka/logs
- Modify server Properties file, command: VIM / home / atlas / Kafka / config / server properties
#Delete the topic function enable and add it to the broker After id = 0
delete.topic.enable=true
#Modify the storage path of kafka operation log
log.dirs=/home/atlas/kafka/data
#Modify the configuration connection Zookeeper cluster address
zookeeper.connect=localhost:2181/kafka
- Configure kafka environment variable, VIM / etc / profile d/my_ env. sh
export KAFKA_HOME=/home/atlas/kafka
export PATH=$PATH:$KAFKA_HOME/bin
- Start, command: / home / atlas / Kafka / bin / Kafka server start sh -daemon /home/atlas/kafka/config/server. properties
- Stop, command: / home / atlas / Kafka / bin / Kafka server stop sh stop
9, Install hbase
- Unzip the installation package, command:
tar -xzvf hbase-2.0.5-bin.tar.gz -C /home/atlas/
mv hbase-2.0.5/ hbase
- To configure environment variables, command:
vim /etc/profile.d/my_env.sh

export HBASE_HOME=/home/atlas/hbase
export PATH=$PATH:$HBASE_HOME/bin
- Modify HBase env SH file, command: VIM / home / atlas / HBase / conf / HBase env sh
#modify
export HBASE_MANAGES_ZK=false #It turned out to be true
- Modify HBase site XML file, command: VIM / home / atlas / HBase / conf / HBase site xml
<property>
	<name>hbase.rootdir</name>
	<value>hdfs://localhost:9000/HBase</value>
</property>
<property>
	<name>hbase.cluster.distributed</name>
	<value>true</value>
</property>
<property>
	<name>hbase.zookeeper.quorum</name>
	<value>localhost</value>
</property>
- Start, command: / home / atlas / HBase / bin / start HBase sh
- Stop: / home / atlas / HBase / bin / stop HBase sh
10, Install solr
- Unzip the installation package, command:
tar -xzvf /home/atlas/rar/solr-7.7.3.tgz -C /home/atlas/
mv solr-7.7.3/ solr
- Create user, command: useradd solr
- Set password, command: echo solr | passwd --stdin solr
- Modify the owner of the solr directory to the solr user. The command is chown -R solr:solr /home/atlas/solr
- Modify / home / atlas / Solr / bin / Solr in. SH file, command:
vim /home/atlas/solr/bin/solr.in.sh
ZK_HOST="localhost:2181"
- Start command: sudo -i -u solr /home/atlas/solr/bin/solr start
11, Install atlas
1. Upload and unzip the compressed package
- Unzip apache-atlas-2.1.0-server tar. GZ file, renamed Atlas
tar -xzvf /home/atlas/rar/9_atlas/apache-atlas-2.1.0-server.tar.gz -C /home/atlas/
mv apache-atlas-2.1.0/ atlas
2. Atlas integration Hbase
- Modify atlas / conf / atlas application Properties configuration file, command: VIM / home / atlas / atlas / conf / atlas application properties
atlas.graph.storage.hostname=localhost:2181
- Modify atlas / conf / atlas env SH configuration file, command: VIM / home / atlas / atlas / conf / atlas env sh
#Append at the end of the file
export HBASE_CONF_DIR=/home/atlas/hbase/conf
3. Atlas integration Solr
- Modify atlas / conf / atlas application Properties configuration file, command: VIM / home / atlas / atlas / conf / atlas application properties
#Solr, comment out here
#Solr cloud mode properties
#atlas.graph.index.search.solr.mode=cloud
#atlas.graph.index.search.solr.zookeeper-url=
#atlas.graph.index.search.solr.zookeeper-connect-timeout=60000
#atlas.graph.index.search.solr.zookeeper-session-timeout=60000
#atlas.graph.index.search.solr.wait-searcher=true

#Solr http mode properties
atlas.graph.index.search.solr.mode=http
atlas.graph.index.search.solr.http-urls=http://localhost:8983/solr
- Copy files, command: cp -rf /home/atlas/atlas/conf/solr /home/atlas/solr/atlas_conf
- Execute the following command
sudo -i -u solr /home/atlas/solr/bin/solr create -c vertex_index -d /home/atlas/solr/atlas_conf
4. Atlas integration Kafka
- Modify atlas / conf / atlas application Properties configuration file, command: VIM / home / atlas / atlas / conf / atlas application properties
atlas.notification.embedded=false
atlas.kafka.data=/home/atlas/kafka/data
atlas.kafka.zookeeper.connect=localhost:2181/kafka
atlas.kafka.bootstrap.servers=localhost:9092
5. Atlas Server configuration
- Modify atlas / conf / atlas application Properties configuration file, command: VIM / home / atlas / atlas / conf / atlas application properties
atlas.server.run.setup.on.start=false
- Modify atlas-log4j XML file, command: VIM / home / atlas / atlas / conf / atlas-log4j xml
#Remove the comments from the following code
<appender name="perf_appender" class="org.apache.log4j.DailyRollingFileAppender">
    <param name="file" value="${atlas.log.dir}/atlas_perf.log" />
    <param name="datePattern" value="'.'yyyy-MM-dd" />
    <param name="append" value="true" />
    <layout class="org.apache.log4j.PatternLayout">
        <param name="ConversionPattern" value="%d|%t|%m%n" />
    </layout>
</appender>

<logger name="org.apache.atlas.perf" additivity="false">
    <level value="debug" />
    <appender-ref ref="perf_appender" />
</logger>
6. Atlas integration Hive
- Modify atlas / conf / atlas application Properties configuration file, command: VIM / home / atlas / atlas / conf / atlas application properties
#Append at the end of the file
######### Hive Hook Configs #######
atlas.hook.hive.synchronous=false
atlas.hook.hive.numRetries=3
atlas.hook.hive.queueSize=10000
atlas.cluster.name=primary
- Modify hive site XML file, command: VIM / home / atlas / hive / conf / hive site xml
#Append in the configuration tag
<property>
      <name>hive.exec.post.hooks</name>
      <value>org.apache.atlas.hive.hook.HiveHook</value>
</property>
7. Install Hive Hook
- Unzip Hive Hook, command: tar -zxvf apache-atlas-2.1.0-hive-hook tar. gz
- Copy the file dependencies in the Hive Hook directory to the atlas installation path, command: cp -r apache-atlas-hive-hook-2.1.0/* /home/atlas/atlas/
- Modify HIV / conf / HIV Env SH configuration file, command: VIM / home / atlas / hive / conf / hive env sh
export HIVE_AUX_JARS_PATH=/home/atlas/atlas/hook/hive
- Add the Atlas configuration file / home / Atlas / Atlas / conf / Atlas application Copy properties to / home / Atlas / hive / conf directory, command: CP / home / Atlas / Atlas / conf / Atlas application properties /home/atlas/hive/conf/
12, Atlas launch
1. Start pre configuration
- Start Hadoop, command: start all sh
- Start Zookeeper with the command: / home / atlas / Zookeeper / bin / zkserver sh start
- Start Kafka, command: / home / atlas / Kafka / bin / Kafka server start sh -daemon /home/atlas/kafka/config/server. properties
- Start Hbase, command: / home / atlas / Hbase / bin / start Hbase sh
- Start Solr, command: sudo -i -u solr /home/atlas/solr/bin/solr start
3. Start Atlas service
- Enter the bin directory of atlas, and the command is cd /home/atlas/atlas/bin
- Execute startup script, command:/ atlas_start.py, wait 2min
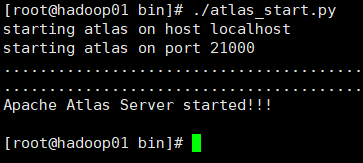
- Access port 21000 of Hadoop 01
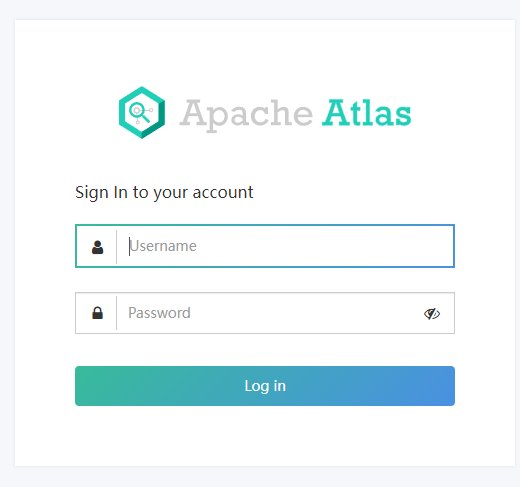
- Log in with the default account, user name: admin, password: admin