Recently, we need to build a live broadcast platform for online classes. Considering the clarity and delay, we agree that WebRTC is the most appropriate.
There are two reasons: first, the "point-to-point communication" is very attractive to us. There is no need for an intermediate server. The client is directly connected, and the communication is very convenient; In addition, WebRTC browser has native support, and other clients also have good support, unlike the traditional live broadcast flv JS compatibility can realize the unification of standards.
However, to my great embarrassment, the community read several articles and wrote a pile of theoretical framework, but none of them could run. There are many new concepts in WebRTC. Understanding its communication process is the key, which is rarely described.
So I'll make my own drum. I've worked hard for a few days, but I understand. Next, I will combine my own practical experience and follow the key steps I understand to introduce you to this powerful friend WebRTC from the perspective of application scenario.
Outline Preview
The content introduced in this paper includes the following aspects:
- What is WebRTC?
- Get media stream
- Peer to peer connection process
- Local analog communication source code
- Communication between two ends of LAN
- One to many communication
- I want to learn more
What is WebRTC?
Webrtc (WEB real time communications) is a real-time communication technology, which allows network applications or sites to establish Peer-to-Peer connections between browsers without the help of intermediate media, so as to realize the transmission of video stream, audio stream or other arbitrary data.
Simply put, WebRTC can realize audio and video transmission through direct connection (point-to-point) between browser and browser without the help of media server.
If you've been exposed to live technology, you'll know how amazing it is to have "no media server". Most of the previous live broadcast technologies are based on push / pull logic. If you want to broadcast audio and video live, you must have a streaming media server as an intermediate station for data forwarding. However, this push-pull flow scheme has two problems:
- Higher delay
- Clarity is difficult to guarantee
Because the communication between both ends must pass through the server first, just like it was originally a straight road, you "walked around half a circle", which will certainly take more time. Therefore, the live broadcast will inevitably have a delay, even if the delay is lower, it will take more than 1s.
The essence of clarity is the amount of data. Imagine taking the subway to work every day. The more people there are in the morning rush hour, the easier it is to block the road to the station. If you are blocked, you will stop and go. In addition, you have to detour. Is it even later to get to the company.
Connect this example to high-definition live broadcasting: because of the large amount of data, network congestion is easy to occur, which will lead to broadcast jam and higher delay.
But WebRTC is different. It does not need a media server. It is directly connected to two points and one line. First, the latency must be greatly shortened. In addition, because the transmission route is shorter, the data stream with high definition is easier to reach, which is relatively difficult to jam, so the playback end is not easy to get stuck, which takes into account the clarity and delay.
Of course, WebRTC also supports intermediate media servers, and server forwarding is indeed indispensable in some scenarios. This article only discusses the point-to-point mode, which aims to help you understand and start WebRTC more easily.
Get media stream
The first step of peer-to-peer communication must be to obtain the media stream from the initiator.
There are three common media devices: camera, microphone and screen. The camera and screen can be converted into video stream, while the microphone can be converted into audio stream. Audio and video streams combine to form a common media stream.
Taking Chrome browser as an example, the video stream acquisition methods of camera and screen are different. For cameras and microphones, use the following API s:
var stream = await navigator.mediaDevices.getUserMedia()
For screen recording, another API is used. The limitation is that this API can only get video, not Audio:
var stream = await navigator.mediaDevices.getDisplayMedia()
Note: I have encountered a problem here. The editor prompts navigator Mediadevices = = undefined, because my typescript version is less than 4.4, you can upgrade it.
The two API s for obtaining media streams have usage conditions and must meet one of the following two conditions:
- The domain name is localhost
- The protocol is https
If not, navigator The value of mediadevices is undefined.
All the above methods have a parameter constraints, which is a configuration object called media constraints. The most useful one is that you can configure to obtain only audio or video, or audio and video at the same time.
For example, as long as I want video, not audio, I can do this:
let stream = await navigator.mediaDevices.getDisplayMedia({
  audio: false,
  video: true
})
In addition to simple configuration to obtain video, you can also configure parameters related to video quality such as video definition and bit rate. For example, if I need to get 1080p ultra clear video, I can match it as follows:
var stream = await navigator.mediaDevices.getDisplayMedia({
  audio: false,
  video: {
    width: 1920,
    height: 1080
  }
})
Of course, the video resolution configured here is 1080p, which does not mean that the actually acquired video must be 1080p. For example, my camera is 720p. Even if I configure 2k resolution, I can actually get 720p at most. This has something to do with hardware and network.
As mentioned above, media stream is composed of audio stream and video stream. Streaming media, say one more thing( MediaStream )Will contain multiple media tracks( MediaStreamTrack )Therefore, we can obtain audio and video tracks separately from the media stream:
// Video track
let videoTracks = stream.getVideoTracks()
// Audio track
let audioTracks = stream.getAudioTracks()
// All tracks
stream.getTracks()
What's the point of acquiring the orbit alone? For example, the above API getDisplayMedia for obtaining screen cannot obtain audio, but we need both screen and sound during live broadcast. At this time, we can obtain audio and video respectively, and then form a new media stream. The implementation is as follows:
const getNewStream = async () => {
  var stream = new MediaStream()
  let audio_stm = await navigator.mediaDevices.getUserMedia({
    audio: true
  })
  let video_stm = await navigator.mediaDevices.getDisplayMedia({
    video: true
  })
  audio_stm.getAudioTracks().map(row => stream.addTrack(row))
  video_stm.getVideoTracks().map(row => stream.addTrack(row))
  return stream
}
Peer to peer connection process
If WebRTC is not elegant, the first thing to mention is that the connection steps are complex. Many students were successfully discouraged because they always failed to connect.
Peer to peer connection, that is, the point-to-point connection mentioned above, is realized by RTCPeerConnection function. The point-to-point connection and communication between two browsers is essentially the connection and communication between two RTCPeerConnection instances.
The two instances created with RTCPeerConnection constructor can transmit video, audio or any binary data after the connection is successfully established (RTCDataChannel API needs to be supported). At the same time, it also provides the method of monitoring the connection status and closing the connection. However, one-way data transmission between two points can only be transmitted from the initiator to the receiver.
Let's sort out the specific connection steps according to the core API.
Step 1: create a connection instance
First, create two connection instances, which are the two sides communicating with each other.
var peerA = new RTCPeerConnection()
var peerB = new RTCPeerConnection()
Hereinafter, the end that initiates the live broadcast is called the initiator, and the end that receives and watches the live broadcast is called the receiver
There is no data for these two connection instances. Assuming that peerA is the initiator and peerB is the receiver, the end of peerA should obtain the media stream data as in the previous step, and then add it to the peerA instance. The implementation is as follows:
var stream = await navigator.mediaDevices.getUserMedia()
stream.getTracks().forEach(track => {
  peerA.addTrack(track, stream)
})
When peerA adds media data, peerB must receive media data at a certain link of subsequent connection. Therefore, set the listening function for peerB to obtain media data:
peerB.ontrack = async event => {
  let [ remoteStream ] = event.streams
  console.log(remoteStream)
})
Note here: you must add media data to peerA before proceeding to the next step! Otherwise, the contract event of peerB in subsequent links will not be triggered, and the media stream data will not be obtained.
Step 2: establish peer-to-peer connection
After adding data, both ends can start to establish peer-to-peer connection.
The most important role in establishing a connection is SDP (RTCSessionDescription), which translates into session description. Both sides of the connection need to establish an SDP, but their SDPs are different. The SDP of the initiator is called offer, and the SDP of the receiver is called answer.
In fact, the essence of establishing a peer-to-peer connection at both ends is to exchange SDP s, and verify each other in the process of exchange. Only after successful verification can the connection at both ends succeed.
Now let's create SDP s for both ends. peerA creates an offer and peerB creates an answer:
var offer = await peerA.createOffer()
var answer = await peerB.createAnswer()
After creation, the receiver peerB should first set the offset to the remote description, and then set the answer to the local description:
await peerB.setRemoteDescription(offer)
await peerB.setLocalDescription(answer)
Note: when peerb After setremotedescription is executed, peerb The Ontrack event is triggered. Of course, the premise is that the first step adds media data to peerA.
This is easy to understand. offer is created by peer a, which is equivalent to the other end of the connection, so it should be set to "remote description". answer is created by yourself. Naturally, it should be set to "local description".
Similarly, after peerB is set, peerA should also set answer as remote description and offer as local description.
await peerA.setRemoteDescription(answer)
await peerA.setLocalDescription(offer)
Here, the exchange of SDP s has been completed. But the communication is not over yet. It is still the last step.
When peerA executes setLocalDescription function, the onicecandidate event will be triggered. We need to define this event and add a candidate for peerB:
peerA.onicecandidate = event => {
  if (event.candidate) {
    peerB.addIceCandidate(event.candidate)
  }
}
So far, end-to-end communication is really established! If the process goes smoothly, the media stream data should have been received in the contract event of peerB. You only need to render the media data to a video tag to play.
Let me mention again: these steps seem simple, but the actual sequence is very important. You can't make mistakes in one step, otherwise the connection will fail! If you encounter problems in practice, be sure to go back and check whether there are mistakes in the steps.
Finally, we add a status monitoring event for peerA to detect whether the connection is successful:
peerA.onconnectionstatechange = event => {
  if (peerA.connectionState === 'connected') {
    console.log('Peer to peer connection succeeded!')
  }
  if (peerA.connectionState === 'disconnected') {
    console.log('Disconnected!')
  }
}
Local analog communication source code
In the last step, we sorted out the process of point-to-point communication. In fact, there are so many main codes. In this step, we will string up these knowledge points, simply implement a Demo of local analog communication, and run it to let you see the effect.
The first is the page layout, which is very simple. Two video tags, one play button:
<div class="local-stream-page">
  <video autoplay controls muted id="elA"></video>
  <video autoplay controls muted id="elB"></video>
  <button onclick="onStart()">play</button>
</div>
Then set the global variable:
var peerA = null
var peerB = null
var videoElA = document.getElementById('elA')
var videoElB = document.getElementById('elB')
The button is bound with an onStart method to obtain media data:
const onStart = async () => {
  try {
    var stream = await navigator.mediaDevices.getUserMedia({
      audio: true,
      video: true
    })
    if (videoElA.current) {
      videoElA.current.srcObject = stream // Play the media stream on the video tag
    }
    peerInit(stream) // Initialize connection
  } catch (error) {
    console.log('error: ', error)
  }
}
In the onStart function, the peerInit method is called, and the connection is initialized in this method:
const peerInit = stream => {
  // 1. Create connection instance
  var peerA = new RTCPeerConnection()
  var peerB = new RTCPeerConnection()
  // 2. Add video stream track
  stream.getTracks().forEach(track => {
    peerA.addTrack(track, stream)
  })
  // Add candidate
  peerA.onicecandidate = event => {
    if (event.candidate) {
      peerB.addIceCandidate(event.candidate)
    }
  }
  // Detect connection status
  peerA.onconnectionstatechange = event => {
    if (peerA.connectionState === 'connected') {
      console.log('Peer to peer connection succeeded!')
    }
  }
  // Monitoring data coming
  peerB.ontrack = async event => {
    const [remoteStream] = event.streams
    videoElB.current.srcObject = remoteStream
  }
  // Swap sdp certification
  transSDP()
}
After initializing the connection, swap SDP s in the transSDP method to establish a connection:
const transSDP = async () => {
  // 1. Create an offer
  let offer = await peerA.createOffer()
  await peerB.setRemoteDescription(offer)
  // 2. Create answer
  let answer = await peerB.createAnswer()
  await peerB.setLocalDescription(answer)
  // 3. Set SDP at sender
  await peerA.setLocalDescription(offer)
  await peerA.setRemoteDescription(answer)
}
Note: the code order in this method is very important. If you change the order, most of the connection will fail!
If it goes well, the connection is successful at this time. The screenshot is as follows:
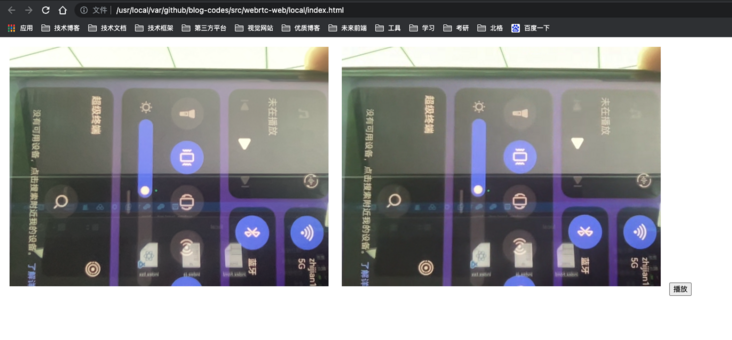
We use two video tags and three methods to realize the demo of local analog communication. In fact, "local analog communication" is to simulate the communication between peerA and peerB, and put the two clients on one page. Of course, this cannot be the case. This demo just helps us clarify the communication process.
The complete code of Demo has been uploaded to GitHub. Please check it here , pull the code and directly open index HTML to see the effect.
Next, let's explore the real scene - how the LAN communicates.
Communication between two ends of LAN
In the previous section, local analog communication is realized, and two end connections are simulated on one page. Now think about it: if peerA and peerB are two clients under a LAN, how do you change the code of local analog communication?
We use two tags and three methods to realize local analog communication. If they are separated, first of all, the two instances of peerA and peerB, as well as the events bound to them, must be defined separately, and the same is true for the two video tags. Then, the onStart method to obtain the media stream must be in peer a at the initiator, which is no problem, but the transSDP method to swap SDP s will fail at this time.
Why? For example, on the peer a side:
// peerA end
let offer = await peerA.createOffer()
await peerA.setLocalDescription(offer)
await peerA.setRemoteDescription(answer)
Answer is used to set the remote description here. Where does answer come from?
For local analog communication, we define variables in the same file and can access each other. But now peerB is on another client, and the answer is also on the peerB side. In this case, you need to create an answer on the peerB side and transfer it to the peerA side.
For the same reason, after the offer is created at the peer a end, it should also be transferred to the peer B end. This requires two clients to exchange SDP s remotely. This process is called signaling.
Yes, signaling is the process of remote SDP exchange, not some kind of certificate.
Two clients need to actively exchange data with each other, so a server is needed to provide connection and transmission. The most suitable implementation scheme of "active switching" is WebSocket, so we need to build a signaling server based on WebSocket to realize SDP switching.
However, this article will not explain the signaling server in detail. I will write a separate article on building the signaling server. Now we use two variables socket a and socket B to represent the WebSocket connection at both ends of peerA and peerB, and then transform the logic of peer-to-peer connection.
First, modify the transmission and reception code of SDP at peer a:
// peerA end
const transSDP = async () => {
  let offer = await peerA.createOffer()
  // Transfer offer to peerB
  socketA.send({ type: 'offer', data: offer })
  // Receive the answer from peerB
  socketA.onmessage = async evt => {
    let { type, data } = evt.data
    if (type == 'answer') {
      await peerA.setLocalDescription(offer)
      await peerA.setRemoteDescription(data)
    }
  }
}
This logic is that after peer a creates an offer, it is immediately passed to peer B. After the peerB end executes its own code and creates an answer, it will be sent back to the peerA end. At this time, peerA will set its own description.
In addition, the candidate part also needs remote delivery:
// peerA end
peerA.onicecandidate = event => {
  if (event.candidate) {
    socketA.send({ type: 'candid', data: event.candidate })
  }
}
The peerB end is slightly different. An answer can only be created after receiving an offer and setting it as a remote description. After creation, it can be sent to the peerA end. At the same time, it also needs to receive candidate data:
// peerB receives the offer from peerA
socketB.onmessage = async evt => {
  let { type, data } = evt.data
  if (type == 'offer') {
    await peerB.setRemoteDescription(data)
    let answer = await peerB.createAnswer()
    await peerB.setLocalDescription(answer)
    // Transfer answer to peerA
    socketB.send({ type: 'answer', data: answer })
  }
  if (type == 'candid') {
    peerB.addIceCandidate(data)
  }
}
In this way, the two ends can realize the connection and communication between two clients in the LAN by means of remote data transmission.
To sum up, two clients listen to each other's WebSocket to send messages, then receive each other's SDP and set each other as remote description. The receiver also needs to obtain candidate data, so that the process of "signaling" can run through.
One to many communication
As we mentioned earlier, both local analog communication and communication at both ends of LAN belong to "one-to-one" communication.
However, in many scenarios, such as live classes in online education classes, a teacher may have to face 20 students, which is a typical one to many scenario. But WebRTC only supports point-to-point communication, that is, a client can only establish a connection with one client. What should I do in this case?
Remember what I said earlier: the point-to-point connection and communication between two clients is essentially the connection and communication between two RTCPeerConnection instances.
Let's make some changes. For example, the receiving end may be several clients such as peerB, peerC and peerD. The logic of establishing the connection is the same as before. Can the initiator expand from "one connection instance" to "multiple connection instances"?
In other words, although the initiator is a client, it can not create multiple RTCPeerConnection instances at the same time. In this way, the essence of one-to-one connection has not changed, but multiple connection instances are placed on one client, and each instance is connected with other receiving ends to realize one-to-many communication in a disguised form.
The specific idea is: the initiator maintains an array of connection instances. When a receiving end requests to establish a connection, the initiator creates a new connection instance to communicate with the receiving end. After the connection is successful, push the instance into the array. When the connection is disconnected, the instance will be deleted from the array.
This method is effective in my personal test. Let's reform the code of the initiator. The message with the type of join indicates that the connection end requests a connection.
// Initiator
var offer = null
var Peers = [] // Connection instance array

// The receiver requests a connection and sends an identification id
const newPeer = async id => {
  // 1. Create a connection
  let peer = new RTCPeerConnection()
  // 2. Add video stream track
  stream.getTracks().forEach(track => {
    peer.addTrack(track, stream)
  })
  // 3. Create and deliver SDP
  offer = await peerA.createOffer()
  socketA.send({ type: 'offer', data: { id, offer } })
  // 5. Save the connection
  Peers.push({ id, peer })
}

// Monitor the information of the receiving end
socketA.onmessage = async evt => {
  let { type, data } = evt.data
  // Receiving end requests connection
  if (type == 'join') {
    newPeer(data)
  }
  if (type == 'answer') {
    let index = Peers.findIndex(row => row.id == data.id)
    if (index >= 0) {
      await Peers[index].peer.setLocalDescription(offer)
      await Peers[index].peer.setRemoteDescription(data.answer)
    }
  }
}
This is the core logic. In fact, it's not difficult. It's very simple when the idea is straightened out.
Because we haven't introduced the signaling server in detail, the actual one to many communication needs the participation of the signaling server, so I only introduce the implementation idea and core code here. For more detailed implementation, I will practice one to many communication again in the next article on signaling server, and the complete source code will be provided at that time.
I want to learn more
In order to better protect the original, I will start the WeChat official account at the front. This official account is only original. It has at least one high-quality article per week. Its direction is front-end engineering and architecture, Node.. JS boundary exploration, integrated development and application delivery.
In addition, I also built a wechat group to provide students interested in this direction with communication and learning. If you are also interested, welcome to join our wechat ruidoc group and make progress together