App packaging has always been done by developers during the submission of tests and final deployment. Because of the large size of the project and the slowness of Android packaging itself, each packaging is time consuming.And according to the rigorous R&D process, developers should only be responsible for submitting code. Packaging during testing and deployment should not be done by developers, so I want to set up an environment for testing and maintenance personnel to package automatically.Later on, I saw a lot of netizens sharing articles about using Jenkins to package Android automatically. After several attempts, I finally built up the environment.
Jenkins Installation
As an open source continuous integration tool, Jenkins can be used not only for Android packaging, but also for iOS packaging, NodeJs packaging, Jave service packaging, and so on.The official address is: https://jenkins.io/ .Jenkins was developed in Java, officially providing a war package, and comes with a servlet container that can run independently or in Tomcat.We're here to run independently.Run the command as:
java -jar jenkins.warRun successfully, open the browser to access http://locahost:8080, the first run will require an administrator password, Jenkins generated at the first run, will print out in the console or follow the file path prompted on the page to view the administrator password.Password output by console:
*************************************************************
*************************************************************
*************************************************************

Jenkins initial setup is required. An admin user has been created and a password generated.
Please use the following password to proceed to installation:

b7004e63acb940368e62a5dacaa2b246

This may also be found at: /Users/dmx/.jenkins/secrets/initialAdminPassword
First Run Page
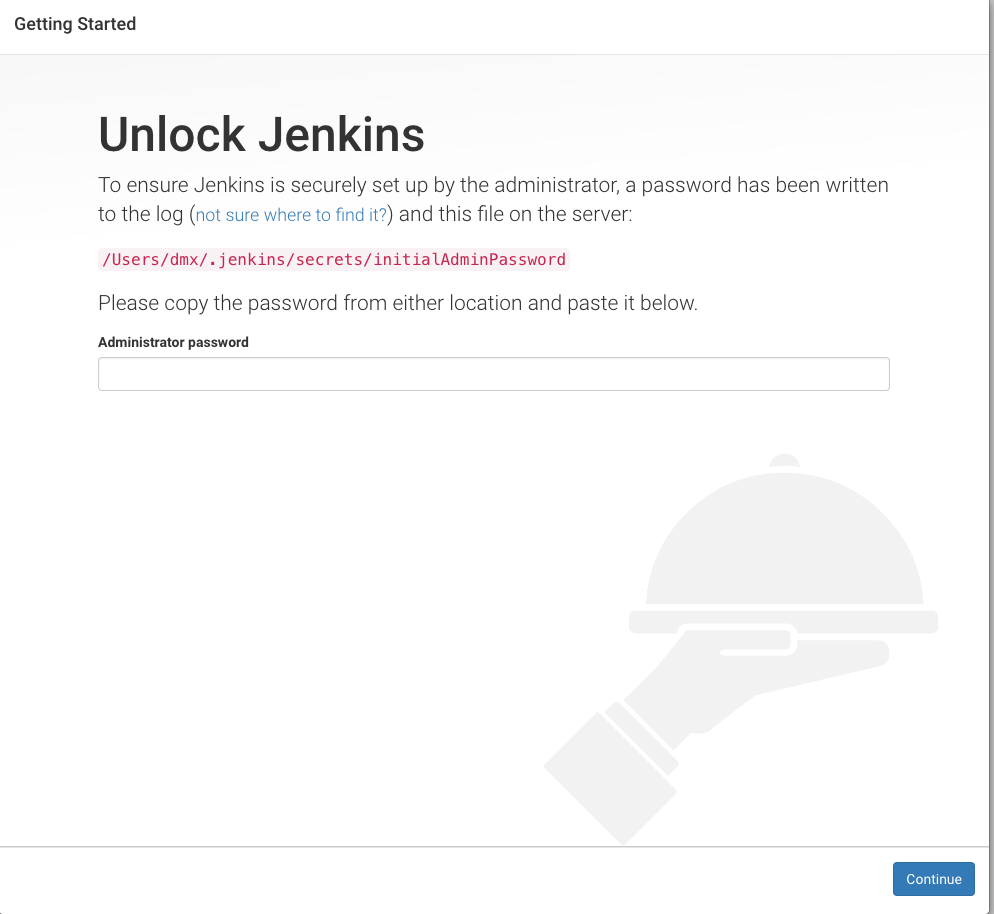
After entering the password, click continue to select the plug-in to install
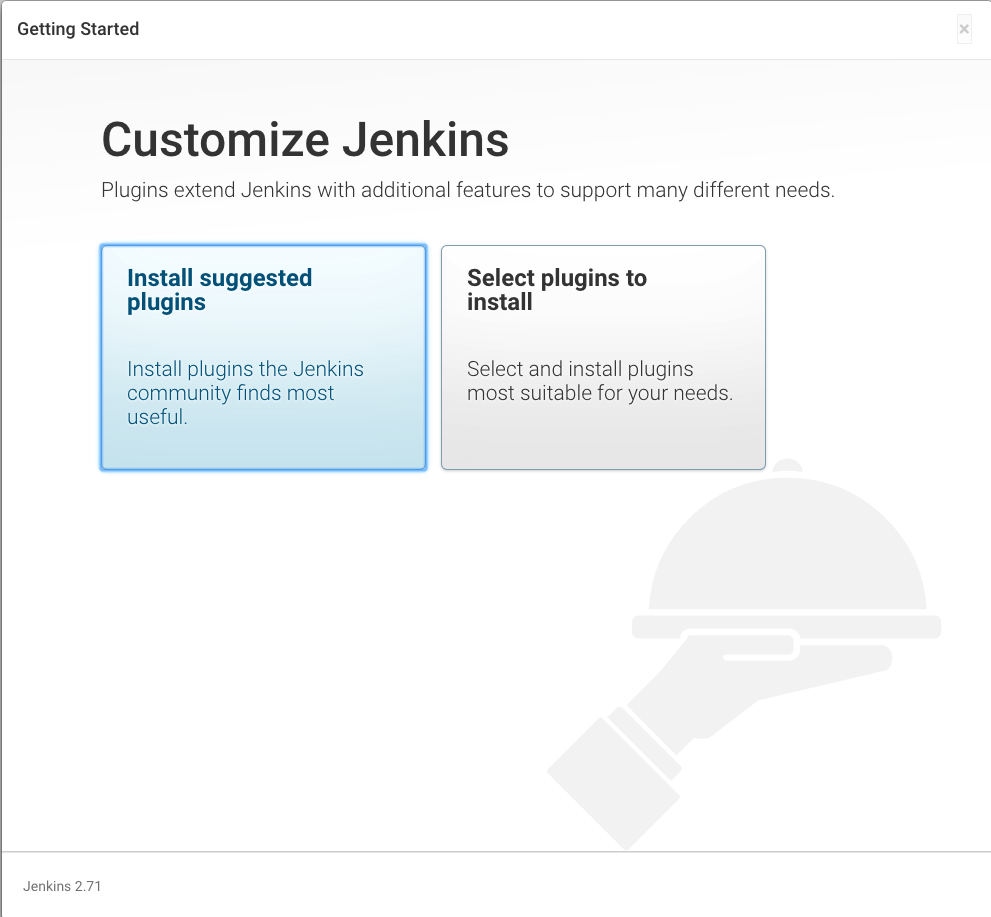
Because there is a dependency between Jenkins plug-ins and Jenkins does not help us automatically install dependent plug-ins, the plug-in installation process is prone to errors, so we recommend that you choose the plug-in you want to install instead of the plug-in Jenkins recommends to install.Click Select plugins to install to go to the next page
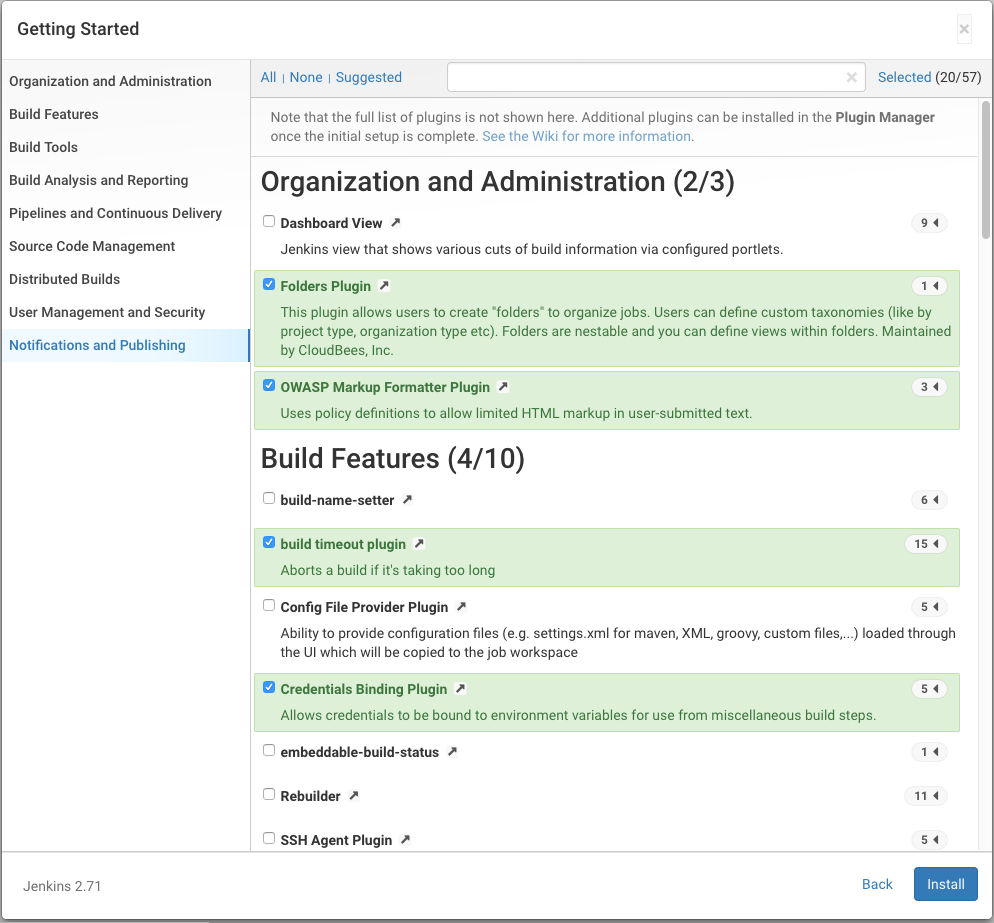
First remove all the plugins that are selected by default, and then select the plugins that we want to install. For Android packaging, the plugins you normally need are
- Git plugin
- Gradle Plugin
- Email Extension Plugin
- description setter plugin
- build-name-setter
- user build vars plugin
- Post-Build Script Plug-in
- Branch API Plugin
- SSH plugin
- Scriptler
- Git Parameter Plug-In
- Gitlab plugin
If the plug-in installation fails due to dependencies, you can install the dependent plug-in first and reinstall the required plug-in based on the error information.
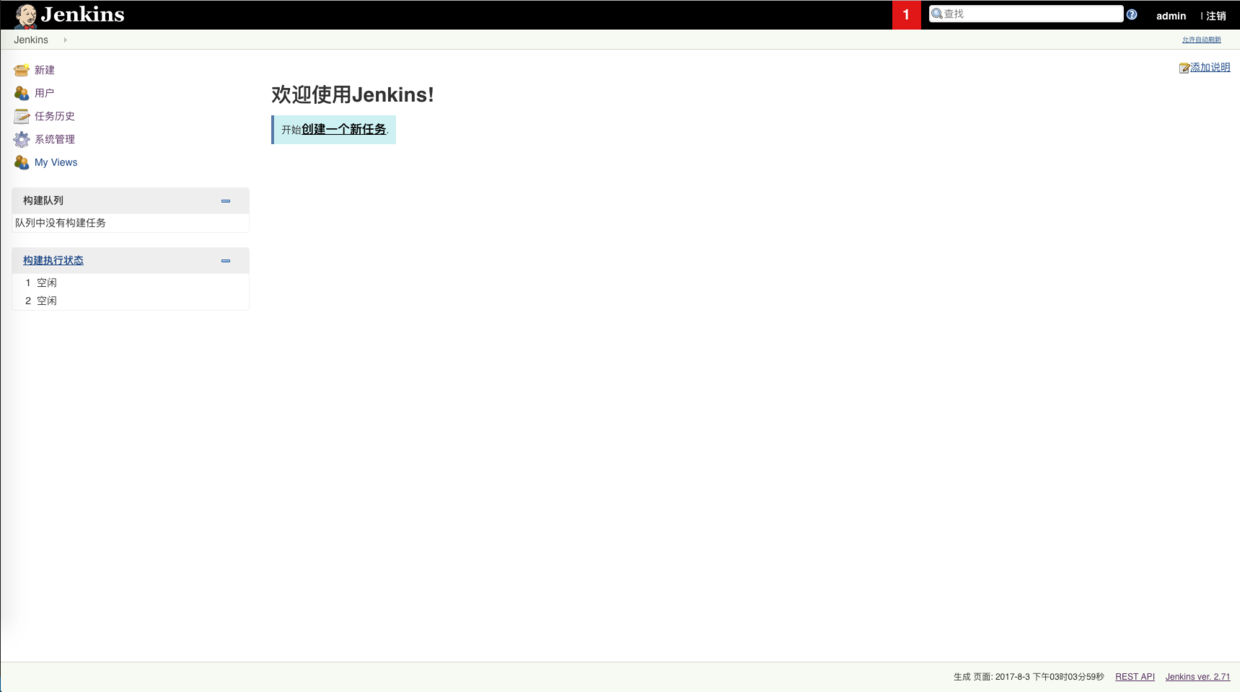
Once the plug-in is installed, create an administrator account to use as prompted, and start the first page after you log in.
Configuring environment variables
The environment variables you need to configure are Android Home, JDK directory, Gradle directory.First click System Administration=>System Settings, select Environment variables, then add Android Home environment variables

Then configure the JDK and Gradle directories in System Management =>Global Tool Configuration
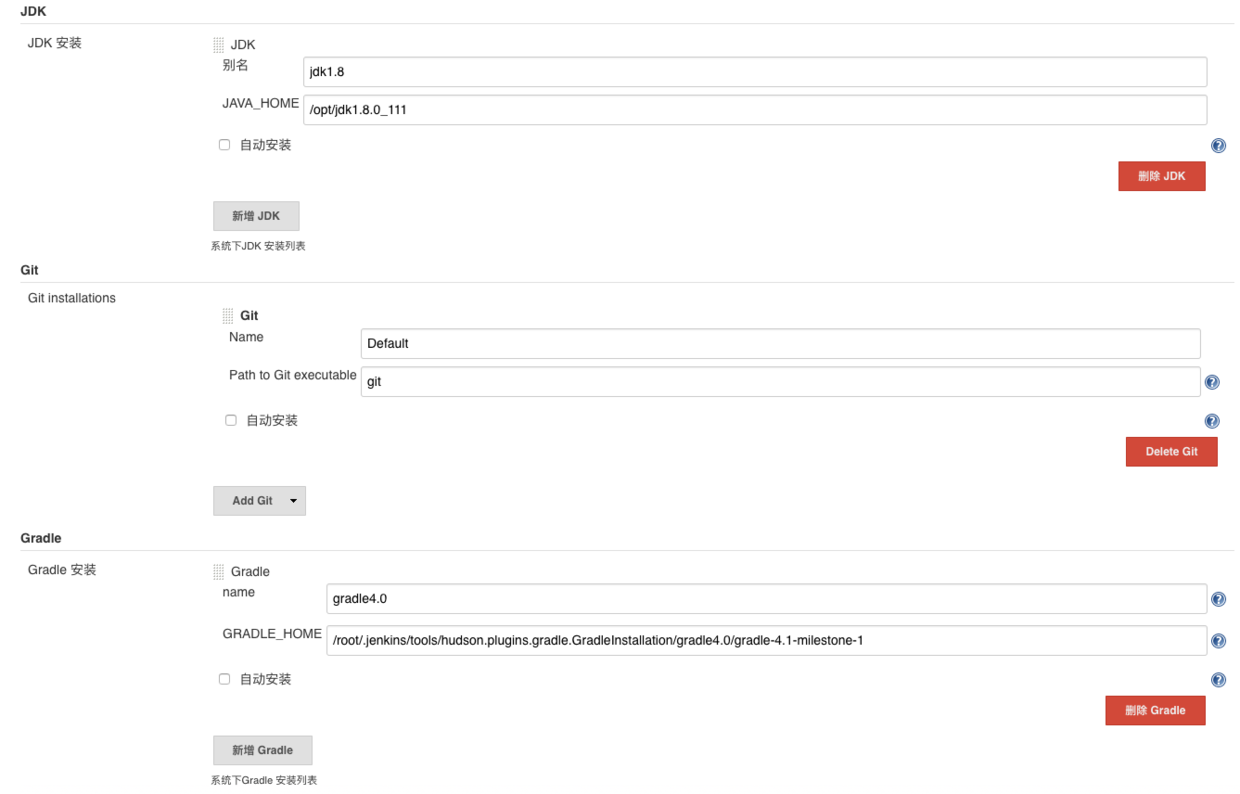
JDK and Gradle recommend that downloads be placed on the server ahead of time instead of using automatic installation, which is very slow for Jenkins
Configure Packaging Scripts
After the Jenkins configuration is complete, we need to refine our gradle script to meet our packaging requirements, both in Jenkins and Android Studio.First we need a variable, IS_JENKINS, to identify whether we are currently packaging in Jenkins or Android Studio. Certificate paths and APK-generated paths differ when packaging in different environments. We define a function to get the certificate path, and then specify the certificate used when packaging in gradle.
def getMyStoreFile(){
    if("true".equals(IS_JENKINS)){
        return file("Use Jenkins Certificate path at packaging time")
    }else{
        return file("Use Android Studio Certificate path at packaging time")
    }
}
android{
  signingConfigs {
        release {
            keyAlias '*****'
            keyPassword '****'
            storeFile getMyStoreFile()
            storePassword '****'
        }
    }
    buildTypes{
      debug{
        ....
        signingConfig signingConfigs.release
      }
      release{
        ....
        signingConfig signingConfigs.release
      }
    }
    ....
}
Then configure the generation path of the apk in different packaging environments
   android.applicationVariants.all { variant ->
        variant.outputs.each { output ->
            //New name
            def newName
            //Output Folder
            def outDirectory
            //Whether or not to package Jenkins, the output path is different
            if ("true".equals(IS_JENKINS)) {
                //BUILD_PATH is the server output path
                outDirectory = BUILD_PATH
                newName = "Your App Name" + "-" + defaultConfig.versionName + "-" + BUILD_TYPE + ".apk"
            } else {
                outDirectory = output.outputFile.getParent()
                newName = "Your App Name" + "-" + defaultConfig.versionName + "-" + BUILD_TYPE + ".apk"
            }
            output.outputFile = new File(outDirectory, newName)
        }
    }
The final gradle script is
apply plugin: 'com.android.application'
repositories {
    flatDir {
        dirs 'libs'
    }
}

dependencies {
   ....
}
def getMyStoreFile(){
    if("true".equals(IS_JENKINS)){
        return file("Use Jenkins Certificate path at packaging time")
    }else{
        return file("Use Android Studio Certificate path at packaging time")
    }
}
android {
      signingConfigs {
        release {
            keyAlias '*****'
            keyPassword '****'
            storeFile getMyStoreFile()
            storePassword '****'
        }
    }
    compileSdkVersion Integer.parseInt(project.ANDROID_BUILD_SDK_VERSION)
    buildToolsVersion project.ANDROID_BUILD_TOOLS_VERSION
    dexOptions {
        jumboMode true
    }
    defaultConfig {
        applicationId project.APPLICATION_ID
        minSdkVersion Integer.parseInt(project.ANDROID_BUILD_MIN_SDK_VERSION)
        targetSdkVersion Integer.parseInt(project.ANDROID_BUILD_TARGET_SDK_VERSION)
        versionName project.APP_VERSION
        versionCode Integer.parseInt(project.VERSION_CODE)
        ndk {
            abiFilters "armeabi", "armeabi-v7a", "arm64-v8a", "mips", "mips64", "x86", "x86_64"
        }
        // Enabling multidex support.
        multiDexEnabled true
    }
    buildTypes {
        debug {
            minifyEnabled false
            shrinkResources false
            signingConfig signingConfigs.release
            proguardFiles getDefaultProguardFile('proguard-android.txt'), 'proguard-rules.pro'
        }
        release {
            // Remove unused resource files
            shrinkResources true
            minifyEnabled true
            signingConfig signingConfigs.release
            proguardFiles getDefaultProguardFile('proguard-android.txt'), 'proguard-rules.pro'
        }
    }
    android.applicationVariants.all { variant ->
        variant.outputs.each { output ->
            //New name
            def newName
            //Output Folder
            def outDirectory
            //Whether or not to package Jenkins, the output path is different
            if ("true".equals(IS_JENKINS)) {
                //BUILD_PATH is the server output path
                outDirectory = BUILD_PATH
                newName = "Your app Name" + "-" + defaultConfig.versionName + "-" + BUILD_TYPE + ".apk"
            } else {
                outDirectory = output.outputFile.getParent()
                newName = "Your app Name" + "-" + defaultConfig.versionName + "-" + BUILD_TYPE + ".apk"
            }
            output.outputFile = new File(outDirectory, newName)
        }
    }
    flavorDimensions("channel")
    productFlavors {
        yingyongbao { dimension "channel" }
    }
    productFlavors.all {
        flavor -> flavor.manifestPlaceholders = [CHANNEL_VALUE: name]
    }
    packagingOptions {
        exclude 'META-INF/DEPENDENCIES.txt'
        exclude 'META-INF/LICENSE.txt'
        exclude 'META-INF/NOTICE.txt'
        exclude 'META-INF/NOTICE'
        exclude 'META-INF/LICENSE'
        exclude 'META-INF/DEPENDENCIES'
        exclude 'META-INF/notice.txt'
        exclude 'META-INF/license.txt'
        exclude 'META-INF/dependencies.txt'
        exclude 'META-INF/LGPL2.1'
    }

}
Variables defined in gradle.properties are used in the gradle script as follows
org.gradle.daemon=true
org.gradle.parallel=true
manifestmerger.enabled=true
android.useDeprecatedNdk=true
org.gradle.configureondemand=true
org.gradle.jvmargs=-Xmx4096m -XX\:MaxPermSize\=4096m -XX\:+HeapDumpOnOutOfMemoryError -Dfile.encoding\=UTF-8

ANDROID_BUILD_MIN_SDK_VERSION=14
ANDROID_BUILD_TOOLS_VERSION=25.0.1
ANDROID_BUILD_TARGET_SDK_VERSION=22
ANDROID_BUILD_SDK_VERSION=24
VERSION_CODE=176
APPLICATION_ID=Your applicationId

#Variables used in jenkins
NODEJS_ADDRESS=app The address of the server to access
API_VERSION=api version number
APP_VERSION=app version number
IS_JENKINS=false
BUILD_PATH=apk Output Path
BUILD_TYPE=Debug
Create Job
Now that we're ready to configure gradle above, we need to create a new task on Jenkins to complete the call to the above script.
Click New in Jenkins and enter Job name. Since Jenkins generates a catalog based on Job name, it is recommended not to use Chinese in English. Then choose to build a free style software project and click OK to enter the configuration page.
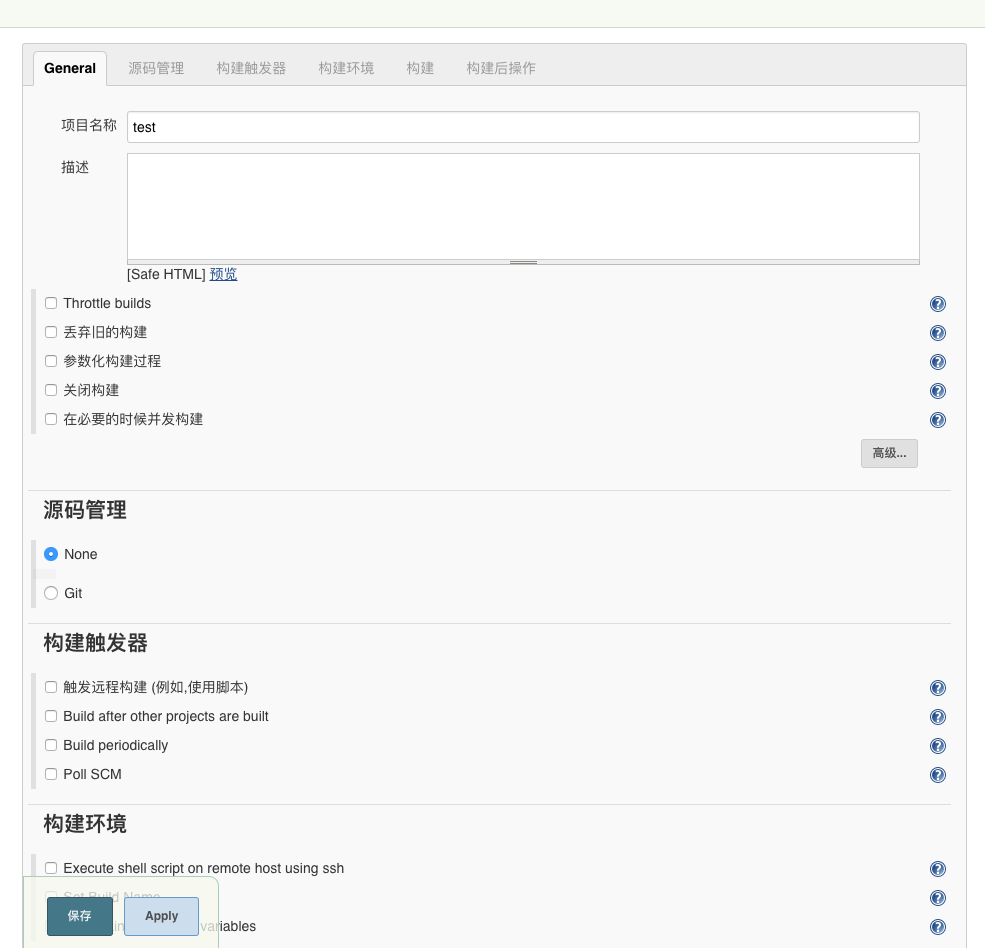
Job configuration is divided into six parts: General, source management, build triggers, build, post-build operations.
General
General can configure Job's basic information, name, description, etc. What we need to focus on is the configuration of the build. If server resources are tight, you can choose to discard the old build, and then select the parameterized build process, so that you can enter some necessary parameters when packaging, such as App version number, packaging type, server address, channel and so on.These input parameters replace the variables defined in gradle.properties during the build process.The types of parameters supported in Jenkins are Boolean, Choice (drop-down selection), String, Git (plug-ins need to be installed).The Dynamic Parameter Plug-in mentioned in other articles on the Web is no longer supported due to security issues.Let's take a look at the parameters we need to add:
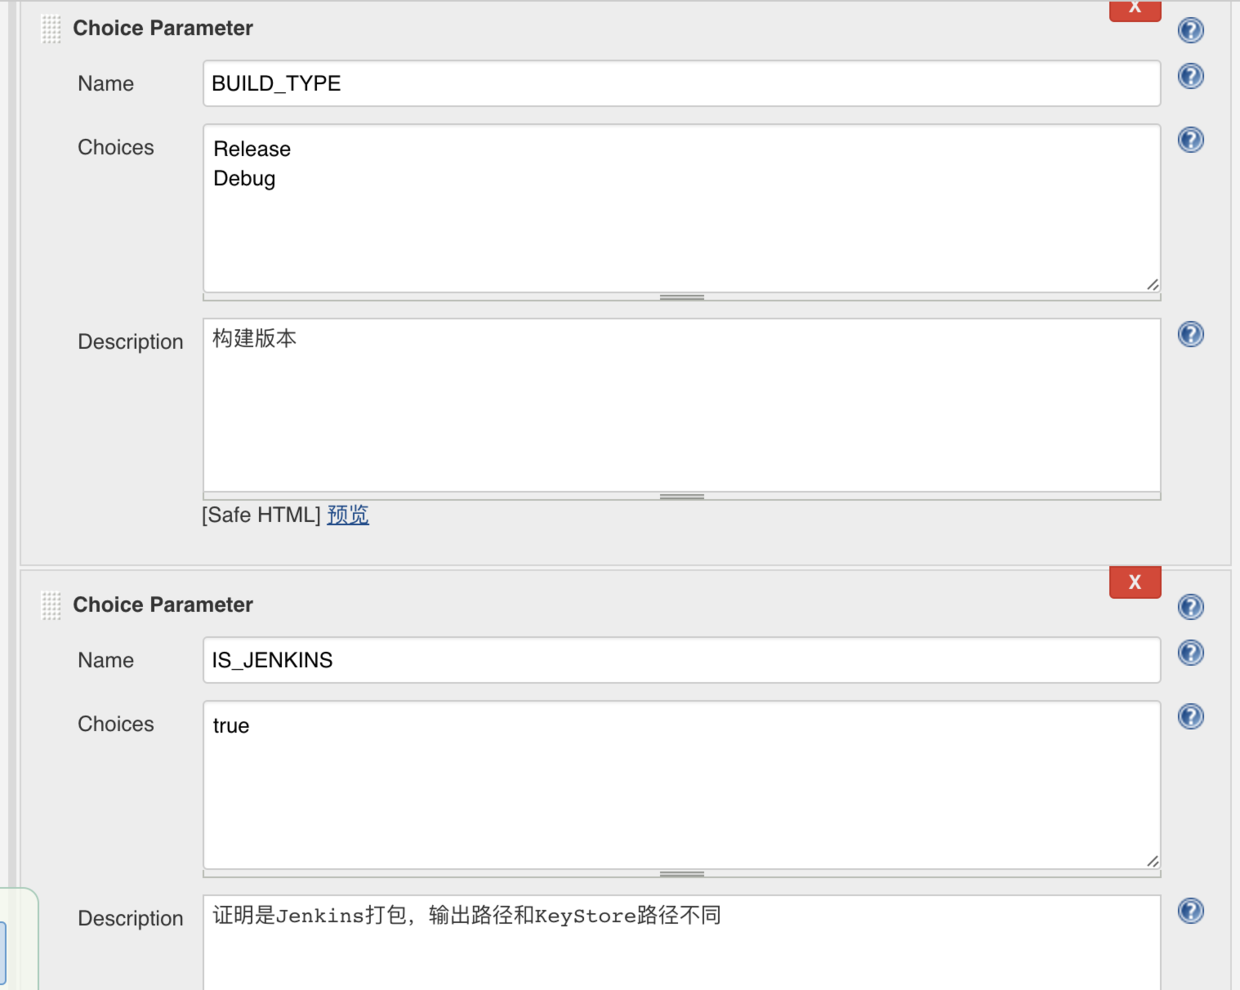
BUILD_TYPE indicates whether the build version is Release or Debug, allowing you to distinguish between an official version of App and a content test version.JS_JENKINS means that this was packaged from Jenkins and the default value is true
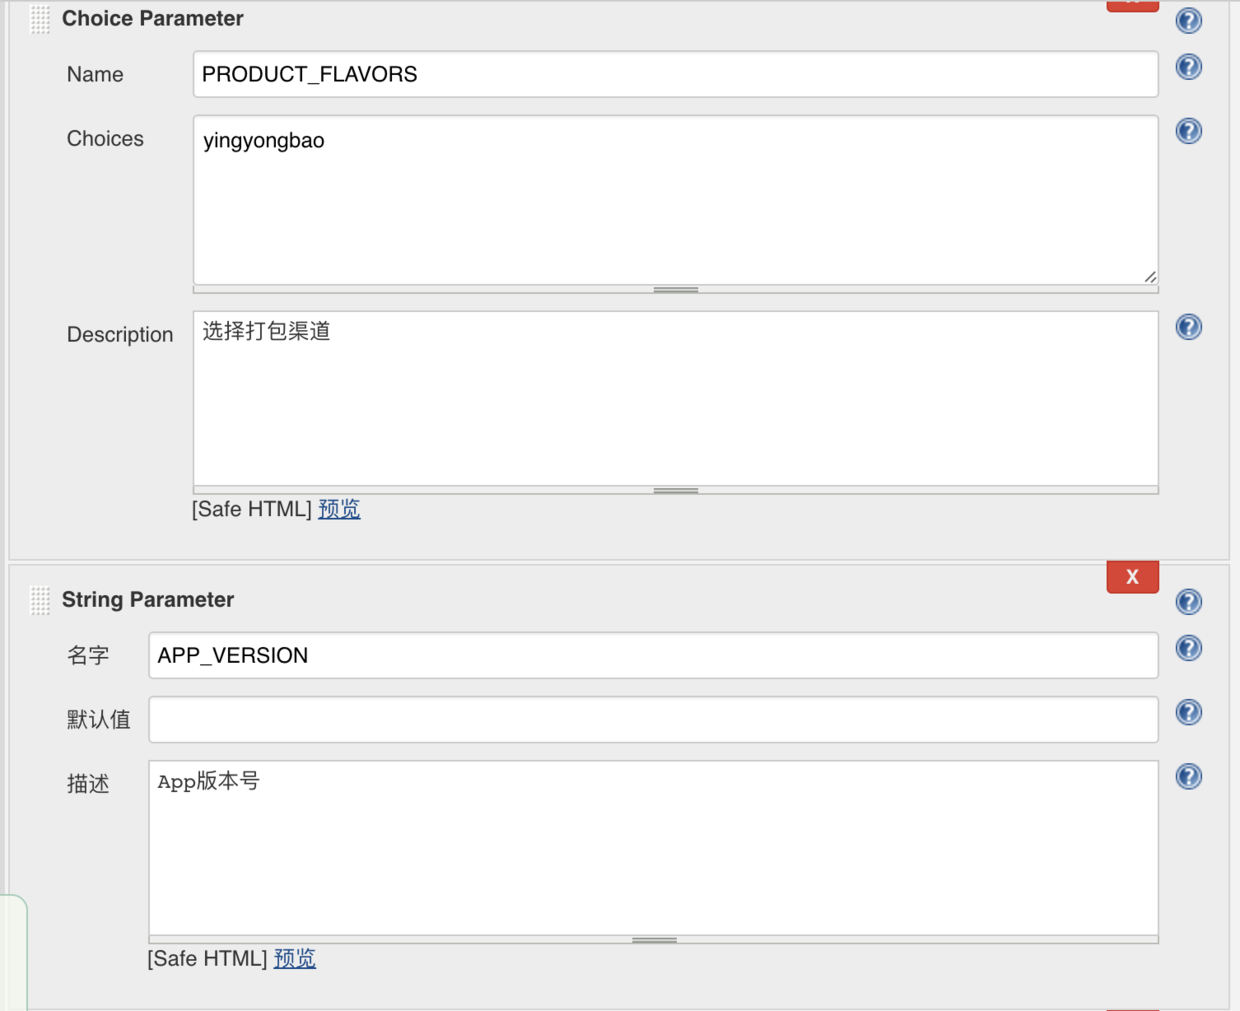
PRODUCT_FLAVORS represents App's channel. We have only set up App Bao as one channel at present. If there are many channel packages, it will be inefficient to package, so we need a special multi-channel packaging tool.APP_VERSION represents the version number of an APP, and this parameter is added here to enable maintenance personnel to specify the version number of the release when the App is released.
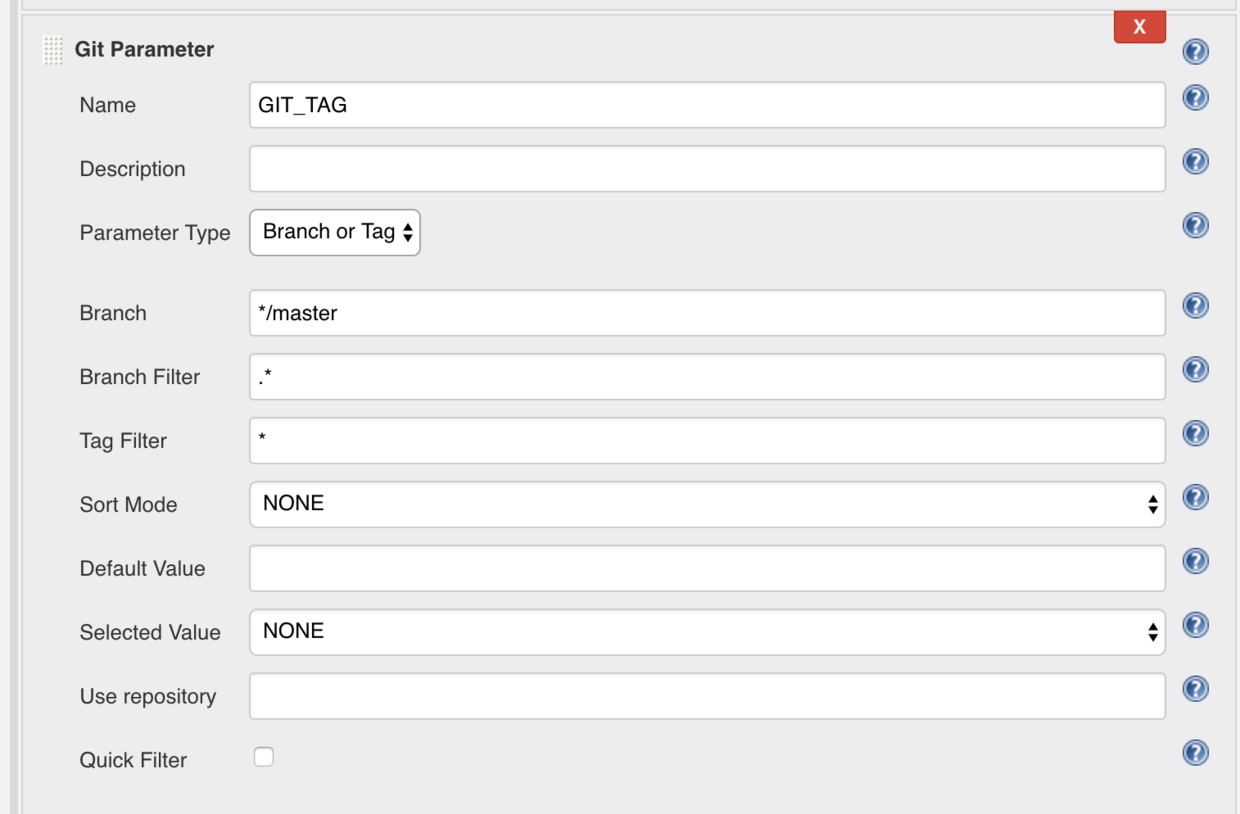
GIT_TAG is used to choose which branch or TAG on the repository to use when packaging, where Parameter Type can choose Tag, Branch, Branch or Tag or revision, where we choose Branch or Tag
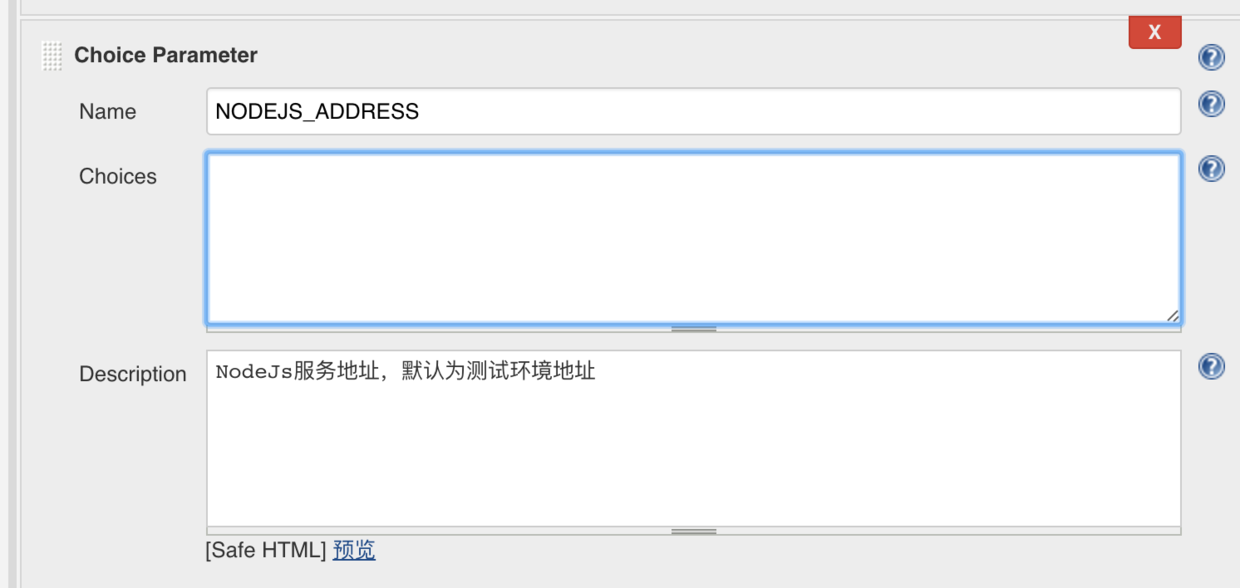
NODEJS_ADDRESS represents the server address, where you can configure the test environment, production environment address, and choose which background service to package.
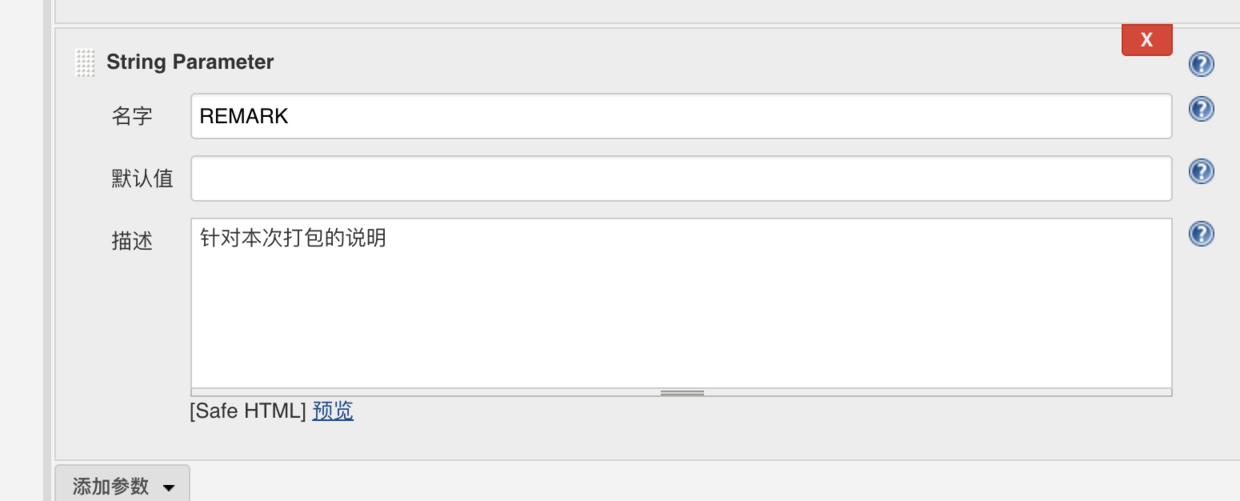
REMARK is used to describe this packaged version, such as which problem to verify with this package, etc. Otherwise, it would be difficult to recall what the version was packaged for at that time, depending on the version number alone.
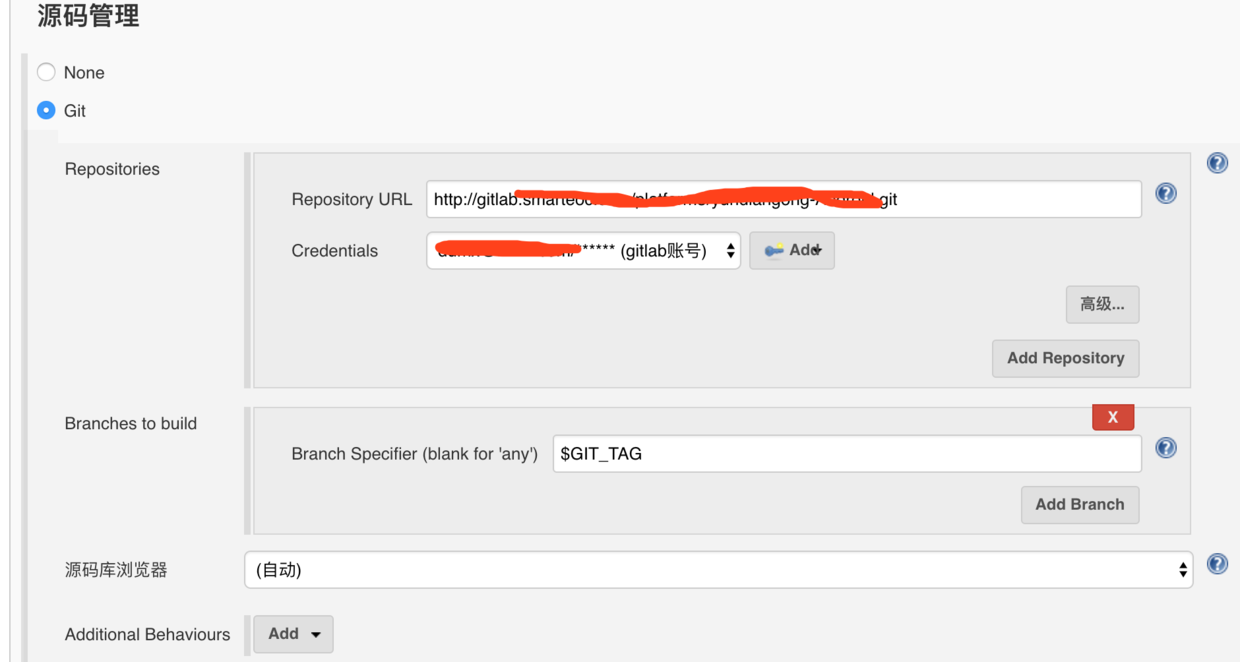
Source Management
Our company uses Gitlab for code management. Select git here, enter the warehouse address, and bind the GIT_TAG variable to the Branch Specifier so that GIT_TAG automatically reads the branch and TAG list on the warehouse.
Build triggers
Build triggers are used to configure when a build is triggered, typically manually, periodically, or when code is submitted.Submitting code triggers requires adding webhook s to gitlab, we use manual triggers here so do not configure them here
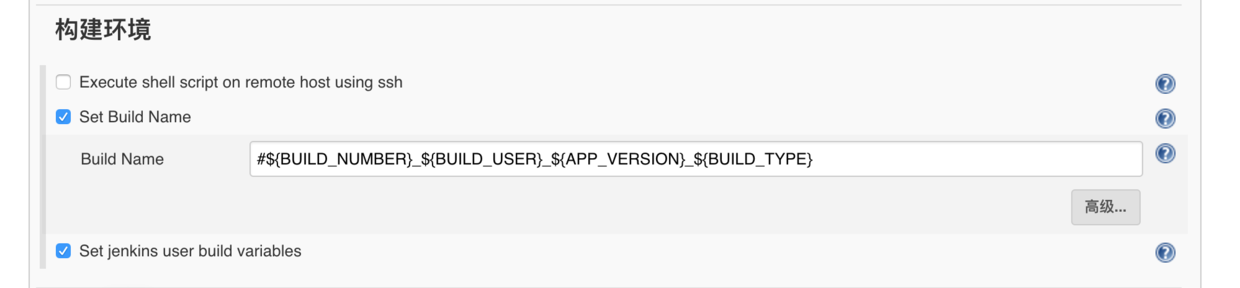
Build environment
By checking Set Build Name to set the build name, we set the name here to
#${BUILD_NUMBER}_${BUILD_USER}_${APP_VERSION}_${BUILD_TYPE}In Jenkins, ${} denotes a reference variable, where BUILD_NUMBER is the build number and the variable provided for Jenkins; BUILD_USER is the builder, that is, the current logged-in user, and needs to select Set jenkins user build variables; APP_VERSION is the App version number; BUILD_TYPE is the build type.An actual build is named #14_admin_1.2_Release, meaning the 14th build, built as admin, and built as App version 1.2 Release
structure
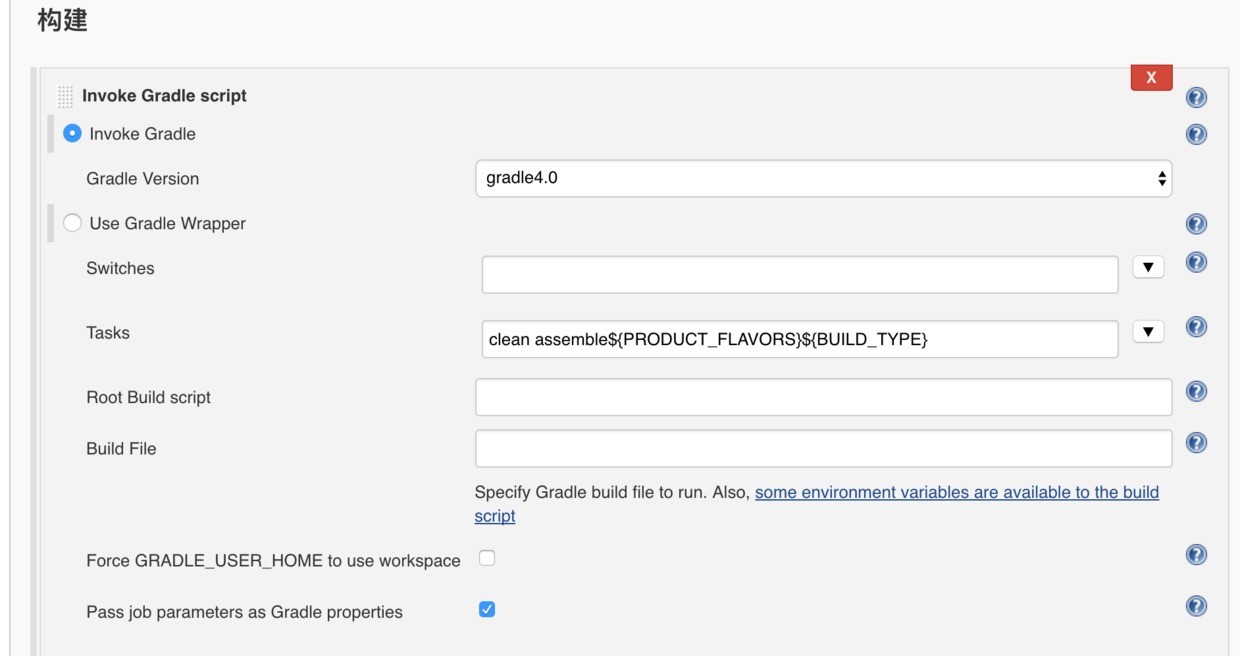
Check invoke gradle to build by calling the gradle script and choose the version of gradle configured in system administration, here gradle4.0
Then enter the packaging command in Tasks
clean assemble${PRODUCT_FLAVORS}${BUILD_TYPE}First clean, then assemble to package.With PRODUCT_FLAVORS choosing yingyongbao and BUILD_TYPE as Release as examples, the actual command executed is
clean assembleYingyongbaoRelease
Then check Pass job parameters as Gradle properties to pass our custom parameters into the gradle script when packaging
So we can package the apk successfully
Realize QR Code Download
For ease of use, we should also provide a QR code function so that the phone can download and install after scanning.There are two general practices: one is to choose to upload the packaged apk to a third-party platform; the other is to set up a service locally to implement the functionality of a static file server.Here, we choose to set up a static file service on the local server and display the file addresses in a two-dimensional code.
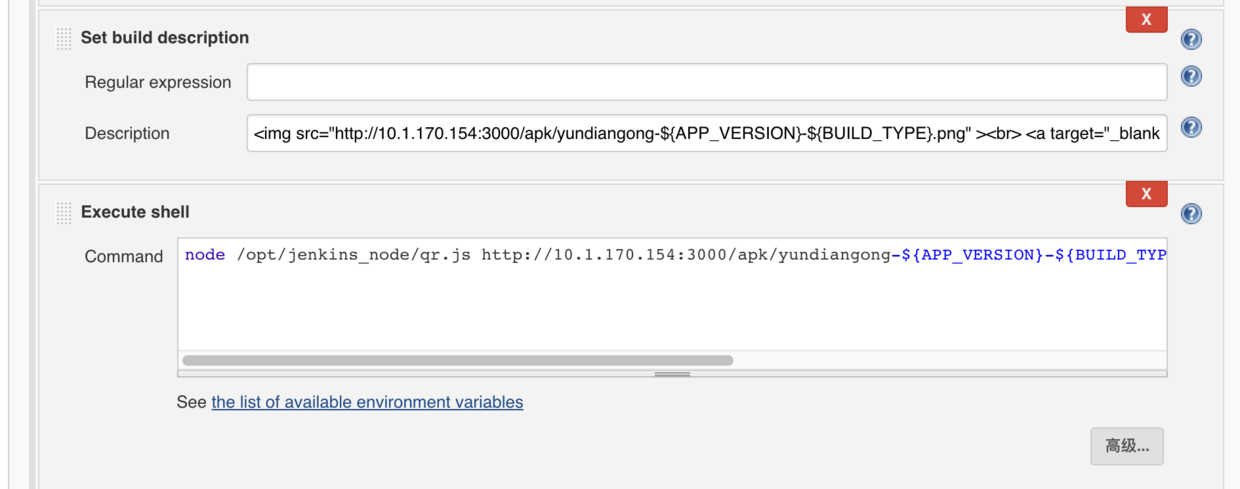
Enter a script to execute after the build is complete in Excute Shell to generate a two-dimensional code based on the apk path
node /opt/jenkins_node/qr.js http://10.1.170.154:3000/apk/yundiangong-${APP_VERSION}-${BUILD_TYPE}.apk /opt/jenkins_node/apk/yundiangong-${APP_VERSION}-${BUILD_TYPE}.pngThat is, to execute the qr.js file under / opt/jenkins_node (which needs to be set according to your actual directory settings) through node, passing two parameters at the same time, the first parameter file, APK file access path, I set the APK output path to / opt/jenkins_node/apk directory in the gradle packaging script, through the static file service access address http://10.1.170.154:3000/apk/yundiangong-${APP_VERSION}-${BUILD_TYPE}.apk (10.1.170.154 is our internal server and needs to be set according to your circumstances); the second parameter is the path to save the generated QR code, also the /opt/jenkins_node/apk directory, so that the static file service can provide both APK and QR code downloads.
Then, by setting the build description to display the QR code function, by defining an html fragment, you need to select Markup Formatter as Safe HTML in System Administration=>Configure Global Security
<br> <a target="_blank" href="http://10.1.170.154:3000/apk/yundiangong-${APP_VERSION}-${BUILD_TYPE}.apk">Click Download</a><p>${REMARK}</p>This will display a QR code with a click-and-download link and a description of the build
We use nodeJs to implement a static file service, start an http service with nodejs, and then return the corresponding apk file by parsing the request.The code is as follows
const http = require('http')
const path = require('path')
const url = require('url')
const fs = require('fs')
const mime = require('mime')

const port = '3000'
const server = http.createServer((req, res) => {
  if (req.url === '/') {
    res.end('Hello World')
    return
  }
  if (req.url === '/favicon.ico') return //No response favicon request

  // Obtain url->patnname Name of file
  let pathname = path.join(__dirname, url.parse(req.url).pathname)
  pathname = decodeURIComponent(pathname) // url Decode to prevent Chinese path errors
  if (fs.existsSync(pathname)) {
    if (!fs.statSync(pathname).isDirectory()) {
      // with binary read file
      fs.readFile(pathname, 'binary', (err, data) => {
        if (err) {
          res.writeHead(500, { 'Content-Type': 'text/plain' })
          res.end(JSON.stringify(err))
          return false
        }
        res.writeHead(200, {
          'Content-Type': `${mime.lookup(pathname)};charset:UTF-8`
        })
        res.write(data, 'binary')
        res.end()
      })
    } else {
      res.statusCode = 404;
      res.end('Directory Not Support')
    }

  } else {
      res.statusCode = 404;
      res.end('File Not Found')
  }
});
server.listen(port);
A widget for generating QR codes is also implemented using nodejs, and qr-image module is used to generate QR codes.
const qr=require('qr-image')
const  args = process.argv.splice(2);
const filePath=args[0]//Source File Address
const distPath=args[1]//Target File Address
const img=qr.image(filePath,{size:5})//Generate 2D Code Picture
img.pipe(require('fs').createWriteStream(distPath));//Save Pictures
The code complete address is: https://github.com/dumingxin/jenkinsNode.git , you first need to install node js, then npm install in the code directory, and finally start the static file service by executing node web.js.You can use pm2 to start web.js if you want to run in the background
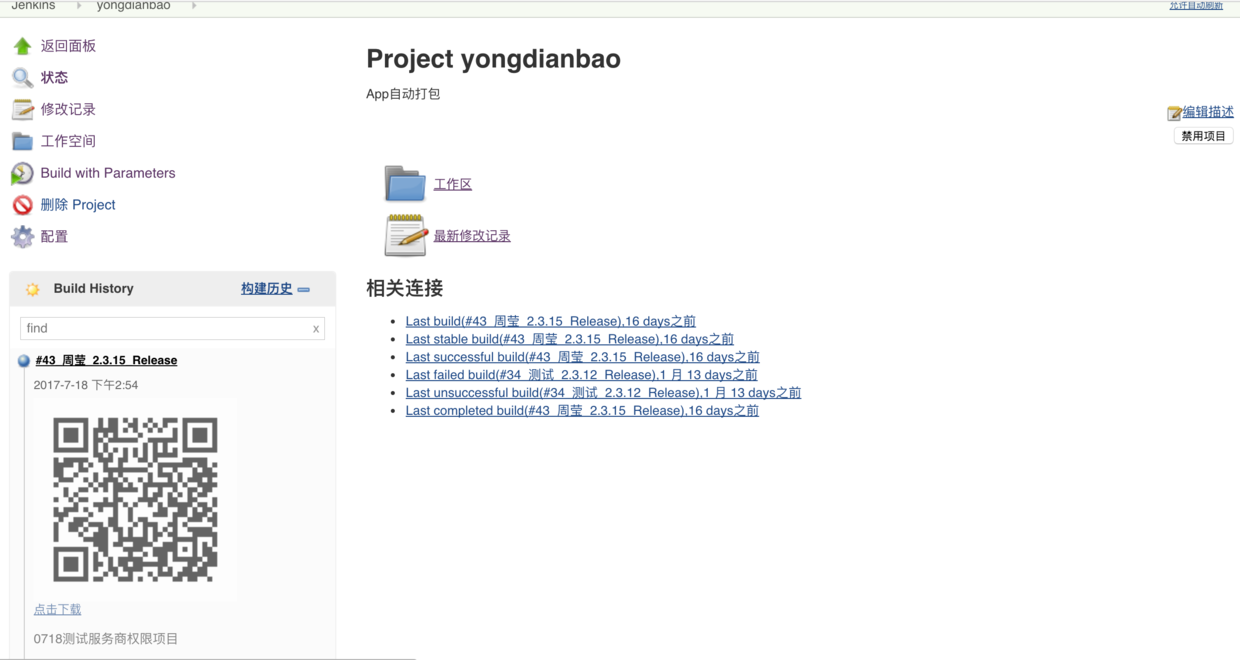
Effect of successful final packaging