Preconditions
Related documents
Of course, you need to apply for an aws account (required: credit card)
Understand the concept of computing node group in advance
Explanation of concept points:
nodegroup: node group is the node combination concept of eks. It is divided into self-management node group and managed node group. It is used to configure the node resource allocation mode of multiple resources. The relevant parameters include: maximum and minimum number of nodes, system basic quota, available area and other information. It can also play a big role in the subsequent rapid kuo smooth upgrade
- EKS managed node group will display the creation method on the web page - Web page creation, command line creation, yaml configuration file, and nodegroup type is defined by managedNodeGroups
Advantages: it is suitable for the company team with weak operation and maintenance ability. It can be upgraded on the web page. It is simple to use, but the degree of customization is low and the function is simple - The self-management node group web does not display the creation method - the command line uses the -- managed=false parameter when creating, and the yaml configuration file uses nodeGroups to define the nodegroup type
yaml template file
apiVersion: eksctl.io/v1alpha5
kind: ClusterConfig

metadata:
  name: test-eks01-1-16
  region: ap-northeast-1
  version: "1.17" #The specified version defaults to the latest

vpc: #Join vpc
  id: "vpc-0c5772731331faf1c"
  subnets:
    private:
      ap-northeast-1d:
        id: "subnet-09593b4fc19416371"
      ap-northeast-1a:
        id: "subnet-0e2ec95462826a769"
      ap-northeast-1c:
        id: "subnet-06d1ea445c2d75506"
  #     ap-northeast-1c:
  #         id: "subnet-07b057c0481f60720"
  #     ap-northeast-1d:
  #         id: "subnet-09ff2d8c908309b97"
  #     ap-northeast-1d:
  #         id: "subnet-049ee3fe1eed8bf97"
  clusterEndpoints: ##Public and intranet access master
    publicAccess: true
    privateAccess: true


nodeGroups: #Node group type
  - name: test-eks01-nodegroup-1-17-2
    privateNetworking: true #Node node only has intranet address and accesses the Internet in nat gateway mode
    instanceType: t3.medium #Instance type
    minSize: 1
    maxSize: 3
    desiredCapacity: 1
    kubeletExtraConfig: #Node pressure expulsion configuration
      kubeReserved: #kubenernetes component reservation configuration
        cpu: "300m"
        memory: "300Mi"
        ephemeral-storage: "1Gi"
      kubeReservedCgroup: "/kube-reserved"
      systemReserved: #Reserved configuration of system components
        cpu: "300m"
        memory: "300Mi"
        ephemeral-storage: "1Gi"
      evictionHard: #Hard expulsion conditions
        memory.available:  "200Mi"
        nodefs.available: "10%"
      featureGates:
        TaintBasedEvictions: true
        RotateKubeletServerCertificate: true #Fixed open or inactive
    volumeSize: 50
    ssh: # import default public key (~/.ssh/id_rsa.pub)
      allow: true
    labels: {role: k8s-worker}
    #taints: #stain
    #  feaster: "true:NoSchedule"
    tags: #Node label
      nodegroup-role: worker-test
    preBootstrapCommands:
      # Commands executed after node node creation
      - "echo 'the is node1.17' >> /usr/local/testcmd.txt "
Cluster creation mode selection
The second recommended command line creation method
1.AWS-Web page creation method (simple and convenient, low degree of customization, and the default node group is managed node group)
iam permission management is very big and I haven't understood it yet, so I finally chose to use the command line method to create it. One is required for cluster creation and one is also required for node group creation
1. Create an iam for eks cluster role in advance to replace the cluster role you perform AWS related resource calls
iam account creation document
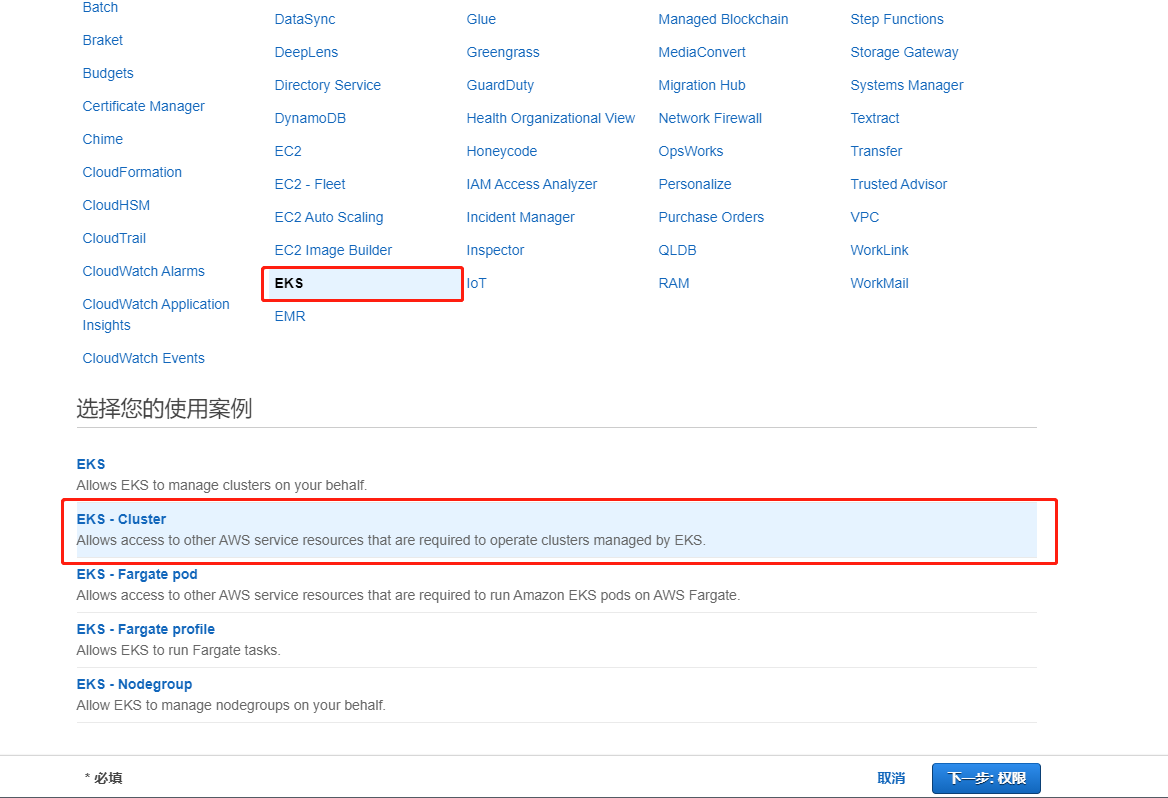
Pay attention to selecting eks cluster management permission, otherwise there will be no iam role available when creating a cluster in the next step
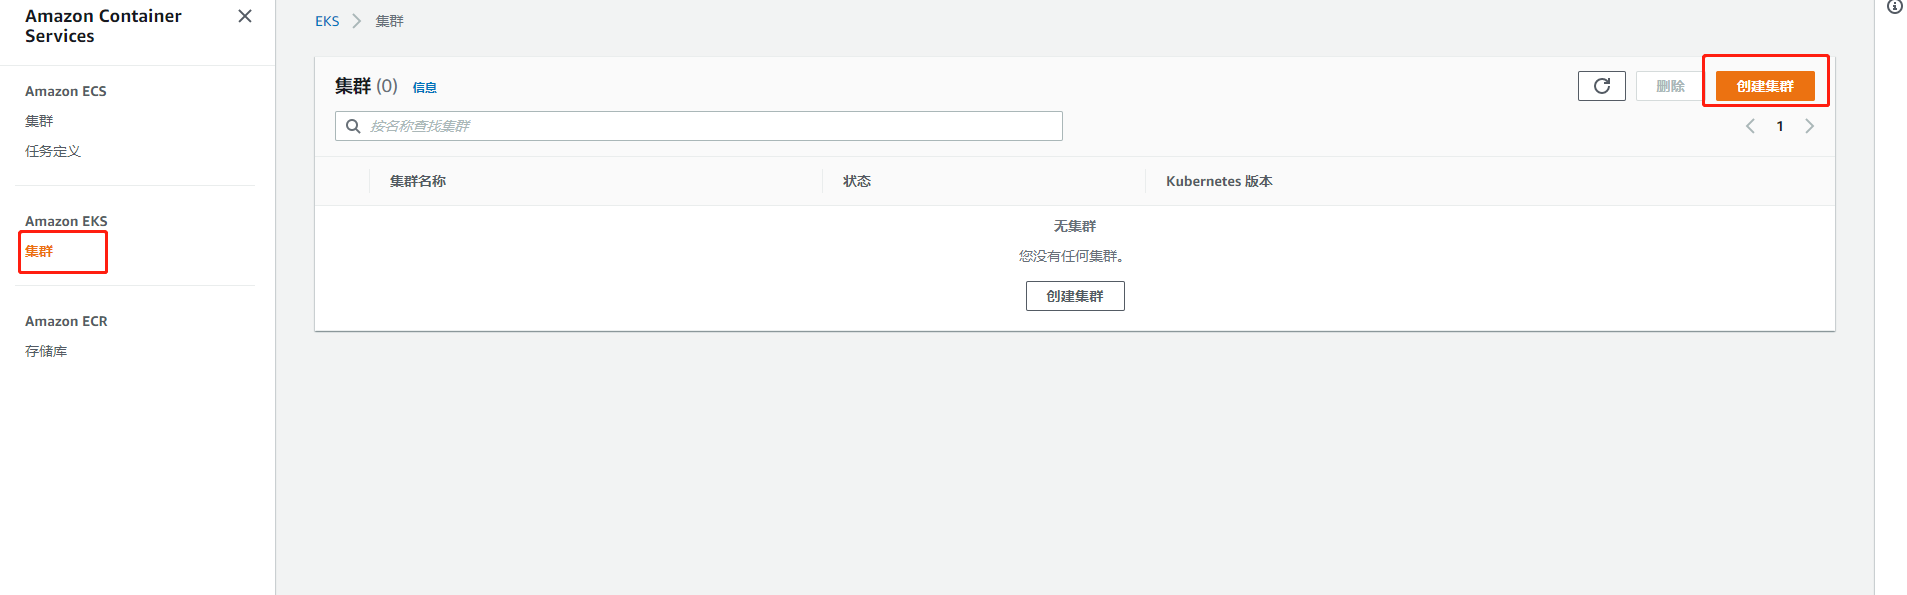
2. Start creating eks clusters and join the managed node group( Official website link)
Page 1: basic information
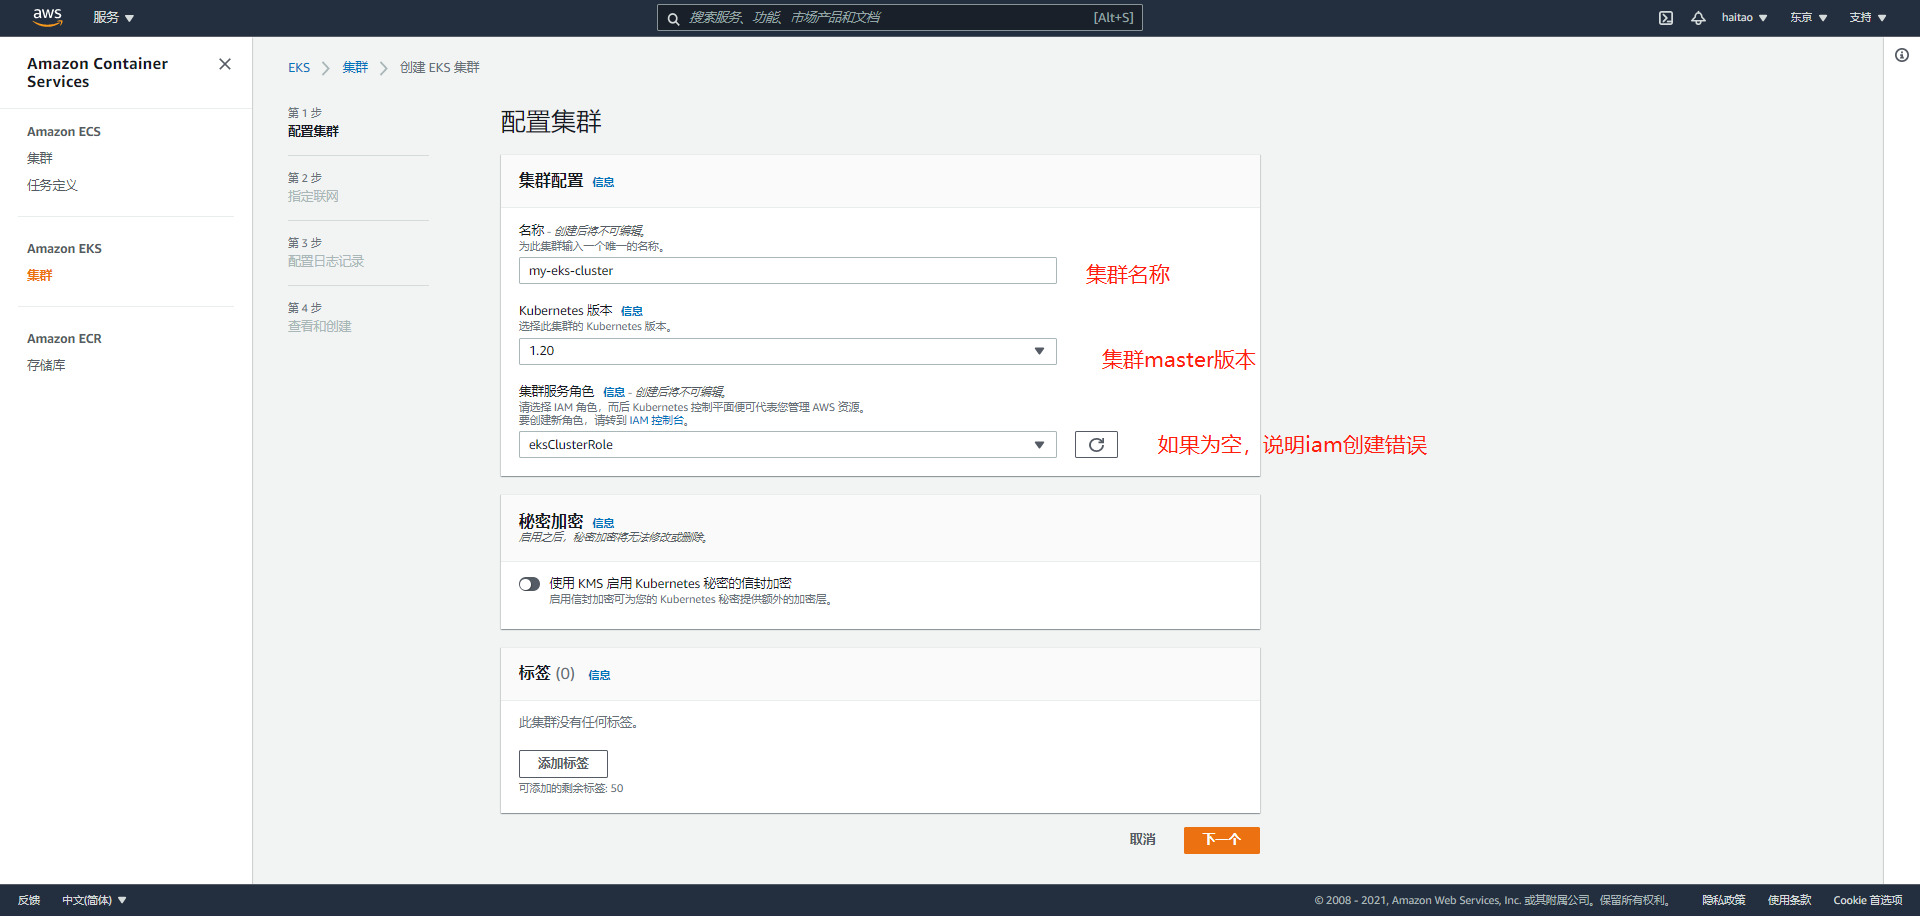
Page 2, cluster configuration
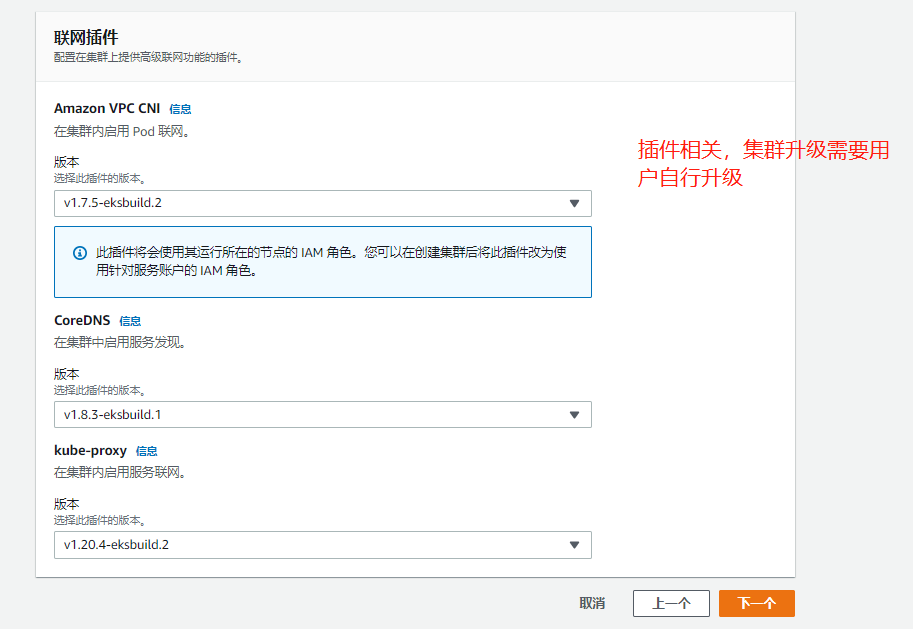
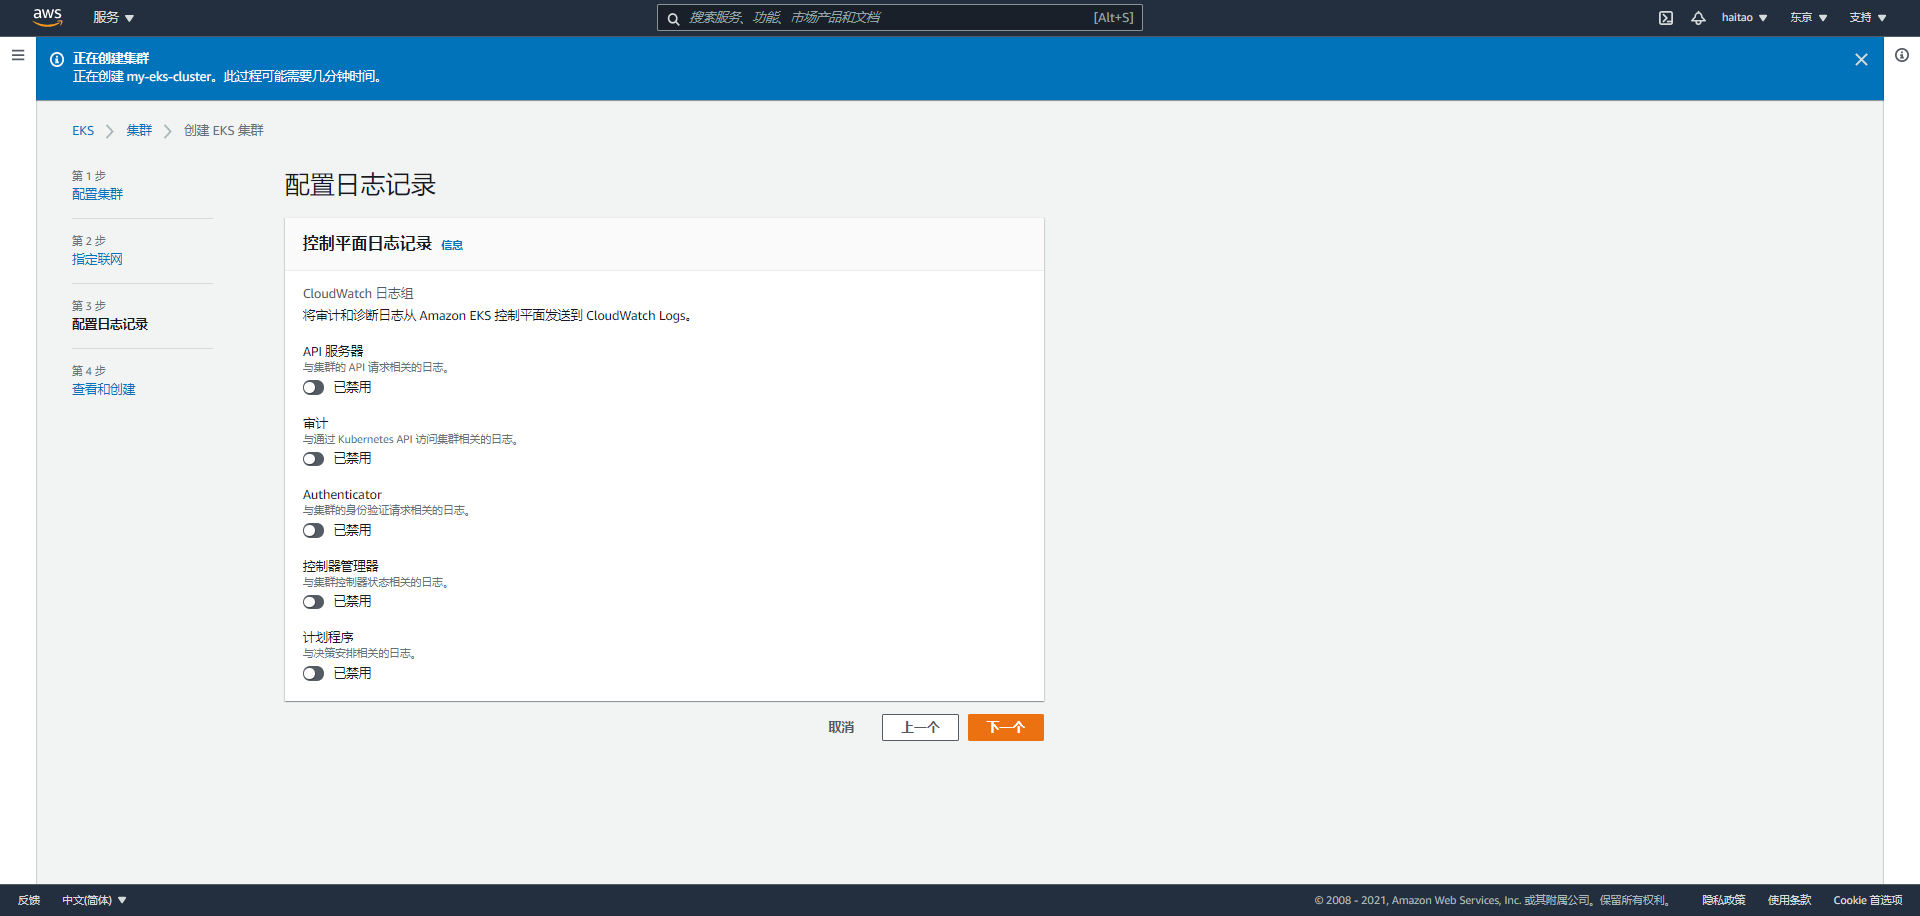
Page 3: add on Selection
On page 4, you will have an overview of all configurations. The next step is to create a cluster
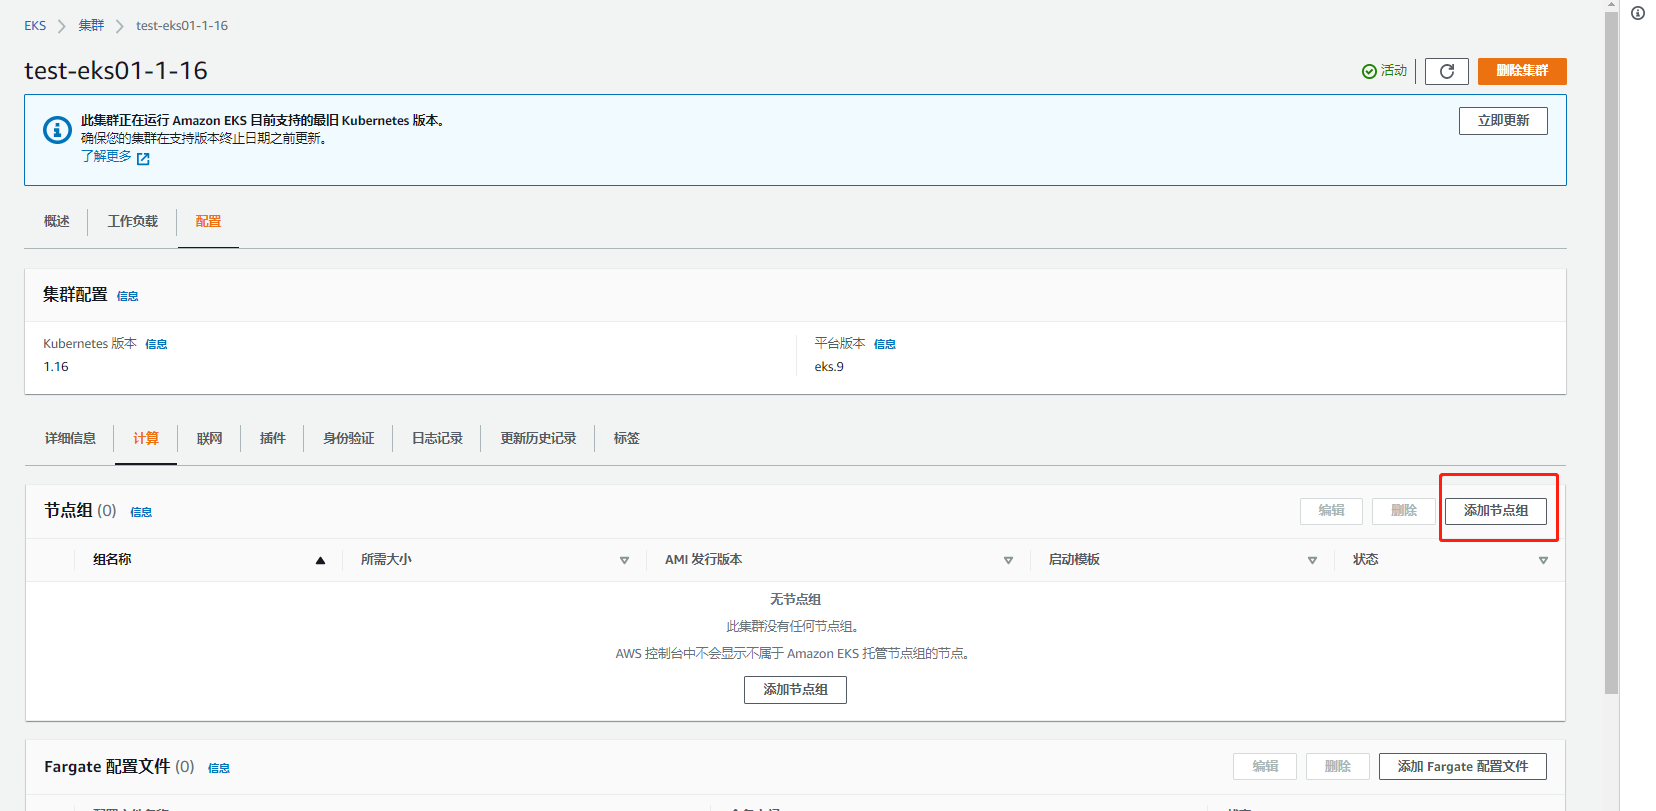
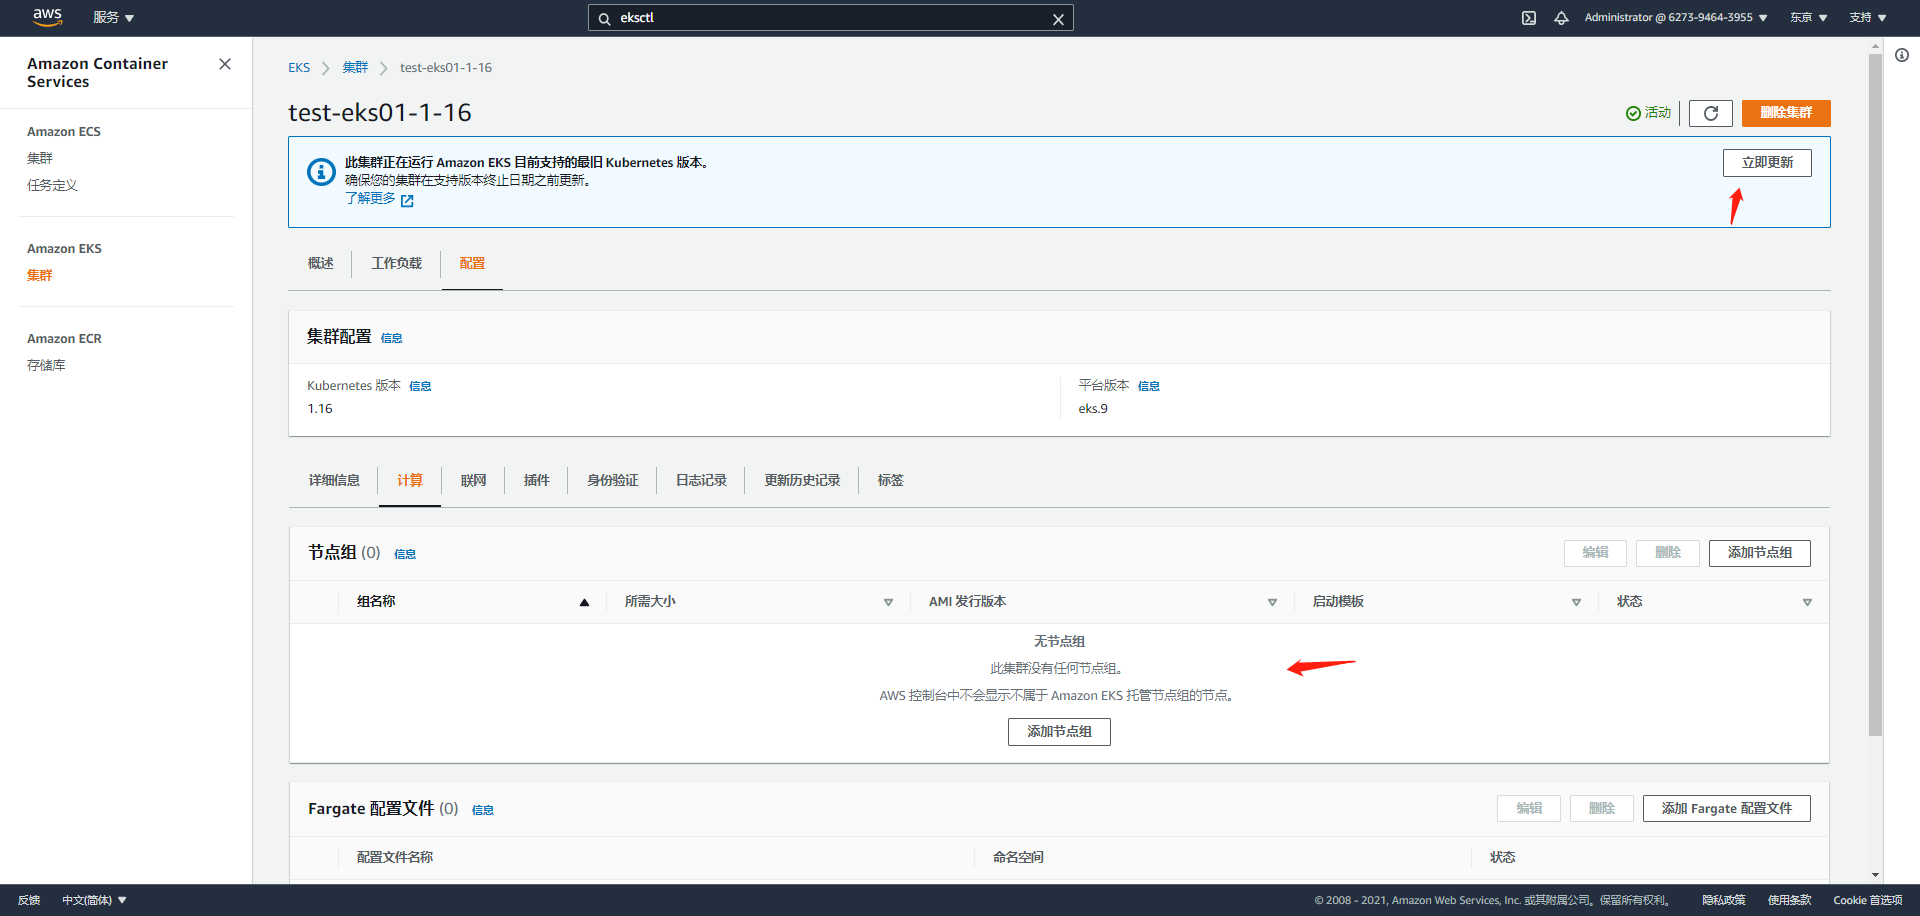
Such an eks cluster that has not joined the computing node is created. Let's start configuring the node node
Page 1: basic configuration and node label stain addition
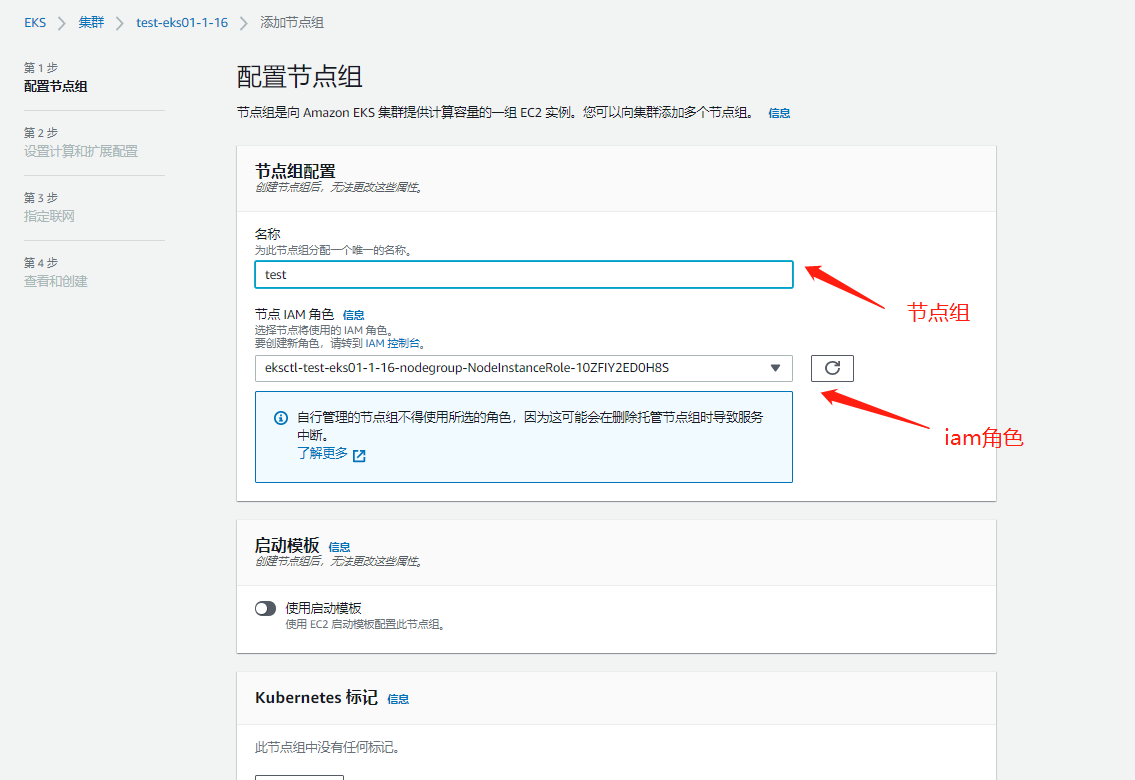
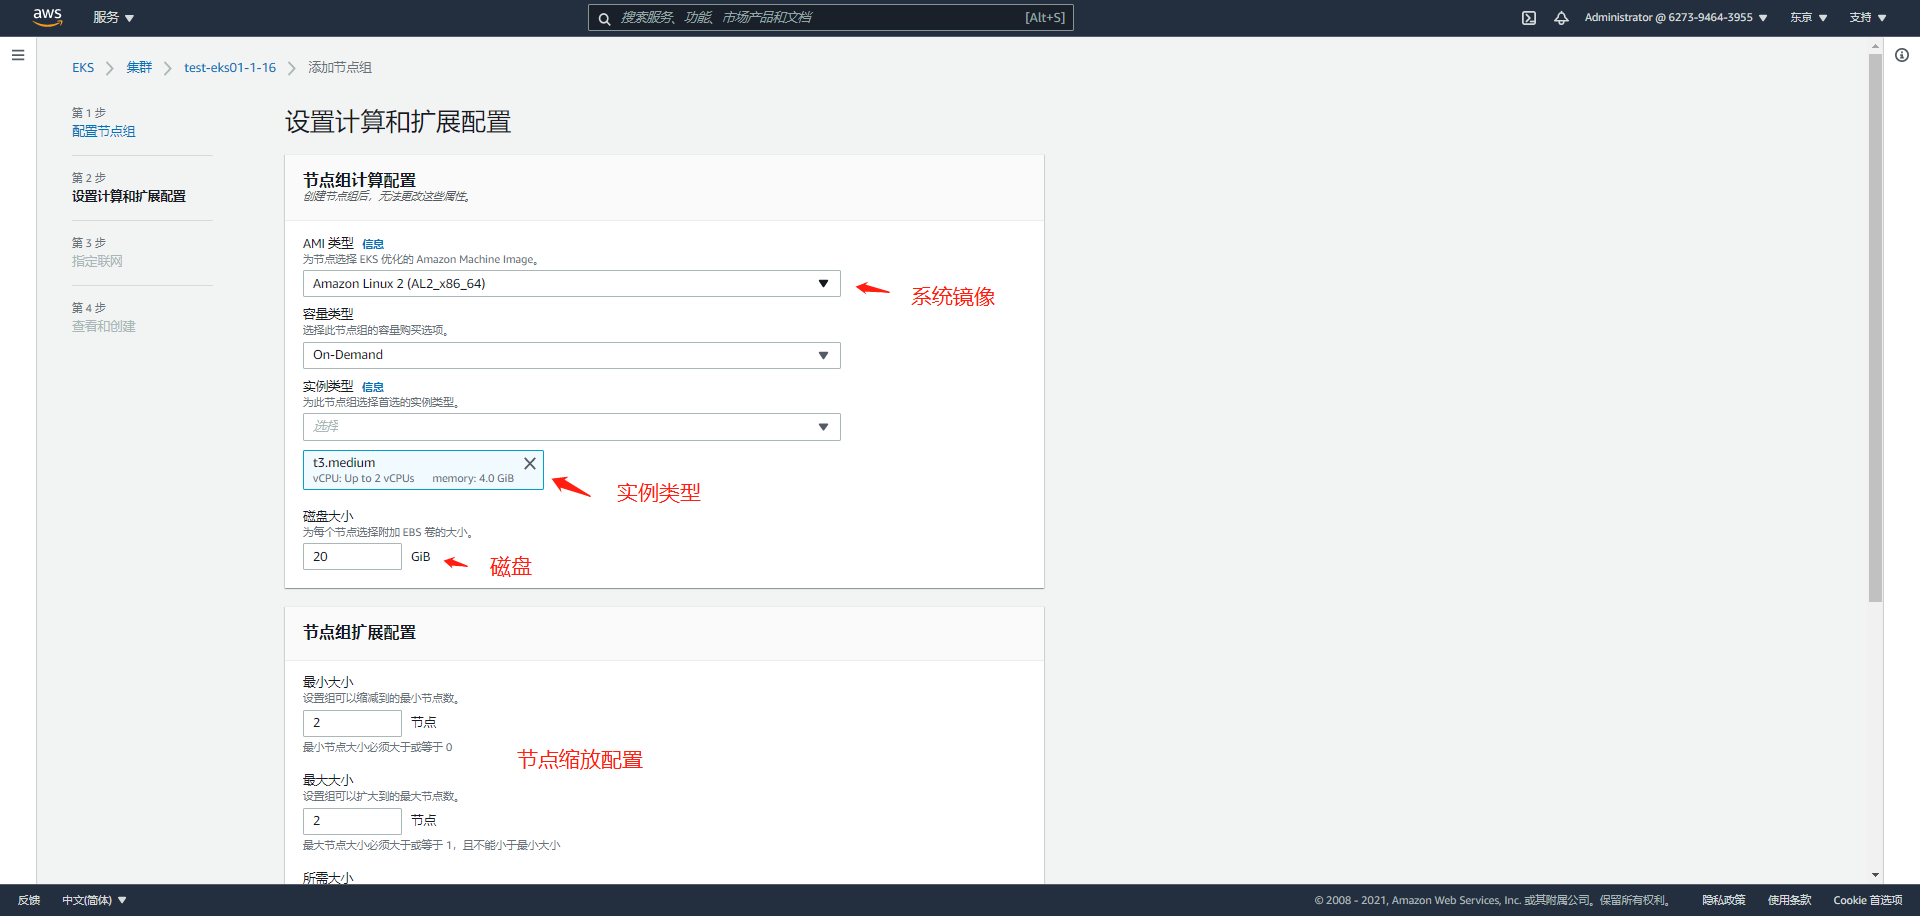
node basic configuration, scaling configuration, etc

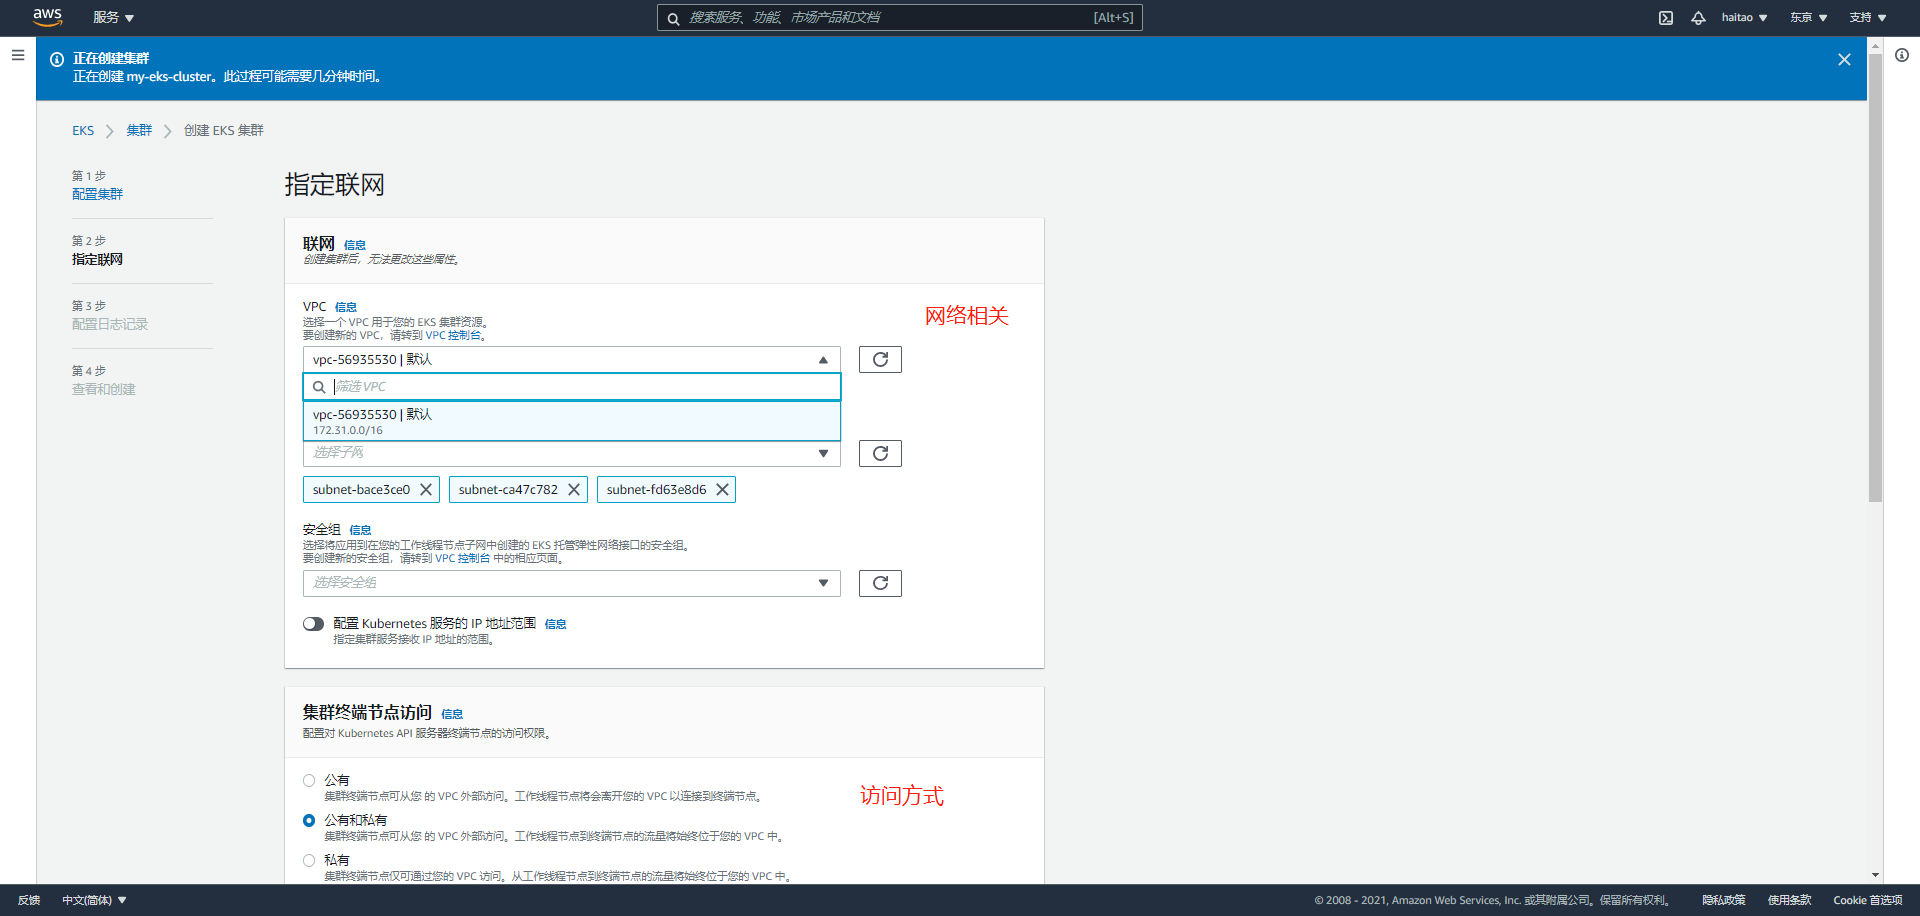
Network related
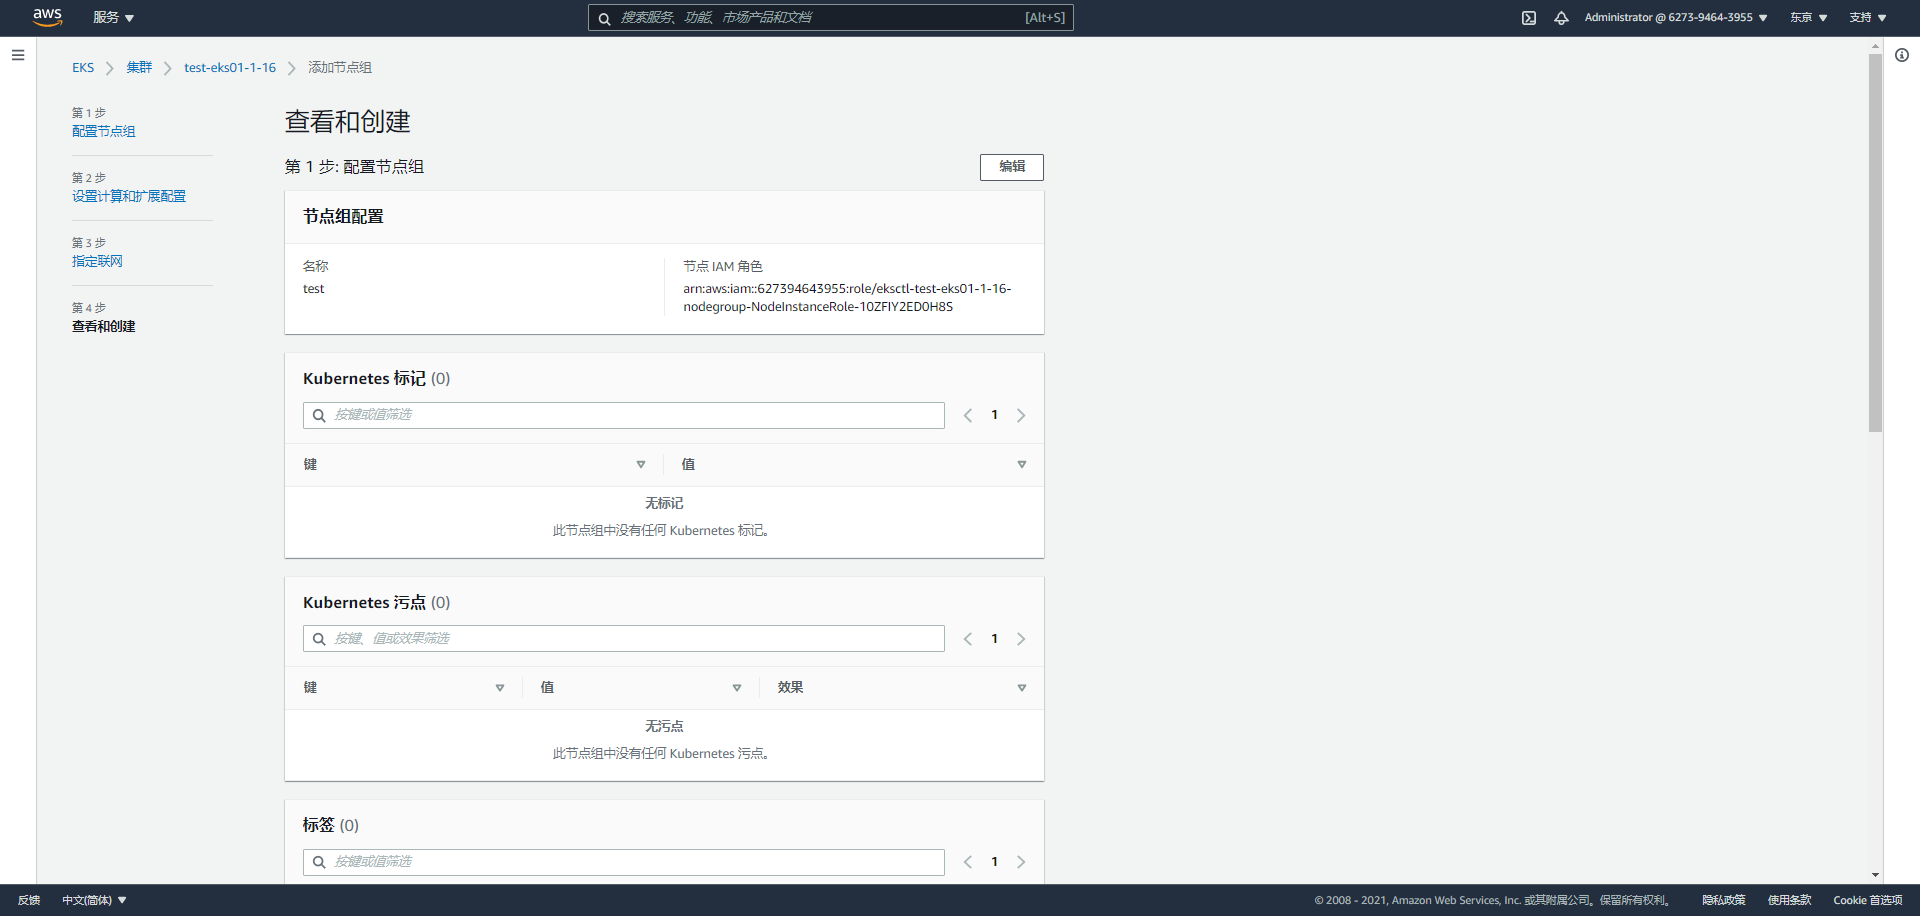
Overview of all configurations and completion of creation
3. Upgrade cluster and node nodes
web operation is enough
There are two steps
1. Upgrade the master first (about 10 minutes)
2. Just upgrade nodegroup (according to the number of pod s)
4. Upgrade the default plug-in
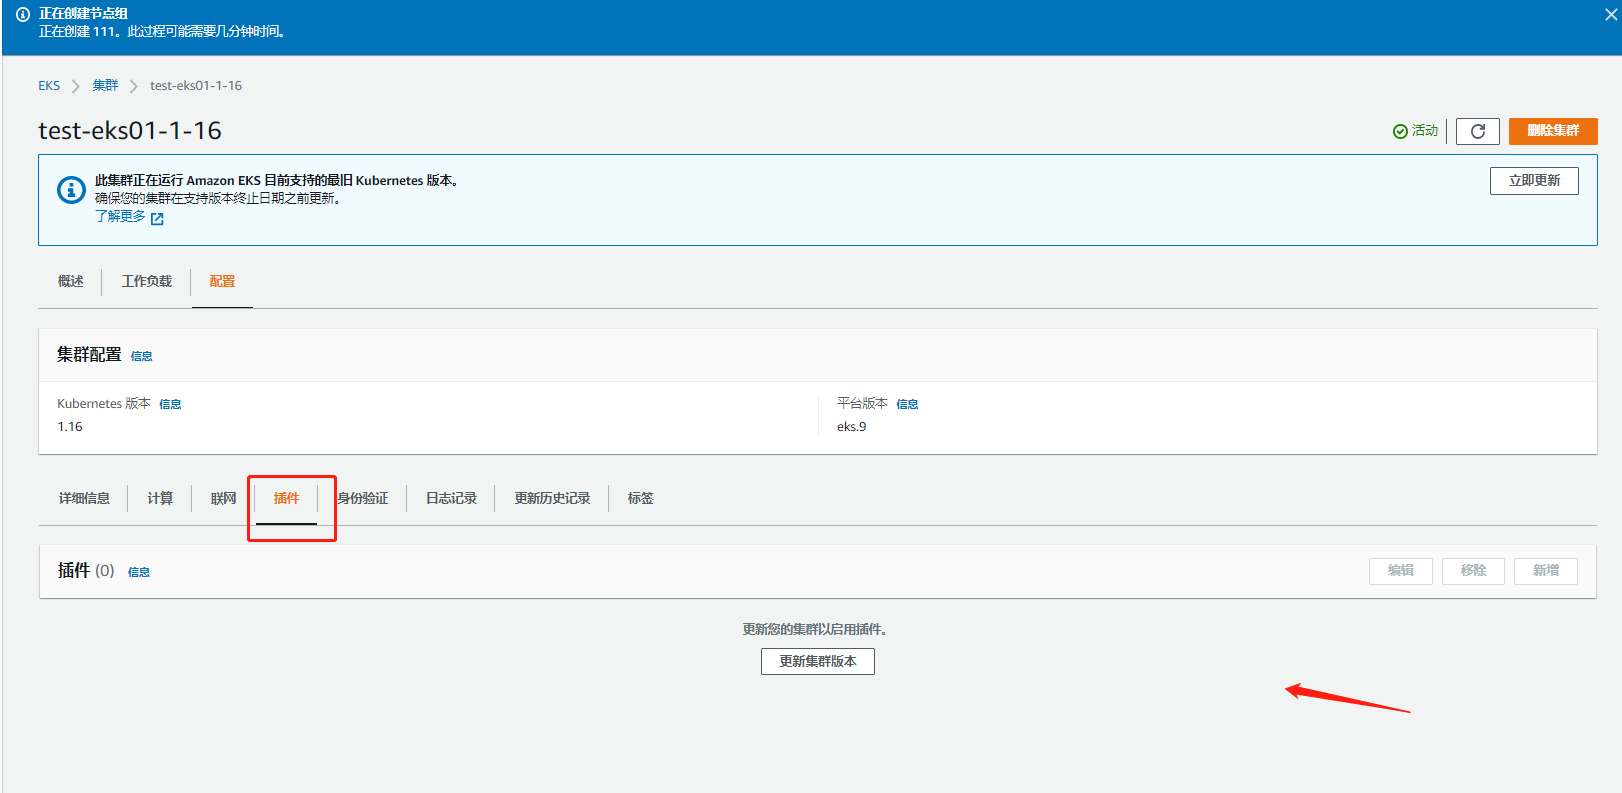
I don't have any resources for self-management clusters here. If I use the web mode, I can click to upgrade myself
2. To create eksctl from the command line, first install AWS CLI and eksctl, then configure the account information and use the command to create clusters and other resources
- Step 1: AWS cli installation method (configure account secret information)
Related configuration files
Command line configuration user-config information
aws configure
vim ~/.aws/credentials #Static modification
vim ~/.aws/config #Static modification
- Step 2: eksctl installation method (eks command line management command)
Note: eksctl uses the aws account to create relevant resources by default. Be careful and strict when typing each command!!
1.Steps to create a simple cluster
Related commands
##Create cluster command line mode
# eksctl create cluster \
--region ap-northeast-1 \
--name test-eks \
--nodegroup-name eks-workers \
--node-type m6.large \
--nodes 2 \
--nodes-min 1 \
--nodes-max 3 \
--node-volume-size=50 \
--alb-ingress-access \
--ssh-access \
--node-private-networking \
--vpc-cidr 172.0.0.0/16

##yaml profile creation
# eksctl create cluster -f cluster.yaml

##Create cluster skip creating node group
# eksctl create cluster --config-file=<path>|--name=<k8s-name>  --without-nodegroup

##View your cluster
# eksctl get cluster
Delete the cluster format and empty all resources with one click when creating a cluster!!!!!!!!
eksctl delete cluster -f cluster.yaml
2. Create a node group
##Command line creation
eksctl create nodegroup \
  --cluster <my-cluster> \
  --name <al-nodes> \
  --node-type <t3.medium> \
  --nodes <3> \
  --nodes-min <1> \
  --nodes-max <4> \
  --ssh-access \
  --ssh-public-key <my-key>

##Deploy node groups in yaml file mode (automatically deploy to the cluster)
eksctl create nodegroup --config-file=<path>

##View all node groups
eksctl get nodegroup --cluster=<k8s-name>

##Delete a node group from a node
eksctl delete nodegroup --cluster=<k8s-name> --name=<nodegroup-name>

##Scale management node group (max~min)
eksctl scale nodegroup --cluster=<k8s-name> --nodes=3 <nodegroup-name>

##Scale the node group and change the max\min size
eksctl scale nodegroup --cluster=test-eks01-1-16 --nodes=4 --name=test-eks01-nodegroup-1-17 [ --nodes-min=2 ] [ --nodes-max=6 ]
Instance yaml file
apiVersion: eksctl.io/v1alpha5
kind: ClusterConfig

metadata:
  name: test-eks01-1-16
  region: ap-northeast-1
  version: "1.17" #The specified version defaults to the latest. Note: this configuration will also be used when creating nodegroup s for global parameters

vpc: #Join vpc
  id: "vpc-0c5772731331faf1c"
  subnets:
    private:
      ap-northeast-1d:
        id: "subnet-09593b4fc19416371"
      ap-northeast-1a:
        id: "subnet-0e2ec95462826a769"
      ap-northeast-1c:
        id: "subnet-06d1ea445c2d75506"
  #     ap-northeast-1c:
  #         id: "subnet-07b057c0481f60720"
  #     ap-northeast-1d:
  #         id: "subnet-09ff2d8c908309b97"
  #     ap-northeast-1d:
  #         id: "subnet-049ee3fe1eed8bf97"
  clusterEndpoints: ##Public and intranet access master
    publicAccess: true
    privateAccess: true


nodeGroups:
  - name: test-eks01-nodegroup-1-17-2
    privateNetworking: true #Node node only has intranet address and accesses the Internet in nat gateway mode
    instanceType: t3.medium
    minSize: 1
    maxSize: 3
    desiredCapacity: 1 #Default quantity
    kubeletExtraConfig: #Node pressure expulsion configuration
      kubeReserved: #kubenernetes component reservation configuration
        cpu: "300m"
        memory: "300Mi"
        ephemeral-storage: "1Gi"
      kubeReservedCgroup: "/kube-reserved"
      systemReserved: #Reserved configuration of system components
        cpu: "300m"
        memory: "300Mi"
        ephemeral-storage: "1Gi"
      evictionHard: #Hard expulsion conditions
        memory.available:  "200Mi"
        nodefs.available: "10%"
      featureGates:
        TaintBasedEvictions: true
        RotateKubeletServerCertificate: true #Fixed open or inactive
    volumeSize: 50
    ssh: # import default public key (~/.ssh/id_rsa.pub)
      allow: true
    labels: {role: k8s-worker} #Node label
    #taints: #stain
    #  feaster: "true:NoSchedule"
    tags:
      nodegroup-role: worker-test
    preBootstrapCommands:
      # Commands executed after node node creation
      - "echo 'the is node1.17' >> /usr/local/testcmd.txt "
View related resources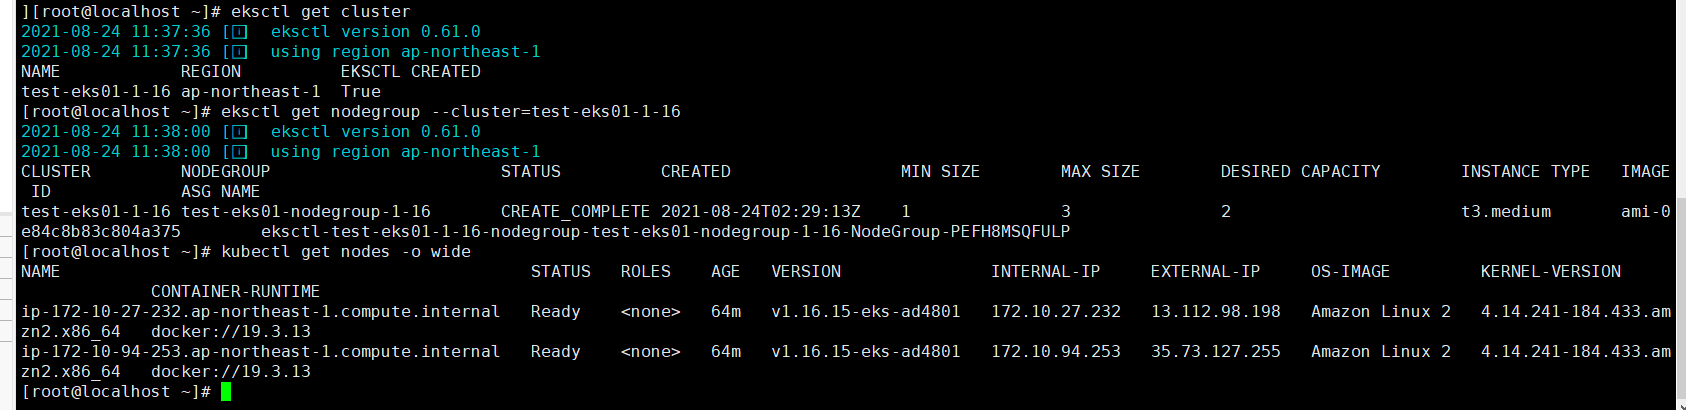
3. Upgrade cluster and node nodes
reference resources Official documents
eksctl document
- Upgrade cluster
eksctl upgrade cluster --name <my-cluster> --approve
Or click web page upgrade to refer to web deployment mode upgrade
- Upgrade node group
Upgrade managed node group
eksctl upgrade nodegroup --name=managed-ng-1 --cluster=<k8s-name> --kubernetes-version=1.17
Self managed node group
Artificial upgrade
Idea: 1 Upgrade master node 2 Modify the version field of yaml 3 Deploy a new node group 4 Modify the non schedulability of the scheduling group 5 Modify yaml difference and compatibility API version of pod 6 Expel the old scheduling pod to the new node group 7 Delete old node group
Detailed deployment command
1. Upgrade the master node
# eksctl upgrade cluster --name <my-cluster> --approve
2. Deploy after modifying the version field of yaml
# cat new-nodegroup.yaml |grep version
  version: "1.16" #The specified version defaults to the latest
3. Deploy a new node group
# eksctl create nodegroup --config-file=<path>
4. Modify the old node, which is not schedulable
Non schedulability does not affect the current pod
# kubectl cordon <node-name>

Cancel unscheduled
# kubectl uncordon <node-name>
5. Modify the version field of yaml
Slightly
Refer to k8s official website, update logs and community documents, yaml format, image, API version
6. Expel the old scheduling pod to the new node group
# kubectl drain --ignore-daemonsets <node-name1>
# kubectl drain --ignore-daemonsets <node-name2>
7. Delete old node group`
# eksctl delete nodegroup --cluster=<k8s-name> --name=<nodegroup-name>
4. Upgrade the built-in cluster plug-in
Choose to upgrade by yourself. In fact, the bottom layer is to replace the image version. It is recommended to upgrade during shutdown and maintenance to facilitate accident fallback!!
To update kube-proxy,Please run:


eksctl utils update-kube-proxy --cluster=<clusterName>
To update aws-node,Please run:


eksctl utils update-aws-node --cluster=<clusterName>
To update coredns,Please run:


eksctl utils update-coredns --cluster=<clusterName>
After upgrading, be sure to run kubectl get pods -n kube-system And check all plug-ins pod Whether it is ready or not, you should see the following:


NAME                       READY   STATUS    RESTARTS   AGE
aws-node-g5ghn             1/1     Running   0          2m
aws-node-zfc9s             1/1     Running   0          2m
coredns-7bcbfc4774-g6gg8   1/1     Running   0          1m
coredns-7bcbfc4774-hftng   1/1     Running   0          1m
kube-proxy-djkp7           1/1     Running   0          3m
kube-proxy-mpdsp           1/1     Running   0          3m