2.1. vue.config.js configuration
Vue CLI depends on Webpack, but Vue CLI hides the configuration in Webpack. If we are not satisfied with some configuration in Webpack, if we really want to modify a configuration of Webpack in CLI, we can use vue.config.js. The configuration in vue.config.js is merged with the configuration of Webpack in Vue CLI.
https://cli.vuejs.org/
If you encounter a problem, first find the answer from the official document
vue.config.js has three configuration methods: (finally understand this!)
*Method 1: configure directly through the options provided to us by the CLI: (the name may be different from that in the webpack, but it corresponds to each other one by one)
*For example, publicPath: configure the subdirectory of application deployment (the default is ` / ', which is equivalent to deploying in` https://www.my-app.com/ `);
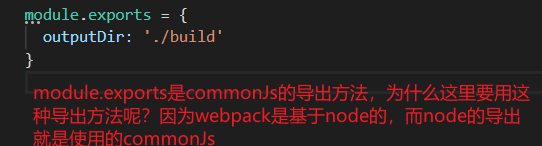
*For example, outputDir: modify the output folder;
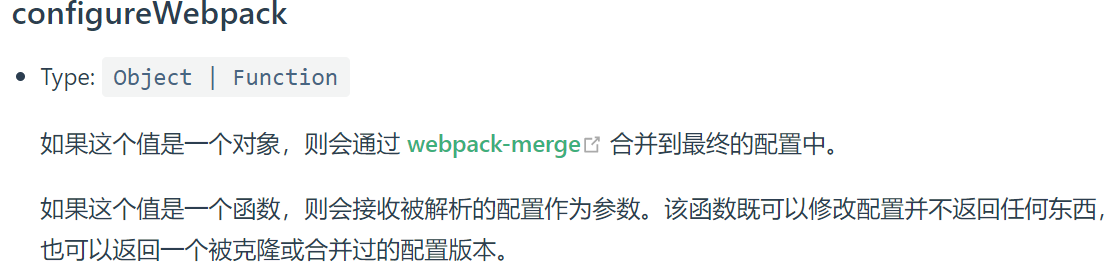
*Method 2: modify the configuration of the webpack through configureWebpack: (the same as the name in the webpack, merge directly)
*It can be an object and will be merged directly;
*It can be a function that will receive a config. You can modify the configuration through config;
*Method 3: modify the configuration of webpack through chainWebpack: (overwrite the relevant configuration in webpack)
*Is a function that will receive a message based on [webpack chain]( https://github.com/mozilla-neutrino/webpack-chain )The config object can be used to modify the configuration;
Compare the modification of alias in mode 2, mode 2 and mode 3 below, because the first of mode 2 is combined with the configuration of webpack, and there is an alias' @ 'for src in webpack, so the following operations are performed. However, mode 2 and mode 3 of mode 2 cover the relevant configurations in the webpack, so you need to get the src and alias it again. Therefore, you need to get the path and get the absolute path (here again involves a require d search rule, pay attention to review (jsplus--24)). In addition, pay attention to the difference between the receiving function of mode 2 and mode 3.
 1 const path = require('path')
 2
 3
 4 module.exports = {
 5   // Configuration mode 2:
 6   configureWebpack: {
 7     resolve: {
 8       alias: {
 9         components: '@/components'
10       }
11     }
12   },
13   configureWebpack: (config) => {
14     config.resolve.alias = {
15       '@': path.resolve(__dirname, 'src'),
16       components: '@/components'
17     }
18   },
19   // Mode 3:
20   chainWebpack: (config) => {
21     config.resolve.alias
22       .set('@', path.resolve(__dirname, 'src'))
23       .set('components', '@/components')
24   }
25 }
2.2. Vue router integration (why can't you remember this step)
- Install the latest version of Vue Router:
1 npm install vue-router@next
- Create router object: (create a router folder under src, index.ts below)
 1 import { createRouter, createWebHashHistory } from 'vue-router'
 2 import { RouteRecordRaw } from 'vue-router'
 3
 4 const routes: RouteRecordRaw[] = [ #ts is a type of Oh!
 5 {
 6 path: '/',
 7 redirect: '/main'
 8 },
 9 {
10 path: '/main',
11 component: () => import('../views/main/main.vue')
12 },
13 {
14 path: '/login',
15 component: () => import('../views/login/login.vue')
16 }
17 ]
18
19 const router = createRouter({
20 routes,
21 history: createWebHashHistory()
22 })
23
24 export default router
- To install router and register routes:
1 import router from './router' #export default the exported router does not need parentheses
2
3 createApp(App).use(router).mount('#app')
- Configure jump in App.vue:
1 <template>
2 <div id="app">
3 <router-link to="/login">Sign in</router-link>
4 <router-link to="/main">home page</router-link>
5 <router-view></router-view>
6 </div>
7 </template>
2.3. vuex integration
- Installation vuex:
1 npm install vuex@next
- Create a store object: (create a new store folder under src, and then create an index.ts)
 1 import { createStore } from 'vuex'
 2
 3 const store = createStore({
 4 state() {
 5 return {
 6 name: 'coderwhy'
 7 }
 8 }
 9 })
10
11 export default store
- Install store registration:
1 import store from 'vuex'
2 createApp(App).use(router).use(store).mount('#app')
- Use in App.vue:
1 <h2>{{ $store.state.name }}</h2>
Using the volar plug-in to detect ts will be more strict. For example, if the above $store is not declared in the script, an error will be reported. Here you can
Declare it in shims-vue.d.ts: (but I don't need it because I use the vetur plug-in. The functions of these two plug-ins are syntax highlighting, error prompt, etc.)
1 declare let $store: any
2.4. Element plus integration (it's better for this department to see the official website directly)
Element Plus, a Vue3.0-based desktop component library for developers, designers and product managers:
*I believe many students have used element UI in Vue2, and element plus is a UI component library developed by element UI for vue3;
*Its usage is the same as that of many other component libraries, so learn element plus, and others like ant design Vue, NaiveUI and VantUI are similar;
Installing element plus
1 npm install element-plus
2.4.1. Global import
One way to import element plus is global import, which means that all components and plug-ins will be automatically registered:
1 import ElementPlus from 'element-plus'
2 import 'element-plus/dist/index.css'
3
4 import router from './router'
5 import store from './store'
6
7 createApp(App).use(router).use(store).use(ElementPlus).mount('#app')
---Global import (all components are integrated): advantages: integration is relatively simple, disadvantages: all components will be packaged
---Local introduction (reference on demand): advantage: the package will be smaller
Quick start | Element Plus (gitee.io)
It seems that the method of on-demand introduction on the official website has always been. This time, it has not been successful, so I'd better record the process!
1 npm install -D unplugin-vue-components
Modify the configuration of vue.config.js
1 const Components = require('unplugin-vue-components/webpack')
2 const { ElementPlusResolver } = require('unplugin-vue-components/resolvers')
configureWebpack: { plugins: [ Components({ resolvers: [ElementPlusResolver()] }) ] },
Then you can use it directly, but note that the icon is special!
Supplementary knowledge points
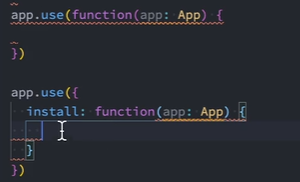
app.use() can pass in a function or an object.
When a function is passed in, the function will be executed automatically by default, and the app will be passed into the function.
When an object is passed in, the install of the object will be executed by default, and the app will also be passed in by default when the install of the object is executed
2.5. axios integration
- Install axios:
npm install axios
- Encapsulating axios: (why encapsulate? 1. If you don't encapsulate, axios is directly used in all files. Once axios is not updated or upgraded, we have to change many places, which is very troublesome to maintain; 2. There may be many common features when sending network requests. For example, for projects such as background management system, other interfaces are requesting in addition to the login interface It is necessary to carry tokens when sending. It is better to put each token in the header and then send the request. Since each request needs this operation, it is better to encapsulate it, otherwise there will be a lot of duplicate logic.)
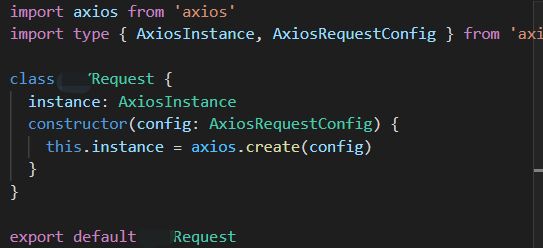
- Encapsulation logic: (I feel suddenly enlightened!!!) create an index.ts in src--service as the export file of the service (for other places, just import '. / service' instead of index.ts) , create index.ts in service--request, which encapsulates a HYRequest class as follows. Instantiate the HYRequest class in src--service--index.ts, and then you can call it directly using the instance. Method elsewhere!
- Axios in axios.get we used before is actually an Axios instance
- Why should we choose to encapsulate all axios into one class? If there is a lot of logic to encapsulate, class is a good choice, because class has stronger encapsulation, and class itself has encapsulation (inheritance and polymorphism)
- Detailed description of packaging logic:
1. In most cases, a project has only one base_url, but what if a project has two base_urls? Should we export two new requests? You should know that axios can configure base_urls, that is, I can't distinguish who is who. What should I do? You can create different axios instances according to different configurations when encapsulating axios
Reference code
2.6 configuration of environment variables
See 32ppt