Catalog
4.2 person information modifications
4.3 Background Notification Management
1. Main functions
1. Implement the basic function of adding, deleting, and checking;
2. Use cookie s to save user passwords;
3. Realize the function of announcement publishing (similar to online announcement of educational administration);
4. Mail sending function;
2. Development environment
IDE: Microsoft visual studio 2017 (now 2019)
Language: C#+ASP.NET Related
Database: MySQL5.7.24 (wampserver included)
Database management tools: Navicat and PHP myadmin4. 8.4
Other: MySQL-connector version: 6.10.9, this must be the same version as those of mysql packages in your VS, otherwise various errors will occur.
3. Database Structure
3.1 User Table 1
This table stores user information for logging on to the system. Some field data in this table may be duplicated with other tables. The purpose of using this table alone for logging on is to reduce unnecessary read and write burden on the server. Another Bachelor's Degree Thesis at Harbin Polytechnic University - 20 - user information tables are used to store more detailed data.
Table 3-1 Users Table 1 (user, login only)
| Field name | type | length | Is it empty | key | Notes |
| Id | Int | 10 | no | Self-Growing Index | Unique Identification |
| Username | VarChar | 200 | no | User name | |
| Password | VarChar | 200 | no | Password |
3.2 User Table 2
This table contains all the data that an employee account should have, the login name is separated from the system nickname, and information such as banned identity and personal contact information is stored. If you modify to the same field as User Table 1, the data in both tables will change together. The specific table structure is shown in tables 3-2. (Actually, some fields are not used, time limits)
Table 3-2 User Table 2 (user_information)
| Field name | type | length | Is it empty | key | Notes |
| Id | Int | 10 | no | Self-Growing Index | Unique Identification |
| Username | VarChar | 200 | no | Only | User name |
| Password | VarChar | 200 | no | Password | |
| loginID | VarChar | 255 | Only | Login name | |
| Type | VarChar | 255 | Type of Employee | ||
| Flag | Int | 10 | no | Ban Identification | |
| | VarChar | 255 | E-mail address | ||
| | VarChar | 255 | QQ Number | ||
| Tel | VarChar | 255 | Phone number | ||
| Eal1 | VarChar | 255 | Evaluation AssuranCe Level, rating (short term) | ||
| Eal2 | VarChar | 255 | Evaluation AssuranCe Level, Evaluation Level (Comprehensive) | ||
| Registertime | Datetime | no | Registration Time |
3.3 Background User Table
A dedicated table for the background account, used only for the login of the background account, completely separate from the employee table. The specific table structure is shown in tables 3-3.
Table 3-3 Background user table (admin_userinfo)
| Field name | type | length | Is it empty | key | Notes |
| Id | Int | 10 | no | Self-Growing Index | Unique Identification |
| Adminname | VarChar | 200 | no | User name | |
| Password | VarChar | 200 | no | Password |
3.4 Notification Form
Notification table, which holds the details of the notification. The ID represents the unique identity. The body uses a long variable string. Both time identities are visible, allowing the user to confirm the timeliness of the notification.
The specific table structure is shown in tables 3-4.
Table 3-4 Notification Form
| Field name | type | length | Is it empty | key | Notes |
| Id | Int | 10 | no | Self-Growing Index | Unique Identification |
| Title | VarChar | 200 | no | Title | |
| Contents | VarChar | 6000 | text | ||
| Subtime | Datetime | no | Release time | ||
| Edittime | Datetime | no | Modification Time |
3.5 Payroll
The payroll table does not store the employee's own payroll data, but records the details of the payroll factor for each type of work, is designed and saved behind the scenes, and is invoked after the employee's assessment results are completed.
The specific table structure is shown in tables 3-5.
Table 3-5 Wages
| Field | Description | Type and length | Primary key | Empty | Default value |
| Id | Self-growth | Int(10) | yes | no | 1 |
| Type | Type of work | VarChar(64) | no | no | nothing |
| Basis | Base wage | Float | no | no | nothing |
| Performance | Performance bonus (percentage) | Float | no | yes | 0 |
| Manqin | Full time bonus (percentage) | Float | no | yes | 0 |
| Craft | Type addition | Float | no | yes | 0 |
3.6 Assessment Form
The evaluation form is an overall data used to record users'evaluation results, time and other information, specific evaluation details, which need to be set according to different employee positions.
The specific table structure is shown in tables 3-6.
Table 3-6 Evaluation Table
| Field | Description | Type and length | Primary key | Empty | Default value |
| Id | Self-growth | Int(10) | yes | no | nothing |
| Type | Type of work | VarChar(64) | no | no | nothing |
| Attendance | Duration of Attendance | Float | no | no | nothing |
| Requirement | Demand Acceptance | Int | no | no | nothing |
| Extra | Additional Performance | Float | no | yes | nothing |
| Self | Self-rated Score | Int | no | no | 0 |
| Date | Evaluation Date | Date | no | no | 0 |
| LoginID | User name for evaluation | Varchar(64) | no | no | automatic |
| Auditstatus | Audit Marker | Int | no | no | 0 |
| AuditID | Evaluation Order Number | Varchar(64) | no | no | generate |
| Backres | Background Score | Int | no | no | -1 |
| Result | final result | Float | no | no | -1 |
| Wage | Income Wages | Float | no | no | 0 |
4. Design and Implementation
4.1 Login and Registration
The login process is as follows:
1.1 Open the system, enter the login interface, enter the user name and password;
1.2 Logon failure, return to the login interface;
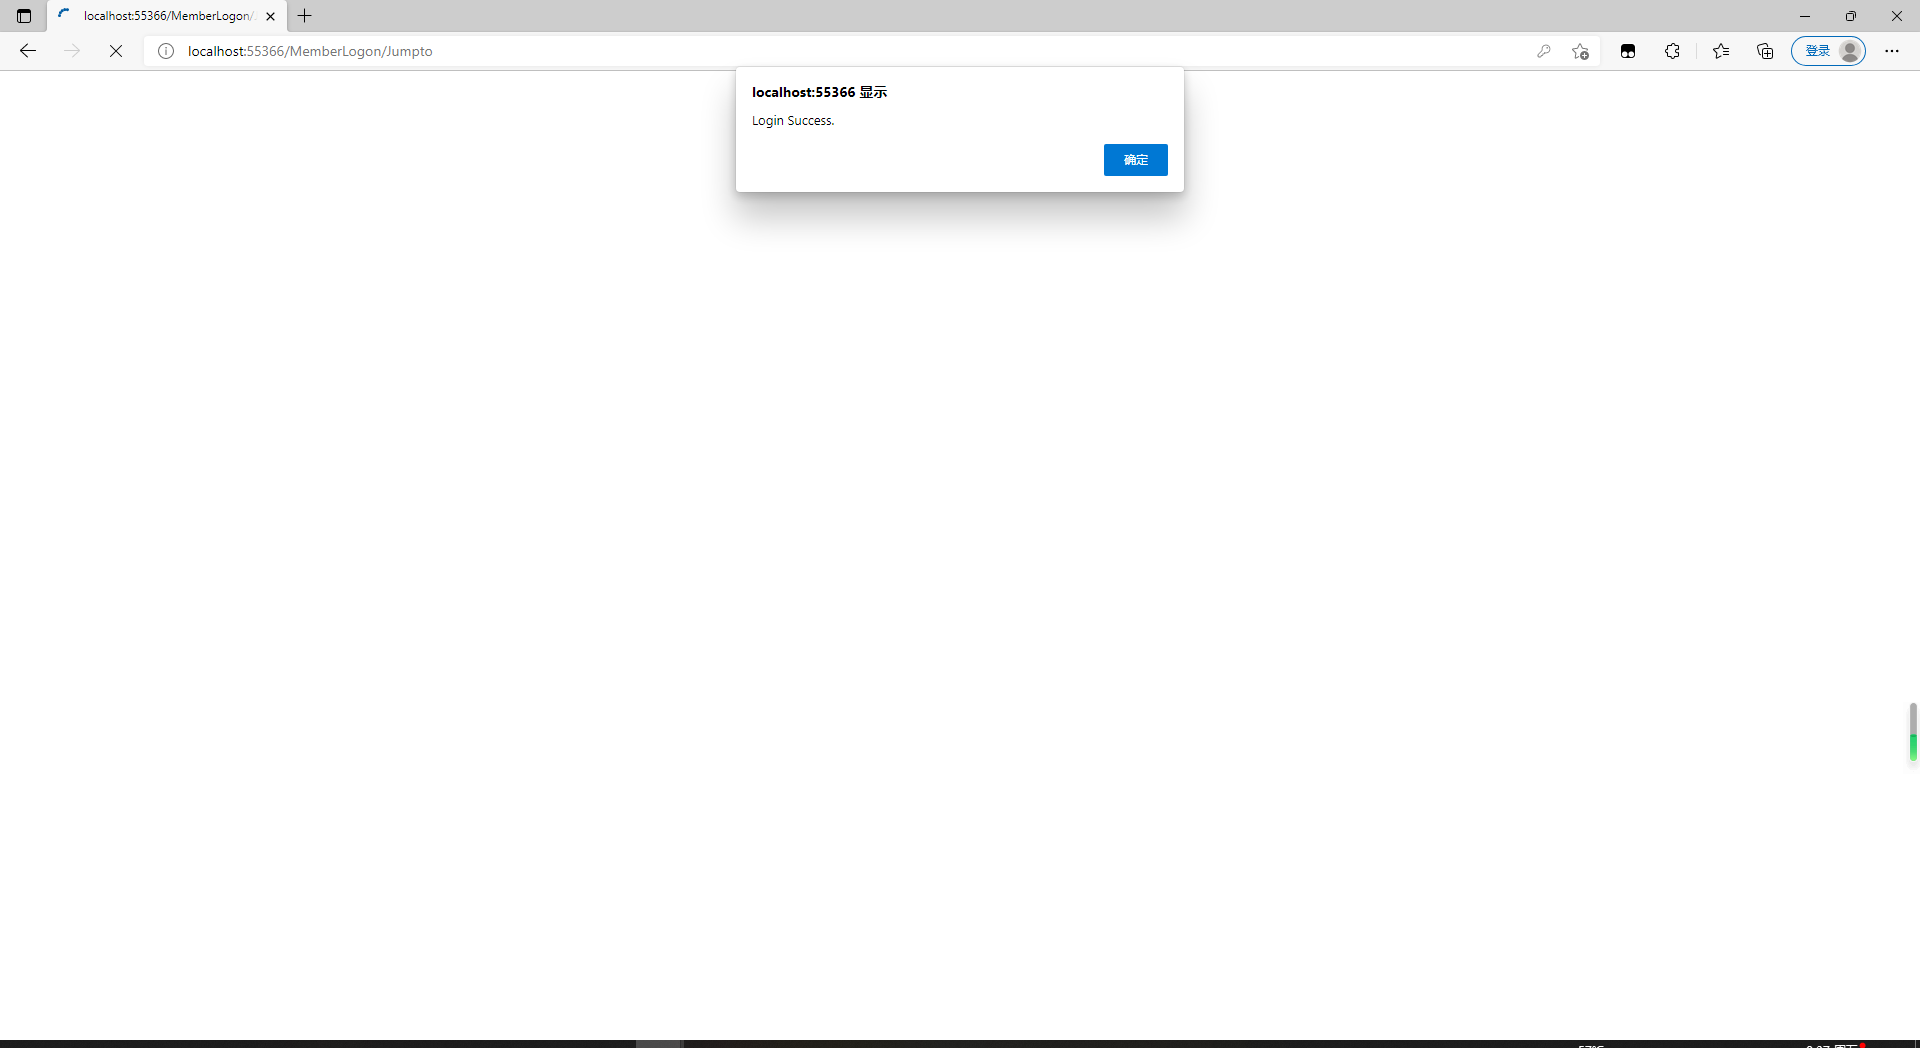
1.3 Logon success, according to the user's identity, into the corresponding system internal page.
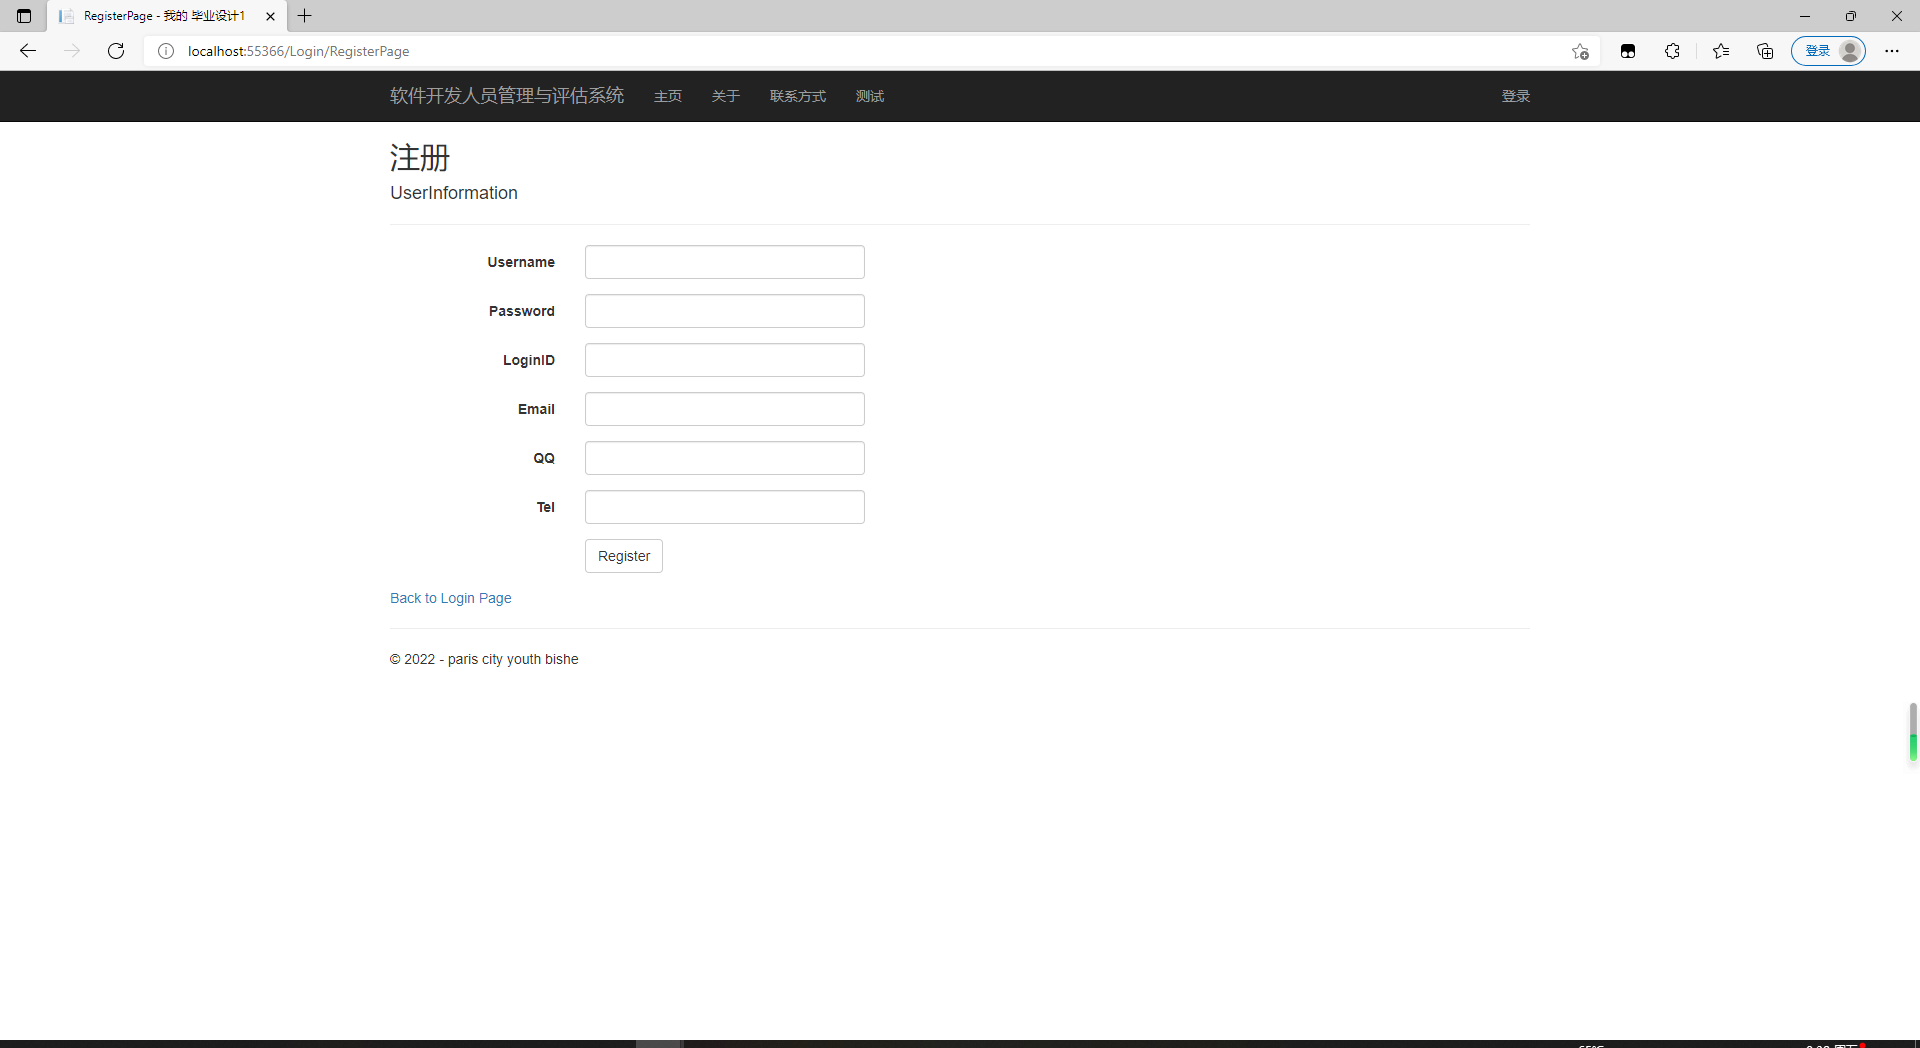
The registration process is as follows:
1.4 Open the system, enter the login interface, click on the label "Click here to register";
1.5 Enter the registration page and enter the information to be registered;
1.6 Click Submit, if a duplicate user name occurs, it will be forced to call back and re-register.
1.7 After successful registration, you can log in with a new account.
Logon state save:
Cookies are set up in this system to save the login status, to avoid the cumbersome operation of re-login every time a user visits the software developer management and evaluation system, to choose to remember the password, a Cookie will be saved automatically after successful login, and the user's login name and password will be saved. Cookies will not disappear even if the browser is closed and restarted. Passwords are loaded automatically, and if the cookies are read correctly, the software developer management and evaluation system can skip the login and read the user's information directly. The way to clear a Cookie is to log out of your account, delete the information in the Cookie after you log out, log in again to force a re-entry of your password, or access the system directly.
The login code is as follows (an actionresult is the code for a page, in a controller file, controller.cs):
 public ActionResult LoginPage(User user)
        {
            name1 = user.Username;
            pwd1 = user.Password;

            if (name1 == "" || pwd1 == "")
            {

                //Response.Write("<script>alert('Login Failed,your username or password can not be empty!');</script>");
                return RedirectToAction("ErrorView");

            }

            try
            {
                loginConnection.Open();
                MySqlCommand CheckLoginCmd = loginConnection.CreateCommand();
                CheckLoginCmd.CommandText = "select * from user where username = '" + name1 + "'";
                MySqlDataReader CheckLoginReader = CheckLoginCmd.ExecuteReader();
                string pwd11 = MD5Str.MD5(pwd1);
                while (CheckLoginReader.Read())
                {
                    pwd2 = CheckLoginReader["password"].ToString();
                }

                if (pwd2 == pwd11)
                {
                    //After the password pair, save the account password in the cookie
                    //Session["uinfo"] = user;
                    ViewData["test1"] = user;
                    HttpCookie RememberCookie = new HttpCookie("RemeUser");
                    RememberCookie["UserName"] = name1;
                    RememberCookie["UserPwd"] = pwd1;
                    RememberCookie.Expires = DateTime.Now.AddDays(3);

                    //RememberCookie.Value = "username";
                    //RememberCookie.Expires = DateTime.Now;
                    Response.Cookies.Add(RememberCookie);
                    //Response.Write("<script>alert('"+ RemCheck.ToString() + "');</script>");

                    loginConnection.Close();
                    return RedirectToAction("../MemberLogon/Jumpto");
                    /*else
                    {
                        HttpCookie RememberCookie = new HttpCookie("RemeUser");

                        RememberCookie.Expires = DateTime.Now.AddDays(-1);


                        Response.Cookies.Add(RememberCookie);
                        Response.Write("<script>alert('Login Success.');</script>");
                        loginConnection.Close();
                    }*/
                }
                else
                {
                    //return RedirectToAction("Index");
                    //Response.Write("<script>alert('Login Failed,your username or password is error.');</script>");
                    loginConnection.Close();
                    return RedirectToAction("ErrorView");

                }
                return View();
            }
            catch (Exception exception)
            {
                string ex = exception.ToString();
                //return View(ex);
                return RedirectToAction("ErrorView");
            }

        }
Page code (view layer, cshtml file):
@{
Layout = "~/Views/Shared/_Layout.cshtml";
}
@{
ViewBag.Title = "User Login";
}
@{
var RemeUserInfo = ViewData["remeuser"] as bishe1.Models.User;
}
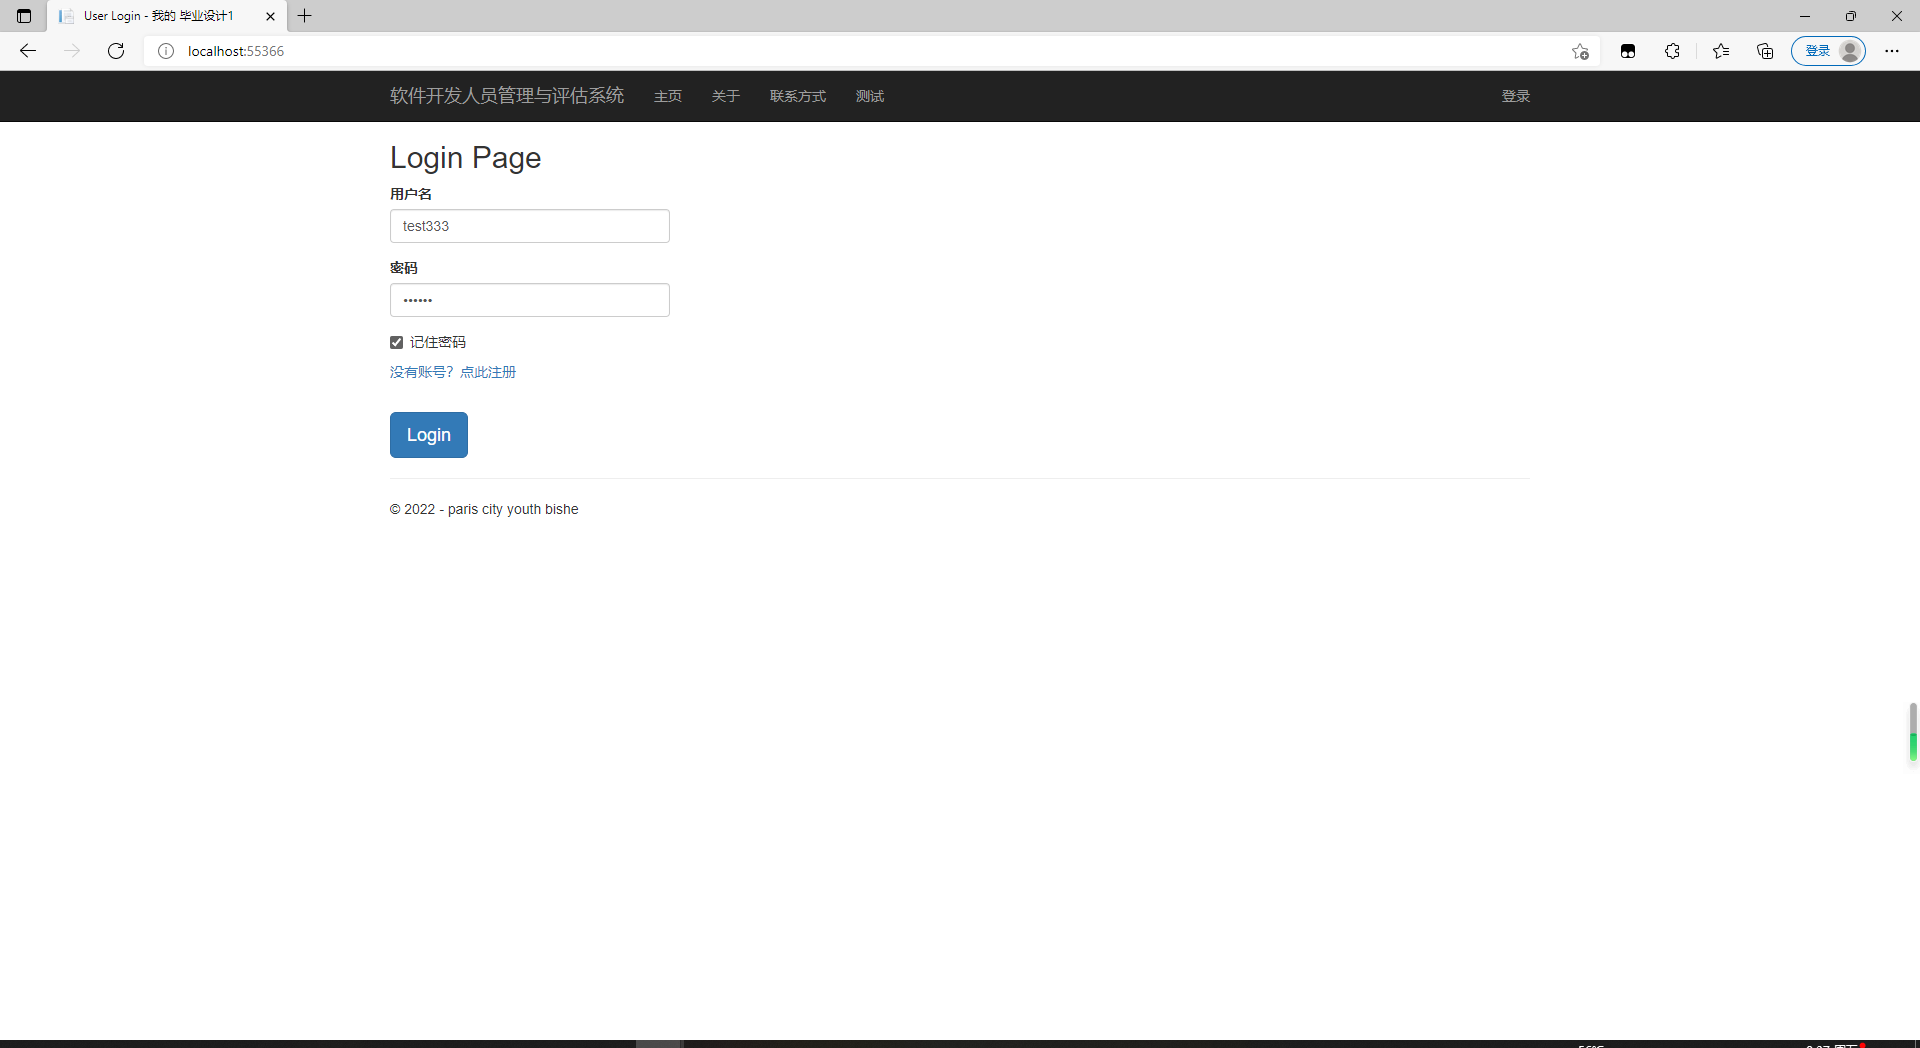
<h2>Login Page</h2>
<form role="form" action="/Login/LoginPage" method="post">
<div class="form-group">
<label for="name">User name</label>
<input type="text" class="form-control" placeholder="enter one user name" name="Username" value="@ViewBag.Username">
</div>
<div class="form-group">
<label for="name">Password</label>
<input type="password" class="form-control" placeholder="Please input a password" name="Password" value="@ViewBag.Password">
</div>
<div class="checkbox">
<label>
<input type="checkbox" name="RemCheckbox" >Remember password
</label>
</div>
<p>
@Html.ActionLink("No account? Click here to register", "RegisterPage")
</p>
<br />
<button type="sumbit" class="btn btn-primary btn-lg " name="LoginBtn" onclick="LoginBtn_Click()">Login</button>
<br />
</form>
<!--<form role="form">
<div class="form-group">
<label for="name">Verification Code</label>
<input type="text" class="form-control" placeholder="Please enter the verification code">
</div>
</form>-->
Effect: The password for the test account is 123456 111111
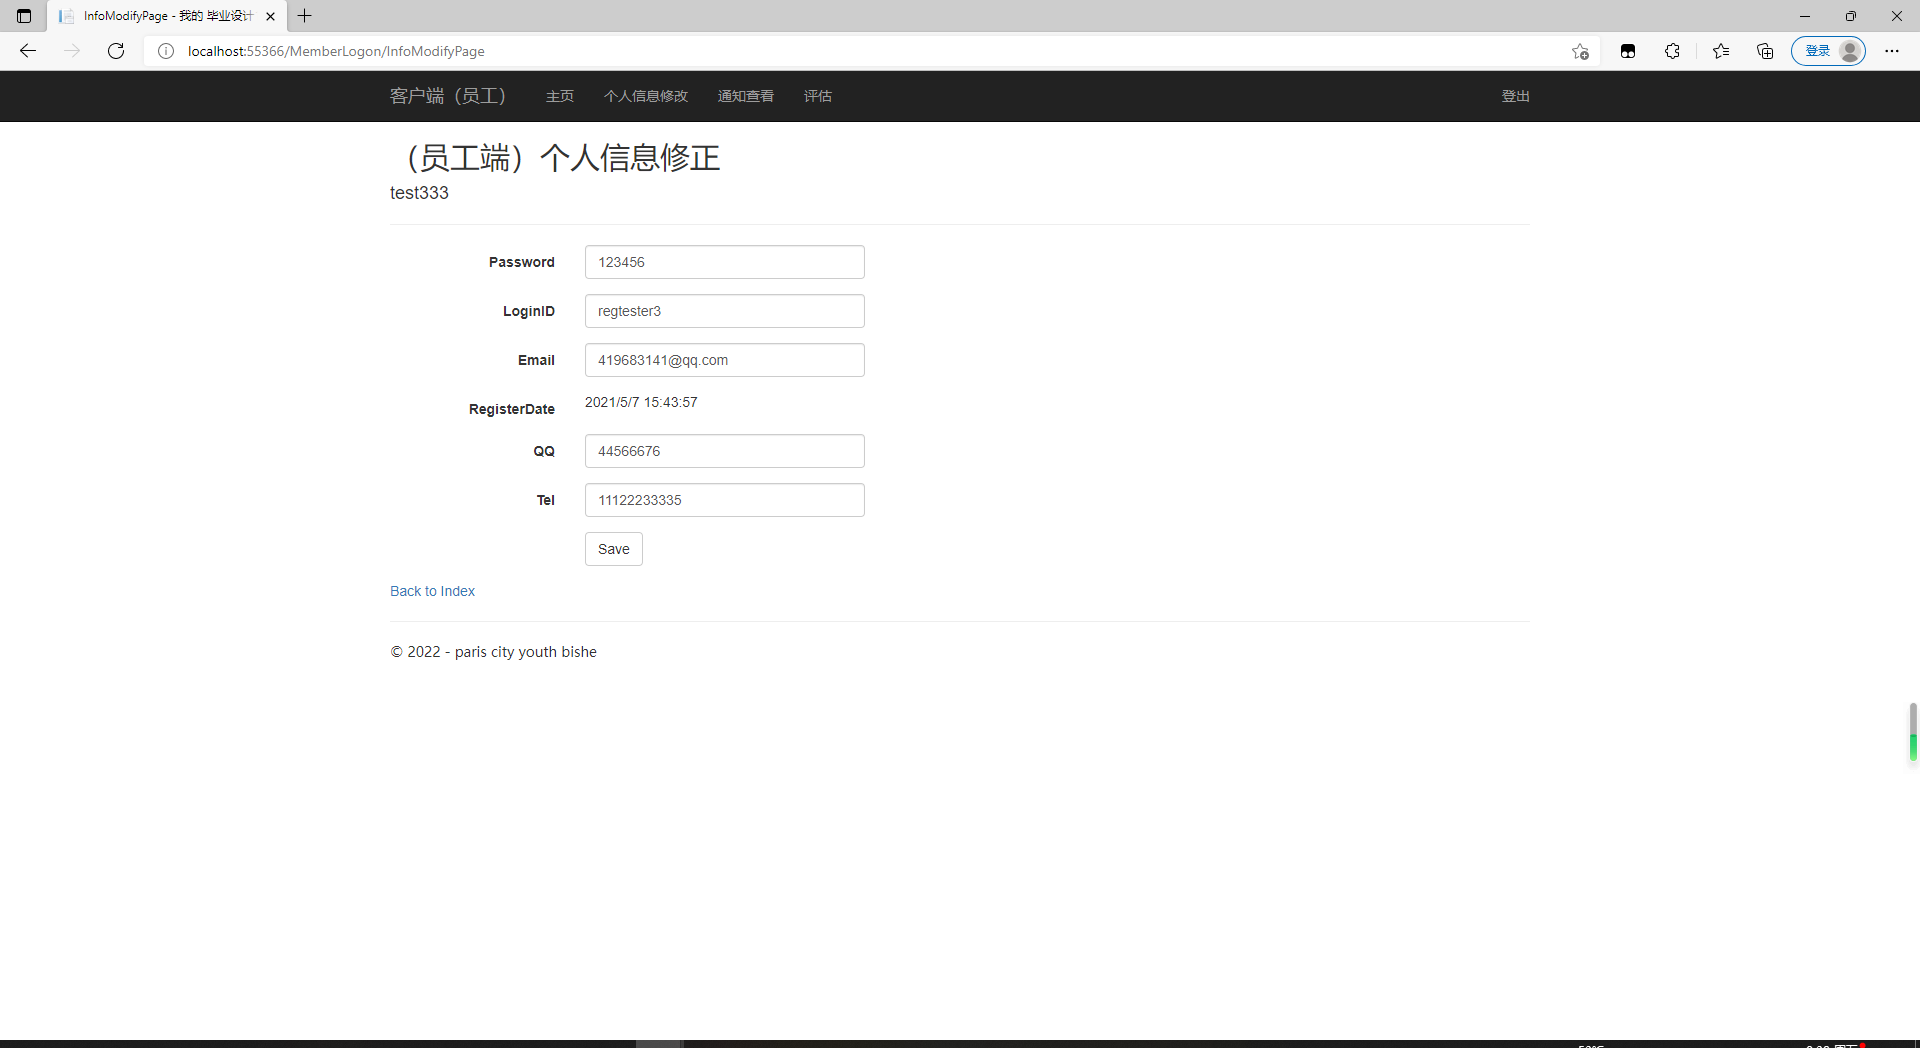
4.2 person information modifications
Enter the system interface without invalidating the browser Cookie;
Open the employee personal information modification interface;
Browse your personal information and correct any entries that need to be modified.
If there are no other requirements, click Save to submit;
After saving, configure employees'positions, set permissions, and store data in the database background.
(Author's note: Because an existing encapsulation class of MD5 is used here, the password is taken out of the cookie, otherwise it is shown here)
4.3 Background Notification Management
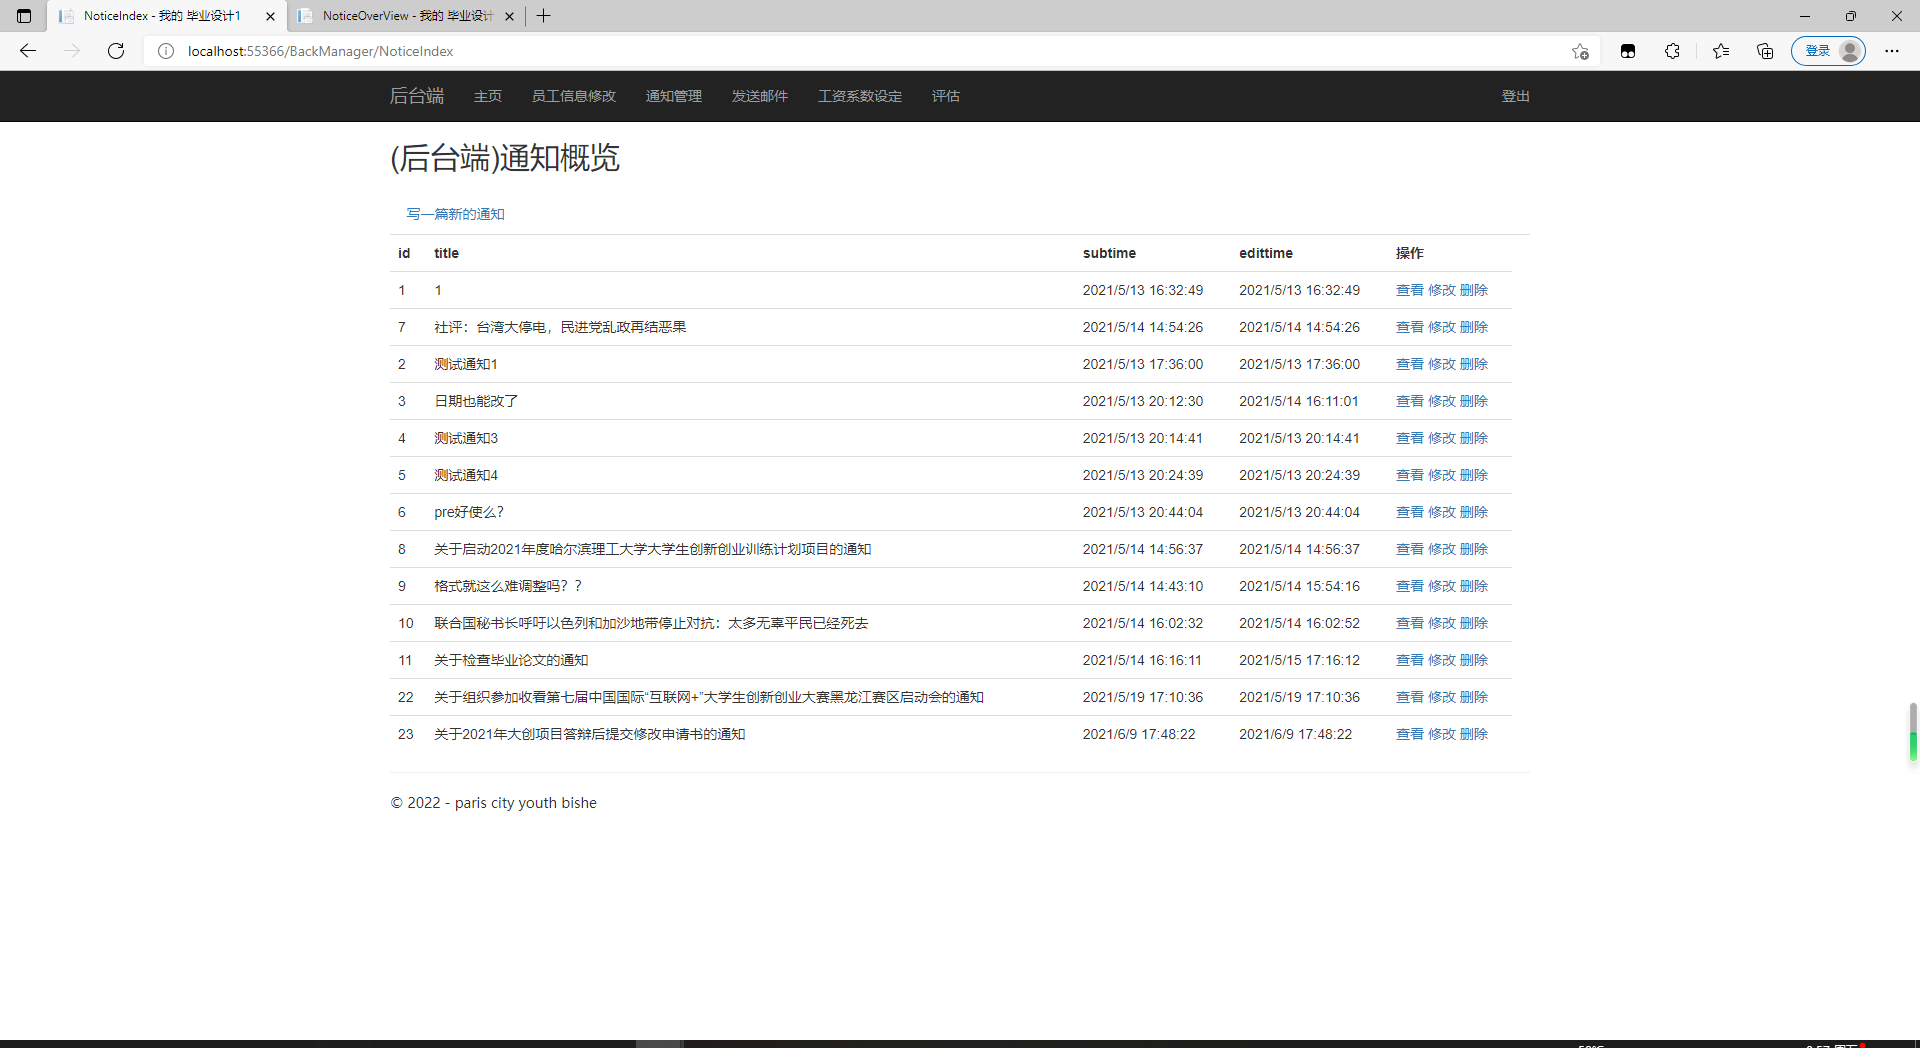
Background account is required for publishing. The average employee has access only and does not have the ability to modify or delete.
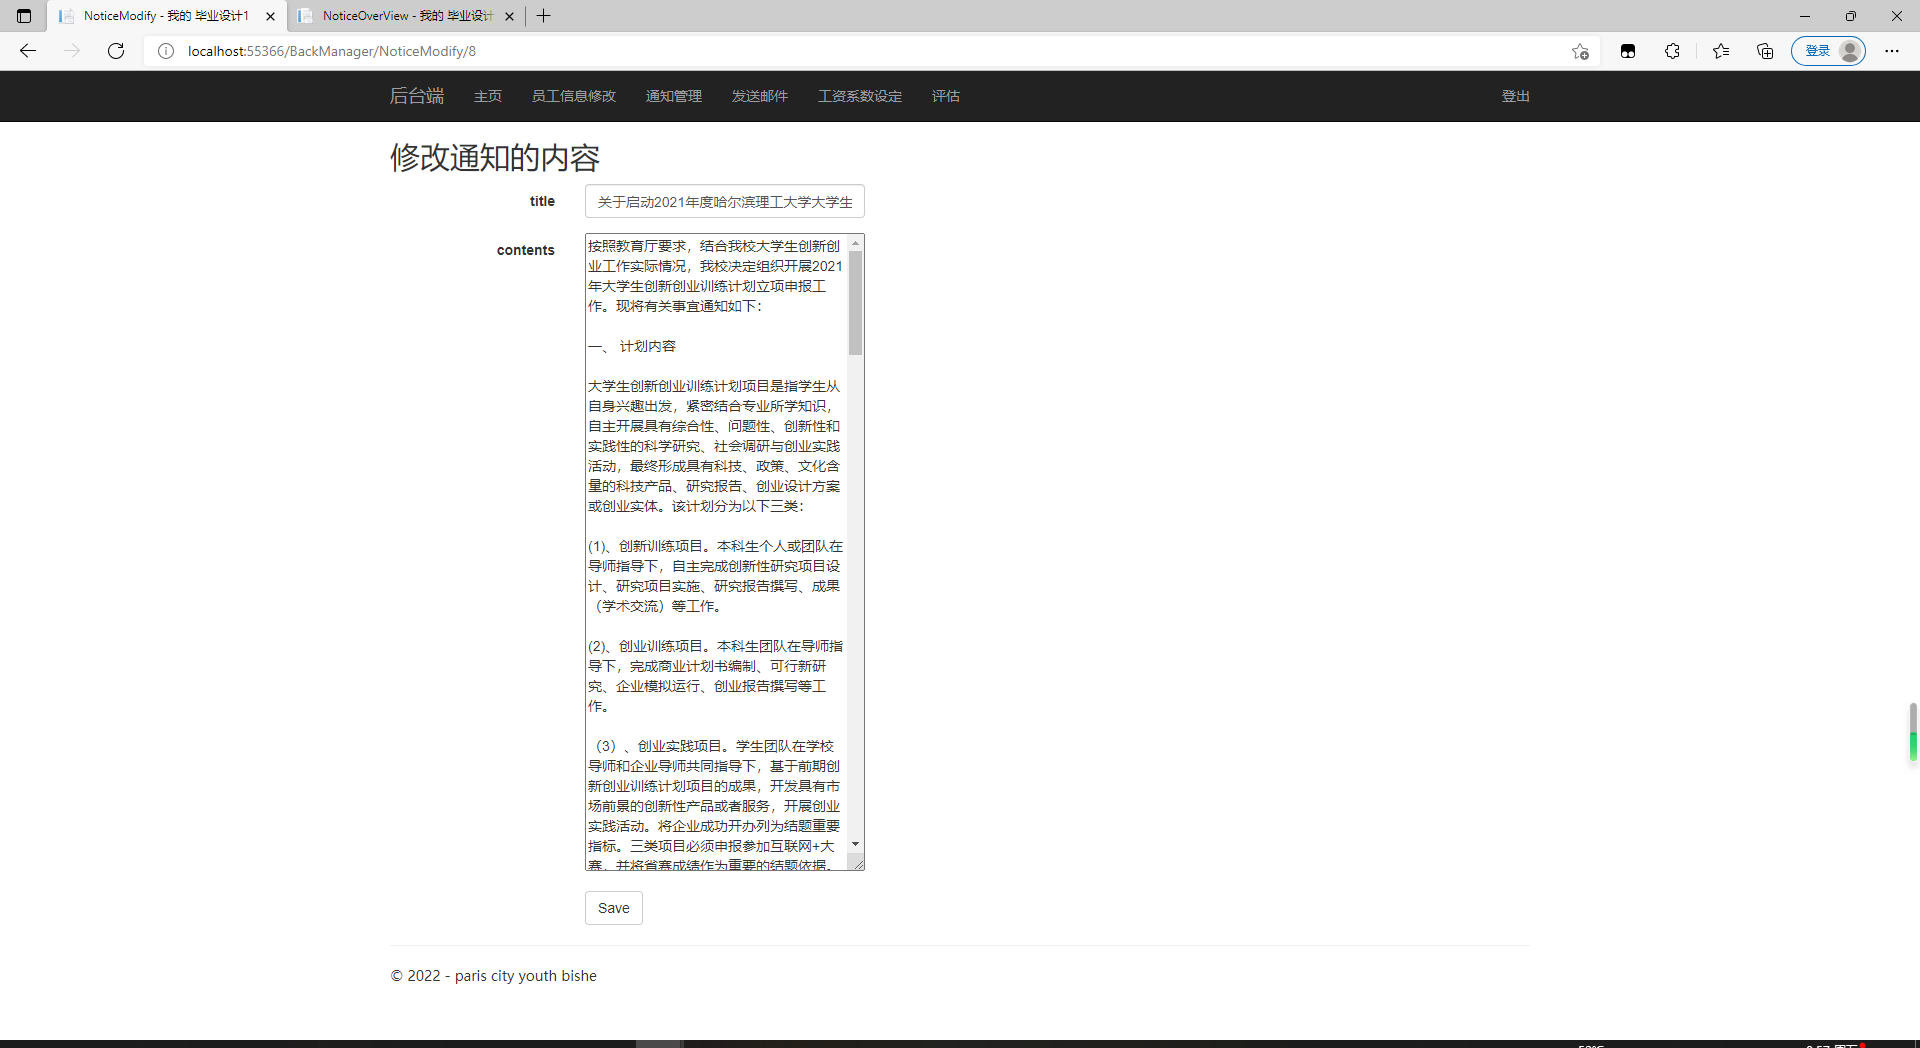
After logging in to the background account, enter the notification management module, you can see the notification publishing page, a title box and a text field, which can be published after input. The publishing backend can modify any notification, but the employee side has only the lookup option.
The EF model is used here. .NET EF(Entity Framework ) is a powerful model that can operate on databases without the need for developers to write SQL statements.
Why use EF models? When I was writing the notification section, I thought how many posts were in my notification form? I add a new notification in the background, and that will change too. Are these changes too troublesome for me to use SQL statements? How do I display them dynamically? I click a post to show his content?
The EF model solves these problems. It encapsulates the operation of the SQL statement so that you can use C# and cshtml to complete the database access and deletion checks, of course, you must first correspond to the table structure.
EF files can be opened in XML format, and when you open them, you will find the table structure is inside.
I have consulted a blog about EF model and I think it will benefit a lot if you need to. This person writes very clearly and I follow his steps step by step.
Using viewbag is a good way to transfer data between HTML files (views) and controllers.
public IList<notice> NoticeList { get; set; }
NoticeEntities1 ne = new NoticeEntities1();
/// <summary>
///EF model used here
/// </summary>
/// <returns></returns>
public ActionResult NoticeOverView()
{
NoticeList = ne.Set<notice>().ToList();
ViewBag.NoteList = NoticeList;
return View();
}
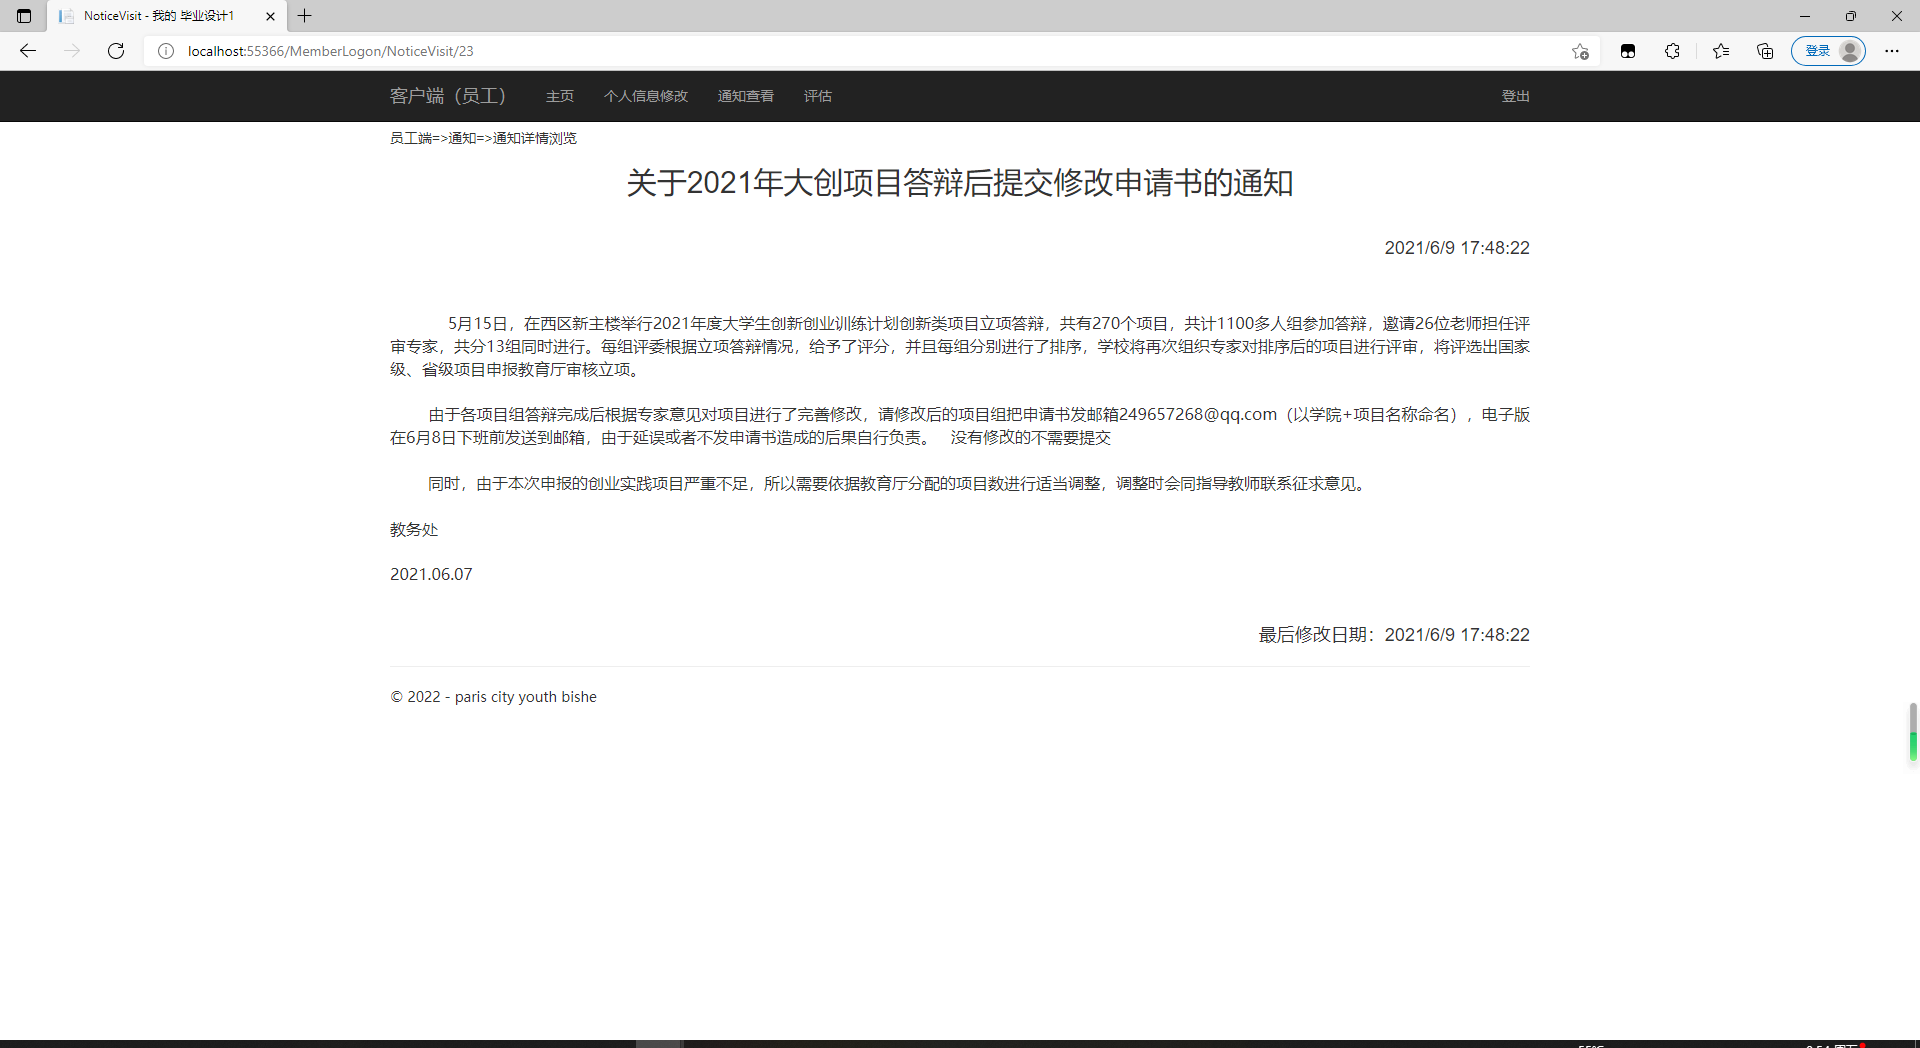
public ActionResult NoticeVisit(int id)
{
notice noteInfo = ne.Set<notice>().Where(u => u.id == id).FirstOrDefault();
return View(noteInfo);
}@model IEnumerable<bishe1.Entity.notice>
@using bishe1.Entity;
@{
ViewBag.Title = "NoticeOverView";
Layout = "~/Views/Shared/_MemberLayout.cshtml";
}
<h5>home page=>Notification Browsing (Employee Side)</h5>
<table class="table">
<tr>
<th>
@Html.DisplayNameFor(model => model.id)
</th>
<th>
@Html.DisplayNameFor(model => model.title)
</th>
<th>
@Html.DisplayNameFor(model => model.subtime)
</th>
<th>
@Html.DisplayNameFor(model => model.edittime)
</th>
<th>
operation
</th>
<th></th>
</tr>
@foreach (notice noticeInfo in ViewBag.NoteList)
{
<tr>
<td>@noticeInfo.id</td>
<td>@noticeInfo.title</td>
<td>@noticeInfo.subtime</td>
<td>@noticeInfo.edittime</td>
<td>
<a href="/MemberLogon/NoticeVisit/@noticeInfo.id">See</a>
</td>
</tr>
}
</table>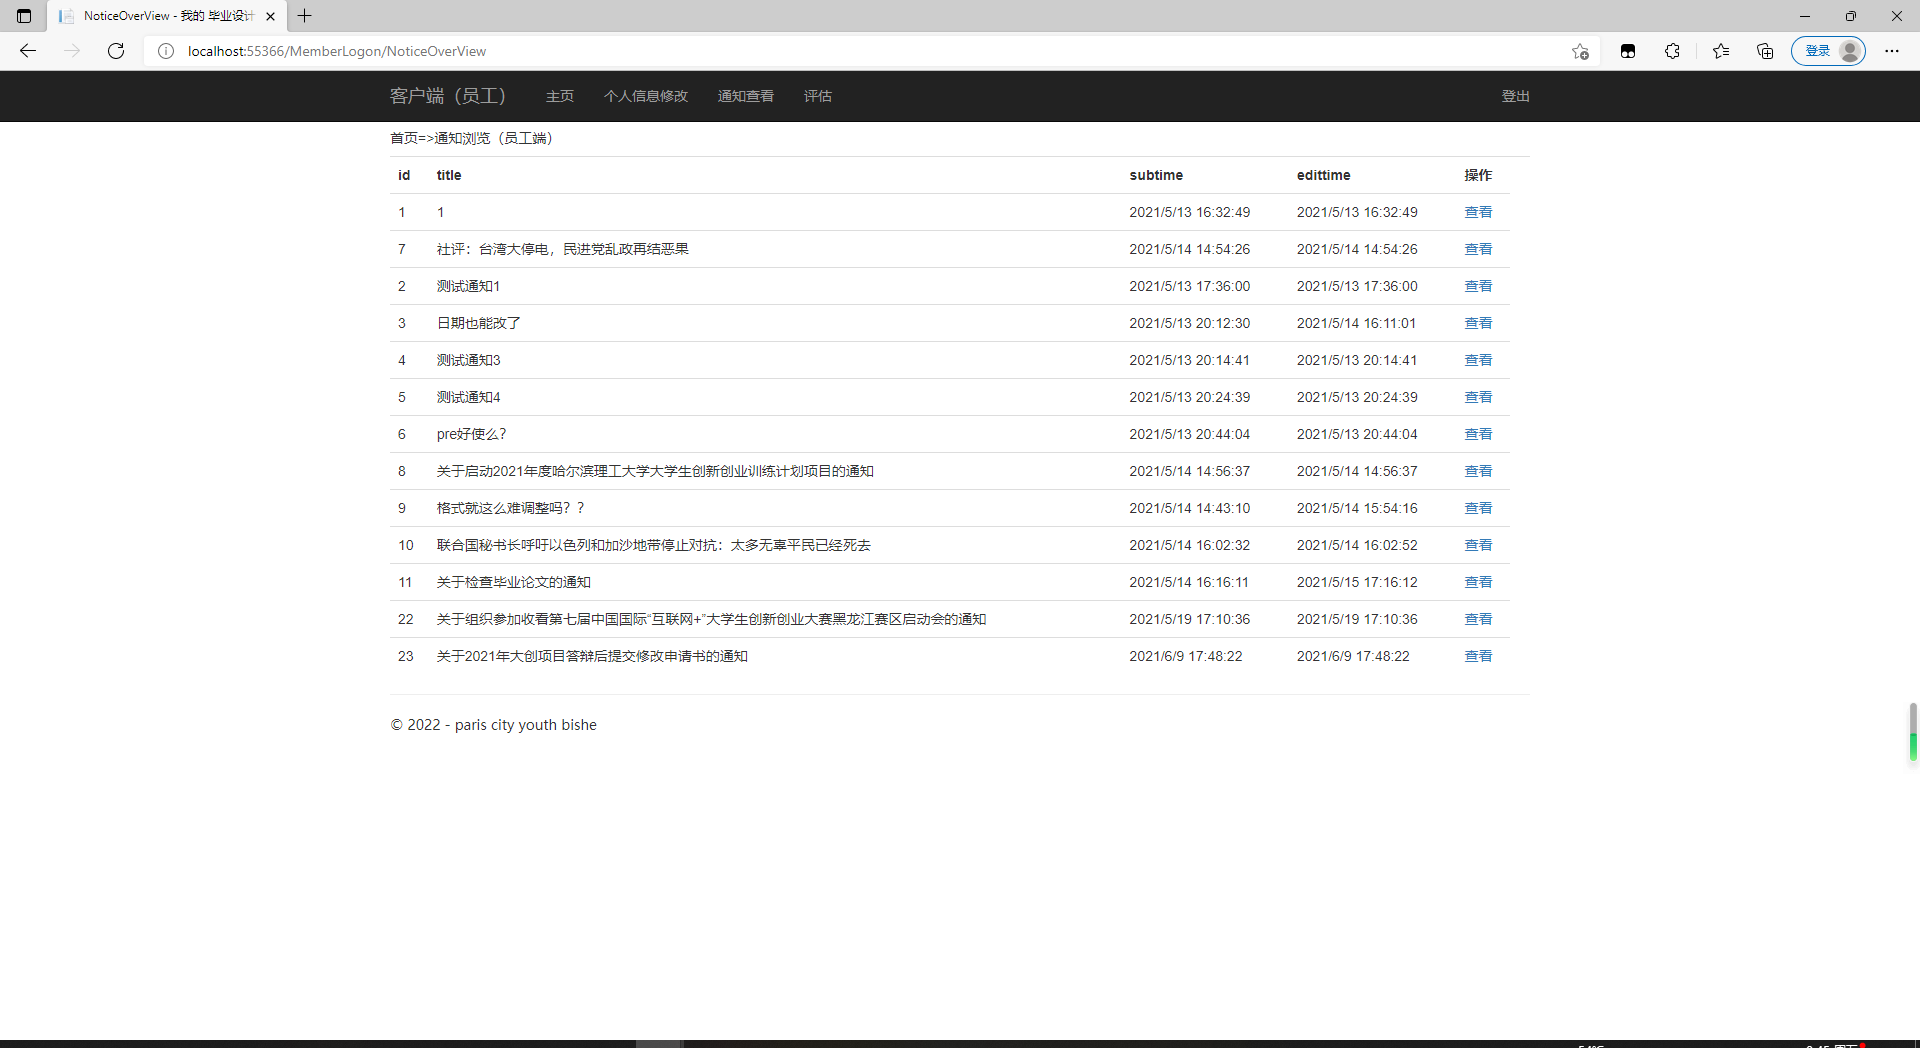
To be honest, seeing these dates (in order to test the effect of what you have done) is also a strong memory. Every time you see these days, it reminds you of the years you fought for the end of last summer. (
Modification of notification (admin1,123456 for background account)
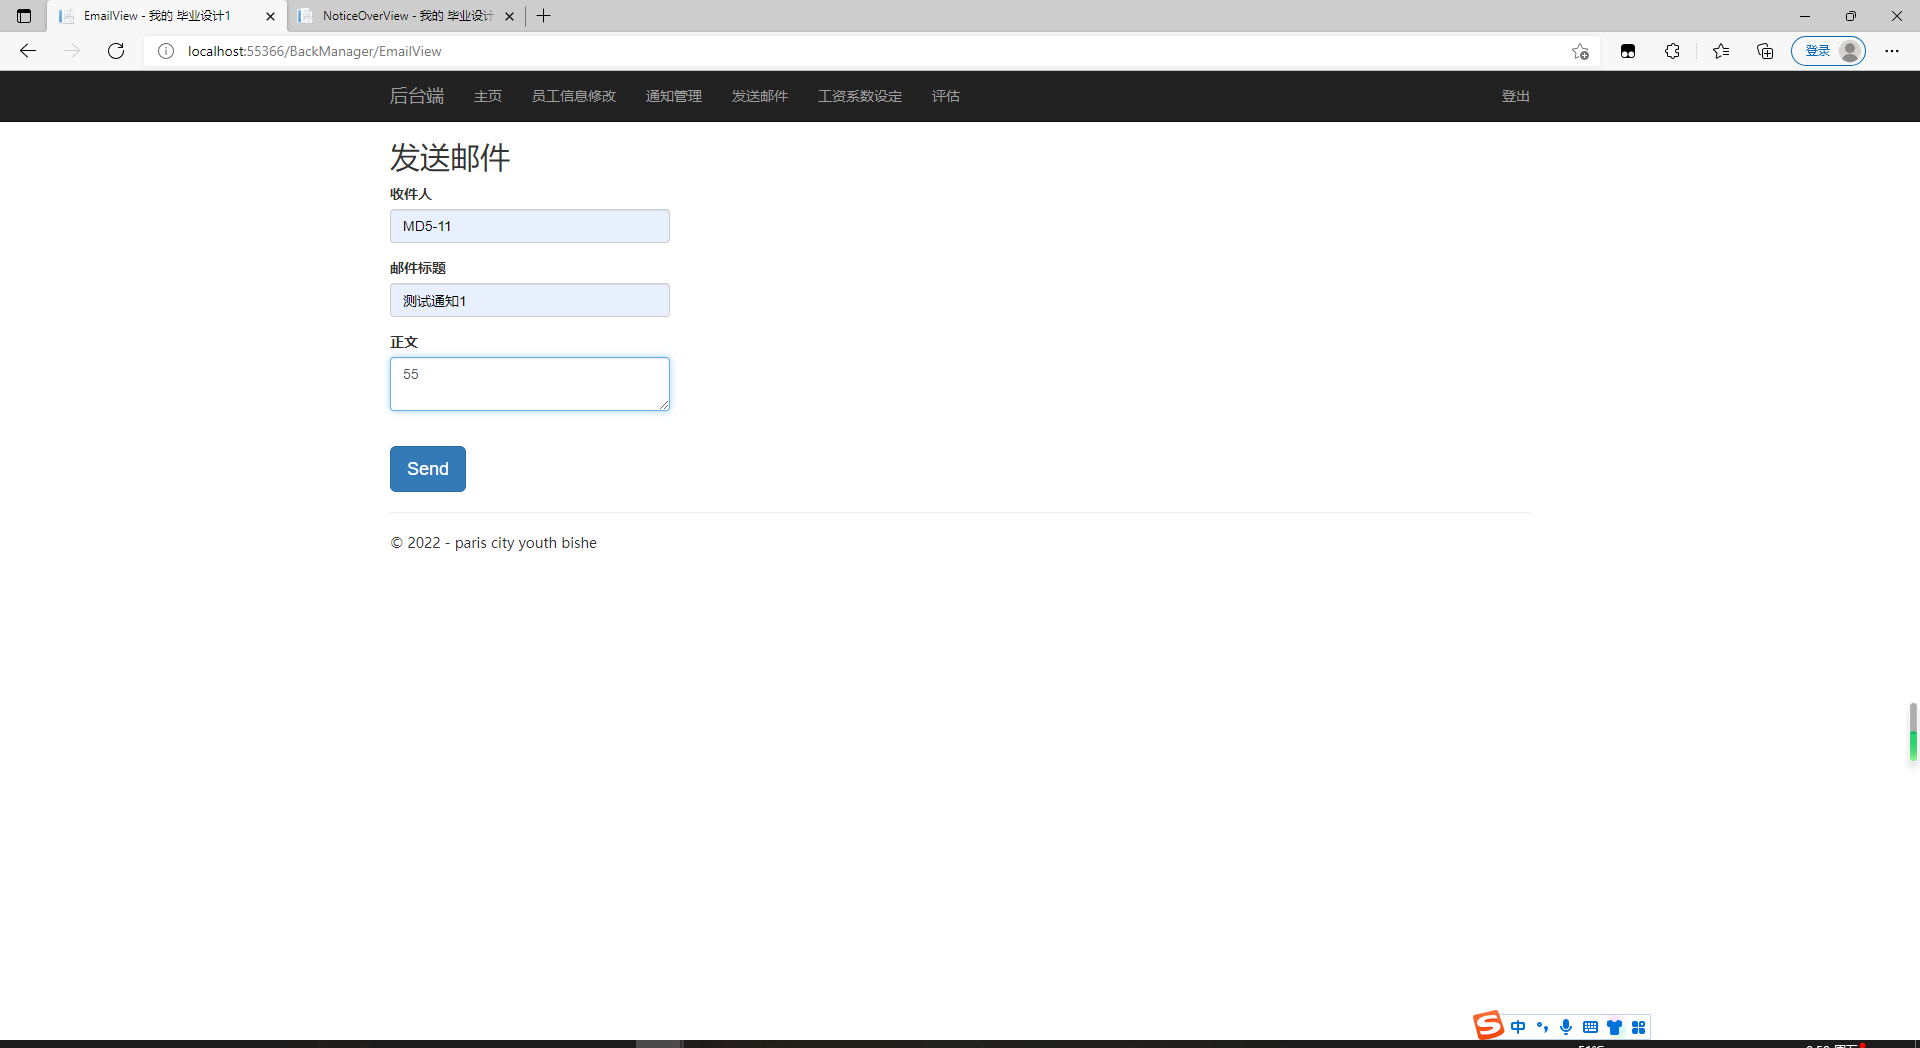
4.4 Mail Sending
The Software Developer Management and Evaluation System has developed a mail function for management to communicate with employees separately, taking into account that management may need to deliver messages to an employee separately.
The procedure is as follows:
Enter the background login interface and log in to the background account;
Click on the Mail Management Label;
Enter three items: the recipient, the title and the body of the message. The recipient here is the user's system nickname (loginID). The software developer management and evaluation system will search the database table for the corresponding email address based on this field, and use the SMTP service to save the header and body of the message and send it to the corresponding recipient mailbox, provided that the mailbox address is correct.
After successful delivery, the employee should be prompted to receive the message and then go to their mailbox to check the content.
Here is a sendmail class.
4.5 Evaluation Management
The evaluation of software developer management and evaluation system is divided into two versions, employee-side and background. On the employee-side, choose their own identity, enter the evaluation interface, enter their own evaluation data, and then submit. The software developer management and evaluation system will calculate evaluation weights based on the data. The evaluation template will be open to employees, but they will not get the results for the first time. After the background administrator completes the operation, the evaluation results are returned to the employee's page information collection interface.
Backend can view the evaluation data of all employees, and can modify the index weight of the evaluation. When the evaluation data is collected in the background, it can be directly passed, or it can give the management's subjective evaluation based on the data. A weighted value will be saved with the data of automatic evaluation and returned to the employees.
The evaluation process for a software developer management and evaluation system is shown in the following figure:
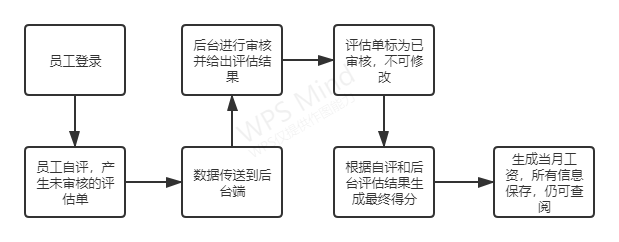
First, to be self-assessed by the employee, the employee first logs on to the software developer management and evaluation system employee side and enters the evaluation homepage.
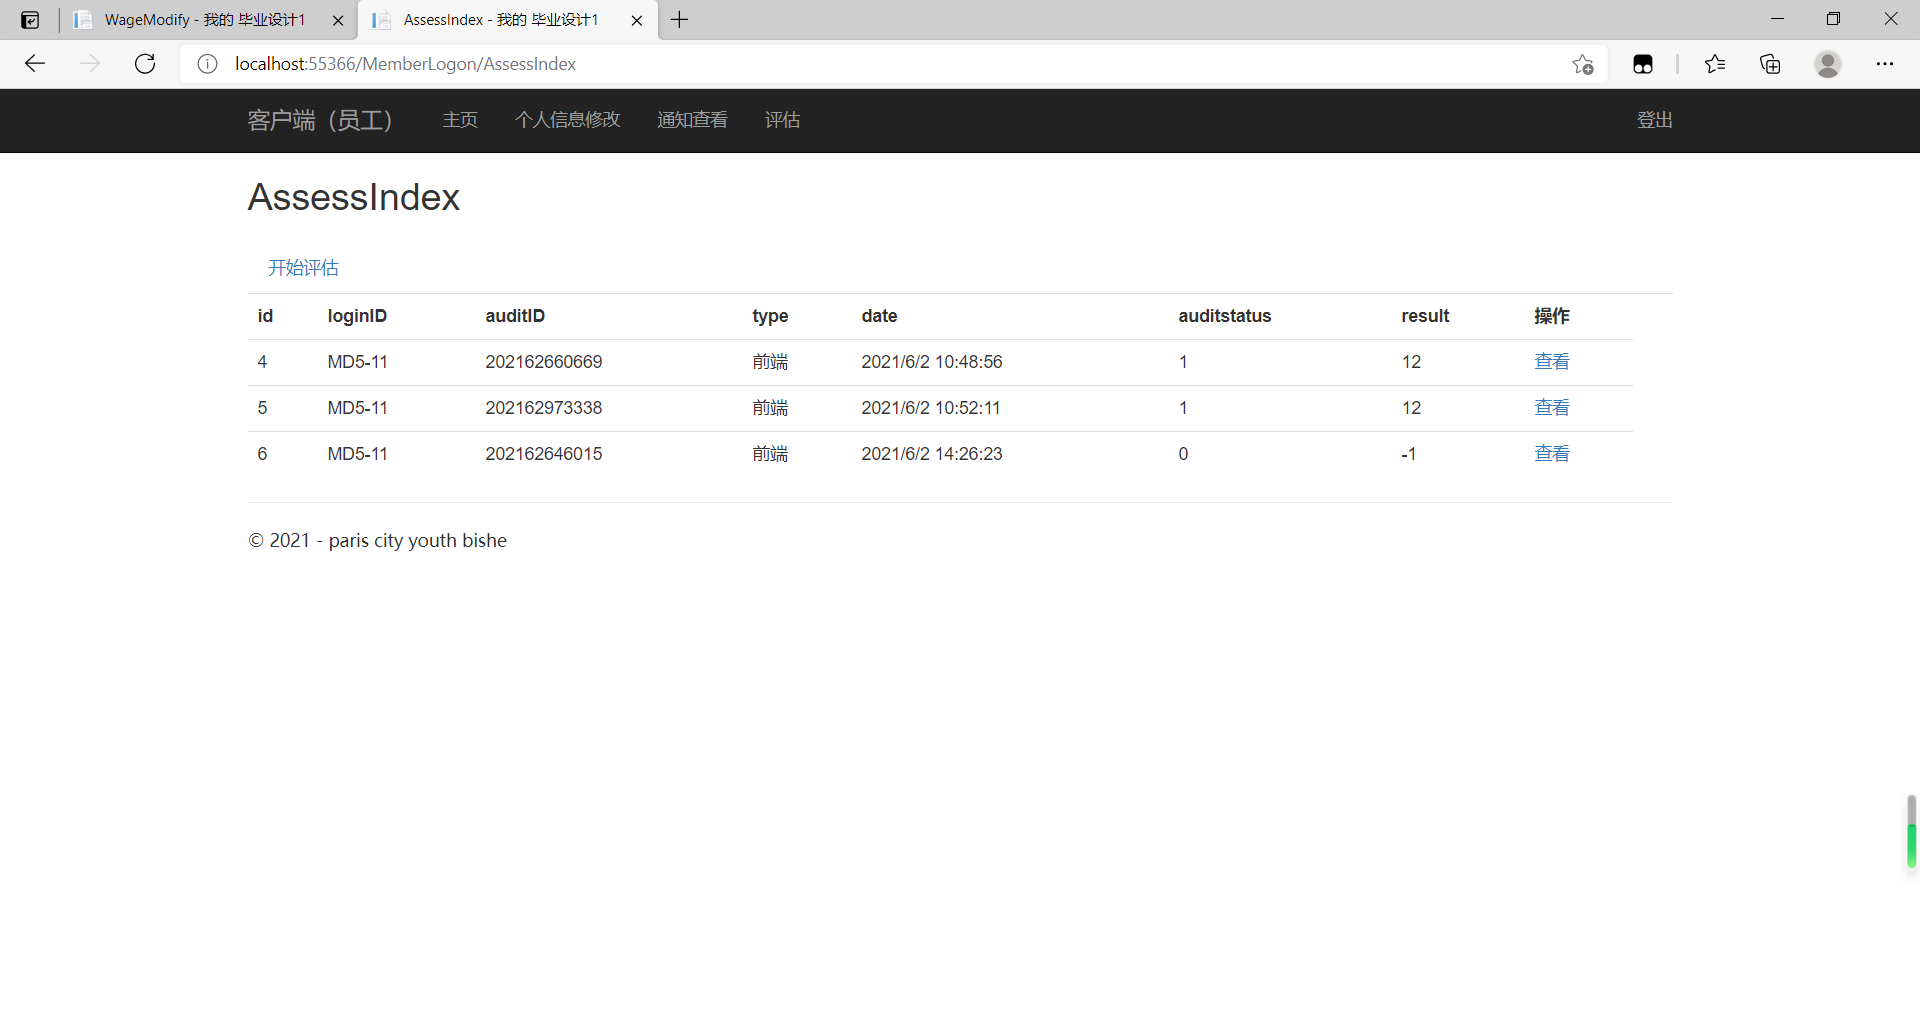
The following diagram shows the first page of the Employee-side Evaluation System:
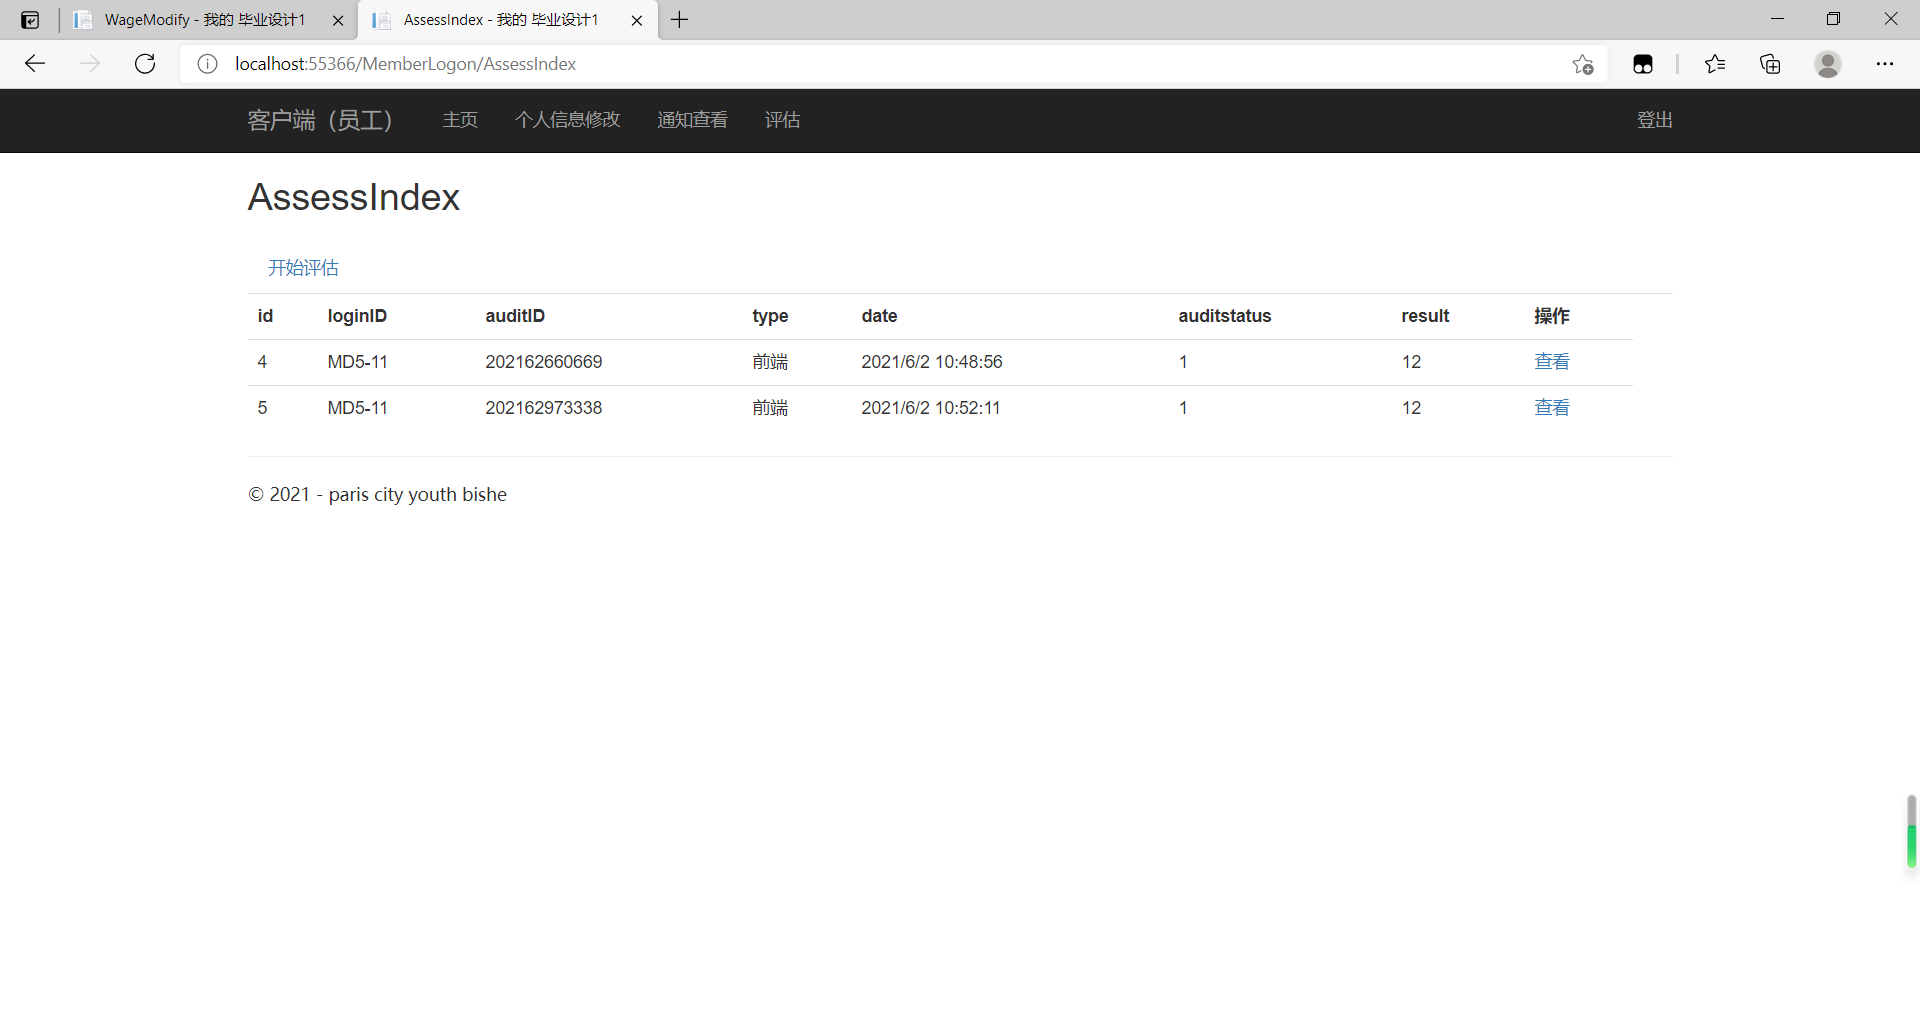
When you enter the page, you can see the assessment information that has been submitted, as well as the audit status, 0 is not audited, 1 is audited. Submitted data can not be modified, can only be viewed. If you want to do a new evaluation, you need to click Start Evaluation.
The following shows the first step of evaluating on the employee side, submitting self-assessment data:
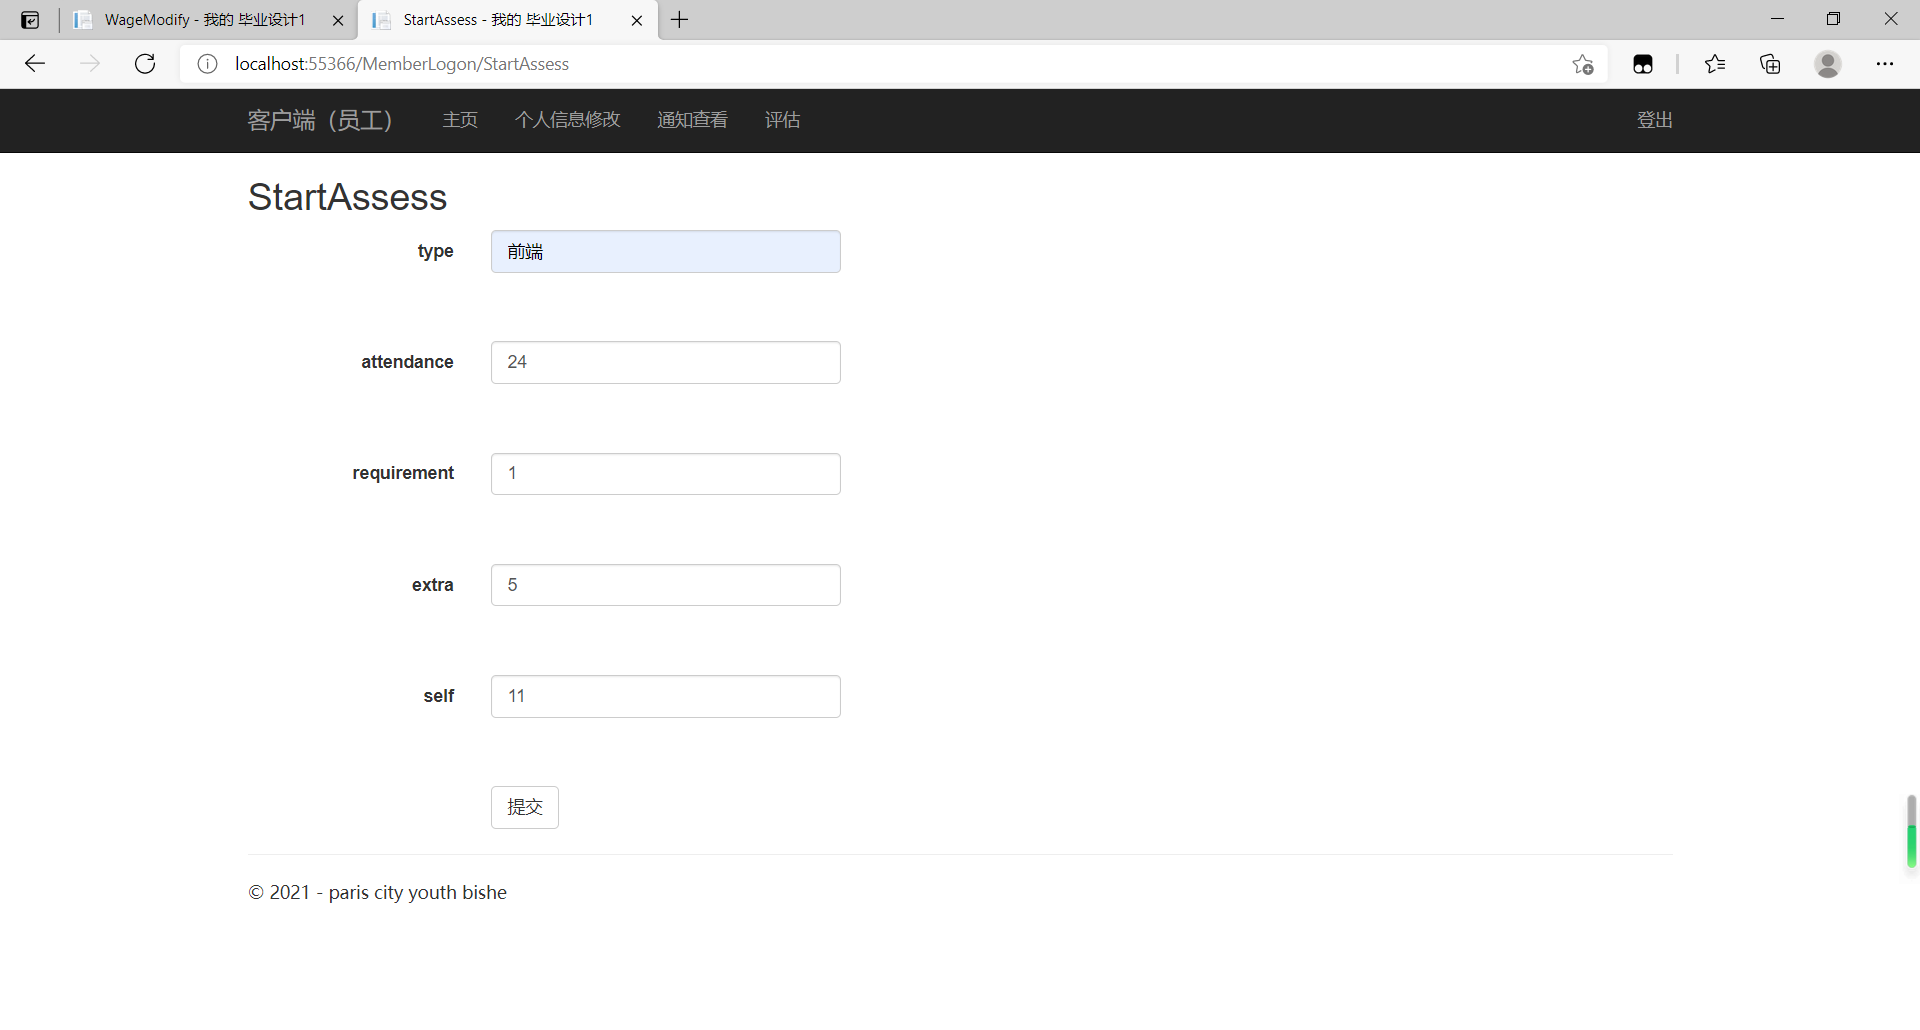
Employee-side input self-assessment data
After clicking Submit, the data will be recorded as unaudited, requiring a final audit score from the backend.
After submission, the unaudited data is marked as 0, as shown in the figure.
Results after submission, audit flag shown as 0
Next, go to the back end to review the evaluation data. All unaudited evaluation entries can be modified here. However, all entries have only one chance to be modified. Click Modify to enter the corresponding entry, and the audited evaluation information can only be viewed.
The effect of background auditing is shown in the diagram.
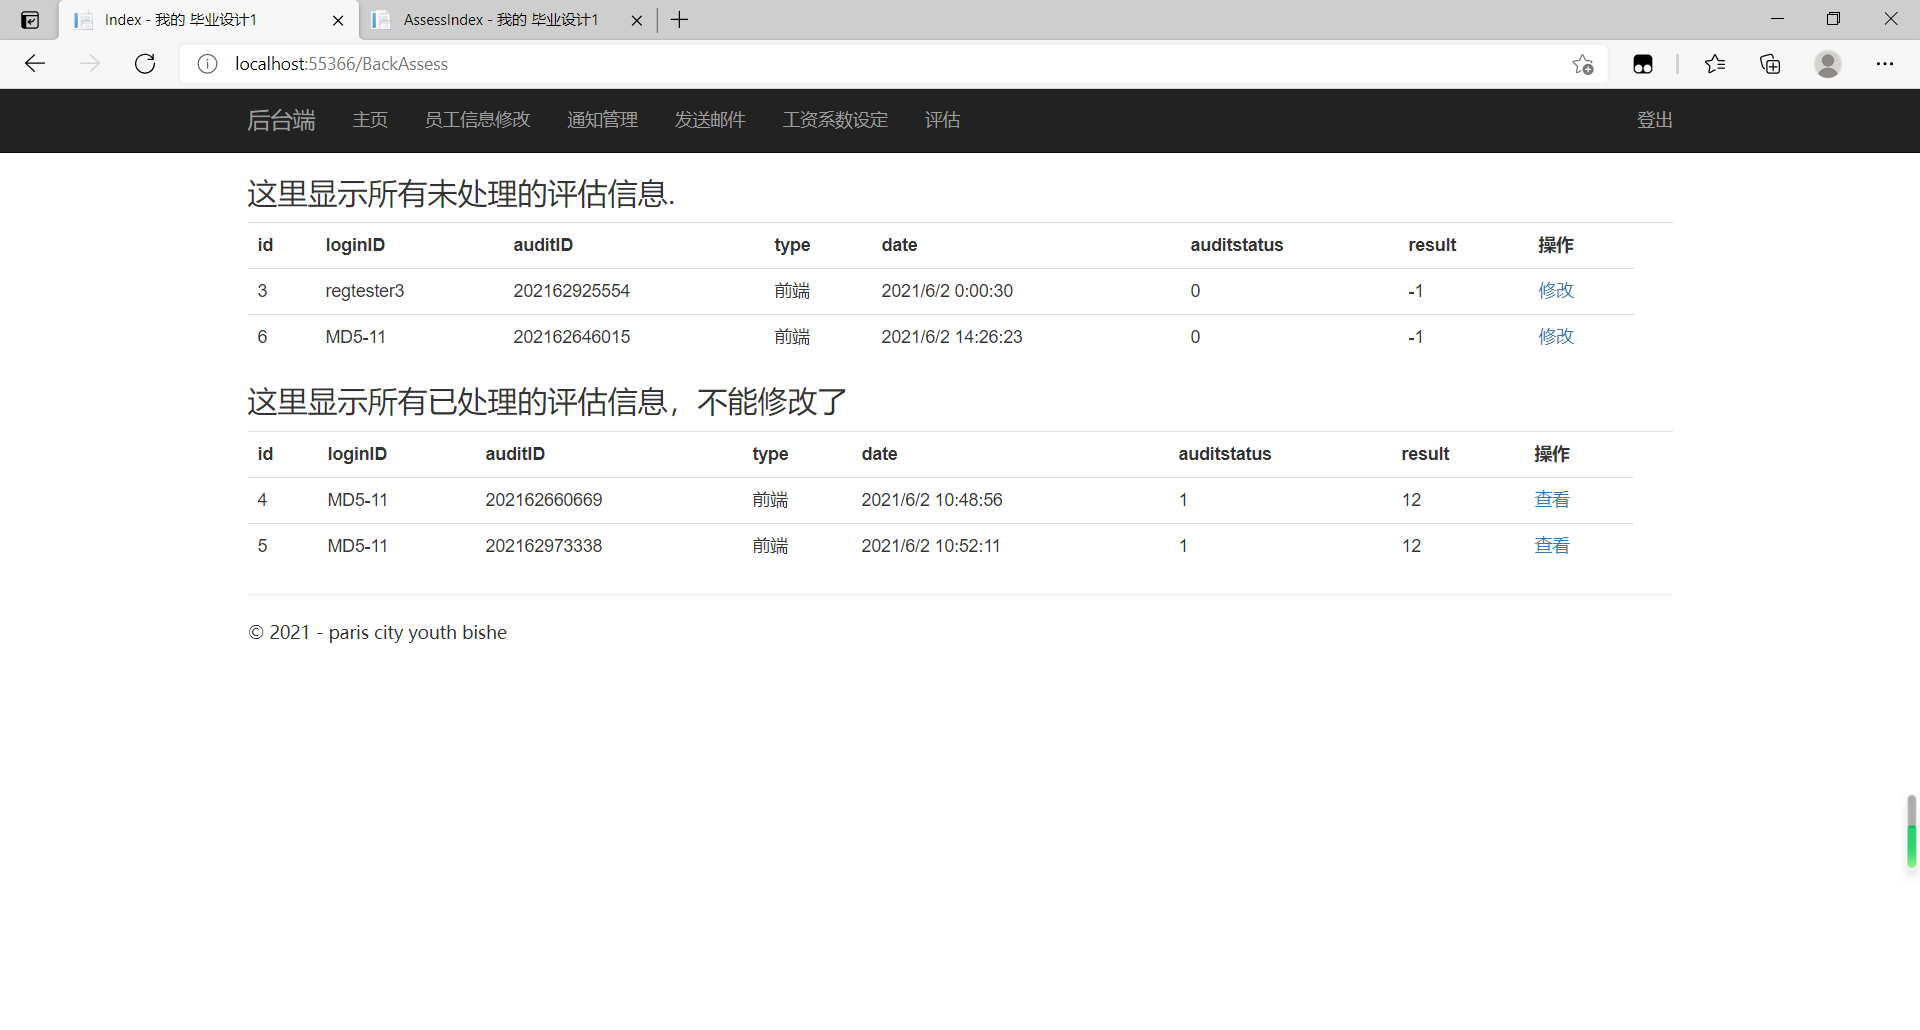
Backend evaluation page, you can see that only unaudited evaluation records can be modified
Enter the entry to see its detailed data, give background in backres (Background Rating Attribute), also represents the evaluation results of the software company management in the system, the results will be weighted with the self-evaluation results, if the difference is small will take the mean value, if the gap is large the data in the background will have a higher weight.
Shows the effect of background data auditing:
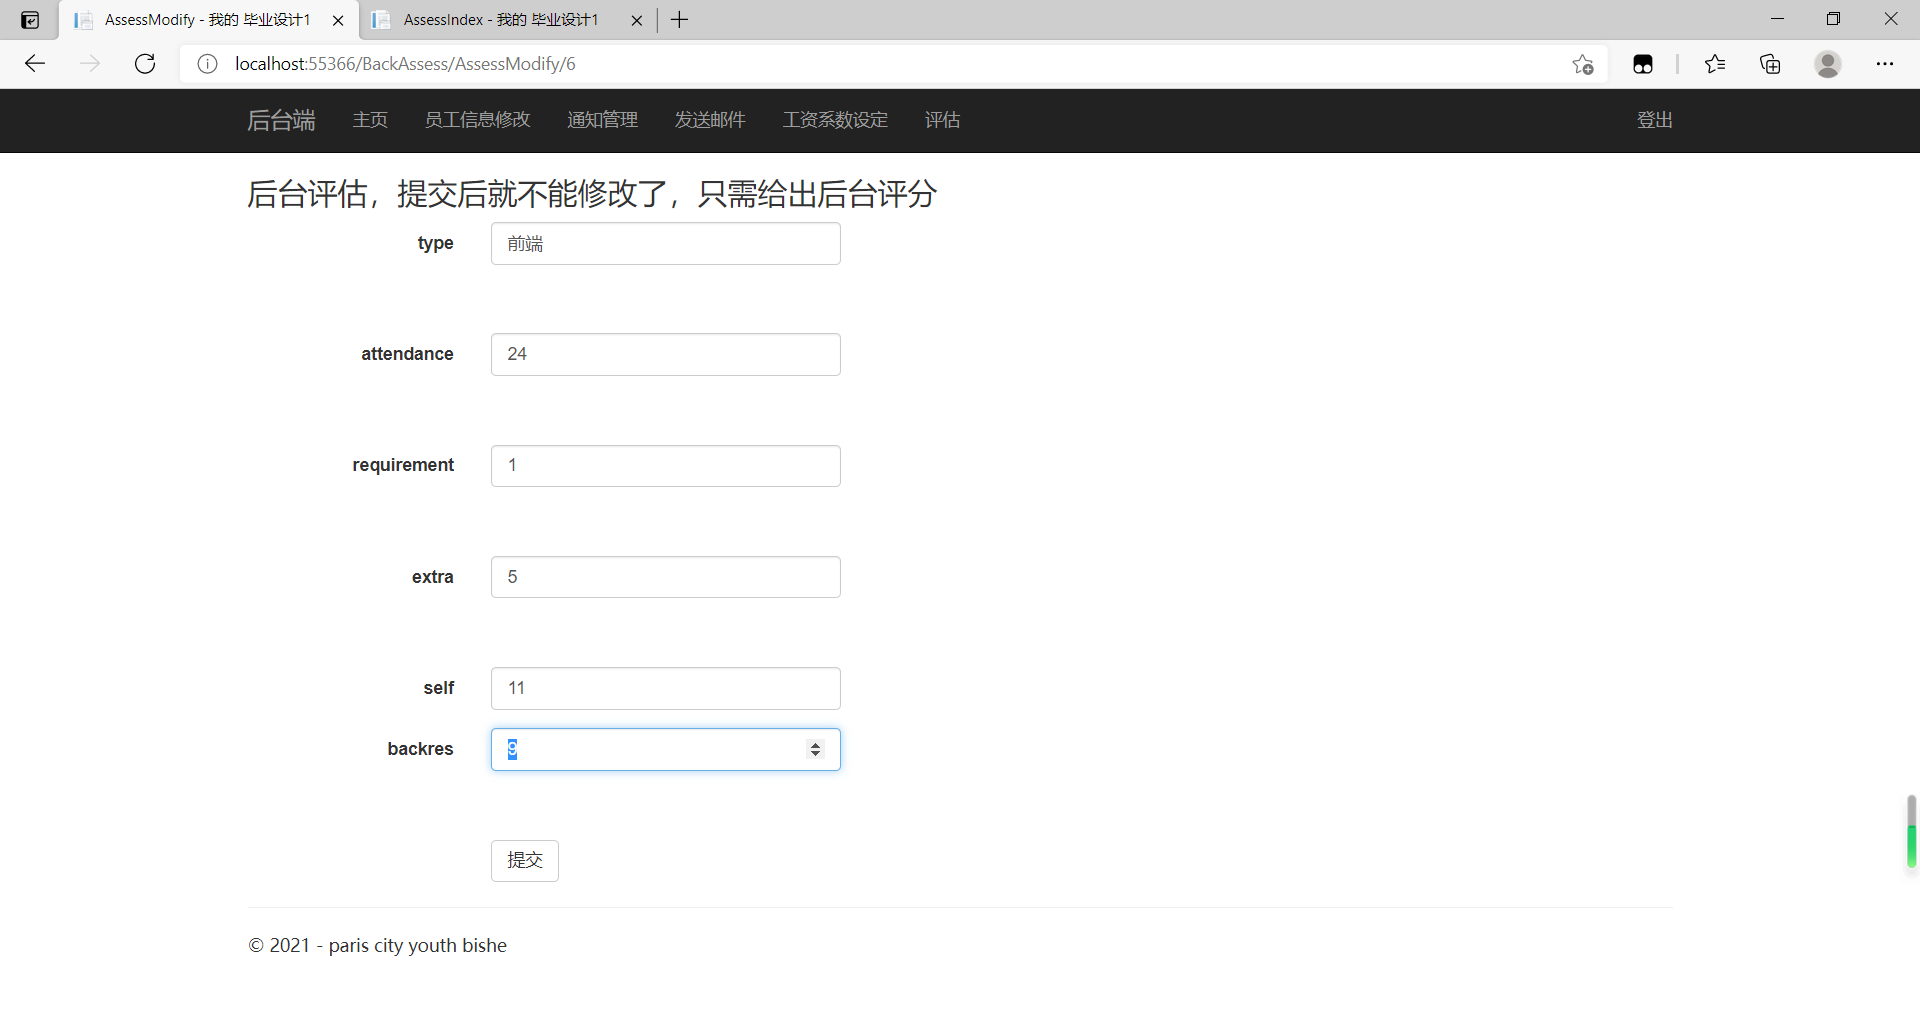
Background can give the final score based on employee self-assessment data and actual situation
The following figure shows the effect of background data review, and you can see that the newly modified attributes have been locked.
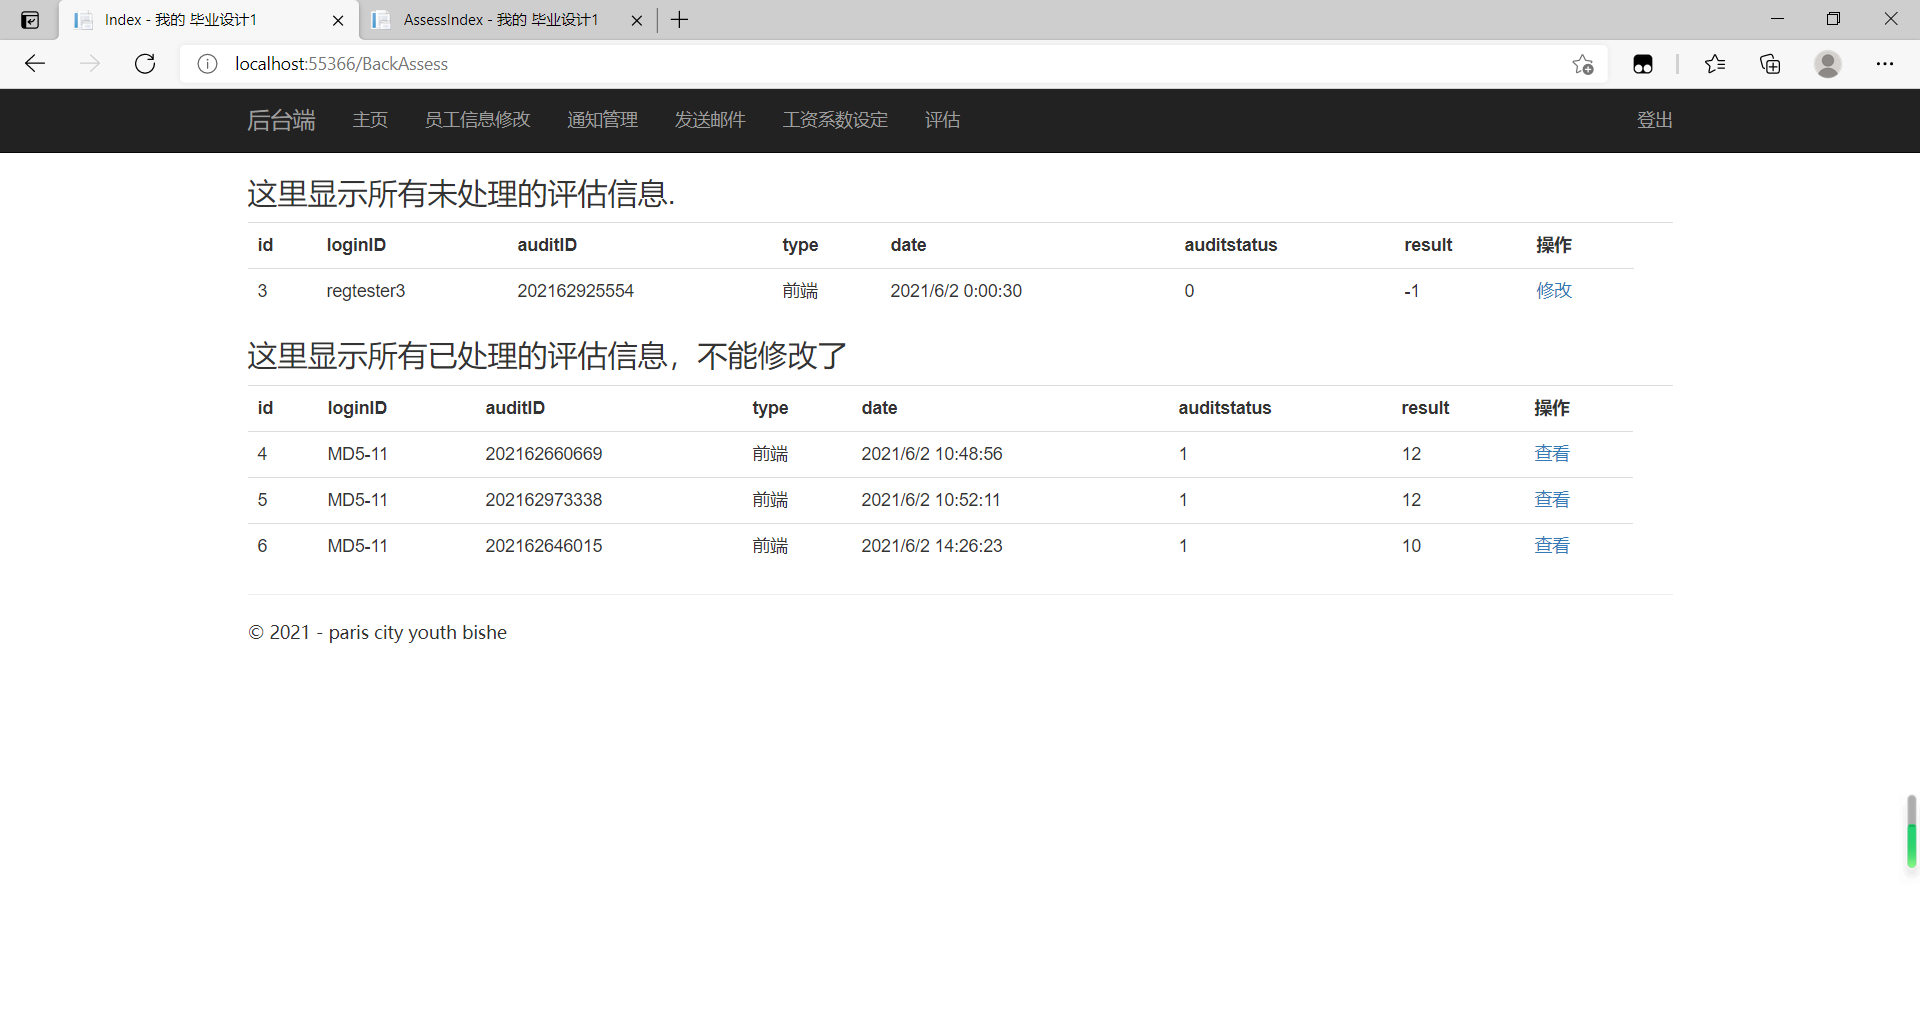
Data is generated and locked by system calculations after submission
After background review and upload, the evaluation entry cannot be modified and the data is returned to the employee side. However, the backend can also see all the entry details, while employees can only see their own information, other people's assessment information can not see.
The following chart shows detailed assessment information for employees who sign in again.
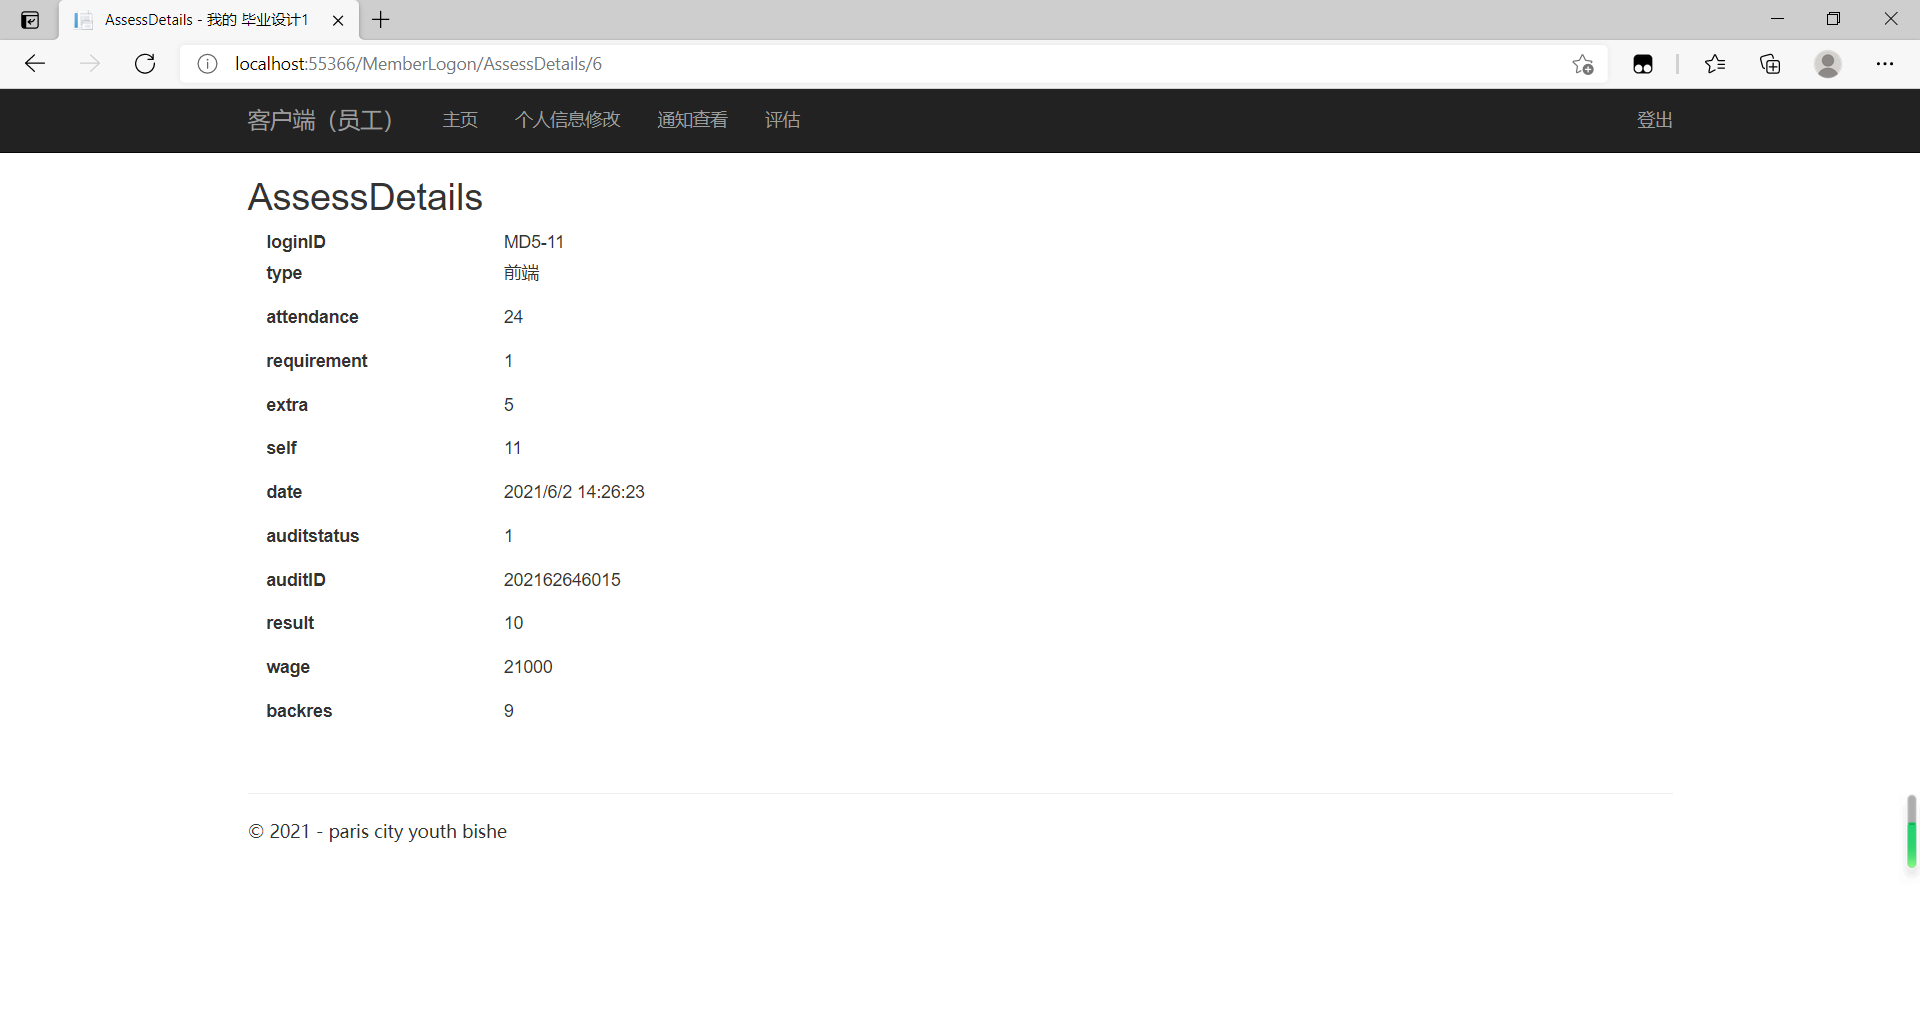
Employees can finally review the evaluation results
This concludes a complete evaluation process. Here are some implementation details:
Read evaluation information for a specific user:
AssessList = ae.Set<assess1>().Where(u=>u.loginID == loginID).ToList();
If you want to add where constraints when reading using the MVC5+EF6 model, you can call where method of the EF model. This method originates from the ienumerable class of C#and can generate SQL query conditions in the presence of entity context. If the where method precedes tolist, the where method is executed before the query. After tolist, all data is queried and filtered according to where's criteria.
Therefore, in the background, this method can also be used to separate unaudited assessments from audited ones, and only unaudited entries can be modified (final auditing).
public ActionResult Index(){

  AssessList = ae.Set<assess1>().Where(u => u.auditstatus == 0).ToList();

  ViewBag.AssessList = AssessList;

  AssessList2 = ae.Set<assess1>().Where(u => u.auditstatus == 1).ToList();

  ViewBag.AssessList2 = AssessList2;

  return View();

 }
At this point, the main functions of the system have been displayed, and some specific details have been given.
The code links are as follows:
ASP.NET MVC software developer performance evaluation system. zip