preface:
Recently, I want to do some gadgets related to raspberry pie. I found that some people will use raspberry pie personal blog to build websites. When building a personal blog site, I will use the intranet penetration technology provided by peanut shell, Natapp (which was modified by ngrok), Xiaomi ball and other platforms to access my personal blog from the Internet. I used the intranet penetration of Natapp platform, and the free version can't fix the domain name. Every time I use the domain name, it will change, which is not very convenient. Therefore, I build an intranet penetration server myself.
Text:
ngrok1. Version x is an open source intranet penetration tool from ngrok2 0 closed the source from the beginning. It makes its own intranet penetration platform to provide services for users. This article uses ngrok1 Build intranet penetration service with version X.
0. Preparation in advance:
First, you need to have a server with public IP. I happen to have a 1-core 2G lightweight server, I will deploy some services on it (this kind of server is very cheap. Personally, I think it is much better to build a blog on the server than raspberry pie). In addition, you also need to have a domain name. I bought a domain name on Xinwang and filed it on a cloud.
1. Installation go environment:
// Download installation package
wget https://storage.googleapis.com/golang/go1.8.3.linux-amd64.tar.gz --no-check-certificate
// decompression
tar zxvf go1.8.3.linux-amd64.tar.gz
// Configure environment variables
vim /etc/profile
export GO_HOME=/usr/local/go
export PATH=$GO_HOME/bin:  ...
source /etc/profile
// Verify that the installation was successful
go version
2. Download ngrok1 X source code:
mkdir /data/ngrok
cd /data/ngrok
git clone https://github.com/inconshreveable/ngrok.git
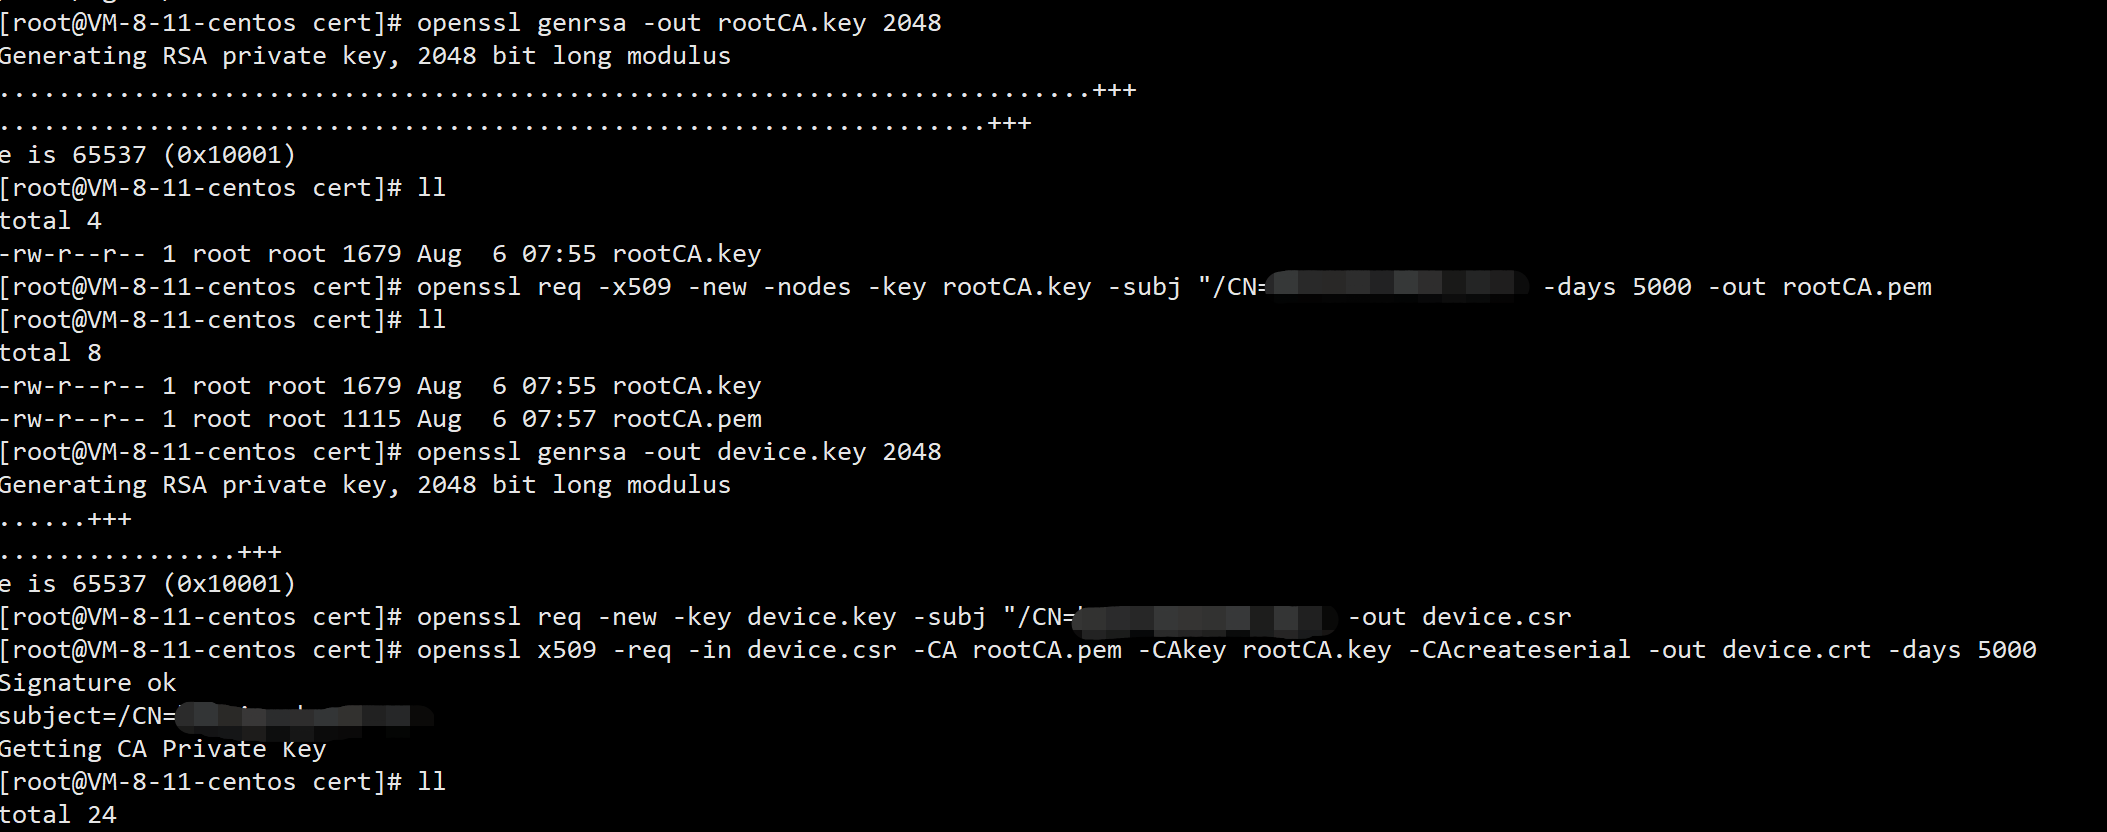
3. Generate certificate file:
// Create certificate directory
mkdir /data/ngrok/cert
cd /data/ngrok/cert
// Do the following in sequence
openssl genrsa -out rootCA.key 2048
// Modify / CN = your domain name. Here you can try to use the pan domain name
openssl req -x509 -new -nodes -key rootCA.key -subj "/CN=XXXXXX" -days 5000 -out rootCA.pem
openssl genrsa -out device.key 2048
// Modify / CN = your domain name. Here you can try to use the pan domain name
openssl req -new -key device.key -subj "/CN=XXXXXXz" -out device.csr
openssl x509 -req -in device.csr -CA rootCA.pem -CAkey rootCA.key -CAcreateserial -out device.crt -days 5000
4. Replace the original certificate:
cp ./rootCA.pem  /data/ngrok/ngrok/assets/client/tls/
cd /data/ngrok/ngrok/assets/client/tls/
cp ./ngrokroot.crt  ./ngrokroot.crt0806
mv ./rootCA.pem ./ngrokroot.crt

cp ./device.crt /data/ngrok/ngrok/assets/server/tls/
cd /data/ngrok/ngrok/assets/server/tls/
cp ./snakeoil.crt ./snakeoil.crt0806
mv ./device.crt ./snakeoil.crt

cp ./device.key /data/ngrok/ngrok/assets/server/tls/
cd /data/ngrok/ngrok/assets/server/tls/
cp ./snakeoil.key  ./snakeoil.key0806
mv ./device.key ./snakeoil.key
5. Compilation server:
cd /data/ngrok/ngrok
make
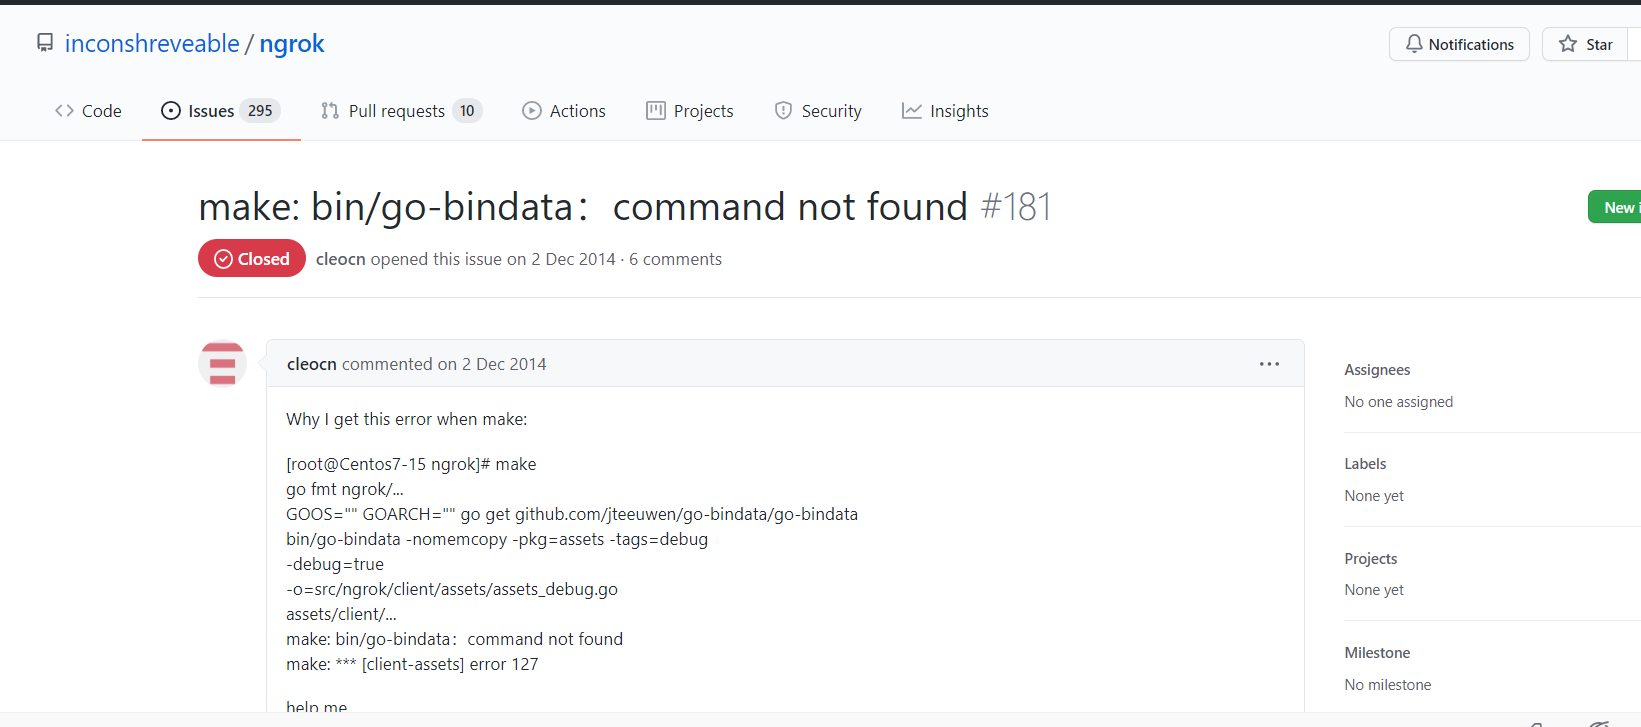
Question 1: Make: bin / go bindata: command not found question:
We can directly clone the go bindata project locally, build the project locally, and put the go bindata file in the corresponding folder:
git clone  github.com/jteeuwen/go-bindata
cd ./go-bindata/go-bindata
go build
mkdir   /data/ngrok/ngrok/src/github.com/jteeuwen/go-bindata
cp ./go-bindata   /data/ngrok/ngrok/src/github.com/jteeuwen/go-bindata
mkdir   /data/ngrok/ngrok/bin
cp ./go-bindata   /data/ngrok/ngrok/bin
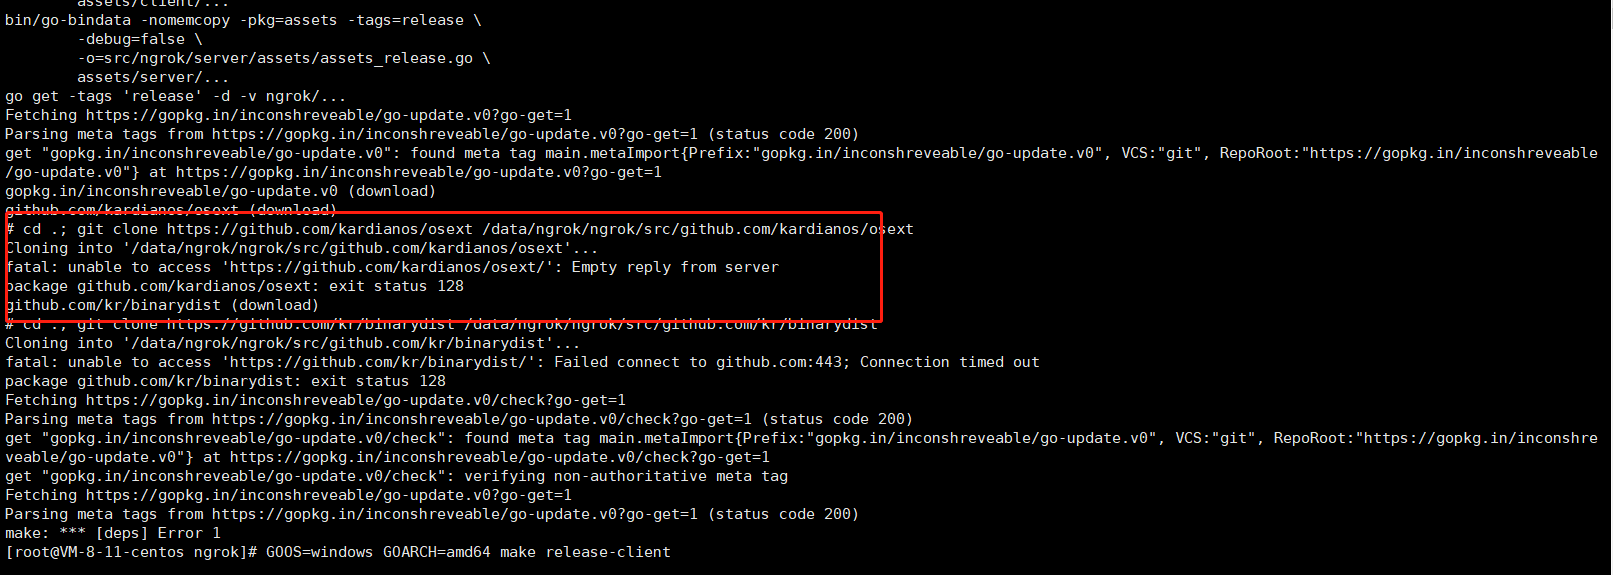
Question 2: some dependent projects cannot be pulled from GitHub
You can pull the project locally and upload it to the relevant directory.
6. Compile the client (take the Windows version as an example):
GOOS=windows GOARCH=amd64 make release-client
Other version compilation commands:
// Linux platform 32-bit system:
GOOS=linux GOARCH=386 make release-client
// Linux platform 64 bit system:
GOOS=linux GOARCH=amd64 make release-client
// Windows platform 32-bit system:
GOOS=windows GOARCH=386 make release-client
// Windows platform 64 bit system:
GOOS=windows GOARCH=amd64 make release-client
// MAC platform 32-bit system:
GOOS=darwin GOARCH=386 make release-client
// MAC platform 64 bit system:
GOOS=darwin GOARCH=amd64 make release-client
// ARM platform:
GOOS=linux GOARCH=arm make release-client
// Raspberry pie system:
GOOS=linux GOARCH=arm  make release-client
7. Operation server:
setsid ./ngrokd -tlsKey="/data/ngrok/ngrok/assets/server/tls/snakeoil.key" -tlsCrt="/data/ngrok/ngrok/assets/server/tls/snakeoil.crt" -domain="XXX" //Domain name - httpaddr = ": 81" - httpsaddr = ": 442" - log "stdout"

You can use ngrokd -h to query what commands the server can use:
Usage of ./ngrokd:
  -domain string
    	Domain where the tunnels are hosted (default "ngrok.com")
  -httpAddr string
    	Public address for HTTP connections, empty string to disable (default ":80")
  -httpsAddr string
    	Public address listening for HTTPS connections, emptry string to disable (default ":443")
  -log string
    	Write log messages to this file. 'stdout' and 'none' have special meanings (default "stdout")
  -log-level string
    	The level of messages to log. One of: DEBUG, INFO, WARNING, ERROR (default "DEBUG")
  -tlsCrt string
    	Path to a TLS certificate file
  -tlsKey string
    	Path to a TLS key file
  -tunnelAddr string
    	Public address listening for ngrok client (default ":4443")
8. Run the client:
Download the Windows version client compiled in step 6 to the local, and first configure ngrok Cfg file, as follows:
server_addr: "XXX:4443"  // domain name
trust_host_root_certs: false
Start the client in command mode (only http protocol penetration is configured here):
ngrok -config=ngrok.cfg -proto=http -log=ngrok.log -subdomain=The port number of the domain name prefix proxy
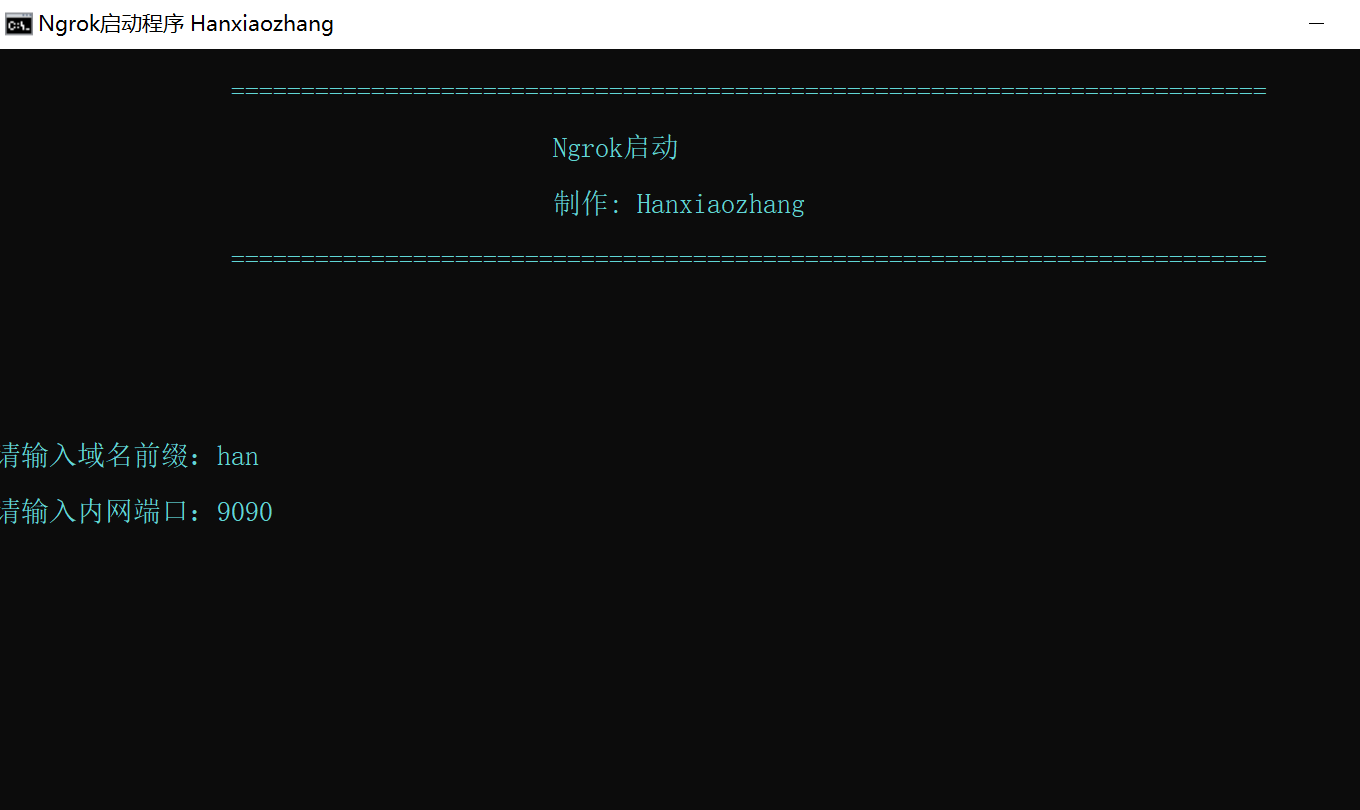
Start the client in script mode:
@echo OFF
color 0b
Title Ngrok Start program Hanxiaozhang
Mode con cols=109 lines=30
:START
ECHO.
Echo                  ==========================================================================
ECHO.
Echo                                         Ngrok start-up
ECHO.
Echo                                         make: Hanxiaozhang
ECHO.
Echo                  ==========================================================================
Echo.
echo.
echo.
:TUNNEL
ECHO.
ECHO.
ECHO.
set /p clientid=   Please enter the domain name prefix:
echo.
set /p port=   Please enter the intranet port:
echo.
ngrok -config=ngrok.cfg -proto=http -log=ngrok.log -subdomain=%clientid% %port%
You can use ngrok - h to query what commands the server can use:
Usage: ./ngrok [OPTIONS] <local port or address>
Options:
  -authtoken string
    	Authentication token for identifying an ngrok.com account
  -config string
    	Path to ngrok configuration file. (default: $HOME/.ngrok)
  -hostname string
    	Request a custom hostname from the ngrok server. (HTTP only) (requires CNAME of your DNS)
  -httpauth string
    	username:password HTTP basic auth creds protecting the public tunnel endpoint
  -log string
    	Write log messages to this file. 'stdout' and 'none' have special meanings (default "none")
  -log-level string
    	The level of messages to log. One of: DEBUG, INFO, WARNING, ERROR (default "DEBUG")
  -proto string
    	The protocol of the traffic over the tunnel {'http', 'https', 'tcp'} (default: 'http+https') (default "http+https")
  -subdomain string
    	Request a custom subdomain from the ngrok server. (HTTP only)

Examples:
	ngrok 80
	ngrok -subdomain=example 8080
	ngrok -proto=tcp 22
	ngrok -hostname="example.com" -httpauth="user:password" 10.0.0.1


Advanced usage: ngrok [OPTIONS] <command> [command args] [...]
Commands:
	ngrok start [tunnel] [...]    Start tunnels by name from config file
	ngork start-all               Start all tunnels defined in config file
	ngrok list                    List tunnel names from config file
	ngrok help                    Print help
	ngrok version                 Print ngrok version

Examples:
	ngrok start www api blog pubsub
	ngrok -log=stdout -config=ngrok.yml start ssh
	ngrok start-all
	ngrok version
9. Use:
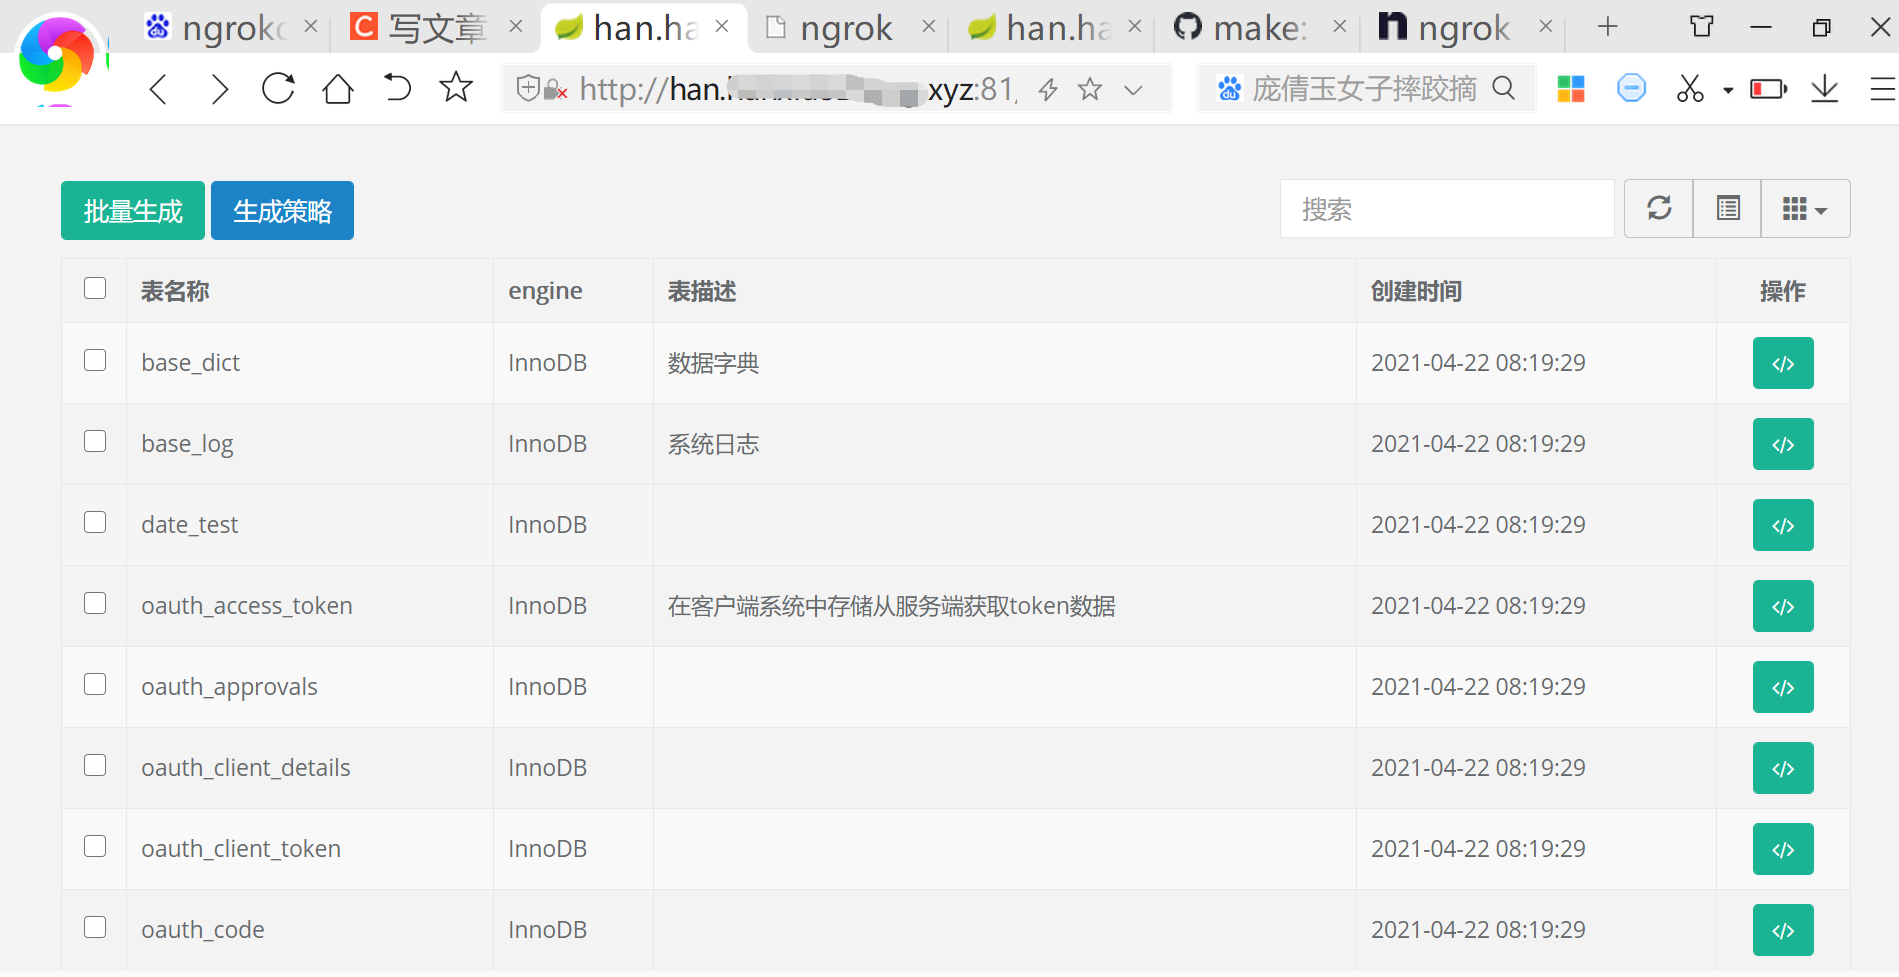
Access intranet penetrating websites through domain name:
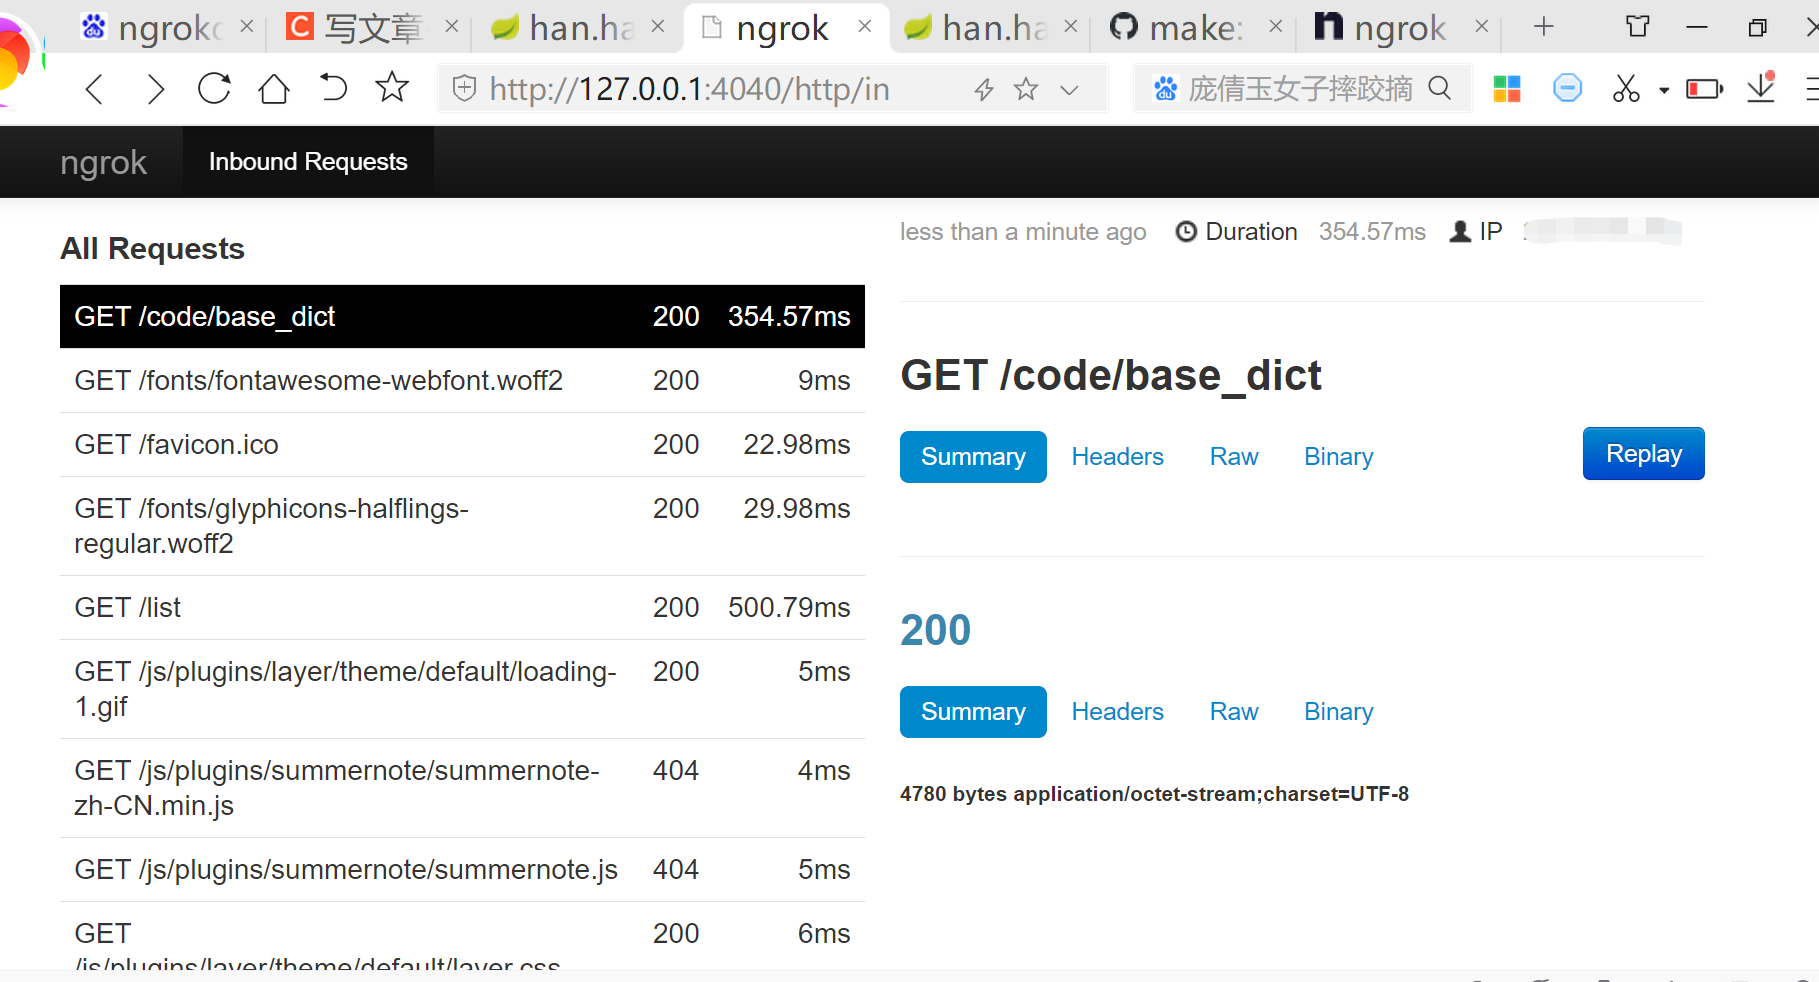
Visit http://127.0.0.1:4040/ ngrok management platform:
 10. Article reference: