preface
With the WEB single page With the rise of (SPA) technology, more and more back-end work has been transferred to the front-end, and data sharing between different components has become an urgent problem to be solved. One component changes the data value, and other components using the data should make positive response and change, which makes the synchronization problem very troublesome. Application state management is the solution to complete the data synchronization problem Case. There are many different methods to manage the status of applications. In large and medium-sized single page application projects, Vue introduces Vuex to share data or status among multiple components and complete centralized data and status management, so that one modification can be used in multiple places.
Installation of VUEX
Vuex is designed for VUE JS application development status management plug-in. This plug-in is not the only solution for VUE to manage the status of applications. It must be installed before use. The installation steps are as follows
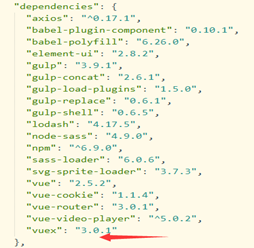
- Check whether the component is installed. Open the file package. In the project directory JSON, view the dependencies item, as shown in the following figure. If there is a "vuex" item, it means it has been installed; If it is not installed, it needs to be installed through npm.
- Open the cmd window, enter the directory where the project is located, and enter the command: cnpm install vuex – save or npm install vuex – save to complete the installation of vuex
- After the installation is complete, open the package.exe again JSON file, as shown in the above figure. If there is a "vuex" item, it means that it has been successfully installed
vuex five basic objects
Vuex is designed for Vue JS application development state management mode. Centralized storage management is adopted to apply the state of all components, and corresponding rules are used to ensure that the state changes in a predictable way. These rules focus on the use of vuex's five default basic objects.
State object: state is a single state tree, which is used to store the values of various variables. Variables can be array, object, string and other data types. Only when these states are defined in state can the state of this object be obtained, modified and read in the component. Store state (variable or property), which is a simple key value pair object, such as
const state = {
	  loginState: false
	  ...
	  }
A state object is defined here. The state object contains an attribute (variable) loginState. Its data type is Boolean and the default value is false.
The state value of the component that depends on this data is obtained through this$ store. state. [key], such as loginState:
var loginState = this.$store.state.loginState
It is worth noting that data is used to receive the state value. When the state in the state changes, it is necessary to place the acquisition of the state value in the calculated of the using component in order to monitor the change of the value. The data and view are synchronized.
Getters object: data derived from basic data (state), which is equivalent to the calculated attribute of state. When using the Vuex store instance in the project, if you need to perform a simple operation on the state object status value of the store before using it, you need to use the calculation property getter of the store instance. For example, if the turnover is recorded in state, the turnover UOM is yuan. The statistics module needs to use the turnover, but the UOM is 10000 yuan. At this time, getters need to be used, which can be understood as the calculation attribute of state. For example:
import Vue from 'vue'
import Vuex from 'vuex'

Vue.use(Vuex)

const store = new Vuex.Store({
  state: {
    loginState: false,
    atm: 10020 //
  },
  getters: {
    convertAtm: function(state) {
      return state.atm / 10000
    }
  }
})

export default store
A turnover conversion function is defined in getters, which can be directly used in the statistics component. When used, the statistics component is calculated through this$ store. getters. Convertatm gets the required value.
Changes object: through the state object or Getters object, the component can easily use the state in the store instance. If the state in the store instance needs to be changed in the component, you need to submit the modification using the method provided by mutation. The following illustrates the use of the movements object through an example.
There is an attribute value in state to record the current value. The value is obtained in a component. The component contains two buttons to increase or decrease the value value respectively. The code in the store is as follows
import Vuex from 'vuex'
Vue.use(Vuex)
const state = {    //Define state
  value: 1
}
const mutations = {  //Define variations
  increment (state, v) {
    state.value = parseInt(state.value) + parseInt(v)
  },
  decrement (state, v) {
    state.value = parseInt(state.value) - parseInt(v)
  }
}
export default new Vuex.Store({
  state,
  getters,
  mutations  //Register changes
})
The above code defines a state with a value of 1, and defines two methods, increment and increment, in mutations, to complete the increase and decrease of the state value respectively. The code in the calling component is as follows:
import Vue from 'vue'
<template>
  <div class="hello">
    <h1>use computed receive:{{ computedmsg }}</h1>
    <input type="number" value="1" v-model="num" />
    <button @click="increment">+increase</button>
    <button @click="decrement">-reduce</button>
  </div>
</template>
<script>
export default {
  name: 'hello',
  data () {
    return {
      num: 1
    }
  },
  computed: {
    computedmsg () {
      return this.$store.state.value
    }
  },
  methods: {
    increment () {
      this.$store.commit('increment', this.num)  //The first parameter is the function name defined by the store, and the second is the parameter
    },
    decrement () {
      this.$store.commit('decrement', this.num)
    }
  }
}
</script>
<style>
</style>
When a component changes the status value, use this$ store. Modify the commit () method, where the first parameter is the function name defined by changes, and the second parameter is the parameter to be passed in. Through this mechanism, the change rules of state are encapsulated in the changes object, and the passed in parameter is a factor (parameter) of state change.
Actions object: vuex modifies the state value through the changes object. Once commit is executed, the attribute value in state will change. It is impossible to complete some operations before or after commit. At this time, it must be completed with the help of the actions object. Actions is similar to the proxy object of changes. The actual state modification submission is completed by the commit of changes. Using actions can dynamically enhance the corresponding functions. When the actions object is used, the custom function in actions receives a context parameter and the formal parameter to be changed. The context has the same methods and properties as the store instance, so it can execute the context Commit ('') calls the method in mutations. The example code is as follows:
[example] there is an attribute of count in state. When you click change, the value of count is changed to add the passed in parameter, and you need to output "do you want to change the state? Forget it or change it" on the console before changing this state.
import Vue from 'vue'
import Vuex from 'vuex'

//Using vuex modules
Vue.use(Vuex);

//Declare a static constant of 4
const state = {
  count: 4
};
const mutations = {  //The use here has been able to complete the increase of state
  add(state, n) {
    state.count += n.a;
  }
};
//actionAdd here is the method corresponding to the triggered event in the component
const actions = {
  increment(context,num) { //The specified object officially given by context can be understood as a store object, and num represents a parameter
    console.log("Do you want to change the status? Forget it or change it ")
    context.commit('add', {//add 'here is the method in mutations
      a: num.res //res is the transfer parameter
    })
  },
};

//Export a module
export default new Vuex.Store({
  state,
  mutations,
  actions
})
Here, increment is a user-defined function with two parameters: context and num. the specified object officially given by / context can be understood as a store object. Num represents a parameter. The parameter can be a single value, an object or an array. Num here is an object.
The component code used is:
<template>
  <div class="hello">
    <p>Component interior count{{count}}</p>
    <button @click="addNum">+increase</button>
  </div>
</template>

<script>
  export default {
    name: 'storeAction',
    data() {
      return {}
    },
    computed: {
      count() {
        return this.$store.state.count
      }
    },
    methods: {
      addNum() {
        this.$store.dispatch('increment', {
          res: 15
        })
      }
    }
  }
</script>
In the component, you can use this$ store. Dispatch distributes action. increment is the parameter name defined by action, and {res: 15} is the parameter to be passed in.
Modules object: Vuex uses a single state tree, and all States are concentrated in one object. When the project is very complex, the store object may become quite bloated and difficult to maintain. To solve this problem, Vuex allows the store to be divided into several modules for management. Each module has its own state, mutation, action and getter.
[example] create the modules module and divide the system store into app and user modules.
First, create the modules folder under the project store file to store the modules divided by the system state, and create app. In this directory JS and user JS files are used for the management of project level status values, app JS complete code is as follows
const state = {
  appName: 'entry name'
}
const getters = {
  getName (state) {
    return state.appName
  }
}
const mutations = {
  Set_Name (state, name) {
    state.appName = name
  }
}
const actions = {
  setAppName (context, name) {
    console.log(name)
    context.commit('Set_Name', name)
  }
}
export default {
  namespaced: true, // The file name used to identify this method when it is referenced globally
  state,
  getters,
  mutations,
  actions
}
user.js code is as follows:
const state = {
  userName: 'Felix'
}
const getters = {
  getName (state) {
    return state.userName
  }
}
const mutations = {
  Set_Name (state, name) {
    state.userName = name
  }
}
const actions = {
  setUserName (context, name) {
    context.commit('Set_Name', name)
  }
}
export default {
  namespaced: true, // The file name used to identify this method when it is referenced globally, such as user/setUserName
  state,
  getters,
  mutations,
  actions
}
Secondly, complete the loading of the two modules and modify the store / index JS code is as follows
import Vue from 'vue'
import Vuex from 'vuex'
import app from './modules/app'
import user from './modules/user'
Vue.use(Vuex)
export default new Vuex.Store({
   modules: {
    app,
    user
  }
})
This completes the maintenance better than writing all the States together. The use method is the same as that above. You only need to add the name of the module. The code is as follows
<template>
  <div class="hello">
    <h1>entry name:{{ getAppName }}</h1>
    <h1>entry name:{{ mapAppName }}</h1>
    <h1>User name:{{ getUserName }}</h1>
  </div>
</template>
<script>
export default {
  name: 'hello',
  computed: {
    getAppName () {
      return this.$store.state.app.appName
    },
    getUserName () {
      return this.$store.state.user.userName
    },
  }
}
</script>
Summary
vuex state manager is a single state tree. State is used to define and store state values through this store. Key can obtain the status value. In order to achieve real-time response, the obtained state value should be in calculations; Sometimes the getters object needs to be used when changing state values are taken; The status value cannot be updated directly, and the changes object needs to be used; If asynchronous update is required, the Actions object is used as the proxy object of changes to complete the status update. The modules object is very simple. It cuts the store into several modules, which is easier to maintain.