Introduction to HTML
The full name of HTML is hypertext markup language, which is a markup language. It includes a series of tags. Through these tags, the document format on the network can be unified, and the scattered Internet resources can be connected into a logical whole. HTML text is a descriptive text composed of HTML commands. HTML commands can explain text, graphics, animation, sound, tables, links, etc.
Hypertext is a way of organizing information. It associates the text and charts in the text with other information media through hyperlink method. These interrelated information media may be in the same text, other files, or files on a computer geographically far away. This way of organizing information connects the information resources distributed in different locations in a random way, which provides convenience for people to find and retrieve information.
Source of information: Baidu's HTML Encyclopedia
Use of HTML
New HTML
There are multiple versions of HTML. Now we often use HTML5 version. You can also choose the corresponding version according to your preferences.
The following is the statement of HTML5
<!DOCTYPE html>
<html lang="en">
<head>
	<!--The following code is to set the encoding format-->
    <meta charset="UTF-8">
    <!--Here is the setting label-->
    <title>Title</title>
</head>
<body>

</body>
</html>
This is the statement of HTML4
<!DOCTYPE HTML PUBLIC "-//W3C//DTD HTML 4.01 Transitional//EN"
        "http://www.w3.org/TR/html4/loose.dtd">
<html>
<head>
	<!--The following code is to set the encoding format-->
	<meta http-equiv="Content-Type" content="text/html;charset=UTF-8">
	<!--Here is the setting label-->
    <title>Title</title>
</head>
<body>

</body>
</html>
Use of HTML basic Tags
Under the head tag is the website resources and information, while under the body tag is the content displayed on the web page.
- Title: website title tag (a required tag in the head, which is generally only used in the head)
<title>title</title>
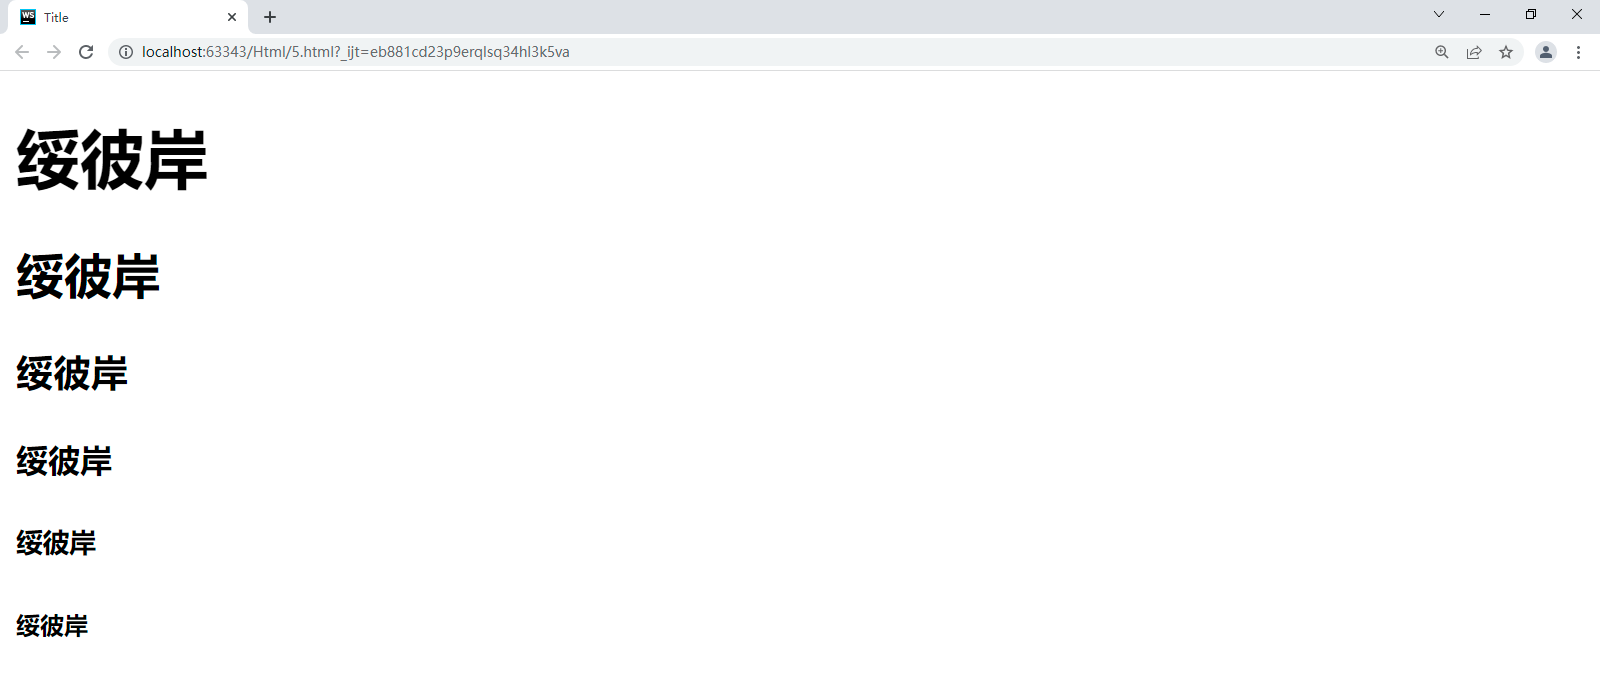
- h1~h6: from large to small, it is used to represent the label of the title
<h1>Suibi'an</h1>
<h2>Suibi'an</h2>
<h3>Suibi'an</h3>
<h4>Suibi'an</h4>
<h5>Suibi'an</h5>
<h6>Suibi'an</h6>
The effect is as follows (enlarge the page by 200%):

- p: Paragraph label, the content of the package automatically crosses lines, and there is a blank line between the upper and lower content
<p>Paragraph label 1</p>
<p>Paragraph label 2</p>
The effect is as follows (enlarge the page by 200%):

- i and em: italic labels
<i>Italic 1</i>
<em>Italics 2</em>
The effect is as follows (enlarge the page by 200%):

- b and strong: bold labels
<b>Bold 1</b>
<strong>Bold 2</strong>
The effect is as follows (enlarge the page by 200%):

- u: Underline label
<u>Underline</u>
The effect is as follows (enlarge the page by 200%):

- s: Delete line label
<s>Delete line</s>
The effect is as follows (enlarge the page by 200%):

- hr: divider label
<p>Paragraph label 1</p>
<hr>
<p>Paragraph label 2</p>
The effect is as follows (enlarge the page by 200%):

- br: cross line label
<p>Paragraph label 1</p>
<br>
<p>Paragraph label 2</p>
The effect is as follows (enlarge the page by 200%):

- a: Hyperlink tag (href middle page address)
<a href="https://www.baidu. Com "> Click Baidu</a>
The effect is as follows (enlarge the page by 200%):

- img: picture label
src: the path of the image to be displayed (generally, the imgs folder is established in the project directory, and then the image resources are put into it for easy calling) alt: the prompt displayed when the image is not loaded successfully title: the prompt displayed when the mouse hovers width: the width of the image height: the height of the image (only one of the width and height attributes will be automatically scaled in equal proportion)
<!--Here is the code for using local pictures src In is the local address-->
<img src="./imgs/001.png" alt="picture" title="picture" width="100px" height="100px">
<hr>
<!--The following is the code for using web page pictures src In is the web address-->
<img src="https://gimg2. baidu. com/image_ search/src=http%3A%2F%2Fimg. bagevent. com%2Fresource%2F20180314%2F13550999837508. jpg&refer=http%3A%2F%2Fimg. bagevent. com&app=2002&size=f9999,10000&q=a80&n=0&g=0n&fmt=jpeg? SEC = 1648232614 & T = d92be112606eb212675442a28295f917 "ALT =" picture "title =" picture "width =" 100px "height =" 100px ">
In src/ imgs is the directory where the file is found (it needs to be created under the project directory before it can be used), 001 PNG is the picture to be selected
The effect is as follows (enlarge the page by 200%):

- Audio: audio tag
Autoplay: autoplay (not available in some browsers)
Controls: display controls
Loop: loop playback
muted: Mute
<audio src=".\audio\test.mp3" controls muted autoplay></audio>
The effect is as follows (enlarge the page by 200%):

In src/ Audio is the directory where the file is located (you need to create it in the project directory before you can use it), test Mp3 is the audio you want to select
- video: video tag
Autoplay: autoplay (not available in some browsers)
Controls: display controls
Loop: loop playback
Muted: Mute (the video can be played automatically after being muted)
<video src=".\video\test.mp4" controls muted autoplay></video>
The effect is as follows (enlarge the page by 200%):

In src/ Video is the directory where the file is located (you need to create it in the project directory before you can use it), test Mp4 is the video you want to select
The above is all the content of this article. Thank you for watching. I will write some articles related to HTML later. If you like, you can click like + pay attention.