PXE batch deployment system
1, What is PXE
Preface introduction:
PXE pre boot execution environment (PXE), also known as pre execution environment, provides a mechanism to boot a computer using Network Interface. This mechanism allows the computer to start without relying on local data storage devices (such as hard disks) or locally installed operating systems.
The most obvious advantages of PXE:
PXE is designed to be suitable for various computer systems. The description of version 2.1 identifies six system specifications, including IA-64 and DEC Alpha. However, there is only the complete expression of IA-32 Intel includes PXE in the extended firmware interface of IA-64 and implements the standard.
2, PXE component introduction
1. Share the corresponding system installation files
FTP/NFS/HTTP
2. Provide DHCP service and tell tftp address
3. Provide tftp service
1) Provides a menu of system installation sources
2) Share kernel vmlinuz and initialize image file initrd img
3)pxelinux.0
Introduction:
pxelinux0 file (equivalent to a small operating system, which can be considered as the bottom layer of an operating system. Mount the CD to the host workstation, and the mount point / var/ftp/pub contains this file) -- start the kernel loading module vmlinuz (the compressed file of vmlinux, which can be considered as a small kernel module), initrd IMG (you can realize the compatibility between any hardware system and the kernel without changing the kernel file, and you can load various hardware formats by yourself) - start KS Cfg file (where the CD is placed, shell script can be written to achieve more functions) --- complete startup
4)syslinux
pxelinux.0 tftp service sharing
Provide system boot support
3, PXE service deployment provides centos 7.6 installation source
1. Expand the root partition (the size of the root partition is not enough. Perform this operation {skip})
Check out the newly added hard drive

The physical volume "/ dev/sdb" was successfully created.
[root@localhost ~]# pvcreate /dev/sdb
  Physical volume "/dev/sdb" successfully created.
Volume group "centos" expanded successfully
[root@localhost ~]# vgextend centos /dev/sdb
  Volume group "centos" successfully extended
The size of the logical volume / root changed from 17.51 gib (4482 extents) to 36.51 gib (9346 extents). Logical volume / root resized successfully.
[root@localhost ~]# lvextend -L +19G /dev/centos/root
  Size of logical volume centos/root changed from <17.51 GiB (4482 extents) to <36.51 GiB (9346 extents).
  Logical volume centos/root successfully resized.
xfs_growfs synchronous file system
[root@localhost ~]# xfs_growfs /dev/centos/root
meta-data=/dev/mapper/centos-root isize=512    agcount=4, agsize=1147392 blks
         =                       sectsz=512   attr=2, projid32bit=1
         =                       crc=1        finobt=0 spinodes=0
data     =                       bsize=4096   blocks=4589568, imaxpct=25
         =                       sunit=0      swidth=0 blks
naming   =version 2              bsize=4096   ascii-ci=0 ftype=1
log      =internal               bsize=4096   blocks=2560, version=2
         =                       sectsz=512   sunit=0 blks, lazy-count=1
realtime =none                   extsz=4096   blocks=0, rtextents=0
data blocks changed from 4589568 to 9570304
2. Deploy ftp service to provide system installation source
Install required services
yum install -y vsftpd dhcp tftp-server xinetd syslinux -y
Create folder mount CD copy CD file
Ensure that the CD is mounted normally
[root@localhost ~]# mkdir /var/ftp/centos7.6
[root@localhost ~]# mount /dev/sr0 /mnt/
mount: /dev/sr0 Write protected, will mount as read-only
[root@localhost ~]# cp -r /mnt/* /var/ftp/centos7.6/ &   #   &Indicates that the execution is suspended in the background
[1] 1461         # Process id


[1]+  complete                  cp -i -r /mnt/* /var/ftp/centos7.6/      #Copy completed
Start service self start view service
[root@localhost ~]# systemctl start vsftpd
[root@localhost ~]# systemctl enable vsftpd
Created symlink from /etc/systemd/system/multi-user.target.wants/vsftpd.service to /usr/lib/systemd/system/vsftpd.service.

[root@localhost ~]# netstat -antp | grep ftp
tcp6       0      0 :::21                   :::*                    LISTEN      1488/vsftpd
[root@localhost ~]#
3. Deploying tftp services
1) Shared kernel, initialization image file, menu file
[root@localhost ~]# cp /mnt/isolinux/* /var/lib/tftpboot/

[root@localhost ~]# mkdir /var/lib/tftpboot/centos7.6

[root@localhost ~]# mv /var/lib/tftpboot/vmlinuz /var/lib/tftpboot/initrd.img /var/lib/tftpboot/centos7.6/

[root@localhost ~]# ls /var/lib/tftpboot/
boot.cat  boot.msg  centos7.6  grub.conf  isolinux.bin  isolinux.cfg  memtest  splash.png  TRANS.TBL  vesamenu.c32

[root@localhost ~]# ls /var/lib/tftpboot/centos7.6/
initrd.img  vmlinuz
2) Share pxelinux 0 file
[root@localhost ~]# cp /usr/share/syslinux/pxelinux.0 /var/lib/tftpboot/
3) Edit menu file
[root@localhost ~]# mkdir /var/lib/tftpboot/pxelinux.cfg
[root@localhost ~]# mv /var/lib/tftpboot/isolinux.cfg /var/lib/tftpboot/pxelinux.cfg/default
[root@localhost ~]# vim /var/lib/tftpboot/pxelinux.cfg/default

label centos76
  menu label Install CentOS7.6
  kernel centos7.6/vmlinuz
  append initrd=centos7.6/initrd.img inst.stage2=ftp://192.168.140.143/centos7.6 inst.repo=ftp://192.168.140.143/centos7.6 ks=ftp://192.168.140.143/centos7.6/centos76_ks.cfg
initrd = system initialization image file, relative path
inst.stage2 = specify the storage location of system installation files
inst.repo = specify the storage location of the software installation package
4) Start tftp service
[root@localhost ~]# vim /etc/xinetd.d/tftp
# modify
	disable			= no
[root@localhost ~]# systemctl restart xinetd.service
[root@localhost ~]# systemctl enable  xinetd.service
4. Configure DHCP service
[root@localhost ~]# vim /etc/dhcp/dhcpd.conf

subnet 192.168.140.0 netmask 255.255.255.0 {
    range 192.168.140.66 192.168.140.88;
    option routers 192.168.140.2;
    option domain-name-servers 114.114.114.114,223.5.5.5;
    next-server 192.168.140.143;
    filename "pxelinux.0";
}
Start service
[root@localhost ~]# systemctl start dhcpd
[root@localhost ~]# systemctl enable dhcpd
Created symlink from /etc/systemd/system/multi-user.target.wants/dhcpd.service to /usr/lib/systemd/system/dhcpd.service.
[root@localhost ~]# netstat -tunlp | grep dhcp
udp        0      0 0.0.0.0:67              0.0.0.0:*                           12170/dhcpd
[root@localhost ~]#
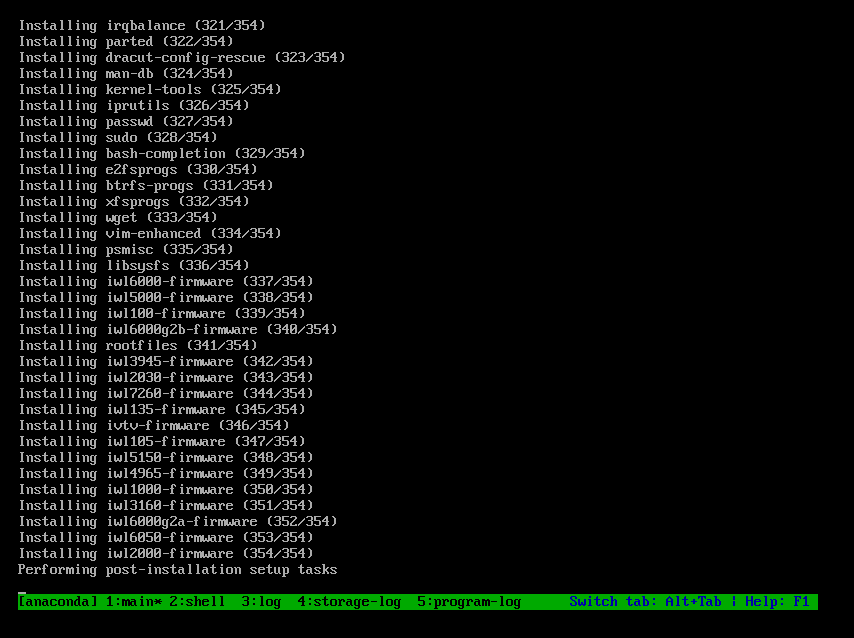
5. Testing
CentOS 7 requires 2G memory capacity
Preliminary implementation of automatic installation!!!!!!!!!!!!!!

4, Add centos 6.6 installation source
1. Share centos 6.6 CD files via FTP
[root@localhost ~]# mount /dev/sr0 /mnt/
mount: /dev/sr0 Write protected, will mount as read-only
[root@localhost ~]# cd /mnt/
[root@localhost mnt]# ls
CentOS_BuildTag  GPL       Packages                  RPM-GPG-KEY-CentOS-6           RPM-GPG-KEY-CentOS-Testing-6
EFI              images    RELEASE-NOTES-en-US.html  RPM-GPG-KEY-CentOS-Debug-6     TRANS.TBL
EULA             isolinux  repodata                  RPM-GPG-KEY-CentOS-Security-6
[root@localhost mnt]# mkdir /var/ftp/centos6.6
[root@localhost mnt]# cp -r /mnt/* /var/ftp/centos6.6/
[root@localhost centos6.6]# ls
CentOS_BuildTag  GPL       Packages                  RPM-GPG-KEY-CentOS-6           RPM-GPG-KEY-CentOS-Testing-6
EFI              images    RELEASE-NOTES-en-US.html  RPM-GPG-KEY-CentOS-Debug-6     TRANS.TBL
EULA             isolinux  repodata                  RPM-GPG-KEY-CentOS-Security-6
[root@localhost centos6.6]#
2. Share centos 6.6 kernel and initialization files through tftp
[root@localhost ~]# mkdir /var/lib/tftpboot/centos6.6
[root@localhost ~]# cp /mnt/isolinux/vmlinuz /mnt/isolinux/initrd.img /var/lib/tftpboot/centos6.6/

[root@localhost centos6.6]# ls
initrd.img  vmlinuz

[root@localhost tftpboot]# ls
boot.cat  centos6.6  grub.conf     memtest     pxelinux.cfg  TRANS.TBL
boot.msg  centos7.6  isolinux.bin  pxelinux.0  splash.png    vesamenu.c32
3. Add centos6 menu item
vim /var/lib/tftpboot/pxelinux.cfg/default

label centos66
  menu label Install CentOS6.6
  kernel centos6.6/vmlinuz
  append initrd=centos6.6/initrd.img
4. Test centos 6.6
5, Configure kickstart file to realize automatic system installation
1. kickstart file introduction
kickstart file, automatic response file, referred to as ks file
The file records the operations during system installation (disk partition, root password, etc.)
2. kickstart file format
conventional arrangement
Set language and time zone
Set root password
Disk partition
network card
Install software
%packages
Software name
Software name
Software name
@Software group name
%end
Automatic operation after system installation
%post
Operation command
Operation command
Operation command
%end
3. Acquisition of kickstart file
anaconda-ks.cfg
System config kickstart graphical tool
Minimizing the system requires the installation of x11 graphics forwarding tool
yum install -y x11
4. Configuration ks file to realize centos 7.6 automatic installation
1) Share ks files via ftp
[root@localhost ~]# vim centos76_ks.cfg

[root@localhost ~]# cp centos76_ks.cfg /var/ftp/centso7.6
2) Edit menu file
[root@localhost ~]# vim /var/lib/tftpboot/pxelinux.cfg/default


label centos76
  menu label Install CentOS7.6
  kernel centos7.6/vmlinuz
  append initrd=centos7.6/initrd.img inst.stage2=ftp://192.168.140.143/centos7.6 inst.repo=ftp://192.168.140.143/centos7.6 ks=ftp://192.168.140.143/centos76_ks.cfg
centos 76 ks file reference:
#platform=x86, AMD64, or Intel EM64T
#version=DEVEL
# Install OS instead of upgrade
install
# Keyboard layouts
keyboard 'us'
# Root password
rootpw --iscrypted $1$pHhwGQlp$FnSejX6/.MBUrHVJlIUTb/
# System language
lang en_US
# System authorization information
auth  --useshadow  --passalgo=sha512
# Use text mode install
text
firstboot --disable
# SELinux configuration
selinux --disabled


# Firewall configuration
firewall --disabled
# Network information
network  --bootproto=dhcp --device=ens33
# Reboot after installation
reboot
# System timezone
timezone Asia/Shanghai
# Use network installation
url --url="ftp://192.168.140.10/centos7.6"
# System bootloader configuration
bootloader --location=mbr
# Clear the Master Boot Record
zerombr
# Partition clearing information
clearpart --all --initlabel
# Disk partitioning information
part /boot --fstype="xfs" --size=500
part swap --fstype="swap" --size=2048
part / --fstype="xfs" --grow --size=1

%packages
@core
vim-enhanced
net-tools
psmisc
lftp
wget
rsync
ntpdate
bash-completion
%end


%post
sed -ri '/^#Port/c \Port 33333' /etc/ssh/sshd_config
systemctl restart sshd
%end
centos 66 ks file reference:
#platform=x86, AMD64, or Intel EM64T
#version=DEVEL
# Install OS instead of upgrade
install
# Keyboard layouts
keyboard 'us'
# Root password
rootpw --iscrypted $1$pHhwGQlp$FnSejX6/.MBUrHVJlIUTb/
# System language
lang en_US
# System authorization information
auth  --useshadow  --passalgo=sha512
# Use text mode install
text
firstboot --disable
# SELinux configuration
selinux --disabled


# Firewall configuration
firewall --disabled
# Network information
network  --bootproto=dhcp --device=eth0
# Reboot after installation
reboot
# System timezone
timezone Asia/Shanghai
# Use network installation
url --url="ftp://192.168.140.10/centos6.6"
# System bootloader configuration
bootloader --location=mbr
# Clear the Master Boot Record
zerombr
# Partition clearing information
clearpart --all --initlabel
# Disk partitioning information
part /boot --fstype="ext4" --size=500
part swap --fstype="swap" --size=2048
part / --fstype="ext4" --grow --size=1

%packages
@core
vim-enhanced
net-tools
psmisc
lftp
wget
rsync
ntpdate
%end


%post
sed -ri '/^#Port/c \Port 33333' /etc/ssh/sshd_config
service sshd restart
%end
success